Twitter is one of the most popular social media platforms and is widely adopted by various communities and users from different industries. But like most existing social media platforms, Twitter is centralized. Sure, the social media giant is implementing some crypto features, such as using NFTs (non-fungible tokens) as profile pictures. However, users of the platform face censorship, account blocking, shadowbanning, etc., daily. Fortunately, Web3 provides excellent solutions for these issues. Therefore, we decided to illustrate how you can create a decentralized Twitter in less than 90 minutes. To make sure you can accomplish building a decentralized Twitter effortlessly and that the process goes smoothly, we’ve broken down our article into four stages:
- Deploying a Smart Contract to Tweet on the Blockchain
- Building the Frontend of Our Decentralized Twitter
- Building the Backend of Our Decentralized Twitter
- Handling Off-Chain and On-Chain Data with the Moralis Dashboard
If you decide to take on today’s quest, you will end up with your own instance of a decentralized Twitter. However, that will just be “the cherry on top”. An even greater value awaits you in the form of knowledge and skills you will gain along the way. For one, you will learn how to use Remix to create and deploy smart contracts. You will also get acquainted with Moralis – the best Web3 backend platform. This “Firebase for crypto” platform will save us a lot of time as it will enable us to cover our dapp’s backend needs with short snippets of code. Furthermore, this pinnacle of the current Web3 tech stack will also help you index the blockchain and off-chain data. Nonetheless, by taking on this example project, you will also get to refresh your React skills. Yes, JavaScript proficiency is all you need to become a Web3 developer.
Decentralized Twitter – Demo
Before we take you by the hand and show you how to build a Web3 Twitter clone, you deserve some additional insight. As such, we prepared a quick demonstration of our decentralized Twitter. The latter will help you decide whether or not you want to roll up your sleeves to complete the above-listed four stages moving forward.
So, here’s what the landing page of our decentralized Twitter looks like:

If you know a thing or two about decentralized applications (dapps), you know that Web3 authentication is an essential part. Fortunately, various reputable Web3 wallets make that rather simple. As such, a click on the “Connect Wallet” button offers users to choose their favorite Web3 login tool:
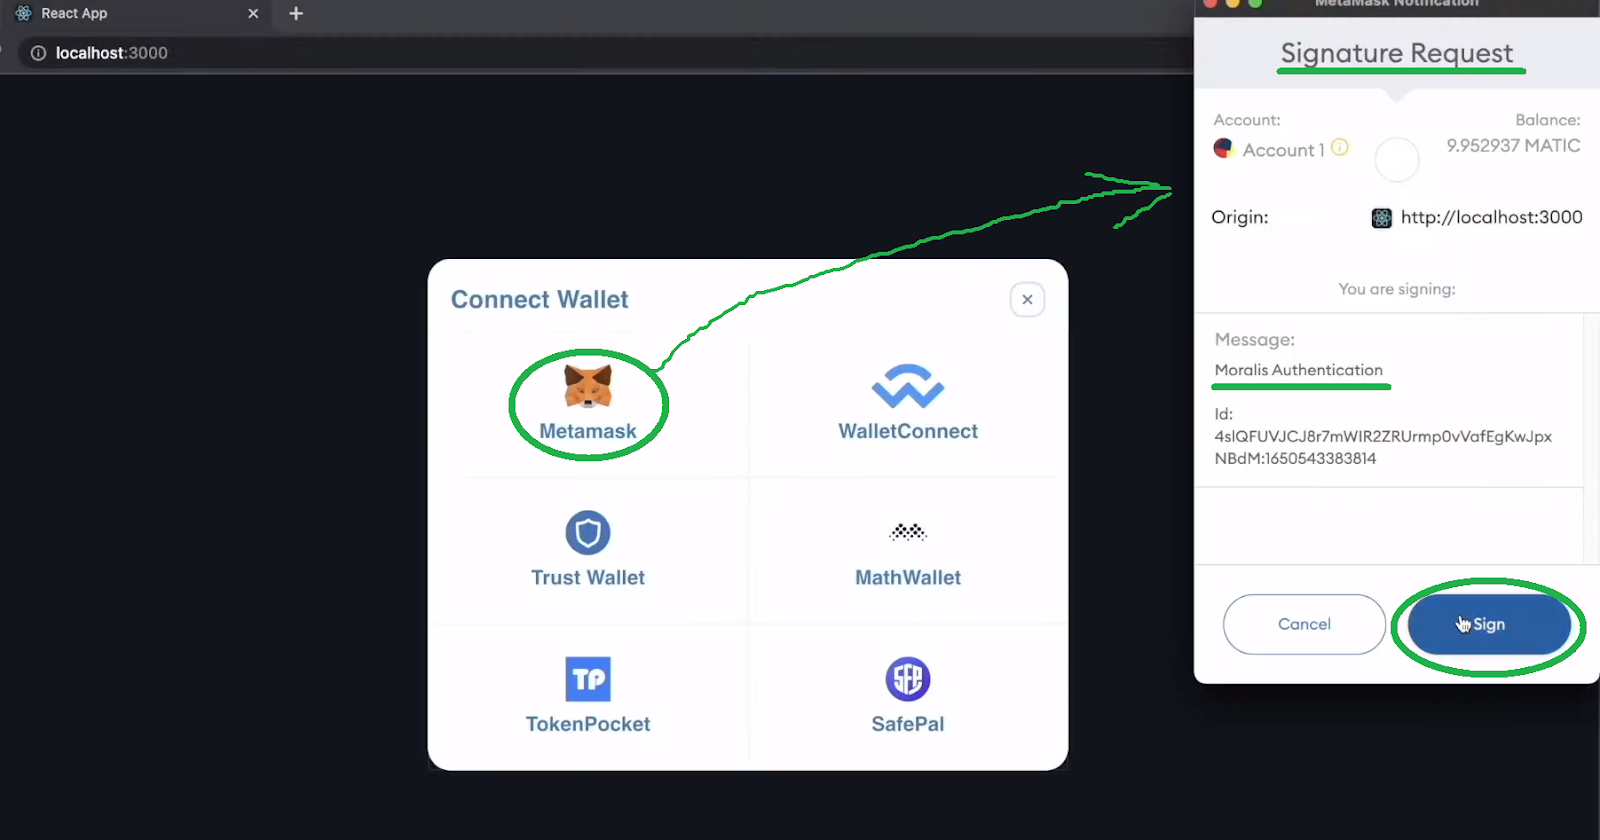
As you can see in the screenshot above, the example user decides to authenticate with MetaMask. When the user clicks on the MetaMask icon, this wallet’s extension pops up, requesting the user’s signature. After clicking on the “Sign” button, the user lands on our decentralized Twitter homepage:
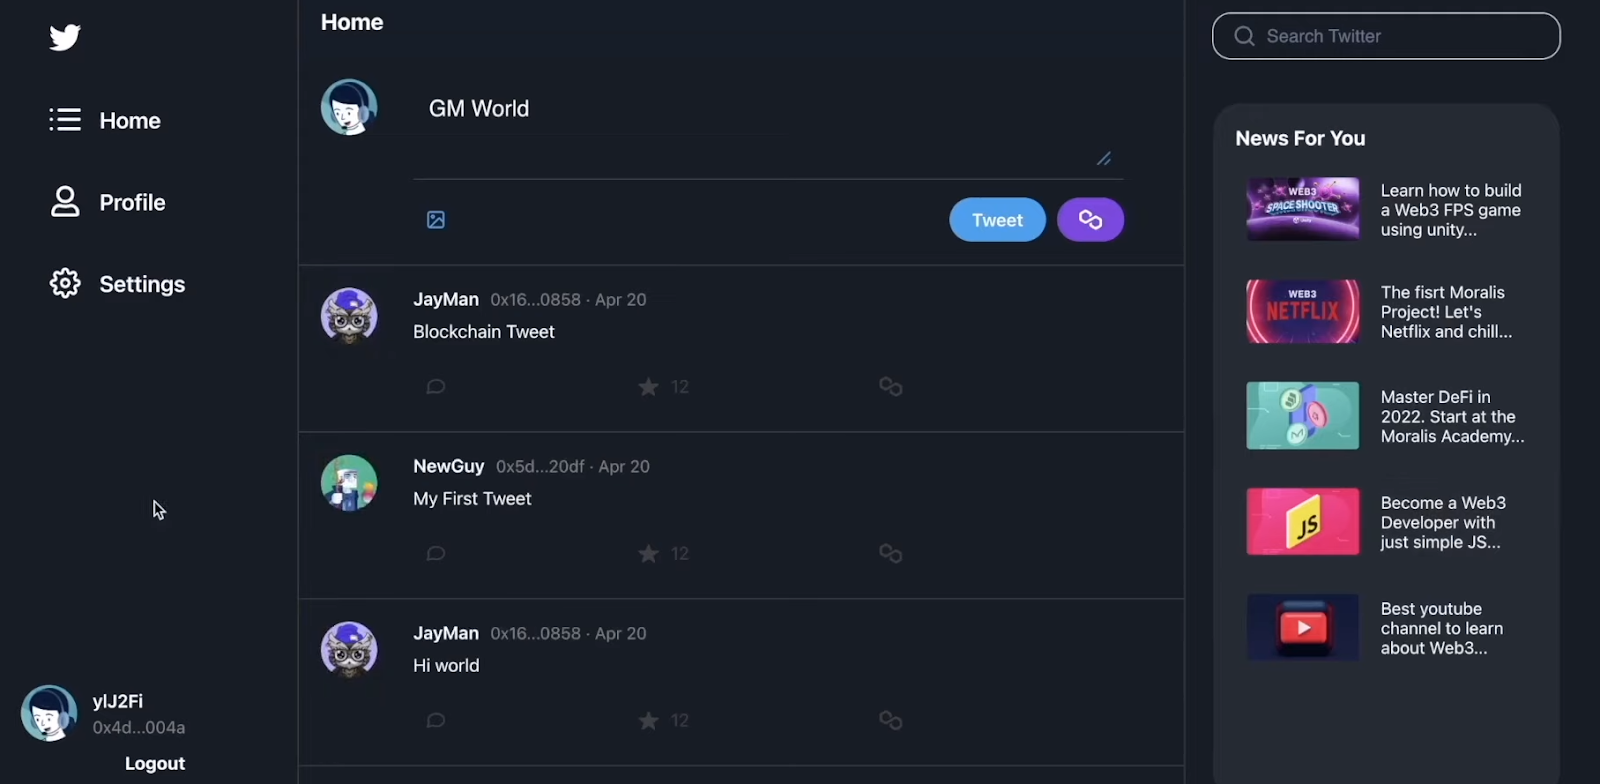
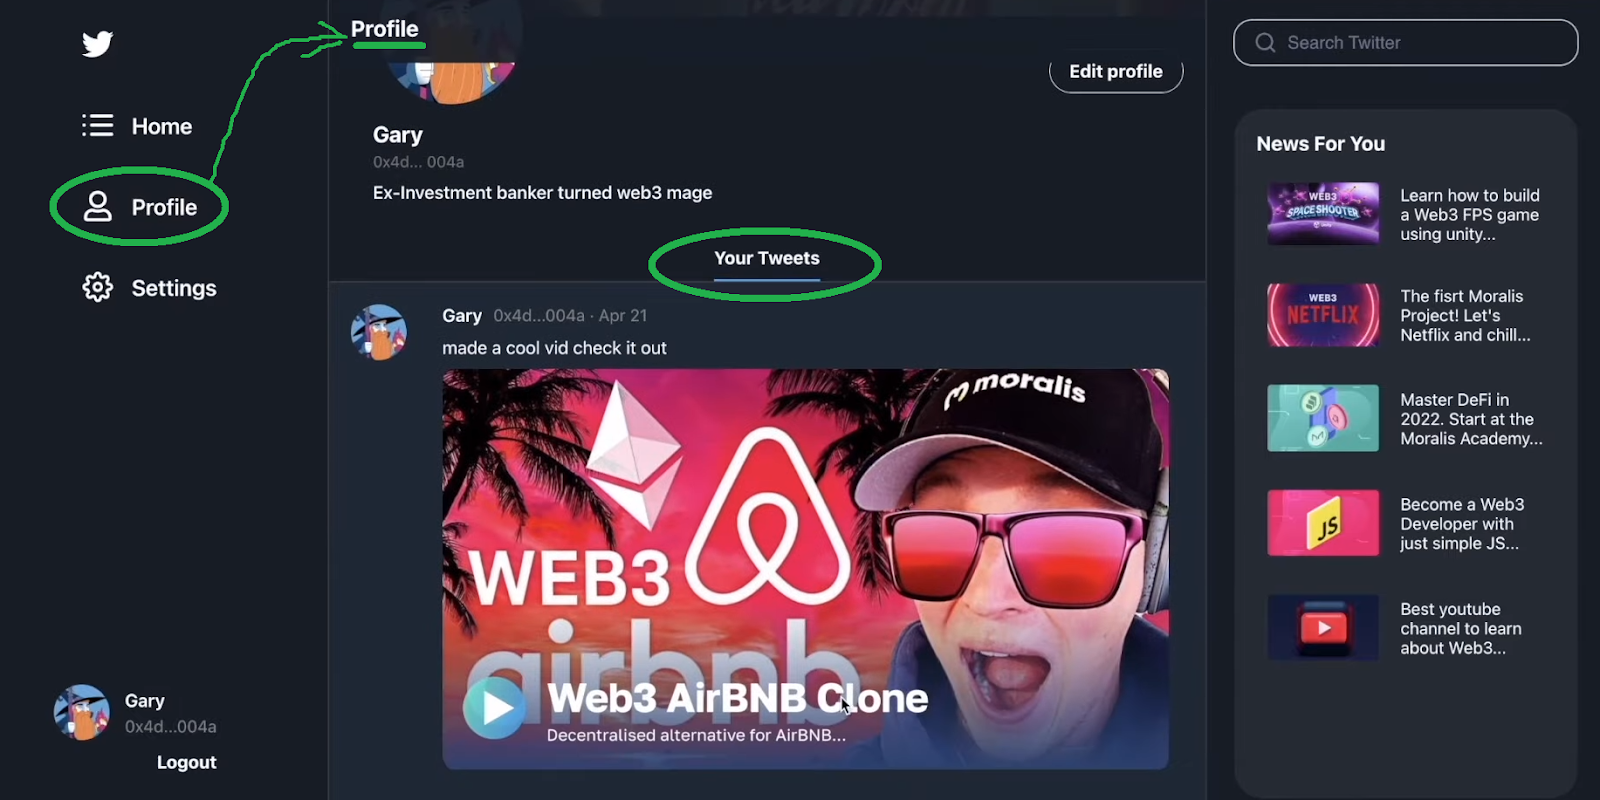
In addition, this is the example user’s first time logging in to our dapp. Accordingly, his profile has been assigned the default user icon. Of course, he can change it easily (see below). Also, the user already sees the latest tweets in the center of the homepage feed. However, before interacting with it, the user should complete the initial profile setup. Thus, the user selects the “Profile” tab, followed by a click on “Edit profile”:
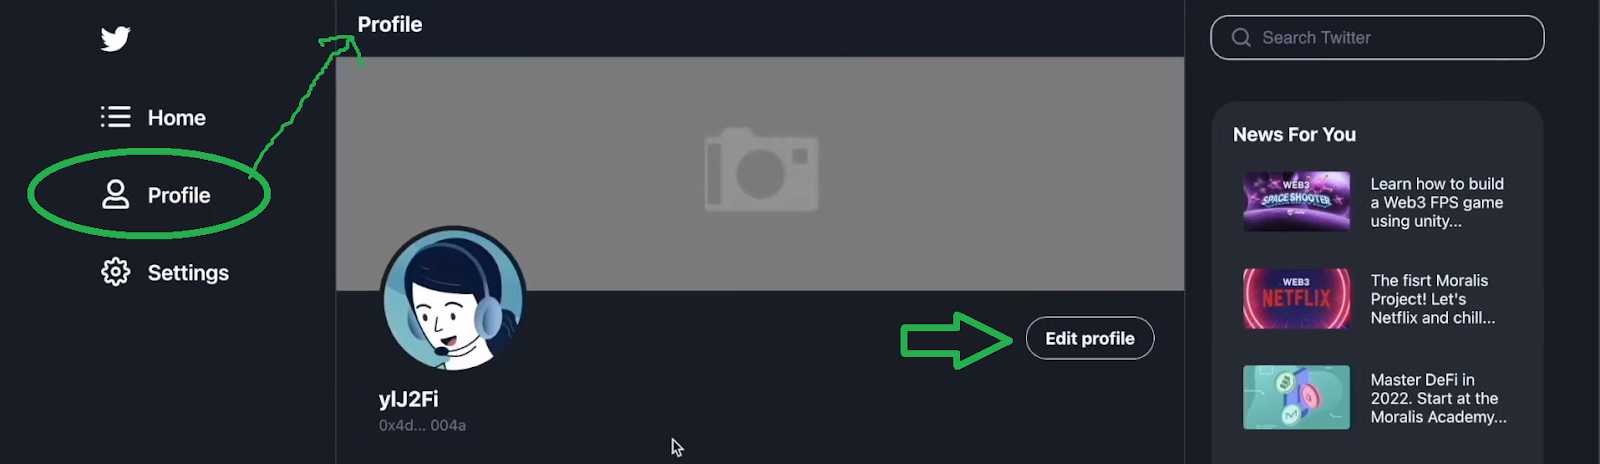
This is where users enter their names and bio. Here, we included a feature that lets users choose their NFTs as their profile pictures:
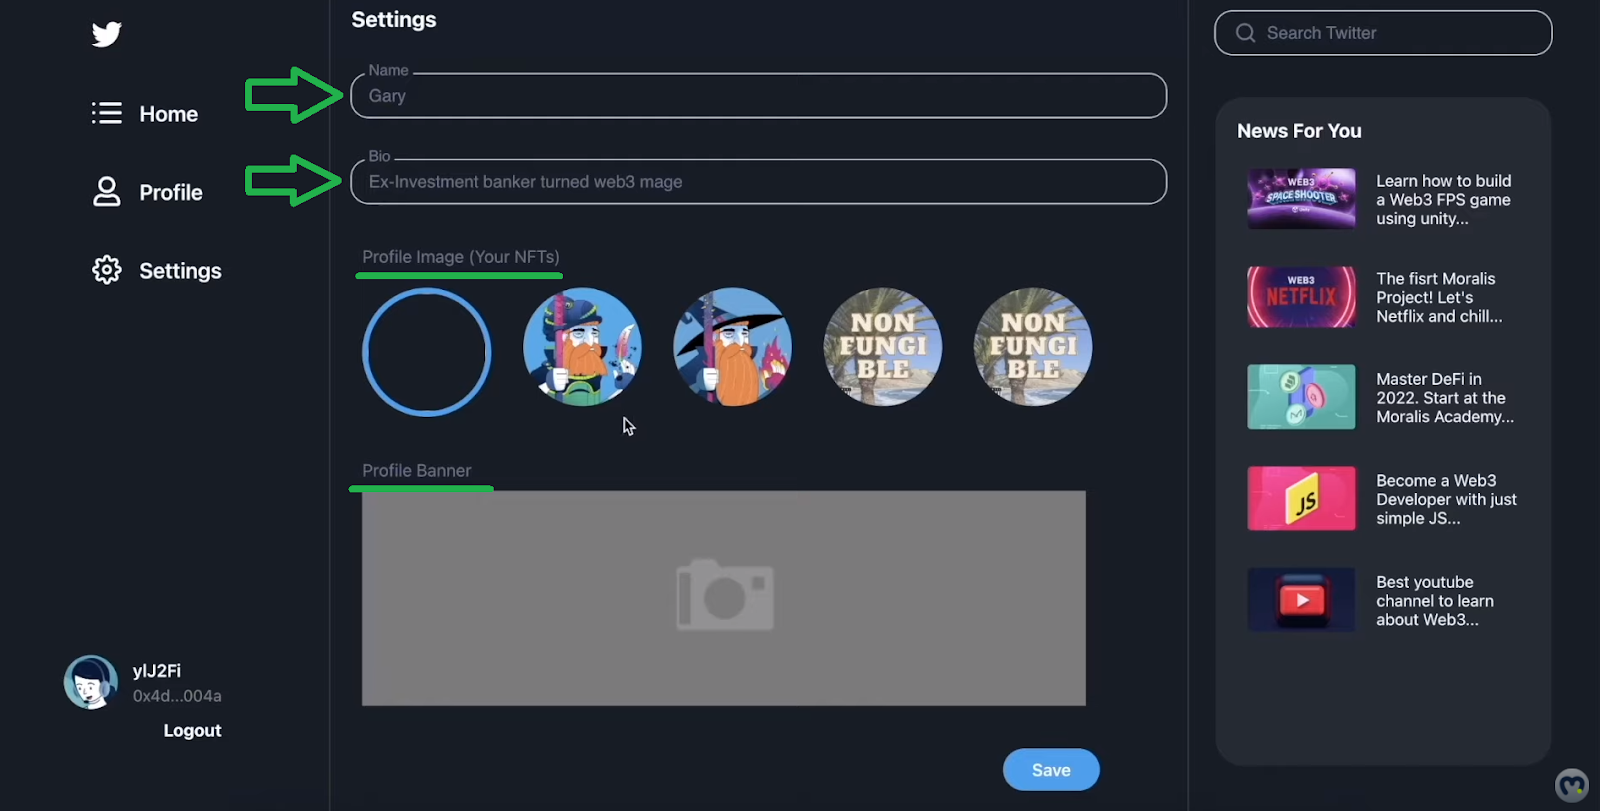
The “Profile” settings also allow users to personalize their banners. When they click on the gray area above, they get to upload their banner pictures. Finally, users need to click on the “Save” button:
Demonstrating Tweeting in Our Decentralized Twitter
To create and post a tweet, users need to click on the “Home” button of our decentralized Twitter:
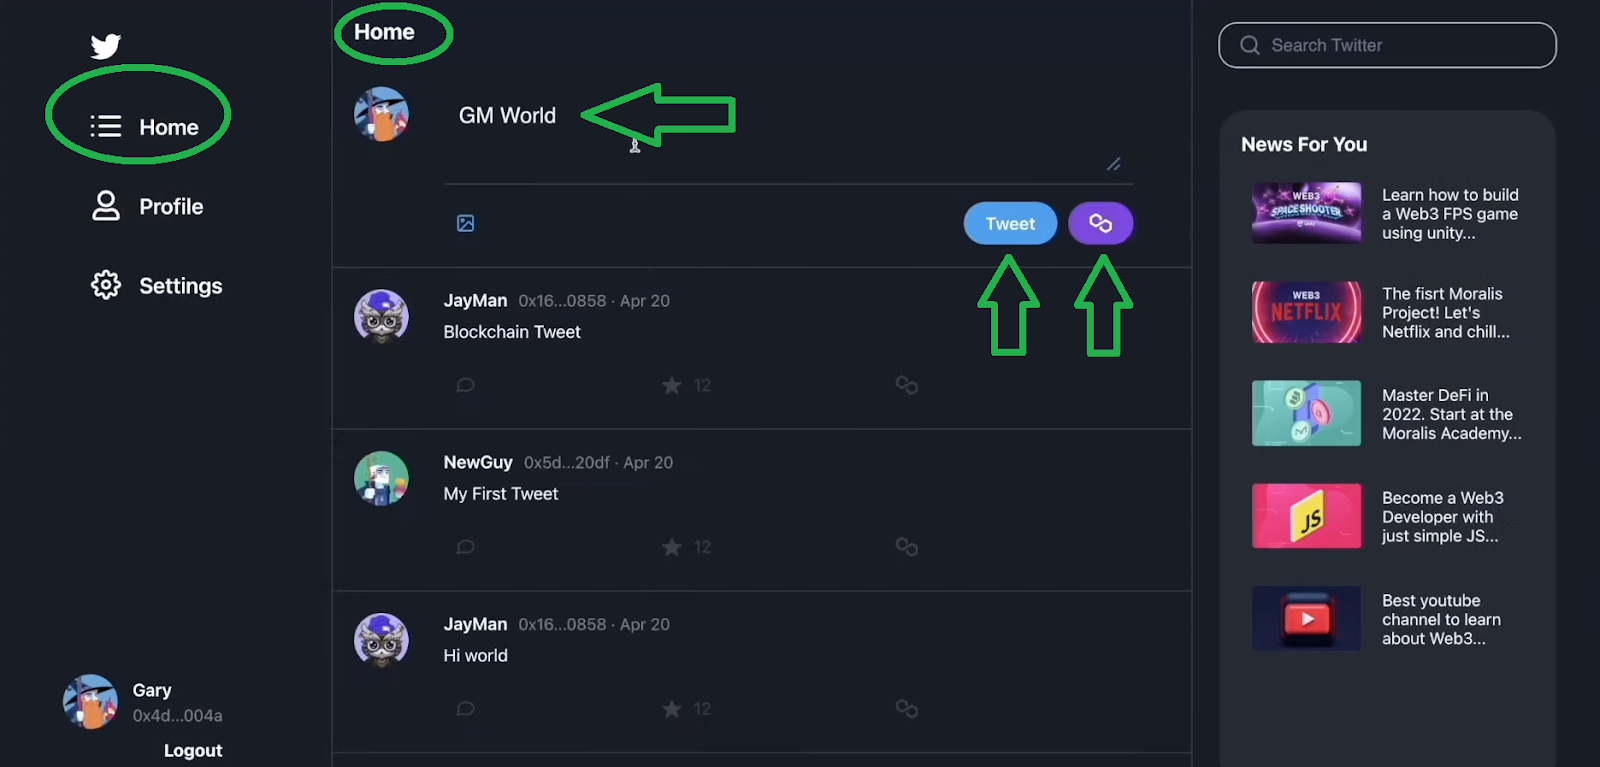
Once on the homepage, users can start typing after clicking on the text entry field (“GM World”, as seen above). They also have a chance to add an image to their tweets via the “image” icon. Furthermore, users can do an off-chain or an on-chain tweet. In the case of the latter, their tweets will be saved on the blockchain.
Note: For the sake of this example project, we used Polygon’s Mumbai testnet. Accordingly, we use the Polygon icon for the “tweet on-chain” button.
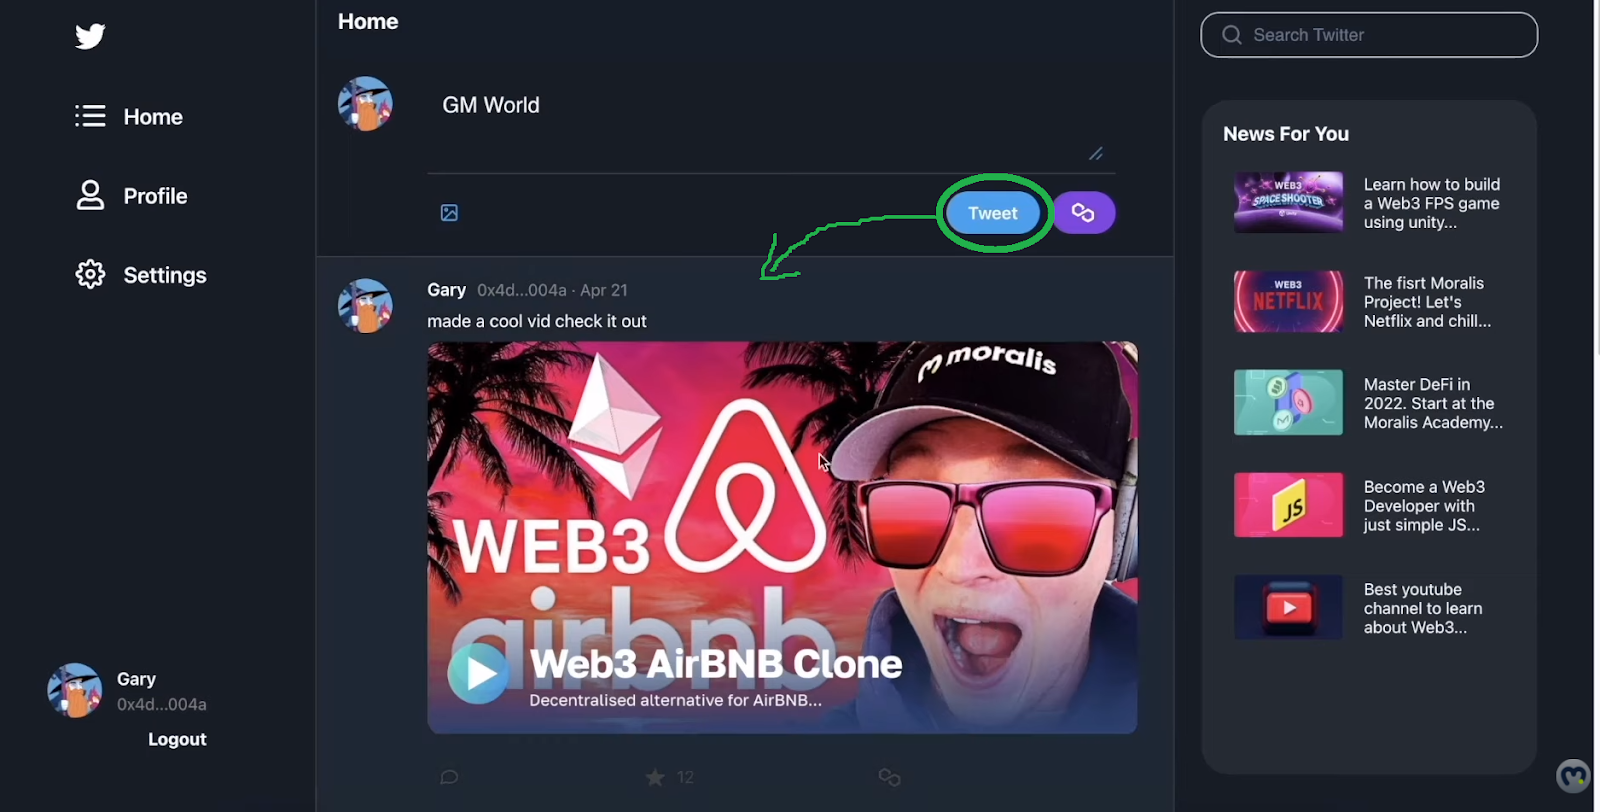
Users must use the “Tweet” button when off-chain tweets are in question. By doing so, their new tweet appears in the tweet thread almost instantly:
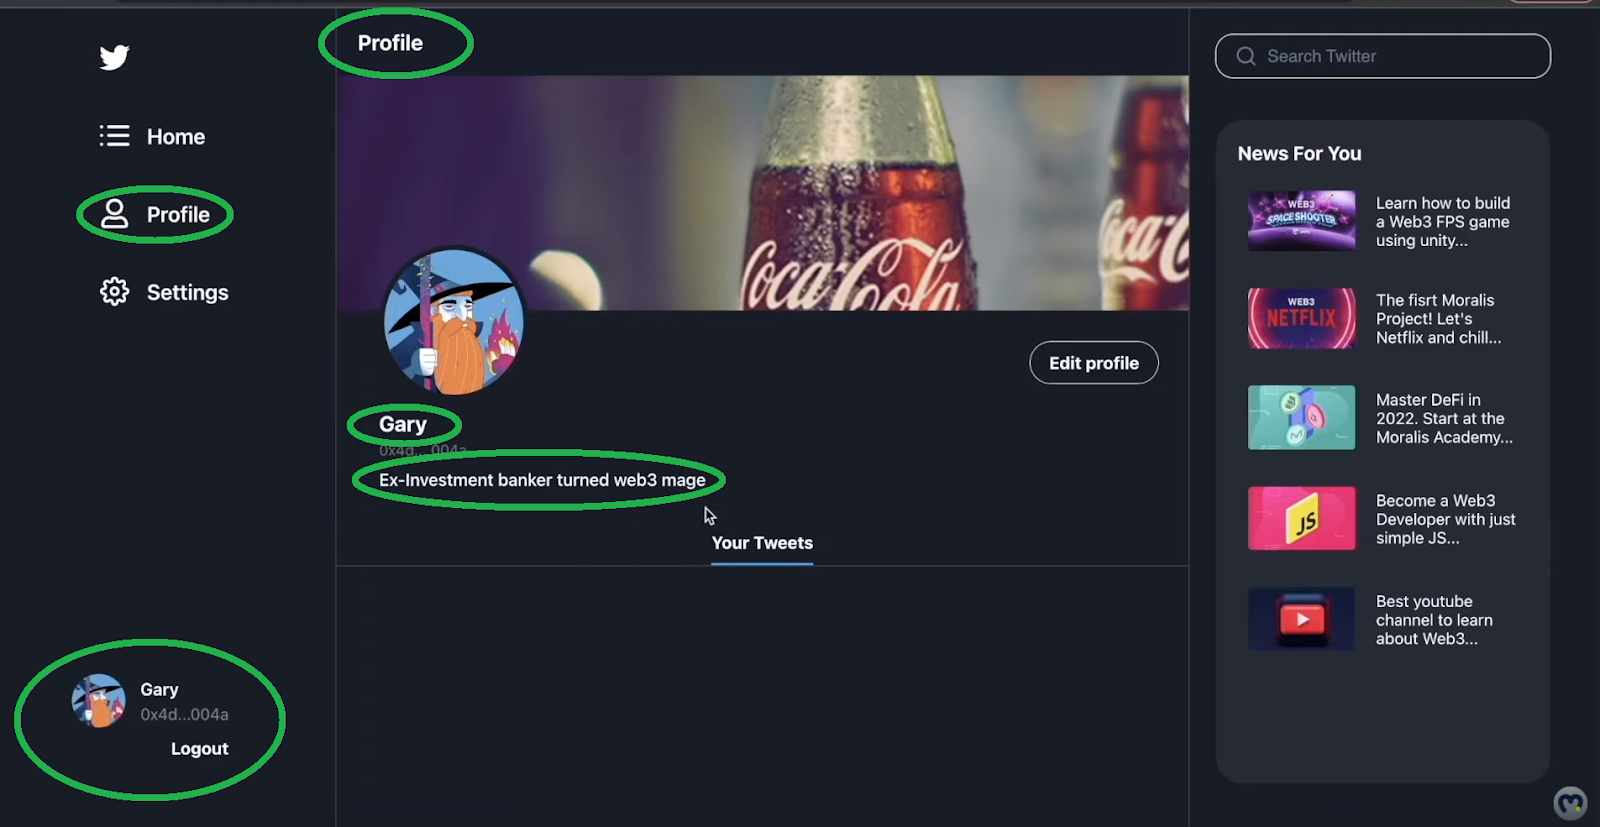
In addition, after tweeting, users will see their tweets within their profile tab (“Your Tweets” section):
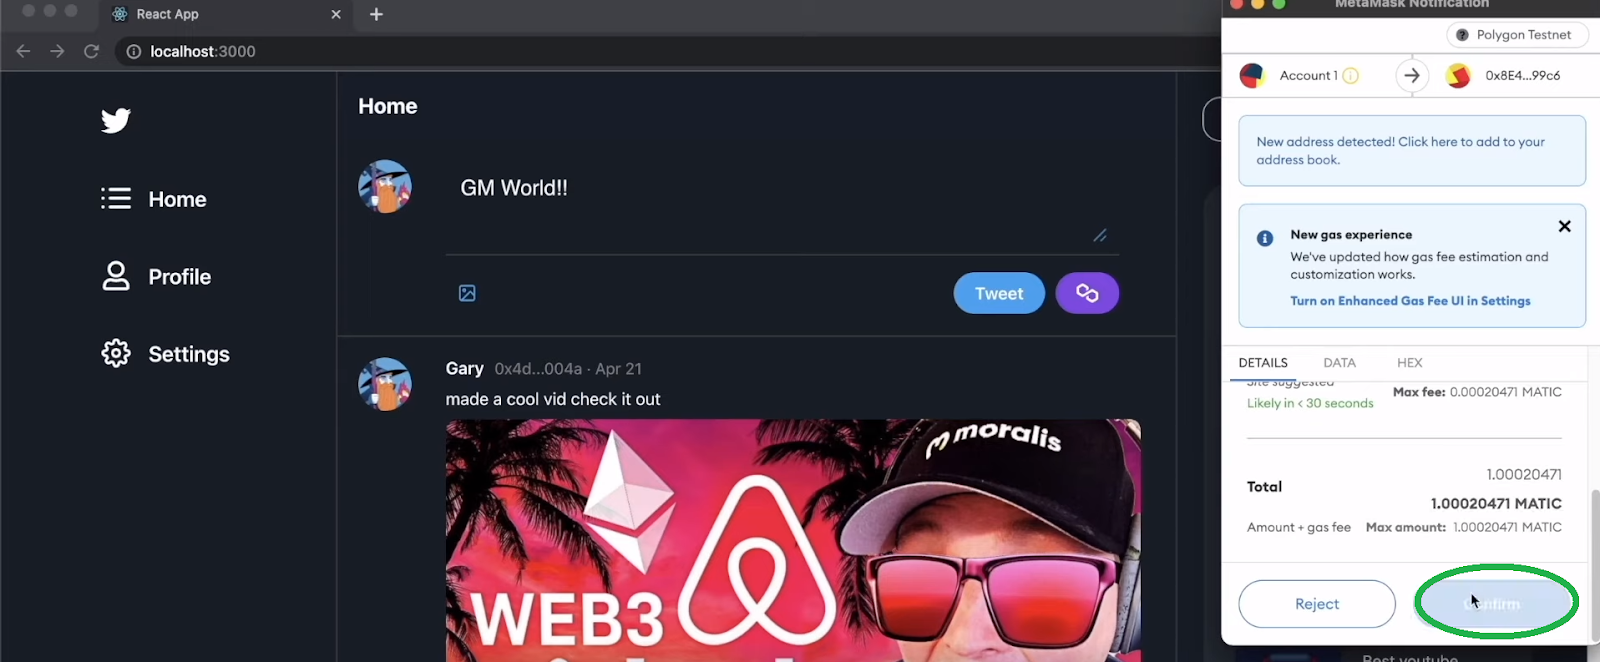
Of course, when users want to post their tweets on the blockchain, they need to click on the “Polygon” button:

As indicated in the screenshot above, this action prompts their Web3 wallet extensions. Hence, they need to confirm the “tweet” transaction. For our decentralized Twitter, users need to pay one MATIC to save their tweets on the chain:
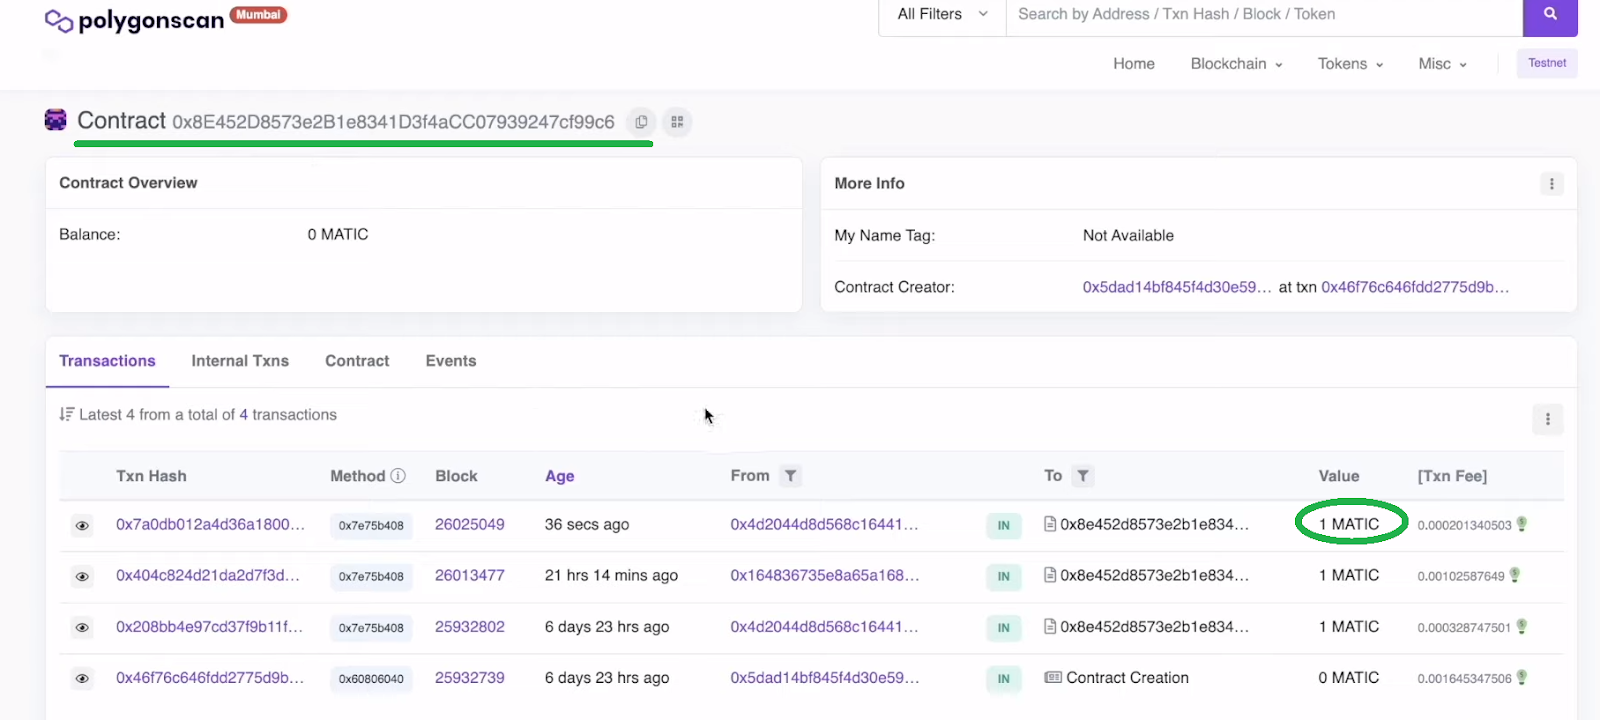
The confirmed transactions usually get processed within seconds. As soon as that happens, users’ on-chain tweets also appear on the homepage’s tweet thread:

We also want to confirm that the above tweet got saved on the blockchain. Thus, we use PolygonScan (testnet) to search our smart contract’s address. Hence, we can view the above-presented transaction:
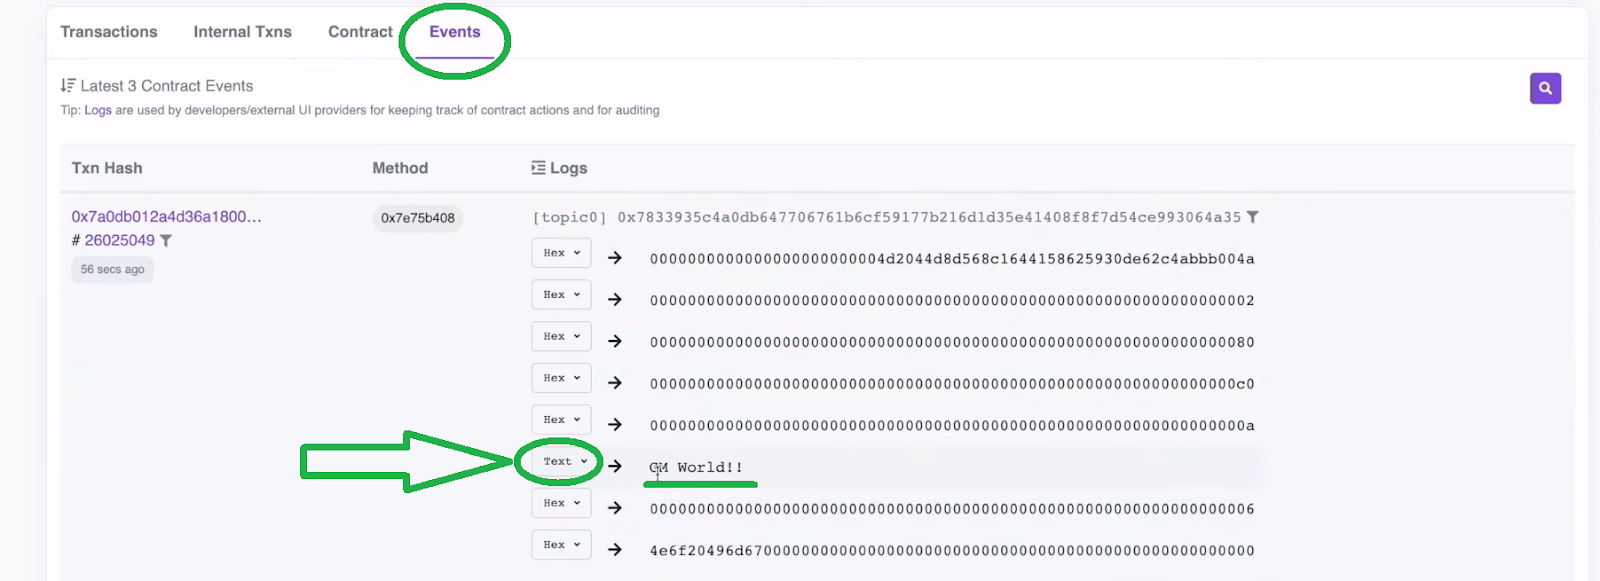
The “Events” tab enables us to see our example tweet. However, to see its content in text format, we must turn “Hex” into “Text”:
Building a Decentralized Twitter in Less Than 90 Minutes
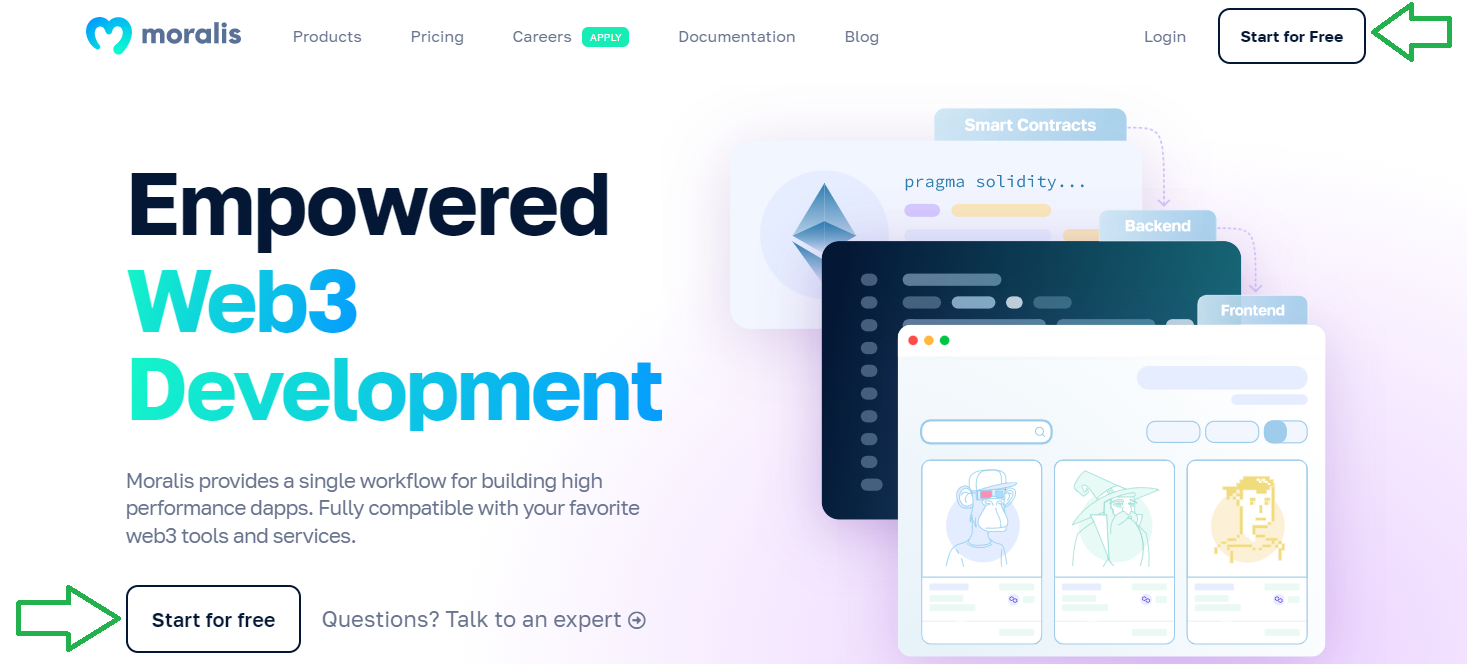
Those who decided to get their hands dirty will now learn how to complete the four stages of our “building a decentralized Twitter” quest. You will start by deploying our “on-chain tweeting” smart contract using Remix. Since you can copy our contract’s code, you don’t have to worry about your Solidity skills. Then, you will use React to build the frontend of our decentralized Twitter. Finally, you’ll unleash the power of Moralis’ SDK to cover the backend features. Fortunately, you get to create your free Moralis account, which provides all you need to build a decentralized Twitter.

Note: Since videos can show a lot more than screenshots, we will include timestamps moving forward. Jump to each timestamp in the video at the bottom of this article. You’ll have a chance to follow an in-house Moralis expert’s lead and complete our project in less than 90 minutes. Nonetheless, start by cloning our code. Use the final code if you want to explore the finished Twitter clone. Although, we encourage you to use the starter code and implement the rest of the code, following our lead.
Stage 1 – Deploying a Smart Contract to Tweet on the Blockchain
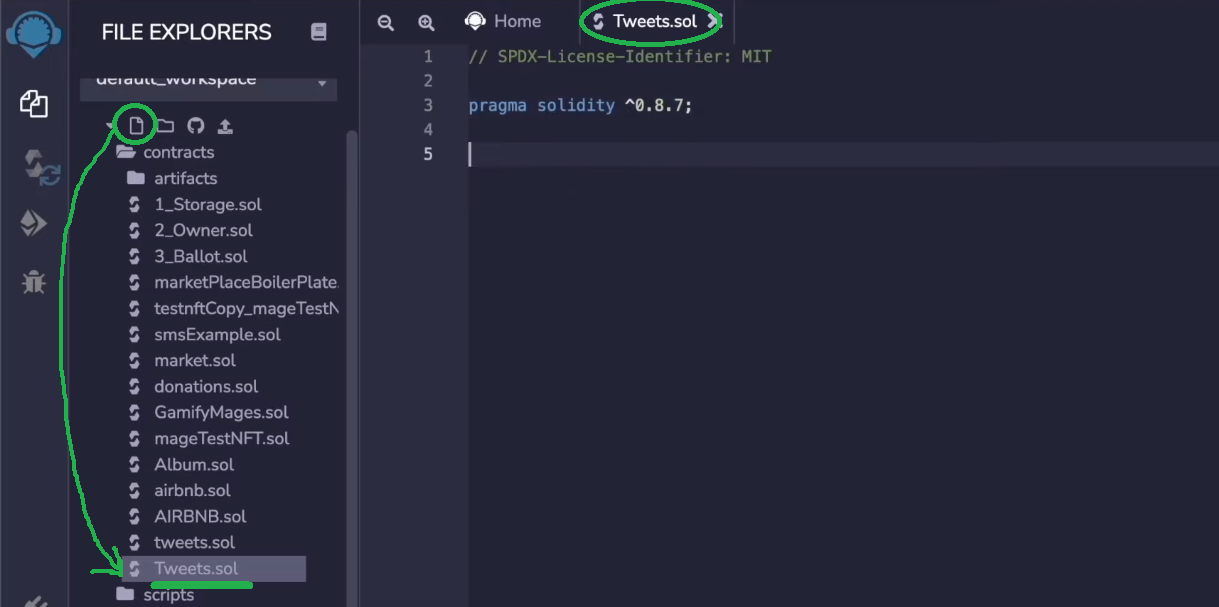
When it comes to completing on-chain transactions, smart contracts are doing the heavy lifting behind the scenes. So, to cover the “on-chain tweeting” feature of our decentralized Twitter, we need to create and deploy a Web3 contract. For details, use the video below starting at 4:42. Start by opening the Remix IDE. Next, create a new file and name it “tweets.sol“:
As with all contracts, we must first add a “pragma” line. However, as mentioned above, you can use the “tweets.sol” link and copy the entire code and paste it into Remix. Then, it’s time to compile your smart contract (use the video below at 15:51):

Once you’ve compiled your smart contract, you can use Remix to deploy it. Don’t forget to have your MetaMask extension connected to Polygon’s testnet (Mumbai). Also, make sure to select the “Injected Web3” environment:
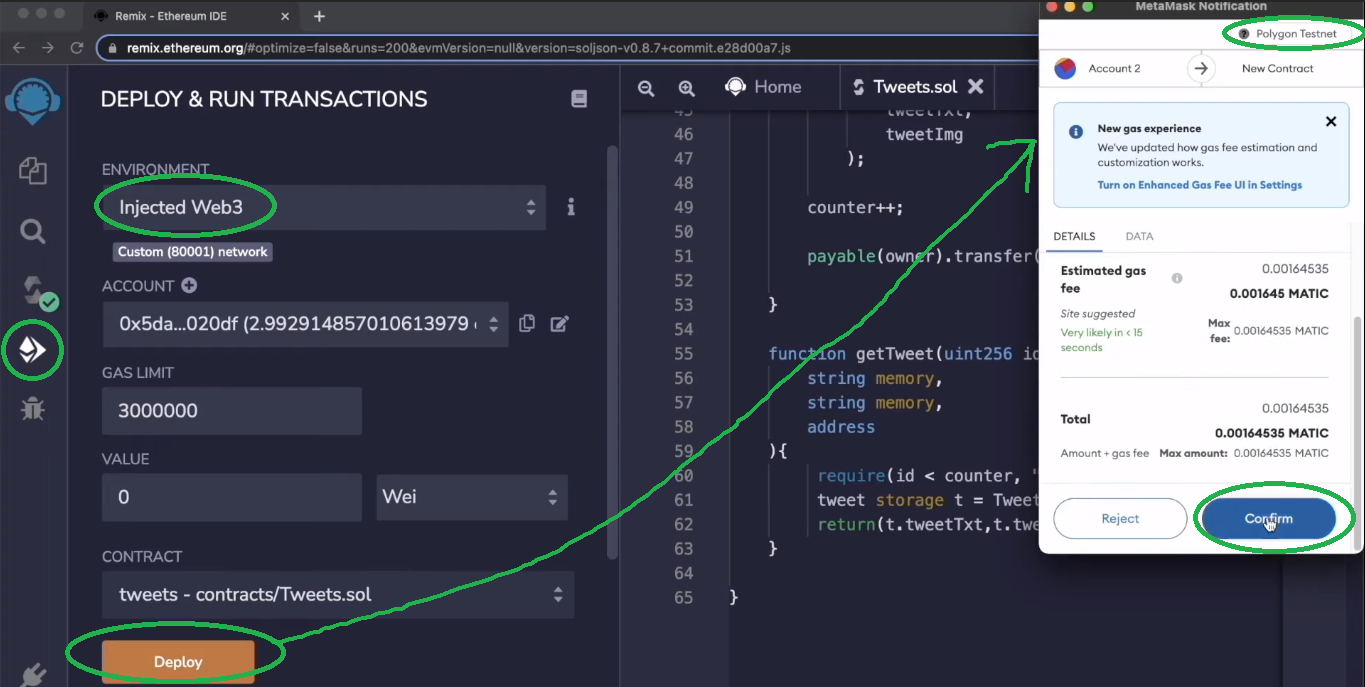
Note: To deploy your smart contract on the Mumbai testnet, you will need some “play” MATIC. As such, use the Mumbai testnet faucet.
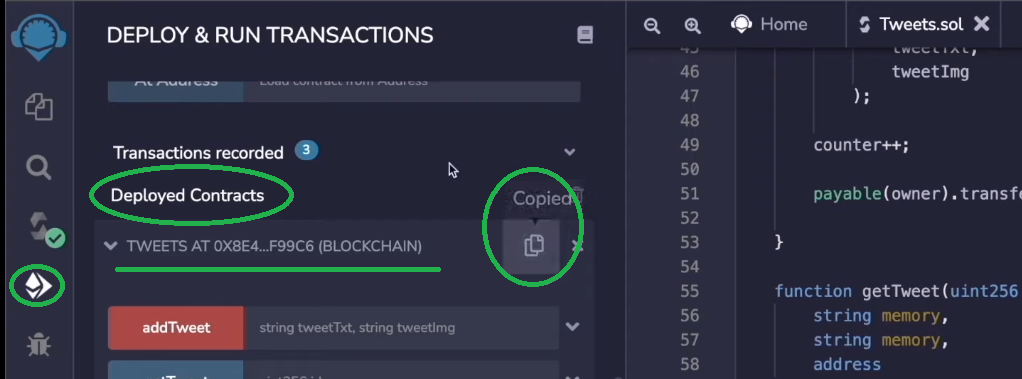
After successfully deploying your smart contract, you can copy its address. You will need the latter as you move forward:
Stage 2 – Building the Frontend of Our Decentralized Twitter
With your instance of the “tweets” smart contract deployed, you can focus on building a decent user interface (Web3 UI). This is where React comes in handy. As an additional shortcut, we encourage you to use Moralis’ web3uikit. Detailed guidance awaits you at 20:15 of the video tutorial below.
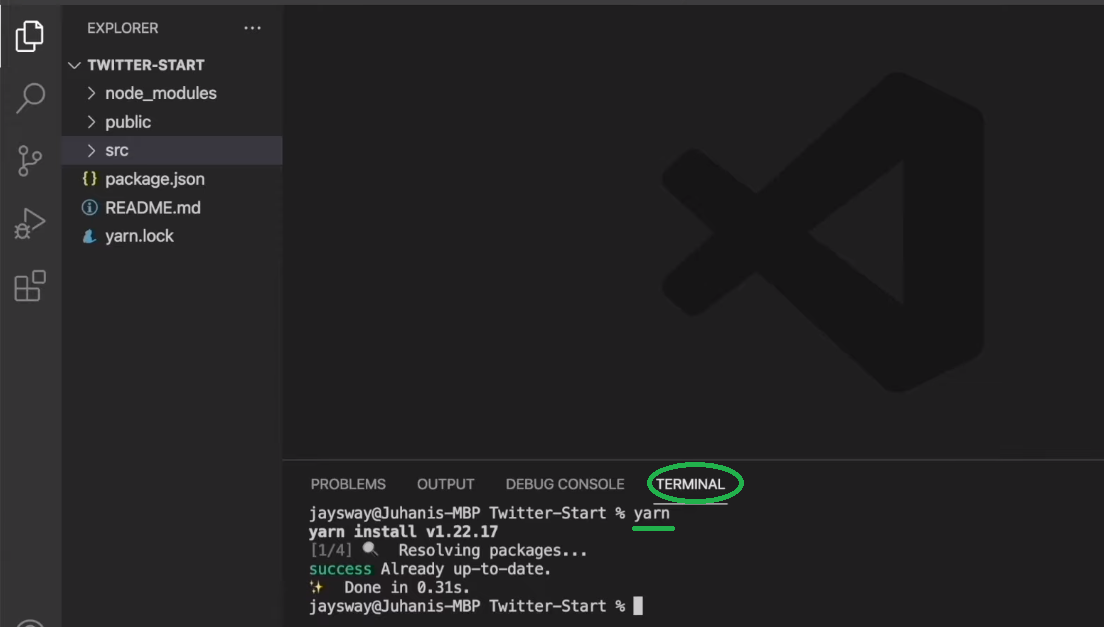
For starters, you’ll get to complete the initial project setup. Hence, you will first want to clone our code and install all dependencies. You can do this using Visual Studio Code (VSC) or any other code editor:
Starting at 22:41, you’ll learn to build your decentralized Twitter sidebars. As such, you will use the “Sidebar” component to simplify things and have the sidebar ready in less than ten minutes:
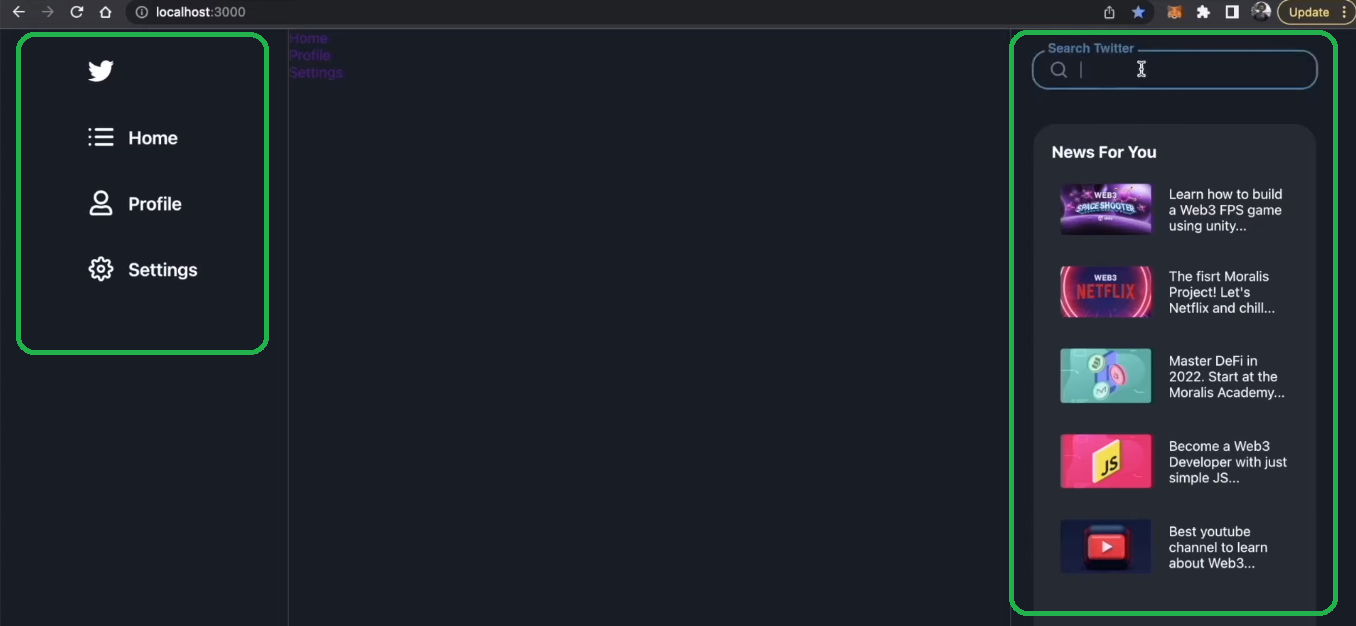
With the sidebars ready, you will get to build the homepage starting at 31:44. The “Home.js” file will hold the majority of the code. This is where you’ll program the proper logic. Moreover, using web3uikit will make adding icons, buttons, and the text area as straightforward as it gets. In addition, the video tutorial will also show you how to neatly incorporate the uploading of the images. As such, you will have the “tweeting” area set in place in no time.
Moving forward, you will create your decentralized Twitter feed. This is where you’ll focus on the “TweetInFeed.js” file. Finally, you will wrap up your frontend efforts by adding the “Profile” and “Settings” pages.
Stage 3 – Building the Backend of Our Decentralized Twitter
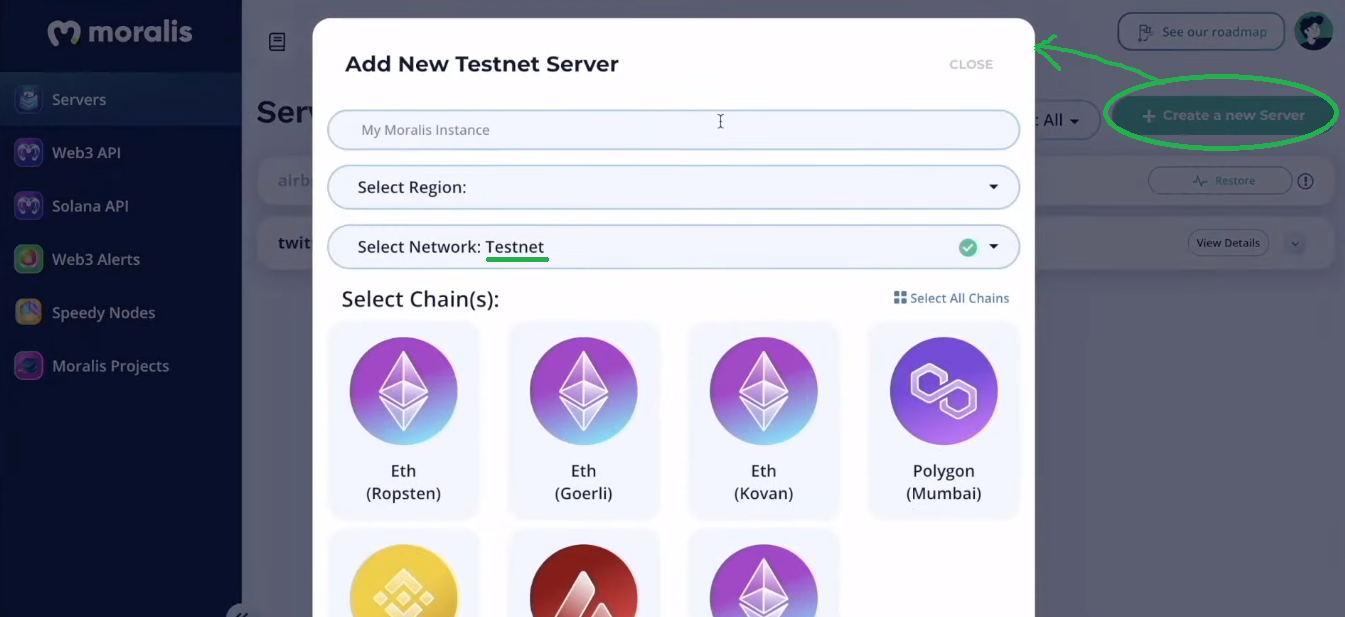
With the frontend completed, you should add Web3 functionality to create a decentralized Twitter. As such, make sure to use the video guide below starting at 57:29. As mentioned before, this is where Moralis will make things pretty simple for you. Although, you do need to complete some initial setups. As such, log in to your Moralis account to access the “Servers” tab inside your Moralis admin area (57:46). There, you need to create your Moralis server:
After successfully spinning up your server, you get to use its details (server URL and application ID):
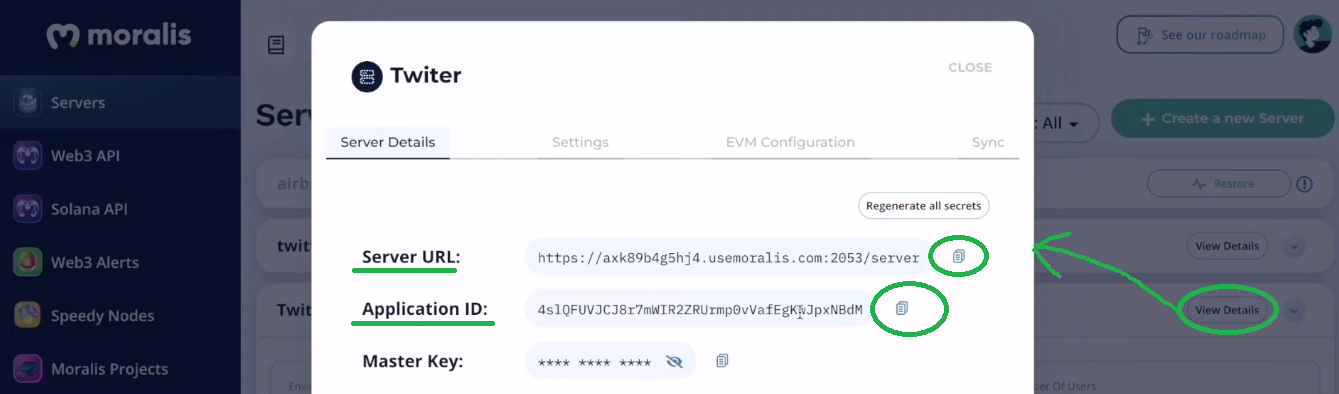
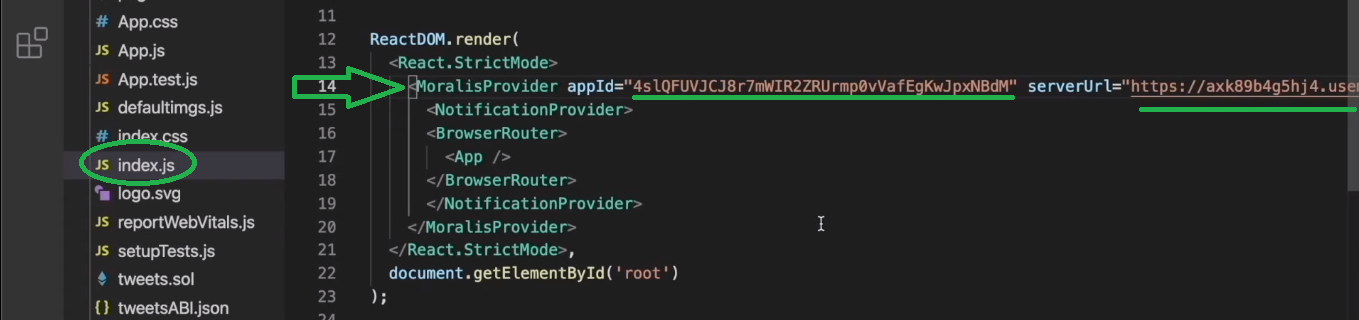
Finally, open the “index.js” file and populate the marked line (as seen below) with your server’s details:
The above step gives you access to the Moralis SDK. You can now use the Moralis documentation to copy proper hooks (e.g., “isAuthenticated”). That way, you’ll easily cover the entire Web3-related backend, including Web3 authentication. This is where you will use web3uikit, which will provide you with a neatly looking “Connect Wallet” button. While implementing these features, you will mainly focus on the “App.js” file.

Stage 4 – Handling Off-Chain and On-Chain Data with the Moralis Dashboard
Last but not least, starting at 1:00:59, you’ll learn to use the Moralis dashboard. As such, you’ll be able to store off-chain data and on-chain data with ease. For this final stage of our example project, you will use the “Settings.js” file to upload to IPFS. You’ll see how the Moralis integration of IPFS enables you to save files in a decentralized manner. For our decentralized Twitter, we will use this option to save the image files that users want to tweet. Along the way, you’ll get to use the “useMoralis” and “useMoralisWeb3Api” methods. They will enable you to create the “saveEdits” async function and to utilize “useEffect” and “getNFTs”. Finally, you’ll implement the code to enable “on-chain” tweeting (1:12:40). This is where the Moralis dashboard’s “Tweets” class will play a major role.
2022 Guide to Building a Decentralized Twitter – Summary
If you took on the above-presented example project, you now have your own decentralized Twitter up and running. You’ve learned to use your existing JavaScript and React skills to create a relatively advanced dapp. Furthermore, with the help of excellent tools such as Remix and Moralis, you were able to cover blockchain aspects without breaking a sweat. Nonetheless, now that you know that blockchain development with the right tools and proper guidance is no big deal, you should take on other example projects. For instance, you can dive into our other “clone” feats. These include building a Uniswap DEX clone, a Web3 Netflix clone, a Web3 Spotify clone, a Reddit clone for Web3, an OpenSea clone, and a Coinbase clone.
Furthermore, you may want to explore other crypto and blockchain development topics. If so, check out the Moralis blog and the Moralis YouTube channel. Some of the latest articles and tutorials there include an EIP 1559 example, the full decentralized finance guide, the “mint game assets as NFTs” tutorial, building a decentralized autonomous organization (DAO), fractional NFTs, SPL vs ERC20 tokens, building a Solana token dashboard, creating your own metaverse, building a play-to-earn (P2E) game smart contract, and creating a BNB NFT. Moreover, if you are Unity proficient, make sure to explore Unity Web3 programming. In addition, you can learn about Web3 game design by building a Web3 game that enables players to buy NFTs in-game.
Nonetheless, you might be eager to become a blockchain developer as soon as possible. If that’s the case, you need to consider taking a more professional approach. Hence, enrolling in Moralis Academy might be just the right path for you.
