VHS and DVD formats are long gone and forgotten in today’s digital age, at least to some extent. Today, online streaming services such as Netflix are the new norm. With Netflix being one of the major and most successful streaming services globally, we thought it would be beneficial to illustrate how to develop a Web3 Netflix clone. You might have already noticed that creating a Web3 Netflix clone was the first Moralis Projects example. This Web3 clone of Netflix is just the first of many challenges you can take on, as Moralis Projects feature new quests every week. As such, make sure to sign up by following the previous link. However, let us now dive deeper into our article and discover how to develop a Web3 Netflix clone with Moralis!
A common misconception is that blockchain development is challenging; however, it doesn’t have to be difficult. Sure, there are still many devs who fall into the trap of building directly on top of RPC nodes. By doing so, they face the limitations of RPC nodes. Thus, they spend vast amounts of time dealing with the backend. However, at the same time, we have both beginners and JavaScript-proficient programmers with rather basic Web3 knowledge building dapps effortlessly in hours. How’s that possible? It’s thanks to Moralis – the ultimate Web3 backend platform. This “Firebase for crypto” platform is the pinnacle of the current Web3 tech stack. As such, it solves all of your blockchain-related backend needs. So, if you want to develop a Web3 Netflix alternative effortlessly, create your free Moralis account and dig in. Combining our instructions and a “code-along” video will get you to the finish line in 65 minutes.
Develop a Web3 Netflix Clone with Moralis
Using the Web3UI kit, React, and Moralis, we will develop a Web3 Netflix clone and guide you step by step. To help you see the big picture in advance, we will start with a quick demo of our finished Web3 Netflix clone. Then we will take care of the initial setup. We will get things ready using the code available on GitHub and our favorite code editor, Visual Studio Code (VSC). Then, we will start to develop a Netflix clone and implement Web3. We will first focus on creating a top banner for our dapp. Next, we will focus on setting up the homepage. Moving forward, we will create a modal for the thumbnails with on-click events. As the final step of our Web2 functionalities, we will equip our Netflix clone with a movie player.
With our application basically ready, it’s time to add Web3 functionality. As such, we will first complete the initial Moralis setup. This will give us access to the Moralis SDK. Our first Web3-related task will revolve around Web3 authentication. Thus, we will use Moralis’ Web3 API to easily add Web3 login. We will also add a pop-up notification for authentication. Next, we are going to devote our attention to the Moralis dashboard (database) and cloud functions. In addition, we will create the “My List” page to ensure that we develop a Web3 Netflix clone with some cool additional features. For the final stage of our quest, we will use Moralis’ IPFS integration and show you how to upload to IPFS. So, in case you haven’t created your free Moralis account yet, do so now since it will cover Web3 functionality as we get to that part.
Develop a Web3 Netflix Clone – Demo
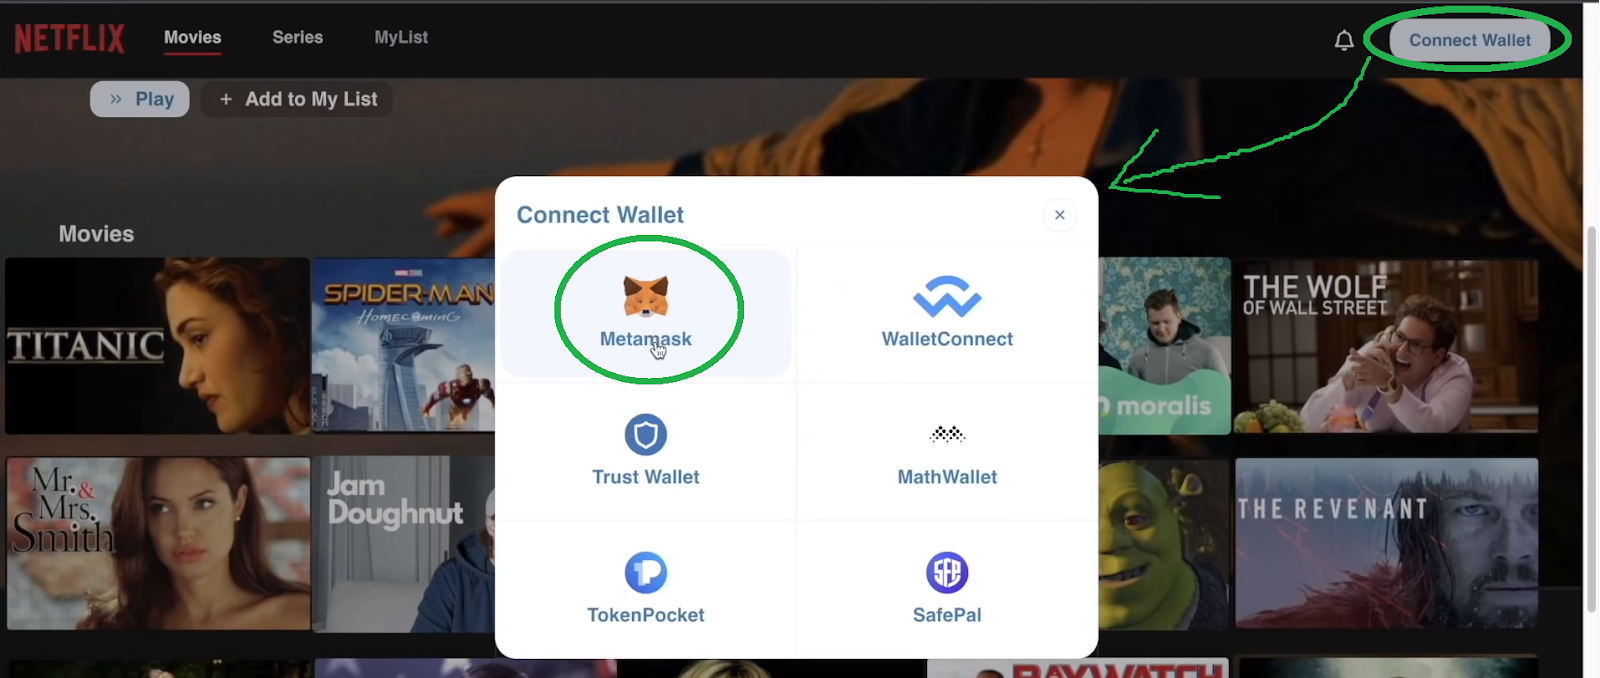
As mentioned, let’s take a look at a demo of our Web3 Netflix clone. The gist of our example dapp can be seen in this screenshot:
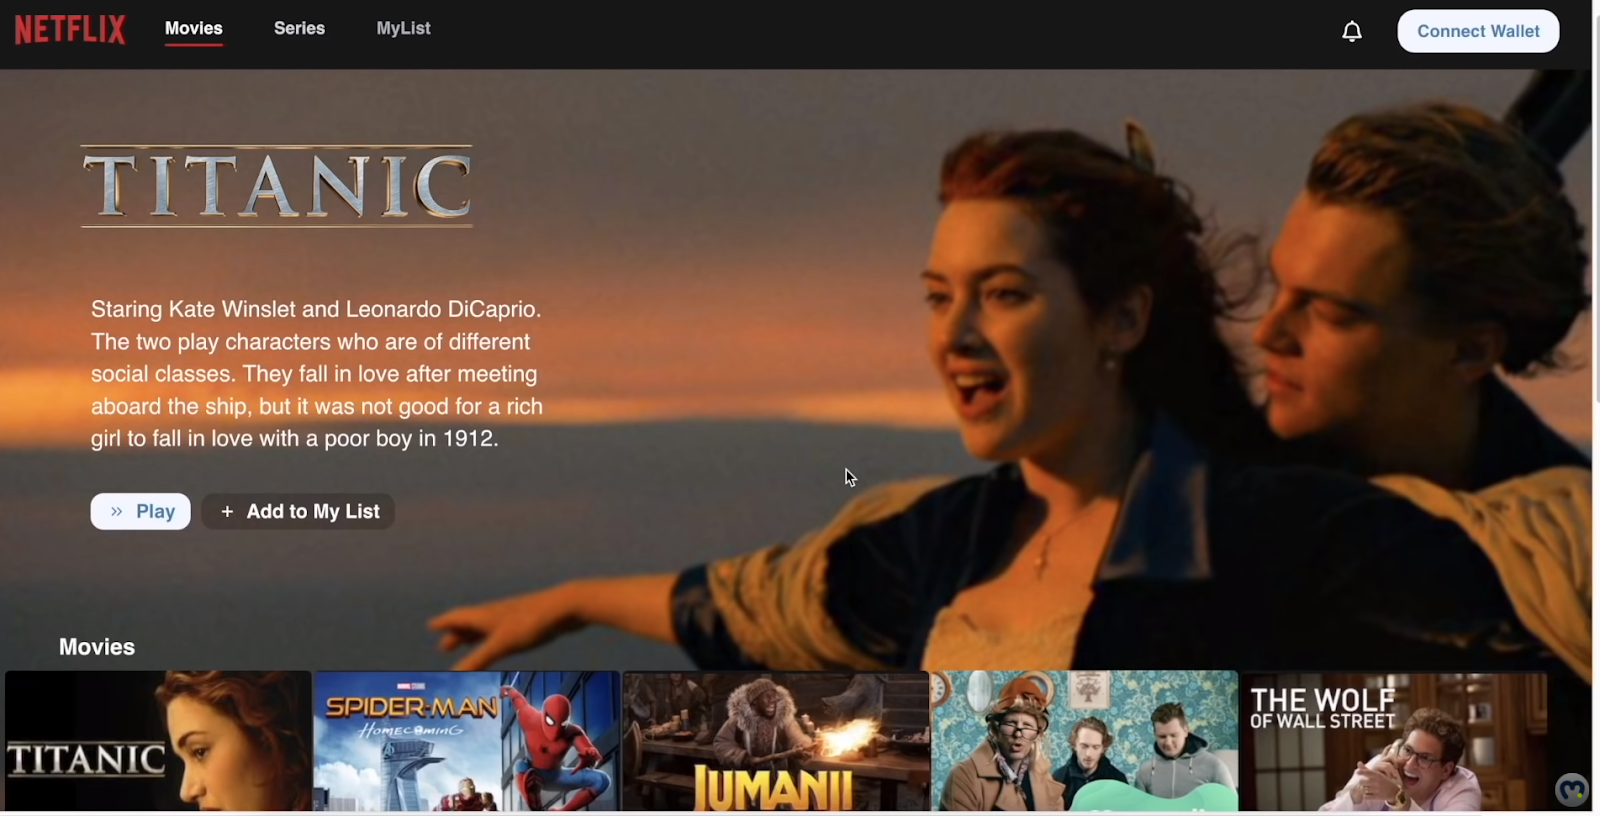
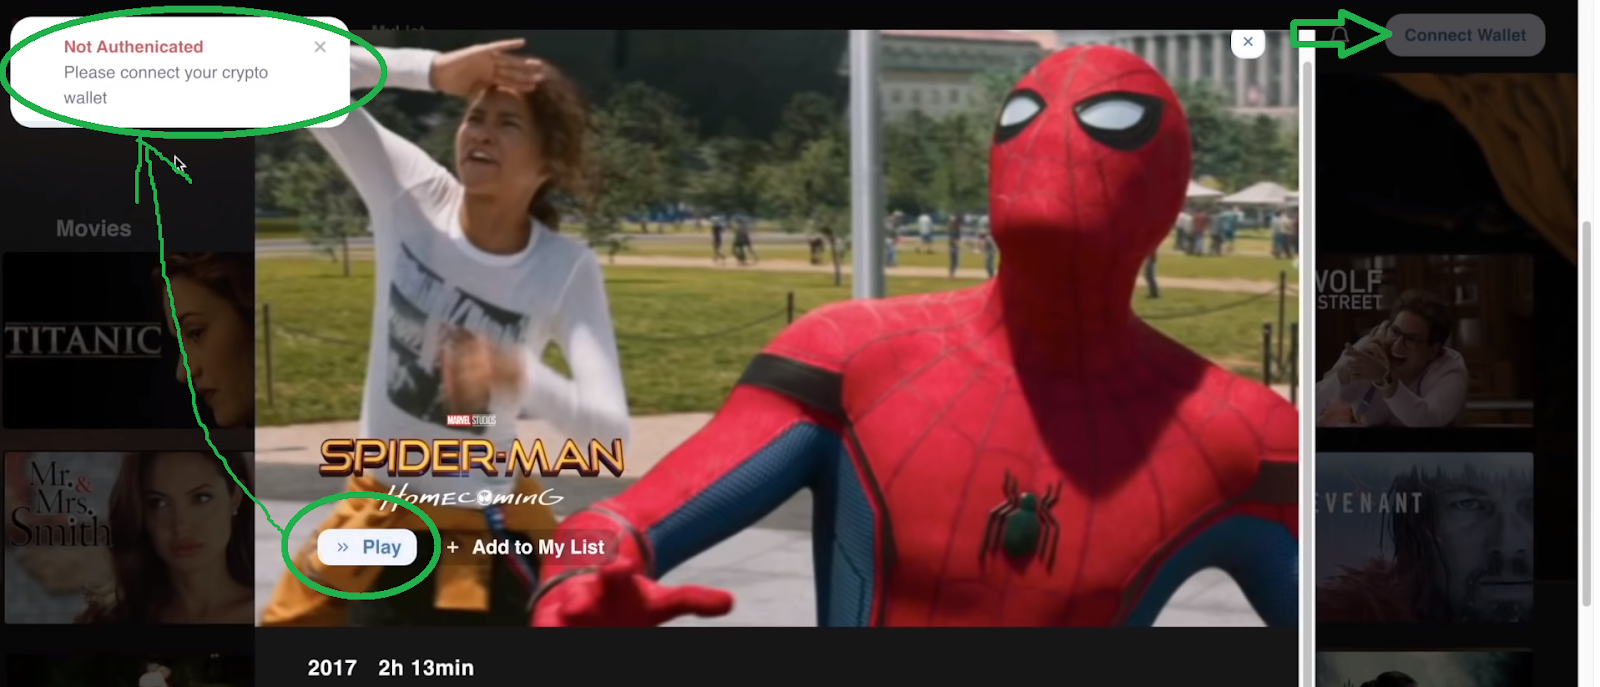
As you can see, we have the “Netflix” logo followed by the menu bar at the top. In the top-right corner, we have the “Connect Wallet” button, which takes care of the Web3 authentication process. Below the top banner, we have a neat example of a movie with an image of the adorable Jack and Rose. Furthermore, we have thumbnails of other movies displayed at the bottom. Potential users can, of course, select any of those movies by clicking on their thumbnails. So, as an example, let’s say they chose Spider-Man:

As you can see in the screenshot above, a pop-up window for the relevant movie will appear after clicking on the thumbnail. At the bottom, it contains details about the movie in question. In the middle, there’s an image with the movie’s title. There are also the “Play” and “Add to My List” buttons. However, we made sure that the “Play” button works only for authenticated users. Thus, if users that are not logged in click on the button, they get a notification:
Web3 Netflix User Authentication Demo
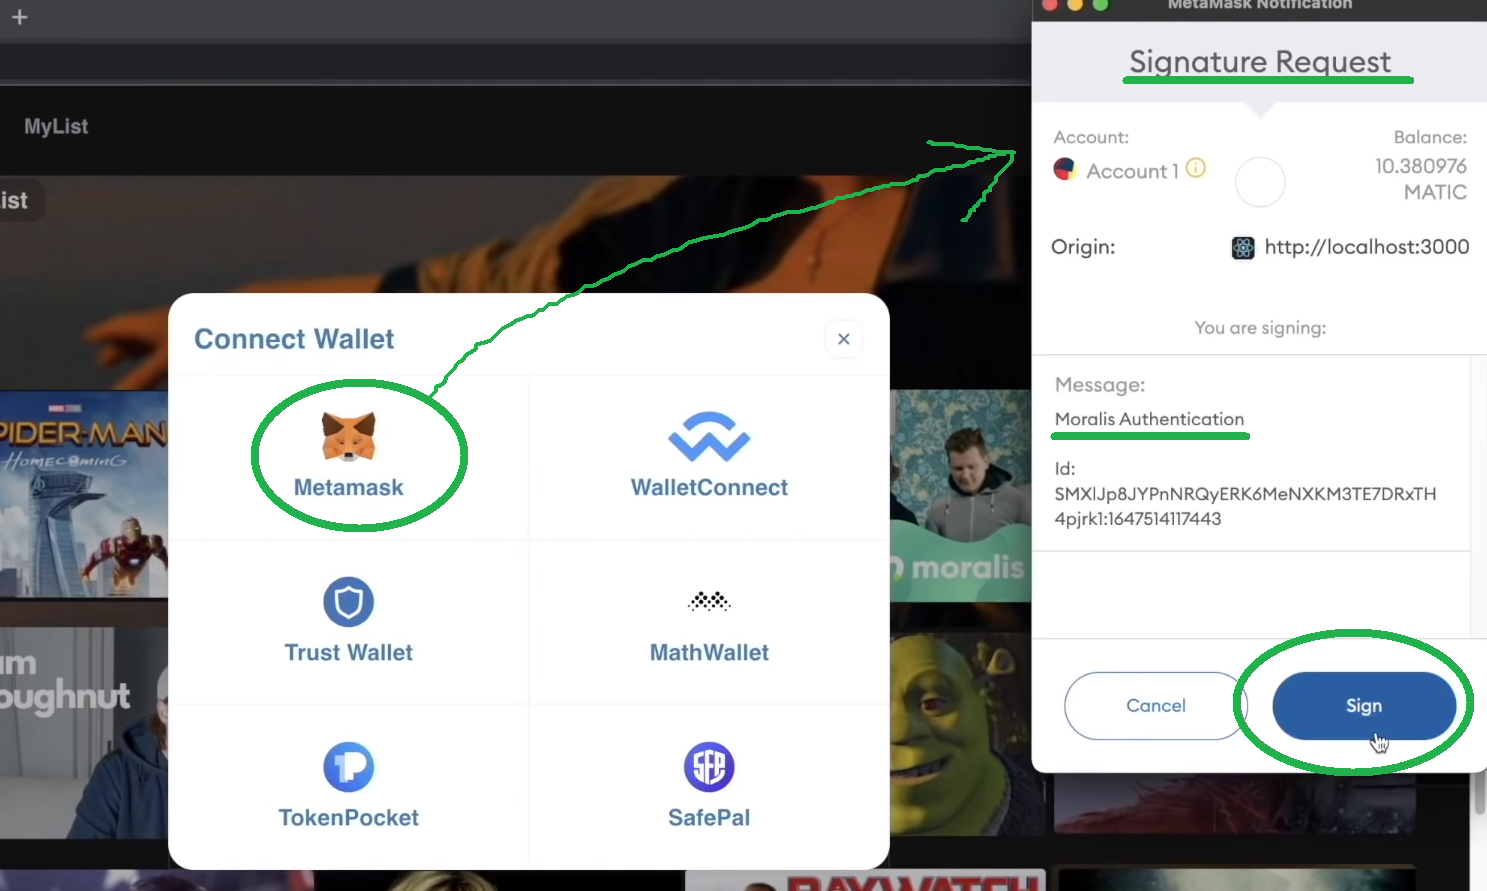
So, users that want to use our Netflix clone need to log in first. Fortunately, they can do so easily using their favorite Web3 wallet. They need to close the above pop-up window and then click on the “Connect Wallet” button:
Next, they need to select their preferred crypto wallet. Let’s assume they go with MetaMask. As such, their MetaMask extension will prompt them to confirm the login by clicking on the “Sign” button:
As an indication that users are now logged in, they will see their balance and address displayed in the place where the “Connect Wallet” button was before:

Web3 Netflix Movie Playing Demo
Once users are authenticated, they can watch movies. As demonstrated above, they need to select a movie by clicking on a thumbnail. Then, they need to click on the “Play” button, which opens the movie player:

Here’s what our movie player looks like:
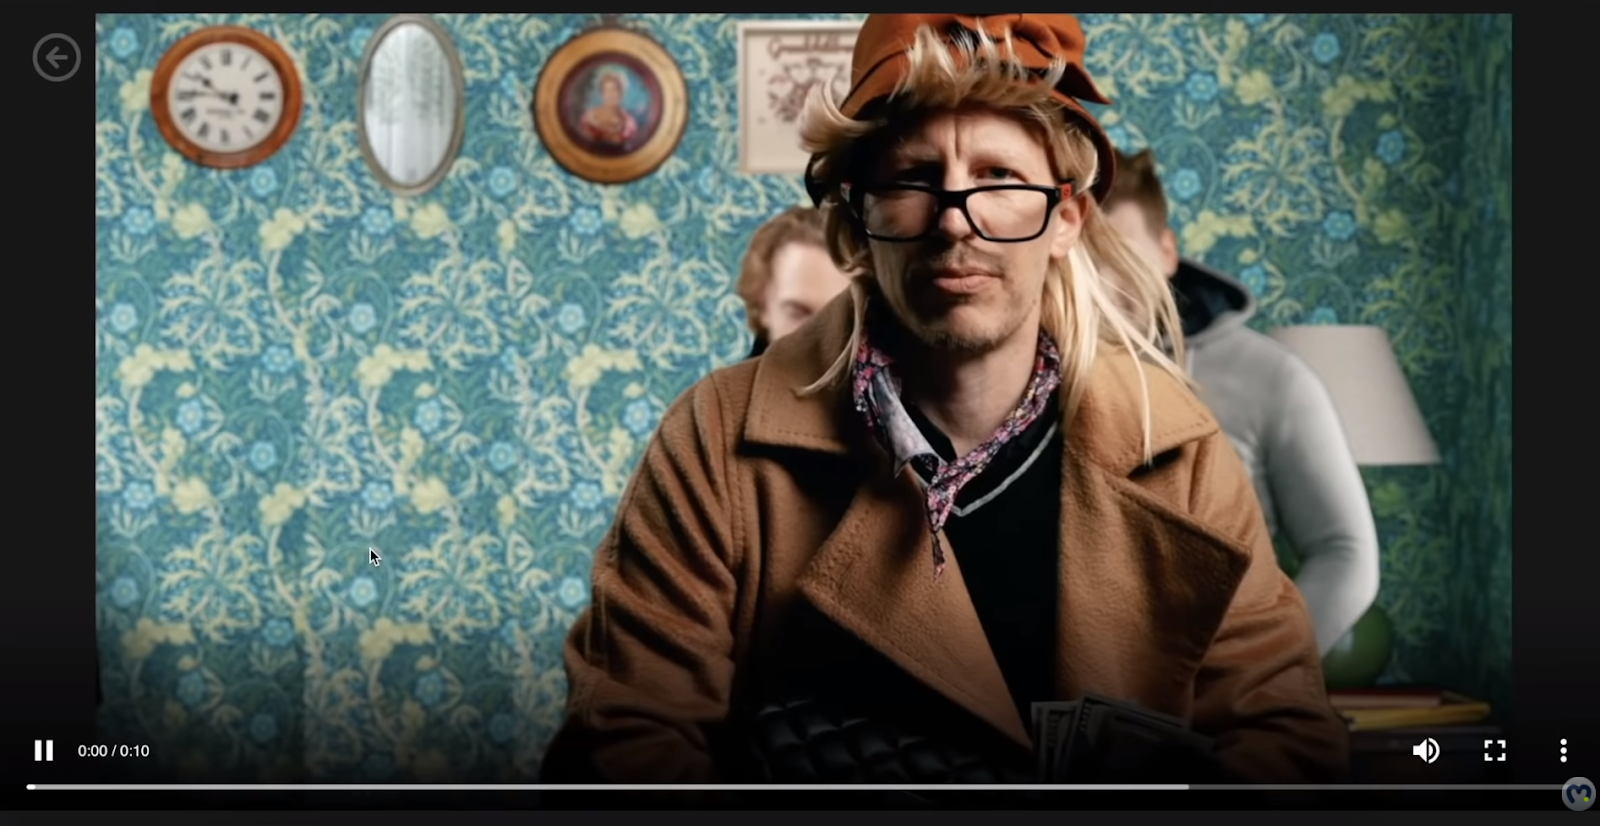
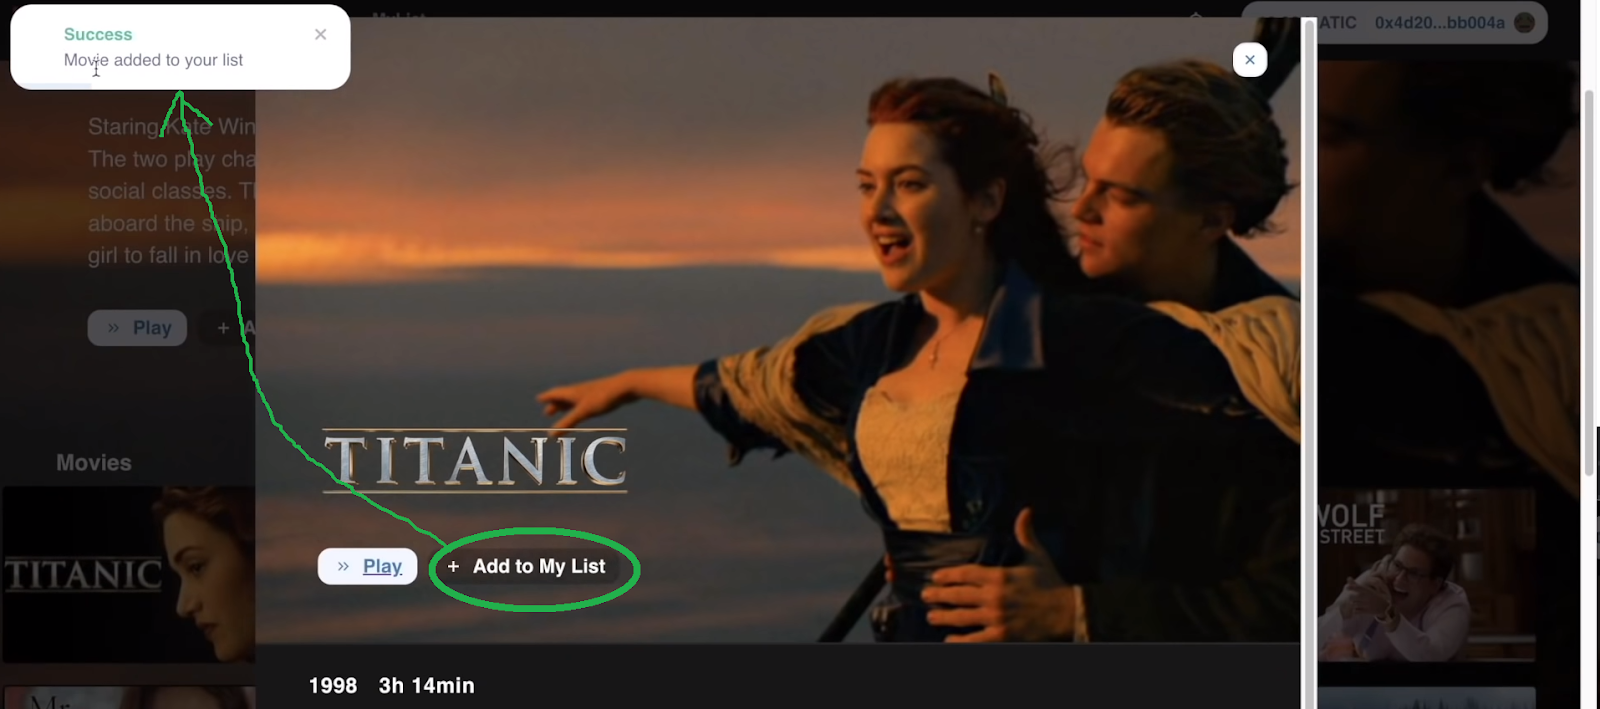
As you can see in the screenshot above, there is a timeline and other standard commands at the bottom. To exit the player, users get to use the “back” arrow in the top-left corner. Moreover, now that users are logged in, they can also add movies to the “My List”:
Of course, users can view all the movies that they’ve added to that list. They do so by clicking on the “My List” option in the top menu:

By clicking on the thumbnails of the movies inside “My List”, users get to access the same pop-up windows containing the movies’ details.
That wraps up our Web3 Netflix clone demo. We hope you are impressed with the results and that you are excited to roll up your sleeves and learn to develop your own Web3 Netflix clone. Nonetheless, in case you are more of a video person, make sure to use the video at the end of this article(0:40).
Develop a Web3 Netflix Clone – Follow Along
In order to get the most out of this example project, we recommend using our starter code (“Netflix-Starter”). By doing so, you will need to implement the necessary code, following our lead. However, if you want an additional shortcut, you can also access the finished code on GitHub.
Note: The following instructions assume that you are starting with the “Netflix-Starter” code.
Develop a Netflix Web3 Clone – Example Project’s Initial Setup
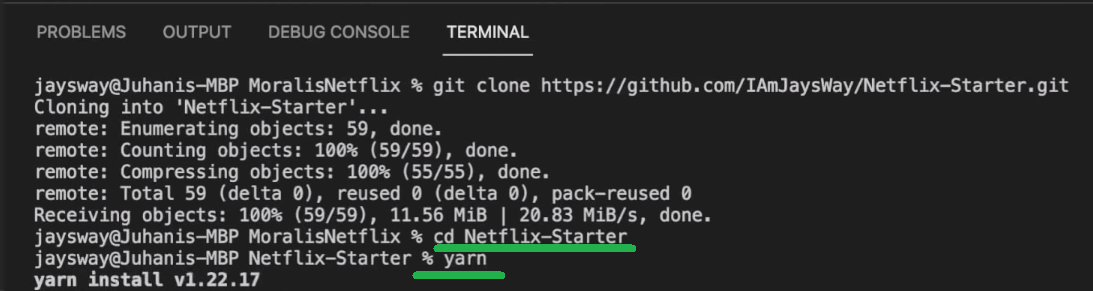
We’ll start by cloning the starter code (from GitHub) and opening VSC. Inside VSC, enter the “git clone” command, followed by the code repository’s URL:

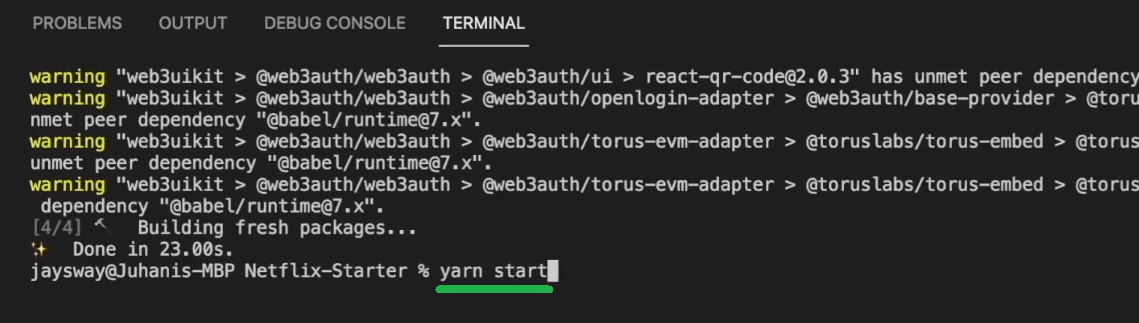
Then you want to “cd” into the “Netflix-Starter” folder and install all dependencies:
Now, you can already access the “src” folder, where all the initial coding files await you:
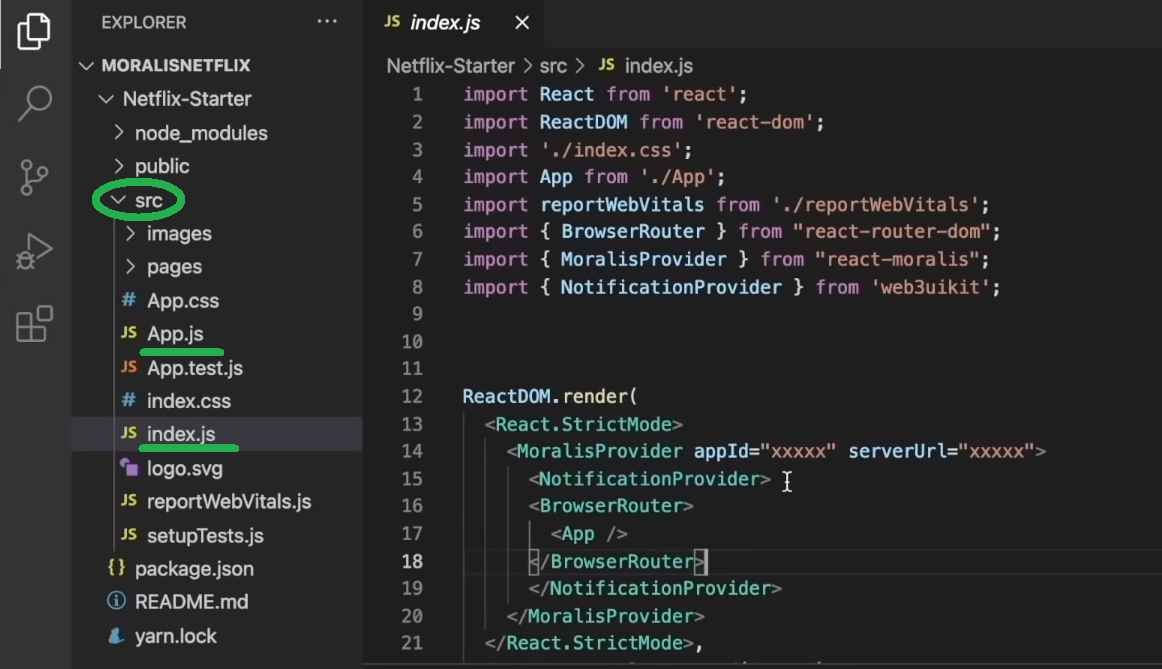
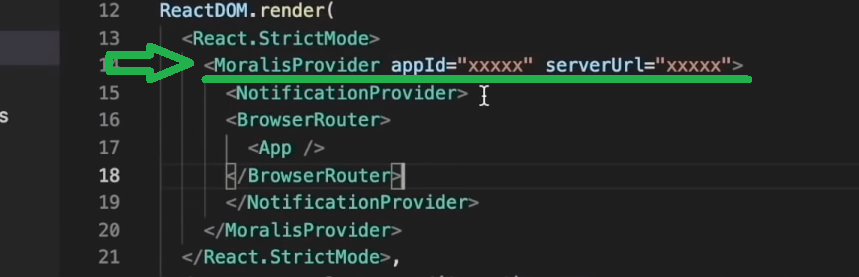
You have the “index.js” and “App.js” files, which contain everything you need to start with a clean slate. For instance, “index.js” contains the React router and the notification provider. Moreover, this is also where you’ll need to paste your Moralis server’s details:
In “App.js”, we have the two initial routes – the “Home” page and the “Player” page:
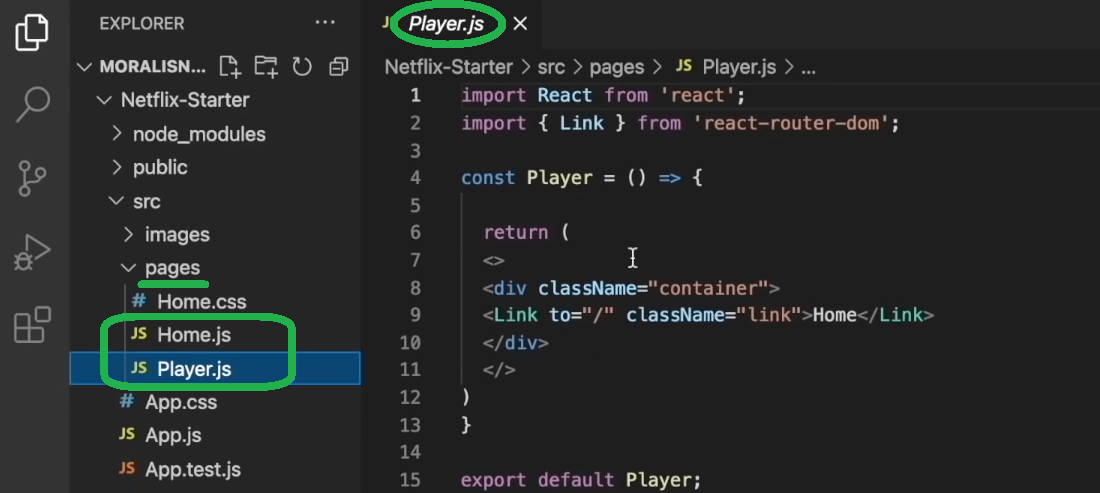
Furthermore, within the “pages” folder, you can find the “Home.js” and “Player.js” files. They correspond to the above two pages and link them together:
Nonetheless, if you want to take a look at what your blank canvas looks like, use the “yarn start” command:
As you can see, you have two blank pages that are cross-linked:

This wraps up the initial project setup. Now you are ready to roll up your sleeves and develop a Web3 Netflix clone. Of course, you will have a Moralis expert guiding you along the way in the video below. There’s quite a lot to cover, so we decided to use the upcoming sections to give you a quick preview of the steps. Of course, we strongly encourage you to dive deeper using the video tutorial.
Creating the Web3 Netflix Clone’s Top Banner
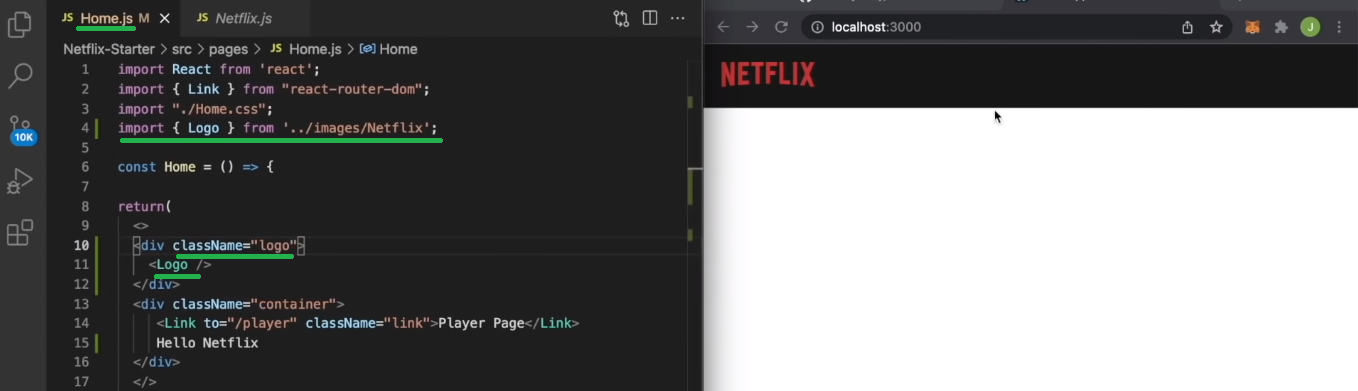
Starting at 04:03, you’ll start creating the top banner for our example project. This is where the Netflix logo and top menu will be included (as per the above demo). Here, you’ll rely on the “images” folder, where you also have the “Netflix.js” file. You’ll first import the logo and start using the provided “home.css” file for a nice design:
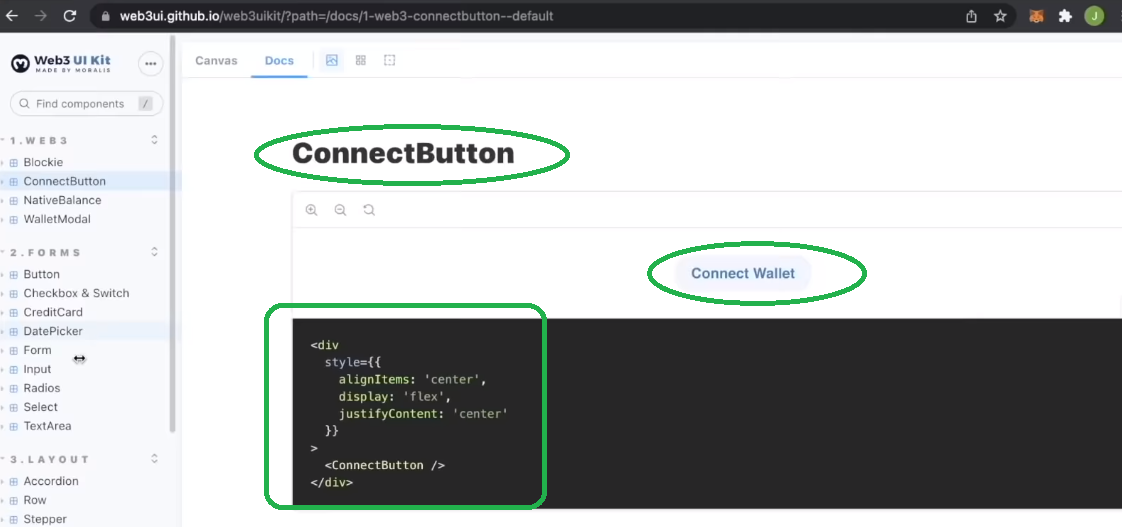
Moving forward, you will add the “Connect Wallet” button and other top menu options. This is where you’ll be relying on Moralis’ Web3UI kit:
Creating the Web3 Netflix’s Homepage
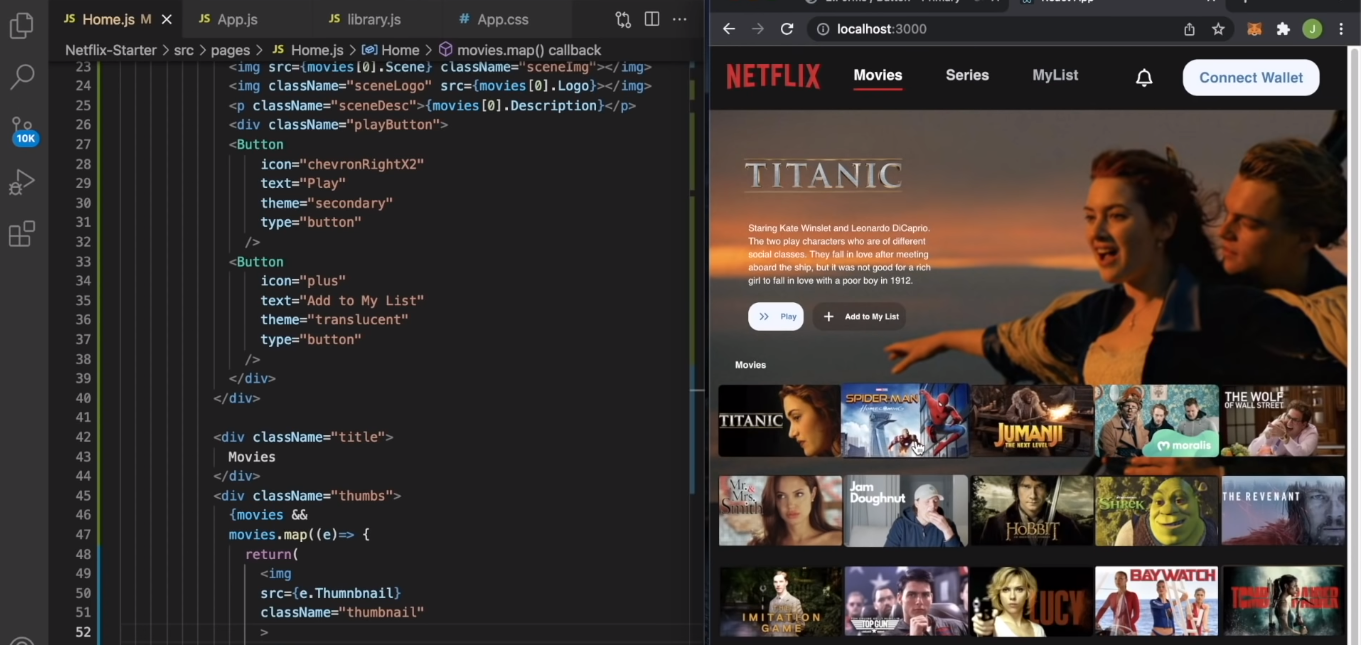
At 10:31 of the video below, you will start building the content for the homepage. This includes the thumbnails, descriptions, and other details. For this purpose, you will be creating the ”library.js” file, which will contain all the content except for the movies. They will be stored in a decentralized manner on IPFS. With the “library.js” file ready, you’ll be able to pull the specific details to “home.js” and display the relevant content on the homepage:

By following the detailed instructions in the video below, you will have your homepage ready in no time:
Adding a Modal and Movie Player
If you remember the above demo, you know that to develop a Web3 Netflix clone properly, we also need to keep track of which thumbnail is clicked. As such, we need to create a modal that appears after clicking on a thumbnail. Moreover, the content displayed in the modal needs to correspond to the clicked thumbnail. As such, you will create on-click events. For a deep dive into this part of our example project, use the video below starting at 19:57.
In addition, with the modal set in place, you’ll want to make sure that the “Play” button works properly. As such, you’ll want it to link to the “Player” page and ensure that the movie starts playing automatically. The detailed guidance awaits you at 27:13 in the video.
Develop a Web3 Netflix Clone – The Backend
At 32:18, the video will show you how to create a Moralis server. As such, you will get to connect with the ultimate Web3 SDK. Then, you will get to set the pop-up notification in place for authentication purposes. Moreover, you will also learn how to access your Moralis dashboard and how to work with cloud functions (39:51). Then, at 49:30, you will be guided through adding content to the “My List” page. Finally, last but not least, you’ll learn how to upload files to IPFS (56:56).
Here’s the video tutorial we’ve been referencing throughout the article:
How to Develop a Web3 Netflix Clone – Summary
By this point, you know how to develop a Web3 Netflix clone in just over an hour. You know that by using our template code, you can get to the finish line easily. If you’ve taken on our example project yourself, you’ve learned a lot along the way. Aside from completing the initial setups, you now have a clear understanding of how the React app function. In addition, you know how to use Moralis to add Web3 functionality and, in turn, turn apps into dapps. Ultimately, you also have a proper Web3 Netflix clone on your hands. We encourage you to take this example project even further. For instance, you can add subscription plans to your Web3 Netflix clone. Of course, subscriptions should be paid in crypto. This and many other additional features can easily be added using Moralis’ SDK.
If you enjoyed this example project, make sure to check out our other tutorials. For instance, you can learn how to build a Web3 Spotify clone, how to create a Coinbase clone, how to create a Reddit clone for Web3, and how to create an OpenSea clone. Moreover, the Moralis YouTube channel and the Moralis blog contain other excellent tutorials and explanations of various crypto concepts. Some of the latest topics include the benefits of Web3 gaming, how to create an ETH wallet or a multi-chain wallet, Web3 metaverse, NFT power-ups, DeFi staking, building a metaverse game, communicating with a Web3 database, why is Web3 important, and much more.
Both of these outlets can serve as your free continued crypto education. However, if you want to become a Web3 developer and go full-time crypto sooner rather than later, you should consider a more professional approach. Thus, you may want to enroll in Moralis Academy.
