Music has a special place in all of our hearts; it can change how we perceive things, change our mood, and it can convey crucial messages. Yes, it’s not surprising that audio streaming platforms such as Spotify have become so popular. Whatever genre you’re into, or whatever song you’d like to find, there’s an audio streaming platform for everyone. Moreover, as you probably know, Spotify is one of the leading options. However, with the rise of Web3, we believe that the music industry is ready for a change. Thus, creating a leading “Web3 Spotify” alternative is a huge opportunity that lies in front of every blockchain developer. As such, we want to show you how to build a Web3 Spotify clone and, in turn, bring decentralization to the table. Of course, this is also an easy way to offer songs as NFTs and accept crypto payments.
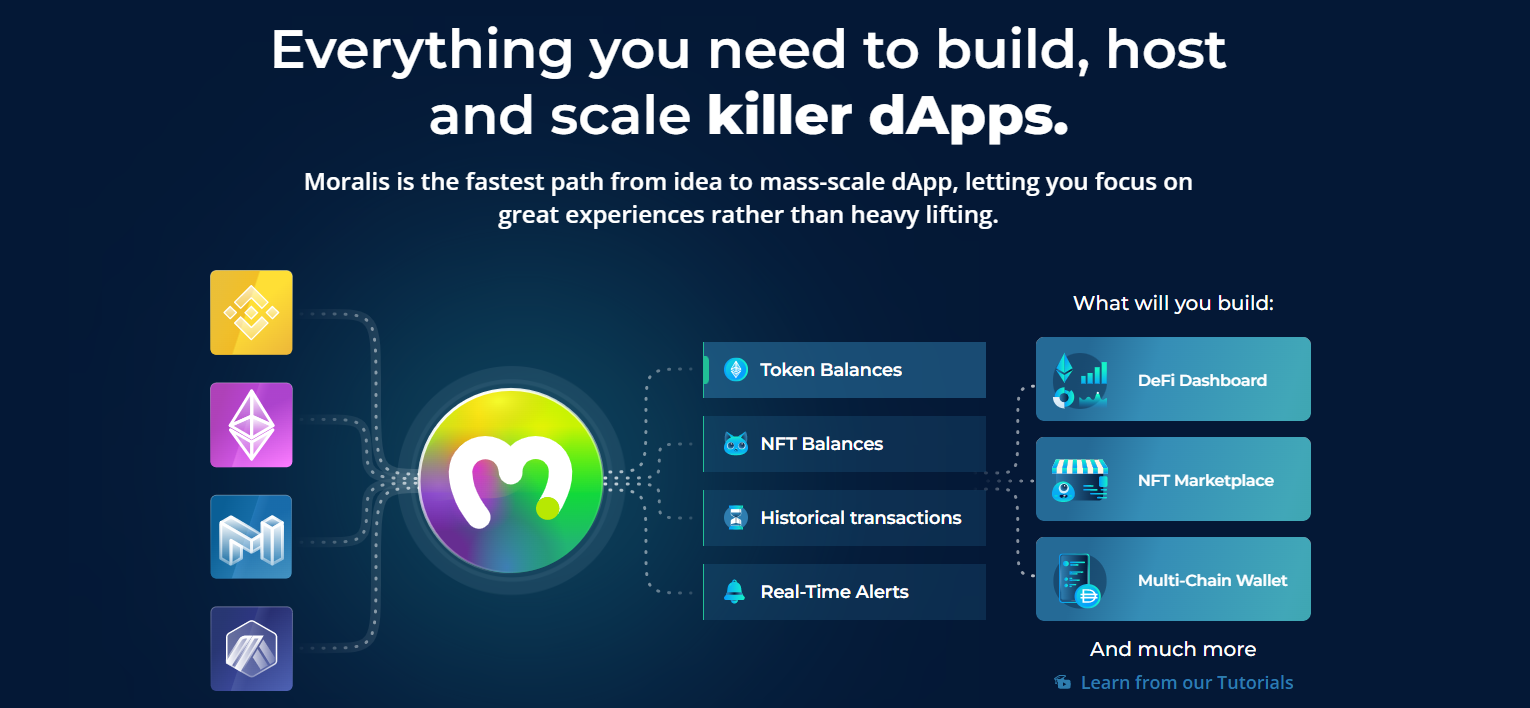
Moving forward, we will take on an example project where we will create a Web3 Spotify clone using some phenomenal tools. To help us with the frontend and create an excellent Web3 UI, we will use a design system called “Ant Design” (covered in our video below). To cover our blockchain-related backend needs, we’ll let the ultimate Web3 development platform, Moralis, carry the load. This “Firebase for crypto” platform is the best Web3 backend platform and the premier platform of the Web3 tech stack. With Moralis’ SDK, you get to cover backend functionality by copying and pasting short code snippets. As such, you get to save 87% on development time. Plus, Moralis enables you to index the blockchain easily. Also, this top choice among Web3 development platforms is all about cross-chain interoperability. Now, create your free Moralis account now and join us as we build a Web3 Spotify clone!
Our Web3 Spotify Clone Preview
Before we actually roll up our sleeves and start building a Web3 Spotify clone, let’s do a quick preview of our dApp. In turn, you get to see what our end result will look and feel like. Also, this will help you decide whether or not you want to follow our guide to the point and create your own Spotify clone with Web3.
Here’s the home screen of our Spotify clone:
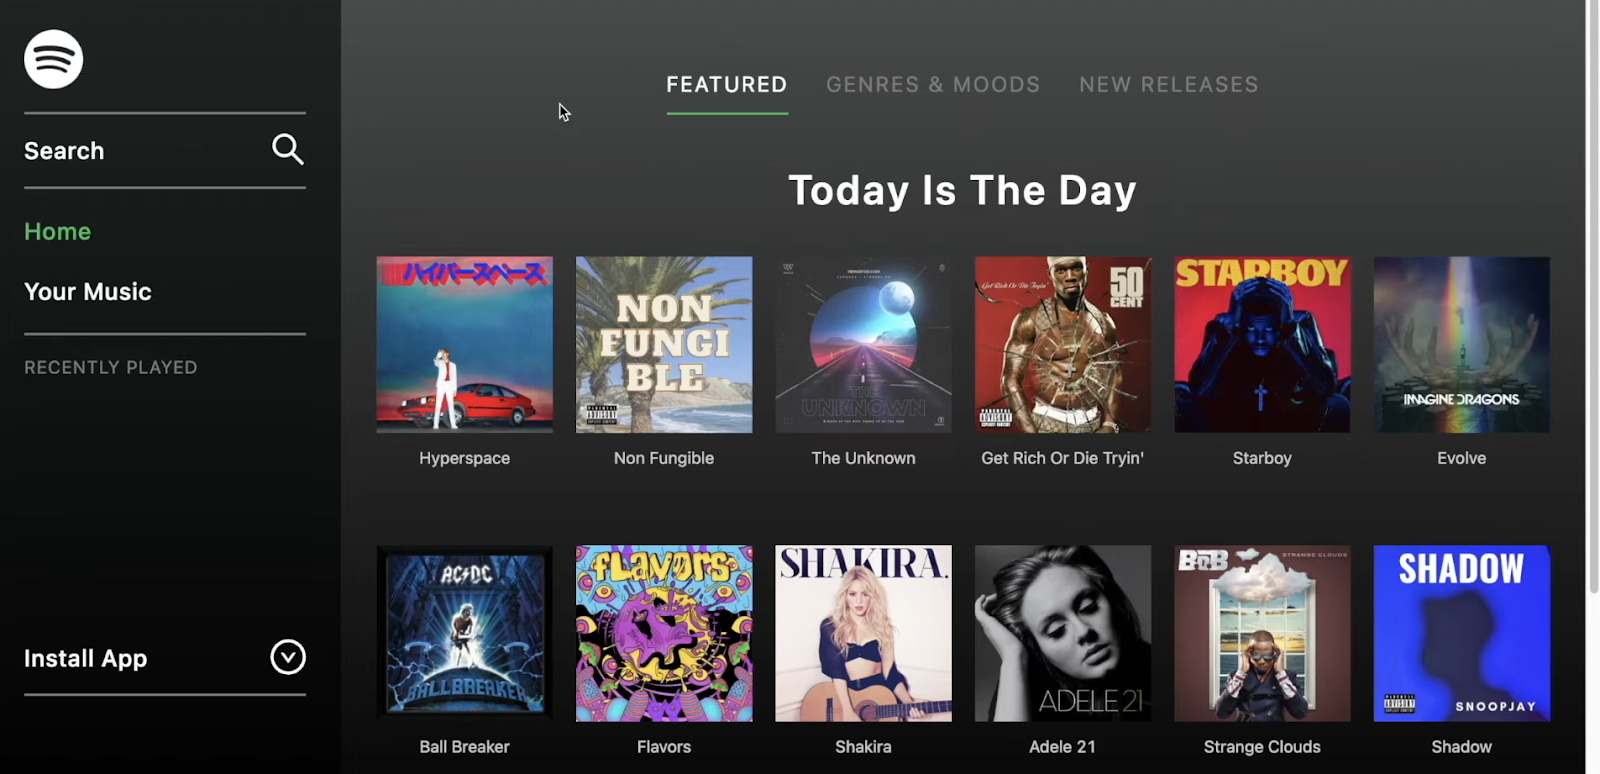
Looking at the screenshot above, you can see that our dApp has a side menu bar. The latter includes the logo, search bar, the “home”, “your music”, and the “recently played” tabs. Also, it has a tab where you can go to install apps. Furthermore, the majority of the screen is where the different albums are displayed. Moreover, they can be shown in three ways. As you can see, there are also featured albums. Users can also view albums by genre and mood. Finally, users can view new releases.
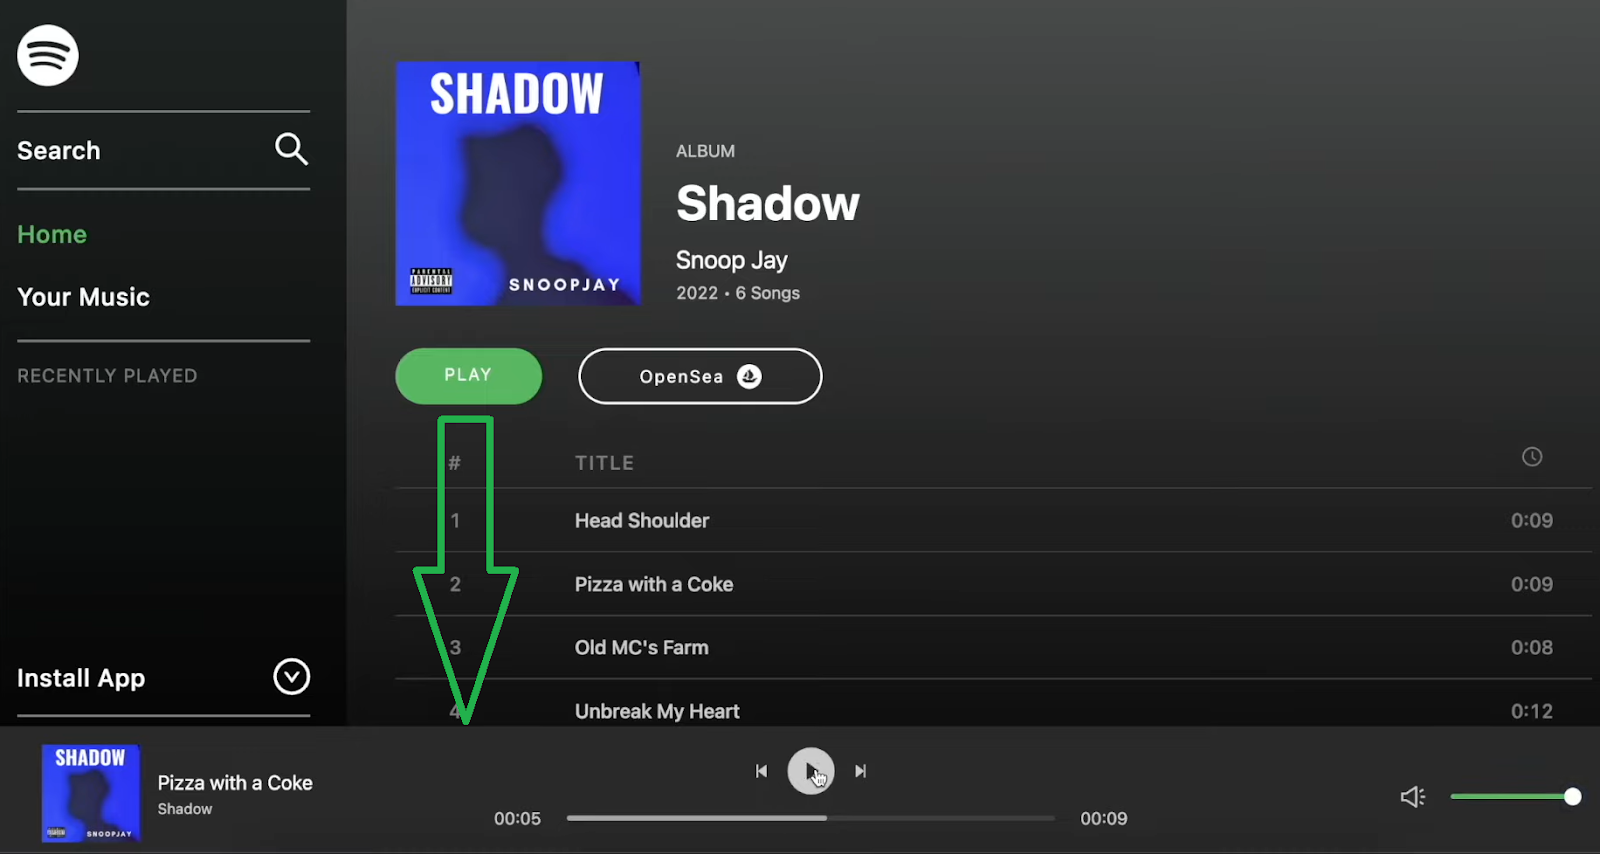
Furthermore, what’s fantastic about all of these music albums in our dApp is that they are actually NFT collections. By clicking on one of the above albums, we get to see the songs it contains:
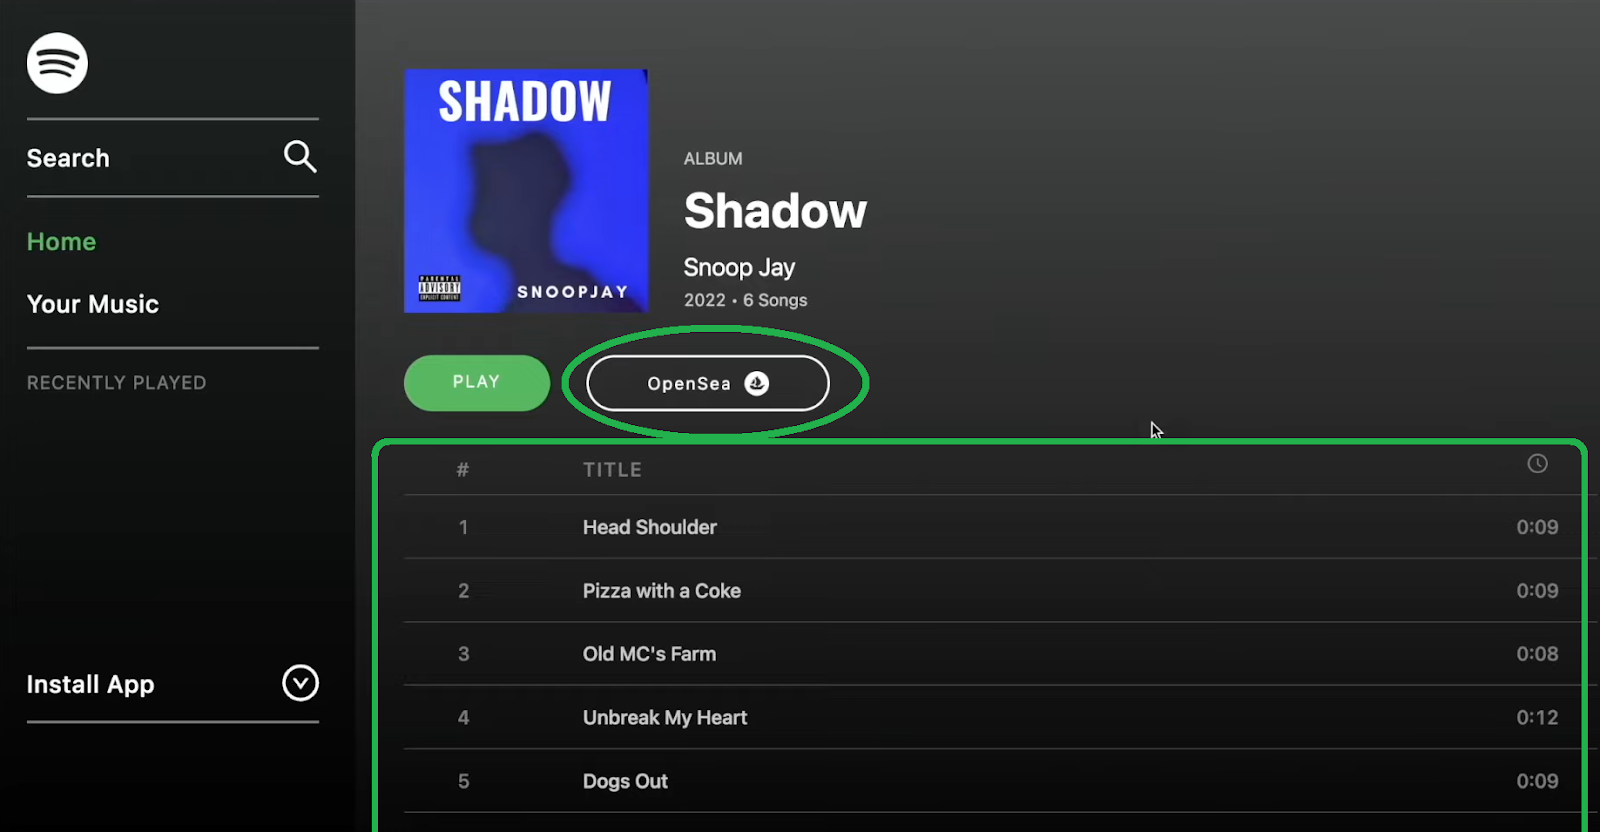
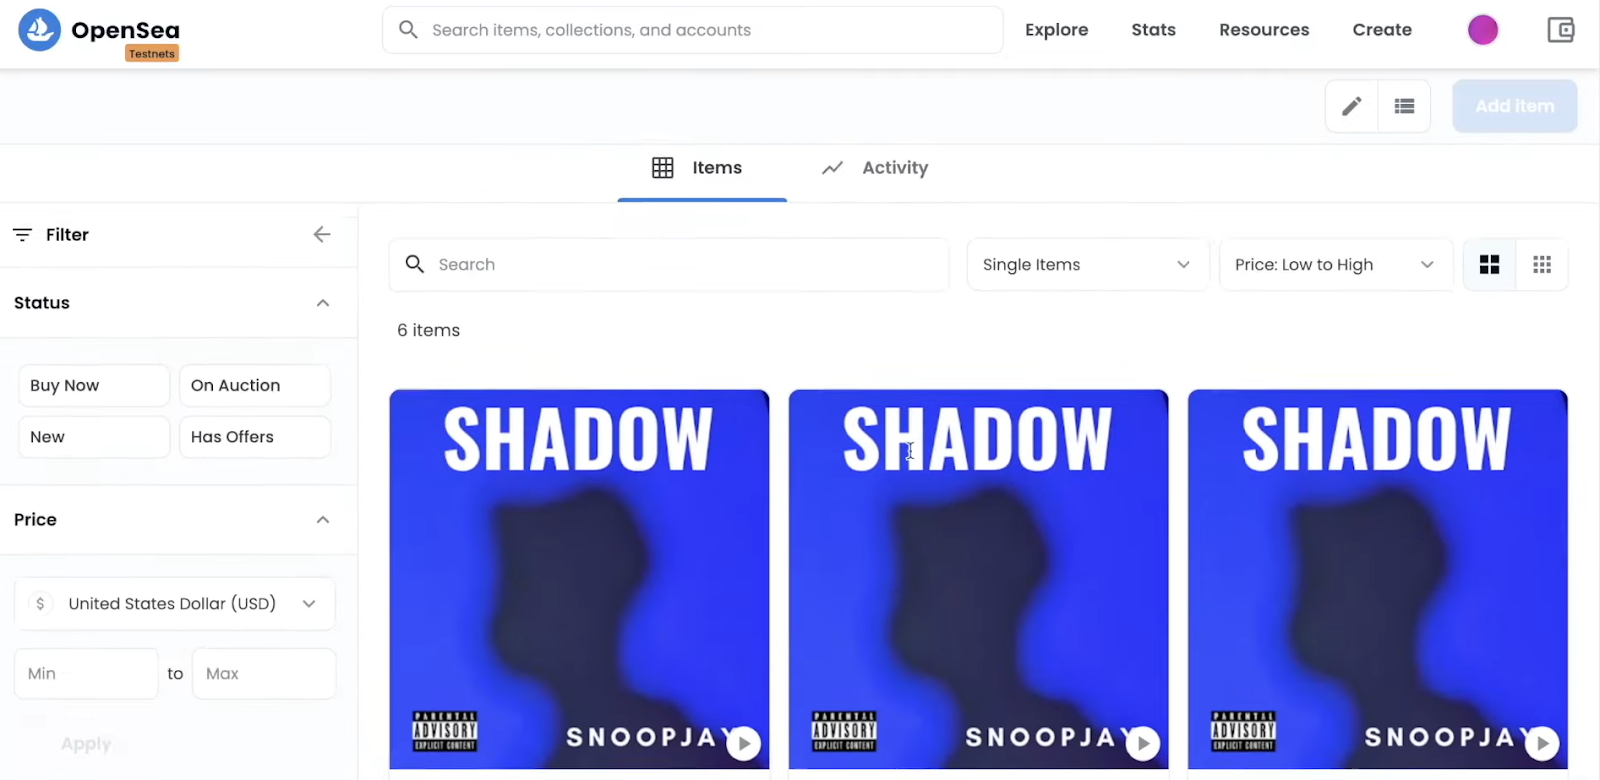
In the screenshot above, you can see the details of the “Shadow” album. Below the album’s cover image, you can also notice the titles of the songs and their length on the right-hand side. Furthermore, there are two buttons under the album’s cover and above the list of songs. The play button activates the dApp’s music player, and the “OpenSea” button transfers us to the NFT marketplace. There, we can view and even purchase all of the songs as NFTs:
The dApp’s music player enables us to skip songs within that album, hit pause or play, and adjust the volume:
Build a Web3 Spotify Clone – Example Project
Now that you know what an excellent Web3 Spotify clone we are about to build, you are probably eager to get going. However, before we cover our example project’s setup, let’s inform you that you can access the entire code on GitHub. As such, you have the option to clone the finished code to create your own Spotify clone in minutes. On the other hand, you may use the starter code and build it up as we move forward. If you want to get the most out of this tutorial, we recommend the latter.
Initial Project Setup
As you probably realized, you’ll need a code editor. We prefer to work with Visual Studio Code (VSC); however, feel free to use your favorite editor. The first step would be to use the “starter code” link above and clone the code:
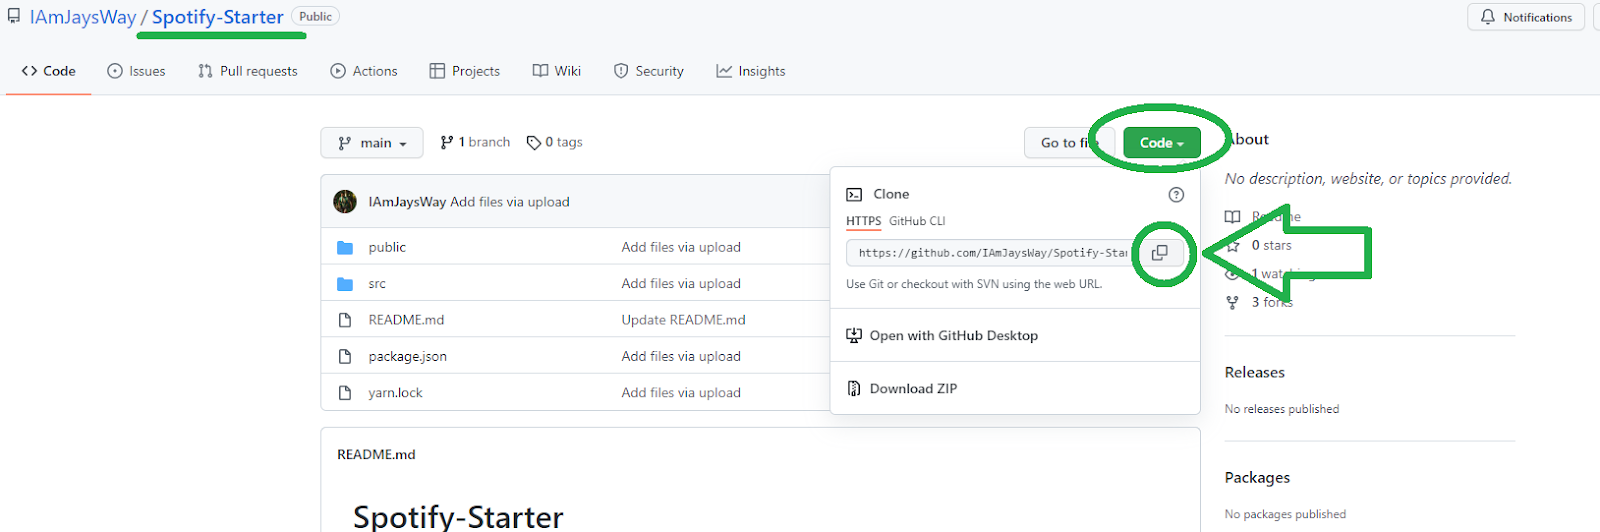
With the above GitHub URL copied, use your terminal to clone the code using the “git clone” command followed by the URL:

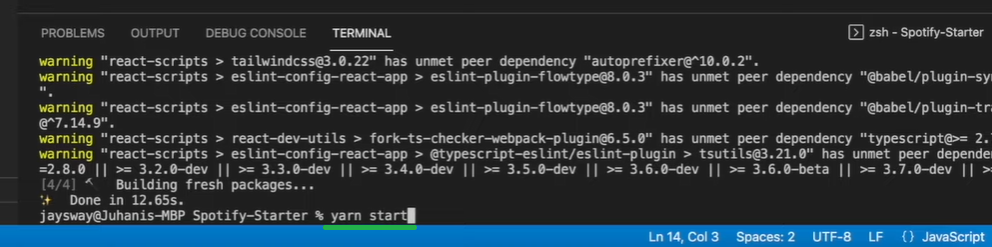
Next, enter “cd Spotify-Starter” in the command line. Then, install all the dependencies by typing “Yarn”:

Before moving any further, let’s also have a look at the file structure of our template:
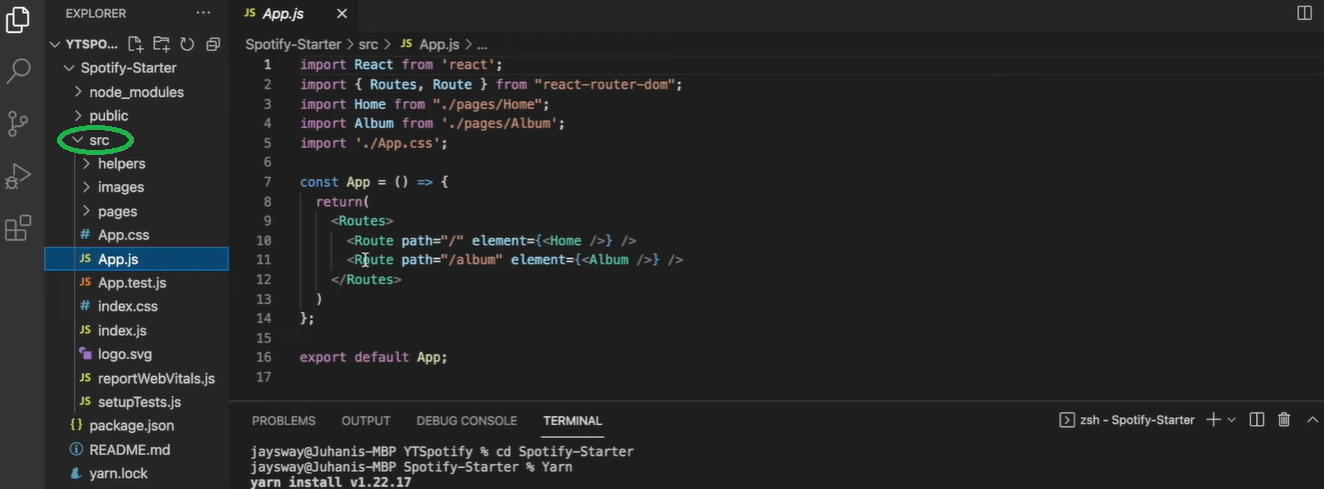
The “src” folder is where all the important files are located. The “App.js” file already utilizes a React router to route to home and album pages. Another file we want to point out is the “index.js”:
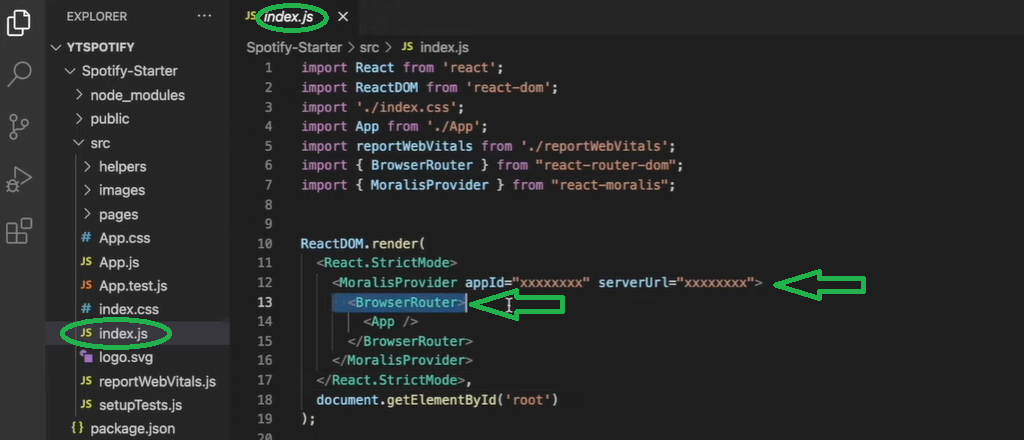
This is where we use the React “BrowserRouter”. Furthermore, this is also the file in which we will paste our Moralis server’s details to access the power of Moralis’ SDK.
Finally, we can view what we are starting with by entering “yarn start” in the terminal’s command line:
Running our application in “localhost:3000”, we can see the “Album Page” page on a blank canvas:
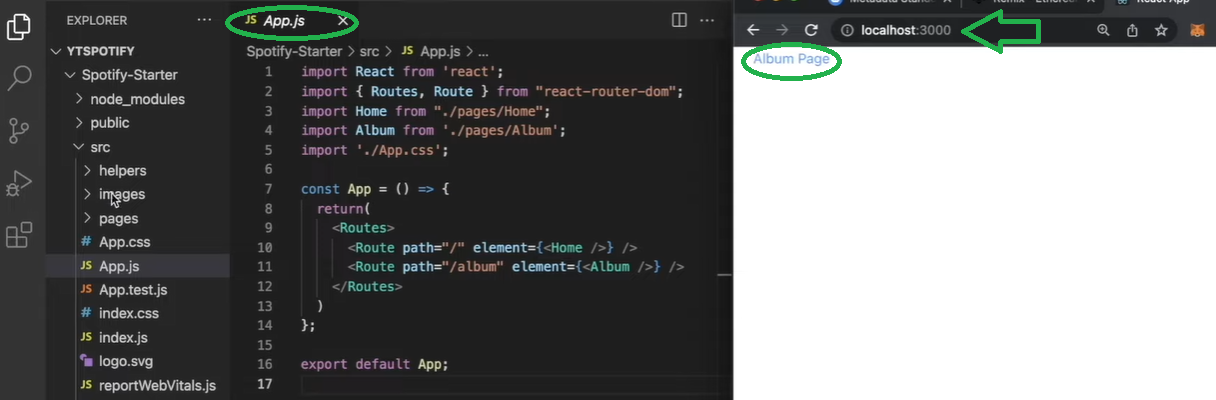
You can even test it by clicking on “Album Page”, which should take you away from the “Home” page to the “Album Page”. Of course, when we are on the “Album Page” page, we see the “Home” link:

Our Next Steps
With the initial setup covered, it is time to focus our attention on the UI of our dApp. After that, we will transition to adding Web3 functionality by connecting with Moralis. With that under our belts, we will be able to use IPFS to store our audio files in a decentralized manner. Then, we will also show you how to use Remix to deploy smart contracts, which will take care of the NFT minting process. Finally, we will put Moralis’ Web3 API to good use.
Building a Web3 Spotify Clone’s UI
Since most of you are JavaScript-proficient and have quite a lot of experience with frontend programming, we will not go through the details of building our Web3 Spotify clone’s UI. Instead, we encourage you to use the video at the bottom of this article. There, a Moralis expert will provide you with detailed guidance. He’ll first show you how to create the sidebar (03:11). Next, you’ll have a chance to learn how to create a proper home page, starting at 11:17. At 20:43, you’ll get to tackle the album page. Then, as the final part of our Web3 Spotify clone’s UI, you will implement an audio player (31:31).
By completing all of these stages, you will have an application that looks like the one presented in the “Our Web3 Spotify Clone Preview” section. However, to convert this app into a dApp, you need to include Web3 functionality. As such, it’s time to make way for Moralis.
Web3 Spotify Clone and Moralis
As mentioned in the introduction, Moralis is the name of the game when you are looking to overcome all of the limitations of RPC nodes. Aside from providing the most practical solutions for Web3 authentication, this phenomenal tool offers countless shortcuts. Moreover, once you create your Moralis server, you also get to access your Moralis dashboard. The latter, in combination with the Moralis “sync” feature, enables you to sync and index smart contract events. Plus, Moralis includes multiple integrations, including WalletConnect, MetaMask, and IPFS. It is the latter that we’ll use to upload files to IPFS. In addition, in case you are more into creating games, Moralis’ Metaverse SDK also enables you to handle Unity Web3 programming with ease.
With that out of the way, let’s focus back on our example project; it’s time to complete the initial Moralis setup.
Initial Moralis Setup
- Create Your Free Moralis Account – Use the link at the beginning of this article to access the signup page. There, you’ll get to create your free account. Just enter your email address, create your password, and confirm your account by clicking on the confirmation link (check your inbox). However, if you already have an active Moralis account, just log in.
- Create a New Server – After successfully logging in to your Moralis account, use its “Servers” tab. In the top-right corner, you’ll see the “+ Create a new Server” button. Click on it. Next, a drop-down menu offering different network types will appear (see the image below). Select the one that suits your project’s needs.
Note: In the case of example projects or early stages of your own projects, selecting “Testnet Server” makes the most sense.

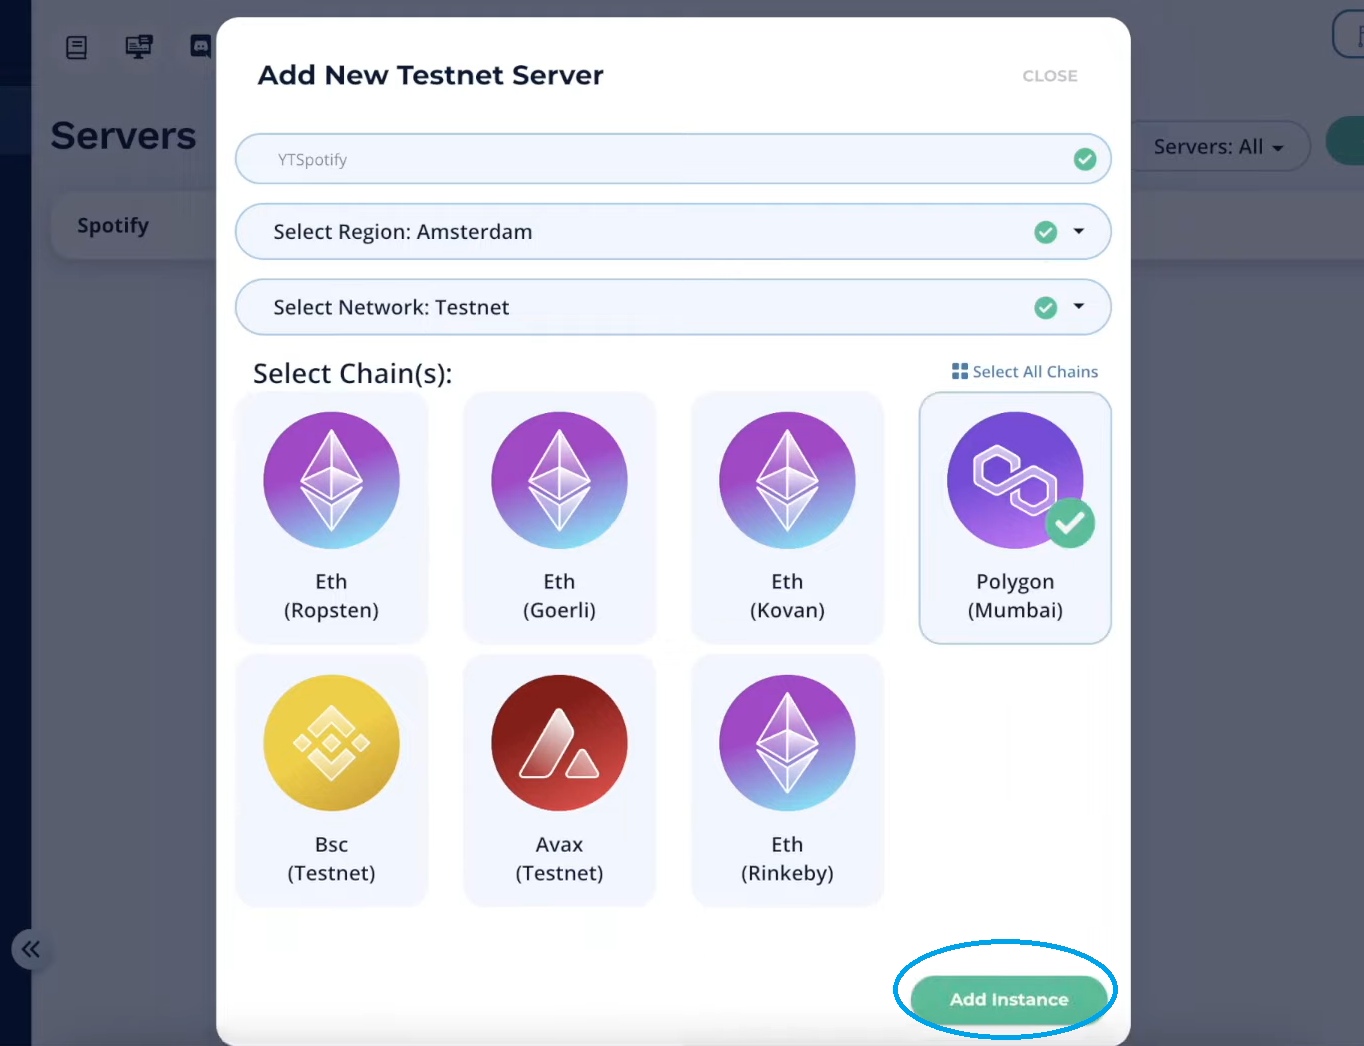
Once you’ve selected the server type, you need to enter your server’s details in the new pop-up window. Provide a server name, select your region, network, chain(s), and spin up your server by clicking on the “Add Instance” button:
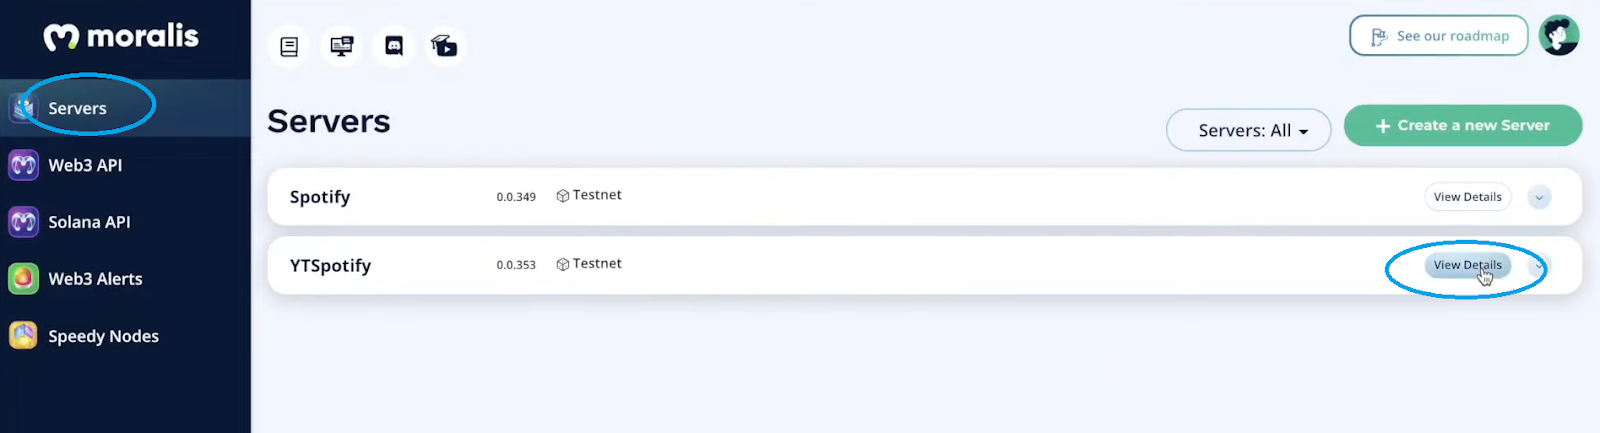
- Access Server Details – You can now access your server’s details by clicking on the “View Details” button next to your server name:
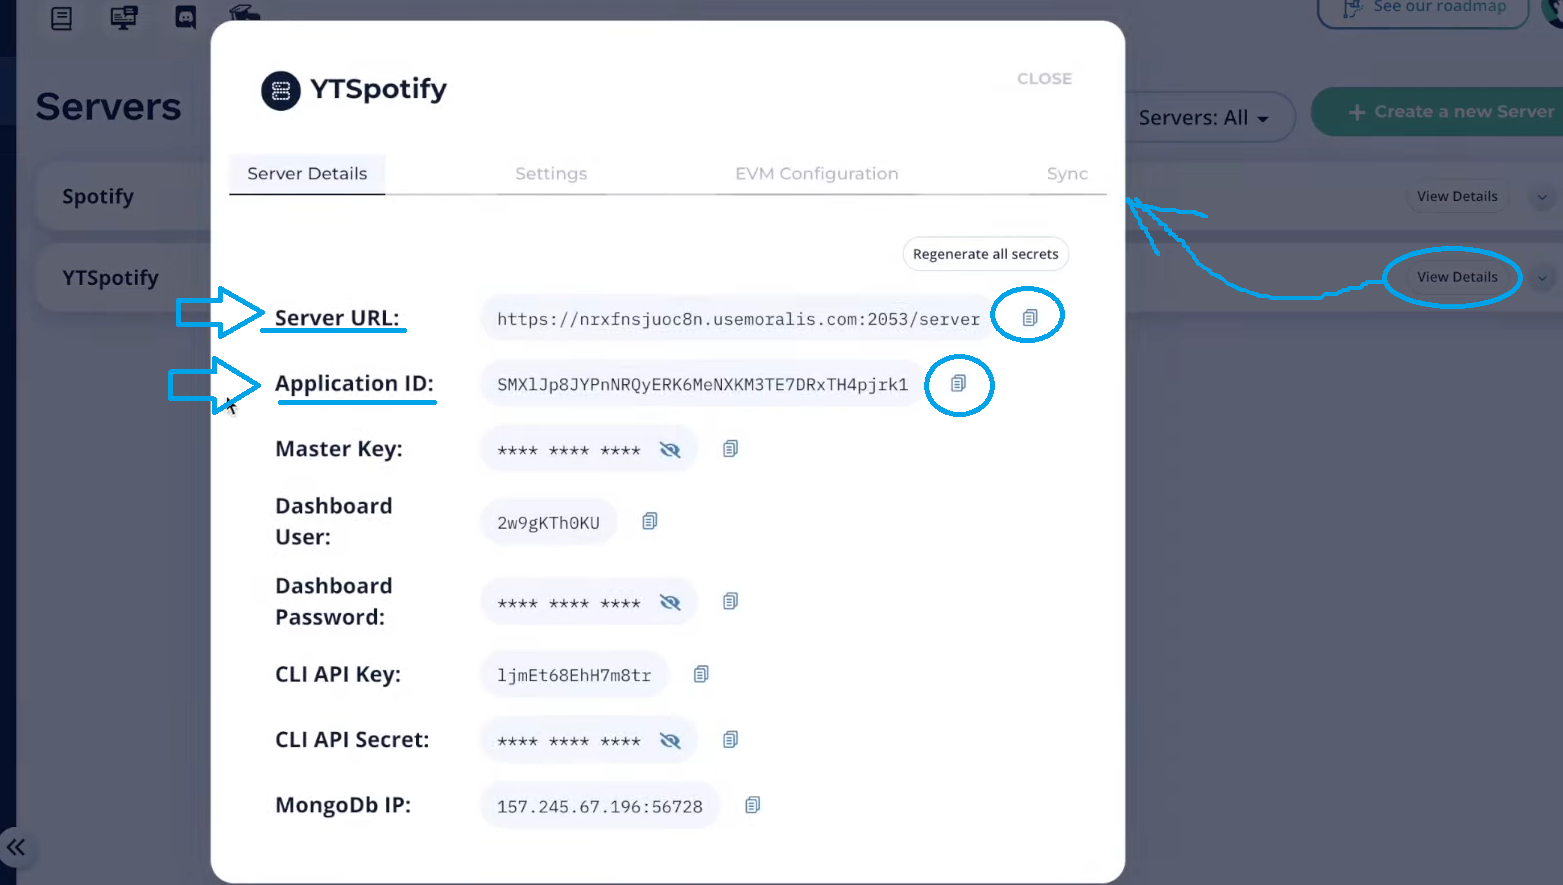
Your server’s details will be displayed in a new pop-up window. By using the “copy” icons, you get to copy your server URL and application ID:
- Initialize Moralis – Paste the above-copied details into the “index.js” file’s replacing placeholders:
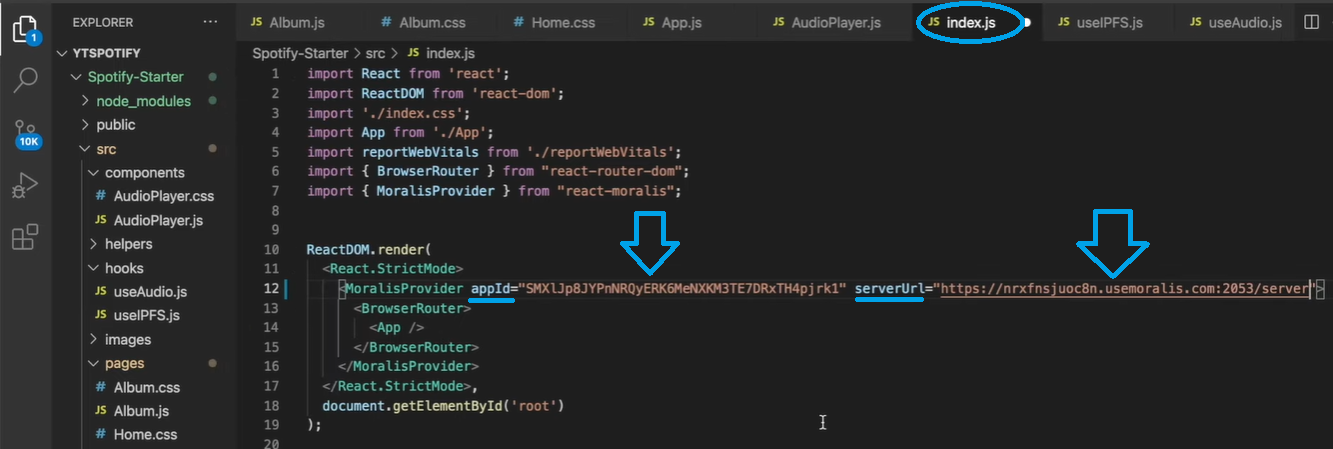
Note: Don’t copy the server details from the image above. You need to use your server’s details.
Uploading Audio Files and Album Covers to IPFS
There are many cloud file storage solutions that you could use. However, the majority of them are centralized and would not comply with our goal of creating a decentralized future. Fortunately, Moralis comes with IPFS integration that offers a decentralized cloud storage solution.
To cover this part, create a new folder (“Album”) by using our resources. This folder contains the “metadata.js” and the “music.js” files, and the “export” folder with example audio files and an album’s cover image:
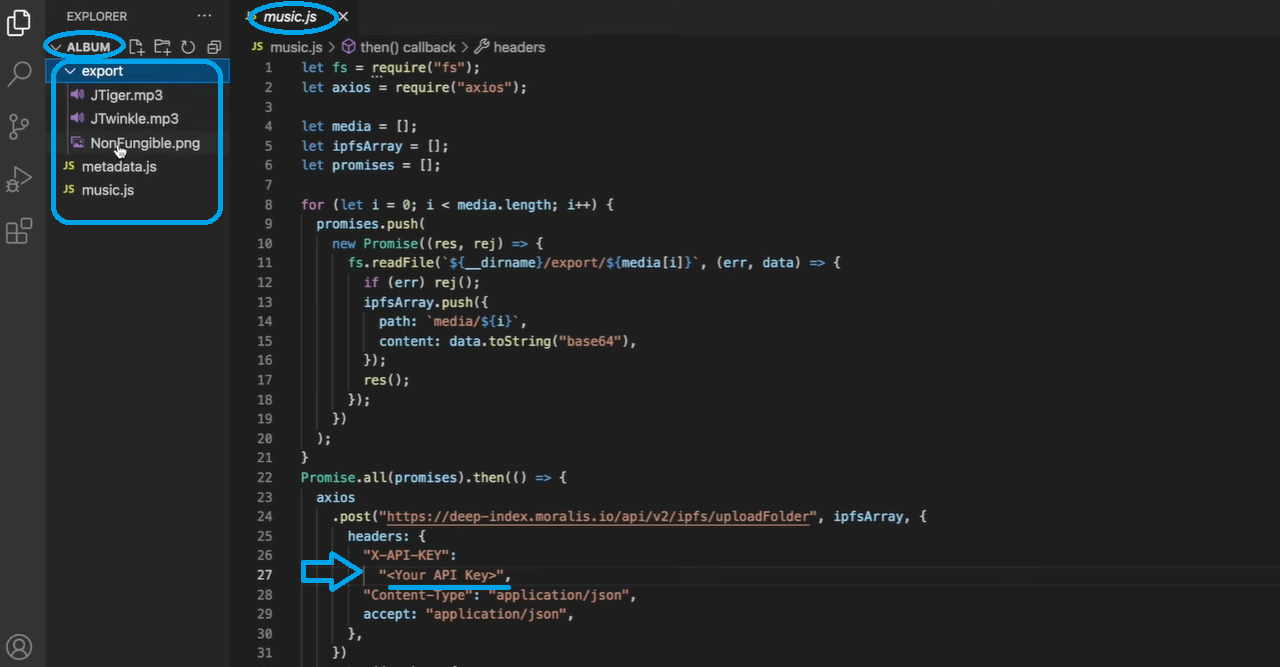
In the screenshot above, you can also see that you need to enter your API key inside the “music.js” file. For details on how to do that and how to successfully upload files to IPFS, refer to the video below (57:00).
Album NFT Mint
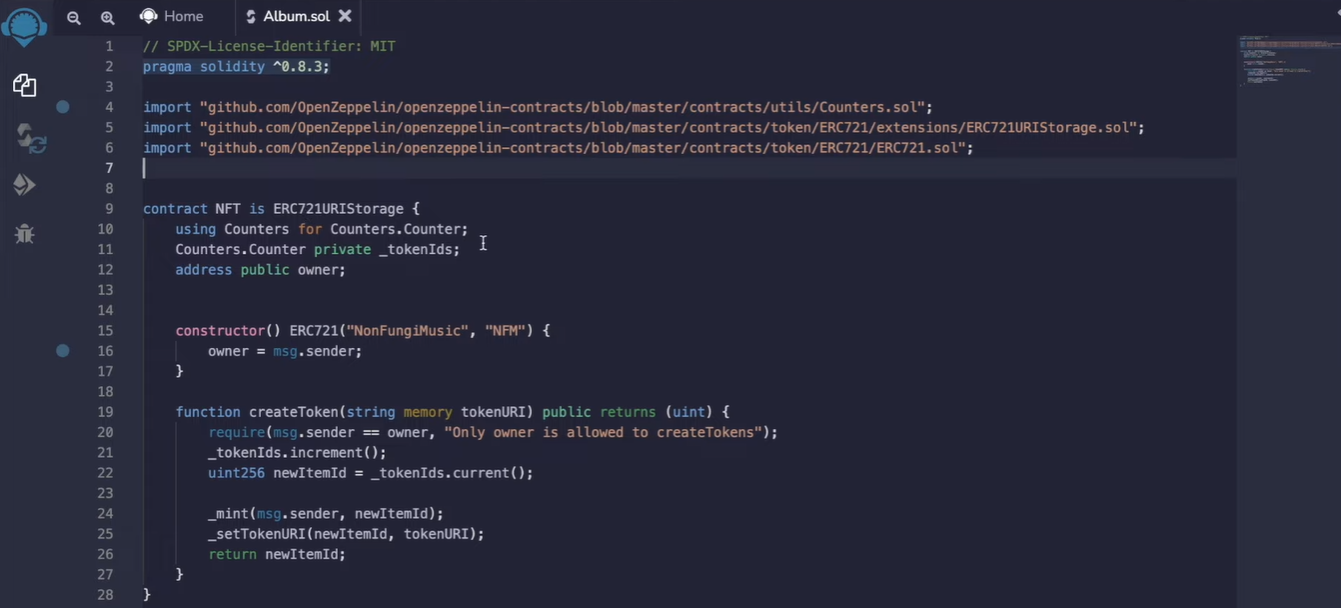
With files successfully uploaded to IPFS and their metadata at your disposal, you are ready to mint album NFTs. This will enable you to list them on OpenSea, as shown in the preview at the top of the article. For that purpose, we created a simple smart contract called “Album.sol”. The latter is also at your disposal on GitHub. To learn more details about this smart contract and how to compile and deploy it using Remix, watch the video below at 01:04:20.
Note: Remember that we’ve selected the Polygon testnet for our project. As such, you’ll need some play MATIC in your Web3 wallet to complete the minting of album NFTs.
Reading Album NFTs
Now that the album NFTs are ready, we can use Moralis’ Web3 API within our React app to fetch those NFTs and display them inside our Web3 Spotify clone. To get this done, the Moralis expert in the video will guide you through the creation of a new hook called “useAlbum.js” (01:09:22). This is also where you’ll see the power of Moralis’ “getAllTokenIds” endpoint.
Here’s the video that we’ve been referencing throughout the article:
How to Build a Web3 Spotify Clone – Summary
We’ve covered quite a lot of ground in this article. With the help of our guide herein and watching our Moralis expert’s video tutorial, we’ve managed to guide you through the entire process of creating a Web3 Spotify clone. Moreover, despite the fact that this is quite an extensive project, you can finish it in just over an hour. That is if you start with our “starter” code and complete the above-covered steps yourself. However, if you use our finished code, you can have your Web3 Spotify clone up and running in minutes. This is a perfect Web3 project to try out, seeing as there’s massive Web3 growth all around!
If you enjoyed this example project, make sure to check out the Moralis YouTube channel and the Moralis blog. Aside from countless other example projects, these are excellent places where you can continue your free blockchain development education. Some of the latest topics cover how to build a Web3 Amazon marketplace, a medieval metaverse game, a Web3 MMORPG with Unity, a cross-chain Zapper dApp with ReactJS, how to launch a white-label NFT marketplace, and much more.
On the other hand, you might be more serious and want to become a Web3 developer relatively soon. If that’s the case, you need to take a professional approach. Fortunately, there is a community of supportive and advancing developers waiting for you at Moralis Academy. Besides access to high-value courses, you will also get a personalized study path and professional mentoring. As such, you’ll have everything you need to go full-time crypto sooner rather than later.
