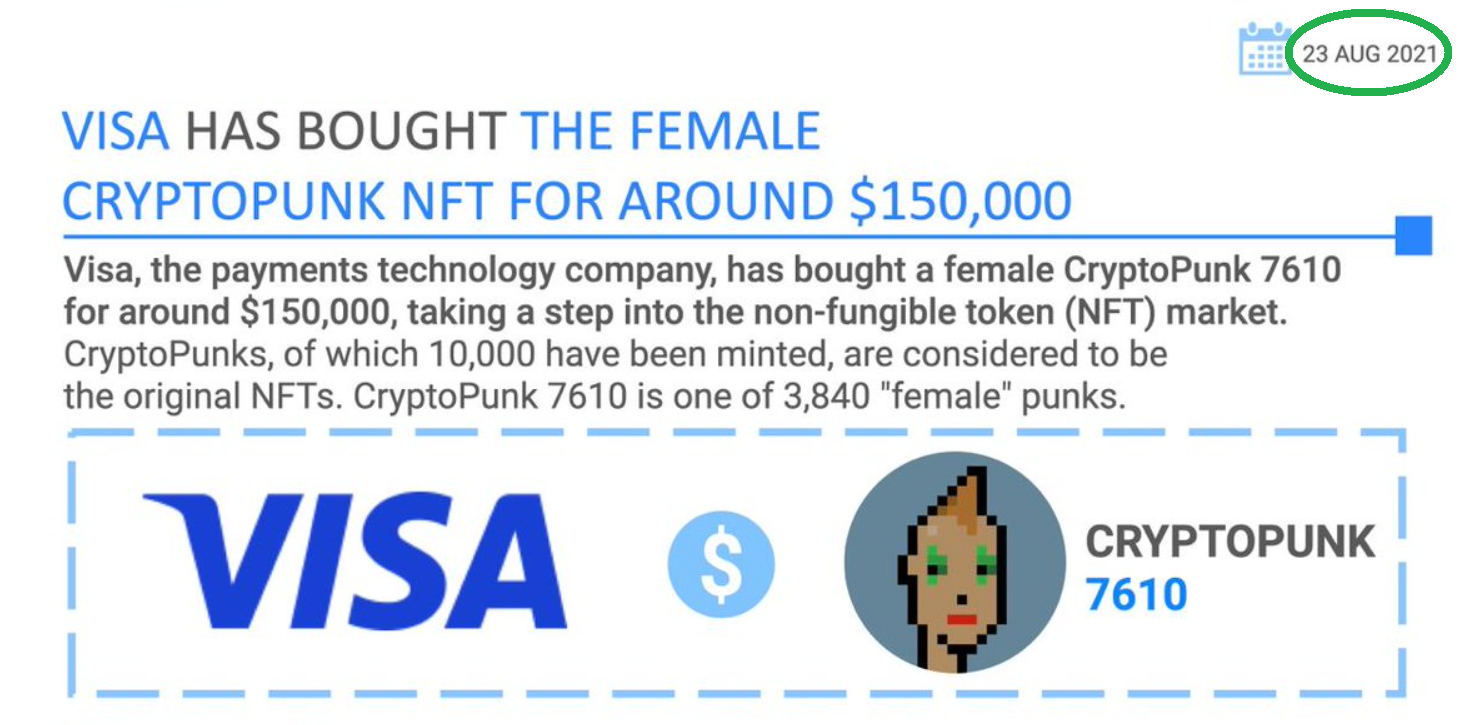
With NFT marketplaces such as OpenSea seeing billions of dollars in transaction volume, and big-name companies like Visa purchasing an NFT, we can all agree that non-fungible tokens made their mark in 2021. Now, judging by the continued popularity growth of NFTs in 2022, it’s never been a better time to learn NFT development. Part of this includes the process of creating an NFT minting website. While this process might sound a bit daunting, it doesn’t have to be. In fact, with the right tools and proper guidance, you can learn how to launch an NFT minting page easily. Also, by following along in straightforward walkthroughs, such as the one we’ll present herein, you can create your own minting website in record time.
Moving on, you’ll learn how to use the ultimate Web3 development platform, Moralis, to create your own minting website. Furthermore, Moralis (a.k.a. Firebase for crypto) gives you access to its NFT API – the best OpenSea API alternative. In turn, you get to copy and paste short snippets of code to cover all of your backend needs. What’s more, with Moralis, your “how to launch an NFT minting page” quest becomes a quick and easy process. Moreover, this Web3 backend platform is cross-chain interoperable, supporting the most popular programmable blockchains. Thus, you get to create your own minting website on multiple chains. This means you can target a wider audience with no extra work. Plus, Moralis’ cross-chain interoperability future-proofs your work. With that said, let us invite you to join us as we create an example minting website. If that sounds interesting, make sure to create your free Moralis account now.
What are NFTs?
There might be some complete beginners among you; therefore, we need to cover some basics first before we educate you on how to launch an NFT minting page. As such, let’s start by answering, “what are NFTs?”. NFTs are unique crypto assets, clearly denoted by the word “non-fungible”. As such, there are no two or more NFTs alike. Even when NFTs are copies of the same item they represent, they have unique properties. Thus, NFTs are a great choice for digital collectibles and digital art. Furthermore, they also offer a wide range of real-world use cases. For instance, NFTs can represent all sorts of certifications and ownerships and contribute to overall transparency.
In addition, when it comes to digital art and collectibles, the core of NFTs are, in some cases, JPEG files. However, these are no regular images. The minting process on a specific blockchain converts a regular digital file into an NFT. When minting takes place, it assigns ownership and many other properties, which can be further utilized. Among other options, an NFT can have a commission or tip property assigned to it. Thus, the original owner automatically receives a predefined portion of any future purchase of that NFT. As such, artists can be rewarded as their pieces gain in value over time. Moreover, there are many other neat functionalities that NFTs offer. Thus, you can see that NFTs can improve ownership and transparency. Plus, it can eliminate the need for dishonest intermediaries.
What is NFT Minting?
Now that you know what NFTs are, we can focus on NFT minting, which is also important to understand when wanting to learn how to launch an NFT minting page. So, what is NFT minting? Let’s start by pointing out that without minting, there would be no NFTs. As such, minting is a key aspect of NFTs. Moreover, it’s the minting that takes a file (JPEG, PNG, MP3, MP4, PDF, etc.) and a set of specific details (description, attributes, etc.) and converts them into a non-fungible token.
It’s also worth noting that the term “minting” was borrowed from the concept of governments stamping metal coins. However, in the case of crypto tokens (fungible and non-fungible), minting refers to an execution of a blockchain transaction. When a relevant smart contract is put to work, it creates tokens by saving their details on the blockchain. Once the NFTs’ details are on the blockchain, they are referred to as metadata. In addition, just like fungible tokens, NFTs can be minted on various programmable chains. For example, there’s Avalanche, Polygon, BSC (now BNB Chain), Solana, Fantom, and others. However, despite its high fees, Ethereum is still the leading choice. That is why Ethereum’s NFT standards ERC-721 and ERC-1155 are the ones you’ll hear about most often.
Note: A basic understanding of NFT standards is crucial when minting NFTs, especially when you want to create your own minting website. Thus, make sure to check out the above links.
Nonetheless, with the above in mind, you can already see that learning how to launch an NFT minting page will require at least two parts. On the one hand, you need some sort of interface (decentralized applications [dApps]). On the other hand, you need to interact with smart contracts in the backend to mint NFTs.
How to Launch an NFT Minting Page – An Example Project
In this part of the article, we’ll show you how to build an NFT minter dApp from scratch. Of course, you can use the same principles to add the mint function to an existing interface. As such, we’ll build a Web3 application, which will enable you to mint NFTs. Along the way, you’ll get to see how various Moralis tools simplify the development process. The most important tool for minting in a decentralized manner is Moralis’ IPFS integration. Now, keep in mind that you can avoid using the leading solution for decentralized storage (IPFS). However, doing so will limit you to a more centralized minting method. Moreover, since we don’t want to be exposed to a single point of failure risk, we’ll focus on the decentralized way for this project. Now, let’s do a brief preview of our dApp before exploring how to launch an NFT minting page.
How to Launch an NFT Minting Page – Preview
This is what our finished dApp’s interface will look like:
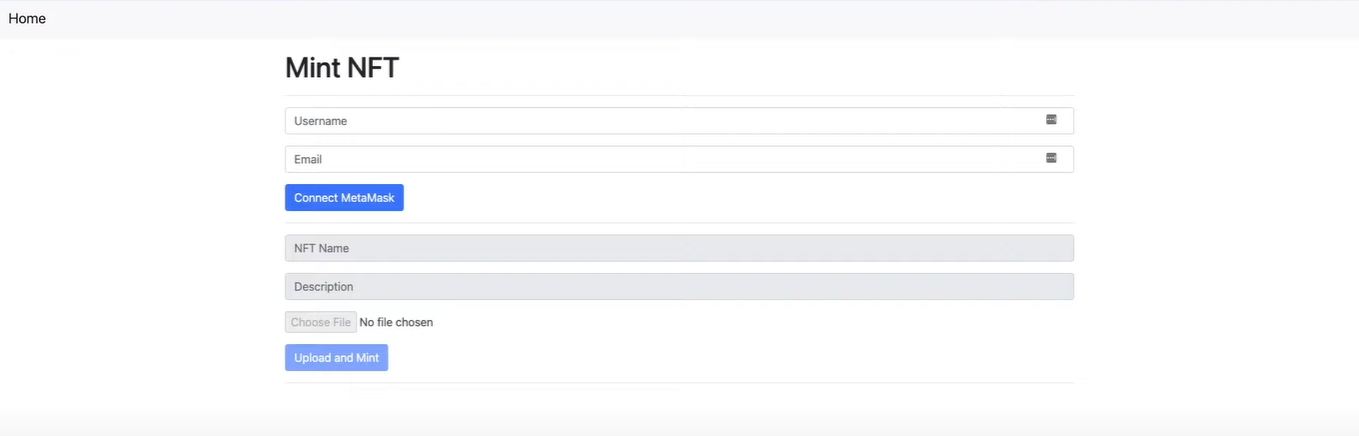
It is all about simplicity without reducing functionality. Looking at the screenshot above, you can see that our minter dApp will enable users to log in with a username and an email address. Also, they’ll then authenticate with MetaMask. Once signed in, users can name the NFT, add its description, choose a file, and finally upload the file and mint the NFT. When all the steps are done properly, users will see the following message at the bottom of the dApp:

Create Your Own Minting Website
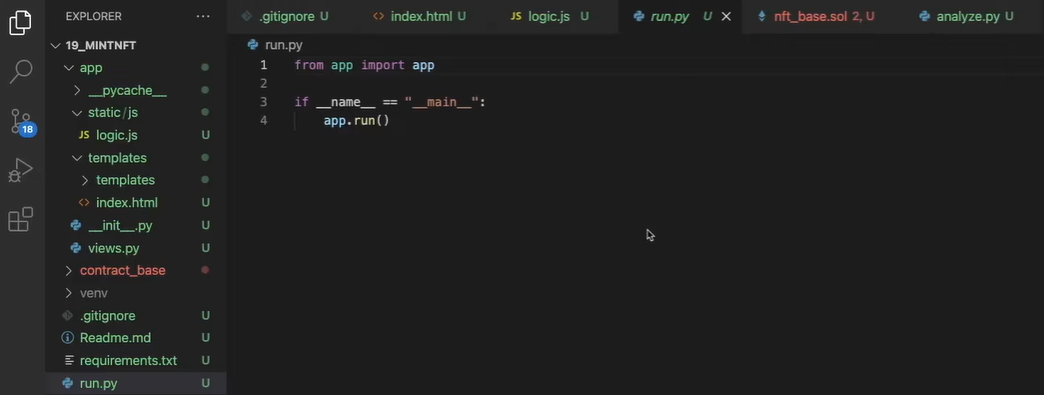
There are several different paths you can take to create the above-presented minter dApp. However, we decided to create a Python flask app. This application will trigger the associated code. Moreover, the main parts of our code are the “index.html” and “logic.js” files. As such, we will focus on those two files herein.
Note: The simplest way to follow along with our example project and create your own minting website is to use our code. To make it easy for you, we made it available on GitHub.
Create Your Own Minting Website – Code Walkthrough
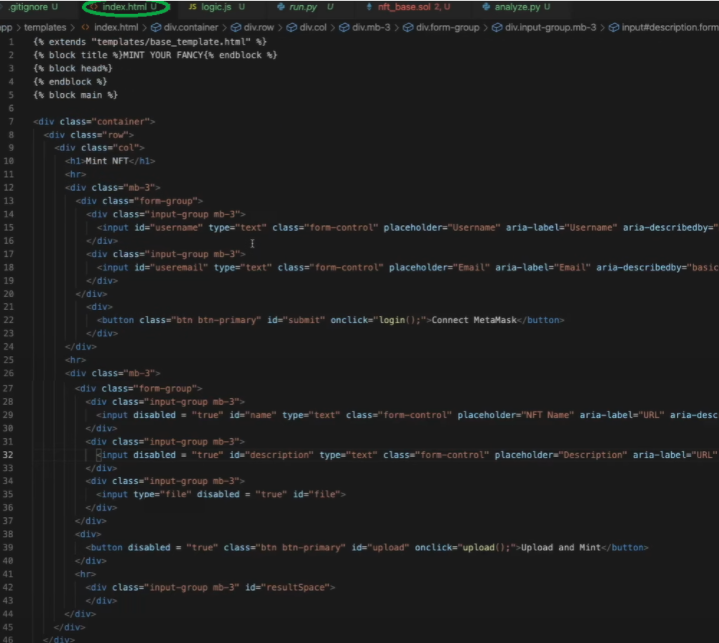
When it comes to the looks and structure of our example dApp, the “index.html” file is the one taking care of that part. Essentially, the “index.html” file presents all the elements enabling users to interact with our decentralized application and mint NFTs. However, we need something that’ll ensure that everything runs smoothly. This is where “logic.js” enters the scene. Furthermore, we use the code covered by this file to deploy the power of Moralis. As such, we simply copy short snippets of code from Moralis’ documentation.
Here’s a preview of our “index.html” file:
Here is the preview of the “logic.js” file:
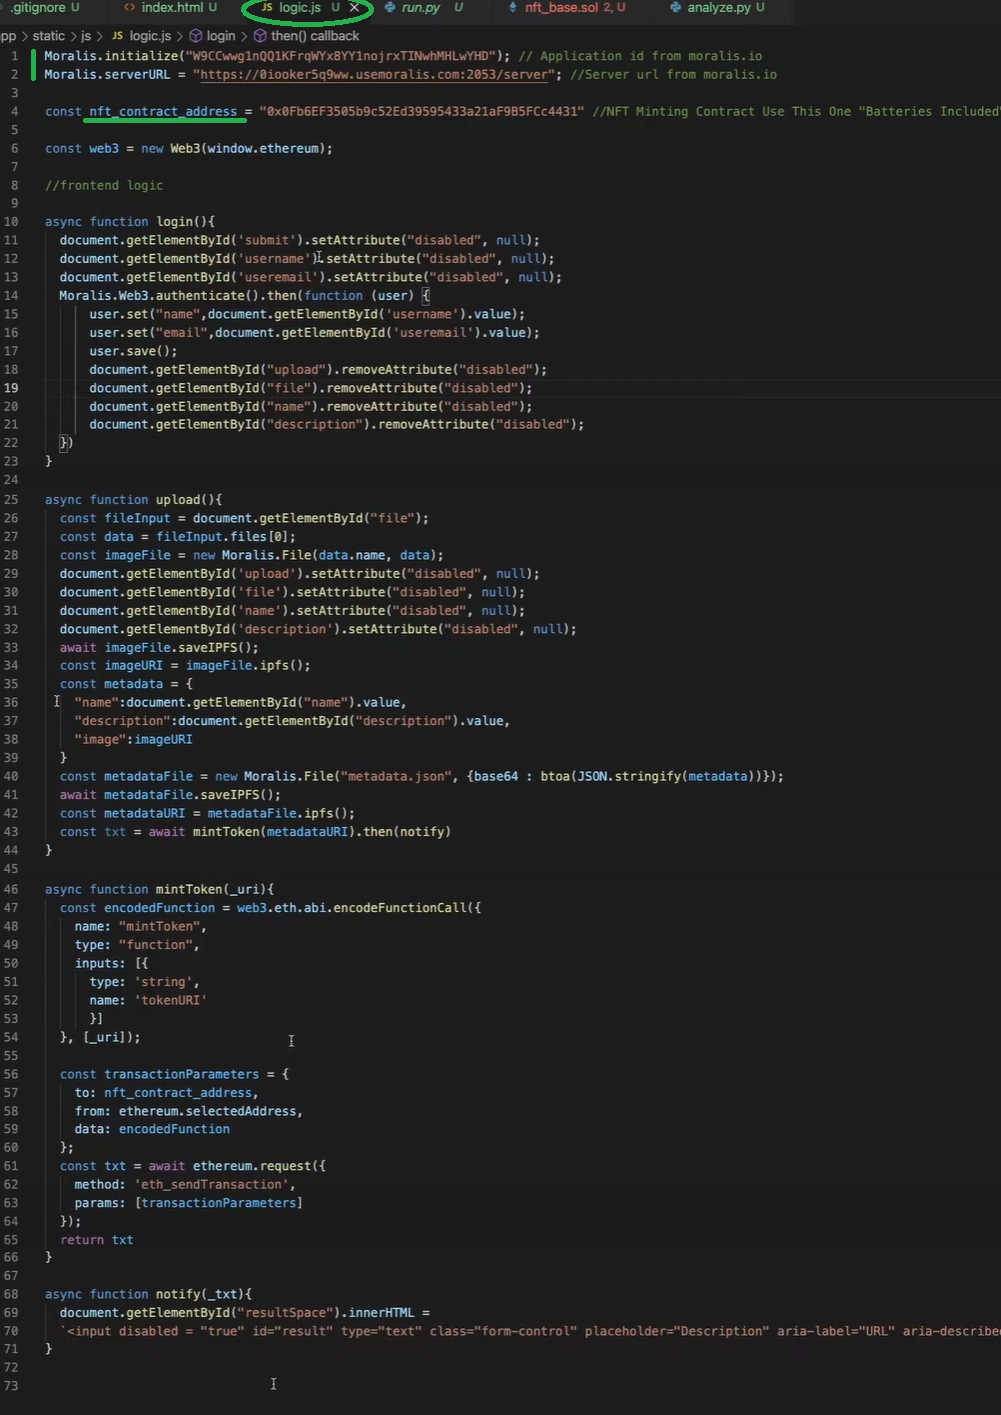
As you can see above, we are able to get the logic of our dApp covered with only 71 lines of code. That is possible thanks to Moralis’ SDK and its NFT API. Furthermore, let’s point out the top two lines of the “logic.js” file. These are vital because they enable you to use Moralis by connecting to your Moralis server. Moreover, we should not skip these initial steps since they are essential. Therefore, we need to cover them in more detail (see the following subsection).
Let’s also repeat that minting is done via interaction with smart contracts. In addition, creating your own smart contract can be tricky. Thus, we decided to cover that aspect using a shortcut (the code on line four). As such, you can focus your attention on using Moralis’ API to mint NFTs.
Create Your Own Minting Website – Initial Moralis Setup
At this point, you know that you need to obtain your created Moralis server URL and application ID. This information is vital when you want to launch an NFT minting page. As such, let’s go through the steps that will provide you with those details:
- Create Your Moralis Account – If you don’t have a Moralis account yet, create one now. You can use the link at the beginning of this article to access the signup page. There, enter your email address, create your password, and click on the confirmation link (check your email inbox). On the other hand, in case you already have an active Moralis account, just log in.
- Create a New Server – After successfully logging into your Moralis admin area, it’s time to create a new server. As such, click on the “+ Create a new Server” button in the top-right corner inside the “Servers” tab. Then, select one of the server type options from the drop-down (see the image below). When working on example projects, it is best to go with the “Testnet Server” option.

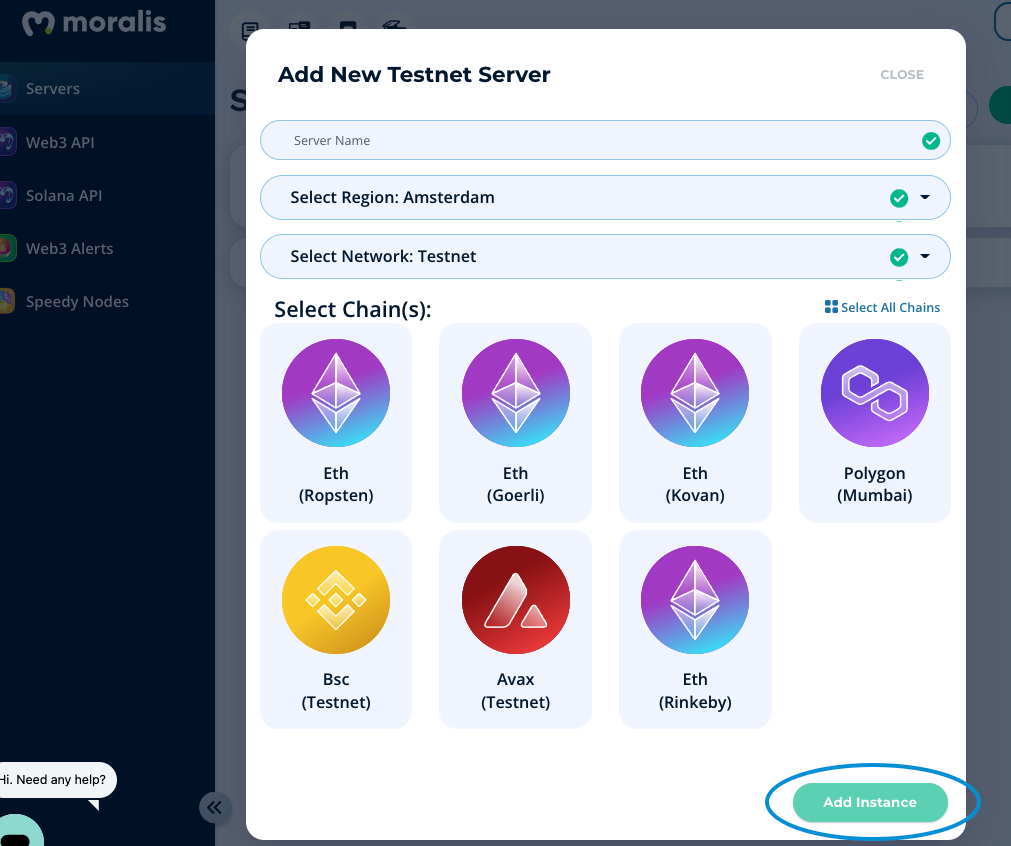
Once you select a server type, a new window will appear. There, you need to enter your server’s name (this can be anything you want), select your region, network, chain(s), and click on “Add Instance”.
- Access Server Details – With your server up and running, you get to access its details (to populate your “.js” file with). As such, click on “View Details” next to your server name. A pop-up window will appear containing all details.

- Initialize Moralis – Now, use the above details and paste them into your “.js” file to obtain the required backend functionality:

Note: Make sure you use the details of your particular server. Do NOT copy the server details from the image above.
Video Explaining How to Launch an NFT Minting Page
In case you want more details about the code presented for our example project, we recommend watching the video that covers creating your own NFT minting application (the above steps in more detail). As such, you’ll discover how to launch an NFT minting page quickly and easily with Moralis.
Take Your NFT Development Further
Using the above tutorial, you should now be able to create your own minting website. Thanks to Moralis and its option to interact with smart contracts through your website, you get to create a powerful NFT minting page with ease. Moreover, we recommend you learn how to implement other excellent NFT features using Moralis. For example, you can incorporate lazy minting. This is when listed NFTs mint at the time of purchase. Thus, the fees related to the minting transaction become relevant only when an NFT sell. Also, with lazy minting, the minting fee can be covered by an NFT creator, a buyer, or the NFT platform.
Lazy Minting Tutorial:
Furthermore, when collectible NFTs (e.g., Bored Ape Yacht Club) are in question, NFT rarity comes to play. Fortunately, you can easily incorporate NFT rarity ranking and rarity filtering into your NFT platform. Just follow a Moralis expert’s lead in the tutorial below.
NFT Rarity Tutorial:
Nonetheless, it also makes sense to learn the details of creating and launching your own NFTs. For that purpose, use this tutorial:
How to Launch an NFT Minting Page – Full Walkthrough – Summary
We’ve covered quite a lot of ground in this article. At this point, you know how to launch an NFT minting page. Furthermore, you know that when using Moralis, you get to create your own minting website utilizing your JavaScript proficiency and MetaMask. Moreover, we also hope you’ve joined us as we took on an example project presented above. If so, you now have your own simple NFT minting page up and running. Now, it is up to you to take your NFT development to the next level.
Do you want to deepen your NFT knowledge further or learn about other aspects of the crypto world? If so, the Moralis blog and the Moralis YouTube channel are the places to be. Both outlets offer a ton of valuable content, including many example projects. Those can also serve as an inspiration for some unique ideas. For instance, some of the latest topics cover Web3 user onboarding, Web3 social login, Web3 authentication via email, BSC wallet, governance tokens, reentrancy smart contract example, what is metaverse, React Native Web3, and much more.
On the other hand, in case you are eager to go full-time crypto as soon as possible, we recommend taking a more professional approach. As such, you may want to consider enrolling in Moralis Academy. Thus, you’ll gain access to a personalized crypto education path and top blockchain courses. However, the real treasure lies in one of the most advancing and supporting blockchain development communities and accessing expert mentorship. The Moralis Academy is, without question, the most optimal path if you want to become a blockchain developer!