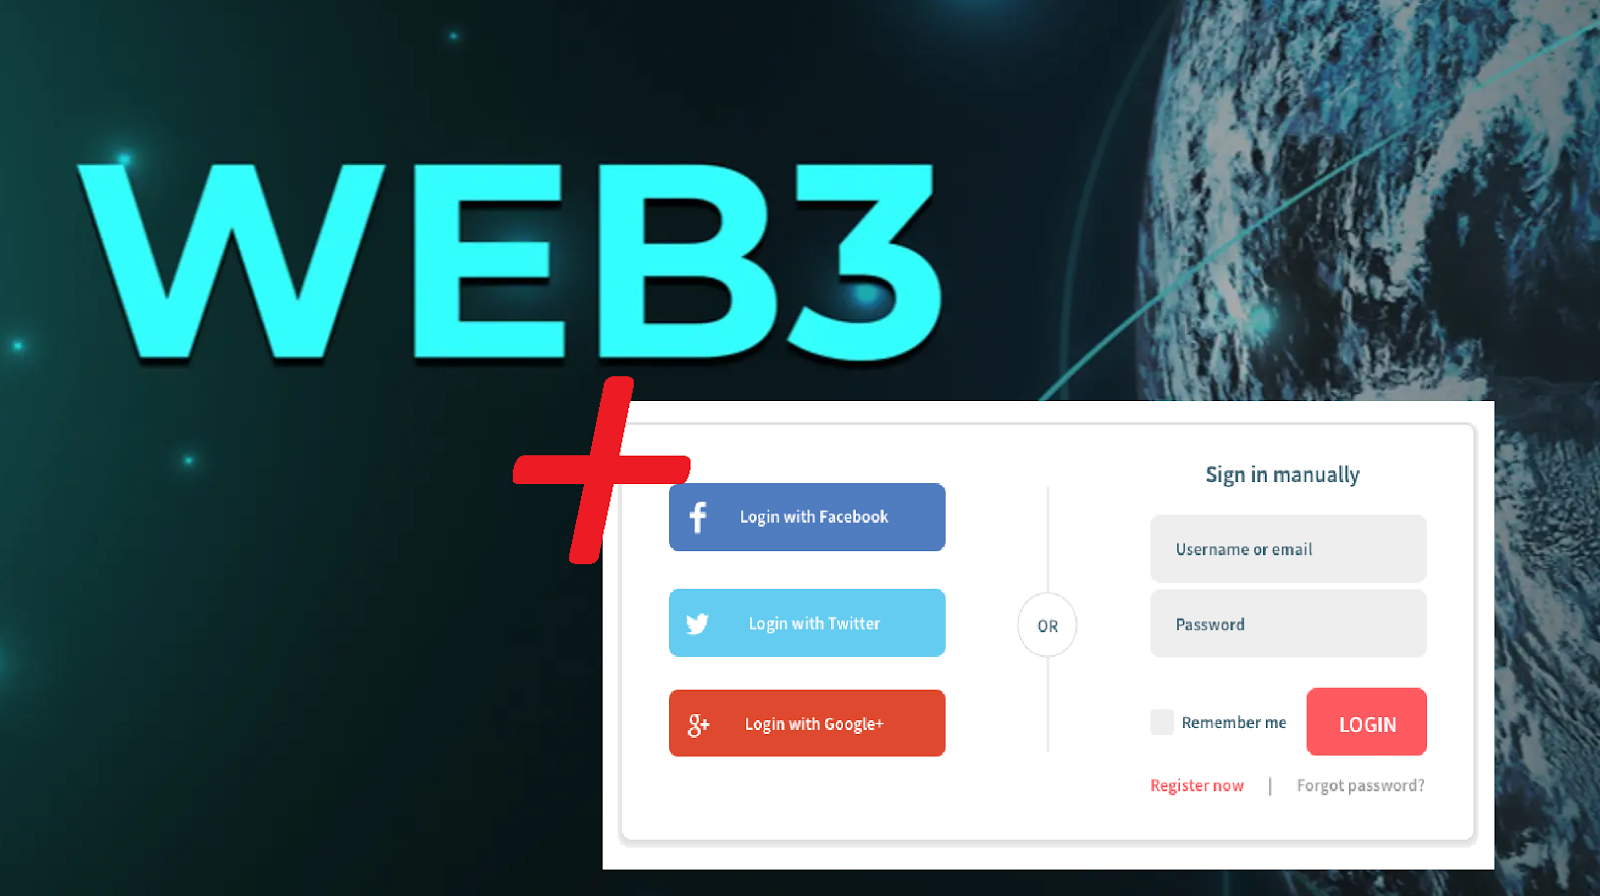
Most Web3 applications these days require a Web3 wallet, which serves as a Web3 authentication or Web3 login tool. However, since many are still unfamiliar with the crypto realm, they might hesitate to dive in and emerge themselves into this territory. But, some areas most people today are quite familiar with are the various social media outlets and the standard sign-in procedures when using Google, email, and Twitter, to name a few. Therefore, combining traditional sign-in and Web3 login would be a game-changer. Fortunately, this is all possible with the ultimate Web3 development platform, Moralis. With Moralis, we can implement Web3 social login quickly into our dApps. In turn, performing social login for Web3 and Web3 authentication via email becomes a straightforward process.
Moving forward, we will show you an example dApp where we’ve already implemented a Web3 social login. Also, we will guide you through all the key steps so that you can start to sign in dApp users with Google or Twitter yourself. Hence, the tools you are about to get familiar with throughout the following sections will help you to onboard new users with ease. In addition, let’s point out that you can easily add this kind of login to any of your existing dApps built with Moralis. All you need to do is cover the initial Web3 auth setup process and then tweak a short snippet of code. Nonetheless, as we move along with our “Web3 social login” quest, you’ll also get a chance to experience some other excellent Moralis features. Thus, you’ll see how the Moralis dashboard enables you to index the blockchain.
What is Web3 Social Login?
Before we focus on the preview of our example dApp, let’s make sure we are all on the same page. As such, let’s together answer “what is Web3 social login?”. First, let’s break things down to “Web3” and “social login”. Here, “Web3” refers to the new kind of internet that is being implemented on top of blockchain technology. In its ideal form, it is decentralized and has a digital monetary system built in. In case you want to dive deeper into the “Web3” and “Web3 authentication” topics, make sure to use the corresponding links in the introduction. We also recommend you explore the Web3 tech stack and read our “Web3 Explained” article to find out how Web3 works.

On the other hand, “social login” refers to a particular type of login option. It is the one where users use their existing social media accounts to sign up and log in to other applications. It enables users to avoid entering their email addresses and creating new passwords. Hence, it is obviously a rather practical option.
Now, if we put it all together, we can conclude that a Web3 social login is a powerful option for Web3 applications. Thus, it serves as a user-friendly method to sign in dApp users with Google or Twitter (and other options).
Web3 Social Login in Action
As mentioned earlier, we will show you our example dApp that incorporates a Web3 social login. Please keep in mind that the purpose of our example is to show you the functionality. Thus, the app is pretty basic. However, we’ve also included the “test transaction” feature. The latter enables us to show you that users logged in via the Web3 social login can fully engage with the Web3 world.
Sign In dApp Users with Google or Twitter – An Example dApp Preview
For the sake of this demo, we will run two dApps parallel with each other. Moreover, both of these dApps offer the Web3 social login feature. Furthermore, by running the apps parallel, we’ll be able to clearly show you a test transaction between two accounts. Here’s our example dApp:

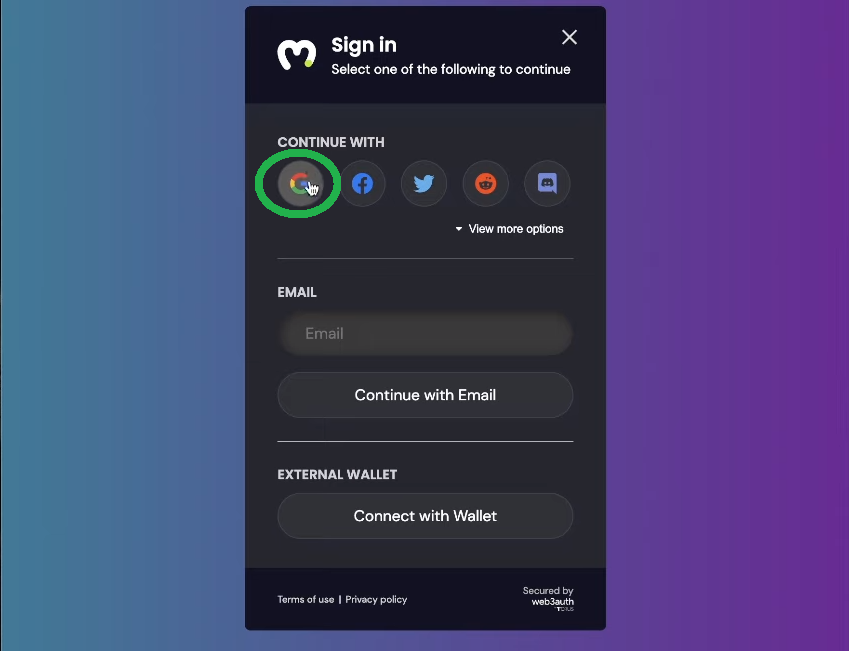
As clearly indicated, users get to log in by clicking on the “Login with Web3Auth” button. Once users click on the button, they will see this login module:

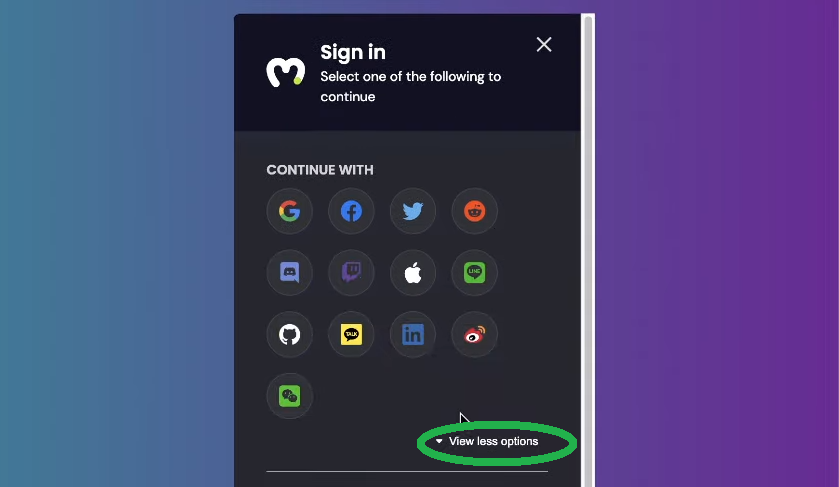
Looking at the screenshot above, you can see that the login module has three sections. There is the “continue with” section, which is the essence of Web3 social login. As you can see, there are many social media options available in that section. Furthermore, additional options can be viewed by clicking on the “View more options” button:
Then there’s the “email” section, which offers users to log in using an email address. With both the Web3 social login and the Web3 email login, crypto wallets are automatically created and assigned to users choosing those login options. As such, you as a developer get to offer them the same functionality as if they were using their hot wallet. Speaking about hot wallets, we also have the “external wallet” section. The latter offers the classic Web3 login method. By traditional Web3 login, we refer to the use of hot crypto wallets such as MetaMask.
Web3 Social Login Demo
For the sake of this demo, let’s say a user decides to log in using his Google account. As such, he needs to click on the Google icon:
Once the user clicks on the Google icon, he is asked to select one of his Google accounts:

After selecting a Google account, the user is also offered to set up two-factor authentication (2FA):
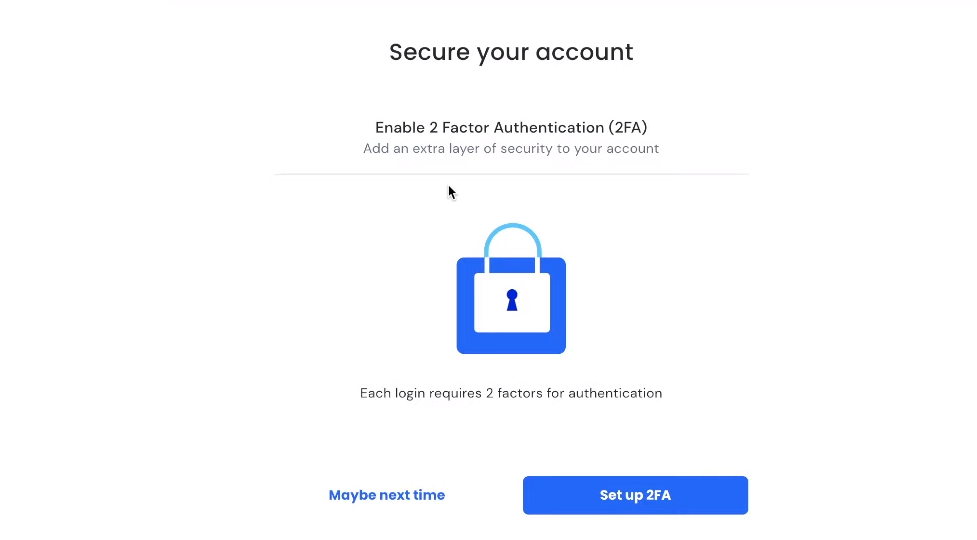
Note: By using the Web3 social login method presented herein, you and your users can access the 2FA feature for free.
For the sake of this demo, we will skip 2FA. Thus, our hypothetical user will click on “Maybe next time”. This also wraps up the login process, which means that the user is now logged in. Moreover, using the Moralis dashboard (database), we can confirm that the above-covered login was detected and successful:
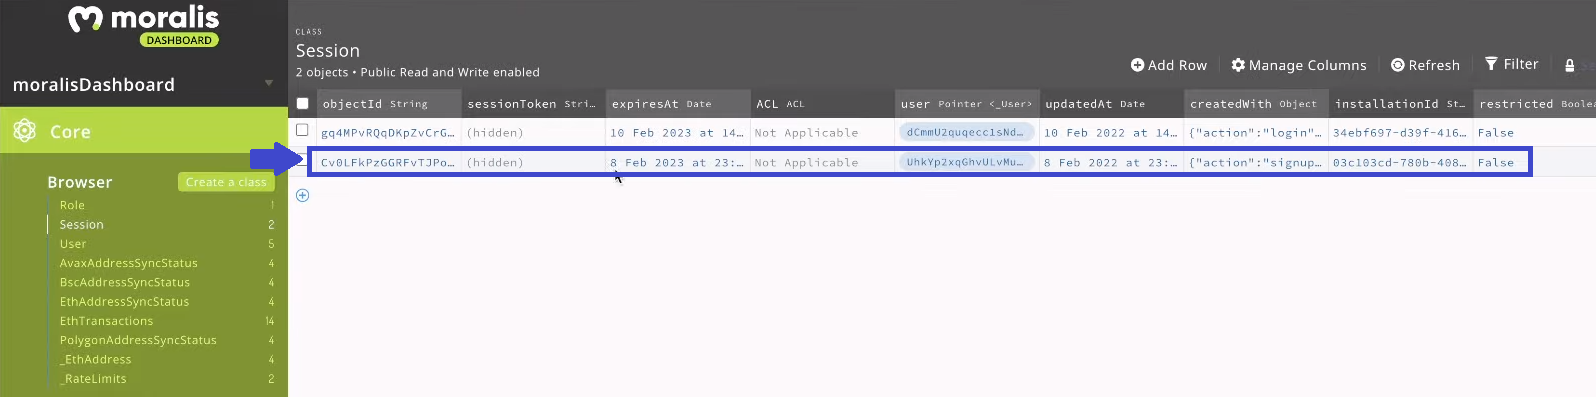
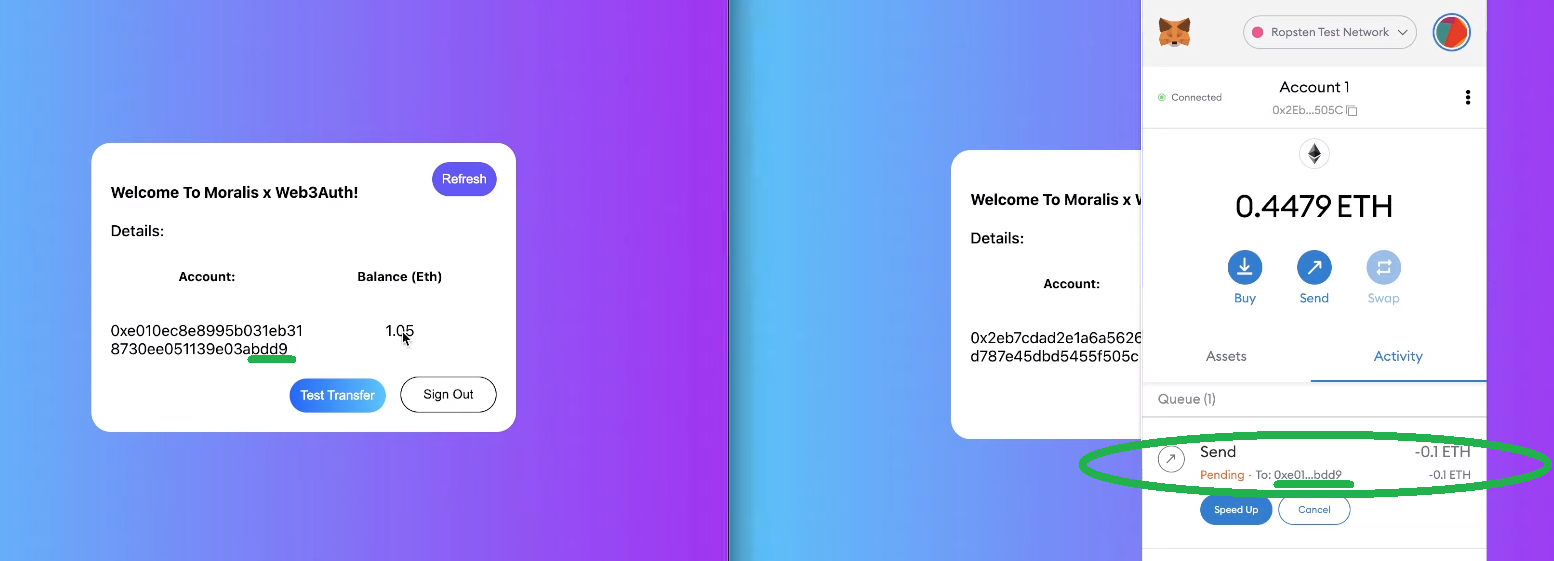
Our Moralis dashboard clearly registered the latest login. Furthermore, our example dApp also shows us that the user is logged in:

The wallet address displayed in the screenshot above has automatically been assigned to the Google account used to log in. To show you that this is fully working, let’s complete a test transfer. Let’s first log in with another account, this time using MetaMask. Once logged in, we use MetaMask to send some test ETH using Ropsten (one of the Ethereum testnets) to the first account:
Note: If you are more of a video person, you can watch the tutorial of the above-presented demo in the video below (starting at 0:53).
How to Sign In dApp Users with Google or Twitter – The Implementation
As mentioned previously, Moralis’ newly added authentication feature, “Web3Auth”, is what makes Web3 social login possible. As such, in order to set Web3 social login in place, you need to set up your Web3Auth account. Aside from that, you need to complete the initial Moralis setup.
You can find detailed instructions in the Moralis documentation under “Users” > “Web3 Authentication” > “Web3Auth”. However, to assist you even further, let’s guide you through the setup steps herein.
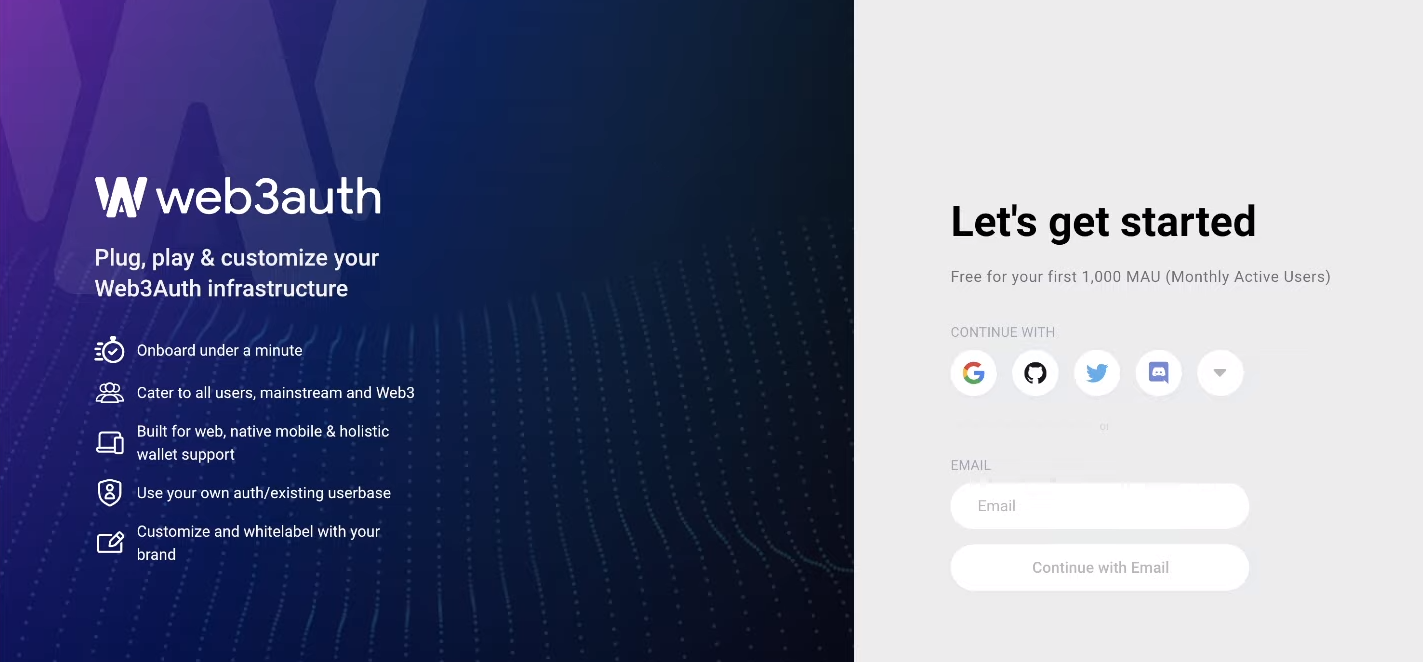
- For starters, you need to obtain a publishable client ID. As such, you need to create a Web3Auth account using your email address:
- After creating your account, you’ll get to access your dashboard. There, navigate to the “Plug and play” section:

- Once inside the “Plug and play” section, click on “Create project”.
- With your project created, you get to copy that project’s client ID:

- Now it’s time to add the SDK to your application.
- In case you import Moralis via a CDN, use this line of code:
<script src="https://unpkg.com/@web3auth/[email protected]/dist/web3auth.umd.min.js"></script>
- In case you import Moralis via an NPM or another package manager, use this command:
npm install --save @web3auth/web3auth
- With all of the above steps completed, you are ready to call the authenticate function. The latter accepts some parameters of which client ID (obtained above) is the only required one. Use these lines of code and replace the placeholder with your client ID:
const user = await Moralis.authenticate({
	provider: "web3Auth",
	clientId: "ABC*****************",
})
Here are the optional parameters that you can also use:
- “chainId” – Determine the supported network you are looking to connect.
- “theme” – Select the color of the theme – light or dark (dark by default).
- “appLogo” – Use your logo.
- “loginMethodsOrder” – Determine the social logins that you want to allow and the order in which they show up.
Web3 Social Login – Do it Yourself
Now, it is time for you to roll up your sleeves and implement the above steps. That is also the best way to learn to sign in dApp users with Google or Twitter. However, we decided to make things as easy for you as possible. As such, you have the entire code required to build the above-presented example dApp on GitHub. The part that interests us the most is inside the “SignIn.js” file. Thus, all you need to do is copy that code and add your Web3Auth client ID. For video guidance on further customization of this authentication feature, use the video below, starting at 8:33.
Nonetheless, to make the above work, you also need access to the Moralis SDK. Thus, you need to complete the initial Moralis setup first.
Initial Moralis Setup – Part 1
If you want to create dApps with maximum ease, you need to complete your Moralis setup. The following steps are the gist of it:
- Create Your Free Moralis Account – Use this link to access Moralis’ signup page. There, enter your email address and create your password. Then, click on the confirmation link (check your email inbox). On the other hand, in case you already have an active Moralis account, just log in.
- Create a Moralis Server – Inside your Moralis admin area, you’ll need to click on the “+ Create a new Server” button (top-right corner inside the “Servers” tab). From the drop-down menu that will appear, offering three server types (see the screenshot below), select the network type that best suits your project. When working on example projects or testing dApps, “Testnet Server” or “Local Devchain Server” are the ways to go. Moreover, in the case of our example dApp above, we used the Ropsten testnet.

With the network type selected, a pop-up window asking for your server details will appear. Thus, enter your server’s name (this can be anything you want), then select your region, network type, and chain(s). Finally, to spin up your server, click on the “Add Instance” button:

Initial Moralis Setup – Part 2
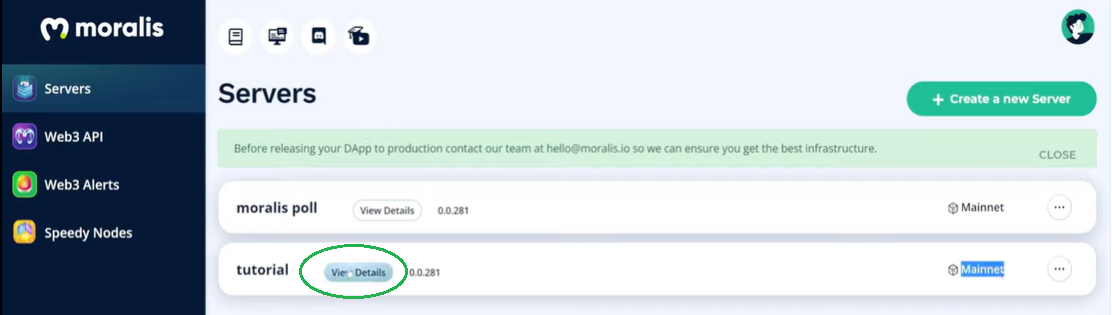
- Access Server Details – After successfully creating your server, you can access all of Moralis’ SDK features. Among others, you get to access the above-mentioned Moralis dashboard (click on the three dots). In addition, you also get to access your server’s details. As such, make sure to click on the “View Details” button:
All the details you need will appear in a new window. Then, copy your server’s URL and application ID by clicking on the copy icons (one by one) on the right-hand side of each detail:

Note: The above window is also where you can access the Moralis “sync” feature, which enables you to sync and index smart contract events.
- Initialize Moralis – Here, you have several different options, depending on the type of project you are dealing with. However, you will either be starting off from scratch or using the ultimate Ethereum dApp boilerplate. When starting from scratch, you will populate your server’s details into the “.js”, “.jsx”, “.html”, or some other file. On the other hand, when using the Web3 boilerplate, you will focus on the “.env” file (see the image below).

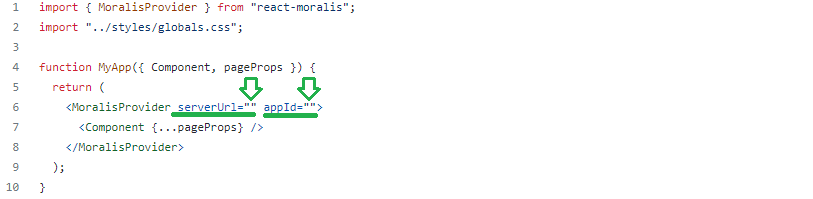
As far as our example goes, you want to use the “_app.js” file. There, paste your server’s details in the designated spots:
Finally, here’s also the video we’ve been referencing throughout the article:
Web3 Social Login – Sign in dApp Users with Google or Twitter – Summary
At this point, you should be eager to start building some phenomenal dApps. Knowing that you can seamlessly onboard non-crypto folks with ease is a real game-changer. Moreover, when you combine this Web3Auth power with Moralis’ SDK and its ultimate Web3 API, you ought to crush your competitors. To further master the implementation of Web3 social login, we recommend you take on some additional example projects. Then, simply tweak the code to sign in dApp users with Google or Twitter. As such, browse the Moralis blog and the Moralis YouTube channel for guidance and inspiration. These outlets are also great places to continue your free crypto education. For instance, some of our latest articles cover a reentrancy smart contract example, what is the metaverse, Web3 backend platforms, React Native Web3, Web3 gamification, NFT game characters, how to mint 10,000 NFTs, and Web3 data science.
However, if you are ready to shift things to a higher gear, make sure to enroll in Moralis Academy. Then, enroll in the courses that best match your current stage. When it comes to beginner courses, JavaScript Programming 101 and Crypto for Beginners may be just what you need. However, if you are looking for an intermediate-level course, Technical Analysis 101 and Ethereum Smart Contract 101 are waiting for you. Nonetheless, in case you are ready for more advanced topics, Blockchain Business Masterclass, DeFi 101, and DeFi 201 might be your best picks. Aside from professional courses, Moralis Academy also provides you with one of the most supportive communities and expert mentorship. With all that in your corner, you ought to become a blockchain developer and go full-time crypto in no time.

