Since different users have different preferences, limiting users to a single or “static” Web3 authentication method is not optimal. It’s much better to equip your dapps with “dynamic” Web3 authentication, which provides several user-friendly options. Also, it’s important to use multi-chain solutions. After all, you don’t want to be stuck to a particular chain in this fast-evolving industry. Thus, you should implement dynamic Web3 authentication solutions that offer cross-chain interoperability. Furthermore, by implementing a dynamic multi-chain wallet login flow, you future-proof your dapps and expand their reach.
Not too long ago, implementing login solutions aimed toward blockchain was quite complicated. However, the Web3 tech stack’s come a long way in the last couple of years. As a result, you can now implement dynamic Web3 authentication in minutes when you use the right tools. As far as Web3 authentication goes, the Moralis Auth API is the leading solution. It enables you to implement authentication options with single lines of code. As such, it’s the most straightforward solution for both beginners and experienced developers. Moralis is also all about cross-platform interoperability. Accordingly, you can dive into blockchain development and implement authentication solutions using your legacy skills. Moreover, with that said, you can use the information in this article, and instead of implementing the authentication solution to a dapp, you can utilize your legacy skills and add it to a website!
If that sounds interesting and you want to learn more, make sure to create your free Moralis account and follow along in this article!
Web3 Authentication – What is it?
Web3 authentication is a method that blockchain technology introduced. Also, we sometimes refer to Web3 authentication as Web3 login as well. Moreover, if you want to make the most out of this article, understanding what Web3 authentication entails is important. Thus, let’s dig a little deeper and explore further what Web3 authentication is. Let’s start by looking at this image:
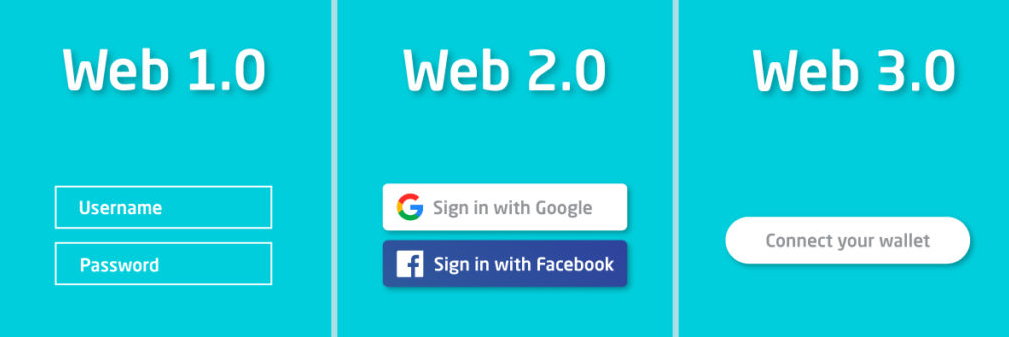
The above image shows the “Connect your wallet” button, which is the gist of all Web3 auth methods. Hence, the goal is to get users to connect their crypto wallets to dapps (decentralized applications). Yet, this process can be direct or more subtle, as in the image above.
For instance, imagine a user who has never heard of or used blockchain wallets previously now wants to use a dapp. If that dapp offered the “Connect your wallet” button, the user would have no idea what to do. As such, “indirect” Web3 authentication options are way better for onboarding newcomers. These methods use email or social logins that are known to all traditional users on the frontend. However, on the backend, they still create Web3 wallets (crypto addresses) that are used to authenticate users.
On the other hand, experienced Web3 users have their wallets ready and are on the lookout for the “Connect your wallet” buttons. As such, it’s important to know who your users are. Though, when targeting users with wildly different backgrounds, it’s best to use dynamic Web3 authentication solutions.
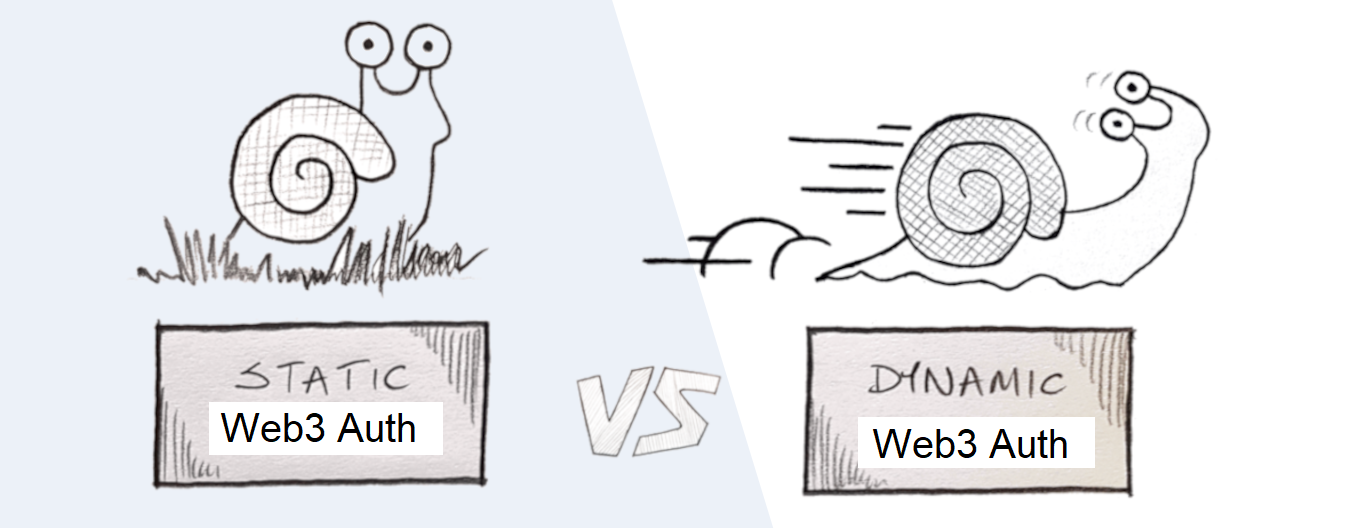
Static vs Dynamic Authentication for Web3
It’s important to distinguish the two types of authentication methods for Web3. So, in this sense, the word “static” refers to a single option. An example of that would be a dapp that only offers a way for users to authenticate with MetaMask.
On the other hand, dynamic Web3 authentication refers to multi-choice solutions. Of course, one of the options could still be MetaMask (after all, it’s the most popular Web3 wallet). However, there’d be at least one additional option. Hence, this dapp would offer other popular crypto wallets and perhaps even some of the above-described “subtle” Web3 authentication methods.
Moreover, it’s important to point out that, unfortunately, there is no clear answer to whether static or dynamic Web3 authentication is better. In most cases, users have different preferences, and catering to their needs and wants will be easier with a more dynamic login solution.

Alleviating Onboarding with Dynamic Web3 Authentication
Even though MetaMask remains the most popular blockchain wallet, many other reputable options exist, and some protocols support an extremely wide range of wallets. Also, as mentioned earlier, “indirect” authentication solutions that utilize email or social logins exist. By implementing these other dynamic authentication solutions, it’s clear that onboarding to Web3 becomes more straightforward for traditional Web2 users.
That said, let’s take a closer look at some of the best MetaMask alternatives. After all, by definition, all these alternatives offer dynamic Web3 authentication. Furthermore, you can implement any of them in minutes using Moralis’ Auth API. Moreover, these are the three most popular alternatives:
- WalletConnect
- Magic.Link
- Web3Auth
In addition, Moralis also supports RainbowKit and Coinbase Wallet authentication methods. However, we’ll get you acquainted with the above-listed solutions later in this article. Moreover, as you can imagine, every one of these solutions comes with some advantages, disadvantages, and specific use cases. Thus, we encourage you to explore them further on your own.
WalletConnect Overview
Many sites refer to WalletConnect as an application or a crypto wallet. However, it is, in fact, an open-source protocol. The purpose of WalletConnect is to establish a connection between all sorts of crypto wallets and dapps. It’s important to point out that this protocol ensures a safe connection between applications, wallets, or devices using it. Furthermore, WalletConnect establishes symmetrically encrypted connections. It achieves this encryption via a shared key between two peers.

Another great thing about WalletConnect is that it is, by default, a dynamic Web3 authentication solution. After all, it can be used with more than 170 wallets, with new options being added regularly. To get the latest details, visit WalletConnect’s official website:

When WalletConnect is implemented as a verification option, it offers two methods. On the one hand, users can establish the connection using a deep link. On the other hand, users can simply scan a QR code. Of course, the principles behind both ways are the same – one peer (or dapp) sends out the code or link, and the other peer needs to scan or approve it. So, by integrating WalletConnect into dapps, you can offer your users safe and reliable connections. Nonetheless, it’s worth pointing out that WalletConnect requires users to have one of the supported wallets installed on their phones. Hence, this method is particularly suitable for mobile Web3 users.
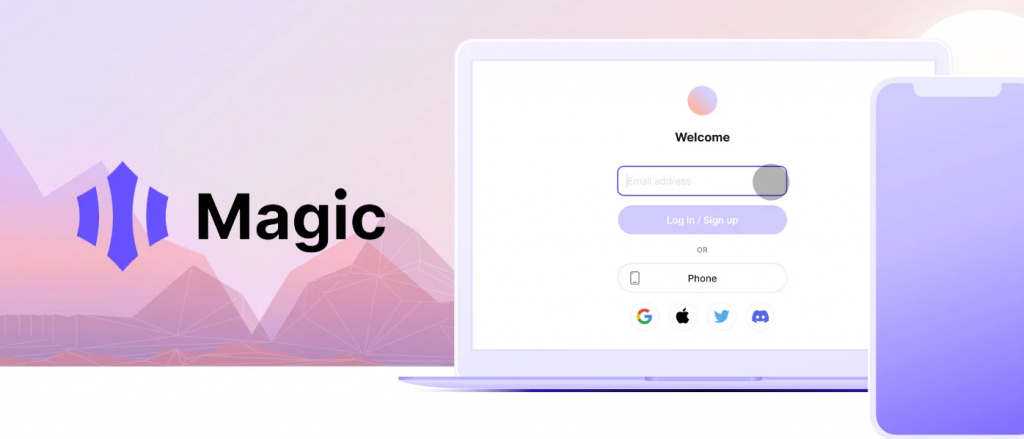
Magic.Link Overview
Magic.Link, also known as Magic, is a dynamic web authentication method created by Magic Labs. What makes Magic special is that it offers passwordless Web3 onboarding. As such, this neat tool enables devs to implement Web3 authentication that requires no Web3 knowledge on the users’ side. After all, Magic creates wallets and manages keys. Furthermore, Magic supports Web3 authentication with an email address, social account, or phone number. As such, it is a great alternative to onboard Web2 users to Web3.
Web3Auth Overview
In many ways, Web3Auth is quite similar to Magic and is equipped with the most popular Web2 authentication options. Hence, it is a tool to use if you want to enable users to enter the Web3 realm easily. In addition, Web3Auth also offers fiat-to-crypto APIs that allow your customers to purchase and interact with the chain in question directly on your dapp.

Ultimately, this dynamic alternative also eliminates seed phrases. Instead, Web3Auth utilizes a non-custodial, multi-factor authentication method. The latter is a secure and decentralized way to protect users’ private keys. Moreover, Web3Auth is also OAuth 2.0 compatible, which means you can verify users on the backend via a single API.

How to Add Dynamic Web3 Authentication with Web3Auth
If you are interested in adding any of the above-presented dynamic Web3 authentication solutions to your dapps, you should explore Web3 authentication how-to guides in the Moralis docs. These also include detailed steps on how to add Web3Auth. The instructions are designed in a way that requires you to first connect MetaMask to a website with NextJS. As such, we’ll rather focus on demonstrating an example dapp that uses Web3Auth herein.
So, here’s a screenshot of our example dapp that offers dynamic Web3 authentication via Web3Auth:
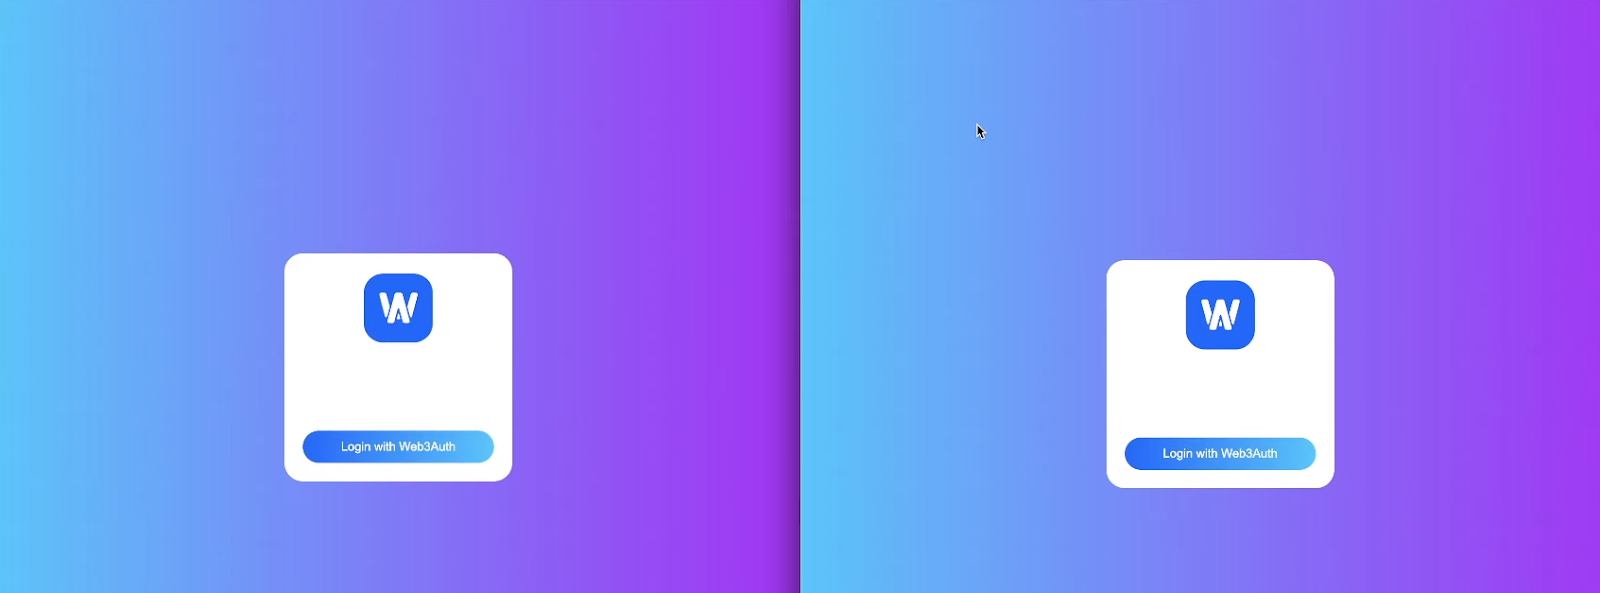
The image above shows that it all starts with the “Login with Web3Auth” button. After users click on that button, various login options they can choose from appear:
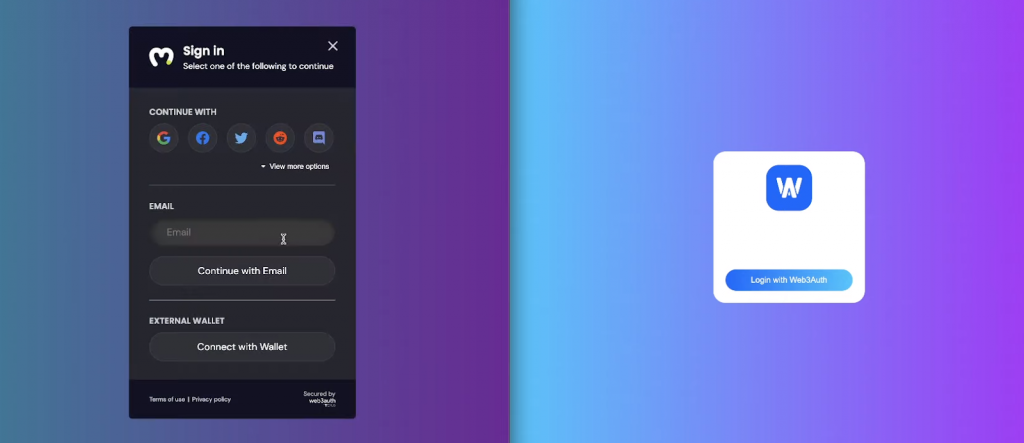
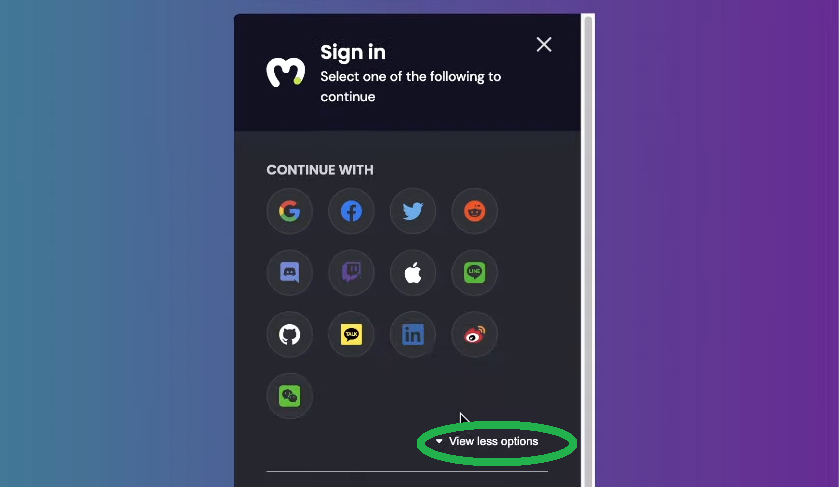
The left-hand side of the above screenshot displays the Web3Auth login module. As you can see, the module offers three sections: “continue with”, “email”, and “external wallet”. Accordingly, users easily choose between using their social login, email address, or crypto wallet. So, for instance, if users wanted to connect with their MetaMask extension, they’d need to click on the “Connect with Wallet” button. Furthermore, the “continue with” section also includes the “View more options” button. By clicking on that button, users get to see all supported social login alternatives:
Web3 Social Login Example with Web3Auth
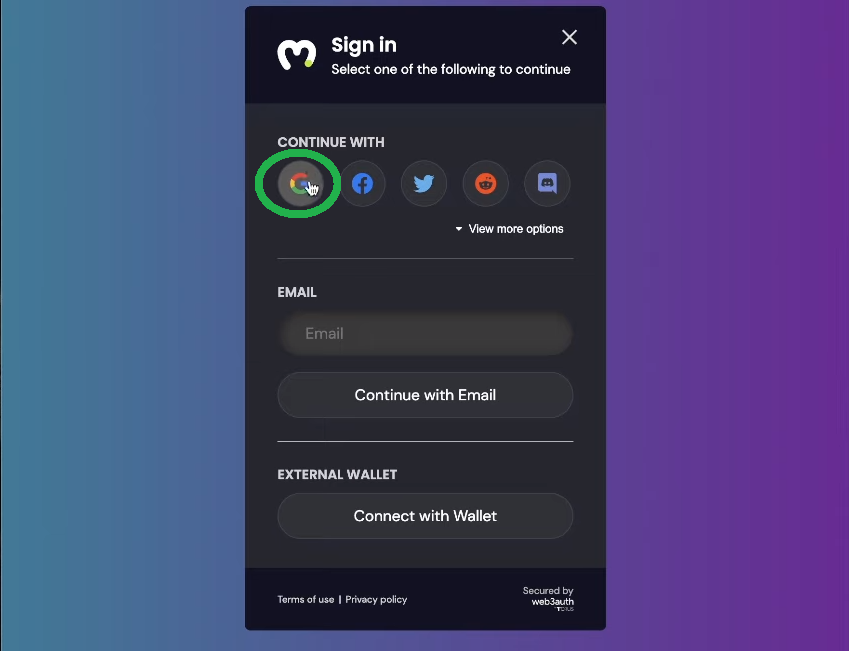
For the sake of this demonstration, let’s focus on authenticating with Google. Though it’s worth pointing out that, basically, the same principles apply when using other social login options. So, to authenticate with Google, users must click on the Google icon in the “continue with” section:
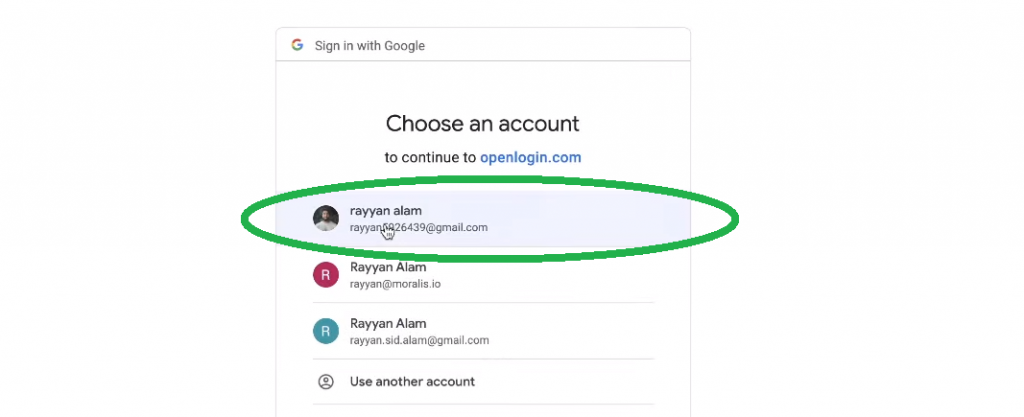
Then, users need to select one of their Google accounts:
Next, users also have a chance to set up two-factor authentication (2FA):
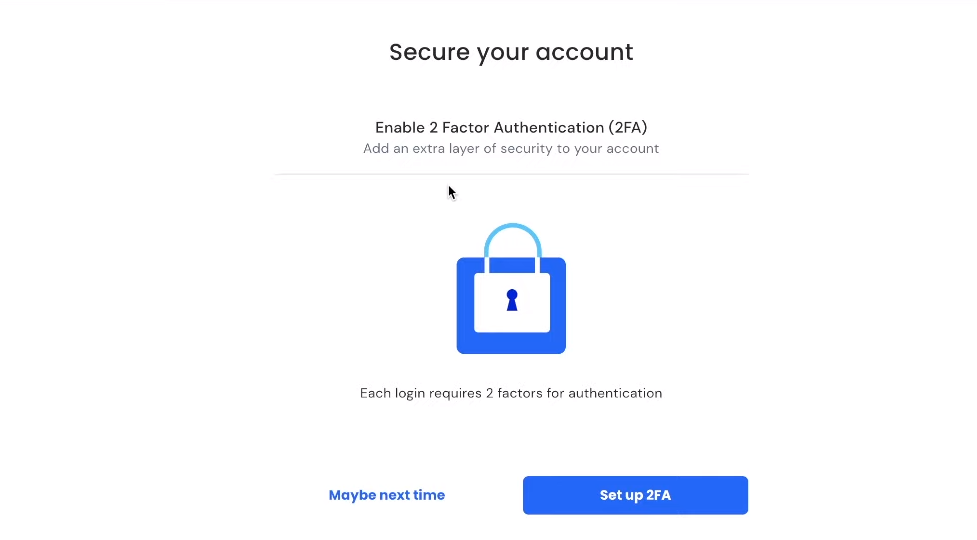
We’ll focus on users that skip 2FA by clicking on “Maybe next time”, which also concludes this Web3 authentication process. Furthermore, by completing the above steps, users also receive their crypto addresses that can be used for actual transactions:
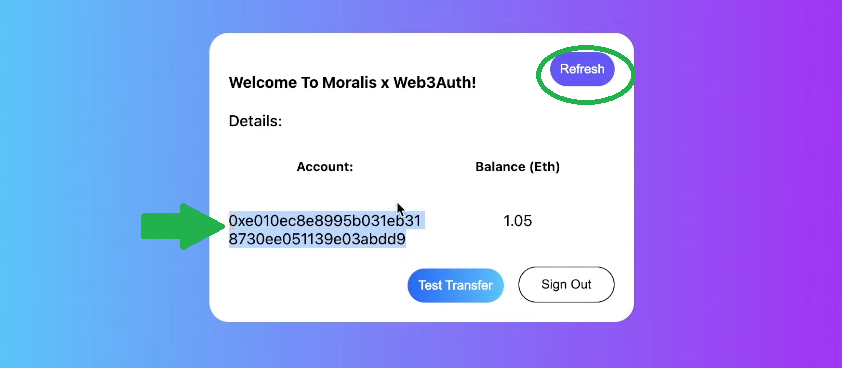
The wallet address marked in the above screenshot was created automatically and assigned to the Google account that was used for logging in. Moreover, as seen in the following image, this is a fully functional address that can receive supported cryptocurrencies:
Web3Auth Implementation
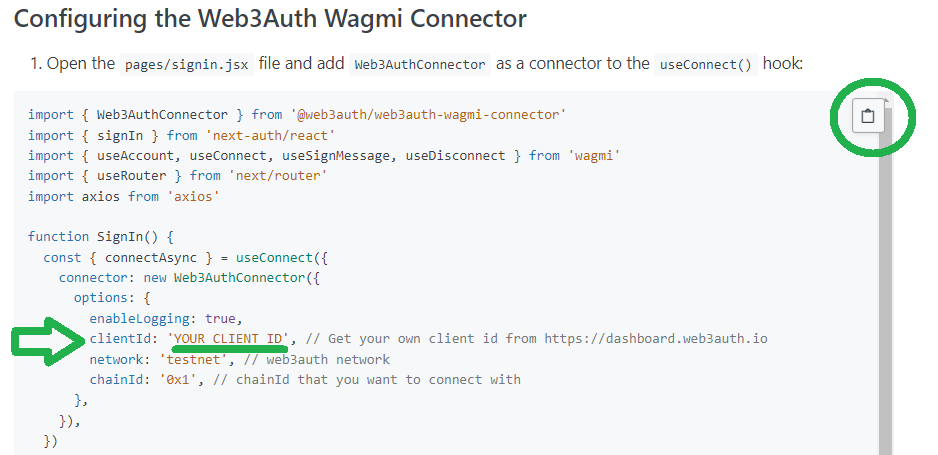
If you decide to implement Web3Auth, you’ll find the code you need in the Moralis documentation. You’ll also need to set up your Web3Auth account. This is where you’ll get your own client ID. Then, you’ll use that ID to replace the “YOUR_CLIENT_ID” placeholder in the code provided by the Moralis docs.
Nonetheless, here are the steps you need to complete to get your Web3Auth client ID:
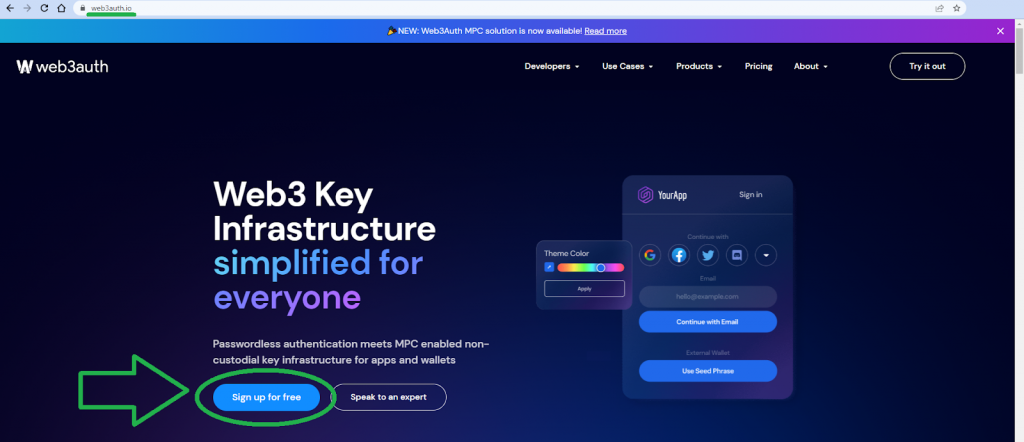
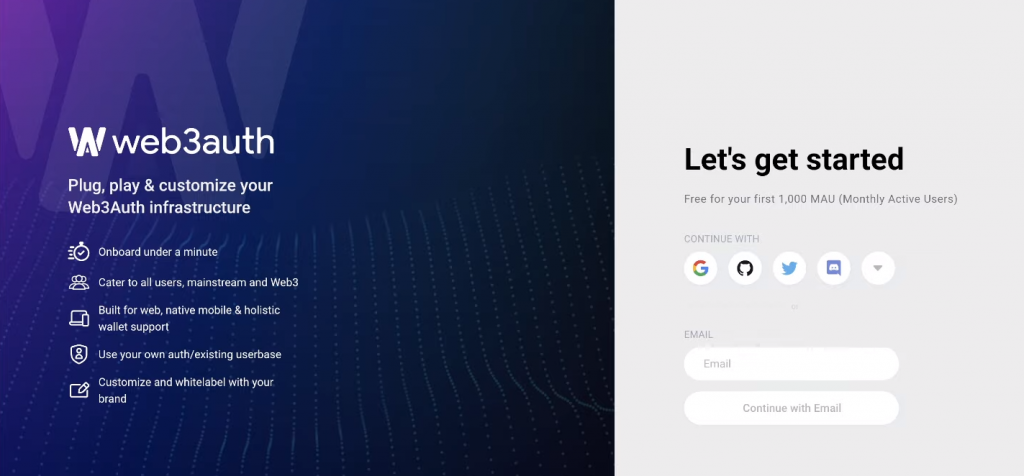
- Visit Web3Auth’s official website and click on the “Sign up for free” button:
- On the next page, use your social accounts or your email address to create your account:
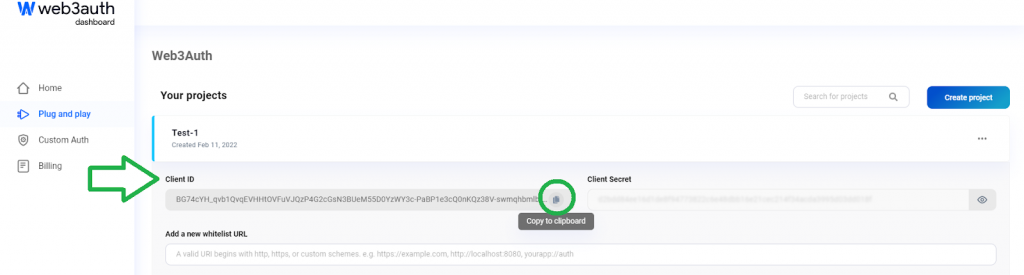
- With your Web3Auth account up and running, you’ll be able to visit your dashboard. There, you’ll need to go to the “Plug and play” section:

- Next, use the “Create project” button.
- After creating your project, you’ll be able to copy that project’s client ID:
- Finally, replace the “YOUR_CLIENT_ID” placeholder with the above-copied ID:
Add Dynamic Web3 Authentication to a Website – Summary
We covered quite a distance in today’s article. You explored Web3 authentication and the various alternatives. Furthermore, you now know that Web3 login serves to connect users to the blockchain. You also learned about static and dynamic Web3 authentication, and you now know that the latter just means that users can choose among two or more different authentication methods. In addition, you also discovered that Moralis’ Web3 Auth API supports some of the most popular dynamic Web3 authentication solutions. Nonetheless, we also showed you a demo of a dapp that uses Web3Auth. Last but not least, if you decided to visit the Moralis documentation, you could follow the instructions and implement the authentication method. Plus, we showed you how to obtain your Web3Auth client ID.
If this was your first time hearing about and working with Web3 authentication solutions, we encourage you to dive a bit deeper. After all, every dapp needs to have a reliable authentication in place. Thus, make sure to explore other how-to guides in the “Web3 Authentication” category of Moralis’ documentation. We also encourage you to use the Moralis YouTube channel and the Moralis blog as your guides. Some of the latest topics there will show you the easiest way to build dapps, how to connect dapps to Cronos, how to build BNB Chain dapps, how to connect a dapp to the Ethereum network, and much more.
Additionally, you might be interested in going full-time crypto sooner rather than later. In that case, you ought to become blockchain certified by completing some top-notch blockchain development courses at Moralis Academy. The “Crypto for Beginners” course is a great place to start.
