If you are reading this, you’re probably looking to build BNB Chain dapps. Did you know that Moralis offers the fastest and easiest way to create a Web3 dapp? If you want to learn more about this, read on as we will illustrate how to build a BNB Chain dapp in minutes using Moralis’ BNB Chain boilerplate! Moreover, if you want to skip the tutorial and immediately inspect the project, you can jump straight into the code using the link below:
Complete BNB Chain Boilerplate Documentation – https://github.com/ethereum-boilerplate/ethereum-boilerplate
If you click on the link above, you will notice that the repository is called “ethereum-boilerplate”. This might be confusing as you are looking to create BNB Chain dapps. However, worry not; Moralis’ Ethereum boilerplate is EVM-compatible, meaning it works just as well for creating BNB Chain dapps.
The BNB Chain boilerplate – in combination with various other development tools – makes it possible to build BNB Chain dapps in a matter of moments. The clearest example is Moralis’ enterprise-grade Web3 APIs, allowing you to save both valuable resources and time on any Web3 project. For example, check out the Web3 Streams API allowing you to stream essential blockchain data into the backend of all your projects!
So, if you have ambitions to create BNB Chain dapps using the BNB Chain boilerplate, sign up with Moralis right now! You can set up your account entirely for free and receive immediate access to the various tools of Moralis, facilitating a more seamless developer experience.
What is BNB Chain?
Earlier this year, Binance decided to rebrand its blockchain network to ”BNB Chain”. One of the reasons for the rebrand was to highlight the interoperability of the ecosystem’s two chains and the BNB (“Build & Build”) token, all while simultaneously distancing the network from Binance’s brand. The motivation behind this decision is that BNB is more than Binance. Consequently, the token, in combination with BNB Chain, is now a separate ecosystem that takes a different route from that of Binance.
Furthermore, BNB Chain consists of two chains: BNB Beacon Chain and BNB Smart Chain. Prior to the rebrand, these two blockchains were named Binance Chain and Binance Smart Chain. Nevertheless, the BNB Chain ecosystem still consists of two blockchains running parallel to one another.
The first one, BNB Beacon Chain, has the primary purpose of processing and validating decentralized transactions within the BNB Chain network. This chain was designed to host the network’s native BNB token. However, BNB Beacon Chain does not feature smart contracts, which limited the ecosystem and resulted in the development of another chain: BNB Smart Chain.
BNB Smart Chain features smart contracts and runs parallel with BNB Beacon Chain. However, even though they run parallel, they remain separate. As such, this suggests that they can work independently if, for instance, one of the chains goes offline. Moreover, BNB Chain is EVM-compatible, meaning that development on BNB Chain is quite similar to the Ethereum blockchain. Accordingly, if you have experience with Ethereum development, you can quickly develop dapps for the BNB Chain ecosystem.
With a more profound understanding of BNB Chain, it is now time to take a closer look at the BNB Chain boilerplate, which presents the fastest way to build a Web3 app!
BNB Chain Boilerplate – Fastest Way to Build BNB Chain Dapps
Prior to exploring the easiest way to build a BNB Chain dapp, we will take a closer look at Moralis’ BNB Chain boilerplate. This will give you an idea of the boilerplate’s capabilities and what you are working towards. Nevertheless, this is the landing page of the BNB Chain boilerplate:

The first thing you will notice is a navigation bar at the top of the application. This bar features tabs such as ”Transactions”, ”Transfers”, ”Balances”, etc. However, if you were to click on one of these tabs immediately, you would not have much luck. Instead, you would need to authenticate your Web3 identity first by clicking on the ”Connect Wallet” button:

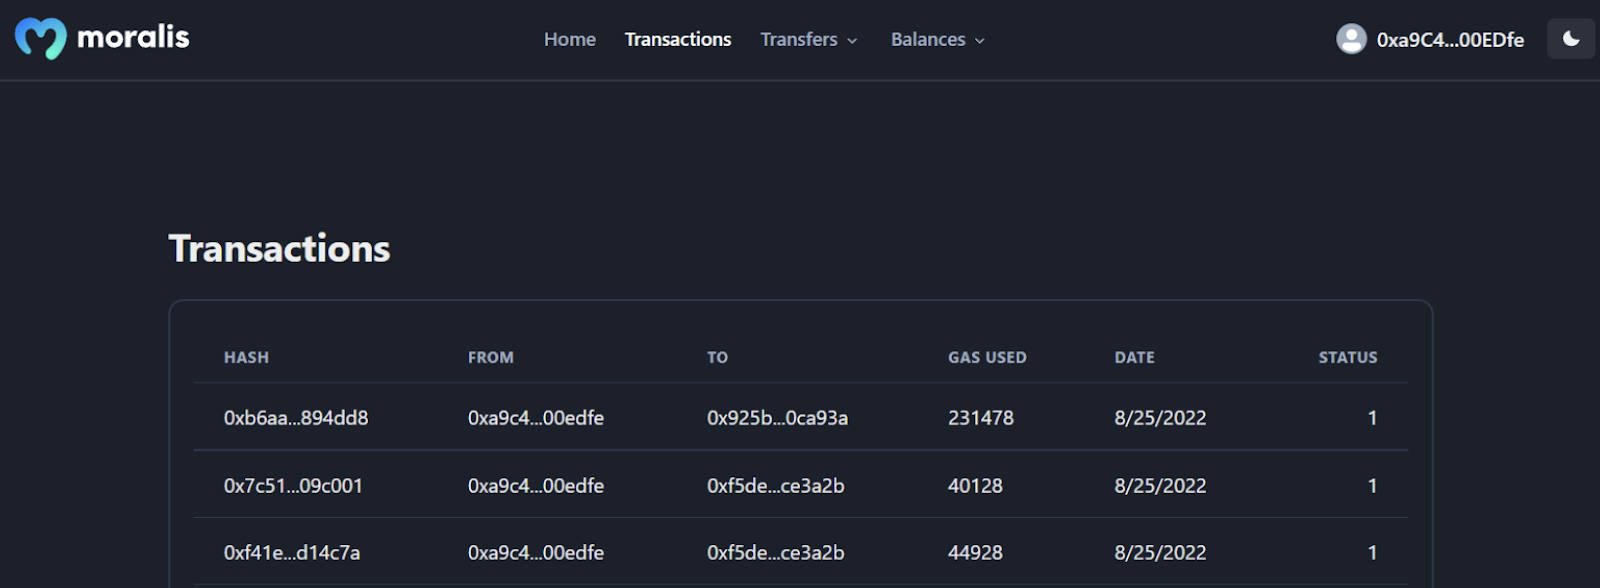
Clicking on this button will prompt your MetaMask wallet, allowing you to sign a message. Once the message is signed, it will autonomously populate the various tabs of the BNB Chain boilerplate with information regarding your Web3 wallet. As such, if you, for instance, click on the ”Transactions” tab, you will be presented with a table displaying your transaction history:
Moreover, if you click on either of the other tabs, you can filter between ”ERC-20” and ”NFTs”. Moreover, if you select the balances tab, it will look something like this:
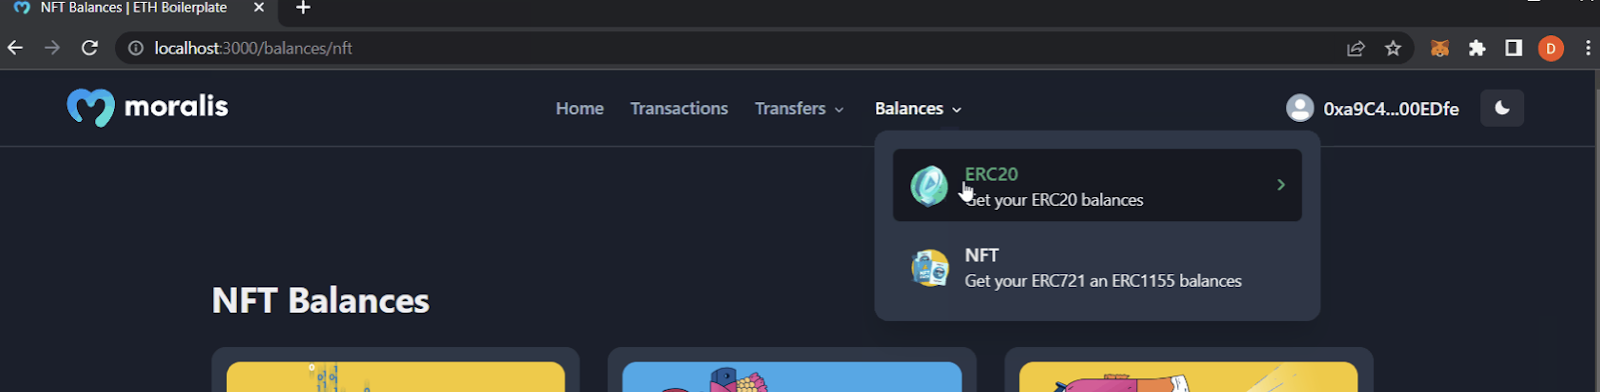
From there, if you, for example, click on the ”NFTs” option, the dapp will display all your NFTs neatly:

Moreover, an additional feature of the BNB Chain boilerplate is the light/dark mode. To toggle between these two, you can use the button at the far right:

That essentially covers the main features of the template. As such, the BNB Chain boilerplate provides an excellent foundation for any of your future projects with features such as Web3 authentication, acquiring on-chain data, etc. All you must do is tailor the template to fit the needs of your customers/users!
Build Dapps with the BNB Chain Boilerplate – Three Step Breakdown
Now that you know how Moralis’ BNB Chain boilerplate works and what you are working towards, we will jump straight into creating a BNB Chain dapp! Since you will be using the BNB Chain boilerplate, you can create a dapp in only three steps:
- Cloning the BNB Chain Boilerplate
- Environment Variable Configurations
- Starting the Dapp
Following these steps will allow you to create a dapp in minutes! However, if you are more of a video learner, you can also check out the tutorial below. In the following clip, one of Moralis’ developers provides a full breakdown of the entire process in video format:
Nevertheless, you can additionally join us here as we will provide a complete walkthrough of each step. So, without further ado, let’s jump right into the first step and illustrate how you can clone the BNB Chain boilerplate to your local directory!
Step 1: Cloning the BNB Chain Boilerplate
To clone the BNB Chain boilerplate, you first need to create a folder for the project and open an IDE (integrated development environment). We are using VSC (Visual Studio Code) for this tutorial; however, you can choose any environment you prefer. Moreover, note that the process might differ somewhat if you do not use VSC.
With your IDE launched and a project folder at your disposal, the next step is to open a new terminal. If you are using VSC, you can do so by clicking on ”Terminal” at the top, followed by ”New Terminal”:

Next up, visit the GitHub repository for the BNB Chain boilerplate. You will find the link to the repo in the introduction. Once you click on the link, you must copy the repo URL. You can do so by clicking on the ”Code” button and copying the URL:

From there, you can clone the template by inputting the following command into the terminal (ensure that you run the command in the project’s folder):
git clone “BOILERPLATE_URL”
Next, you can use the following command to navigate to the correct folder:
cd ethereum-boilerplate
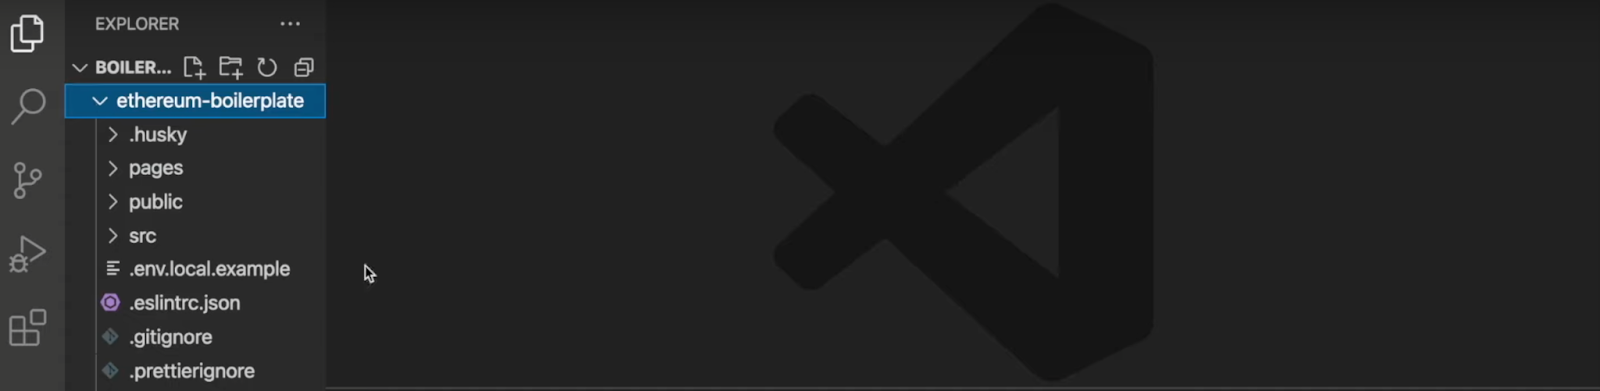
If you input all the right commands in the suitable locations, you should now have a version of the BNB Chain boilerplate in your local directory. As such, it should look something like this:
Step 2: Environment Variable Configurations
Next up, proceed by renaming ”.env.local.example” to ”.env.local” and open the file. This should be the original contents of the file:
APP_CHAIN_ID=0x1
APP_DOMAIN=ethereum.boilerplate
MORALIS_API_KEY= # Get your KEY https://admin.moralis.io/account/profile
NEXTAUTH_SECRET= # Linux: `openssl rand -hex 32` or go to https://generate-secret.now.sh/64
NEXTAUTH_URL=http://localhost:3000 # replace for production
As the code snippet above illustrates, there are five environment variables in total. We will go through each of them and show you the proper configurations. So, let’s start with ”APP_CHAIN_ID”, initially set to ”0x1”. This is the chain ID for the Ethereum network, and as you are looking to create a BNB Chain app, you will need to alter this value. As such, change ”0x1” to ”0x38”, which corresponds to the BNB Chain mainnet.
The second variable is ”APP_DOMAIN”; you can leave this one as is. The third variable is ”MORALIS_API_KEY”, which currently does not have a value. Hence, you will need your own API key, and to acquire the key, you will need a Moralis account. So, if you have not, create your Moralis account now and sign in. Once you log in, navigate to the ”Account” tab, click on ”Keys”, and copy the Web3 API key:

You must paste this into the code and ensure that ”MORALIS_API_KEY” equals this value. The fourth variable is ”NEXTAUTH_SECRET”, to which you will need to add a secret key. You can use the following link to generate the value you need to input into the code: “https://generate-secret.now.sh/32”.
The last variable is ”NEXTAUTH_URL”, initially set to ”http://localhost:3000”. This works for now since we are in the development stage. As such, you can test the application on a local host. However, when you launch the dapp, this needs to equal the dapp’s domain.
Here is an example of what the final ”.env.local” code can look like:
APP_CHAIN_ID=0x38
APP_DOMAIN=ethereum.boilerplate
MORALIS_API_KEY= "YOUR_API_KEY"
NEXTAUTH_SECRET= b8e786967d7bcbc0f920d35bcc3f891c
NEXTAUTH_URL=http://localhost:3000
Step 3: Starting the Dapp
With all the configurations finalized to the BNB Chain boilerplate, you are almost entirely done and ready to test the dapp. However, you will need to install a few dependencies before doing so. To accomplish this, use either of the following commands to input into the terminal (depending if you are using “yarn” or “npm“):
npm i
yarn
As soon as all dependencies are installed, you can go ahead and run the application by inputting either of these commands into the terminal:
npm run dev
yarn run dev
This will run the application on a local host, allowing you to start the app using the URL you specified in an earlier step: “http://localhost:3000”.
Now you are done! You have successfully created a dapp using Moralis’ BNB Chain boilerplate. All that remains is for you to tailor the template by adding or removing features to make it suitable for your customer segment!
For example, if you want to add additional authentication mechanisms, you can find some excellent guides here at Moralis. If this interests you, learn how to add a sign in with RainbowKit or add Coinbase Wallet login functionality!
Summary – BNB Chain Boilerplate
In this article, we illustrated how to create a BNB Chain dapp using Moralis’ BNB Chain boilerplate. Thanks to this “Web3 template“, you were able to create a simple dapp in only three steps:
- Cloning the BNB Chain Boilerplate
- Environment Variable Configurations
- Starting the Dapp
By following the steps above, you created a dapp where users could sign in with their Web3 wallets. Once authenticated, they can explore the various tabs of the dapp to find information relating to their Web3 wallets. For example, users can click on a tab displaying their transaction history in a neat table!
If you found this article helpful, take a closer look at some additional content here at Moralis’ Web3 blog. For example, learn how to connect to PlayFab with Web3 or create your own Solana NFT. Moreover, we have some other guides if you want to develop dapps for other networks. For instance, learn how to build an Ethereum dapp or build and connect a dapp to Polygon!
Additionally, if you are new to blockchain development, we recommend checking out Moralis Academy. The academy offers some of the most sophisticated blockchain courses for new and experienced developers. If you want to learn the basics, check out the following course: ”Ethereum Fundamentals 101”. Begin your Web3 development journey and become blockchain certified in no time!
Nevertheless, if you want to build any type of dapp, sign up with Moralis! The tools of Moralis facilitate a significantly more accessible development experience, which allows you to save valuable time and resources for any further Web3 projects. What’s more, creating your own Moralis account is entirely free, so you have nothing to lose!
