Ethereum is the most popular network for Web3 development, but did you know that it is possible to build an Ethereum dapp in only five steps through Moralis? Thanks to Moralis’ Ethereum boilerplate, you now have the opportunity to create Ethereum dapps in minutes! If this sounds interesting, follow along and learn how to build an Ethereum dapp.
Full Boilerplate Documentation – https://github.com/ethereum-boilerplate/ethereum-boilerplate
This article will illustrate one of the quickest and easiest ways to build an Ethereum dapp. In fact, thanks to Moralis, you will be able to create a dapp in only five simple steps. However, if you do not want to go through each step, you can jump straight into the Moralis Ethereum boilerplate code using the link above!
Moreover, since Moralis supports cross-chain compatibility, it is possible to use the same template when developing dapps for other EVM-compatible chains. So, when working with Moralis, you do not limit yourself to one network and can easily develop dapps for Polygon, BNB Smart Chain, etc. In addition, the boilerplate is even compatible with Solana! If Solana programming interests you, check out Moralis’ Solana API. This tool facilitates a more seamless developer experience for the Solana network allowing you to create dapps in no time.
So, it does not matter if you want to create EVM-compatible dapps or projects for the Solana network; signing up with Moralis should be a no-brainer. Also, creating an account is entirely free, so you have nothing to lose!
What is an Ethereum Dapp?
Before we show you how to easily build an Ethereum dapp, it is essential that you know what Ethereum dapps are. As such, before illustrating the process, we will answer the question, ”what is an Ethereum dapp?”.
To understand Ethereum dapps, we need to explore the intricacies of dapps (decentralized applications). Much like traditional Web2 applications, dapps share similar features and, in many instances, have the same functionality. However, the main difference between conventional apps and dapps is that developers generally build dapps with blockchain technology and Web3 functionality. Dapps, therefore, operate on P2P (peer-to-peer) blockchain networks and function through the use of smart contracts, which are vital components of the Web3 ecosystem.
With decentralization being a dominant and pervading characteristic of these Web3 applications, they are superior to traditional apps in several different ways. That said, let’s explore some of the major benefits of dapps:
- Censorship-Resistant – A significant flaw of centralization is the issue of a single point of failure. Decentralization eliminates this flaw, making it impossible for single entities and governments to censor or block a network or dapp.
- Open-Source – It is not uncommon that dapps are open-source. This encourages the development of the whole Web3 ecosystem and dramatically contributes to increased innovation within the crypto domain.
- Blockchain Compatible – Since dapps are blockchain-based and function through smart contracts, it becomes easy to integrate cryptocurrency functionality into these apps.
Now, with a better understanding of dapps and their benefits, what exactly are they in the context of the Ethereum network? As previously mentioned, dapps are much like traditional apps built on top of blockchain networks. Thus, an Ethereum dapp is essentially an application built on the Ethereum blockchain.
Build an Ethereum Dapp in 5 Steps
With a more profound understanding of dapps and the benefits decentralization induces, we can move on to the main topic and show you how to build an Ethereum dapp quickly. To make life easy for you, we will use Moralis’ Ethereum boilerplate code. With this template, in combination with the many benefits of Moralis – such as the platform’s Web3 authentication capabilities – you will be able to build an Ethereum dapp in the following five steps:
- Creating a Moralis Account
- Cloning the GitHub Repository
- Configuring Environment Variables
- Starting the Dapp
- Testing the Dapp
Moreover, to show you what we are working towards; here is a print screen of the final application:
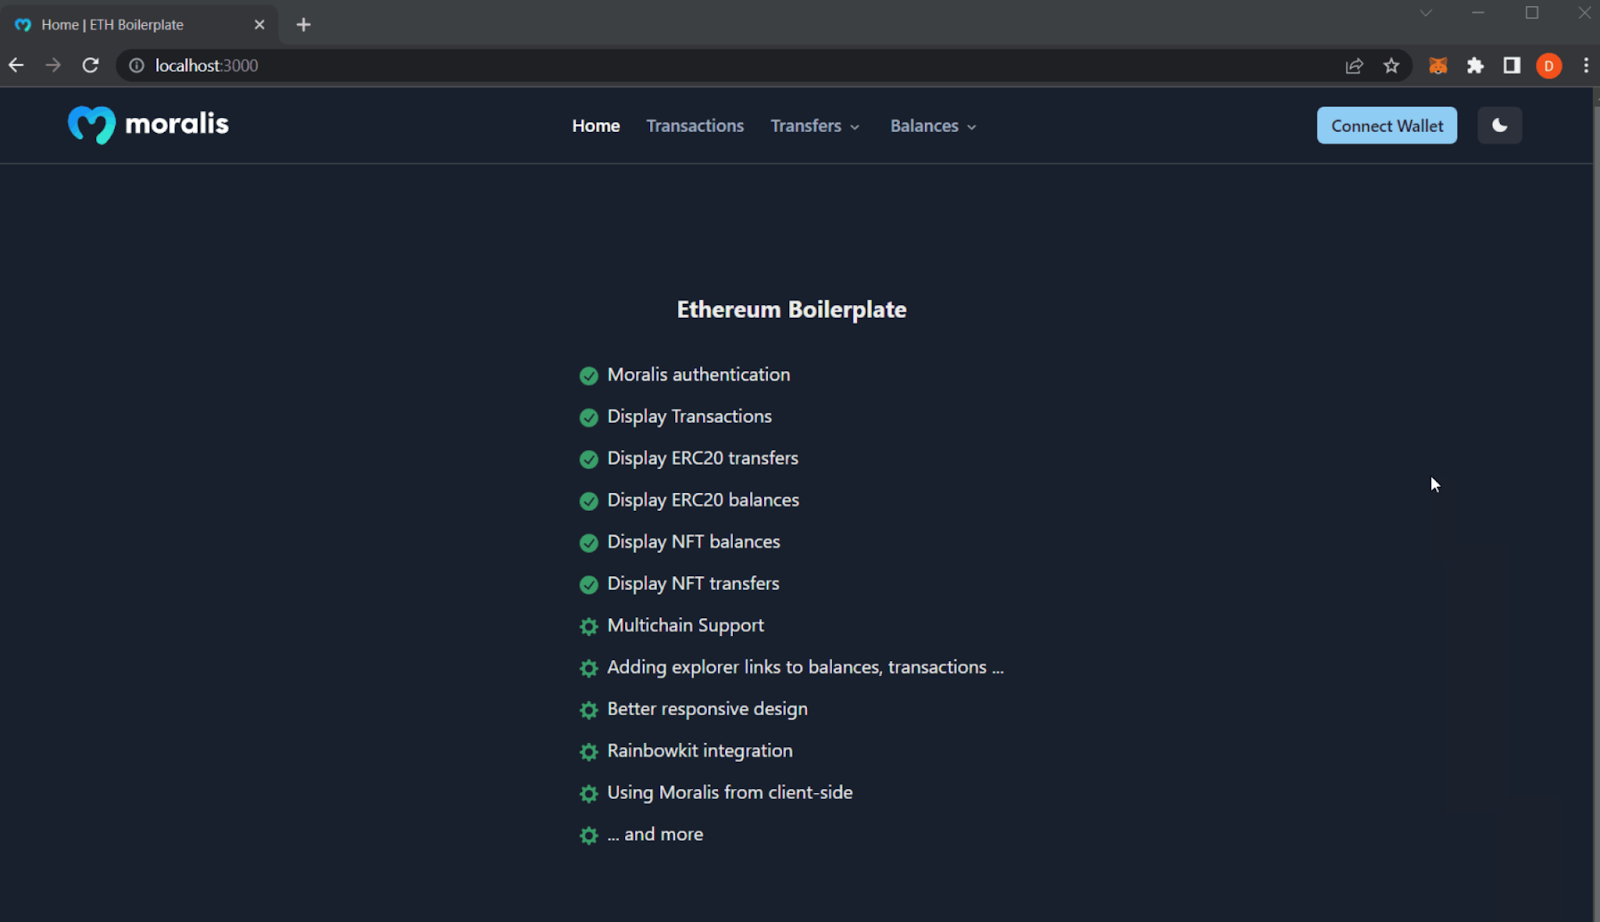
The application will allow you to authenticate yourself using your MetaMask wallet. Once your Web3 identity is confirmed, you can access numerous information regarding your assets and previous transactions. As the image above shows, you have lots of different tabs such as “Transactions”, “Transfers”, and “Balances”. However, we will dive deeper into the specifics of these tabs in the last section when testing that everything works as it should.
However, if you prefer watching YouTube videos to learn, check out the clip below from Moralis’ YouTube channel. This video covers all aspects of this guide and the intricacies of the code from the GitHub repository.
Nonetheless, if you follow along, we will start the tutorial by diving deeper into the first step and show you how to create a Moralis account!
Step 1: Creating a Moralis Account
The first thing you will need in order to build an Ethereum dapp is a Moralis account. Creating a Moralis account is straightforward and only takes a couple of seconds. What’s more, signing up with Moralis is entirely free!
However, if you already have an account, you can skip this part and jump straight into the second step.
Nevertheless, to get started, you need to navigate to “moralis.io” and click on the “Start for Free” button at the top right:

This will open a new window which will be the sign-up form. Further, you simply need to input your email, create a new password, make sure to check the “I accept…” box, and hit “Sign Up”:

Now that’s it; you now have a Moralis account which provides access to a few essentials you will need. Once you sign up and log in to your account, you will see a navigation bar to the left of the Moralis interface:
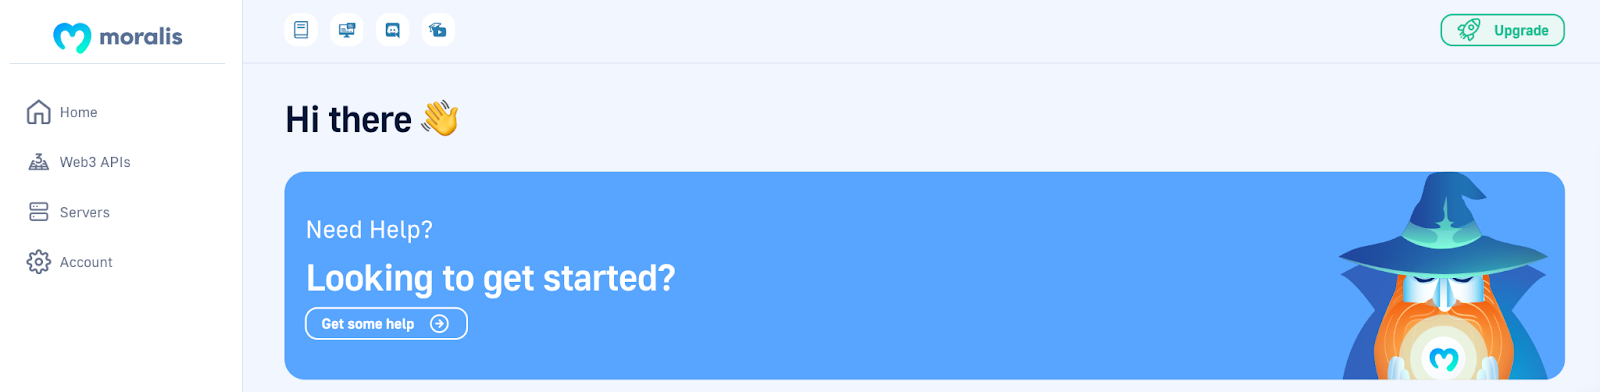
However, we will leave these for now and explore some of your options in the third step of this tutorial. As such, now that you have successfully set up your account, we will proceed to the second stage and look closer at how you can clone Moralis’ Ethereum boilerplate to your local repository!
Step 2: Cloning the GitHub Repository
In this part of the tutorial, we will show you how to clone the GitHub repository (which we linked to in the introduction) onto your local device. Also, we will use VSC (Visual Studio Code) in this tutorial. However, you are free to use any IDE (integrated development environment), but the process might differ somewhat on occasion. Nonetheless, the process will not vary significantly, and you will most likely be able to follow along as we go – even if you are not using VSC.
The first thing you need to do is open the GitHub repository using the link from the introduction. You can also query Google with “Ethereum boilerplate”, and the repo should be the first link that appears. From there, you can go ahead and click on the “Code” button to the right and copy the URL for the repository:

Now, with the URL, you can navigate back to VSC (or your preferred IDE). Next up, you can proceed by creating a new folder. In this instance, we will be calling ours ”BOILERPLATE”. With the folder at your disposal, you need to open a new terminal. If you are using VSC, you can click the ”Terminal” tab at the top of the interface and then hit ”New Terminal”:

From there, make sure you are in the right location corresponding to the folder you previously created. Then run the following command using the link you previously fetched in the terminal:
git clone “BOILERPLATE_URL”
This will clone the project to your local repository, and you can make sure to navigate to the project by inputting the following into the terminal:
cd ethereum-boilerplate
If you run all the correct commands in the suitable locations, it will look something like this in your IDE:

Step 3: Configuring Environment Variables
Now that you have the Ethereum boilerplate on your local device, you need to configure a few variables. As such, you need to navigate to the “.env.local.example” file:
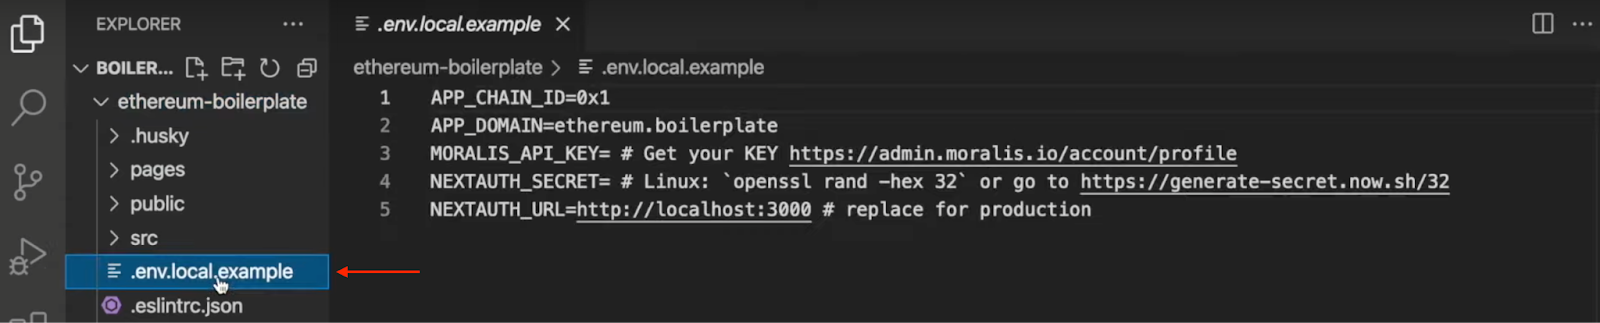
As the image above shows, the file contains five environment variables. This section will go through each and show you the necessary configurations.
The first one is ”APP_CHAIN_ID”, which initially is equal to ”0x1”. This is the chain ID for Ethereum, and as you are looking to build an Ethereum dapp, you can leave this as is. The same goes for the second ”APP_DOMAIN” variable, which can be left unaltered.
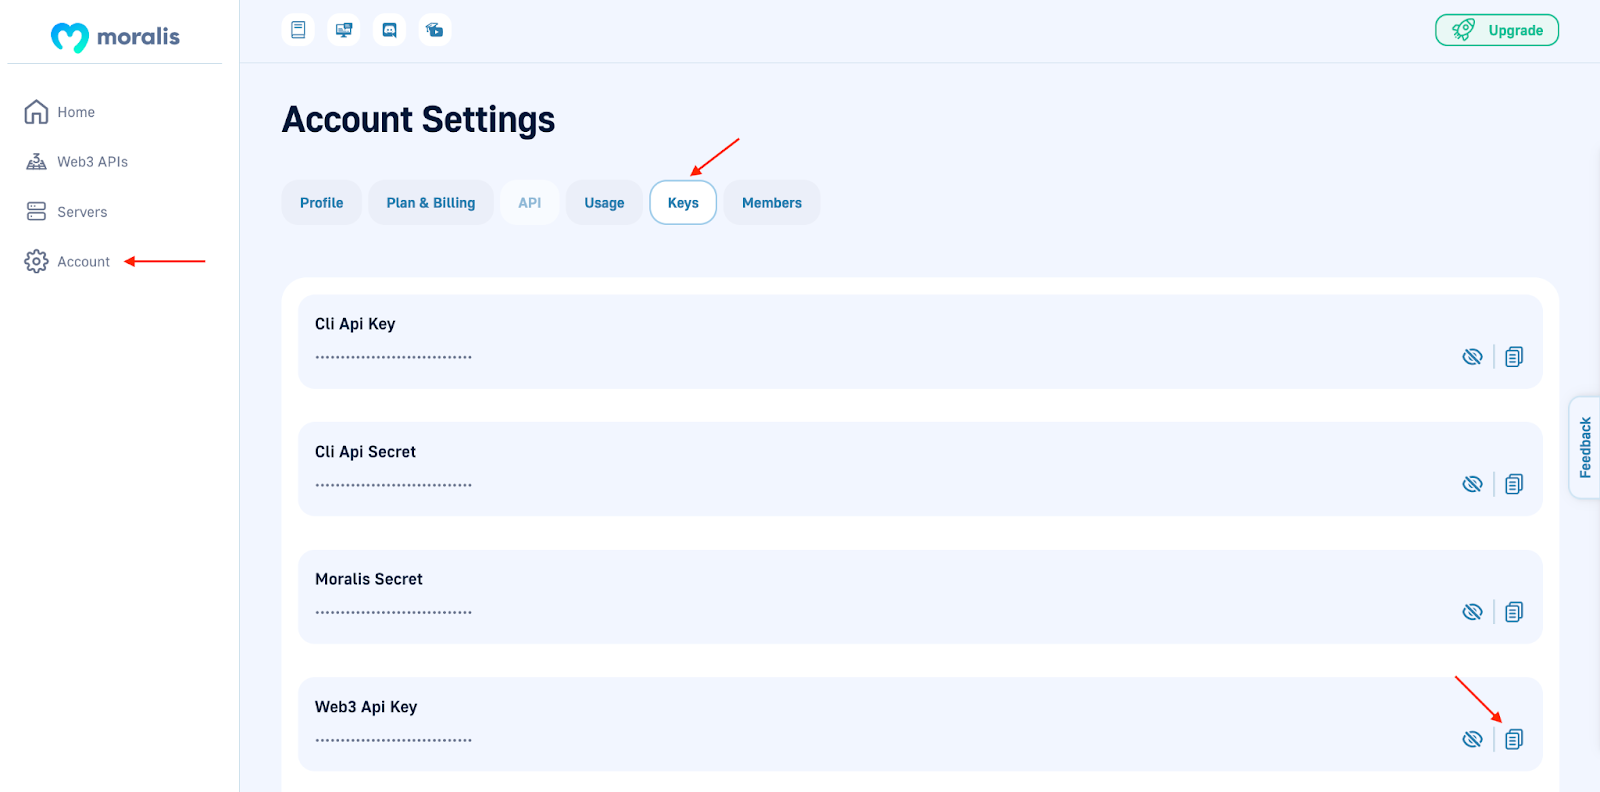
Next, you must set the ”MORALIS_API_KEY” variable to your API key. This is where your Moralis account enters the picture, as this is from where you fetch the key. As such, you can navigate back to the Moralis admin panel. Following this, you need to click on ”Account”, select the ”Keys” tab, and copy ”Web3 Api Key”. Now that you have the key, you can set the ”MORALIS_API_KEY” variable to equal this value.
In addition, you must also create a value for the ”NEXTAUTH_SECRET” variable. If you need help with this, use the following link to generate a key: https://generate-secret.now.sh/32. You can then set the ”NEXTAUTH_SECRET” variable equal to this value.
Lastly, you have ”NEXTAUTH_URL”, which is set to “http://localhost:3000”. It can remain the same as you currently are in the development process. This allows you to test the dapp in a safe environment. However, once you decide to move forward and launch the dapp, this needs to equal the dapp’s URL.
With all configurations finalized, all that remains is to change the file’s name to ”.env.local”!
Final ”.env.local” code:
APP_CHAIN_ID=0x1
APP_DOMAIN=ethereum.boilerplate
MORALIS_API_KEY= "YOUR_API_KEY"
NEXTAUTH_SECRET= b8e786967d7bcbc0f920d35bcc3f891c
NEXTAUTH_URL=http://localhost:3000
Step 4: Starting the Dapp
For the fourth step of this guide on how to build an Ethereum dapp, we will quickly show you how to launch the application. However, before doing so, you need to install the necessary dependencies, which you can do through either of these:
npm i
yarn
With the dependencies installed, run a local dev server through one of these commands:
npm run dev
yarn run dev
This should get the Ethereum dapp running on localhost 3000. You can use the following link to access the application and test that everything works as it should: “http://localhost:3000”.
Step 5: Testing the Dapp
If you access the Ethereum dapp through the link in the previous step, it should bring you to the following landing page:

To test the functionality of the dapp, you need to authenticate yourself with your wallet. To do so, you can click on the ”Connect Wallet” button at the top right:

This should prompt your MetaMask wallet and allow you to sign a message. Once you authenticate, you can explore the tabs at the top. The “Transactions” tab will display all your transactions in a neat table, including information such as a hash, addresses, gas costs, etc.:

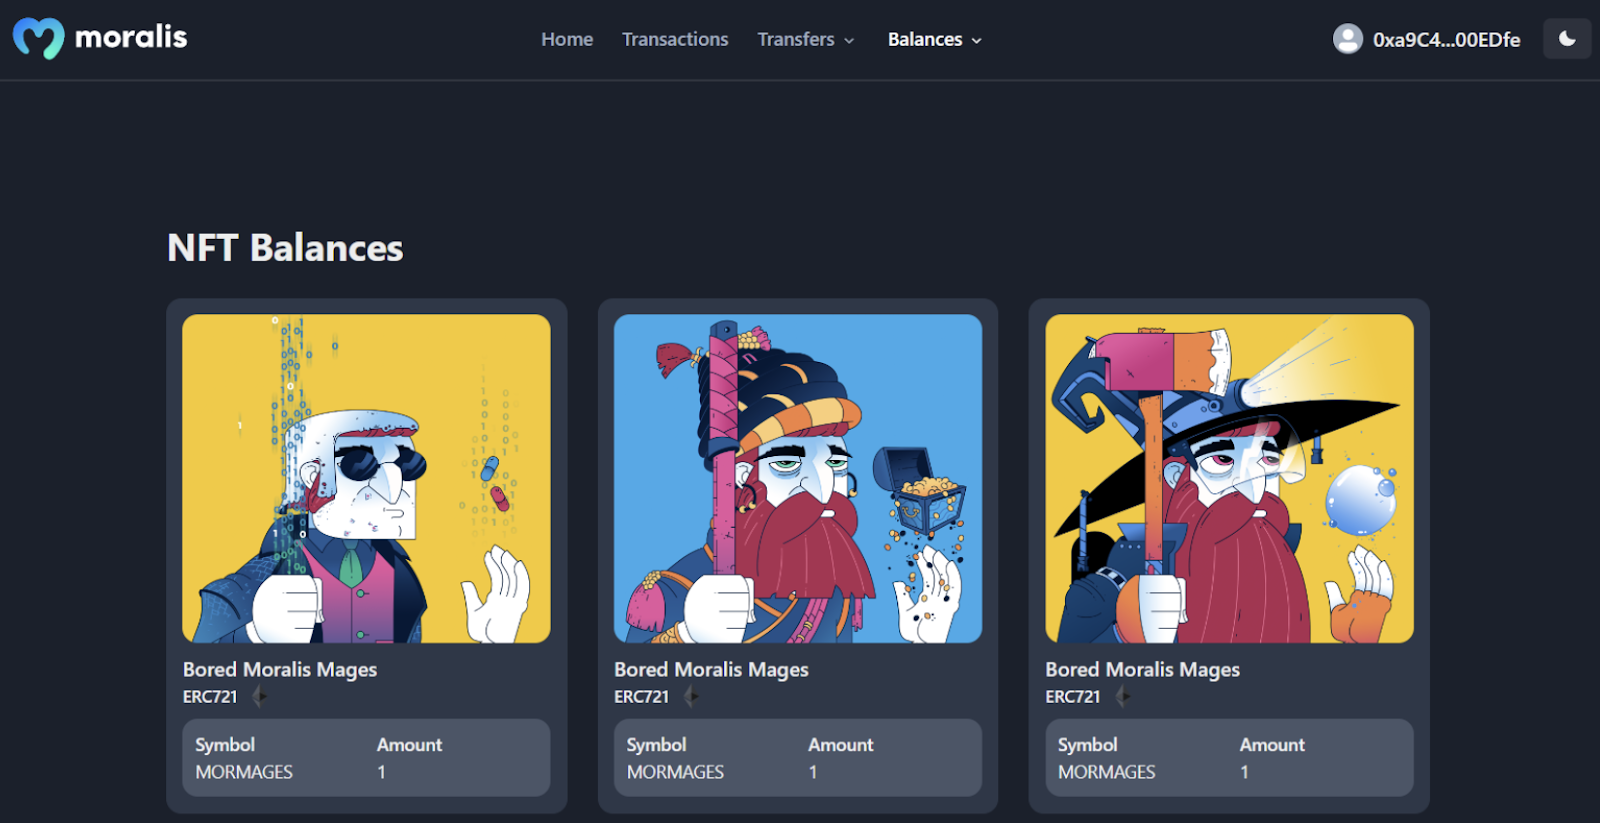
Moreover, the other two tabs allow you to look at transfers and balances. Also, these allow you to toggle between ERC-20 tokens and NFTs. For example, the “Balances” tab will enable you to choose NFTs:

If you click on this alternative, all your NFTs contained within your wallet will be displayed nicely:
That’s essentially it for this tutorial on how to build an Ethereum dapp! If you can sign in with your wallet and view the different tabs, you will know that the application works. However, you can further explore the boilerplate in more detail. Be sure to keep checking the documentation which you can find in the GitHub repo, as Moralis will continuously update the boilerplate as time passes!
Now that you know how to build an Ethereum dapp with Moralis’ Ethereum boilerplate, you are free to customize the template to fit your development needs. As such, you can add or remove any features that you deem unnecessary!
How to Build an Ethereum Dapp – Summary
Thanks to Moralis’ Ethereum boilerplate, it is possible to build an Ethereum dapp in just five simple steps:
- Creating a Moralis Account
- Cloning the GitHub Repository
- Configuring Environment Variables
- Starting the Dapp
- Testing the Dapp
This application allows users to sign in using their MetaMask wallet. Once signed in, they have the option to view transactions, transfers, and balances of their account. However, this is only a template, and it is up to you to customize the application to fit the needs of your potential users.
One of the tools providing this accessibility is Moralis’ Web3 Auth API. The API allows you to easily implement several different Web3 authentication mechanisms, which are implementations of the EIP-4361 standard. If you want to implement methods other than MetaMask into your applications, you can find additional guides here at Moralis’ Web3 blog. For instance, check out our “Add a Sign-In with Magic.Link” or “Add a Sign In with RainbowKit” articles!
Moreover, easy integration of Web3 authentication mechanisms is only one way Moralis bridges Web2 and Web3. For example, you can also easily implement Web3 streams or create your own Web3 webhooks.
So, if you want to build an Ethereum dapp, sign up with Moralis immediately! You can create your account for free and draw the full benefits of the platform.
