With the congestion issues of Ethereum, a prominent Web3 development alternative is the Polygon network. Polygon facilitates lower transaction costs and provides higher scalability. That said, did you know that you can build a Polygon dapp in only three steps, thanks to Moralis? If this piques your interest, read on and discover the easiest way to create Polygon-compatible dapps! Moreover, if you would like to skip the tutorial, you can find the complete code for the dapp in the GitHub repository below:
Full Ethereum Boilerplate Docs – https://github.com/ethereum-boilerplate/ethereum-boilerplate
This tutorial will show you how to build a Polygon dapp in three steps. The dapp will allow users to sign in with their Web3 wallets and access information such as their transaction history. The accessibility of the process partly originates from Moralis’ Ethereum boilerplate, which we will use during this guide. However, it might be a bit confusing; an Ethereum template for building a Polygon dapp? Well, a prominent reason you should be using Moralis is that the platform is cross-chain compatible. Thus, you can use this boilerplate to build dapps for any EVM system, including Polygon!
In combination with the Ethereum boilerplate, additional Moralis tools contribute to the accessibility of this process. For example, Moralis’ Auth API makes Web3 authentication more accessible. Furthermore, this allows you to easily integrate EIP-4361 compatible authentication methods, which the template features.
So, if you have ambitions to build a Polygon dapp, you should sign up with Moralis immediately. You can create an account in seconds, and it is completely free!
What is a Polygon Dapp?
The answer to “what is a Polygon dapp?” is relatively straightforward. In short, it is a dapp (decentralized application) built on the Polygon network. However, this does not make much sense if you are unfamiliar with dapps and Polygon. As such, we will take this section to explain both of these concepts, starting with dapps.
Dapps are quite similar to traditional applications in that they fulfill many of the same functions. However, the most significant difference between a Web2 app and a dapp is that the latter is built on a P2P (peer-to-peer) blockchain network. Furthermore, this means that dapps are equipped with blockchain and Web3 capabilities. Moreover, decentralization is generally a pervading attribute of dapps, which provides several benefits. For example, decentralization removes the “single point of failure” that commonly exists within the Web2 ecosystem. As such, dapps offer a higher degree of security since it is harder for users to commit fraudulent behavior and for hackers to access user data.
With a somewhat better understanding of dapps, we can continue by exploring the intricacies of the Polygon network. Polygon is a so-called “scaling solution” or “scaling platform” for Ethereum. Polygon focuses on scalability and low transaction fees, providing a more economically friendly platform than Ethereum. What’s more, as a scaling platform, the network can facilitate lower fees and higher scalability, all while not sacrificing the security of the Ethereum chain.

So, a Polygon dapp is essentially an application built onto this Ethereum scaling platform. This means Polygon dapps are powerful and can easily adopt blockchain-based functionalities.
With a better understanding of what Polygon dapps are, we can progress and demonstrate how you can build a Polygon dapp in only three steps!
Build a Polygon Dapp in 3 Steps
In the following few sections, we will show you the easiest and quickest way to build a Polygon dapp. To make the process as accessible as possible, we will use the Ethereum boilerplate from Moralis. The template allows you to cut down on unnecessary development time as you can avoid reinventing the wheel. As such, you have the opportunity to use the boilerplate’s bare-bones structure as a foundation for your future projects and beat the competition to market!
Thanks to the boilerplate – and additional Moralis tools – you can build a Polygon dapp in the following three steps:
- Cloning the Ethereum Boilerplate
- Configuring Environmental Variables
- Starting the Polygon Dapp
However, before we dive deeper into the first step of the guide, we will take the following section to demonstrate what we are working towards. As such, we will explore the functionality of the dapp in further detail.
Moreover, if you would rather watch a video explaining the steps of this guide, check out the following clip from the Moralis YouTube channel:
Ethereum Boilerplate Functionality – Fastest Way to Build a Polygon Dapp
This section will demonstrate the functionality of Moralis’ Ethereum boilerplate. By exploring this template, you will gain a better understanding of what we are working towards. Nevertheless, this will be the landing page for anyone launching the dapp:
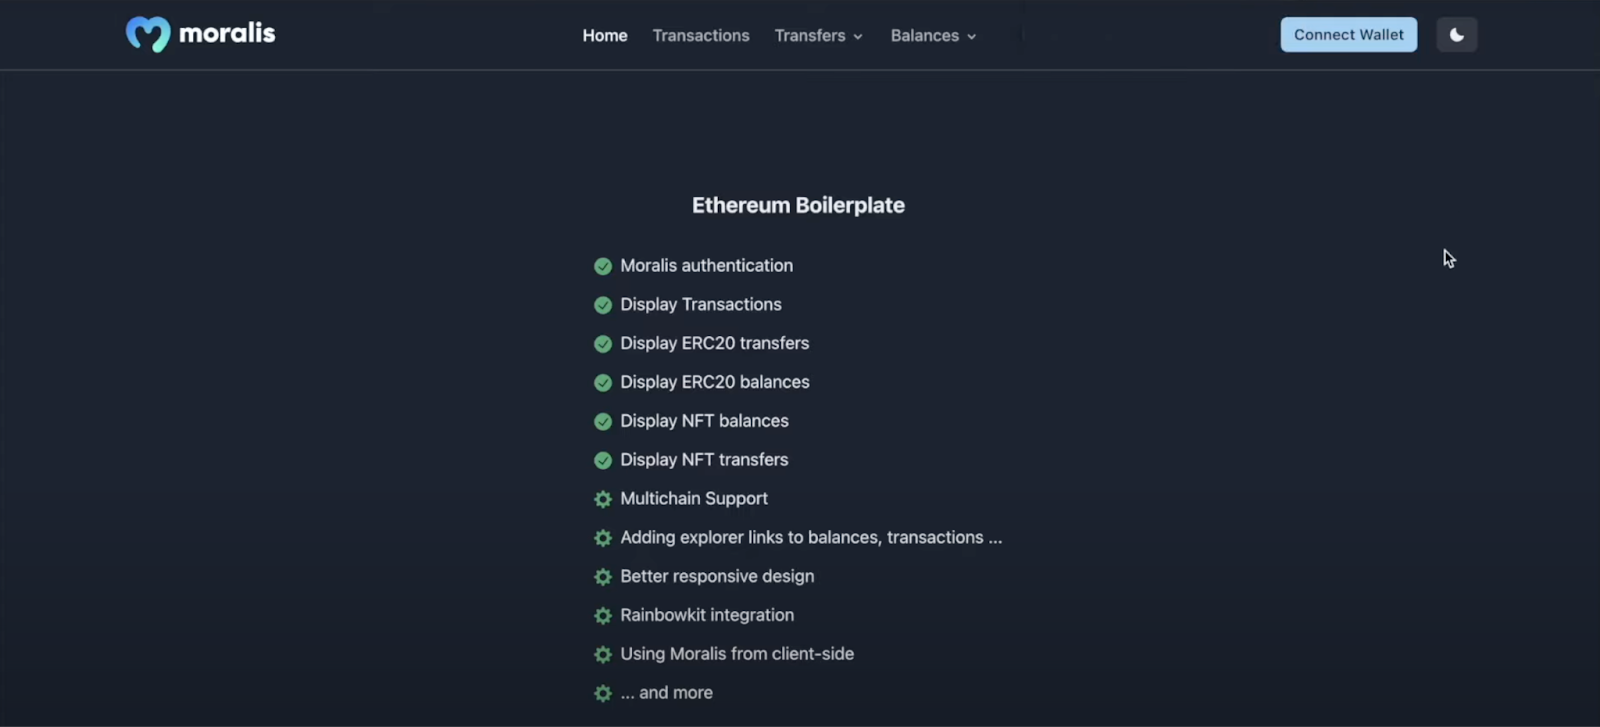
As the image illustrates, you have a few options to choose from in the navigation bar at the top. The dapp features four tabs at the top of the interface: “Home”, “Transactions”, “Transfers”, and “Balances”. Along with these various tabs, you will also find a “Connect Wallet” button at the top right:

Before you interact with the other tabs of the dapp, you will need to authenticate yourself using this button. If you click on “Connect Wallet”, this should prompt your MetaMask wallet and allow you to sign a message. Once you confirm your Web3 identity, the dapp will automatically fetch on-chain data and populate the other tabs with your user information. For example, this is what the “Transactions” tab might look like:
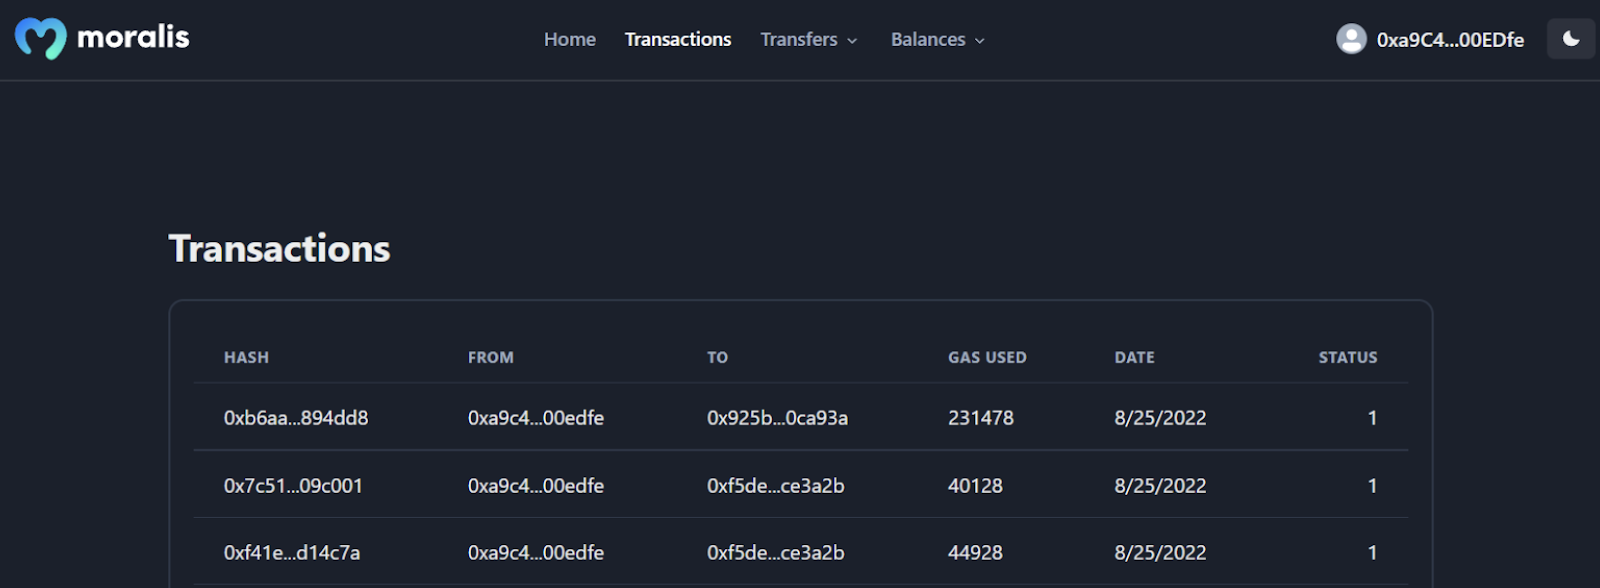
The table above contains several pieces of information. For example, you can see the transaction hash, addresses, dates of the transactions, etc. This information can be essential when you build a Polygon dapp to provide a more pleasant user experience.
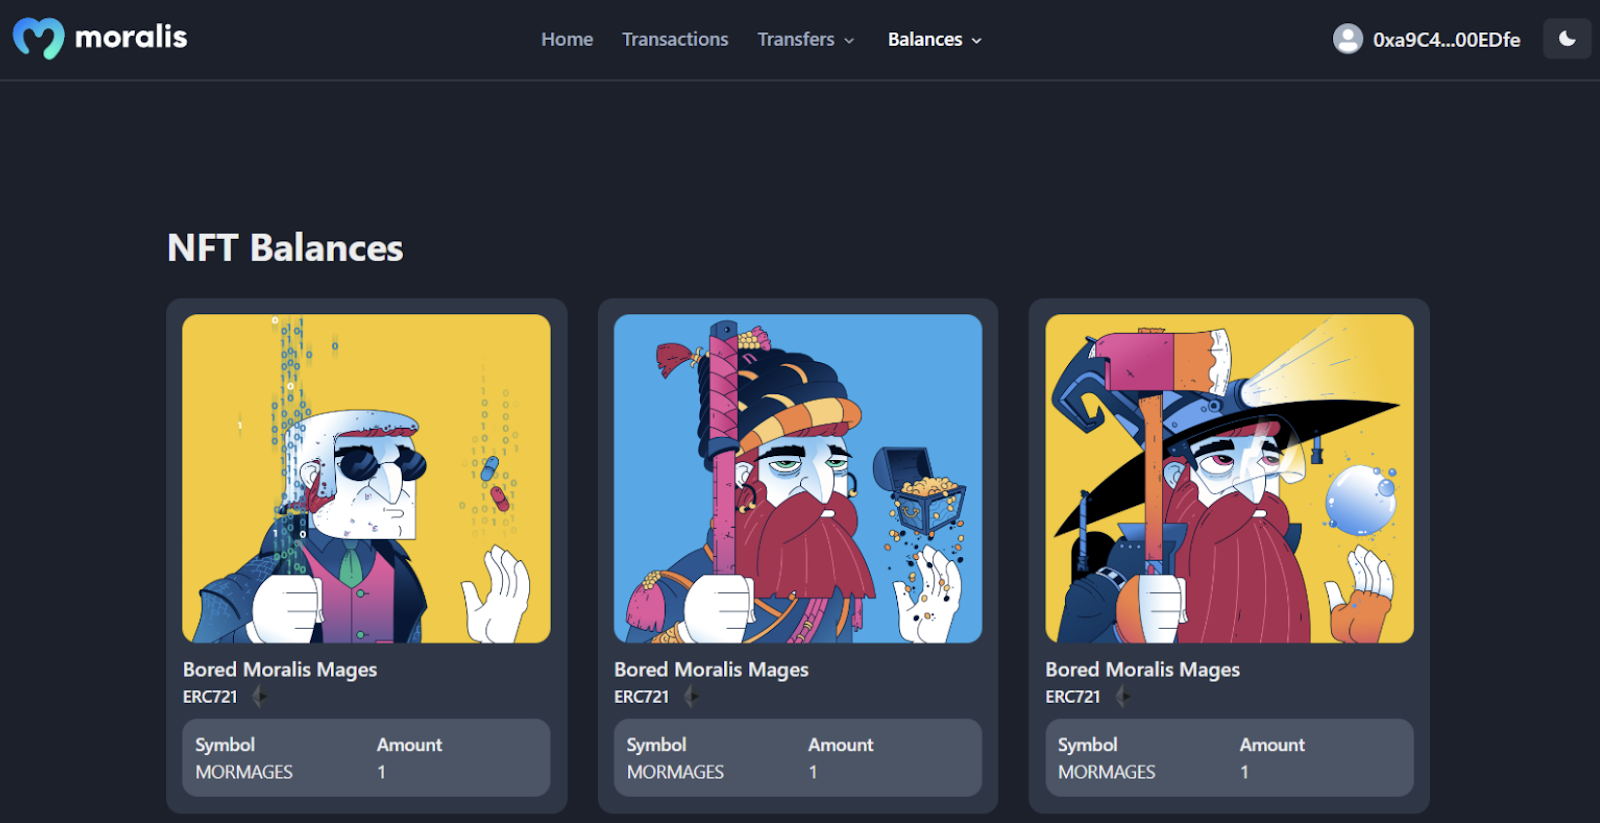
The other “Transfers” and “Balances” tabs also feature drop-down menus allowing you to toggle between ERC-20 tokens and NFTs. For example, this is what it looks like when clicking on “Balances”:

Moreover, if you, for instance, were to click on the NFT option, it would display all the NFTs the wallet contains:
In addition to these essential functionalities, the dapp also features a dark mode. As such, you can toggle between dark and light mode by clicking on the button at the top right:

How to Build a Polygon Dapp
Now that you have discovered the intricacies of the Ethereum boilerplate and have a more profound understanding of our end product, we will continue with the central part and explain how to build a Polygon dapp. So, with no further ado, let’s jump straight in and discover how to clone Moralis’ Ethereum boilerplate to your local repository!
Step 1 – Cloning the Ethereum Boilerplate
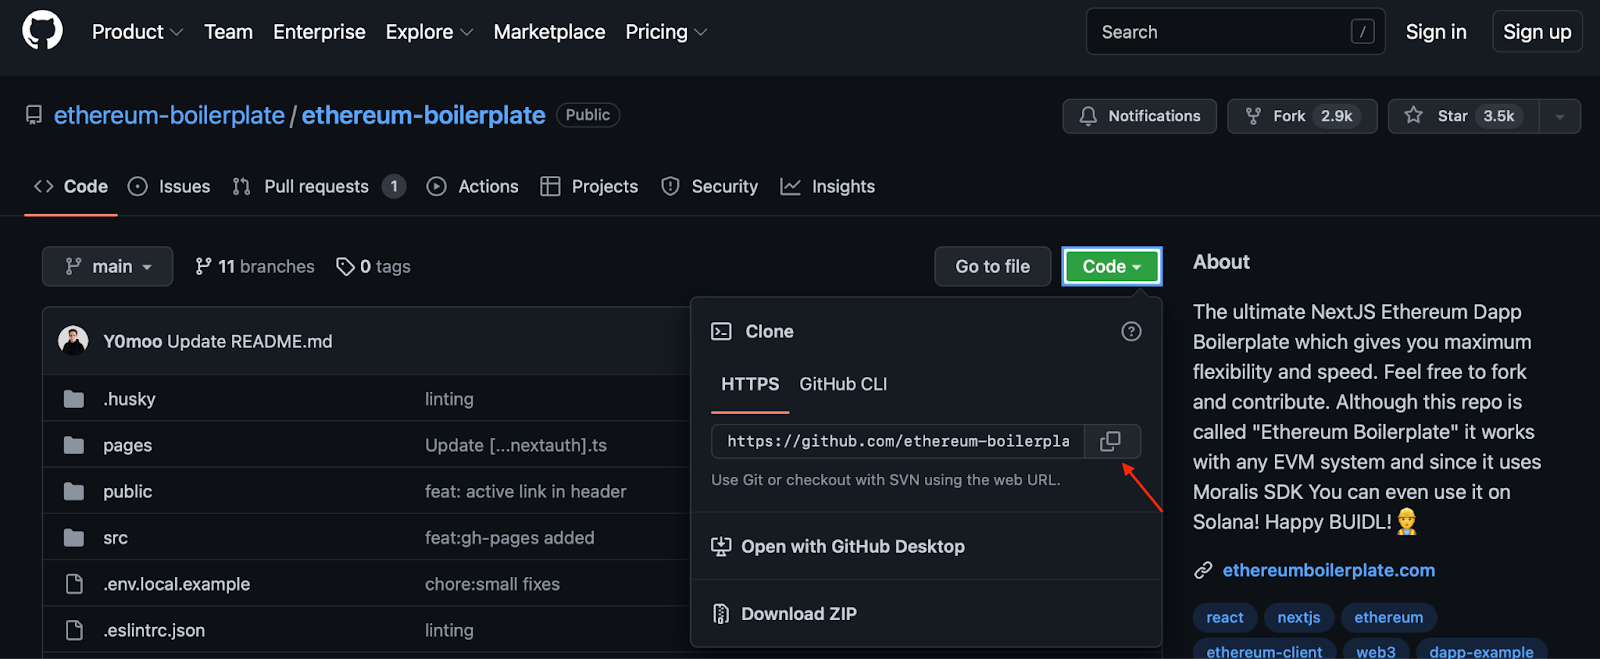
To build a Polygon dapp, you first need to clone the Ethereum boilerplate. So, you can begin by navigating to the GitHub repo to which we initially linked in the article. Once you click on the link, you can proceed by clicking on the green “Code” button and copying the repo URL:
From there, you must open your preferred IDE (integrated development environment) and create a new folder. In our case, we will use VSC (Visual Studio Code) and name the folder “BOILERPLATE”. If you like to work with another IDE, this is fine; however, the process might differ.
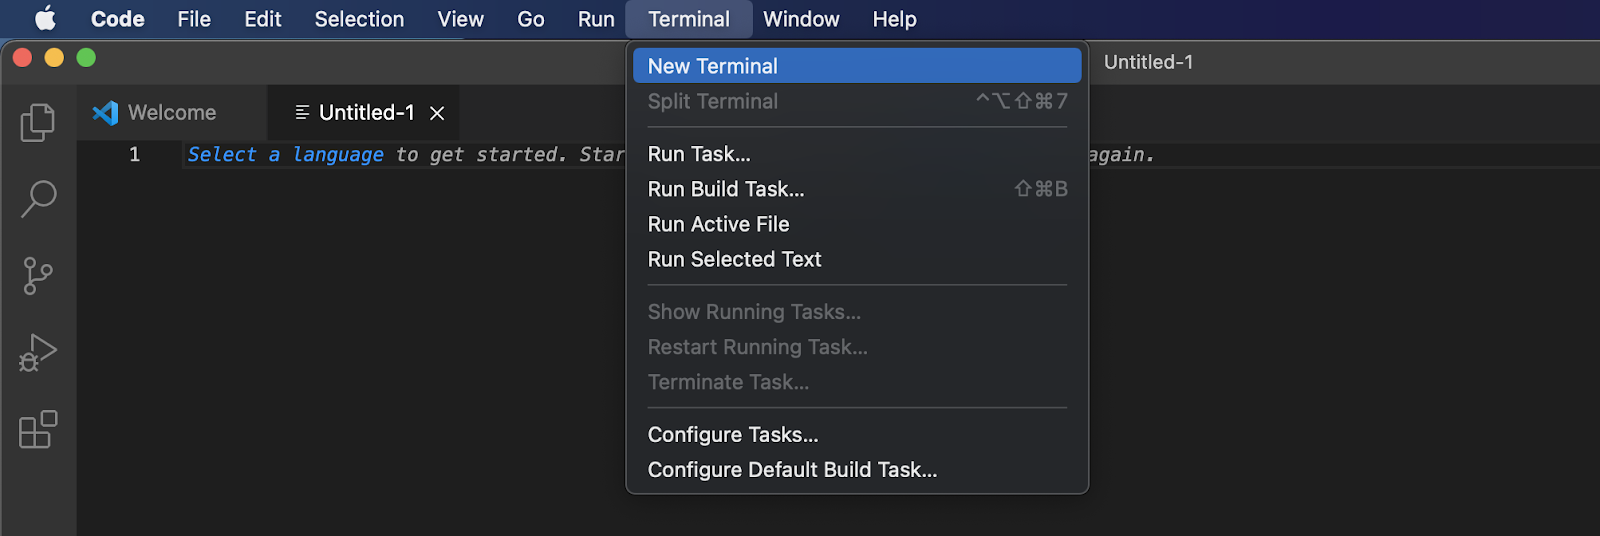
Nevertheless, with your IDE open and the folder at your disposal, you need to open a new terminal. For VSC, you can click on the “Terminal” tab at the top of the interface and hit “New Terminal”:
With a new terminal, you can clone the GitHub repo with the following command using the link you previously fetched. Moreover, make sure you run the command in the right location corresponding to the folder you just set up:
git clone “BOILERPLATE_URL”
From there, you need to navigate to the file, which you can do through this command:
cd ethereum-boilerplate
Running these commands in the proper locations should give you a structure similar to the one below:
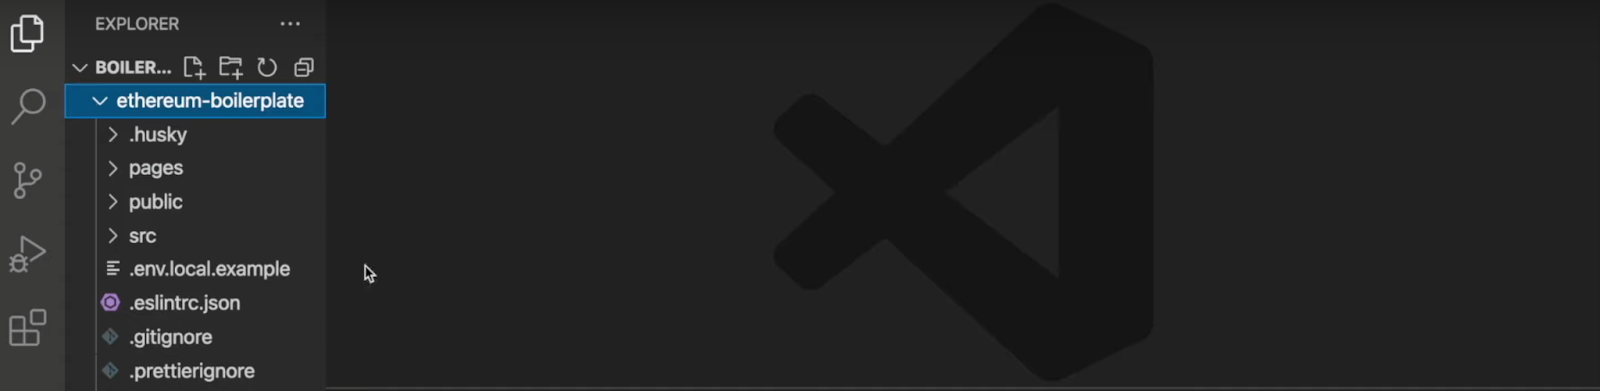
With the GitHub repo cloned, you can move on to the second step, where we will configure a few environment variables!
Step 2 – Configuring Environmental Variables
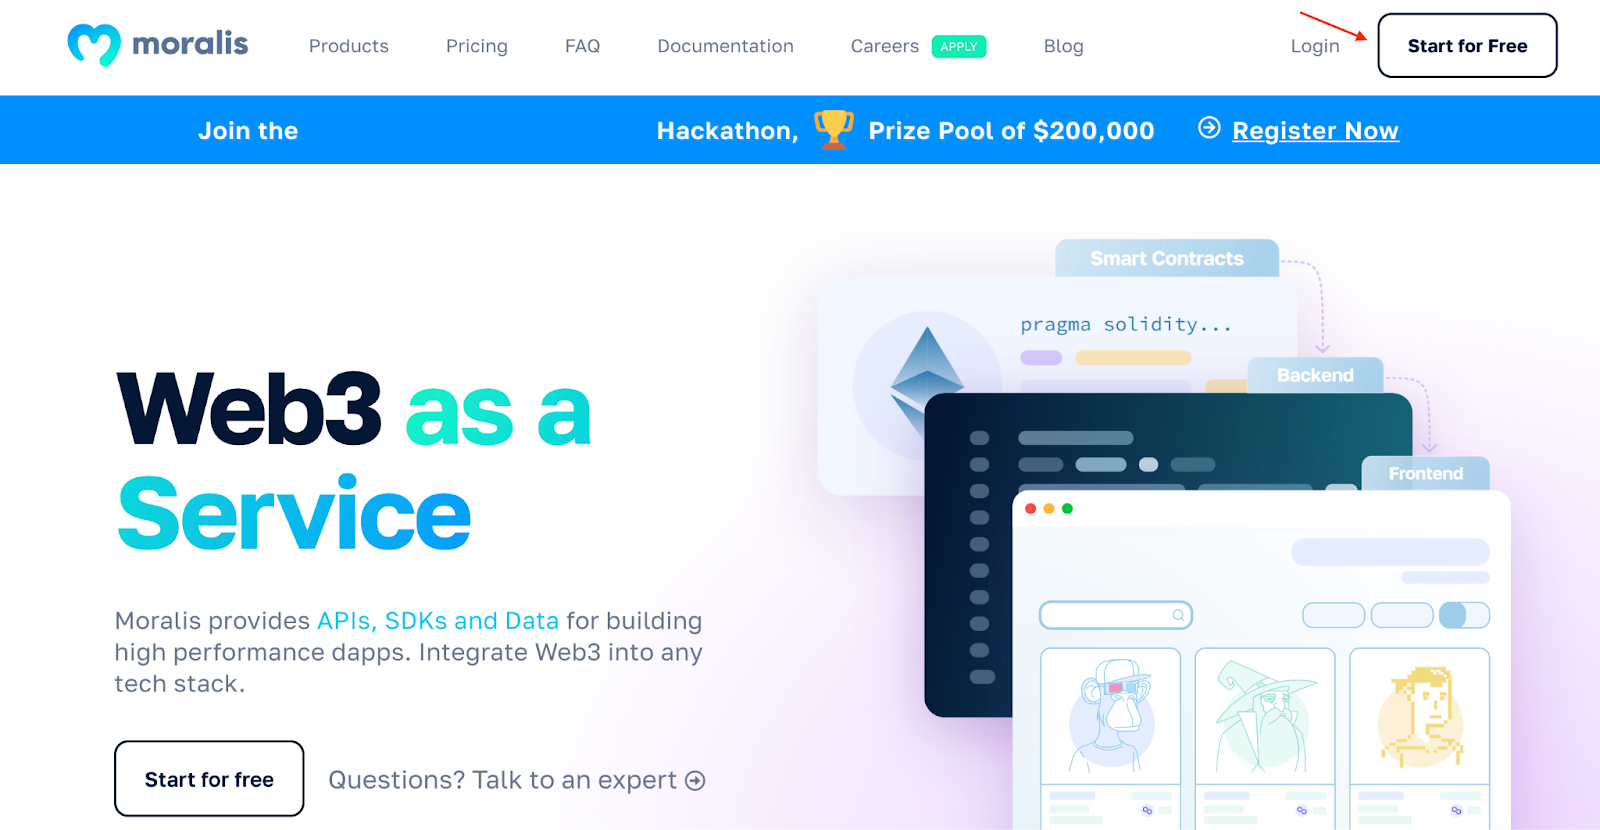
Before configuring the necessary environment variables, you will need a Moralis account. As such, if you have not already, you can visit Moralis, click on “Start for Free”, and fill in the necessary information:
With an account at your disposal, we can progress with the second step on how you build a Polygon dapp and configure the necessary environment variables. So, you can navigate back to your IDE and locate the “.env.local.example” file in your repo. The file will contain the following five variables:
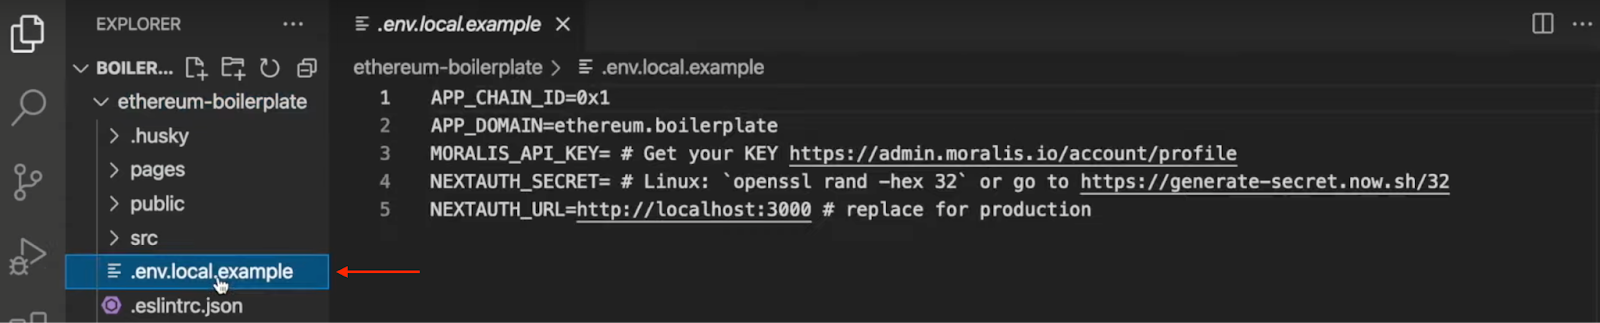
Variable Configuration for Polygon Development
So, let’s break down the variables one by one and look closer at the necessary configurations you need to consider. First, you have the “APP_CHAIN_ID” variable, initially set to “0x1“. This is the ID for the Ethereum blockchain. However, since this is a guide on how to build a Polygon dapp, you need to alter this variable. Moreover, since this is a tutorial and we remain in the development stages, we will opt for the Polygon Mumbai testnet. Accordingly, you can change “APP_CHAIN_ID” to equal “0x13881“, which corresponds to the Polygon Mumbai chain ID.
The second variable, “APP_DOMAIN“, can be left unchanged. However, the third variable, called “MORALIS_API_KEY“, is one you need to consider. This variable needs to equal your API key. To get the key, log in to Moralis, click on “Account”, navigate to the “Keys” tab, and hit the copying button for the Web3 API key. All you need to do from there is set the variable to this value.

Next, you must add a value to the “NEXTAUTH_SECRET” variable. You can use the following link to generate a number: https://generate-secret.now.sh/32.
Finally, you have the last “NEXTAUTH_URL” variable, currently equal to “http://localhost:3000“. You can leave this one as is for now as you remain in the development stages. This allows you to run the dapp on a local host and test it in a safe environment. However, once you plan on launching the dapp, you need to change this value to fit the URL of your dapp.
Now that is it for the variable configurations. All that remains is to rename the file to ”.env.local”, and the final content should look something like this:
APP_CHAIN_ID=0x13881
APP_DOMAIN=ethereum.boilerplate
MORALIS_API_KEY= "YOUR_API_KEY"
NEXTAUTH_SECRET= b8e786967d7bcbc0f920d35bcc3f891c
NEXTAUTH_URL=http://localhost:3000
Step 3 – Starting the Polygon Dapp
Now that we’ve configured the environment variables, all that remains is to start the application. However, before doing so, you need to install some dependencies. This is relatively straightforward, and you simply need to input one of the following commands into the terminal:
npm i
yarn
From there, you can start the application with either of these:
npm run dev
yarn run dev
This will start the Polygon dapp, which will run on local host 3000. You can launch the dapp through the URL specified in the previous step: http://localhost:3000.
Now that is it for this brief guide on how to build a Polygon dapp. From here, you can use this template as a foundation for your future dapps. So, it is now up to you to implement additional features or remove the ones you deem unnecessary!
If you want inspiration for your first project, consider checking out Moralis’ Web3 blog. You can, for example, learn about different types of DAOs or blockchain syncs, which can be helpful in your future blockchain development endeavors.
In addition, consider checking out additional Moralis tools. For example, the platform makes it easy to implement Web3 streams or create Web3 webhooks. However, these are only a few examples of how Moralis can provide a more seamless developer experience. As such, if you want to become a blockchain developer, sign up with Moralis straight away!
How to Build a Polygon Dapp – Summary
This article features a guide on how you can build a Polygon dapp using the following three steps:
- Cloning the Ethereum Boilerplate
- Configuring Environmental Variables
- Starting the Polygon Dapp
The accessibility of this process originates from Moralis’ Ethereum boilerplate, which is the fastest way to build a Web3 app. Furthermore, as Moralis features cross-chain compatibility, it is possible to use the template to build dapps for all EVM-compatible blockchains, including Polygon!
What’s more, it is even possible to use Moralis’ Ethereum boilerplate to create dapps for the Solana network. So, if you are especially interested in Solana programming, we recommend you take a closer look at Moralis’ Solana API. This tool allows you to create sophisticated dapps and Web3 projects for Solana.
Moreover, it does not matter if you are looking to build a Polygon dapp or projects for the Solana network; Moralis will aid in all these processes. As such, you should sign up with Moralis immediately and enjoy a more seamless developer experience!
