When developing dapps (decentralized applications), it is essential to use live on-chain data to provide a more compelling UX (user experience). What’s more, when dealing with live data, you need to ensure proper syncing, especially when it comes to blockchains where on-chain events occur regularly. These frequent occurrences make it urgent and essential to implement reliable Web3 syncing for all future projects. However, this has unfortunately been quite cumbersome and a resource-intensive process in the past as it can be challenging to index blockchains. Fortunately, the Web3 development space has come far, and the limitations of RPC nodes are no longer an issue. Moreover, with Moralis’ Web3 syncs, you can make blockchain syncs effortlessly. This tool allows you to index and sync smart contract events, which is essential when it comes to blockchain syncs!
As you probably know, smart contracts are essential for programmable chains such as Ethereum, BNB Smart Chain, etc. Web3 contracts are basically pieces of software existing on-chain powering these blockchains. These contracts ensure that predefined actions execute upon meeting predefined conditions. As essential features of the Web3 development world, we need information regarding smart contacts, and the best way to implement Web3 syncing is through Moralis.
However, this is only one of the areas in which Moralis shines. Along with excellent service for blockchain syncs, Moralis makes both Web3 authentication and Web3 webhooks more accessible. Furthermore, Moralis offers some of the market’s best APIs (application programming interfaces). Among the interfaces, you will find both the Web3 API and NFT API. These allow you to create both dapps and NFTs with ease!
So, if you want to become a blockchain developer, create your Moralis account right now! You can sign up for free; it only takes a couple of seconds.
What are Smart Contract Events
Before diving deeper into blockchain syncs, it is essential to ensure that you know the basics. For this reason, we need to explore the intricacies of smart contract events. In their simplest form, smart contracts are codified agreements between two or several parties. What’s more, as was mentioned in the introduction, these agreements execute predefined actions when predefined conditions are met. If you would like to learn more about smart contracts, please check out our article that explores smart contracts even further.
With a better understanding of what smart contracts entail, it is pretty simple to understand what smart contract events are. Smart contract events are essentially events that occur when something meaningful happens within these contracts based on their code. As such, smart contract events are basically a signal that smart contracts emit. These signals can be used by dapps, additional smart contracts, or other Web3 projects to communicate.
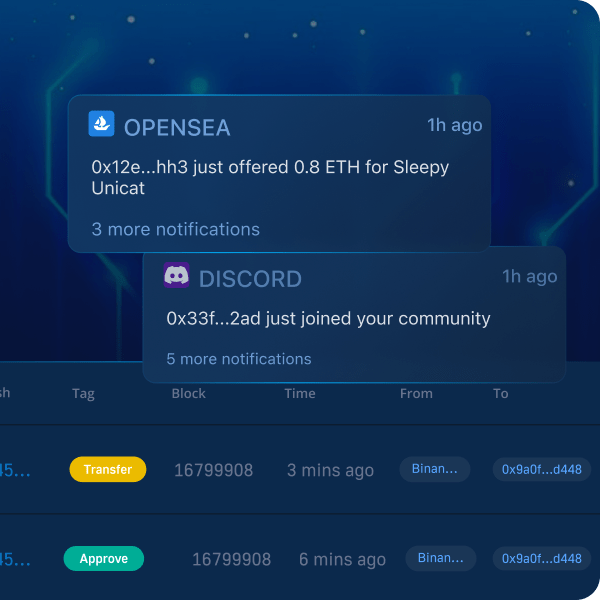
To make smart contract events more understandable, we can look closely at the ERC-20 token standard for smart contracts. Tokens implementing this standard emit an event whenever someone sends a token. Moreover, these events generally contain more information. For example, there is more detailed information regarding transactions when users trade tokens. Based on this information, it is quite clear that blockchain syncs play an essential role in the development of dapps and other blockchain projects.
Now, with a more profound understanding of smart contracts and their events, we can move forward and take a closer look at Web3 syncing. In the following sections, we showcase this simple task and highly encourage you to follow along. This will allow you to learn the intricacies of blockchain syncing. Also, it will enable you to create more sophisticated dapps in the future.
Blockchain Syncs with Moralis
As NFTs, or non-fungible tokens, have continuously made headlines throughout 2021 and 2022, we will exemplify how to implement blockchain syncs by indexing and syncing smart contract events for CryptoPunks. In addition, we will assume we already have a dapp in which we need to track these NFTs. Based on this, we need real-time and historical data regarding the CryptoPunks collection.
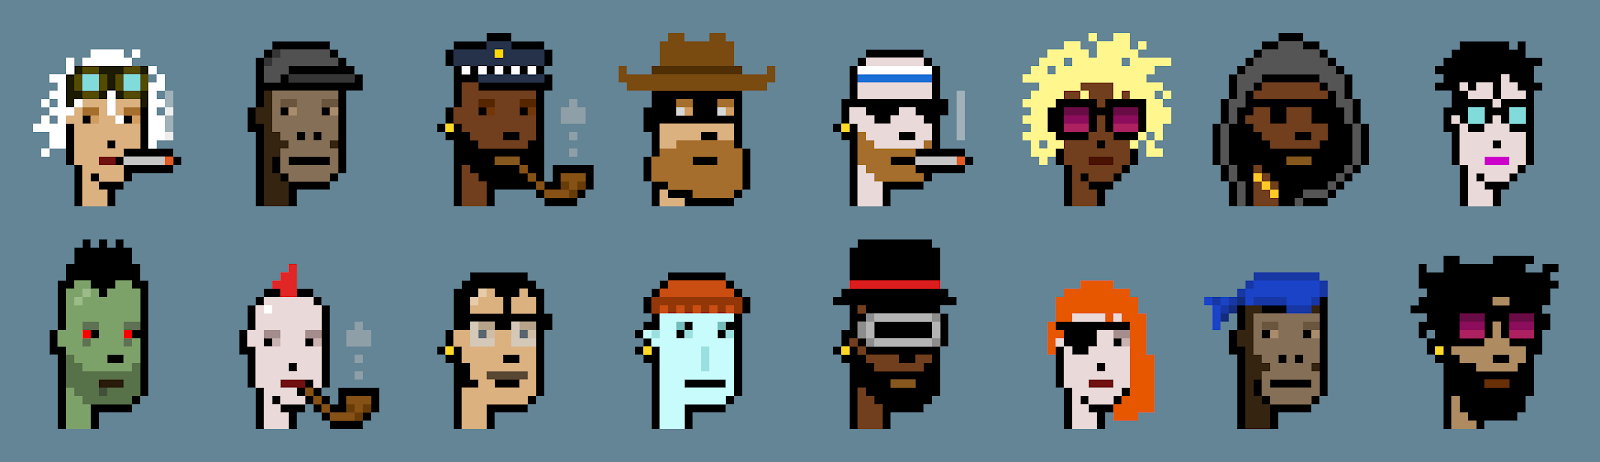
CryptoPunks implement the ERC-721 token standard, meaning an ERC-721 contract runs the show. This makes it easier for you to apply blockchain syncs to transfer events occurring through the CryptoPunks contract. Nonetheless, in order to create blockchain syncs with Moralis, you must take care of the simple initial setup of creating a Moralis dapp.
Moreover, if you have a further interest in NFT collections such as CryptoPunks, we encourage you to learn more about creating your own collection. As such, make sure to check out our article and learn to begin generating NFTs in minutes.
Creating a Moralis Dapp
To obtain the power of Moralis’ backend infrastructure and functionality, we suggest creating a Moralis dapp. Furthermore, creating a decentralized application is important for blockchain syncs and the indexing of smart contract events. So, to create a Moralis account, the first thing you will need to do is create a Moralis account.

With an account at hand, you can initiate the setup process by clicking on the “+ Create New Dapp” button. This will open up a small window within your browser where you need to select the environment, region, and name of your dapp.
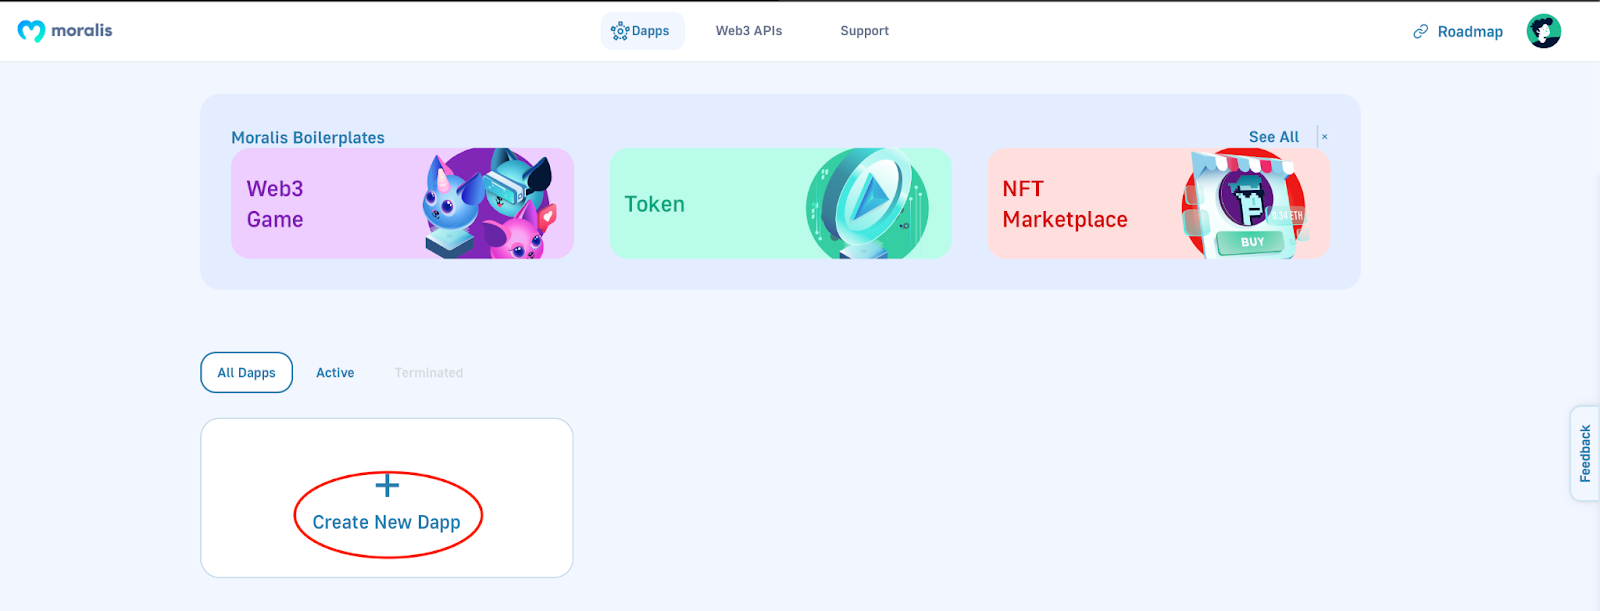
In our case, when it comes to the environment, we will select the “Mainnet” alternative and opt for the Ethereum mainnet. Once you’re done with all your options, you can simply click the “Create Your Dapp” button, which will spin up your very own Web3 project in no time!
Blockchain Syncs – Example Project
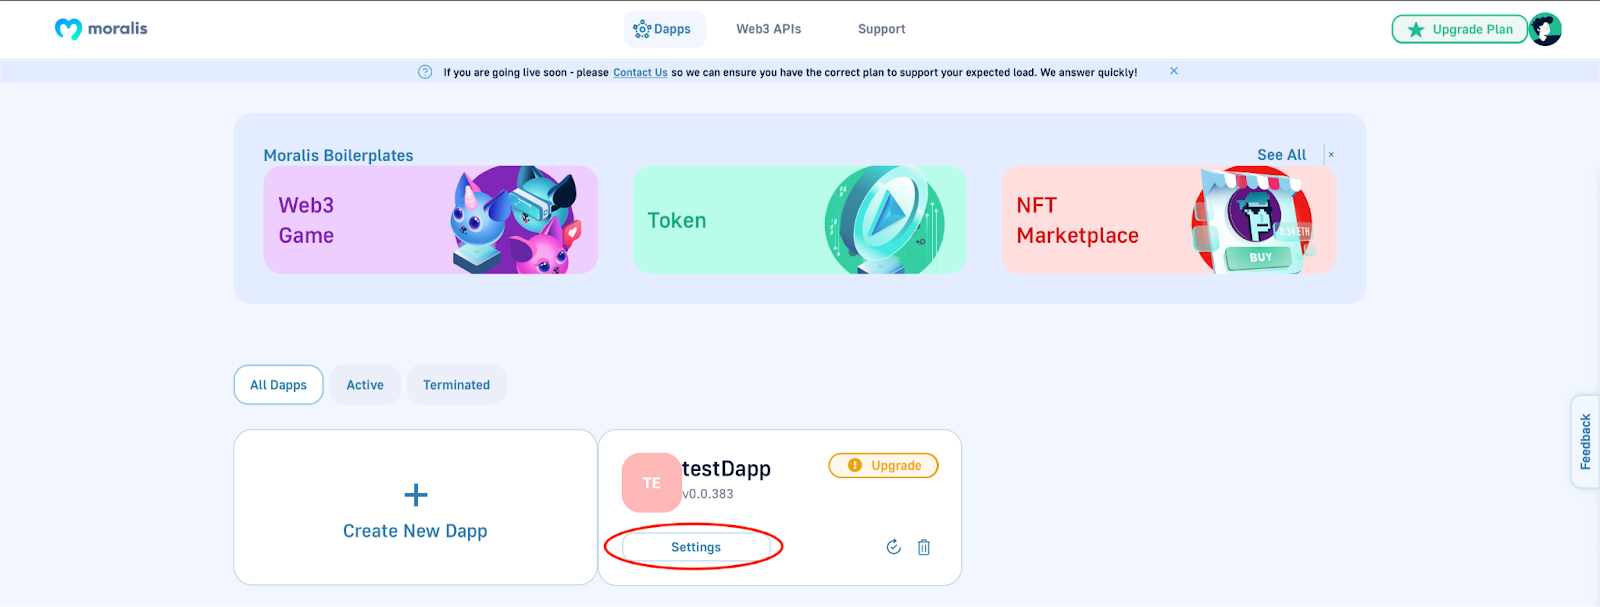
With a dapp at your disposal, the next step in setting up blockchain syncs with Moralis is to click on “Settings” for the dapp in question:
From there, you can proceed by hitting the “Syncs” tab in the navigation bar to the left and clicking on “+ New Smart Contract Event Sync”:

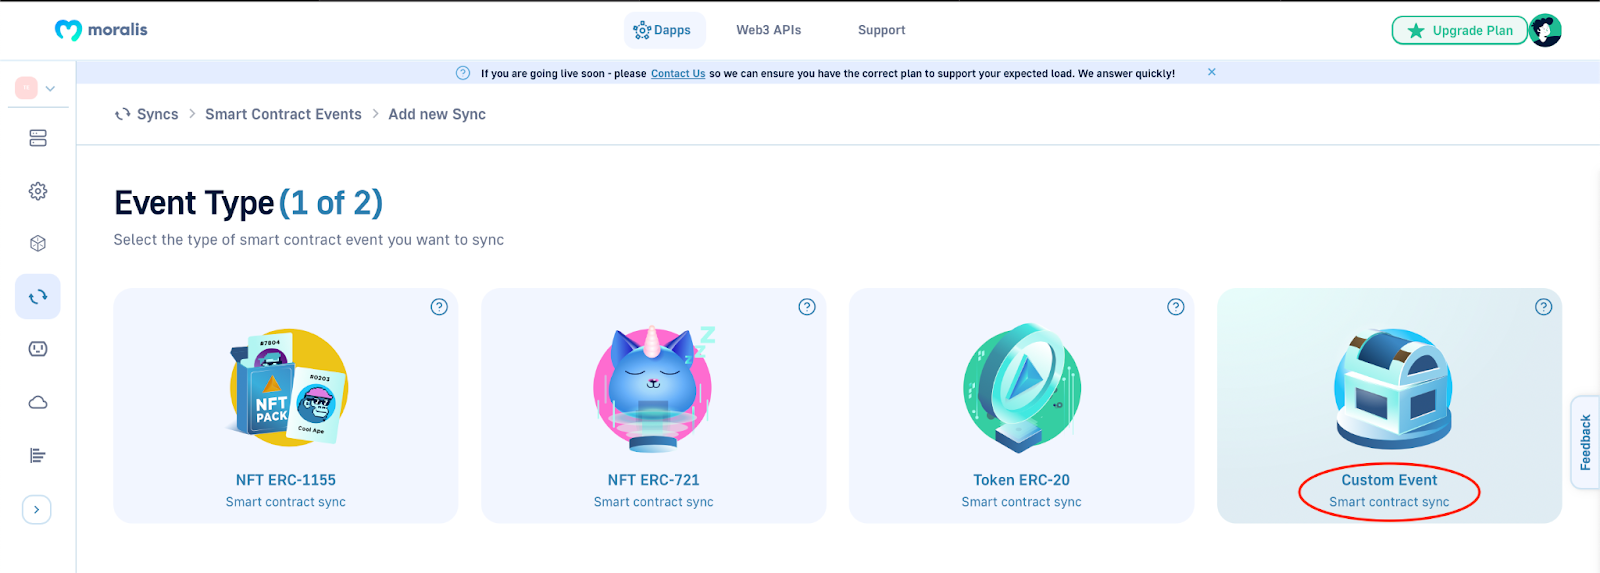
Next up, you will have four options. As our project relates to the CryptoPunks collection, we need to click on the “Custom Event” alternative. This will bring you to the second stage or page for blockchain syncs.
The second page, or “Syncs Settings (2 of 2)”, is where you need to enter specific information in alignment with the project’s goal. Thus, in our case, we need to add data that allows us to track CryptoPunks transfers. However, since you are working with Moralis, this process becomes relatively accessible. All you need to do is copy-paste publicly available on-chain data!
Using Publicly Available On-Chain Data for Blockchain Syncs
In the following few sections, we cover the steps necessary to complete the blockchain syncs for the on-chain events of our CryptoPunks project. However, this is simply an example project. Accordingly, applying this knowledge in your development endeavors is up to you.
If you have followed along in our article, you should be at the second part of the sync settings. In addition, this means you should have an “Address” entry field at the top of your Moralis admin panel:

This “Address” is a contract address that, in this case, should relate to CryptoPunks. You can easily obtain this information using Etherscan, which we will cover in the next section.
Obtaining the Contract Address with Etherscan
Once you open Etherscan, you can use the search option and type in “CryptoPunks”. In addition, make sure to select the verified option:
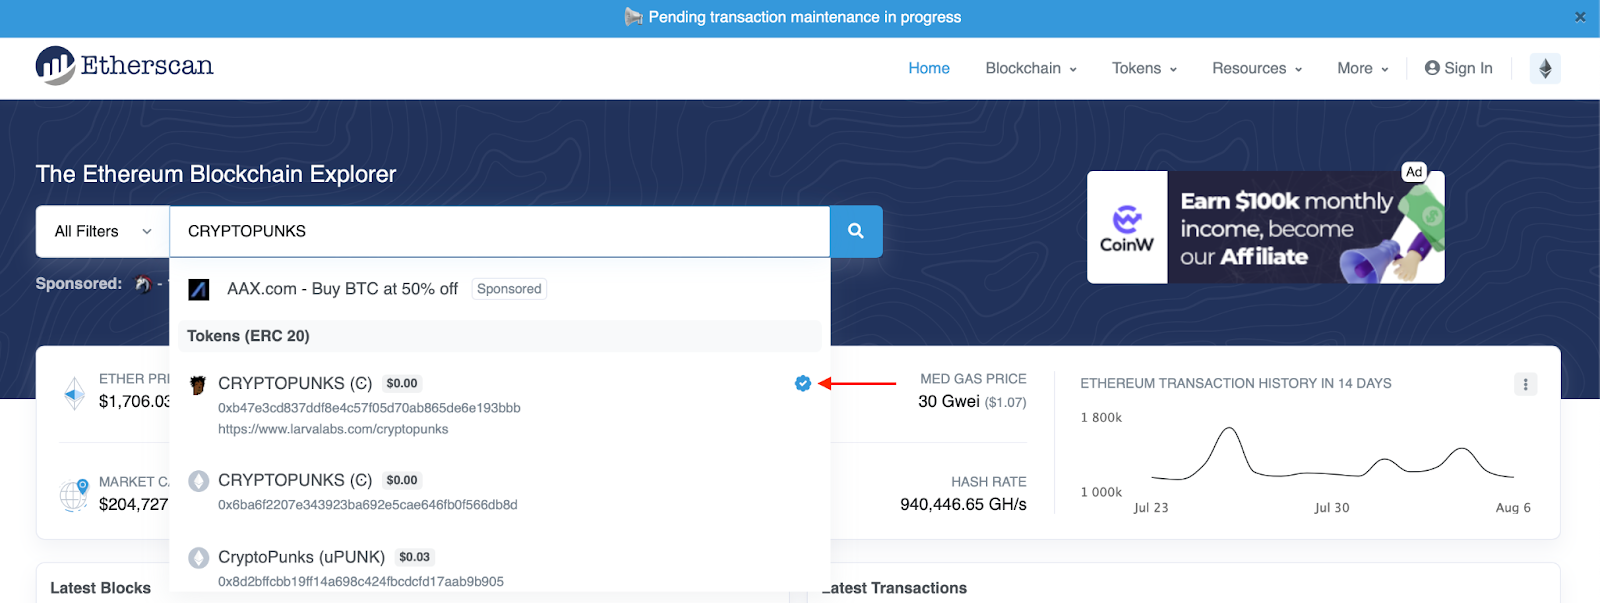
Following this, you need to copy the contract address by clicking on the “copy” icon at the bottom right:

With this at your disposal, the next step is to navigate back to Moralis and paste the address into the correct field. Below the input field for the address, you can see “Eth Mainnet”. This is automatically selected as we chose this chain when setting up the dapp in the previous step.
With the contract address added from CryptoPunks, the next step is to find and input the ABI. As such, we will explore this process in more detail in the following section.
Acquiring the ABI with Etherscan
The next piece of information we need to fetch is CryptoPunks’ contract ABI, which is also available on Etherscan. To get the ABI, you first need to click on the contract address we fetched in the previous stage.
From there, you need to scroll down a bit. You will then come across a horizontal navigation bar with a few options. Among the different alternatives, you can proceed by clicking on the “Contract” tab. Once you click on this tab, you must also ensure that you are in the “Code” section.
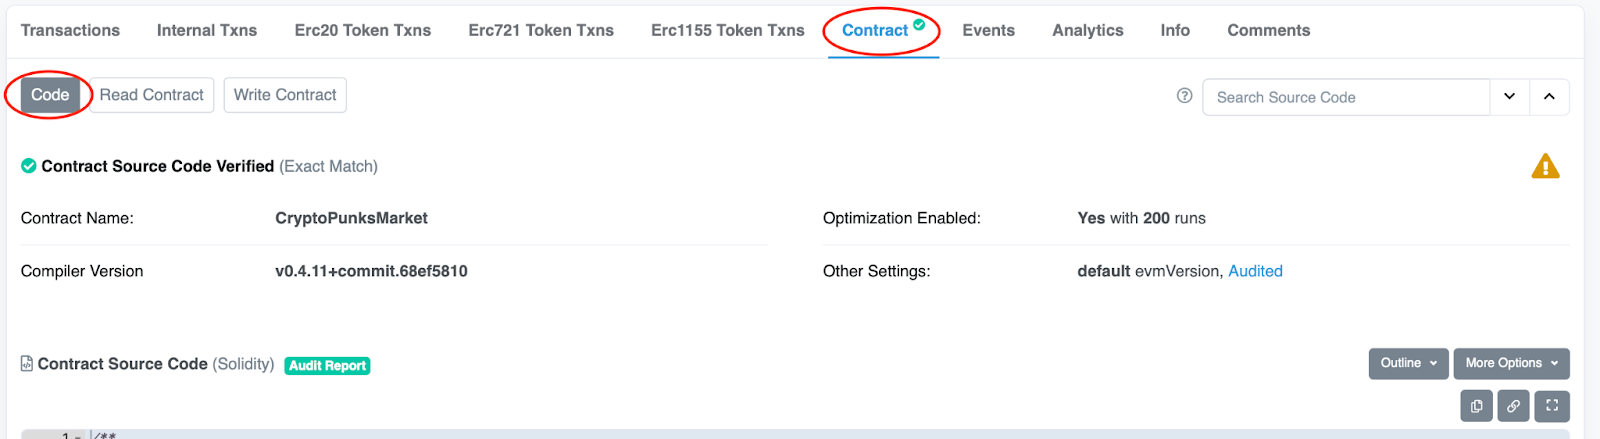
Furthermore, you then need to scroll down to the section labeled “Contract ABI”:
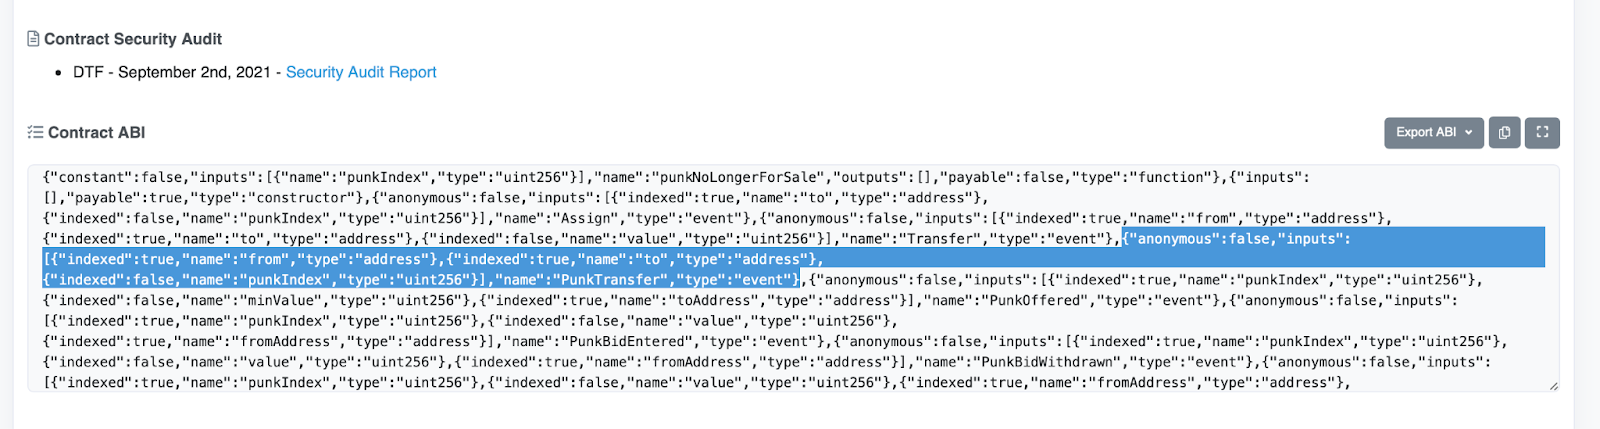
This is a relatively long and cumbersome array; however, we only need a specific part of the entire code. In our case, we are interested in the “PunkTransfer” part of the ABI. As such, all you need to do is locate this object and copy it.
With the ABI at hand, you need to navigate back to Moralis and paste the ABI into the appropriate section. What’s more, ensure that you include squared parenthesis around the ABI. With the ABI pasted, you need to select the right topic. However, you will, in this case, only have one option to pick.
Name, Description, and Historical Data
Next up, you need to name the table, and you can essentially name it whatever you like. However, in our case, we are going to set the table name to “TransferPunks”. What’s more, you can use the same name for the description.

Moreover, as we mentioned previously, we would like to include historical events. Therefore, we need to enable this alternative and enter the maximum number of historical events we want to include.

Lastly, we would like to click on the “Proceed” button at the bottom right. This will result in a new blockchain sync element inside your dapp’s “Syncs” settings tab.
Now, that is it for creating a blockchain sync! Let’s continue and take a closer look at the final result and what we get for creating these syncs. As such, in the following section, we will take a closer look at the results of the blockchain syncs.
Results of the Blockchain Syncs
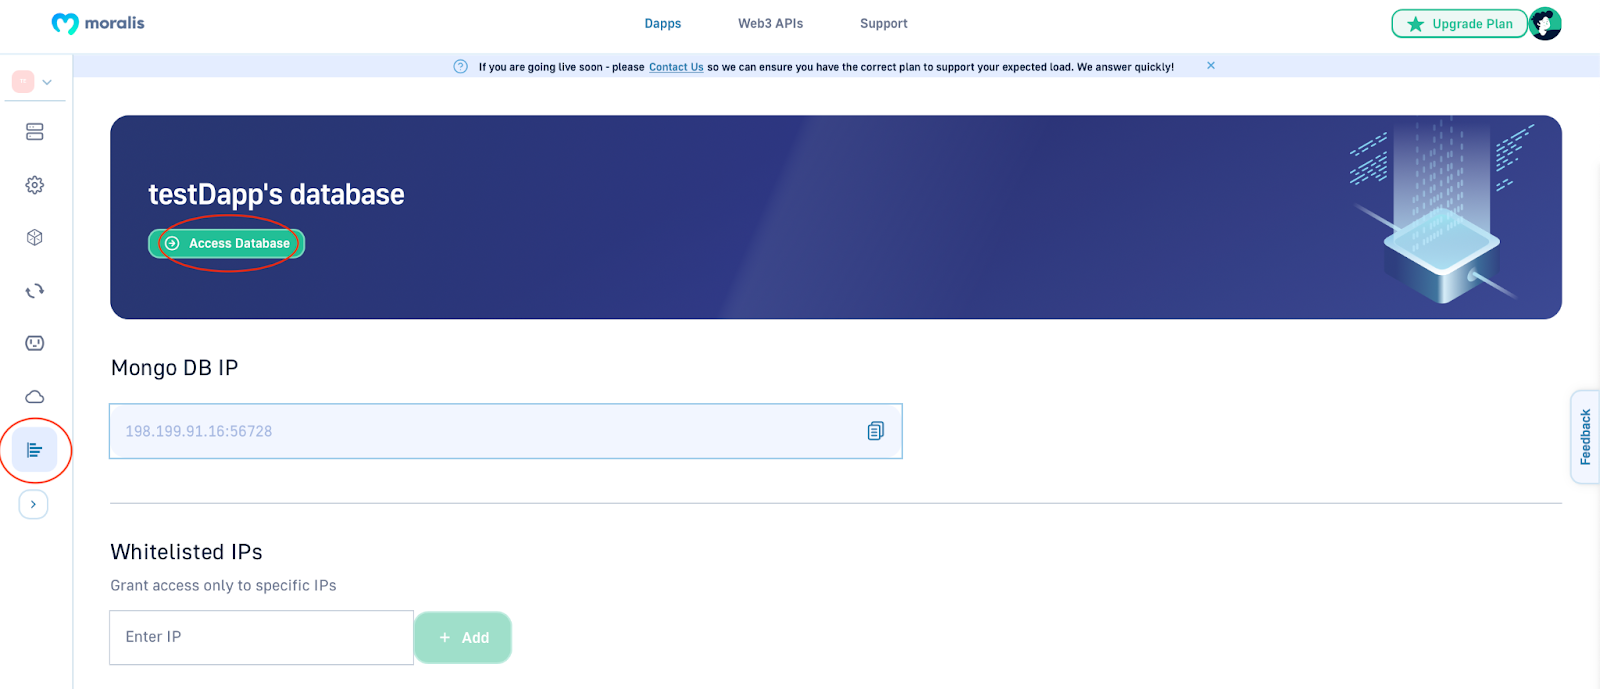
With the blockchain sync all established, you will be able to view all details regarding related events in your database. To access this information, you need to, once again, click on your dapp’s “Settings” button. From there, you need to navigate to the tab for your dashboard and click on the “Access Database” button:
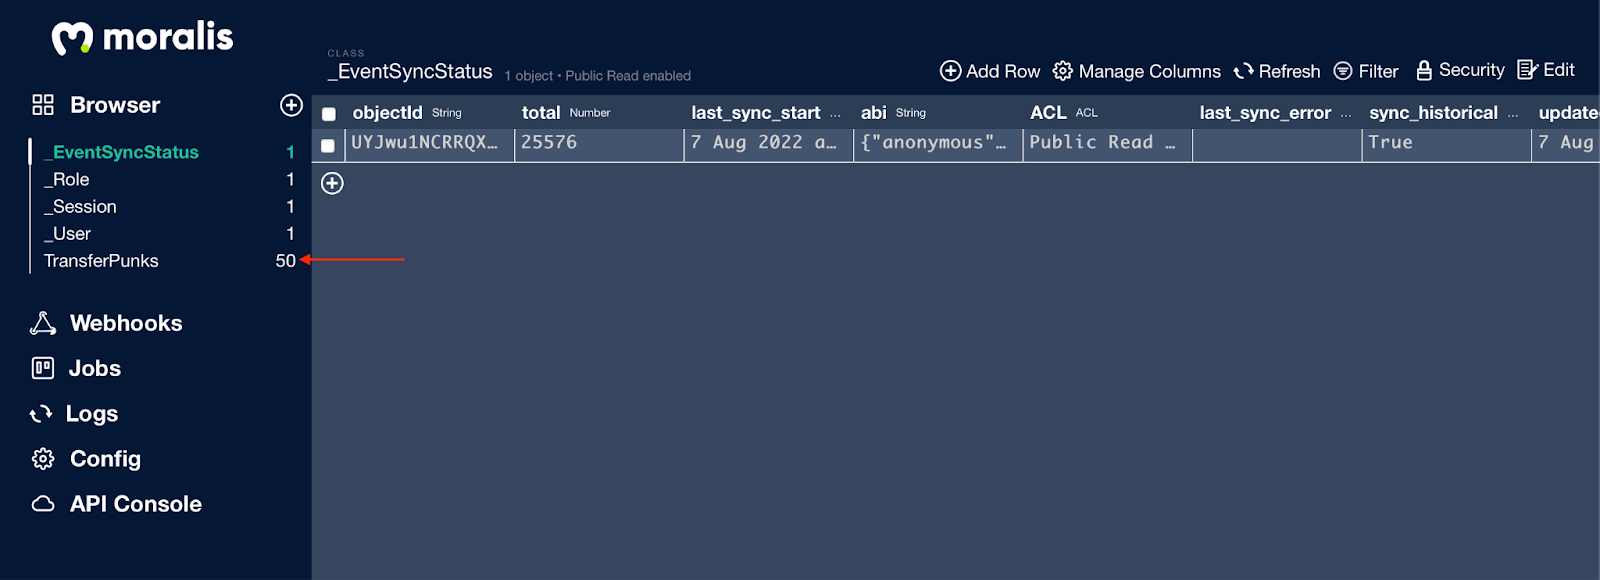
In the dashboard for the database, you will now see the “TransferPunks” class. This was autonomously added through your new blockchain syncs. Moreover, it will look something like this for you:
If you would rather prefer to watch a video of the entire process, please check out the clip from Moralis’ YouTube channel. In this video, one of our developers takes you through the essential steps of setting up your very own blockchain syncs in more detail:
Blockchain Syncs – Summary
Throughout this article, you had the chance to learn what blockchain syncs are and how to implement one yourself. Initially, we explained the intricacies of smart contract events. Following this, we showcased how to effortlessly create your own blockchain syncs. Through this, we could create a simple dapp (decentralized application) fetching on-chain data regarding transfers for the CryptoPunks collection. As such, if you followed along, you now hopefully know how to implement your own blockchain syncs for all future Web3 projects.
If you enjoyed this guide and found it beneficial, we highly encourage you to explore the Moralis blog further. You will find tons of high-quality and interesting content, allowing you to become a more profound Web3 developer. For example, you can learn about different types of DAOs, how to create an NFT candy machine, or explore Ethereum auth.
What’s more, if you are looking to become blockchain certified, consider Moralis Academy. There, you will find the most amazing blockchain courses teaching you everything from the basics to more advanced skills.

For example, we highly recommend “Ethereum 101” or “Blockchain & Bitcoin 101” for beginners. Taking these courses will provide a good foundation for you as a developer and kickstart your Web3 journey!
Nonetheless, if you have the ambition to become a Web3 developer, sign up with Moralis right away! Creating an account only takes seconds, and you can develop dapps more seamlessly in the future.