With NFTs altering the gaming industry, how certifications can be utilized, etc., non-fungible tokens have been the most impactful blockchain use case so far. As such, pioneers within the blockchain space have developed and introduced products that enable users to mint NFTs easily. One of these products is Metaplex’s NFT Candy Machine. This NFT Candy Machine allows users to mint NFTs and set up digital art collections easily on the Solana blockchain. However, while there were some vulnerabilities with Candy Machine v1, Candy Machine v2 solves many of them. Now, if you’d like to make a v2 NFT Candy Machine, you’ve come to the right place!
We will initially cover some basics to get you all up to speed as we move forward. Then, we will take on an example project where we will use Metaplex’s NFT Candy Machine to mint a simple NFT collection. As such, we will take you through the following stages:
- Complete the initial setup for Candy Machine v2.
- Demonstrate how to create a Solana wallet on your local computer.
- Walk you through the Candy Machine v2 configuration.
- Show you how to prepare the assets (images and metadata).
- Create our instance of Metaplex’s NFT Candy Machine and upload the assets to Arweave.
- We will utilize our NFT Candy Machine to create an example NFT collection.
- We’ll show you how to verify if assets were uploaded properly.
- Finally, we’ll mint our Solana NFT tokens.
Prerequisites for Using NFT Candy Machine
Understanding the basics before using NFT Candy Machine is quite important. This includes knowing what Solana NFTs are and what Metaplex is. Let’s start by pointing out that Solana is a popular programmable blockchain. It’s one of the “Ethereum killers”, as many like to call other programmable chains. Moreover, Solana is not EVM-compatible; thus, it relies on its own tools, starting with Web3 wallets. Also, this programmable chain has its own smart contracts, known as “on-chain programs”.
These programs ensure that things run smoothly, such as executing automatic actions according to predefined rules. Furthermore, these programs are also what we use to mint NFTs on Solana. In addition, it’s also worth pointing out that Solana has its token standard (the SPL standard). The latter covers fungible and non-fungible tokens. Save our “What is Solana?” and “SPL vs ERC20 Tokens” articles for later reading!
It is also worth mentioning that non-fungible tokens (NFTs) are special types of crypto assets. NFTs have a set of unique properties, making them suitable for digital collectibles and digital art representation. Moreover, NFT utility offers countless opportunities in the digital and real world.
On the other hand, Metaplex is a popular NFT ecosystem for marketplaces, games, arts, and collectibles. The Metaplex protocol has been providing standards and tools to support NFT development. Among other solutions, Metaplex enables developers to create NFTs in a decentralized manner. Essentially, Metaplex is a combination of smart contracts and tools, which makes creating and launching NFTs simpler. The latter currently come in two forms: Metaplex Storefront and NFT Candy Machine. The latter is an NFT minting tool that we will use herein to mint Solana NFTs.
Create an NFT Candy Machine with Metaplex
Now that you know the basics, you are ready to focus on this article’s example project. As mentioned in the introduction, we tackle it in eight stages. As such, it will be easy for you to follow along, even if you are new to the crypto realm!
In the first stage, we will show you how to complete the initial NFT Candy Machine v2 setup. To further simplify things for you, we also made our code available on GitHub. In the next stage, you’ll see how to set up a local Solana wallet. Then, we’ll take a closer look at the Candy Machine v2 configuration. The fifth stage will be all about preparing the assets and uploading those assets to Arweave. Next, you’ll find out how to create Candy Machine collections. You’ll also learn how to verify uploads. Last but not least, we’ll show you how to use NFT Candy Machine to mint Solana NFTs.
Note: To help us cover all of the stages in more detail, we will also refer to a video tutorial, which you can find at the end of this article.
The Initial Setup for NFT Candy Machine V2
Following are the tools you need to use NFT Candy Machine v2:
- Git
- Node.js
- Yarn (a package manager)
- Ts-node
You need Git for cloning the repository, Node.js as JavaScript runtime, Yarn to install the required dependencies, and TypeScript node (ts-node) as an execution environment.
Note: Install additional dependencies (“brew install pkg-config cairo pango libpng jpeg giflib librsvg”) if you are using an Apple M1 chip.
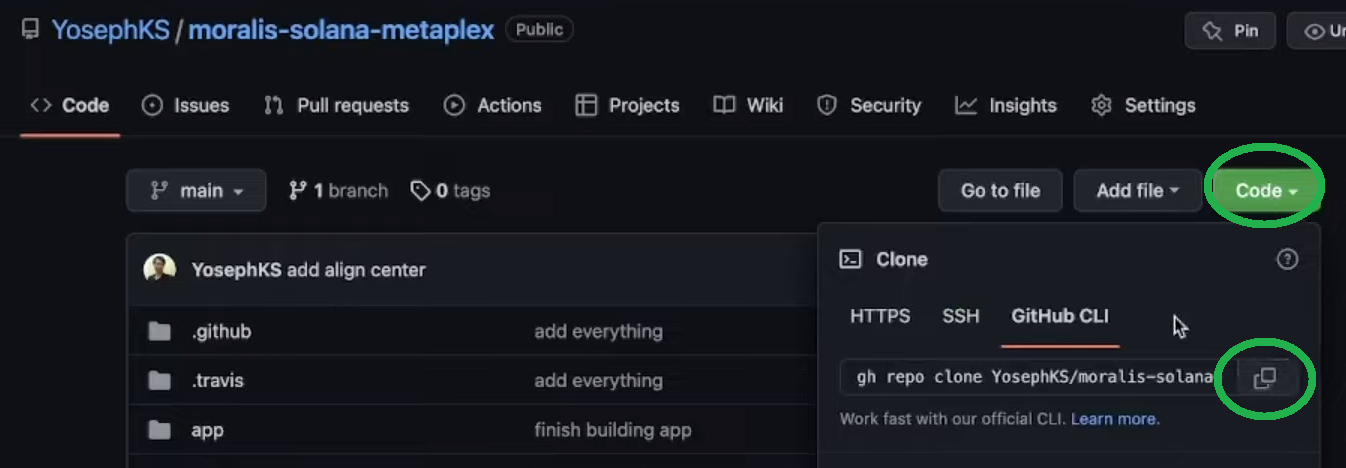
Once you have the above tools set in place, go ahead and clone and install Metaplex. You could use the URL provided by the Metaplex docs; however, we recommend you use our code. The latter is modified in a way to help you follow this tutorial. It also includes specific code from Moralis, which will enable you to take things to the next level. Thus, click on the “GitHub” link above and clone our code:
Your Local Solana Wallet
In the “Prerequisites for Using NFT Candy Machine” section above, you learned that NFT Candy Machine operates on the Solana blockchain. This means you need a Solana wallet with enough SOL (native cryptocurrency on Solana) to cover transaction fees. After all, as you may know, to deploy the on-chain programs, you need to execute on-chain transactions. Fortunately, you can use the Solana Toll Suite feature to create a local wallet effortlessly.
Note: It’s important to keep in mind that local wallets are not very safe. Thus, use them only for development purposes and not to store greater amounts of funds.
Here are the steps you need to complete to create your local Solana wallet:
- Enter the “solana –version” command into your terminal.
- Use your terminal and enter the “solana address” command.
- Finally, enter the “solana balance” command.
Note: If you don’t have your Solana address yet, you can set up your new devnet wallet. In that case, use the Metaplex docs as a guide.
As mentioned above, you must also have a sufficient amount of SOL in your Solana wallet. Since we are focusing on the Solana devnet, you can get SOL for free. As such, simply enter the “solana airdrop 2” command. The latter will ensure you get two SOL tokens in your wallet.
Note: Once you decide to take your NFT Candy Machine to the Solana mainnet, you will need real SOL. Hence, you’ll need to use one of the reputable exchanges to buy it and then transfer it to your wallet.
Configure Your NFT Candy Machine V2
First, open the above-cloned project in your favorite code editor. Since we are using Visual Studio Code (VSC), it might be easiest to follow our lead if you used the same IDE. You can find the configuration inside the “example-candy-machine-upload-config.json” file:
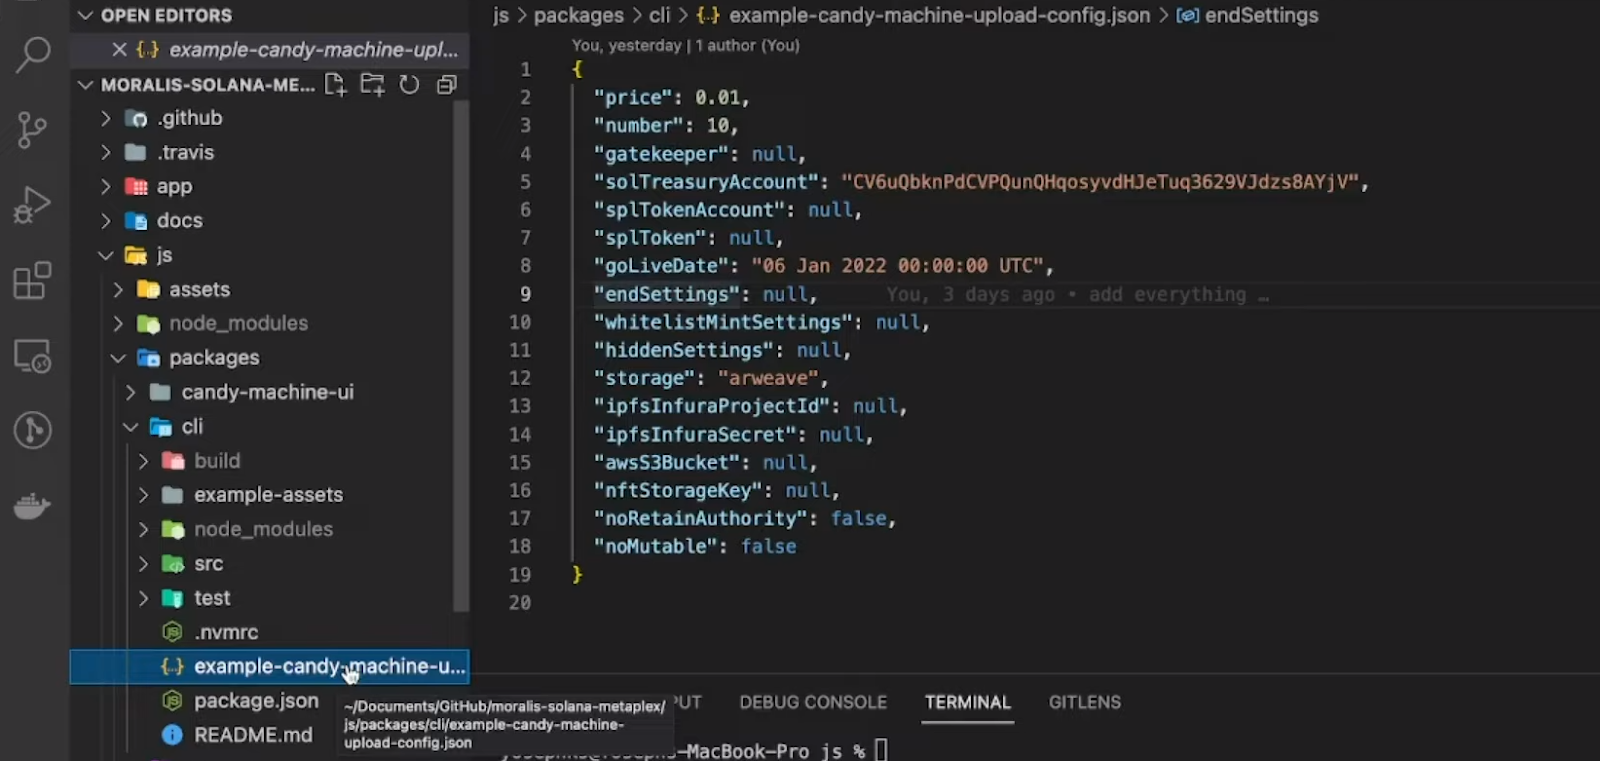
As mentioned in the intro, the above screenshot indicates that we’ll use Arweave to store our assets. But, this option is not set in stone. Accordingly, you can explore other reputable alternatives (video below starting at 4:39).
Preparing the Assets – Images and Metadata
We covered the basics of NFTs above; however, we didn’t point out that NFTs can’t be minted out of thin air. Instead, you need to have a file (e.g., an image) and metadata. The former represents the tangible part of NFTs, while the latter provides the details that are also used when minting. Moreover, the most common types of files are images (e.g., PNGs). On the other hand, metadata comes in the form of JSON files. However, since preparing assets is not the core of this tutorial, we encourage you to use our example assets for your practice run:
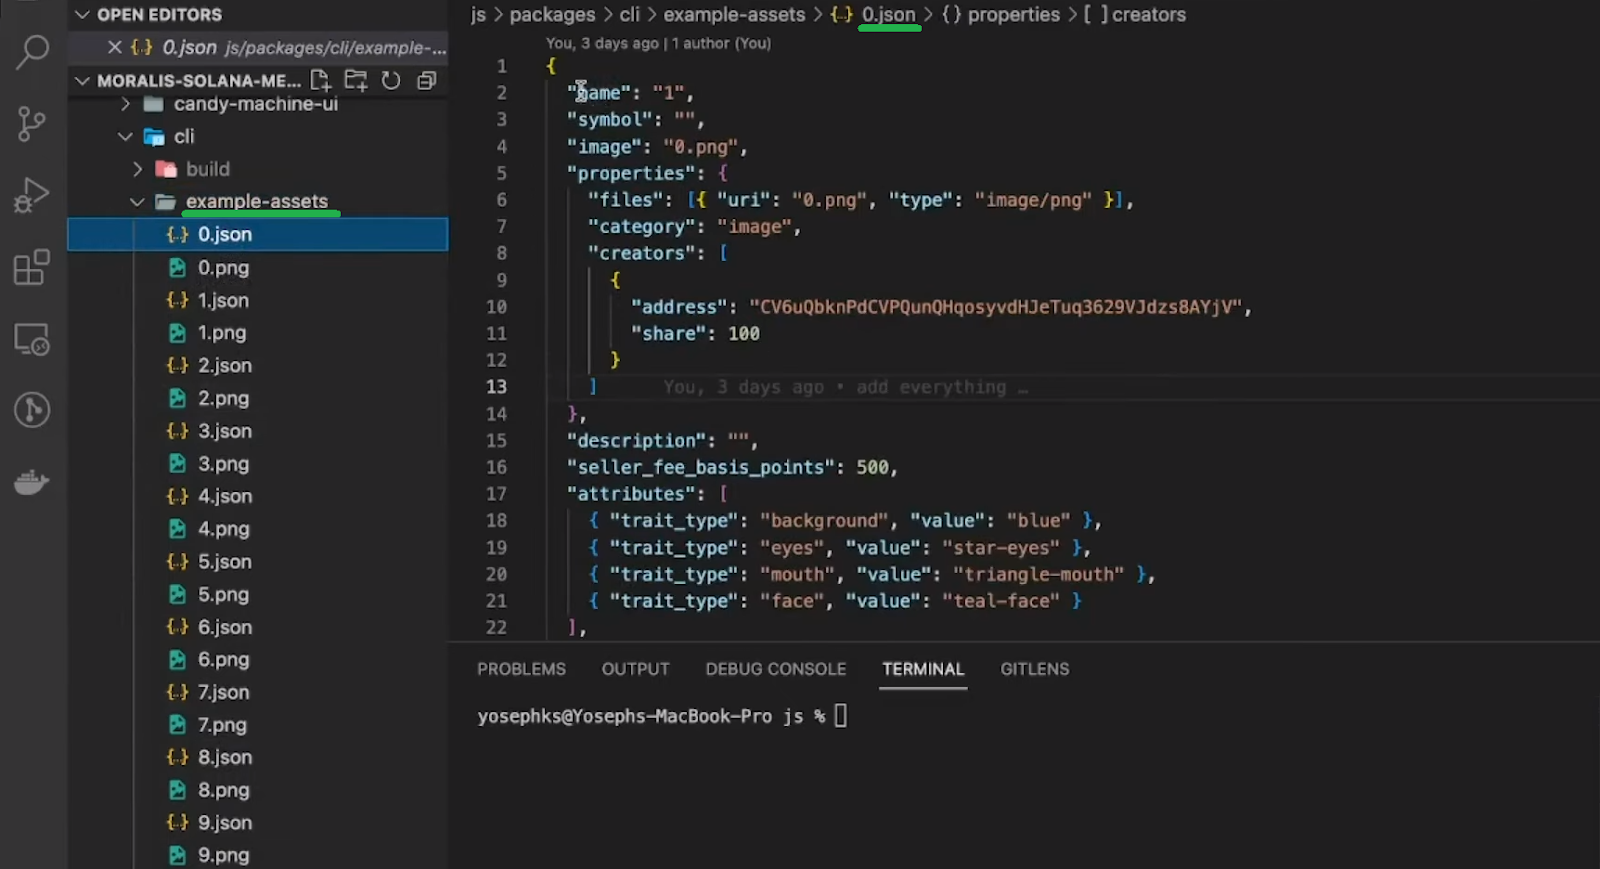
The image above indicates ten pairs of files inside the “example-assets” folder. As such, we can mint ten Solana NFT tokens. In addition, you can see the details of one of our JSON files on the right side of the image. Use the video below, starting at 7:52, for more detailed guidance. That way, you’ll also learn how to take care of optional but recommended asset verification.
Create Your NFT Candy Machine and Upload Your Assets
Use the video below, starting at 12:27, for detailed guidance on how to execute the “upload” command. The latter will upload your assets to Arweave (or another cloud service of your choosing). Essentially, you only need to copy the command provided by the Metaplex documentation and edit the paths to match this project:

The above command lines indicate that you’ll deploy your NFT Candy Machine on the Solana devnet. So, after applying all the necessary tweaks, hit “enter”. That way, your code will upload all the assets and create your instance of the NFT Candy Machine program.
Candy Machine and NFT Collections
With your assets uploaded and your NFT Candy Machine program created, you can create your NFT collections. For details, refer to the video below, starting at 15:35. However, basically, you again just need to copy the command line from the Metaplex docs. Of course, you also need to implement the necessary tweaks to match your project:
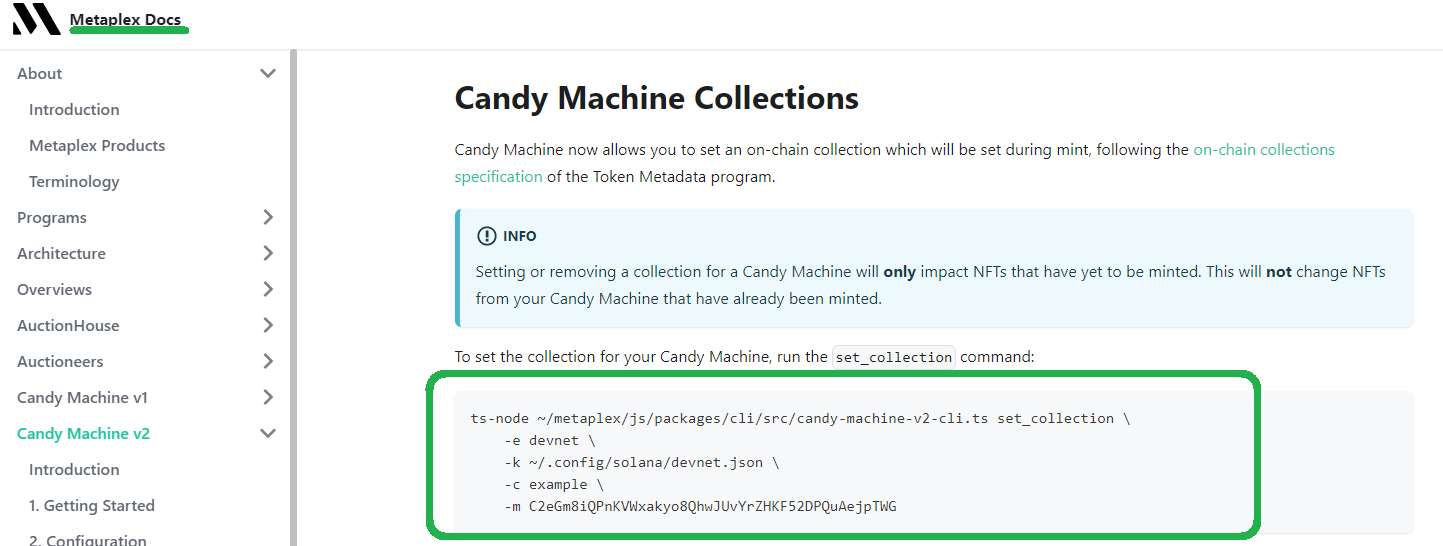
Once you run the above command, you will prepare a collection for your assets. Then, you can set this collection as part of your NFTs’ details during the mint process.
Verifying Assets Upload
Verifying assets upload is another optional but recommended step. This is a way to ensure that all of your assets are uploaded properly:
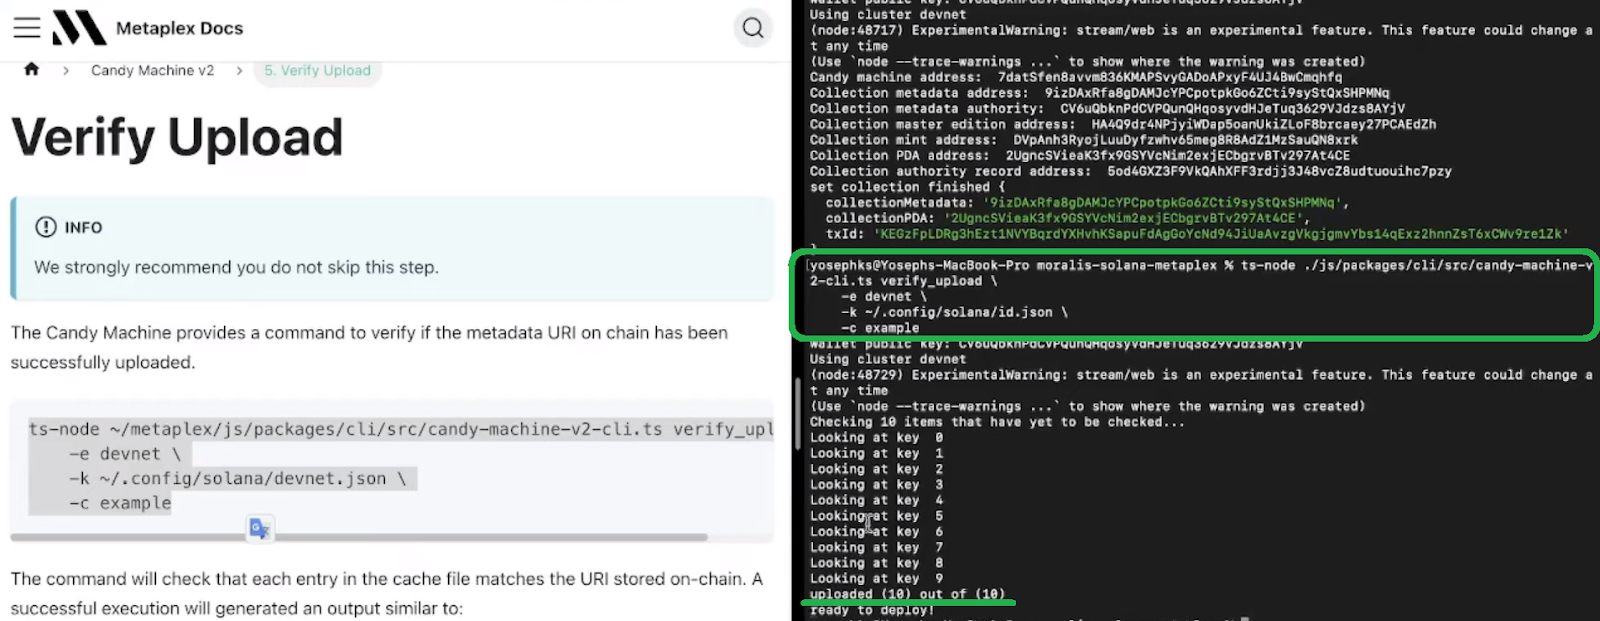
Use the video below (17:23) or visit the Metaplex documentation for detailed instructions regarding the “verify assets upload” step.

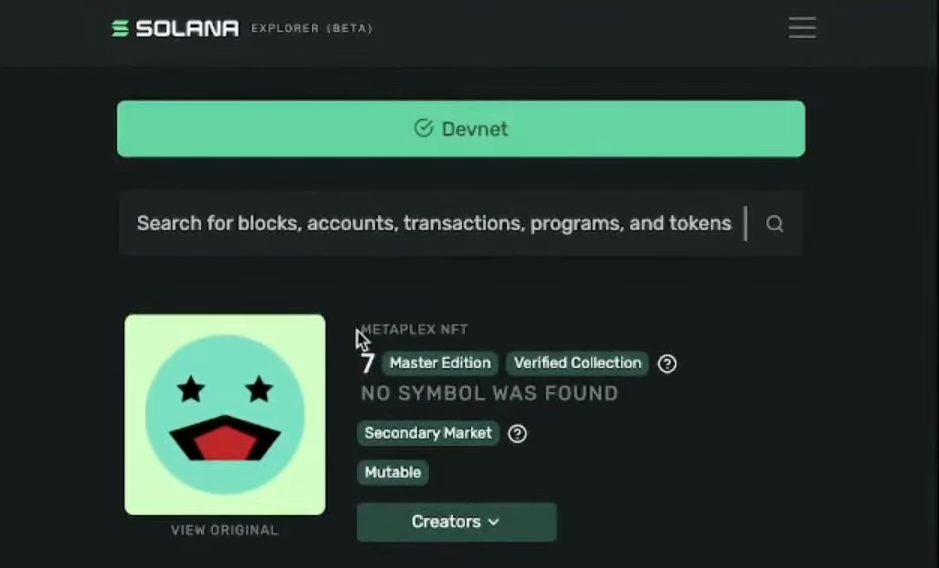
Minting Solana NFTs
By completing all of the previous stages, you can finally mint Solana NFTs (18:18). Just like with all of the above steps, Metaplex makes minting quite simple. As such, you will again copy the correct command from the Metaplex docs. But, before running that command, you need to implement the necessary tweaks to match your file paths. Nonetheless, it is also worth pointing out that you have two mining options. On the one hand, you can mint Solana NFTs individually. On the other hand, you can do batch or bulk minting, which enables you to mint multiple NFTs in one transaction.
The minting process takes your assets and converts them into NFTs. As such, you can now use the Solana explorer to view the details of those NFTs. Don’t forget to switch to devnet:
Beyond NFT Candy Machine – Create an NFT Dashboard
Now that you know how to create an NFT Candy Machine, you might be interested in taking things to the next level. Thus, we want to show you how to create an NFT dashboard. Fortunately, another powerful Web3 tool makes this a whole lot simpler. By using Moralis, the best Web3 backend platform, you can focus on the frontend. Here is an example Solana NFT portfolio tracking dapp:
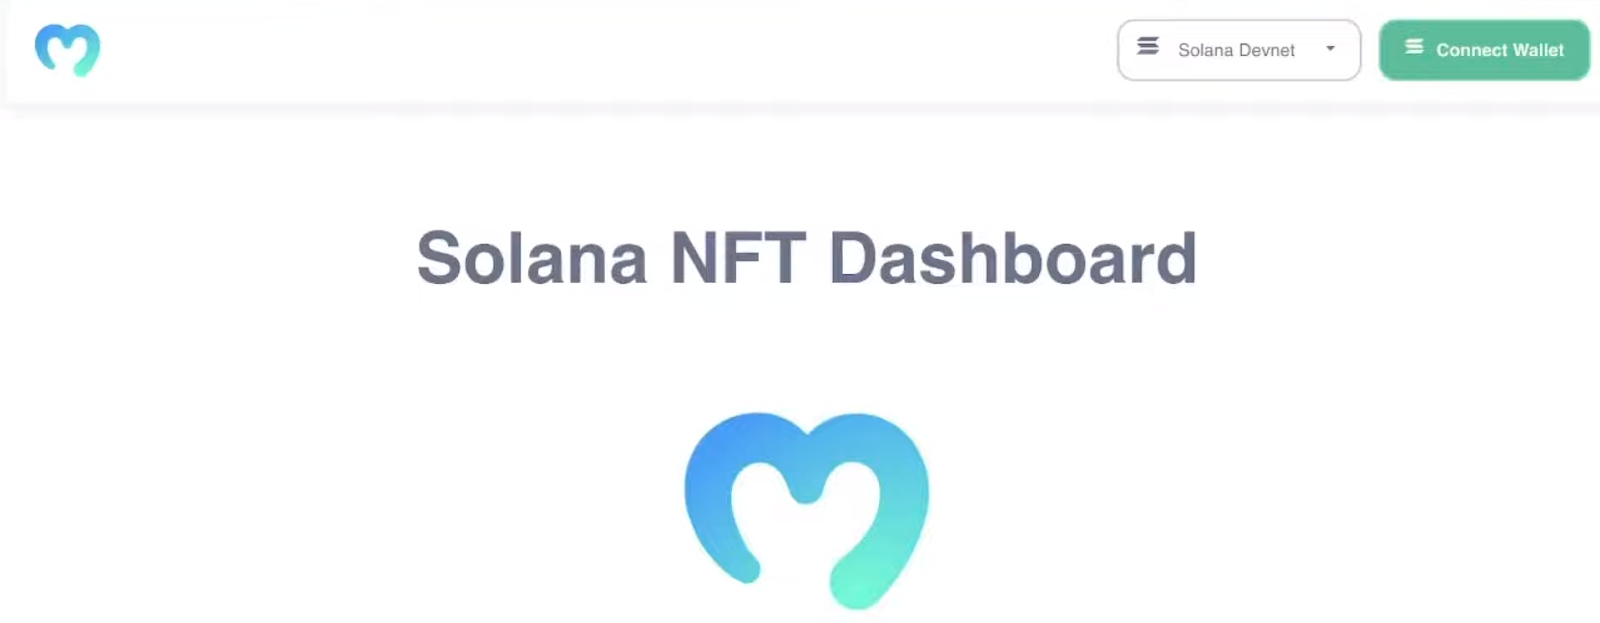
It enables you to authenticate Solana users with the Phantom wallet and neatly display NFTs:

To learn how to use Moralis’ SDK to work with the ultimate Solana NFT API and easily fetch users’ NFTs, use the video below (24:50). You will first learn how to cover the initial Moralis setup, which is the starting point of your dapp development.
How to Create An NFT Candy Machine – Summary
We covered quite a distance in our article. First, we went through the basics, where you learned what Solana NFTs are and what Metaplex is, including that Metaplex makes the minting of NFTs simpler with its NFT Candy Machine. Next, you had a chance to follow our lead and complete all eight stages to finally mint your Solana NFTs. Along the way, you completed the initial NFT Candy Machine setup and learned more about the assets that make up NFTs. Ultimately, if you followed our instructions, you now know how to use Candy Machine v2 to mint Solana NFTs both individually and in batches. Nonetheless, you also had a chance to create an NFT dashboard using Moralis.
To improve your confidence and skills, we encourage you to visit the Moralis blog and the Moralis YouTube channel. On those outlets, you can learn a lot about Solana programming and how Moralis can help you advance your programming skills markedly quicker. However, Solana development is just a small fraction of what these two outlets cover. After all, Moralis is all about cross-chain interoperability. Hence, by completing our tutorial, you can learn to become a Web3 developer for free. However, you may be interested in becoming blockchain certified. In that case, Moralis Academy is the place for you.
