Did you know that the fastest way to build a Web3 app is with Moralis? If you want to learn more about this, follow along as we explain the fastest and easiest way to build a Web3 app using Moralis’ Ethereum boilerplate. If you would like to skip the tutorial and jump straight into the code, you can find the entirety of it in the following GitHub repository:
Complete Ethereum Boilerplate Documentation – https://github.com/ethereum-boilerplate/ethereum-boilerplate
This article illustrates the easiest way to build a Web3 app. To make the development process as seamless and accessible as possible, we will utilize the Ethereum boilerplate from Moralis. In turn, it will allow you to build sophisticated NextJS Web3 applications with several excellent features in minutes. Moreover, even though the repository is called “Ethereum boilerplate”, the code is further compatible with any EVM system and even Solana, thanks to the Moralis SDK!
The accessibility and power of the boilerplate originate from the various tools of Moralis. For example, Moralis’ Auth API allows you to implement EIP-4361-compatible authentication mechanisms with ease through single code snippets. However, this is only one example, and if you want to explore the Moralis platform further, check its additional APIs. For instance, we highly recommend Moralis’ NFT API and the Solana API!
So, if you want to supercharge your Web3 development capabilities, make sure to sign up with Moralis, as this is the best way to build a Web3 app. Moreover, creating an account only takes seconds, and you can get started for free!
What is a Web3 App?
Web3 apps – generally referred to as dapps (decentralized applications) or blockchain apps – are essentially regular applications equipped with blockchain and Web3 (decentralized) functionality. Furthermore, programmers and developers build Web3 applications on P2P (peer-to-peer) blockchain networks through the use of smart contracts. As such, it makes them unique in comparison to traditional applications.
The keyword in dapps is “decentralized”, which provides several advantages. As decentralization is a pervading characteristic of these applications, they are generally outside the scope and control of single dominant authorities. The decentralized aspect provides several benefits, and Web3 apps generally support the following features:
- Open-Source – It is not uncommon that dapps are open source. Accordingly, they can operate independently without a central authority calling all the shots.
- Openness – The records and data of Web3 applications can be entirely public.
- Tokens – Web3 apps can feature cryptographic tokens keeping the networks secure.
However, an essential key takeaway is that not all dapps or Web3 apps have these features, even though many in the community believe they should. Nonetheless, Web3 apps have several exciting aspects and provide many benefits. Here are a few examples:
- Blockchain-Based – Since Web3 apps are based on blockchain technology and smart contracts, it is easy to integrate cryptocurrencies into the functionality of the applications.
- Open-Source – Since many Web3 apps are open-source, it encourages the development of the entire ecosystem, which drives innovation forward.
- Censorship-Resistant – As Web3 applications are decentralized and based on blockchain networks, it removes traditional applications’ single point of failure. This means that it is difficult for individuals or governments to control and censor a network.
With a better understanding of Web3 apps and what they entail, we can move on and demonstrate the fastest way to build a Web3 app!
The Moralis Ethereum Boilerplate – Fastest Way to Build a Web3 App
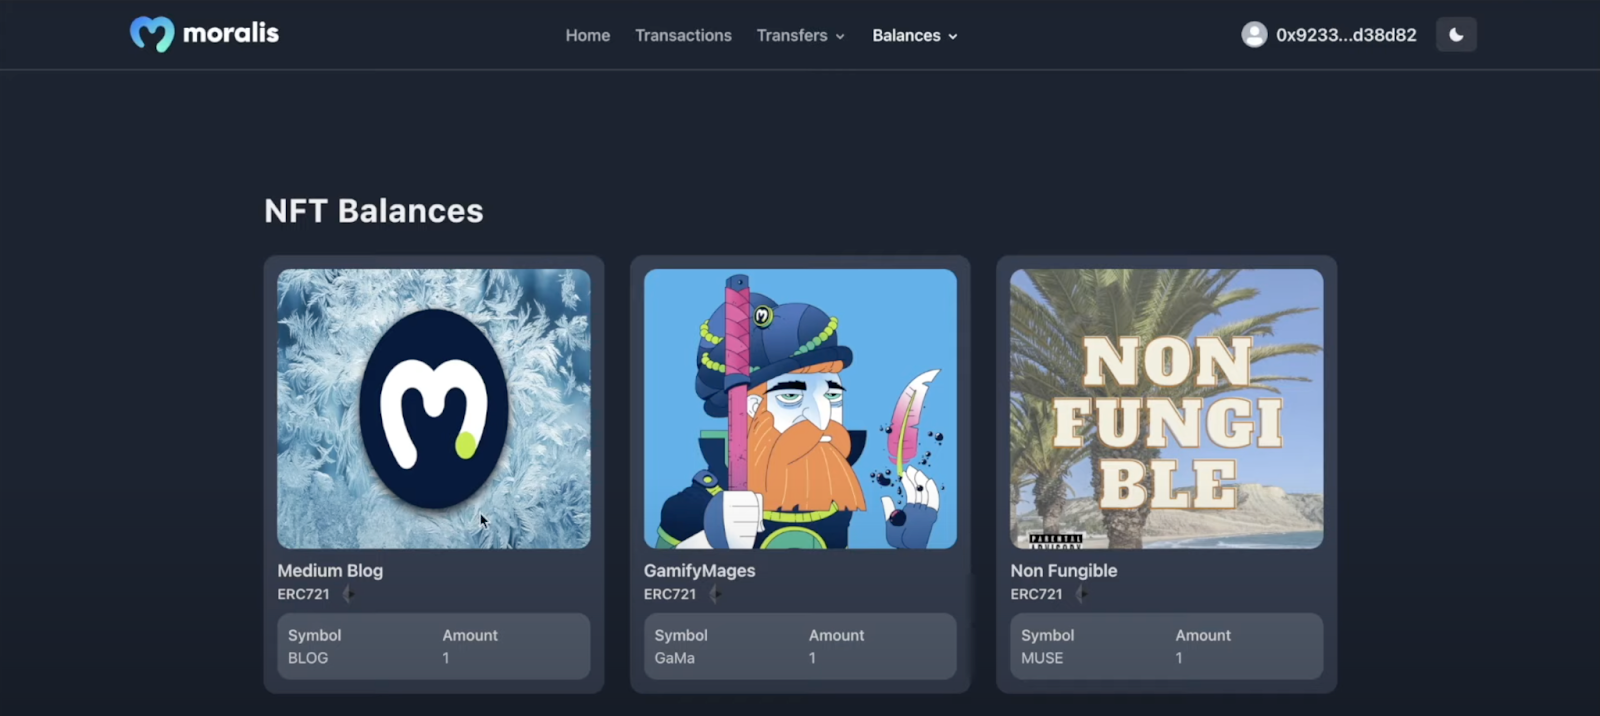
This part of the article will show you the fastest way to build a Web3 app. However, before we dive deeper into the process, we are initially going to show you the capabilities of the application you are about to create. As such, this will be the landing page:

As you can see at the top of the page, you have a navigation bar with several options. If a user initially clicks on these, they would not have much luck, as they would need to authenticate with their Web3 wallet before interacting with the page. Moreover, to authenticate their Web3 identity, they would need to click on the button at the top right:

Clicking this button will prompt their MetaMask wallet and allow them to sign a message. Moreover, MetaMask authentication is only one of the methods Moralis support. Hence, if you would like to add other Web3 authentication mechanisms, you can, for example, check out our guides on how to add sign-in with Magic.Link or add Coinbase Wallet login functionality.
Nevertheless, once users authenticate, they are free to navigate the page as they please. As the navigation bar shows, users will have numerous options. For example, they can view their transactions, transfers, and token balances as shown here:

The “Transfers” tab has a drop-down menu that allows users to toggle between NFT and ERC-20 token transfers:

The “Balances” tab also does this and, in turn, provides the same functionality:

As such, users can, for example, click on the “NFT” option for the “Balances” menu and view their NFTs displayed neatly:
What’s more, these are only the initial features of the boilerplate. Moralis’ dev team continuously implements more features to this template as time passes. Nevertheless, let’s continue and look closer at the fastest way to build a Web3 app!
Build a Web3 App – Cloning the Project
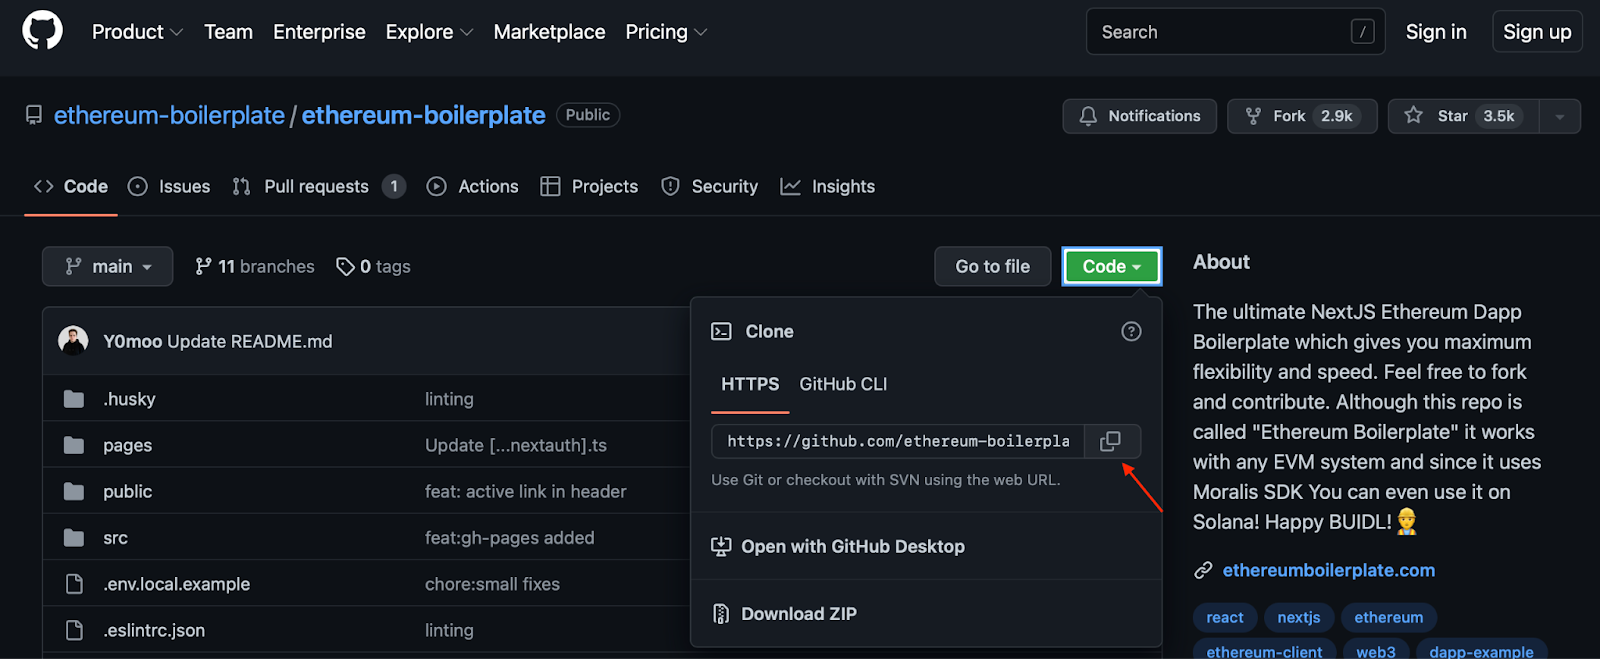
Since the fastest way to build a Web3 app is through the Ethereum boilerplate, the first thing you must do is import this template. So, to initiate the process, you need to visit the GitHub repository to which we initially linked in the article. From there, you can click the green “Code” button and copy the URL, which you can use to clone the entire project:
With the URL at hand, you can proceed by navigating to your favorite IDE (integrated development environment). For this tutorial, we use VSC (Visual Studio Code); however, you are free to use any environment you might be more comfortable with. Just note that the process might differ somewhat if you are not using VSC.
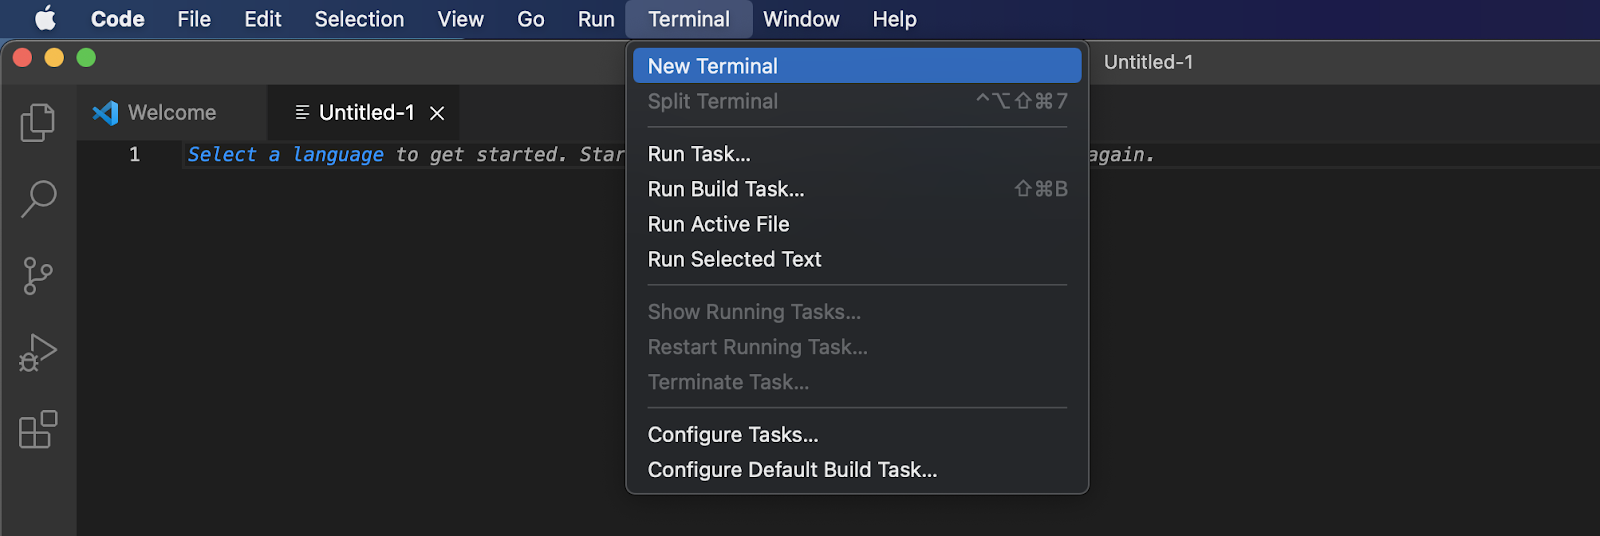
With your IDE open, you need to create a new folder, which we, in our case, are calling “BOILERPLATE“. Next, you must open a new terminal to run a few commands. If you are using VSC, you should be able to launch a terminal by clicking on the “Terminal” at the top of your screen and then hitting “New Terminal”:
From there, you will be able to clone the project to your local repository by running the following command through the terminal (make sure you are in the right location to clone the project to the correct folder you created earlier):
git clone “BOILERPLATE_URL”
With the boilerplate cloned, you can jump into the correct folder with this command:
cd ethereum-boilerplate
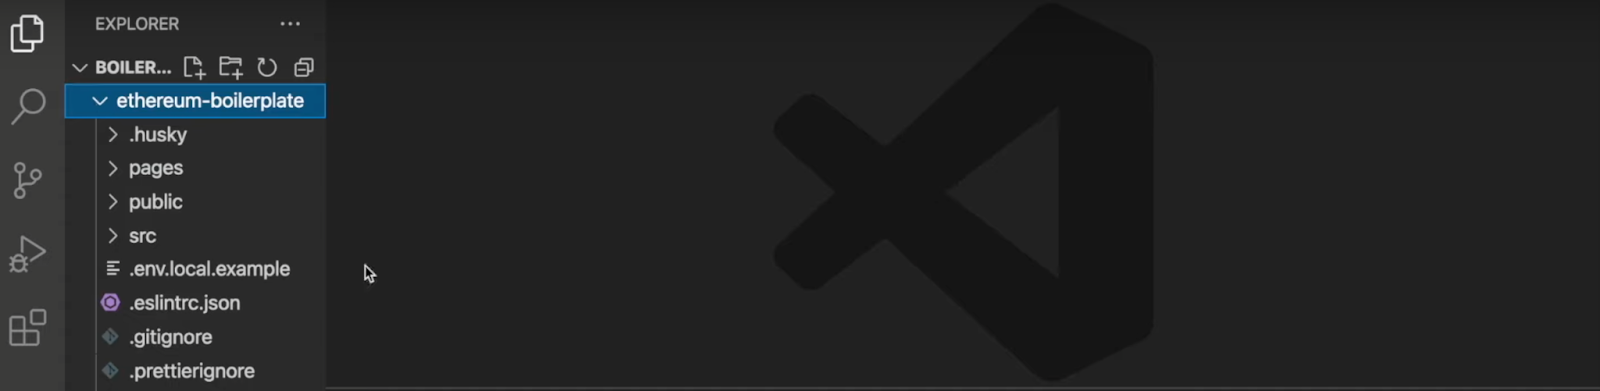
If you run all the correct commands, your local repository should look something like this:
Moreover, to make the application work as intended, we’re going to explore an essential step in the following section. So, with no further ado, let’s dive deeper into the “.env.local.example” file and configure some vital environment variables!
Configuring Environment Variables
If you have not already, you can proceed by navigating to the ”.env.local.example” local file in your repository:
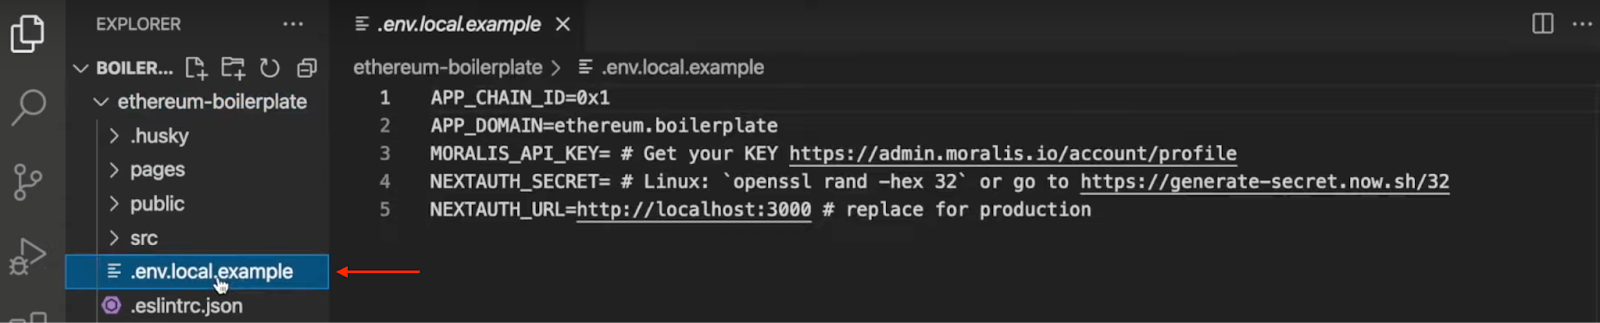
Let’s go through each of these variables, starting with “APP_CHAIN_ID”. This variable is automatically set to “0x1“, the ID for the Ethereum network. However, as Moralis supports cross-chain compatibility, you can choose any EVM-compatible chain. We will opt for the Mumbai testnet. If you would like to do the same, change “APP_CHAIN_ID” to “0x13881“.
Following this, you have the “APP_DOMAIN” variable. This one you can leave as is. Next up, you will need to get your API key. You can acquire a Moralis API key by signing up with the platform. As such, if you have not already, create your Moralis account straight away. It is free, and it only takes moments to get started.
With an account at hand, you can visit the following page: https://admin.moralis.io/account/profile.
From there, click the ”Keys” tab and copy your Web3 API key:
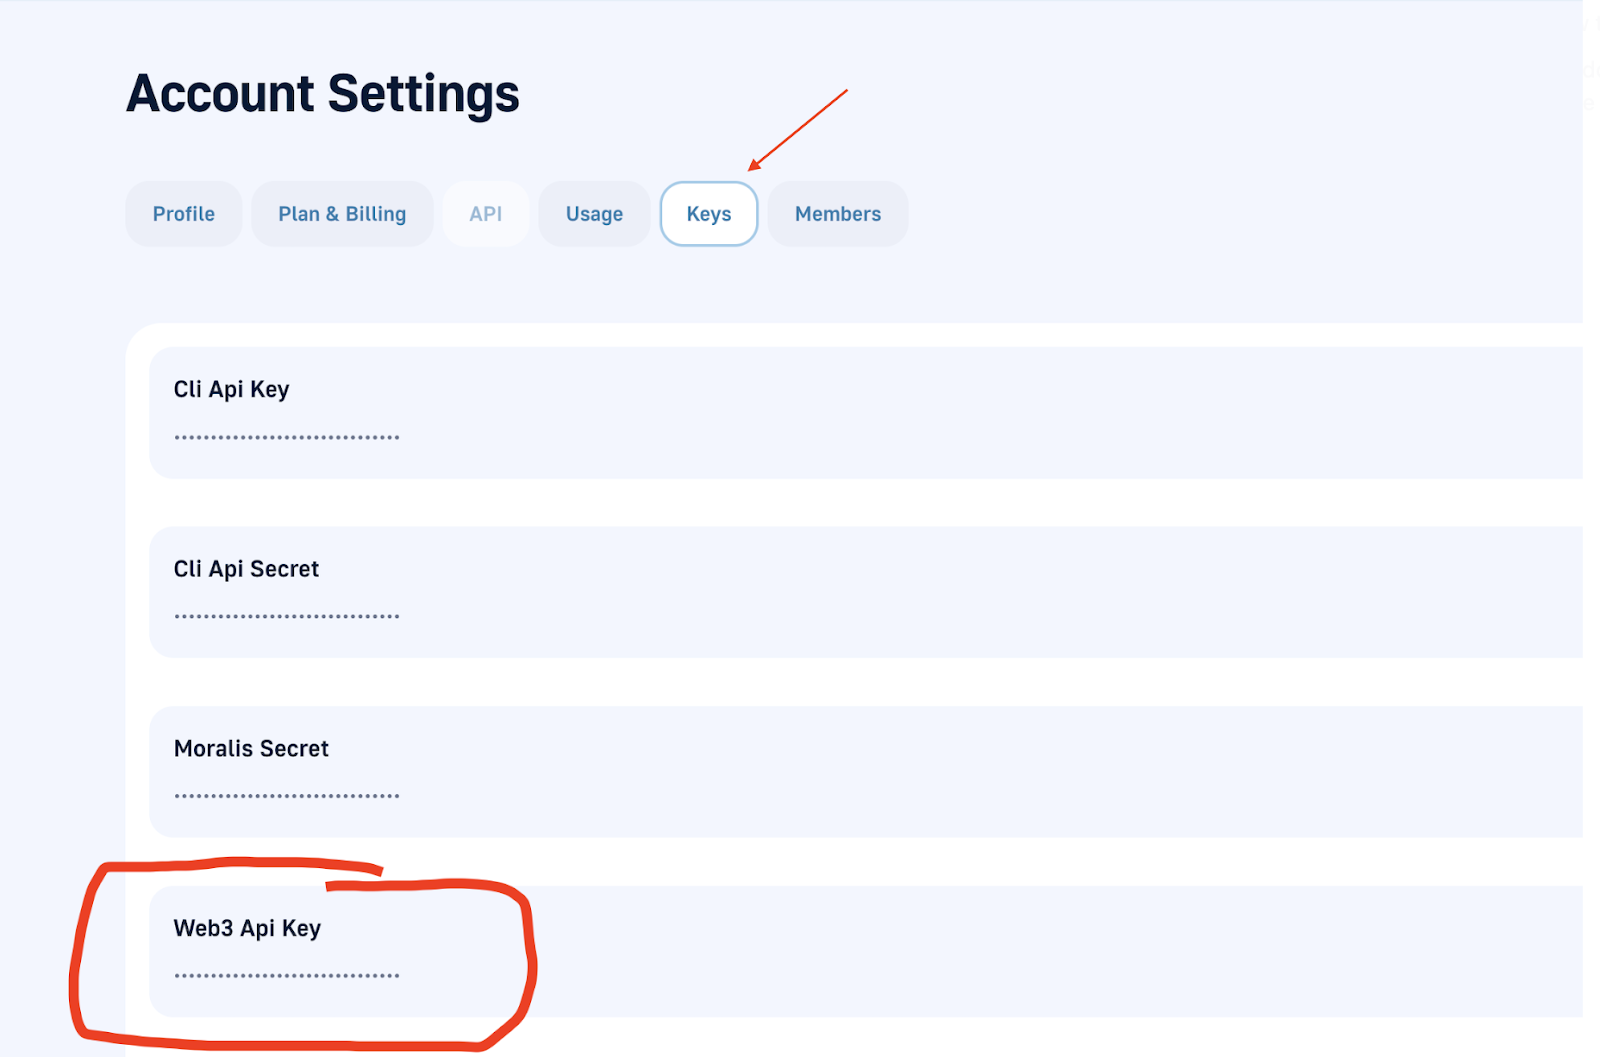
You can then set the ”MORALIS_API_KEY” variable equal to this value.
You will need another key for the “NEXTAUTH_SECRET” variable. If you need help generating a value, click on the following link: https://generate-secret.now.sh/32. Moreover, with a value at hand, set the “NEXTAUTH_SECRET” equal to this generated key.
You then need to specify the “NEXTAUTH_URL“, which should be equal to your app’s URL if you are going into production. However, since this is a tutorial and we need to make sure that everything works as it should, we are using local host 3000, allowing us to test the app before launch.
Lastly, you also need to rename this file to ”.env.local”, removing ”.example” at the end.
Final ”.env.local” Code
So, the final code for the file should look something like this:
APP_CHAIN_ID=0x13881
APP_DOMAIN=ethereum.boilerplate
MORALIS_API_KEY= "YOUR_API_KEY"
NEXTAUTH_SECRET= b8e786967d7bcbc0f920d35bcc3f891c
NEXTAUTH_URL=http://localhost:3000
Starting the Application — Easiest Way to Build a Web3 App
Once you are done configuring the environmental variables, you are almost ready to start the Web3 app. However, before doing so, you must install the necessary dependencies. Depending on if you are using npm or yarn, you can use either of the following commands:
npm i
yarn
With all dependencies installed, the next thing you will need to do is run a local development server. You can do so through either of these:
npm run dev
run yarn dev
This should get an application running on local host 3000. However, on occasion, if you have another project already running on local host 3000, you might need to alter the “NEXTAUTH_URL” environment variable and make sure it is the correct variable. To exemplify, it might look like something like this:
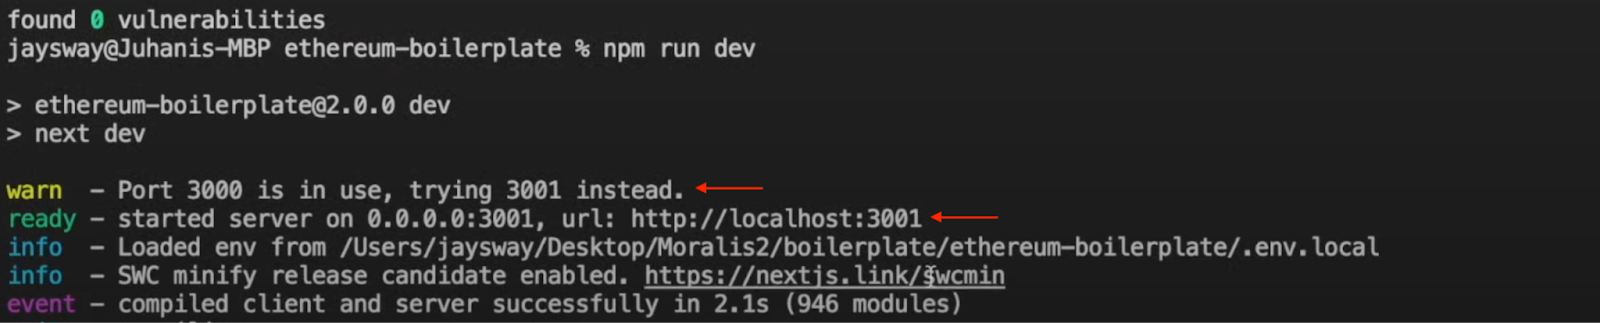
To solve this, you simply need to change the URL variable.
Now that is it for this brief tutorial on the fastest way to build a Web3 app! From here, it is now up to you to customize the application further to fit the needs of your targeted user segment. As such, you have the option to remove or implement new features that are necessary for the functionality of your final product!
If you need inspiration for your next project, check out Moralis’ Web3 blog. The blog offers exciting and fresh new content to inspire you to become a more prominent Web3 developer. For example, learn to set up a self-hosted Parse Server or all you need to know about blockchain syncs.
Nevertheless, if you had trouble during this tutorial, the following clip from Moralis’ YouTube channel explains the easiest way to build a Web3 app in further detail. As such, it will hopefully answer all of your questions:
Fastest Way to Build a Web3 App – Summary
This article demonstrated the fastest way to build a Web3 application using the Ethereum boilerplate from Moralis. Thanks to this template and the platform’s tools, you can create a Web3 application in only minutes. All that’s necessary is to clone the project to your local repo, change a few environment variables, and install some dependencies. As such, if you followed along during this process, you now know the fastest way to build a Web3 app.
If you found the tutorial helpful, you should explore Moralis even further. During the tutorial, we briefly touched on Web3 authentication, one of the areas in which Moralis shines; however, there is much more to the platform. For example, you also have the ability to easily create Web3 webhooks and implement Web3 syncs with the help of Moralis.
Moreover, you can also find other interesting guides here on the blog. A great example is an article addressing Moralis’ NodeJS SDK for Web3. This kit includes several essential features allowing you to easily fetch on-chain data and implement powerful Web3 functionality to your future dapps.
Additionally, if you want to become a more proficient blockchain developer, make sure to check out Moralis Academy. The academy provides blockchain courses of the highest standard, allowing you to become blockchain certified in record time. For example, check out the course on Ethereum fundamentals to get going with your Web3 journey!
Nonetheless, it does not matter what type of Web3 project or dapp you are looking to create; Moralis will help in all your development endeavors. As such, you should take the time to sign up with Moralis straight away and become a member of the community!
