This article will demonstrate how to add sign-in with Magic.Link in five easy steps. If you want to skip the steps and jump straight into the code, check out the GitHub repository below. However, the code in the repo is for MetaMask authentication. Thus, to add sign-in with Magic.Link, you will need to make a few tweaks here and there. Moreover, if you have trouble with this, read on as we explain the entire process!
Complete Authentication App Documentation – https://github.com/MoralisWeb3/demo-apps/tree/main/nextjs_moralis_auth
The lack of a unified identification system is an issue with the traditional Web2 ecosystem of applications and websites. For example, users must keep track of multiple logins for various platforms, negatively influencing user experiences across the entire field. However, this is not the case within the Web3 space as there is existing infrastructure for a pervading identification layer. Further, users can sign in to websites using their Web3 wallets, Web3 identity, or even a simple email through solutions such as Magic. Moreover, it is the solution from Magic that we will direct our attention to in this tutorial. More specifically, this article will illustrate how to add sign-in with Magic.Link using Moralis!
Additionally, we use Moralis’ auth API since it makes the process more accessible. Furthermore, the API allows us to add authentication mechanisms with single code snippets providing a seamless developer experience. Also, all of Moralis’ authentication mechanisms are an implementation of the EIP-4361 standard. Hence, Moralis Web3 authentication is compatible with Web2 and off-chain projects alike. Accordingly, this is one way in which Moralis is bridging the gap between Web2 and Web3!
So, if you have ambitions to become a blockchain developer and add sign-in with Magic.Link, join Moralis right now!
What is Magic.Link?
Now, let’s explore Magic before diving into this. In short, Magic is an SDK for developers that integrates with apps to facilitate passwordless Web3 authentication and onboarding through the use of “magic links”. This strategy is similar to what Slack and Medium use. Moreover, Magic ensures hardware-secured, passwordless login and lighting-fast access to more than 20 blockchains. Also, the connection can be established with only a few code snippets, even if you have an existing authentication solution.

Magic’s ecosystem consists of two products: Magic Connect and Magic Auth. The former is a global Web3 wallet leveraging standard Web3JS RPC methods in combination with Magic functions. Furthermore, this provides the wallet with an extensive set of features. Hence, it offers a one-stop shop for the Web3 ecosystem of dapps and other projects.
Magic Auth supplies a passwordless and app-specific wallet authentication infrastructure. It is highly customizable and can be used instead of standard Web2 authentication mechanisms. Also, you can incorporate over 20 blockchains to create seamless onboarding for your dapps.
Magic links provide many benefits for both users and enterprises, including:
- Seamless Authentication – Magic links provide an easier and faster way for users to sign in. Also, it allows users to avoid password maintenance tasks. This includes creating, storing, and updating passwords frequently. In turn, magic links can contribute to more compelling user experiences benefiting users and businesses.
- No Password Breaches – Since magic links remove the need for passwords, they also eliminate password breaches. Hence, this suggests that magic links provide a more secure system that is harder to tamper with.
- Simple Onboarding – Magic links remove the need for password creation during sign-up processes and provide a quicker onboarding flow. Consequently, you enable users to more seamlessly access your services and become part of your project or dapp!
Add Sign-In with Magic.Link in 5 Steps Using Moralis
With a more profound understanding of Magic, we can move on to the main topic of this article to illustrate how to add sign-in with Magic.Link. Also, to implement authentication mechanisms more seamlessly, we’ll use Moralis’ Auth API. In short, Moralis makes Web3 authentication accessible, and you can implement auth mechanisms with single snippets of code!
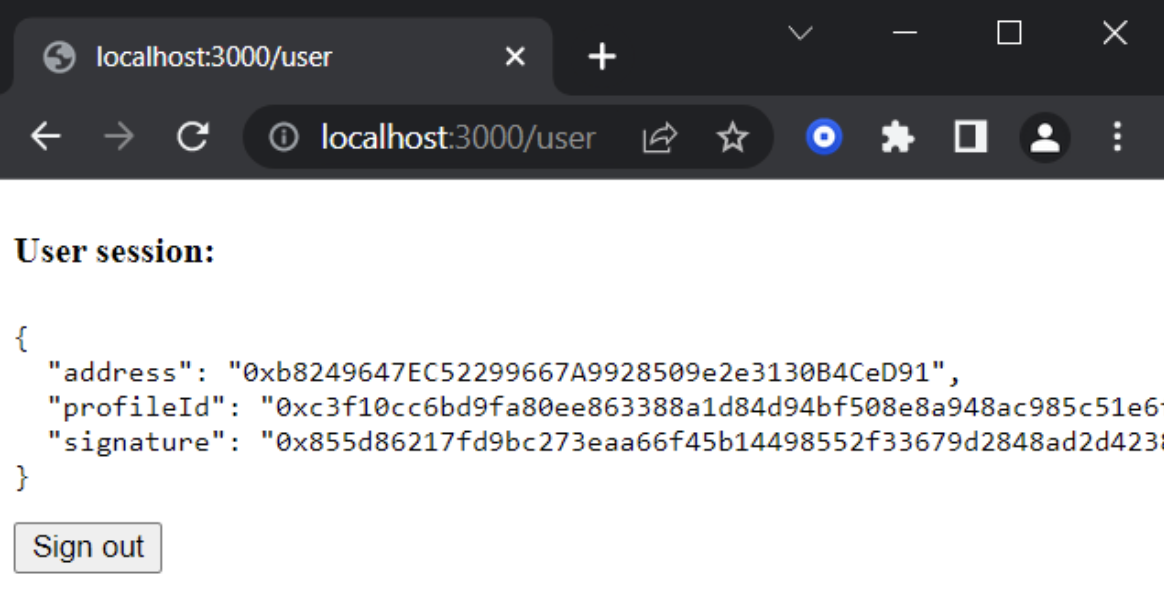
To illustrate the accessibility of Moralis, we will be creating a simple NextJS application where users can sign in without needing an account or password. Once they have authenticated themselves, they can view user information such as an address, profile ID, and signature. Also, once users authenticate, the “next-auth” library will establish a session cookie containing an encrypted JWT. Furthermore, the JWT, in turn, contains info like an address, signed message, etc., which is stored in the user’s browser. Moreover, this is a safe way to store information regarding users without a database. In addition, this data is impossible to access or alter without a secret key.
Nonetheless, to make the process more comprehensible, we will show you how to add sign-in with Magic.Link in five simple steps:
- Installing Dependencies, Libraries, and Magic Connector
- Wrapping the Application
- Setting Up a Request Message Endpoint
- ”NextAuth” Configuration and Creating a Sign-In Page
- Creating the User Page
Moreover, to give you a better understanding of what we are working towards, we will now present two screenshots: one for the login page and one for the user page:
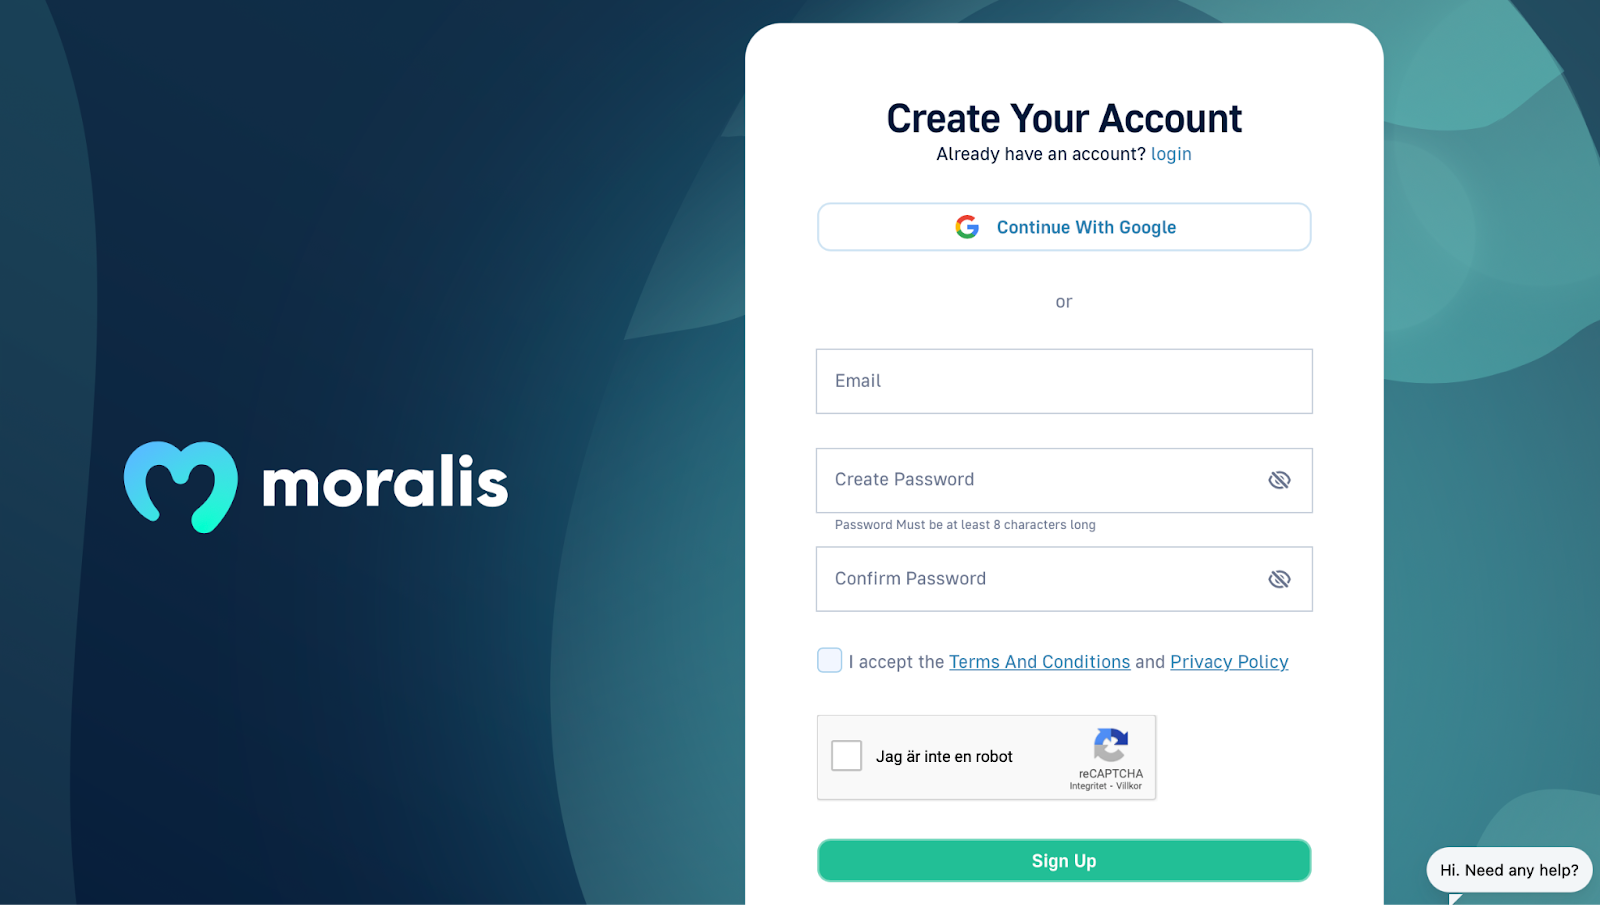
Login Page:

User Page:
Before showing you how to add sign-in with Magic.Link there are a few prerequisites you need before we get started. Thus, before we install the dependencies, libraries, and Magic Connector, we will take the following section to dive deeper into these prerequisites!
Add Sign-In with Magic.Link – Prerequisites
This section will present some preparations you will need to take care of before exploring how to add sign-in with Magic.Link. First, one essential element required to follow along in this tutorial is a Moralis account. Thus, if you have not already, you need to start by creating a Moralis account. Furthermore, signing up with Moralis is easy and only takes a couple of seconds. Also, creating an account is free!
Also, once you have a Moralis account established, you need an IDE (integrated development environment), and in this tutorial, we will use Visual Studio Code. However, it does not really matter, and if you are more comfortable working with other software, you are free to do so.
Lastly, you will need to set up a NextJS application. This process is relatively straightforward; however, if you need help to get going, you can explore the “create-next-app” documentation. In addition, you can also follow the Moralis NextJS dapp tutorial. Moreover, either of these alternatives will show you how to set up a NextJS application from scratch.
Now, with all the prerequisites established, we can continue and dive into the first step of this tutorial on how to add sign-in with Magic.Link!
Step 1: Installing Dependencies, Libraries, and Magic Connector
So, to initiate this brief guide, you can follow along as we show you how to install dependencies, libraries, and Magic Connector. In addition, we’re going to add necessary environment variables. Hence, let’s begin by looking at how you can install the dependencies using Moralis, NextAuth, and Axios. To install these three elements, all you need is the following “npm” code:
npm install moralis next-auth axios
Furthermore, with the dependencies installed, we need to add a particular library. In this case, we will add wagmi. To install the library, you can use the following command:
npm install wagmi ethers
So, with wagmi installed, we can add Magic Connector. Moreover, the easiest way to add Magic authentication for the dapp is through wagmi, and more particularly, the following input:
npm i @everipedia/wagmi-magic-connector
Lastly, you need to add four environment variables to finalize the first step. Also, you need to add these variables to your “.env.local” file in the application root. Moreover, these are the variables you need to add:
- APP_DOMAIN: RFC 4501 DNS authority. This will be used to request signings.
- MORALIS_API_KEY: You can access an API key through your Moralis account.
- NEXTAUTH_URL: This will be your app address.
- NEXTAUTH_SECRET: A key for encrypting users’ JWT tokens. Feel free to generate a fitting value here: https://generate-secret.now.sh/32.
To illustrate what it might look like, here is an example of a ”.env.local” file:
APP_DOMAIN=amazing.finance
MORALIS_API_KEY=xxxx
NEXTAUTH_URL=http://localhost:3000
NEXTAUTH_SECRET=7197b3e8dbee5ea6274cab37245eec212
At this point, the most noteworthy variable we will quickly examine is “NEXTAUTH_URL“. In the example, it is set to “http://localhost:3000“. This is perfect when developing applications as it allows you to test its functionalities in a safe local environment. Then, once you plan on launching a project, you should change this to your application address.
Step 2: Wrapping the Application
So, with the first step finalized, the next stage is to wrap the application using “WagmiConfig” and “SessionProvider”. This process is relatively straightforward, and to begin with, you need to create a new “pages/_app.jsx” file and then add the following content:
import { createClient, configureChains, defaultChains, WagmiConfig } from 'wagmi';
import { publicProvider } from 'wagmi/providers/public';
import { SessionProvider } from 'next-auth/react';

const { provider, webSocketProvider } = configureChains(defaultChains, [publicProvider()]);

const client = createClient({
  provider,
  webSocketProvider,
  autoConnect: true,
});

function MyApp({ Component, pageProps }) {
  return (
    <WagmiConfig client={client}>
      <SessionProvider session={pageProps.session} refetchInterval={0}>
        <Component {...pageProps} />
      </SessionProvider>
    </WagmiConfig>
  );
}

export default MyApp;
Step 3: Setting Up a Request Message Endpoint
Now that you have wrapped your application with “WagmiConfig” and “SessionProvider”, you need to progress by creating a request message endpoint. In short, this endpoint will be responsible for making requests to “Moralis.Auth”. Moreover, the endpoint will generate unique messages that are later signed on the client side.
Nonetheless, to add this request message endpoint, you must create an API ”pages/api/auth/request-message.js” file. With the file all set up, you can continue by adding the following content:
import Moralis from 'moralis';

const config = {
    domain: process.env.APP_DOMAIN,
    statement: 'Please sign this message to confirm your identity.',
    uri: process.env.NEXTAUTH_URL,
    timeout: 60,
};

export default async function handler(req, res) {
    const { address, chain, network } = req.body;

    await Moralis.start({ apiKey: process.env.MORALIS_API_KEY });

    try {
        const message = await Moralis.Auth.requestMessage({
            address,
            chain,
            network,
            ...config,
        });

        res.status(200).json(message);
    } catch (error) {
        res.status(400).json({ error });
        console.error(error);
    }
}
Step 4: ”NextAuth” Configuration and Creating a Sign-In Page
The first part of the fourth step is to configure ”NextAuth”. Hence, you can create a new ”pages/api/auth/[…nextauth].js” file with this content:
import CredentialsProvider from 'next-auth/providers/credentials';
import NextAuth from 'next-auth';
import Moralis from 'moralis';

export default NextAuth({
    providers: [
        CredentialsProvider({
            name: 'MoralisAuth',
            credentials: {
                message: {
                    label: 'Message',
                    type: 'text',
                    placeholder: '0x0',
                },
                signature: {
                    label: 'Signature',
                    type: 'text',
                    placeholder: '0x0',
                },
            },
              async authorize(credentials) {
                try {
                  // "message" and "signature" are needed for authorisation
                  // we described them in "credentials" above
                  const { message, signature } = credentials;

                  await Moralis.start({ apiKey: process.env.MORALIS_API_KEY });

                  const { address, profileId } = (
                    await Moralis.Auth.verify({ message, signature, network: 'evm' })
                  ).raw;

                  const user = { address, profileId, signature };
                  // returning the user object and creating  a session
                  return user;
                } catch (e) {
                  console.error(e);
                  return null;
                }
              },
        }),
    ],
    // adding user info to the user session object
    callbacks: {
        async jwt({ token, user }) {
            user && (token.user = user);
            return token;
        },
        async session({ session, token }) {
            session.user = token.user;
            return session;
        },
    },
});
Setting Up the Sign-In Page
Furthermore, the second part of the fourth step is creating a sign-in page. This is where the users first arrive when they visit the application and where they can log in with Magic. So, to create this page, you must add a new “pages/signin.jsx” file to your repository. With the file at your disposal, you can use the following content to create the page:
import { MagicConnector } from '@everipedia/wagmi-magic-connector'
import { signIn } from 'next-auth/react'
import { useAccount, useConnect, useSignMessage, useDisconnect } from 'wagmi'
import { useRouter } from 'next/router'
import axios from 'axios'

function SignIn() {
  const { connectAsync } = useConnect({
    connector: new MagicConnector({
      options: {
        apiKey: 'YOUR_MAGIC_LINK_API_KEY', //required
      },
    }),
  })
  const { disconnectAsync } = useDisconnect()
  const { isConnected } = useAccount()
  const { signMessageAsync } = useSignMessage()
  const { push } = useRouter()

  const handleAuth = async () => {
    if (isConnected) {
      await disconnectAsync()
    }

    const { account } = await connectAsync()
    const userData = { address: account, chain: '0x1', network: 'evm' }

    const { data } = await axios.post('/api/auth/request-message', userData, {
      headers: {
        'content-type': 'application/json',
      },
    })

    const message = data.message

    const signature = await signMessageAsync({ message })

    // redirect user after success authentication to '/user' page
    const { url } = await signIn('credentials', {
      message,
      signature,
      redirect: false,
      callbackUrl: '/user',
    })
    /**
     * instead of using signIn(..., redirect: "/user")
     * we get the url from callback and push it to the router to avoid page refreshing
     */
    push(url)
  }

  return (
    <div>
      <h3>Web3 Authentication</h3>
      <button onClick={() => handleAuth()}>Authenticate via Magic.Link</button>
    </div>
  )
}

export default SignIn
In this step, it is essential that you make sure to add “MagicConnector” as the connector to the “useConnect()” hook. Doing so specifies that Magic will be the provider and that users can sign in using this method!
Step 5: Creating the User Page
Lastly, you need to create a page where your users are directed once they authenticate themselves. As such, to conclude the final part of this tutorial on how to add sign-in with Magic.Link in five steps, you need to create a new ”pages/user.jsx” file that looks like this:
import { getSession, signOut } from 'next-auth/react';

// gets a prop from getServerSideProps
function User({ user }) {
    return (
        <div>
            <h4>User session:</h4>
            <pre>{JSON.stringify(user, null, 2)}</pre>
            <button onClick={() => signOut({ redirect: '/signin' })}>Sign out</button>
        </div>
    );
}

export async function getServerSideProps(context) {
    const session = await getSession(context);

    // redirect if not authenticated
    if (!session) {
        return {
            redirect: {
                destination: '/signin',
                permanent: false,
            },
        };
    }

    return {
        props: { user: session.user },
    };
}

export default User;
Congratulations! If you have followed along this far, you know how to add sign-in with Magic.Link! However, before we finish this article, we must also ensure that the application works. For this reason, we will dedicate a final section to testing the application and its functionality.
Add Sign-In with Magic.Link – How to Test the App
Since you have gone through all five steps regarding how to add sign-in with Magic.Link, it is now time to test that everything works as it should. So, to test the application, you first need to start the localhost server through the following command:
npm run dev
Once the localhost server is up and running, you can launch the app using the address we set previously:
As soon as the application launches, you can click on the ”Authenticate via Magic.Link” button:

This will prompt Magic, and you need to input an email address:
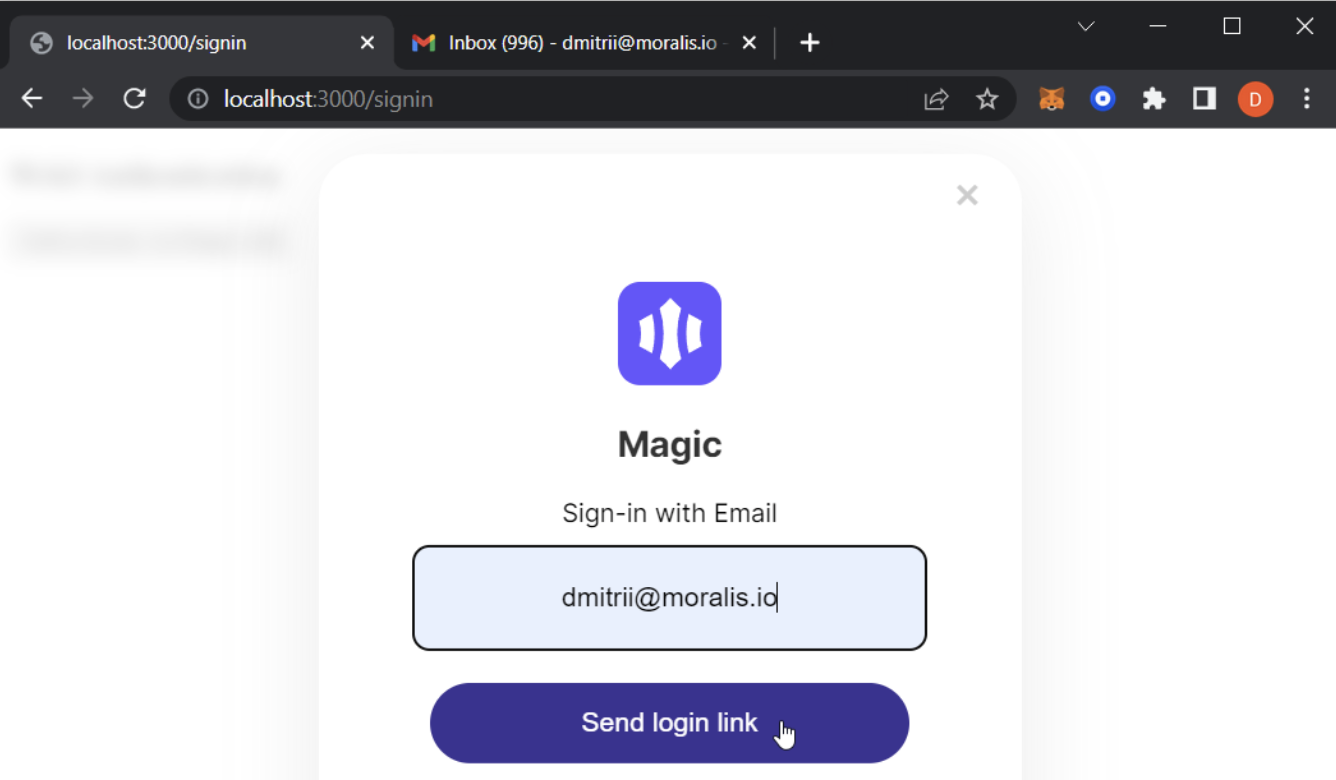
The application will then send a link to your email. Once you click on this link, it will redirect you to the user page. Moreover, if this works, you know that the application also does. This further means that you can add sign-in with Magic.Link for all future projects and allow users to authenticate themselves without needing a password!

However, if you have trouble with the code and this tutorial, check out the official documentation for adding a sign-in with Magic.Link. Also, you can look closer at the GitHub repo to which we initially linked in the article!
Add Sign-In with Magic.Link – Summary
In this article, you managed to create a simple NextJS application and add sign-in with Magic.Link. Through the usage of Moralis, we were able to develop this application in minutes by following these five steps:
- Installing Dependencies, Libraries, and Magic Connector
- Wrapping the Application
- Setting Up a Request Message Endpoint
- ”NextAuth” Configuration and Creating a Sign-In Page
- Creating the User Page
We could easily add this authentication mechanism thanks to Moralis’ Auth API. Furthermore, the API makes Web3 authentication significantly more accessible and provides several options. Thus, when working with Moralis, you do not limit yourself to Magic. For example, check out two of our tutorials on how to add a sign in with RainbowKit or add WalletConnect authentication.
Additionally, Web3 auth is only one of the areas in which the Moralis platform shines. Also, you have the potential to implement Web3 syncs quickly or create Web3 webhooks through Moralis. Moralis also offers access to other tools, such as the NFT API. Moreover, through this, you can create NFTs and NFT-related projects with ease!
So, if you want to authenticate your users, implement Web3 syncs, etc., sign up with Moralis immediately! Creating an account is free, and you can get going with your first project in minutes!
