This article illustrates how Moralis can simplify development for those interested in building a dapp on Cronos. What’s more, when utilizing Moralis as your enterprise-grade API and SDK provider, you can build a Cronos dapp in five steps. So, if that sounds interesting to you, follow our lead through the outlined steps below as we create a decentralized Cronos application!
Complete Boilerplate Documentation – https://github.com/ethereum-boilerplate/ethereum-boilerplate
If you do not want to follow along during the entirety of this tutorial, you can access the complete code using the link above. Otherwise, feel free to join, as we will cover each step of the way in further detail. The accessibility of this process stems from Moralis’ tools, such as the Auth API, Ethereum boilerplate code, and more. Hence, thanks to Moralis, you will be able to build a Cronos dapp in just five simple steps!
However, you might ask yourself, “how can I use an Ethereum boilerplate to build a Cronos dapp?”. Well, this is possible thanks to Moralis’ cross-chain capabilities. You have the option to use the template for any EVM-compatible chains. This suggests that Moralis’ Ethereum boilerplate is the fastest way to build a Web3 app of any kind!
So, are you looking to build a Cronos dapp or a project for any other network? If so, sign up with Moralis immediately! Creating an account only takes a couple of seconds and is free!
What is a Cronos Dapp?
To answer the “what is a Cronos dapp?” question, we must delve deeper into the Cronos network and explore the intricacies of decentralized applications. As such, we will begin this section by briefly explaining some basics of what Cronos entails.
The launch of the Cronos network occurred in 2021 and has since been running parallel with Cronos POS Chain (formerly Crypto.org Chain). The aforementioned chain is closely related to Crypto.com, as the blockchain powers its “Pay” feature. Moreover, Crypto.com has been around since 2016 and is the organization behind both the Cronos EVM blockchain and Cronos POS Chain. Furthermore, the Cronos blockchain is EVM-compatible and supports inter-blockchain communications networks based on the Cosmos SDK. This suggests that Cronos is compatible with Ethereum and Cosmos-based ecosystems. Also, this interoperability makes it possible to port Ethereum dapps and smart contracts easily.
So, with a brief understanding of Cronos, we will continue by explaining dapps further. Dapps, or “decentralized applications”, are relatively similar to traditional Web2 applications. However, the main difference between Web2 and Web3 applications is that Web3 apps are built on blockchain networks. Accordingly, this means that dapps come equipped with blockchain technology and capabilities.
Blockchain tech makes dapps superior to traditional applications in many ways. However, a prominent and pervading characteristic is decentralization. The decentralized aspect of dapps removes the single point of failure generally existing within the Web2 space. As such, it becomes much harder to hack dapps as security is significantly higher.
So, now that you have a better understanding of the Cronos network and dapps, it becomes easy to answer the question, “what is a Cronos dapp?”. In short, a Cronos dapp is basically an application built on the Cronos blockchain!
Build a Cronos Dapp in 5 Steps
With a more profound understanding of what Cronos dapps are, we will proceed and show you how to build one. Thanks to the accessibility of Moralis and the Ethereum boilerplate, you will be able to accomplish this in only five simple steps:
- Explore the EVM-Compatible Boilerplate
- Create a Moralis Account
- Clone the Boilerplate
- Configure Environment Variables
- Start the Cronos Dapp
The Cronos dapp you are about to build will allow users to sign in using their MetaMask wallets. Once they authenticate, users will be able to view information related to their accounts. For example, they can view transaction history, which will be displayed in a table. However, we will dive deeper into how the dapp works in the first step of this tutorial, where we will explore the Ethereum boilerplate.
Moreover, if you are more of a video learner, you can also check out the following clip from the Moralis YouTube channel:
In the video above, one of Moralis’ developers illustrates how the Ethereum boilerplate works, along with a complete setup tutorial. Accordingly, you can also watch this video to learn how to build a Cronos dapp. Otherwise, follow along as we will dive deeper into the EVM-compatible boilerplate in the article’s next section.
Step 1: Explore the EVM-Compatible Boilerplate
This section will cover the details of Moralis’ Ethereum boilerplate to show you what we are working towards. First of all, when you launch the Cronos dapp you are about to build, it will take you to the following landing page:
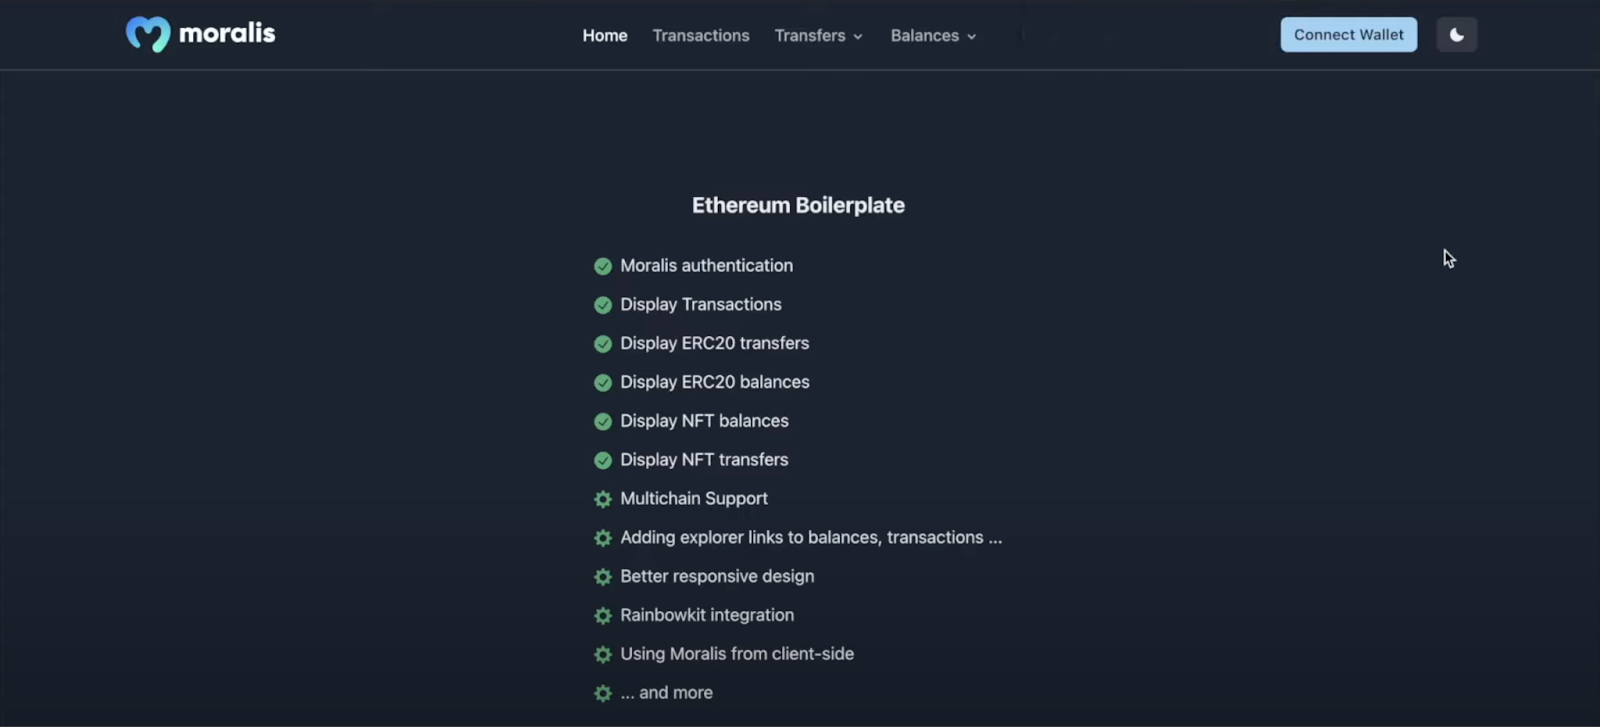
From there, you will notice a navigation menu at the top of the page. This menu contains plenty of options such as “Home”, “Transactions”, “Transfers”, etc. These different tabs will display information regarding your Web3 wallet. However, before you authenticate using the “Connect Wallet” button at the top right, these tabs will not be populated with on-chain data:

Once you click this button, it will immediately prompt your MetaMask wallet and allow you to sign a message. As soon as you authenticate, the various tabs will fill up with information about your wallet. Moreover, MetaMask is only the default option of Moralis, and you can easily implement additional Web3 authentication mechanisms. If you want to learn more about auths, you can, for example, read our article on how to add sign-in with Magic.Link.
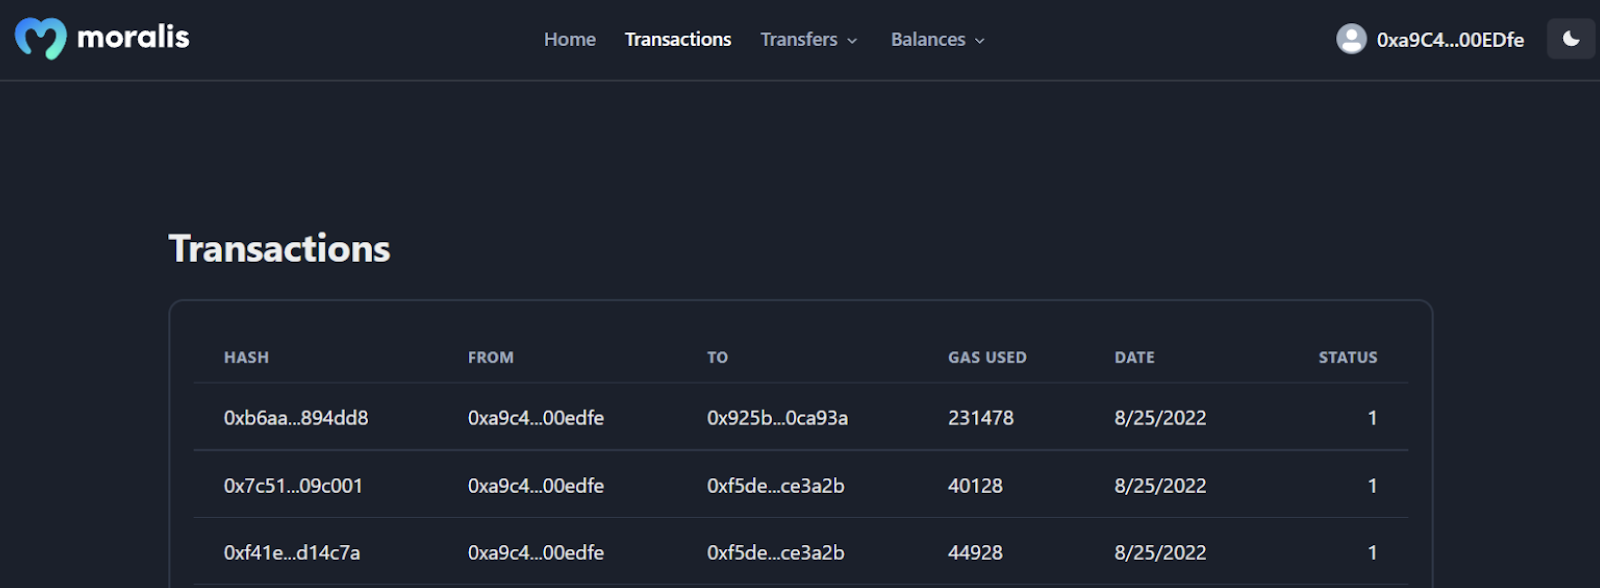
Nevertheless, if you then were to click the ”Transactions” tab, for instance, it will display your transaction history in a neat table:
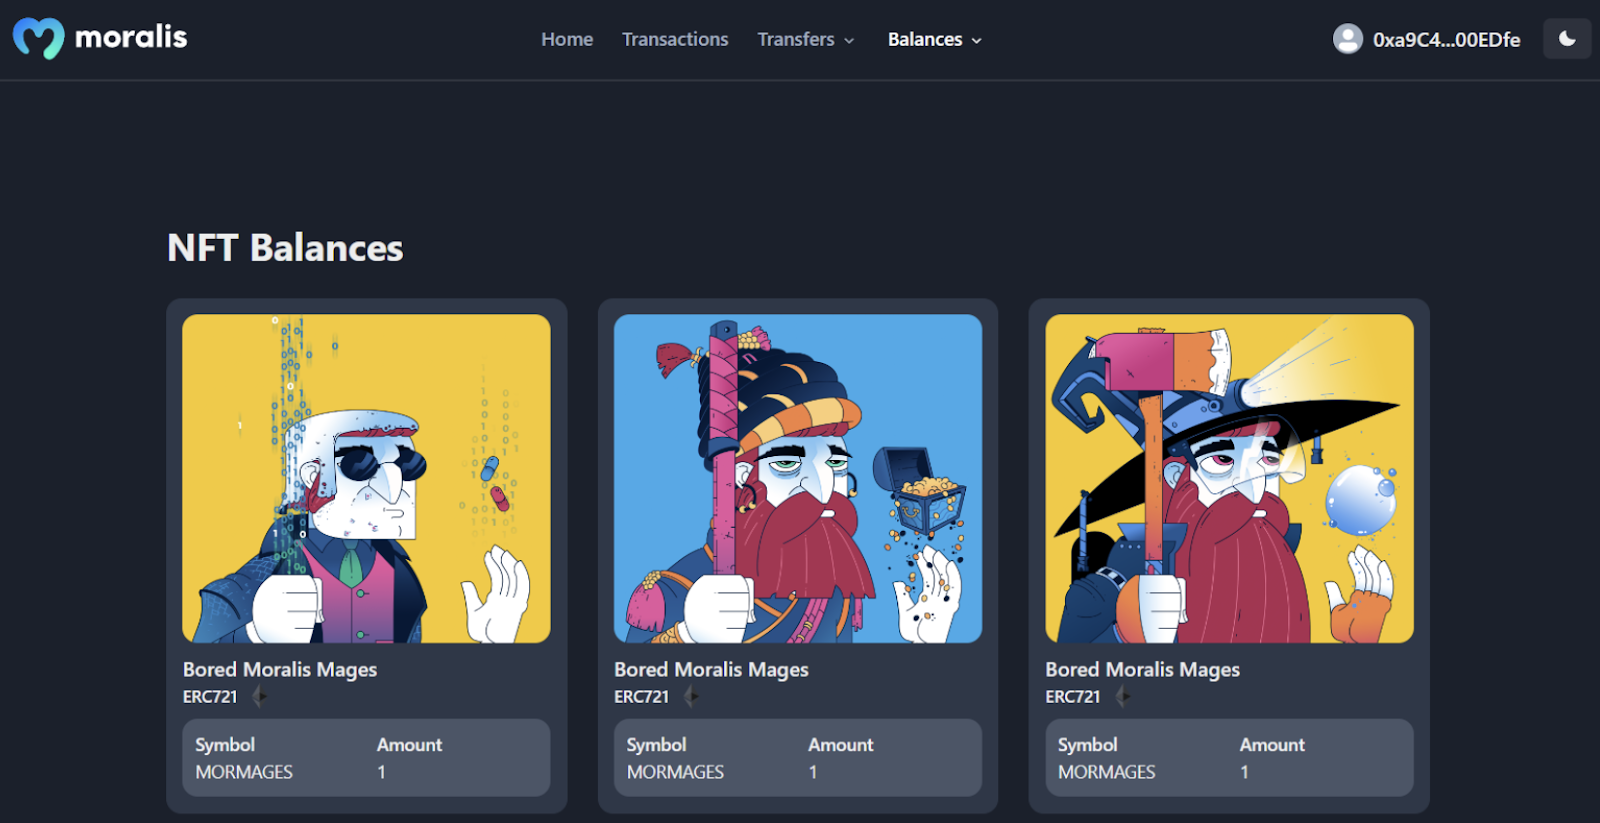
Moreover, both the ”Transfers” and ”Balances” tabs both feature a drop-down menu. As such, if you click on either of these alternatives, you will be able to choose from ”ERC-20” tokens and ”NFTs”:

So, if you, for example, click on ”Balances” and then ”NFTs”, it will display the NFTs of your wallet:
Lastly, the Ethereum boilerplate also features dark and light modes. As such, you have the option to toggle between these modes through the button at the far right:

Step 2: Create a Moralis Account
Now that you know more about the boilerplate and what you are working towards, we can move on to the second step of this article. Further, this section will show you how to acquire your own Moralis account.
So, if you have not already, you must click on the “Start for Free” button at the top right of the Moralis website:
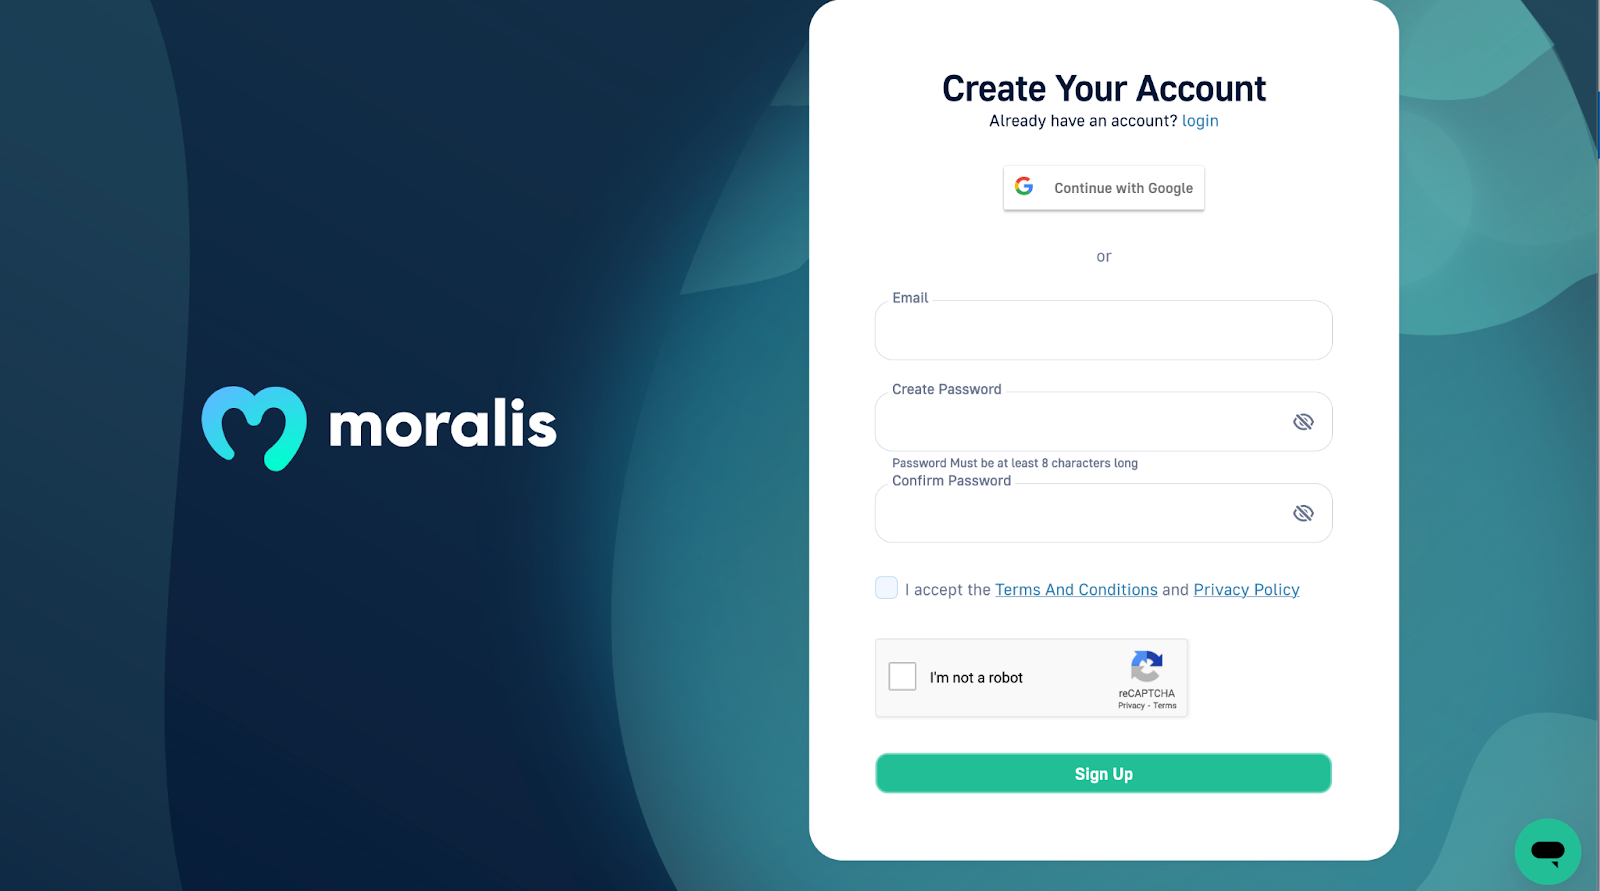
From there, you need to input an email address, create a new password, click on the ”I accept…” box, and hit ”Sign Up”:
That’s it! Creating a Moralis account is easy and only takes a couple of seconds. What’s more, it is completely free!
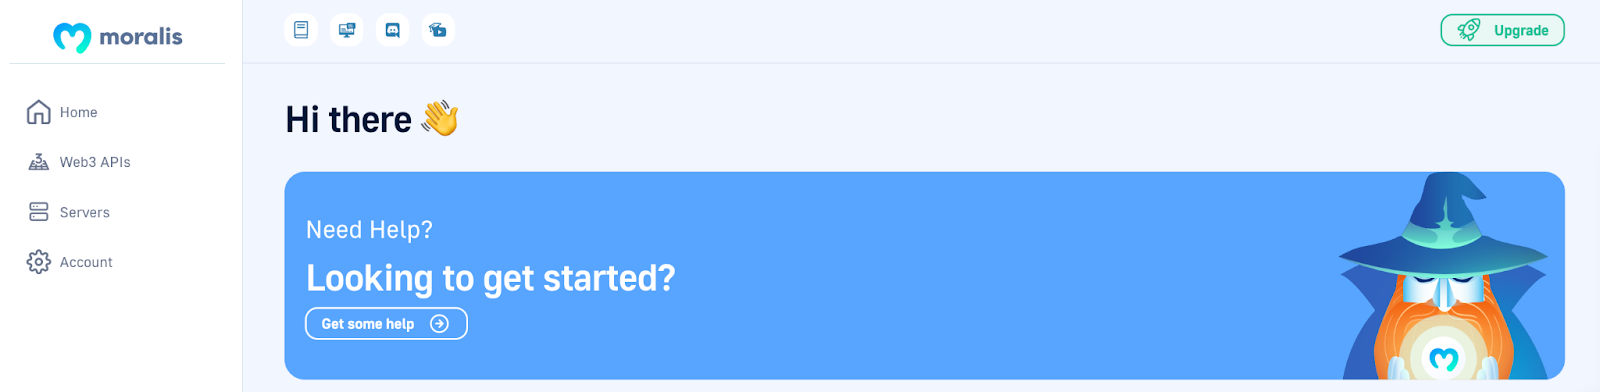
Once you log into your account, you will have arrived at the Moralis admin panel. This will present you with several options such as “Home”, “Web3 APIs”, etc. However, we are going to explore these further in the fourth step, where you need to configure a few variables.
Step 3: Clone the Boilerplate
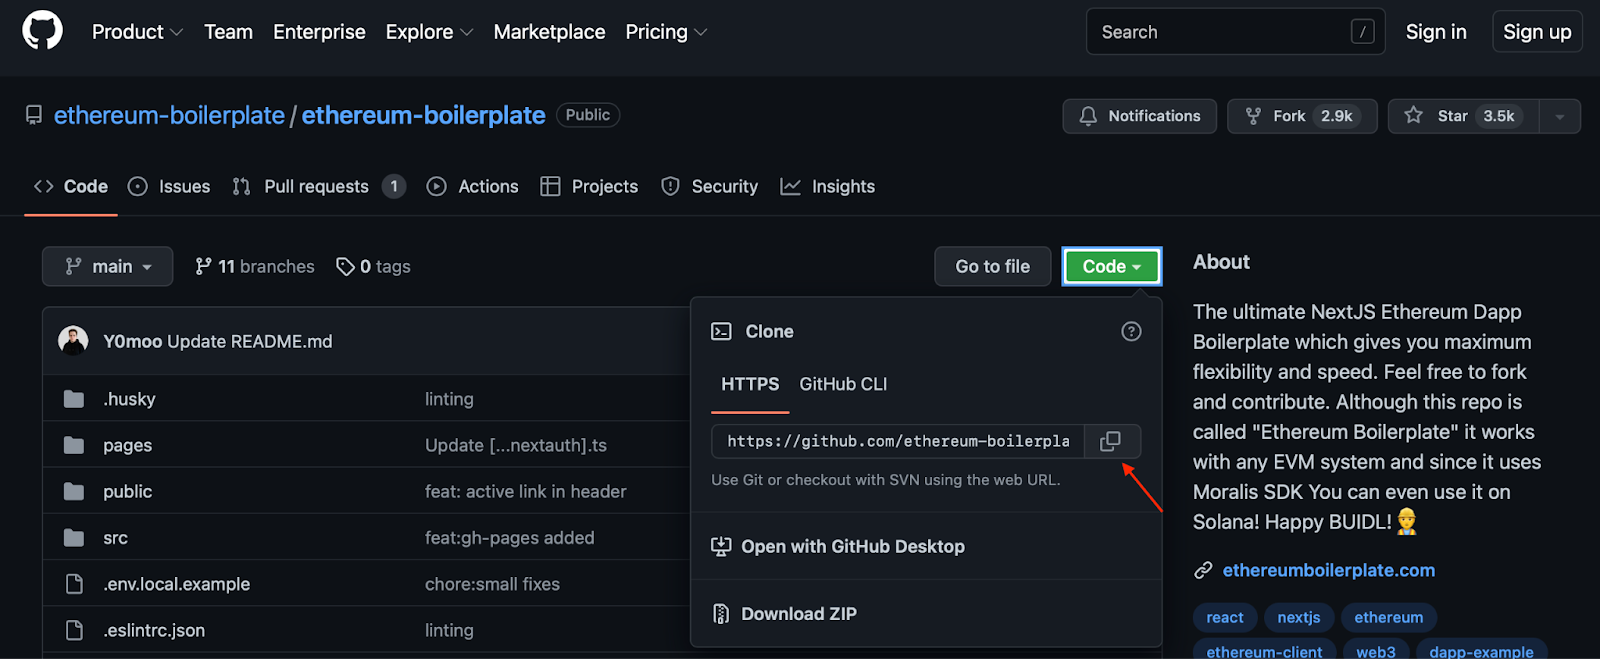
With a Moralis account, the next step is to clone the Ethereum boilerplate to your local directory. As such, you need to visit the GitHub link that you can find in the introduction. From there, you need to hit the green “Code” button to the right. Following this, you can go ahead and copy the repo URL:
Once you have the URL, you can proceed to open your favorite IDE (integrated development environment). We will use VSC (Visual Studio Code); however, you are free to use any IDE you prefer. Just note that the process might be slightly different if you are not using VSC.
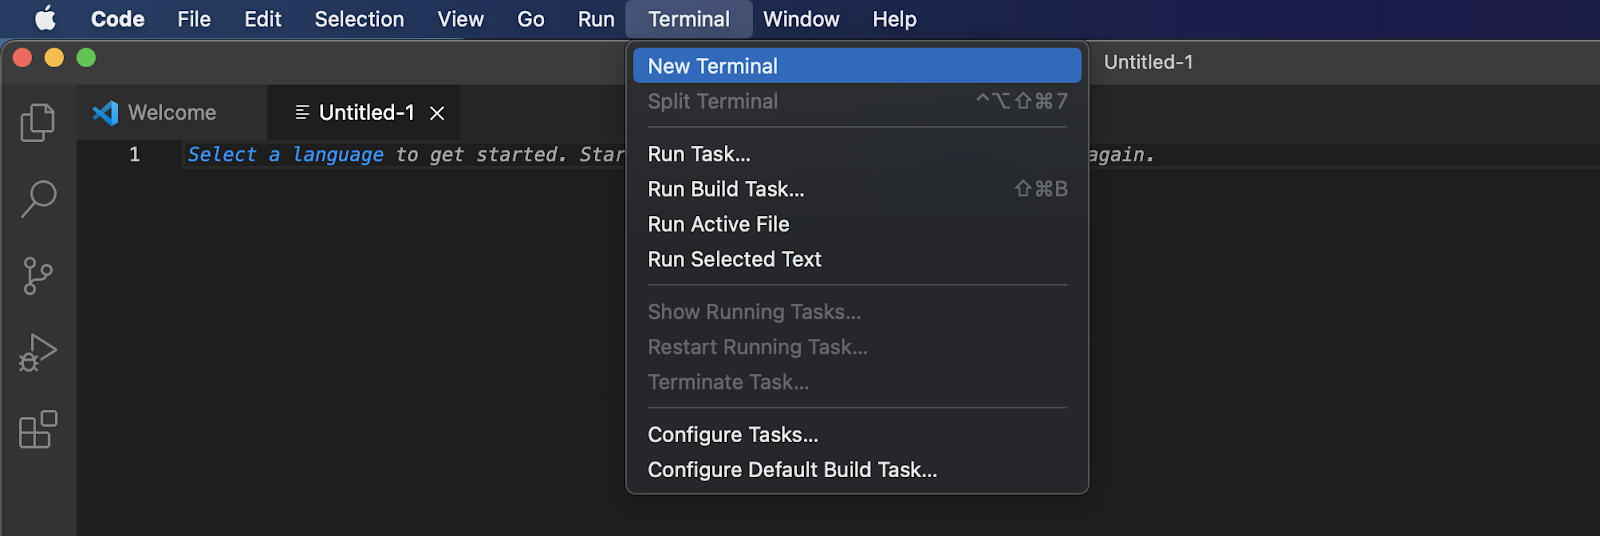
With your environment opened, you need to create a new folder. We will be calling ours “BOILERPLATE”. With the new folder at hand, you can proceed by opening a new terminal. If you use VSC like us, you can do so by clicking on the “Terminal” tab at the top, followed by “New Terminal”:
Now, all that is left is to input the following command into the terminal using the URL you previously acquired:
git clone “BOILERPLATE_URL”
However, before running the command, you need to ensure you are in the right location of your computer, which should be the folder you just set up. Once you run the command above, you can navigate to the correct folder again through this input:
cd ethereum-boilerplate
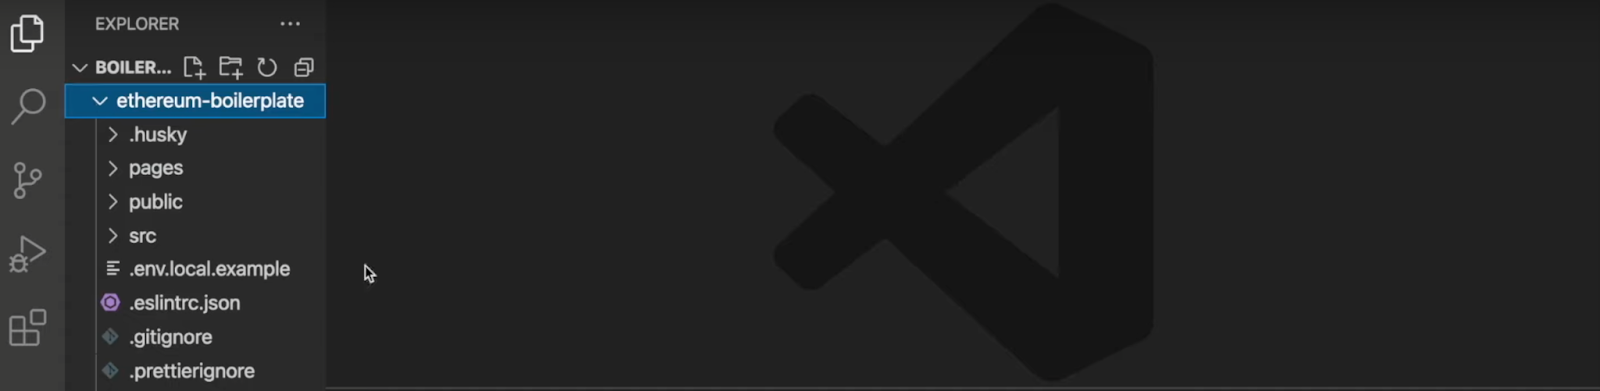
If you followed the previous steps of the article, your local directory should now have the following structure:
Step 4: Configure Environment Variables
Next up, you need to configure a few environment variables. So, to continue, you need to navigate to the “.env.local.example” file in your IDE:
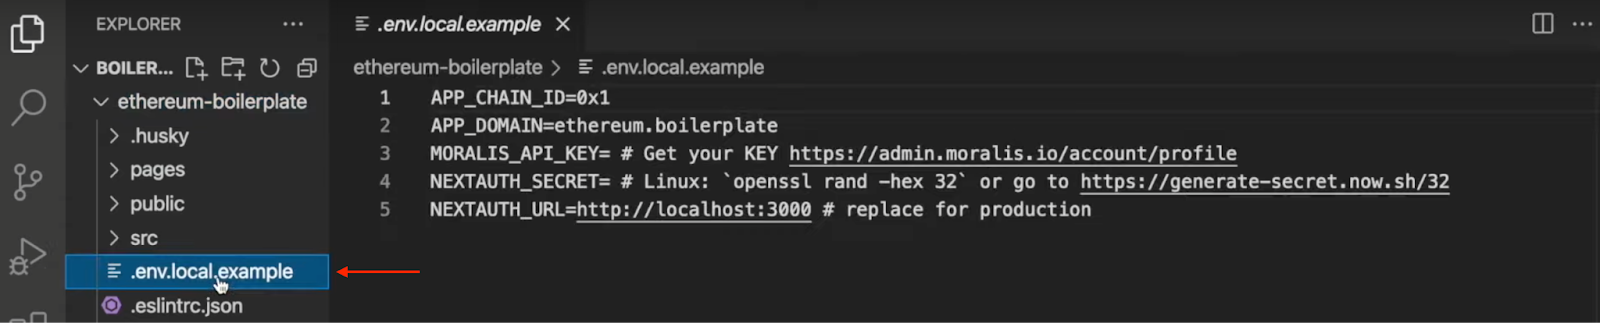
This file contains five environment variables, and for now, we need to focus on “APP_CHAIN_ID“, “MORALIS_API_KEY“, and “NEXTAUTH_SECRET“. So, let’s kick things off by configuring the former.
Now, “APP_CHAIN_ID” is initially set to “0x1“, which is a reference to the Ethereum chain ID. However, since you want to build a Cronos dapp, you must change this variable accordingly. Thus, you can replace “0x1” with “0x152“, which corresponds with the Cronos testnet.
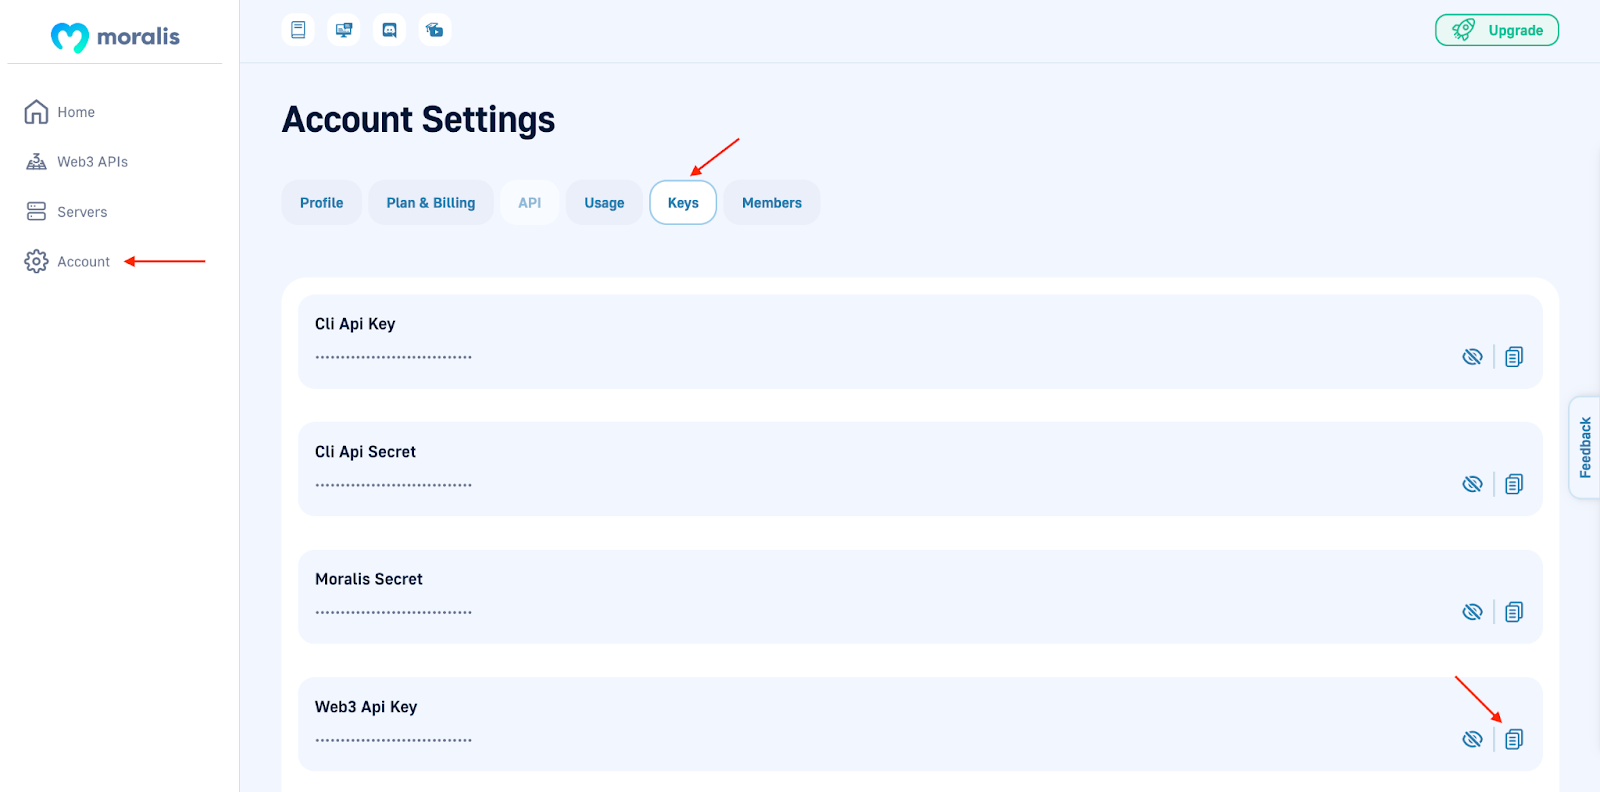
Next, you need to add your API key to the “MORALIS_API_KEY” variable. To acquire your key, please navigate to the Moralis admin panel. From there, click on “Account”, “Keys”, and copy “Web3 API Key”:
Lastly, you must add another key to the “NEXTAUTH_SECRET” variable. Moreover, to make it easy for you, it is possible to use the following link to generate a value: https://generate-secret.now.sh/32.
It is also worth inspecting “NEXTAUTH_URL” a bit further. This variable is currently set to “http://localhost:3000“. You can leave this value as is since it allows you to test your Cronos dapp locally. However, once you launch the dapp, this value must fit your dapp’s URL.
You must also change the file’s name to ”.env.local” by removing ”.example” at the end. To summarize, the final version of your file should look something like this:
APP_CHAIN_ID=0x152
APP_DOMAIN=ethereum.boilerplate
MORALIS_API_KEY= "YOUR_API_KEY"
NEXTAUTH_SECRET= b8e786967d7bcbc0f920d35bcc3f891c
NEXTAUTH_URL=http://localhost:3000
Step 5: Start the Cronos Dapp
The final step of the guide will illustrate how to start your Cronos dapp. However, you must install specific dependencies prior to this. So, you can open the terminal once again and input either of these commands (depending on if you are using “npm” or “yarn”):
npm i
yarn
Once you’ve installed the dependencies, you can start the dapp with either of the following inputs:
npm run dev
yarn run dev
Running one of these commands will start the dapp on localhost 3000, which you specified in the preceding step. As such, you should now be able to launch your Cronos dapp using the following URL: “http://localhost:3000“.
Now, this is it for this tutorial! You now hopefully know how to build a Cronos dapp in five steps. However, if you experienced trouble at any point in the article, we recommend you look closely at the video embedded above. Moreover, you can additionally check out the official Moralis EVM API documentation.
If you found this article interesting and want to develop dapps for other networks alike, make sure to browse Moralis’ Web3 blog further. For example, you can easily learn how to build a Polygon dapp in only three steps!
How to Build a Cronos Dapp – Summary
Creating dapps does not have to be difficult, especially when working with Moralis. In fact, thanks to Moralis and the Ethereum boilerplate, you were able to build a Cronos dapp in only five steps:
- Explore the EVM-Compatible Boilerplate
- Create a Moralis Account
- Clone the Boilerplate
- Configure Environment Variables
- Start the Cronos Dapp
In combination with the Ethereum boilerplate, Moralis’ APIs are another essential part contributing to the accessibility of this process. We already mentioned the EVM API; however, this is just one example of many interfaces. You can additionally check out the NFT API and Solana API. These allow you to create NFT-related projects and Solana dapps easily.
Moreover, if you found the article interesting, check out other articles here at Moralis. For example, learn how to build a Solana NFT explorer or all there is to know about the EIP-4361 standard!
So, if you strive to become a Web3 developer or simply want to build a Cronos dapp, you should sign up with Moralis. Setting up an account is free, and you can start your Web3 development journey straight away!
