With the Ethereum Web3 API presented in this article, developers can fetch native balances, token balances, and NFTs using single lines of code! Although we will explore this API and its code further down below, let’s do a sneak peek of the snippets that can fetch the aforementioned on-chain data:
const nativeBalance = await Moralis.EvmApi.balance.getNativeBalance(options)
const tokenBalances = await Moralis.EvmApi.token.getWalletTokenBalances(options)
const nftsBalances = await Moralis.EvmApi.nft.getWalletNFTs(options)
If you are eager to build with the best Ethereum Web3 API, create your free Moralis account, jump into the EVM API documentation and start tackling our tutorials. However, if you need a helping hand in getting started, explore the following sections. Once you understand the basics and have a solid understanding of Moralis, we’ll demonstrate how to implement the lines of code outlined above. So, are you ready to start your “Web3 Ethereum JavaScript API” journey? Let’s begin!
Overview
Ethereum remains the leading Web3 development blockchain, and many other blockchains follow Ethereum’s footsteps by relying on Ethereum Virtual Machine. This means that the most popular alternatives are EVM-compatible. Hence, the ultimate Ethereum Web3 API is also the best EVM API. As such, it is an essential tool for devs looking to create dapps (decentralized applications) quickly and easily. Also, since JavaScript (JS) continues to be the leading programming language for web development, the Web3 Ethereum JavaScript API tends to be the most popular option. However, as you will learn herein, you can use many other programming languages to master the best Ethereum API in 2023.
Moving forward, we will first ensure you know what the Ethereum network is. We’ll also quickly repeat what an API is. Then, we’ll introduce you to Moralis – the market’s leading enterprise-grade Web3 API provider. This is where you’ll learn what makes this toolbox so universal and powerful. Last but not least, we’ll take on sort of a “Web3 JS tutorial” where you’ll learn to create a NodeJS dapp and fetch useful on-chain data.

The Ethereum Network – What is it?
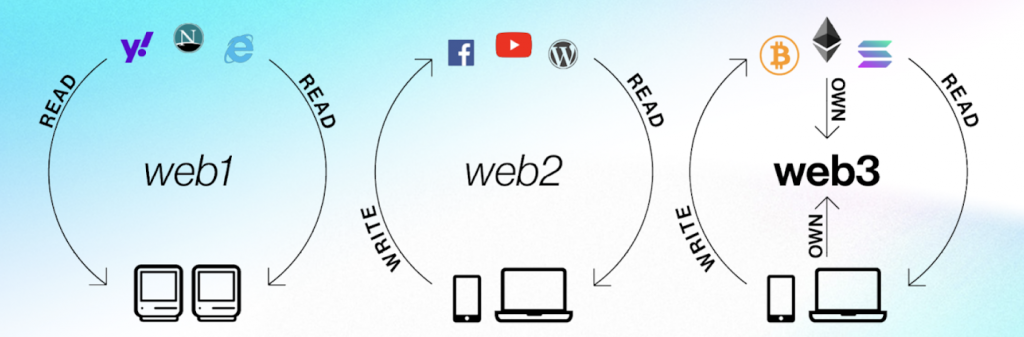
As you may know, Ethereum was the first fully programmable blockchain that went live in July 2015. It was founded by Vitalik Buterin, Gavin Wood, Charles Hoskinson, Anthony Di Iorio, and Joseph Lubin. Following Bitcoin’s lead and the definition of blockchain, Ethereum is a decentralized, digital, public ledger. It verifies and records transactions on its network. However, thanks to its programmability, it became a lot more than what Bitcoin is – the leading decentralized network. As a result, Ethereum and EVM added quite a bit to the foundation of Web3. The latter is the new iteration of the web focusing on ownership.
Furthermore, as “ethereum.org” explains, Ethereum provides open access to digital money and data-friendly services. Anyone with an internet connection can use and build on the Ethereum network. Furthermore, the ability to send and receive crypto assets is an important part of Ethereum’s Web3 network. The latter include Ethereum’s native coin (ether or ETH), fungible tokens (e.g., ERC20 tokens), and non-fungible tokens (NFTs).
Another critical core aspect of the leading programmable chain is smart contracts. These are the foundation of many dapps and all cryptocurrencies. Furthermore, smart contracts (Web3 contracts) are on-chain pieces of software. They trigger specific, predefined actions when certain predefined conditions have been met. Thanks to smart contracts, Web3 can eliminate countless go-between services. However, thanks to the best Ethereum Web3 API, you can create all sorts of dapps without deploying a smart contract.
What is an API?
An API, or application programming interface, facilitates communication between software. Essentially, it translates instructions for mutual understanding. By doing so, APIs provide a reliable and consistent supply of functions and requests. This also ensures reliable programming in a safe and controlled development environment.

The entire ecosystem of the internet is dependent on APIs. We are all continuously in contact with these interfaces. Whenever we use any of our devices (smartphones or computers), they connect to the internet and transfer information to a server or database (see the image above). Then, the receiving end must interpret the data, perform some actions, and send back a response to our devices. Next, our devices continue by analyzing the information and presenting it in a readable way. Moreover, APIs facilitate this entire process to ensure that the involved pieces of software can communicate successfully.
What is an Ethereum Web3 API?
In the context of the decentralized web in general, an Ethereum API ensures the communication between blockchain nodes and backend scripts for decentralized applications (dapps). As a Web3 developer, you can save a lot of time and resources by utilizing a reliable Ethereum Web3 API. After all, the latter enables you to use existing code snippets to fetch all sorts of on-chain data. In addition, a proper Web3 Ethereum JavaScript API allows you to use other JS tools to create any type of dapps.
With that definition in mind, it’s obvious that a proper Ethereum Web3 API makes blockchain development significantly more accessible. By eliminating the need to reinvent the wheel, such an API lets you focus on other aspects of your dapp development.
Introducing the Best Ethereum Web3 API
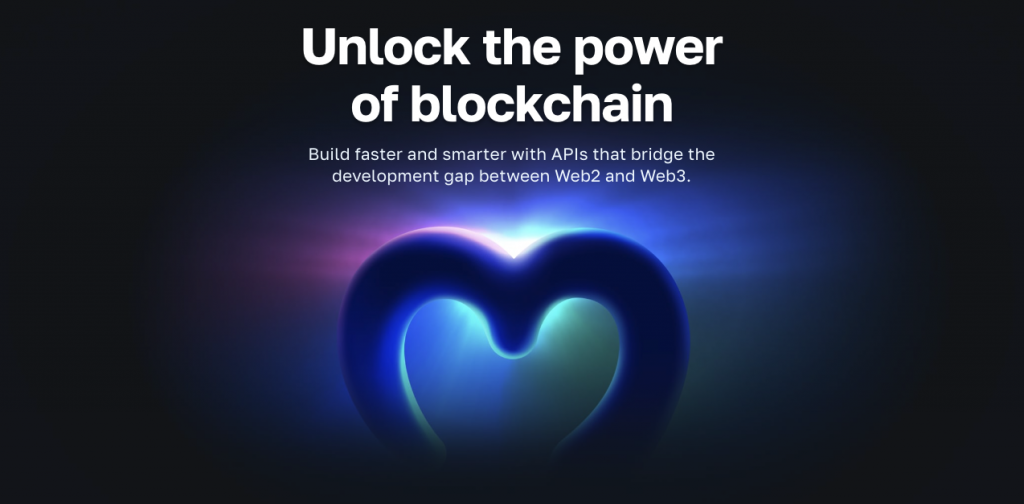
There are several Ethereum Web3 API providers out there. However, the scope, reliability, and speed of Moralis’ EVM API, in combination with 24/7 worldwide customer support, make this the go-to tool for dapp development. In addition, Moralis enables you to bridge the development gap between Web2 and Web3. Thanks to its cross-platform interoperability, you can join the Web3 revolution with your legacy skills and tools.

Furthermore, with Moralis’ Web3 Ethereum JavaScript API, your JS proficiency is enough to create killer dapps. However, you can use many other programming languages, frameworks, and platforms with Moralis’ API, including NodeJS, Python, C#, and more!
Another important aspect is Moralis’s cross-chain interoperability, which supports all leading blockchains, and continuously adds support for new reputable chains. In turn, Moralis’ API serves Ethereum and many other blockchains. This feature gives you many options and future-proofs your work since you’ll never be stuck to any particular chain.

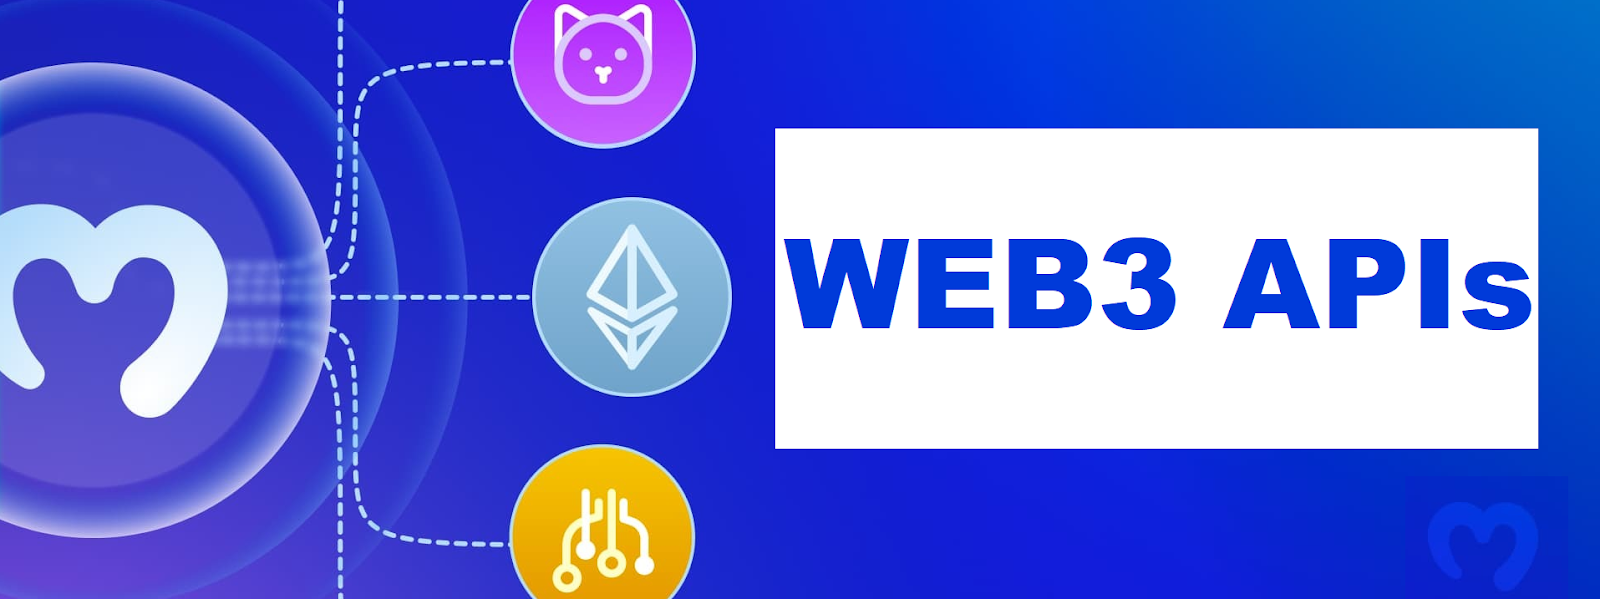
Web3 APIs from Moralis
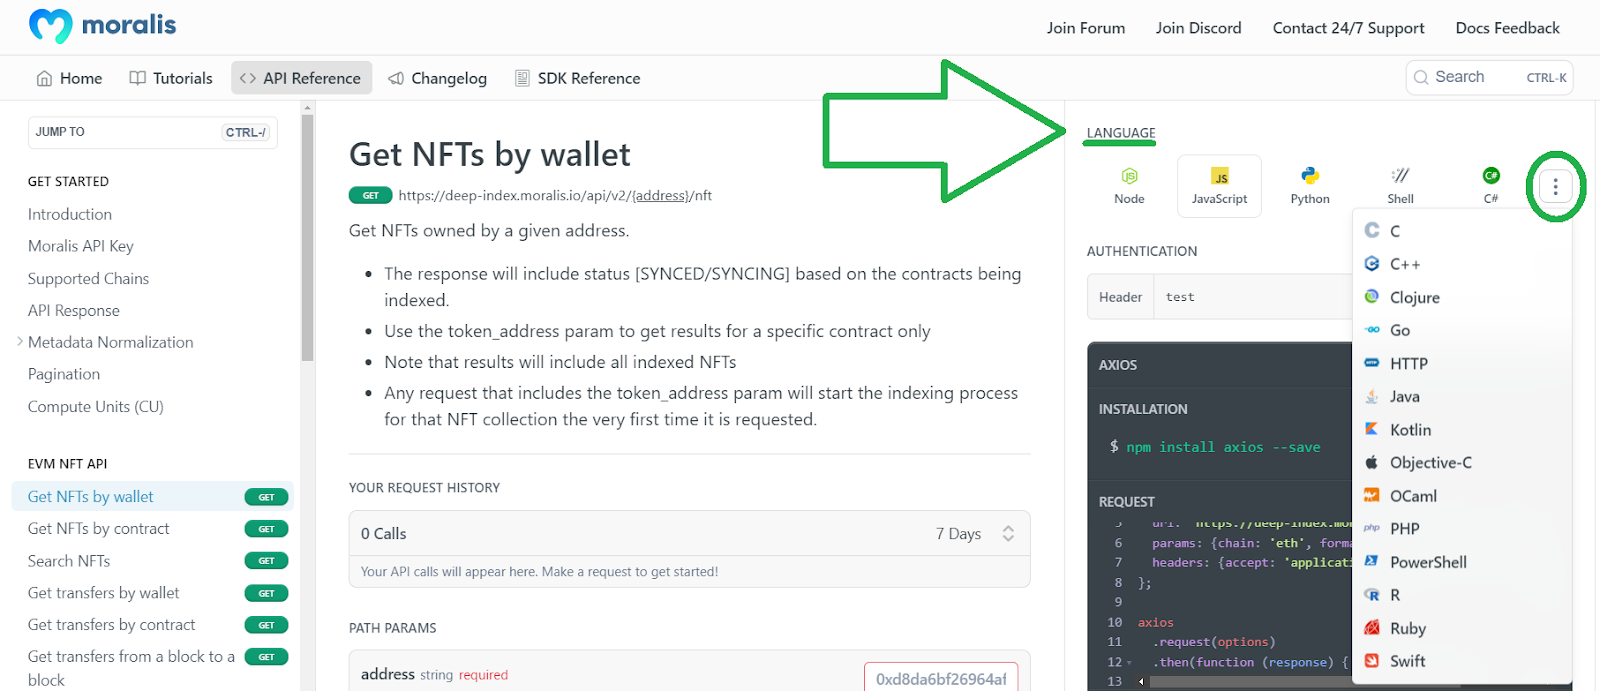
The following is a list of Moralis’ core Web3 APIs that focus on Ethereum and other leading EVM-compatible chains:
- Web3 Auth API – Web3 authentication is a gateway to every dapp. Moralis makes integration of that feature as straightforward as it gets. The Web3 Auth API is compatible with OpenID, OAuth, DIDs, and other standards.
- Token API – Crypto tokens are also one of the core elements of Web3, particularly in DeFi. So, if you wish to build DeFi dapps the easy way, Moralis’ Token API – the ultimate ERC20 token API – is a must-have tool. Among other on-chain data, this tool enables you to get balance of an ERC20 token.
- NFT API – As things stand, NFTs will continue to be all the rage. As such, it’s important to be able to build all sorts of dapps around these unique crypto assets effortlessly. With Moralis’ NFT API, you can build NFT marketplaces, NFT games, NFT trackers, and much more without breaking a sweat.
- Streams API – Have you been trying to figure out whether to use Web3.js or ethers.js? With the Streams API, you do not need to worry about either of the two leading ETH JS libraries. After all, the Web3 Streams API allows you to easily listen to the blockchain. As such, you get to use all sorts of on-chain events to trigger specific functionalities of your dapps. In our ethers.js vs Web3 streams comparison, you’ll learn more about the above-mentioned tools!
How to Use a Web3 Ethereum JavaScript API
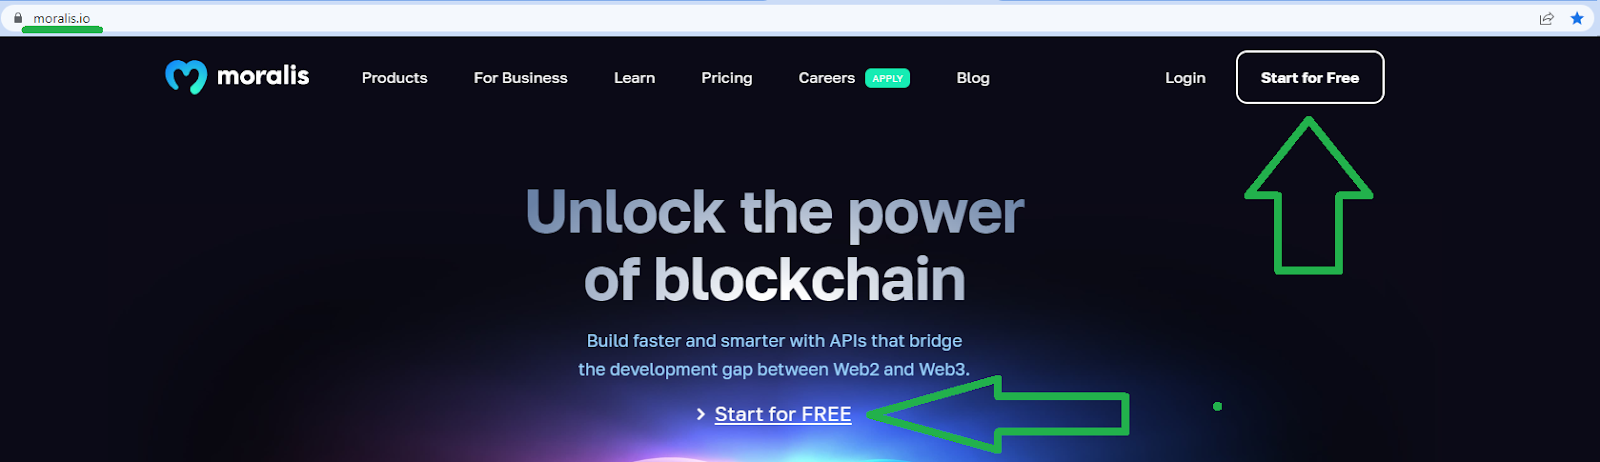
To use any of the above-presented APIs, you need a Moralis account. By visiting Moralis’ homepage, you can start for free:
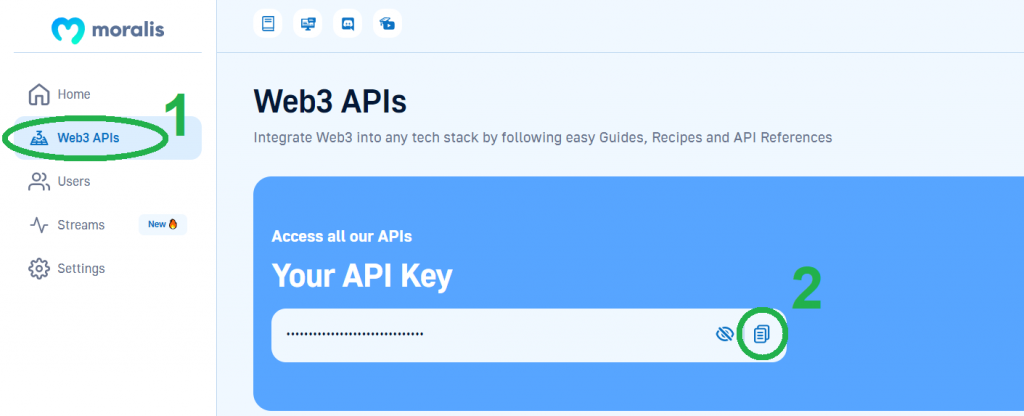
Another important piece of the puzzle is your Moralis Web3 API key. Fortunately, you get to obtain it in two steps once you have your Moralis account ready:
Other prerequisites may vary slightly, depending on which programming platform and frameworks you decide to use for your dapp development. However, in general, you will need a reliable code editor, such as Visual Studio Code (VSC), and install the required dependencies, including Moralis. Having your MetaMask wallet ready with test networks and test coins available will also come in handy, especially when you decide to test your dapps or start deploying smart contracts. In fact, there are many other useful tools of the available blockchain infrastructure you’ll want to get acquainted with. Learn more in the previously linked article!
Nonetheless, to help you better understand how to use Moralis, make sure to take on the example tutorial below.

Web3 Ethereum JavaScript API Tutorial
In this tutorial, we’ll take you through the following five steps:
- Creating a NodeJS App
- Importing and Setting Up the Latest Moralis JS SDK
- Setting Up a Simple Express Server
- Integrating Moralis Services
- Fetching Blockchain Data
In the final step, you’ll learn to implement the snippets of code provided at the top of today’s article. Accordingly, you’ll be able to get a wallet balance of native cryptocurrencies. In addition, by completing this tutorial, you’ll also know how to use the ultimate Ethereum Web API to get all ERC20 tokens owned by an address.

Step 1: Creating a NodeJS App
Start by creating a new folder and naming it “Simple-NodeJS”. Then, open that folder in VSC. Next, use your terminal and enter the following command:
npm init
Moving on, you need to name your project. You can stick to the default options by pressing enter a few times. As a result, you’ll have a new “package.json” file that includes this:
{
  "name": "simple-nodejs-demo",
  "version": "1.0.0",
  "description": "",
  "main": "index.js",
  "scripts": {
    "test": "echo \"Error: no test specified\" && exit 1"
  },
  "author": "",
  "license": "ISC"
}

Step 2: Importing and Setting Up the Latest Moralis JS SDK
To complete this step, you only need to execute a single command that will install the “moralis” dependency. However, since you’ll be using an Express server moving forward, you can hit two birds with one stone using the command below:
npm install moralis express

Step 3: Set Up a Simple Express Server
To complete this third step of today’s Ethereum Web3 API tutorial, you need to create an “index.js” file. Then, populate that file with the lines of code below:
const express = require('express')
const app = express()
const port = 3000

app.get('/', (req, res) => {
  res.send('Hello World!')
})

app.listen(port, () => {
  console.log(`Example app listening on port ${port}`)
})
Next, return to the “package.json” file and add the “start” script:
"scripts": {
  "start": "node index.js"
},
Now it’s time to run your Express server with this command:
npm run start
After running the above command, you’ll be able to visit “http://localhost:3000″ to be greeted by the “Hello World!” message.
Step 4: Integrating Moralis Services
When it comes to integrating Moralis, you need to equip the above-created “index.js” file with the right lines of code and your Moralis Web3 API key. This is how your updated “index.js” script should look like:
const express = require('express')
// Import Moralis
const Moralis = require('moralis').default
// Import the EvmChain dataType
const { EvmChain } = require("@moralisweb3/common-evm-utils")

const app = express()
const port = 3000

// Add a variable for the API key, address, and chain
const MORALIS_API_KEY = "replace_me"
const address = "replace_me"
const chain = EvmChain.ETHEREUM

app.get('/', (req, res) => {
  res.send('Hello World!')
})

// Add this startServer function that initializes Moralis
const startServer = async () => {
  await Moralis.start({
    apiKey: MORALIS_API_KEY,
  })

  app.listen(port, () => {
    console.log(`Example app listening on port ${port}`)
  })
}

// Call startServer()
startServer()
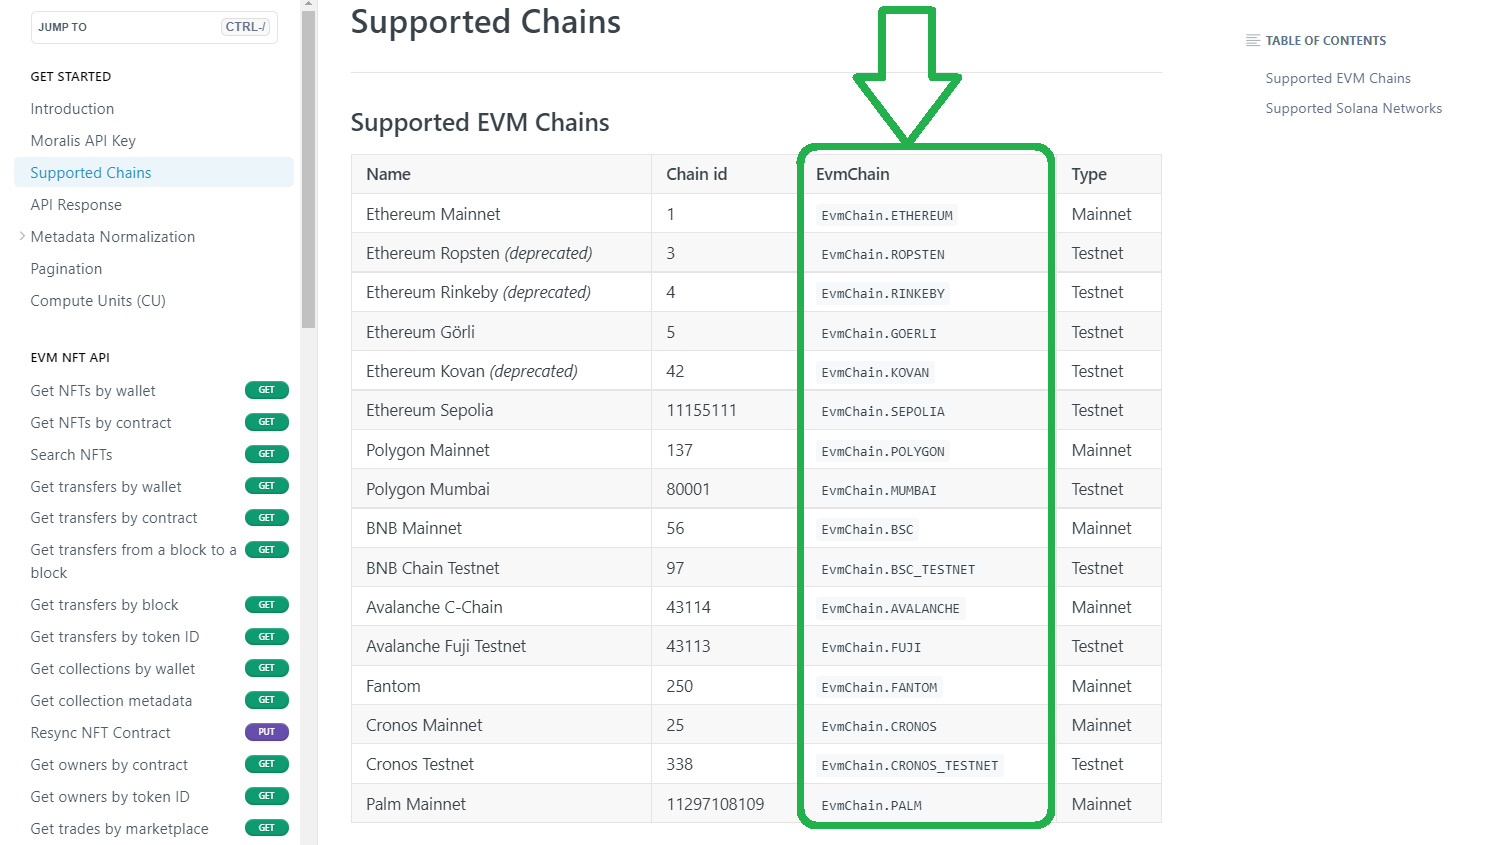
Since the Ethereum blockchain is the focus of our Ethereum Web3 API tutorial, the above script uses “ETHEREUM“. However, by replacing this parameter with other supported chains, you could target another EVM-compatible chain.
Step 5: Fetching Blockchain Data
Finally, we’ve reached the part of today’s tutorial where you’ll learn how to implement the above-presented EVM API endpoints. We’ll first show you how to fetch native balances – in the case of Ethereum, that is ETH. For that purpose, Moralis provides you with the “getNativeBalance” endpoint. This is how you can use this endpoint in your “index.js” file:
async function getDemoData() {
  // Get native balance
  const nativeBalance = await Moralis.EvmApi.balance.getNativeBalance({
    address,
    chain,
  })

  // Format the native balance formatted in ether via the .ether getter
  const native = nativeBalance.result.balance.ether

  return { native }
}

app.get("/demo", async (req, res) => {
  try {
    // Get and return the crypto data
    const data = await getDemoData()
    res.status(200)
    res.json(data)
  } catch (error) {
    // Handle errors
    console.error(error)
    res.status(500)
    res.json({ error: error.message })
  }
})

Our next stop is ERC-20 balances. Following the above example, we only need to use a different endpoint: “getWalletTokenBalances“. The latter is in the “token” EVM API subgroup. So, these are the lines of code you need to add to your script:
// Get token balances
const tokenBalances = await Moralis.EvmApi.token.getWalletTokenBalances({
  address,
  chain,
})

// Format the balances to a readable output with the .display() method
const tokens = tokenBalances.result.map((token) => token.display())

// Add tokens to the output
return { native, tokens }
}

Last but not least, let’s use the “getWalletNFTs” endpoint from the “nft” EVM API subgroup to fetch the first ten NFTs for a given address:
// Get the NFTs
const nftsBalances = await Moralis.EvmApi.nft.getWalletNFTs({
  address,
  chain,
  limit: 10,
})

// Format the output to return name, amount, and metadata
const nfts = nftsBalances.result.map((nft) => ({
  name: nft.result.name,
  amount: nft.result.amount,
  metadata: nft.result.metadata,
}))

// Add nfts to the output
return { native, tokens, nfts }
}
Complete “index.js” Example Script
To help you avoid any mistakes, you might want to copy the entire “index.js” file we’ve been working with above. As such, the following is the complete example script:
const express = require("express")
const Moralis = require("moralis").default
const { EvmChain } = require("@moralisweb3/evm-utils")

const app = express()
const port = 3000

const MORALIS_API_KEY = "replace_me"
const address = "0x9e8f0f8f8f8f8f8f8f8f8f8f8f8f8f8f8f8f8f8f"
const chain = EvmChain.ETHEREUM

async function getDemoData() {
  // Get native balance
  const nativeBalance = await Moralis.EvmApi.balance.getNativeBalance({
    address,
    chain,
  })

  // Format the native balance formatted in ether via the .ether getter
  const native = nativeBalance.result.balance.ether

  // Get token balances
  const tokenBalances = await Moralis.EvmApi.token.getWalletTokenBalances({
    address,
    chain,
  })

  // Format the balances to a readable output with the .display() method
  const tokens = tokenBalances.result.map((token) => token.display())

  // Get the NFTs
  const nftsBalances = await Moralis.EvmApi.nft.getWalletNFTs({
    address,
    chain,
    limit: 10,
  })

  // Format the output to return name, amount, and metadata
  const nfts = nftsBalances.result.map((nft) => ({
    name: nft.result.name,
    amount: nft.result.amount,
    metadata: nft.result.metadata,
  }))

  return { native, tokens, nfts }
}

app.get("/demo", async (req, res) => {
  try {

    // Get and return the crypto data
    const data = await getDemoData()
    res.status(200)
    res.json(data)
  } catch (error) {
    // Handle errors
    console.error(error)
    res.status(500)
    res.json({ error: error.message })
  }
})

const startServer = async () => {
  await Moralis.start({
    apiKey: MORALIS_API_KEY,
  })

  app.listen(port, () => {
    console.log(`Example app listening on port ${port}`)
  })
}

startServer()
Ethereum Web3 API – Exploring How to Use a Web3 Ethereum JavaScript API – Summary
We covered quite a distance in today’s article. Starting with the basics, we explained what the Ethereum network is and what an API entails. With that knowledge, you could understand what an Ethereum Web3 API is. Next, we introduced you to the best EVM API you can use for free. Finally, you even had an opportunity to follow our lead and complete an example NodeJS tutorial. As such, you now know how to create a simple NodeJS backend dapp that fetches native balances, token balances, and even NFTs.
If you enjoyed today’s article and want to learn more about blockchain development, make sure to check out Moralis’ other valuable resources. If you are more into practice, dive into tutorials that await you in the Moralis docs. However, if you are interested in learning from videos or articles like the one herein, you need to visit the Moralis YouTube channel or the Moralis blog. Some of the latest topics explain how to listen to the blockchain with ethers.js, what ERC 1155 NFTs are, what the Sepolia testnet is, how to get NFT collections using Python and React, and much more.
On the other hand, you might be eager to go full-time crypto as soon as possible. If that’s the case, you should become blockchain certified by enrolling in Moralis Academy. Among many other amazing blockchain development courses, this is also the place to master DeFi – the future of finance.
