A real-time wallet tracker is an application or website that allows you to monitor the activity of Web3 wallets. Consequently, when building one, you need a streamlined method for continuously observing wallet addresses and blockchain networks to detect events as soon as they occur. And the easiest way to do so is to leverage Moralis’ Streams API!
With this industry-leading development tool, you can effortlessly set up streams to get instant, customizable updates about events, smart contracts, and wallets sent directly to your project’s backend via webhooks. To highlight the power of the Streams API, here’s how easy it is to set up a stream that monitors the native transactions of a wallet on the Sepolia testnet:
async function streams(){

  const options = {

    chains: [EvmChain.SEPOLIA],
      tag: "transfers",
      description: "Listen to Transfers",
      includeContractLogs: false,
      includeNativeTxs: true,
      webhookUrl: "replace_me"

  }

  const newStream = await Moralis.Streams.add(options)
  const {id} = newStream.toJSON();
  const address = "replace_me";
  await Moralis.Streams.addAddress({address, id})

}

streams()
All you have to do is initialize Moralis, add your webhook URL, and input the address you wish to monitor! Now, if you want a more in-depth breakdown of how this works and how you can configure your streams further, join us in this guide or check out the video below:
Also, in order to make calls to the Streams API, you need a Moralis account. As such, if you haven’t already, sign up with Moralis straight away and get immediate access to all our industry-leading Web3 development tools for free!
Overview
In today’s article, we’ll kick things off by exploring the intricacies of real-time wallet trackers. From there, we’ll introduce you to Moralis’ Streams API, as this is the easiest way to build a real-time wallet tracker yourself. Lastly, to top things off, we’ll dive into our main tutorial and show you how to monitor an address in real-time in five straightforward steps:
- Get a Moralis API Key
- Set Up an Express Server
- Create a Moralis Stream
- Run the Code
- Test Your Stream
So, if you’re already familiar with the ins and outs of wallet trackers, feel free to skip straight into the ”Real-Time Wallet Tracker Tutorial…” section and get right into the action!
Also, if you’re serious about building your own real-time wallet tracker, consider checking out some more Moralis development tools. For example, the Streams API works perfectly together with other interfaces, including the Wallet API, NFT API, and Token API! So, if you haven’t already, don’t forget to sign up with Moralis. You can set up your account for free and get immediate access to all our industry-leading development tools, including the Streams API!
What is a Real-Time Wallet Tracker?
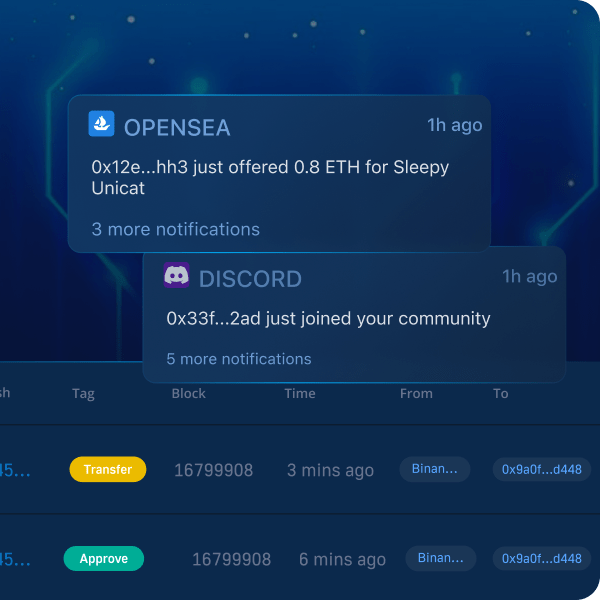
A real-time wallet tracker is a tool that allows you to explore and monitor the activity of a Web3 wallet. There are many options available on the market, and they typically have their own set of unique features. Some are quite basic, only providing simple transaction data such as the transfer amount. Meanwhile, others offer advanced options for customization and provide more detailed information, including block data, logs, addresses, etc.
But how exactly does a real-time wallet tracker work?
The best real-time wallet trackers usually allow users to specify events of interest. This can be everything from native transactions to ERC-20 token transfers. Once a real-time wallet tracker knows what to look for, it continuously monitors the relevant addresses for important on-chain activity. And as soon as it detects an event, it immediately notifies the users so they don’t miss a beat!
However, monitoring addresses and blockchain networks without proper tools is a tedious task, which is why the best real-time wallet trackers leverage Web3 APIs to simplify the process of creating the underlying infrastructure.
But what is the best real-time wallet tracker API? And how can you use tools like these to build decentralized applications (dapps)?
Introducing Moralis’ Streams API – The Ultimate Tool for Building a Real-Time Wallet Tracker
The easiest way to build a real-time wallet tracker is to leverage Moralis’ Streams API. With this industry-leading tool, you can seamlessly set up streams to receive instant, customizable updates directly to your project’s backend via Moralis webhooks whenever something important happens on-chain!
With the Streams API, you can seamlessly monitor all types of events, NFTs, DeFi platforms, smart contracts, wallets, etc. What’s more, the interface supports 44 million contracts and counting across all major EVM blockchains, including Ethereum, Polygon BNB Smart Chain (BSC), and many others.
So, why should you be working with the Streams API?
With Moralis, you can save both development time and money. And to highlight the power of the Streams API, here are three prominent benefits of this industry-leading tool:
✅ Full Customization: The Streams API is the industry’s most flexible and customizable tool for real-time blockchain data. And with this API, you can effortlessly set up Web3 notifications for any use case you can imagine.
✅ Go To Market Rapidly: Monitoring, indexing, and customizing real-time blockchain data is an expensive and time-consuming endeavor. Luckily, with the Streams API, you can monitor any address on any blockchain network with a few lines of code, allowing you to go to market faster.
✅ High Scalability: The Streams API is built to scale. For instance, you can seamlessly listen to the 100 million most active Ethereum wallets with only one stream.
So, when working with Moralis and the Streams API, it has never been easier to build dapps integrating real-time updates and alerts! However, to further highlight the accessibility of this tool, join us in the next section, as we’ll walk you through a comprehensive real-time wallet tracker tutorial!
Real-Time Wallet Tracker Tutorial: How to Track an Address in 5 Steps
One of the core functionalities of a real-time wallet tracker is the ability to monitor a crypto address for relevant events. And since we won’t be able to cover all wallet tracker features in this article, we’ll focus on just that. As such, in this tutorial, we’ll show you how to seamlessly monitor the native transfers of a wallet in five steps using the Streams API:
- Get a Moralis API Key
- Set Up an Express Server
- Create a Moralis Stream
- Run the Code
- Test Your Stream
However, before diving into the initial step of this real-time wallet tracker tutorial, you must deal with a few prerequisites!
Prerequisites
While the Streams API works with multiple programming languages, including Python, JavaScript, etc., we’ll focus on the latter in this tutorial. We will also use ngrok to set up a webhook URL. As such, before you can proceed, you need to have the following ready:
- Node.js v.14+
- NPM/Yarn
- Ngrok
Step 1: Get a Moralis API Key
Calling Moralis’ Streams API requires an API key. As such, if you haven’t already, the first thing you need to do is click on the ”Start for Free” button at the top right to sign up with Moralis:
From there, go to the ”Settings” tab, locate the ”API Keys” section, and copy your Moralis API key:
Save the key for now, as you’ll need it when initializing Moralis in the third step!
Step 2: Set Up an Express Server
For the second step, you need to set up a simple server to receive the Web3 webooks from Moralis. To do so, we’ll be using the Express Node.js application framework!
As such, to start things off, set up a new project in your integrated development environment (IDE). From there, open a new terminal, cd into the project’s root folder, and install Express with the following command:
npm install express
Next, create a new ”index.js” file and add the following code:
const express = require("express");
const app = express();
const port = 3000;

app.use(express.json());
app.post("/webhook", async (req, res) => {

  const {body} = req;
  try {
    console.log(body);
  } catch (e) {
    console.log(e);
    return res.status(400).json();
  }
    return res.status(200).json();
});

app.listen(port, () => {
  console.log(`Listening to streams`);
});
The code defines a single /webhook route to which Moralis can post your streams. Here, we parse the body of the response and log it in the console:
app.post("/webhook", async (req, res) => {

  const {body} = req;
  try {
    console.log(body);
  } catch (e) {
    console.log(e);
    return res.status(400).json();
  }
    return res.status(200).json();
});
From here, you can now start the Express server by opening a new terminal and running the following command:
node index.js
With the server up and running, you must open a new tunnel to ”port 3000” using ngrok. To do so, launch a new terminal and run this command:
ngrok http http://localhost:3000
Running the command above will open a window similar to the one below where you need to copy and save your webhook URL:
Step 3: Create a Moralis Stream
Now that your server is up and running, it’s time to create your stream using Moralis’ Streams API. As such, set up a new Node.js project in your IDE and create a ”.env” file in its root folder. This file will host a MORALIS_KEY environment variable, and it should look something like this:
MORALIS_KEY=’YOUR_API_KEY’
Simply replace YOUR_API_KEY with the key you copied during the first step of this tutorial.
Next, set up a new ”index.js” file and add the code below:
const Moralis = require("moralis").default;
const { EvmChain } = require("@moralisweb3/common-evm-utils");
require("dotenv").config();

Moralis.start({
  apiKey: process.env.MORALIS_KEY,
});

async function streams(){

  const options = {

    chains: [EvmChain.SEPOLIA],
      tag: "transfers",
      description: "Listen to Transfers",
      includeContractLogs: false,
      includeNativeTxs: true,
      webhookUrl: "replace_me"

  }

  const newStream = await Moralis.Streams.add(options)
  const {id} = newStream.toJSON();
  const address = "0xa50981073aB67555c14F4640CEeB5D3efC5c7af2";
  await Moralis.Streams.addAddress({address, id})

  console.log("Stream successfully created")

}

streams()
So, what exactly is happening here?
To explain, we’ll break down a few essential parts of the code below!
At the top of the ”index.js” file, we start by importing Moralis and the environment variable from the ”.env” file:
const Moralis = require("moralis").default;
const { EvmChain } = require("@moralisweb3/common-evm-utils");
require("dotenv").config();
Next, we use our API key to initialize the Moralis SDK:
Moralis.start({
  apiKey: process.env.MORALIS_KEY,
});
We then create a new streams() function where we set up an options object:
async function streams(){

  const options = {

    chains: [EvmChain.SEPOLIA],
      tag: "transfers",
      description: "Listen to Transfers",
      includeContractLogs: false,
      includeNativeTxs: true,
      webhookUrl: "replace_me"

  }
    //…
}
The options object is used to configure our stream, and it has multiple parameters, including chains, tag, description, webhookUrl, etc. This is also where we specify the events we want our stream to monitor.
In this case, we configured our stream to monitor the Sepolia testnet for native transactions. If you want to monitor another chain for other events, simply configure the parameters of options.
Also, don’t forget to add your webhook URL by replacing replace_me and appending /webhook at the end. All in all, the webhookUrl parameter of the options object should look something like this:
webhookUrl: “https://1192-80-217-157-107.ngrok-free.app/webhook”
We then create a new stream by calling Moralis’ Stream.add() method using options:
const newStream = await Moralis.Streams.add(options)
Next, we get the id from the new stream and create an address const to which we add the address we want to monitor:
const {id} = newStream.toJSON();
const address = "0xa50981073aB67555c14F4640CEeB5D3efC5c7af2";
Lastly, we use id and address to add the address to our stream:
await Moralis.Streams.addAddress({address, id})
Step 4: Run the Code
For the final step, you must execute the code above by running the script. However, you need to install a couple of dependencies before doing so. As such, open a new terminal and run the following command:
npm install moralis @moralisweb3/common-evm-utils dotenv
Next, run this command in the project’s root folder to execute the script:
node index.js
If everything worked as intended, your server should now have received an empty webhook response looking something like this:
{
  abi: [],
  block: { number: '', hash: '', timestamp: '' },
  txs: [],
  txsInternal: [],
  logs: [],
  chainId: '',
  confirmed: true,
  retries: 0,
  tag: '',
  streamId: '',
  erc20Approvals: [],
  erc20Transfers: [],
  nftTokenApprovals: [],
  nftApprovals: { ERC721: [], ERC1155: [] },
  nftTransfers: [],
  nativeBalances: []
}
And that’s it; you have successfully created a stream monitoring the native Sepolia testnet transactions of the specified address!
In the next section, we’ll briefly show you how to test that everything works as it should!
Step 5: Test Your Stream
With the Moralis stream active, your server should now start to receive webhook responses whenever the address in question sends a native transaction on the Sepolia testnet. In our case, we added one of our MetaMask wallet addresses to the stream. As such, to test that everything is working as intended, we’ll simply send a small amount of Sepolia testnet ETH to another address:
As soon as the transaction is finalized, your server should have received a response looking something like this:
{
  confirmed: true,
  chainId: '0xaa36a7',
  abi: [],
  streamId: 'a6c08210-c7dc-416c-a140-4746478530ce',
  tag: 'transfers',
  retries: 0,
  block: {
    number: '4692430',
    hash: '0x31754432aa984e524472abb52c05f3175471ae2cb209a751f31e75a9dfab6a94',
    timestamp: '1699967412'
  },
  logs: [],
  txs: [
    {
      hash: '0x2fc3678670ee9895dc5dfc5f189f9839ab5c7351905b6d2b419518a5334450a2',
      gas: '21000',
      gasPrice: '1639464455',
      nonce: '9',
      input: '0x',
      transactionIndex: '78',
      fromAddress: '0xa50981073ab67555c14f4640ceeb5d3efc5c7af2',
      toAddress: '0xb76f252c8477818799e244ff68dee3b1e6b0ace5',
      value: '100000000000000',
      type: '2',
      //…
      receiptCumulativeGasUsed: '25084154',
      receiptGasUsed: '21000',
      receiptContractAddress: null,
      receiptRoot: null,
      receiptStatus: '1'
    }
  ],
  //…
}
The response contains a bunch of information, including block data, a transaction hash, addresses, the transaction amount, and much more. And you can now leverage this information to build a comprehensive real-time wallet tracker in no time!
If you’d like to learn more about how this tool works and how you can configure your streams in various ways, check out our Streams API documentation page!
Summary: How to Build a Real-Time Wallet Tracker
In today’s article, we showed you how to monitor an address in real-time using Moralis’ Streams API. And thanks to the accessibility of this tool, we were able to do so in five straightforward steps:
- Get a Moralis API Key
- Set Up an Express Server
- Create a Moralis Stream
- Run the Code
- Test Your Stream
As such, if you have followed along this far, you now know how to set up your own streams to monitor wallets on multiple blockchain networks with the Streams API. From here, you can now use your newly acquired skills to build your own on-chain wallet tracker!
If you liked this crypto wallet tracking tutorial, consider checking out more content here on Moralis’ blog. For instance, read about the top block explorer API or learn how to build on Solana and EVM. Also, don’t forget to sign up with Moralis if you want to leverage our industry-leading Web3 APIs yourself!