In this tutorial, you will learn how to deploy an AWS Lambda function with Moralis! Furthermore, the tutorial demonstrates how to create and deploy a Lambda application with multiple functions. What’s more, thanks to Moralis’ capabilities and Web3 development tools, you will be able to do so in four straightforward steps:
- Deploying Lambda Functions – Prerequisites
- Project Setup
- Developing the App
- Testing and Deploying AWS Lambda Functions
If you follow along until the end, you will learn how to run Web3 JavaScript functions through AWS Lambda with Moralis! Moreover, if this sounds exciting and you want to jump straight into the tutorial, skip to the ”Tutorial on How to Deploy AWS Lambda Function with Moralis” section immediately! You can also check out Moralis’ official Web3 documentation page of AWS Lambda or the GitHub repository for the Lambda application below:
Full AWS Lambda Application Code – https://github.com/MoralisWeb3/examples-aws-lambda-nodejs/tree/main/aws-node-project

Overview
AWS – short for ”Amazon Web Services” – is one of the market’s most prominent cloud computing platforms. AWS consists of various offerings and services, one of which is AWS Lambda. Furthermore, Lambda is a computing service enabling developers to run code without worrying about the associated administration tasks such as managing operating system access control, provisioning servers, scaling, etc. Instead, developers receive more time to focus on the core product and business logic. However, how does this actually work, and how can you upload an AWS Lambda function?
If you are interested in knowing the answer to this question, join us as we provide a complete walkthrough of how to upload an AWS Lambda function using Moralis in this article. What’s more, before diving deeper into the core section, the guide additionally provides a brief introduction to AWS Lambda. However, if you do not find this a sufficient overview or want more details regarding the service, check out our guide on AWS Lambda and what it is used for!
The Moralis AWS Lambda NodeJS integration is responsible for the accessibility displayed in this tutorial. However, it is only one of many conveniences brought to you by Moralis. An additional great example is the various Web3 APIs supplied by Moralis! For example, if you want to learn more about this, check out the EVM API, allowing you to easily create EVM-compatible projects!
Nevertheless, before continuing the article, sign up with Moralis, as an account is required to follow along! What’s more, creating an account is entirely free and only takes seconds to set up!
AWS Lambda and Lambda Function Introduction
Before showing you how to upload a function, it is beneficial to understand the intricacies of AWS Lambda. Therefore, this initial section briefly explores AWS Lambda and the service’s functions through a quick introduction! So, what exactly is AWS Lambda?
AWS Lambda is a computing service based on an event-driven, serverless architecture. AWS Lambda takes care of the heavy lifting associated with computing infrastructures. As a result, the service provides the opportunity to run code without the need to manage or provision servers. This further means that you can run code from any backend services and applications, and all that’s required of you is the code!
When uploading code to AWS Lambda, you need to organize it in the form of ”Lambda functions”. These functions have information attached to them, such as resource requirements, an entry point, a name, etc. Moreover, AWS Lambda only runs the functions when requested, and you only pay for the computing time they consume. Consequently, AWS Lambda presents excellent opportunities to cut costs and scale up and down when demand fluctuates!
Nevertheless, if you want further information on this service and how it works, check out this article explaining AWS Lambda functions and architecture in more detail!
Now that’s it for this quick introduction to AWS Lambda. It is now time to move on to the central part of this article, where we will show you how to deploy an AWS Lambda function with Moralis!
Tutorial on How to Deploy AWS Lambda Function with Moralis
With a deeper understanding of AWS Lambda and the service’s functions, it is time for the main part of this article. As such, the following sections demonstrate how to deploy an AWS Lambda function with Moralis. In doing so, you will learn how to create and upload an AWS Lambda application featuring multiple Web3-based functions. Consequently, by the end of the tutorial, you will know how to run Web3 JavaScript code via Lambda with Moralis!
Thanks to the capabilities of Moralis, we can divide this ”How to Deploy an AWS Lambda Function” tutorial into three sections, each explaining a central part of the process in a straightforward manner:
- Deploying Lambda Functions – Prerequisites
- Project Setup
- Developing the App
- Test and Deploy an AWS Lambda Function
So, if you want to learn how to upload an AWS Lambda function, follow along as we cover the aforementioned parts in further detail. Nevertheless, without further ado, let us jump straight into the first part of the tutorial and cover the required prerequisites!
Deploying Lambda Functions – Prerequisites
Before you start developing and deploying Lambda functions, there are a few prerequisites you need to deal with. More specifically, there are seven in total:
- Moralis Account – The first thing you need is a Moralis account. As such, if you have not already, join Moralis immediately!
- Integrated Development Environment (IDE) – Next up, you need to download and install an IDE. We recommend Visual Studio Code (VSC) since this is the environment we use throughout the tutorial.
- NodeJS – To follow along, you need the NodeJS runtime environment, which you can download from here: https://nodejs.org/en/.
- Serverless Framework – In addition, you also need the Serverless Framework. You can find a tutorial on how to set up the framework by clicking here.
- AWS Account – Go to the AWS website and create an account.
- AWS Command Line Interface (CLI) – Next, you need to set up the AWS CLI, and you can find a setup guide here.
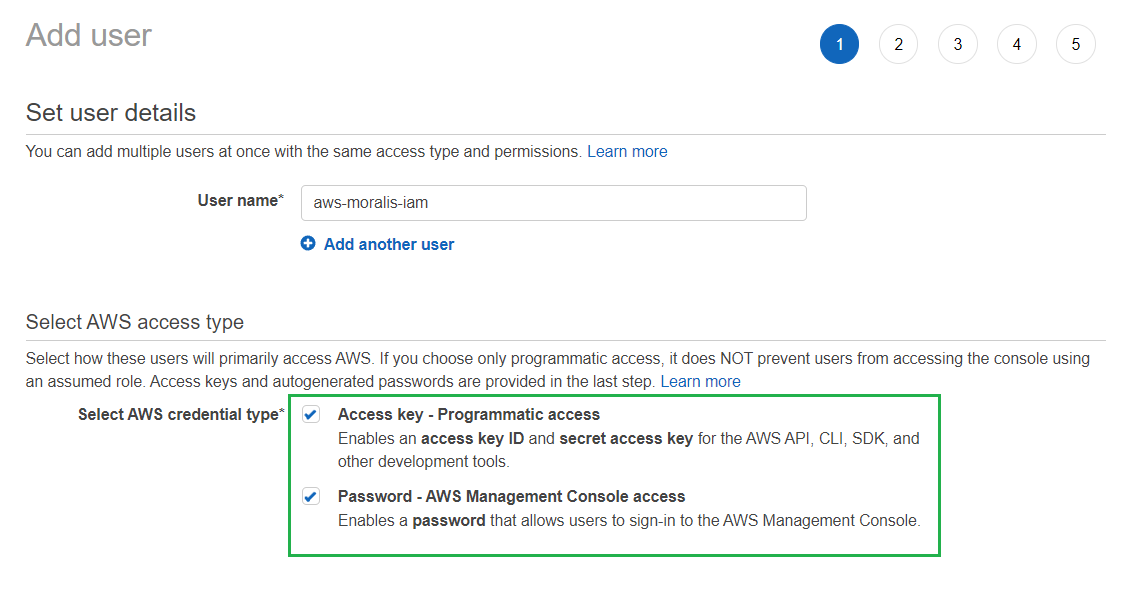
- IAM User – Finally, the last prerequisite is an IAM user. Log in to AWS and open the IAM console to create the user. You must then click on ”Users” and ”Add users” in the navigation menu. When doing so, you should arrive at the following page, where you must input a username and check the boxes for both AWS credential types:
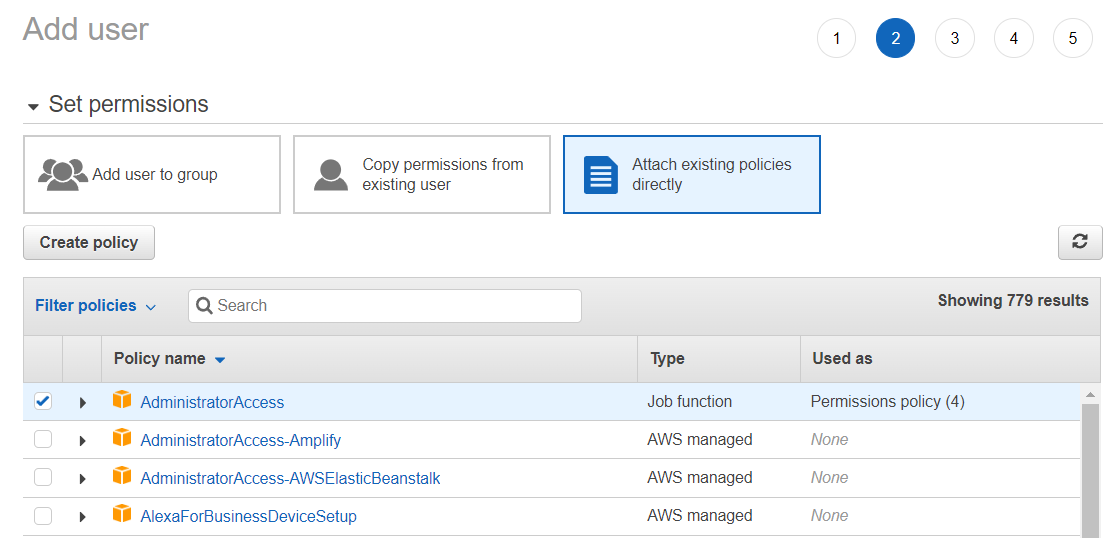
In the second stage of adding a new user, also make sure to add the ”AdministratorAccess” permission:
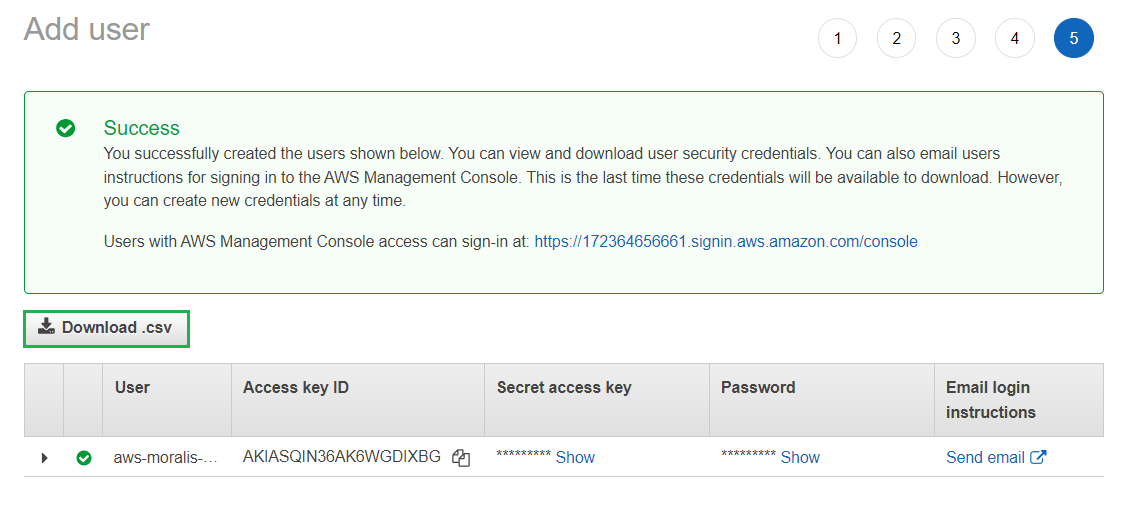
Lastly, go through each preceding step to configure your account according to your needs. When you reach the fifth and final step, make sure to download the AWS credentials in a ”.csv” file:
That covers the seven prerequisites! Let us now progress by showing you how to set up the project!
Project Setup
It is time to set up the project! To begin with, we will show you how to configure your AWS credentials. As such, to proceed, open a new terminal. If you are using VSC, you can do so by clicking on ”Terminal” at the top, followed by ”New Terminal”:

Now, since you installed the AWS CLI in the previous section, you can configure your AWS credentials by running this command:
aws configure
Once you run ”aws configure”, you will need to input some data into the terminal and make a few selections. As such, start by inputting your ”AWS Access Key ID”. Second, do the same for the ”AWS Secret Access Key”. Finally, for the region name and output format, hit enter. Ultimately, it should look something like this:
AWS Access Key ID [None]: AKIAIOSFODNN7EXAMPLE
AWS Secret Access Key [None]: wJalrXUtnFEMI/K7MDENG/bPxRfiCYEXAMPLEKEY
Default region name [None]: ENTER
Default output format [None]: ENTER
Setting Up the Framework
In this sub-section, we show you how to set up the barebones state of the project using the Serverless Framework tool. As such, to continue, create a new folder and open it with the IDE. You can then open a new terminal and run this command:
serverless
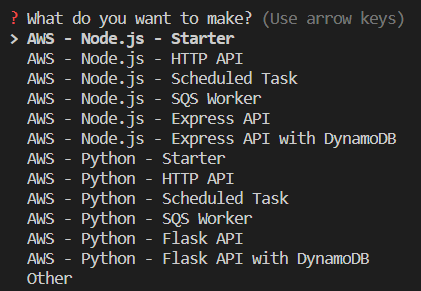
You must then make a few decisions, and first, select the ”Starter” option for the initial prompt:
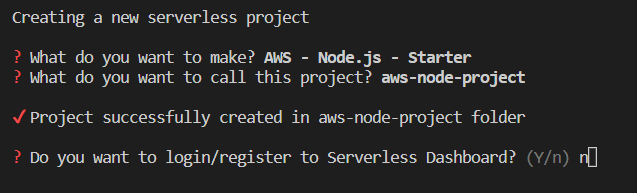
Next up, you need to name the project. Here, you can either input a name yourself or immediately click on enter to choose a default option:

When you click on “enter” to select the name, a Serverless Framework project will download. When it finalizes, the terminal will ask you to log in. However, for this tutorial, you can skip this by inputting ”n” and hitting enter:
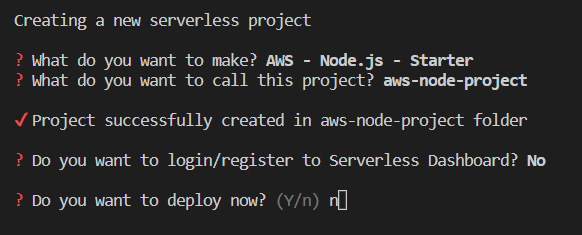
From there, you receive the option to deploy the project. However, you can put this off for a little while and continue by inputting ”n” again and hitting enter:
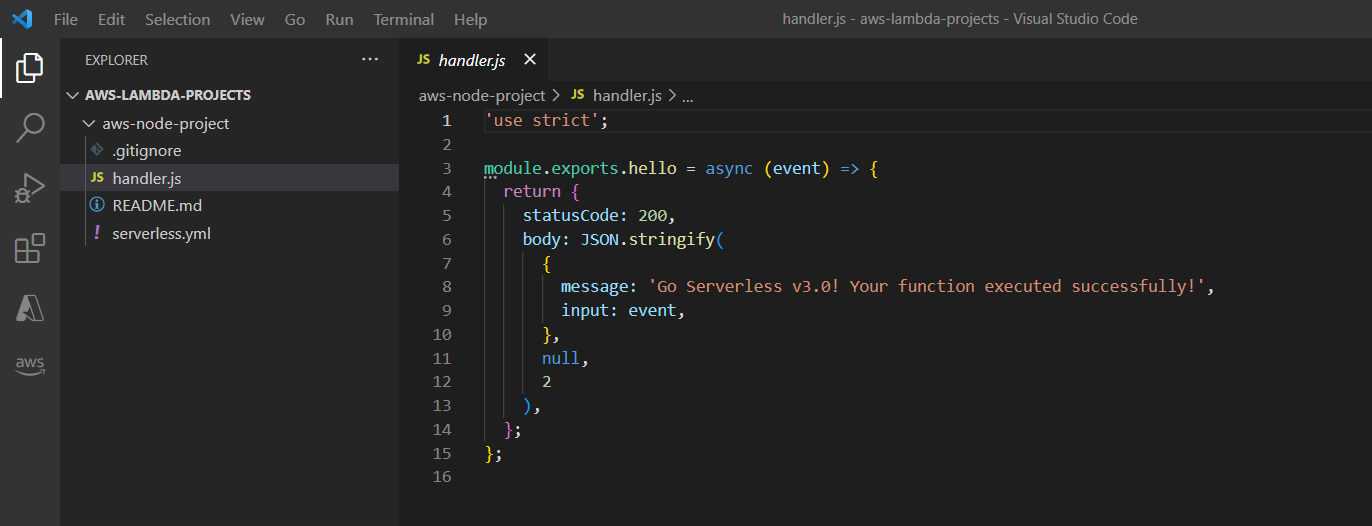
If you followed the steps accurately, you should now have a project with a similar structure to the one shown in the image below:
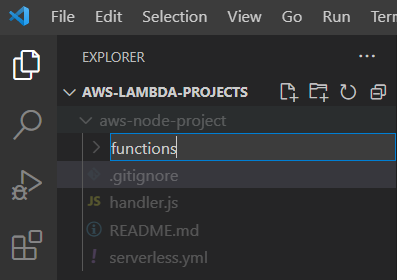
However, this is only a template, and you need to make a few configurations. To begin with, create a new ”functions” folder:
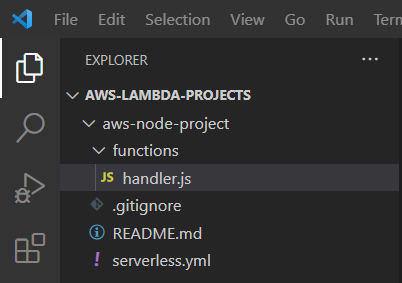
You can then move the ”handler.js” file into this newly created folder:
Lastly, you need to add your Moralis API key, which you can do by replacing the code in the ”serverless.yml” file with this snippet:
service: aws-node-project

frameworkVersion: '3'

provider:
  name: aws
  runtime: nodejs14.x
  environment:
    MORALIS_API_KEY: 'replace_me'

functions:
  hello:
    handler: functions/handler.hello
If you look closely at the code, you will notice the ”replace_me” part, to which you need to add the key. To find the key, log in to the Moralis admin panel and click on ”Web3 APIs” to the left. From there, copy the key and input it into the code:

Developing the App
With the Serverless Framework template at your disposal and the necessary configurations completed, it is now time for the central part of this tutorial, where we show you how to add code for the Lambda app. Specifically, in the following sections, we will show you how to create two functions: ”getNativeBalance()” and ”getWalletNfts()”.
However, before diving into the code for these functions, you must install the Moralis dependencies. As such, open the terminal once again, ”cd” into the project’s root folder, and run this command:
npm install moralis
Running the command above will install Moralis, and you are now ready to start creating the first ”getNativeBalance()” function!
The “getNativeBalance()“ Function
To kick things off, change the name of the ”handler.js” file to ”getNativeBalance.js”:

You can then open the file and progress by replacing ”module.exports.hello” with ”module.exports.handler”:
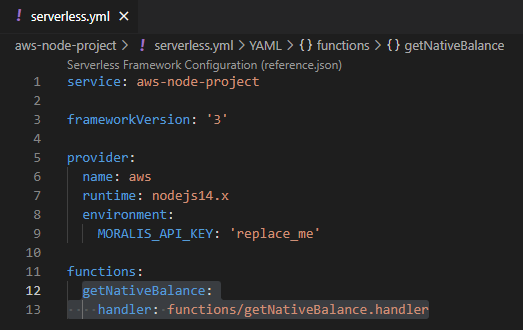
From there, you need to change the name and handler of the function in the ”serverless.yml” file:
Next, navigate back to the ”getNativeBalance.js” file and add Moralis’ ”getNativeBalance()” functionality by first inputting the Moralis requirements:
const Moralis = require('moralis').default;
Following this, you must initialize Moralis with the Web3 API key specified earlier. As such, input the following snippet below the Moralis requirements:
const startMoralis = async () => {
  await Moralis.start({
    apiKey: process.env.MORALIS_API_KEY
  });
};

startMoralis();
Finally, the last thing you need to do is replace the complete ”module.exports.handler” section with the code below. In doing so, you will implement the proper SDK method:
module.exports.handler = async (event) => {
  // Get native balance
  const nativeBalance = await Moralis.EvmApi.balance.getNativeBalance({
    address: event.address,
    chain: event.chain
  });

  // Format the native balance formatted in ether via the .ether getter
  const nativeBalanceEther = nativeBalance.result.balance.ether;

  return {
    result: nativeBalanceEther
  }
};
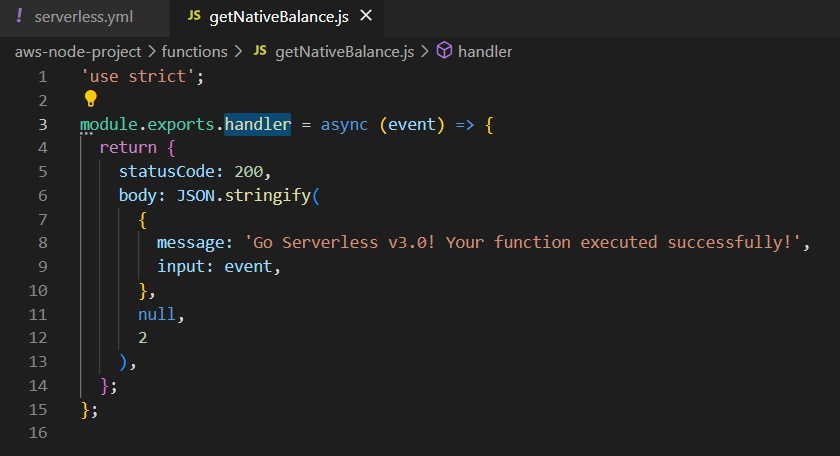
That covers the first ”getNativeBalance()” function, and you should now have a file similar to the one below:
'use strict';
const Moralis = require('moralis').default;

const startMoralis = async () => {
  await Moralis.start({
    apiKey: process.env.MORALIS_API_KEY
  });
};

startMoralis();

module.exports.handler = async (event) => {
  // Get native balance
  const nativeBalance = await Moralis.EvmApi.balance.getNativeBalance({
    address: event.address,
    chain: event.chain
  });

  // Format the native balance formatted in ether via the .ether getter
  const nativeBalanceEther = nativeBalance.result.balance.ether;

  return {
    result: nativeBalanceEther
  }
};
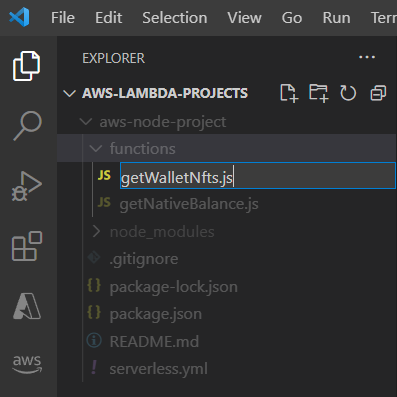
The “getWalletNfts()“ Function
The next function we will add is ”getWalletNfts()”, and we can follow the same steps as the initial function. However, since we previously used the ”handler.js” file, you need to create a new one from scratch. As such, go ahead and create a new file in the ”functions” folder called ”getWalletNfts.js”:
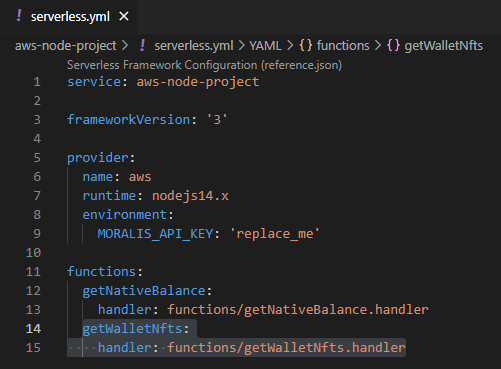
Next up, open ”serverless.yml” and add the function to the ”functions” section:
Finally, to top things off, add the following code to the ”getWalletNfts.js” file:
'use strict';
const Moralis = require('moralis').default;

const startMoralis = async () => {
  await Moralis.start({
    apiKey: process.env.MORALIS_API_KEY,
  });
};

startMoralis();

module.exports.handler = async (event) => {
  // Get wallet NFTs
  const nfts = await Moralis.EvmApi.nft.getWalletNFTs({
    address: event.address,
    chain: event.chain,
    limit: 10
  });

  return {
    result: JSON.stringify(nfts)
  }
};
That’s it for the ”getWalletNfts()” function! All that remains is testing and deploying the functions to Lambda, and we will show you how to do so in the following section!
Test and Deploy an AWS Lambda Function
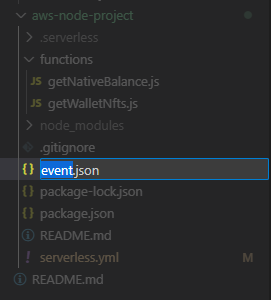
Now that you are done with the Lambda application and the two functions, it is time to ensure that everything works. As such, we will start this section by showing you how to run a local test. So, to begin with, create a new file called ”event.json”:
From there, add a wallet address and chain ID as parameters to the file. It should look something like this:
{
    "address": "0x99EXAMPLEADDRESS",
    "chain": "chain_id"
}
Once you have added the wallet address and chain ID, you can run the test. So, let’s say you want to try the ”getNativeBalance()” function. In this case, open a new terminal, and run the following command:
serverless invoke -f getNativeBalance --path event.json
If the function works as it should, the terminal should return a success message similar to the one down below:

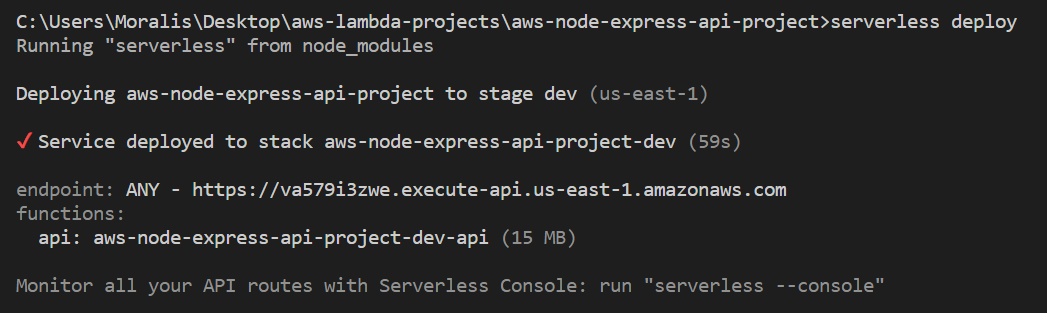
Once you know that the functions work as intended, you must deploy your AWS Lambda application. In order to deploy the Lambda functions, make sure you are in the project’s root folder and run the following command in a new terminal:
serverless deploy
If the deployment process succeeds, you should receive a message like the one below:
That’s it! Congratulations, you have now successfully been able to deploy an AWS Lambda function with Moralis!
If you have any questions, check out the official AWS Lambda documentation. You can also join Moralis’ Discord channel to receive expert assistance from our engineers!
Summary – How to Deploy AWS Lambda Functions
In this article, you learned how to deploy an AWS Lambda function with Moralis. What’s more, thanks to the accessibility of the AWS Lambda NodeJS integration, you were able to do so in only four straightforward steps:
- Deploying Lambda Functions – Prerequisites
- Project Setup
- Developing the App
- Testing and Deploying AWS Lambda Functions
The steps above will teach you how to create and deploy a Lambda application with multiple functions. As a result, you can run Web3 JavaScript code directly through AWS Lambda with Moralis!
If you found this tutorial on deploying Lambda functions helpful, you might want to check out additional content here at Moralis’ Web3 blog. For example, learn how to use IPFS for NFT metadata or explore Polygon webhooks!
Additionally, if you want to become a more proficient blockchain developer, check out Moralis Academy! The academy offers great blockchain courses for both new and more experienced developers. For instance, if you are new to the space, learn the basics of Web3 development through the following course: ”Ethereum Fundamentals”.

Nevertheless, no matter if you want to continue deploying AWS Lambda functions or build other Web3 projects, sign up with Moralis! In doing so, you can fully leverage blockchain technology’s power and access a more seamless Web3 development experience!
