When creating a Polygon webhook, using the best development tools available is crucial. This is where Moralis’ Web3 Streams API enters the equation to provide a more seamless developer experience, allowing you to set up Polygon webhooks to stream blockchain data into your projects’ backend in a heartbeat!
If you follow along in this tutorial and complete the necessary steps, you’ll learn the efficient way of creating webhooks on Polygon. Furthermore, with Moralis’ Streams API, you can set up Polygon webhooks in two ways:
- Programmatically
- Via Moralis’ Admin Panel
If you want to jump straight to the tutorial, scroll down to the “How to Set Up and Use Polygon Webhooks with Moralis” section! What’s more, you will find the complete code for setting up a Polygon webhook programmatically in the snippet below:
import Moralis from 'moralis';
import { EvmChain } from "@moralisweb3/common-evm-utils";

Moralis.start({
  apiKey: 'YOUR_API_KEY',
});

const stream = {
  chains: [EvmChain.ETHEREUM, EvmChain.POLYGON], // List of blockchains to monitor
  description: "monitor Bobs wallet", // Your description
  tag: "bob", // Give it a tag
  includeNativeTxs: true, // select the events to monitor
  webhookUrl: "https://YOUR_WEBHOOK_URL", // Webhook URL to receive events
}

const newStream = await Moralis.Streams.add(stream);
const { id } = newStream.toJSON(); // { id: 'YOUR_STREAM_ID', ...newStream }

// Now we attach Bobs address to the stream
const address = "0x68b3f12d6e8d85a8d3dbbc15bba9dc5103b888a4";

await Moralis.Streams.addAddress({ address, id });
Overview
Both dapps (decentralized applications) and conventional Web2 platforms need efficient cross-system communications to function optimally and to provide higher user value. Moreover, platforms have several means of communication; however, the most efficient way is via webhooks. Since webhooks play such an essential role in the web’s ecosystem, developers need tools for setting them up efficiently, and within Web3, this is where Moralis’ Web3 Streams API enters the picture!
With the API, you can receive Web3 webhooks on any network and layer-2 solution. This includes Ethereum, Avalanche, BNB Chain, and, of course, Polygon, to which we will direct our attention in this article. If this sounds interesting, follow along as we teach you how to quickly set up Polygon webhooks with Moralis!
If you are already familiar with Polygon webhooks, consider checking out additional content here at Moralis’ Web3 blog. The blog offers fresh content for both new and more experienced developers. For example, if game development excites you, we highly recommend our article on creating a Minecraft Web3 game!
Nevertheless, no matter what Web3 development adventure you embark on, sign up with Moralis! Moralis’ excellent Web3 APIs provide a more seamless developer experience, allowing you to fully leverage the power of blockchain technology!
What are Webhooks, and How Do They Compare to Web3 Webhooks?
Before taking a closer look at Web3 webhooks, this initial part delves deeper into the intricacies of conventional webhooks. Accordingly, we will begin this Polygon webhooks tutorial by answering the question, ”what are webhooks?”.
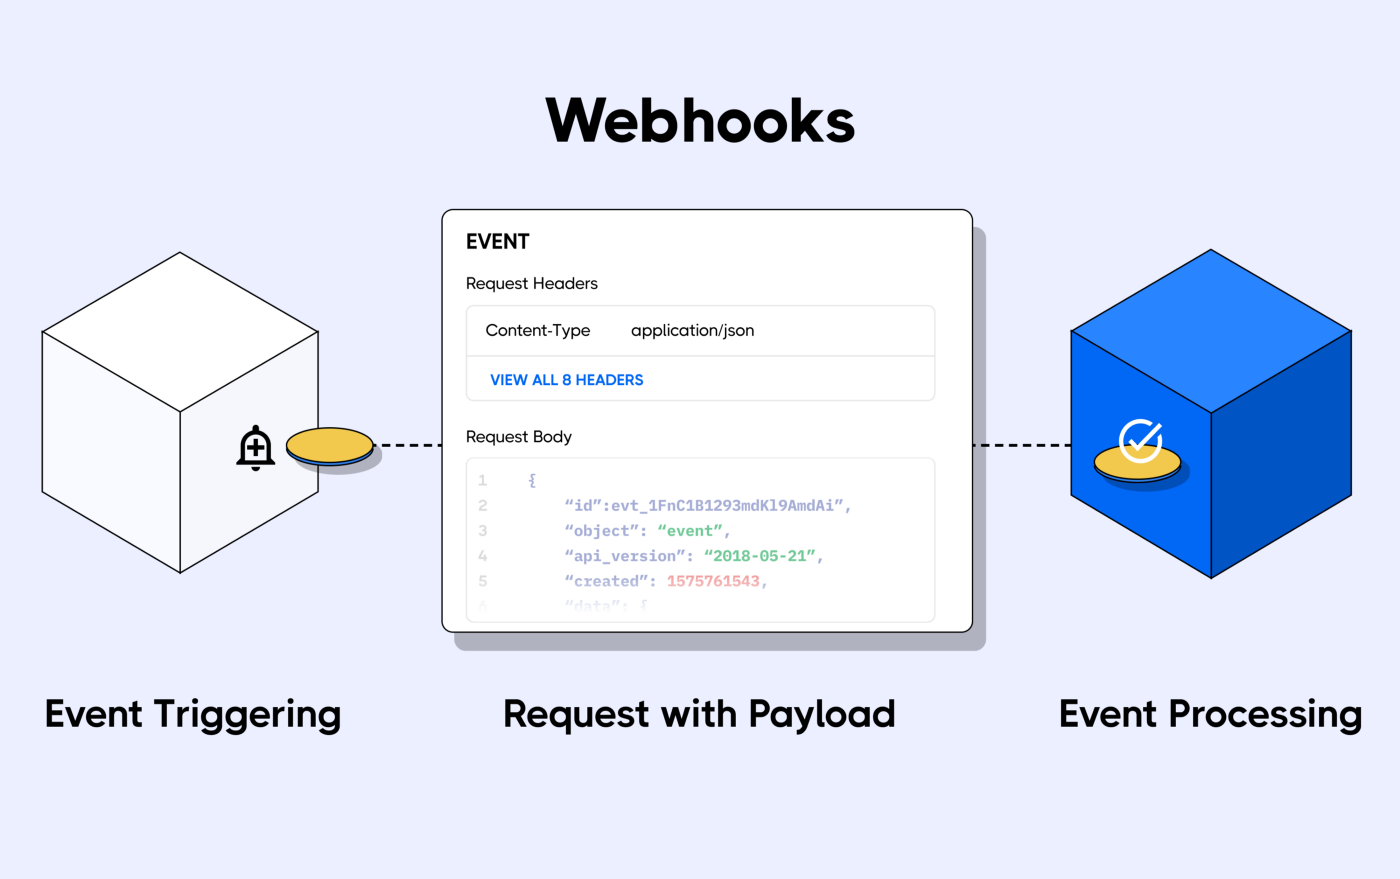
In a highly interconnected online space, systems and applications must have the means to communicate efficiently. Otherwise, since the web’s infrastructure is built with connectivity as a central characteristic, systems would not be able to operate optimally. This is where webhooks come into the equation since they present one of the most efficient ways in how systems communicate.
Nevertheless, webhooks are HTTP requests sent to a destination system (receiver) based on specific events triggered in a source system (sender). Consequently, the source system notifies the destination system when a particular event occurs. Moreover, along with a notification, webhooks often include ”request payloads” containing additional information regarding the events.
Now, with a brief understanding of webhooks and why they are helpful, let us look at what they entail in the context of Web3!
Web3 Webhooks
Web3 webhooks serve the same purpose as conventional webhooks: to enable cross-system communication. However, since Web3 is based on blockchain infrastructure and runs on smart contracts, there are some fundamental differences between the two. As such, blockchain developers use Web3 webhooks to listen to blockchain events. This can be everything from wallet transactions to more complex smart contact events.
Furthermore, developers use Web3 webhooks to avoid redundant tasks like continuously checking the state of a blockchain or polling databases. Instead, they can set up webhooks for smart contract events that interest them to automatically receive request payloads when they trigger. This is significantly more efficient, allowing blockchain developers to save resources and time.
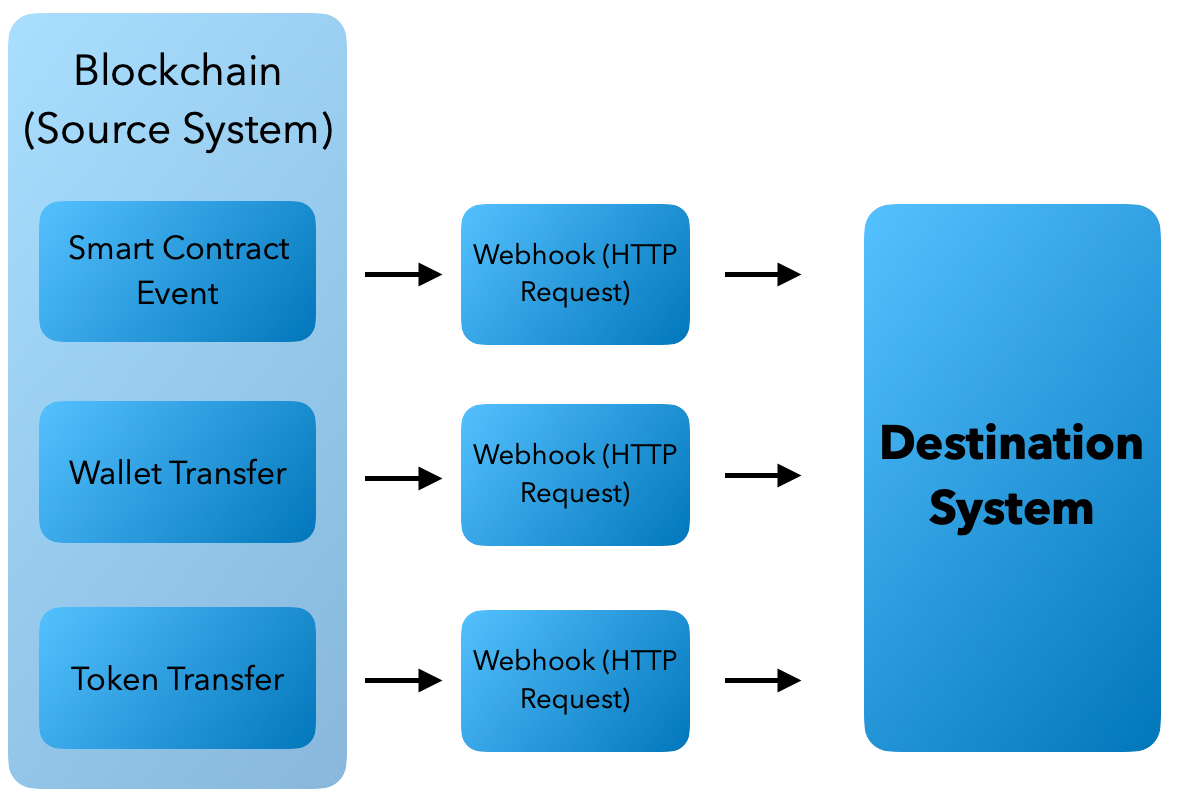
So, if you were to set up a Polygon webhook, the blockchain (source system) would send data to your specified webhook URL based on the smart contract events that interest you. For example, you can use Polygon webhooks to monitor transfers of a certain amount on the blockchain. In this case, you would receive a Polygon webhook whenever a transfer exceeds, let’s say, $100,000 on-chain!
Consequently, as you can imagine, it is highly beneficial for developers to be able to set up Web3 webhooks easily, and the most accessible way to do so is by setting up Web3 streams with Moralis’ Streams API. If this sounds interesting, join us as we show you how to create Polygon webhooks with similar functionality as the example above!
Exploring the Ultimate Webhook Solution for Polygon
When developing dapps (decentralized applications) and other Web3 projects, you need a way to easily access on-chain data, which is vital for providing a compelling user experience. However, from a conventional standpoint, it has been a hassle since it would require the setup of complex data pipelines, running buggy RPC nodes, building abstractions, etc. Fortunately for you, this is no longer the case, thanks to Moralis’ Web3 Streams API!
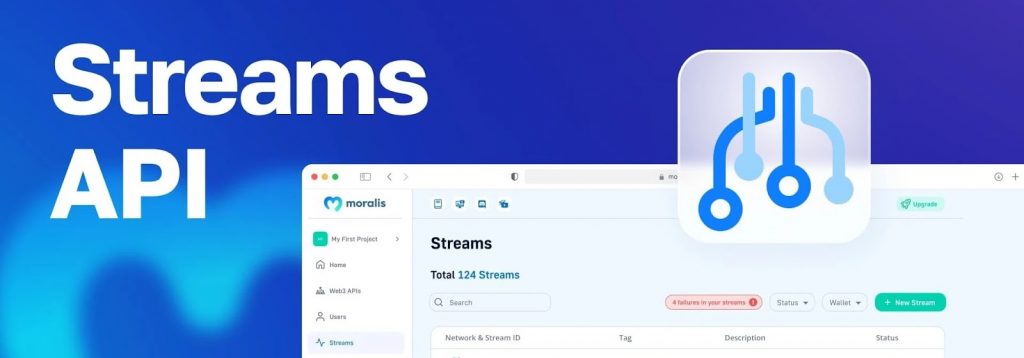
With the Streams API, you can easily stream on-chain data to the backend of your Web3 projects in real time via Web3 webhooks. This is the backbone of the Moralis infrastructure, but how does it actually work?
- You begin by providing an address. If it is a smart contract address, you list the events you have an interest in.
- Select filters that determine when you receive webhooks.
- Specify the blockchains to want to monitor.
- Add your webhook URL.
- Get webhooks and request payloads when the events trigger based on your filters/conditions.
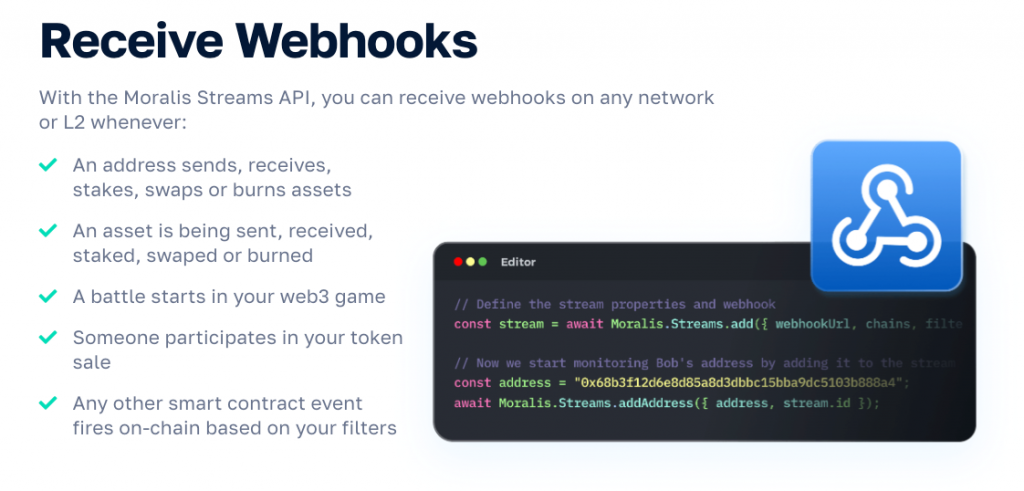
What On-Chain Data Can You Query?
Before showing you how Moralis’ Streams API works, this section will briefly provide additional information on what type of on-chain data you can acquire using the API. This provides an overview of the Streams API’s capacities, giving examples of how to use Polygon webhooks further in your development endeavors. Nevertheless, here are a few instances of when you can get events streamed into your application’s backend:
- Someone partakes in your token sale.
- A particular address sends, receives, swaps, stakes, or burns an asset.
- When a certain asset is swapped, staked, sent, received, etc.
- A battle starts in your game.
However, the four bullet points above are only a few examples, and you can receive webhooks for any other smart contract events that trigger based on your conditions/filters. Nevertheless, if you want to know more about setting up webhooks, read on, as the following sections illustrate how to create Polygon webhooks using Moralis’ Streams API!
How to Set Up and Use Polygon Webhooks with Moralis
Now that you are more familiar with Web3 webhooks and Moralis’ Web3 Streams API, the following sections will show you how to set up webhooks on Polygon. The Streams API is the backbone of Moralis’ infrastructure, allowing you to create Polygon webhooks easily. Hence, if you follow along, you will learn everything you need to know to stream on-chain data into the backend of all future Web3 projects!
When utilizing Moralis, you have two options for creating streams to receive Polygon webhooks on both the mainnet and Mumbai testnet:
- Programmatically – You can create streams programmatically using the Moralis SDK or API to receive webhooks on Polygon.
- With Moralis’ Admin Panel – You additionally have the option to create streams to receive Polygon webhooks via Moralis’ web UI.
The following sections provide comprehensive walkthroughs for setting up webhooks on the Polygon network using both alternatives. To illustrate the accessibility of Moralis’ Streams API, you will learn to create a Polygon webhook for monitoring incoming and outgoing transactions of a Web3 wallet based on its address.
However, suppose you follow along and learn how to set up everything for monitoring wallets. In that case, you can use the same fundamental principles to monitor any on-chain events and stream all sorts of data into the backend of all future projects!
Now, without further ado, let us jump straight into the next section and look closely at setting up Polygon webhooks programmatically!
Programmatically
To begin with, this initial section of the Polygon webhooks tutorial shows you how to create a Polygon webhook programmatically. In doing so, you will be using Moralis’ JavaScript SDK. Nevertheless, to get going, open your preferred IDE (integrated development environment) and create a new folder containing a JavaScript file. Next up, open a new terminal and install the Moralis dependencies. If you, for instance, are using NodeJS, run ”npm install moralis”.
After setting up a JavaScript file and installing the dependencies, it is time to initialize the Moralis SDK. To do so, copy the code snippet below and add it to the top of your JavaScript file:
import Moralis from 'moralis';
import { EvmChain } from "@moralisweb3/common-evm-utils";
Moralis.start({
  apiKey: 'YOUR_API_KEY',
});
You will quickly notice that you need to replace ”YOUR_API_KEY” within the code with your actual key. To acquire the key, you need a Moralis account. Accordingly, if you have not, sign up with Moralis immediately to access the admin panel where your Web3 API key awaits!
As soon as you log in to Moralis, navigate to the ”Home” tab. From there, copy your key and add it to your code by replacing ”YOUR_API_KEY”:
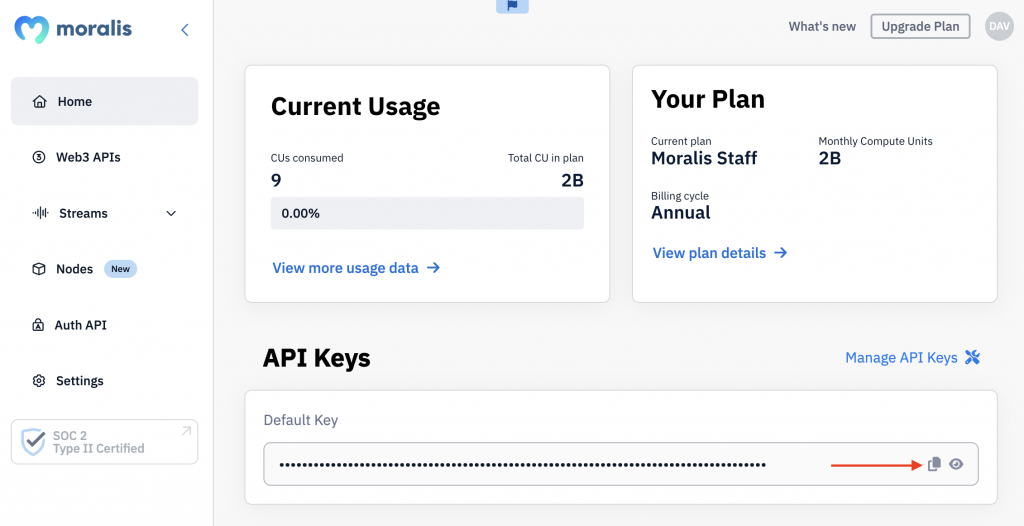
Next up, create a new object called ”stream” and add the following properties: the chain(s), a description, a tag, and a webhook URL. Below, you will find an example of what it should look like:
const stream = {
  chains: [EvmChain.ETHEREUM, EvmChain.POLYGON], // List of blockchains to monitor
  description: "monitor Bobs wallet", // Your description
  tag: "bob", // give it a tag
  includeNativeTxs: true, // select the events to monitor
  webhookUrl: "https://YOUR_WEBHOOK_URL", // Webhook URL to receive events,
}
From there, use the ”stream” object to call Moralis’ ”Moralis.Streams.add(stream)” function. Lastly, create a new ”{ id }” object and add the wallet address that you are looking to monitor:
const newStream = await Moralis.Streams.add(stream);
const { id } = newStream.toJSON(); // { id: 'YOUR_STREAM_ID', ...newStream }
// Now we attach Bobs address to the stream
const address = "0x68b3f12d6e8d85a8d3dbbc15bba9dc5103b888a4";
await Moralis.Streams.addAddress({ address, id });
Ultimately, your JavaScript file should now look something like this:
import Moralis from 'moralis';
import { EvmChain } from "@moralisweb3/common-evm-utils";

Moralis.start({
  apiKey: 'YOUR_API_KEY',
});

const stream = {
  chains: [EvmChain.ETHEREUM, EvmChain.POLYGON], // List of blockchains to monitor
  description: "monitor Bobs wallet", // your description
  tag: "bob", // give it a tag
  includeNativeTxs: true, // select the events to monitor
  webhookUrl: "https://YOUR_WEBHOOK_URL", // Webhook URL to receive events,
}

const newStream = await Moralis.Streams.add(stream);
const { id } = newStream.toJSON(); // { id: 'YOUR_STREAM_ID', ...newStream }

// Now we attach bobs address to the stream
const address = "0x68b3f12d6e8d85a8d3dbbc15bba9dc5103b888a4";

await Moralis.Streams.addAddress({ address, id });
That covers how you set up a Polygon webhook programmatically with Moralis! All that remains is opening a terminal and running the code below with the file’s name:
node “FILE_NAME”
With Moralis’ Web UI
This section will show you how to set up Polygon webhooks via Moralis’ web UI. More specifically, we’ll show you how to monitor USDC transactions on Polygon without breaking a sweat!
The first thing you require is a Moralis account. Hence, if you have not already, start by signing up with Moralis. Once you have an account, you can follow the steps below:
- Step 1: Visit Moralis Streams and click the “+ Create Stream” button:

- Step 2: Name your stream and specify the events you want to monitor. For this guide, pick “Contract Events”:
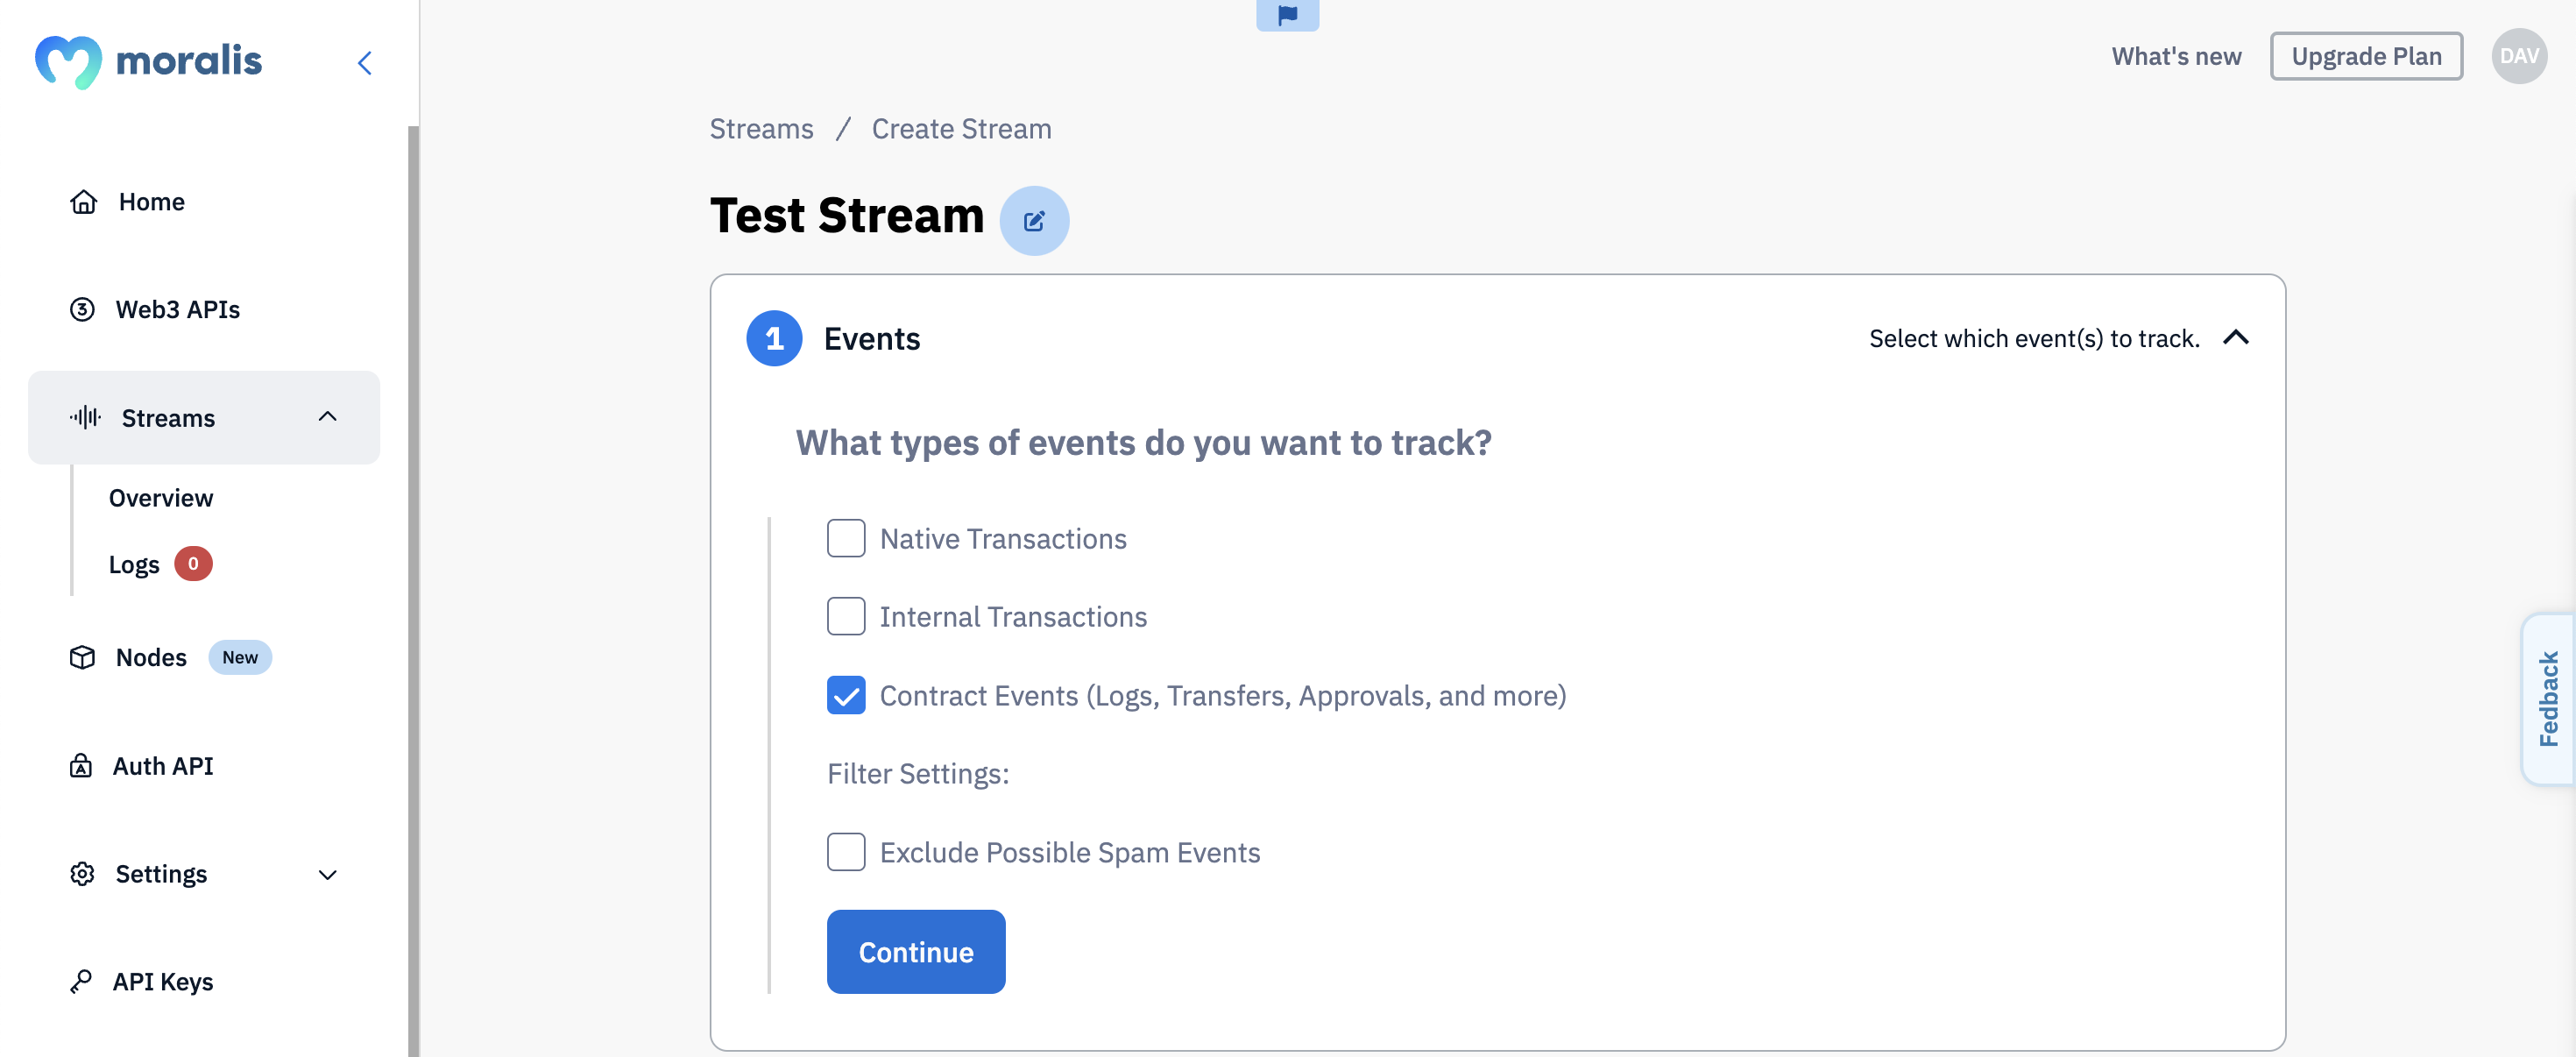
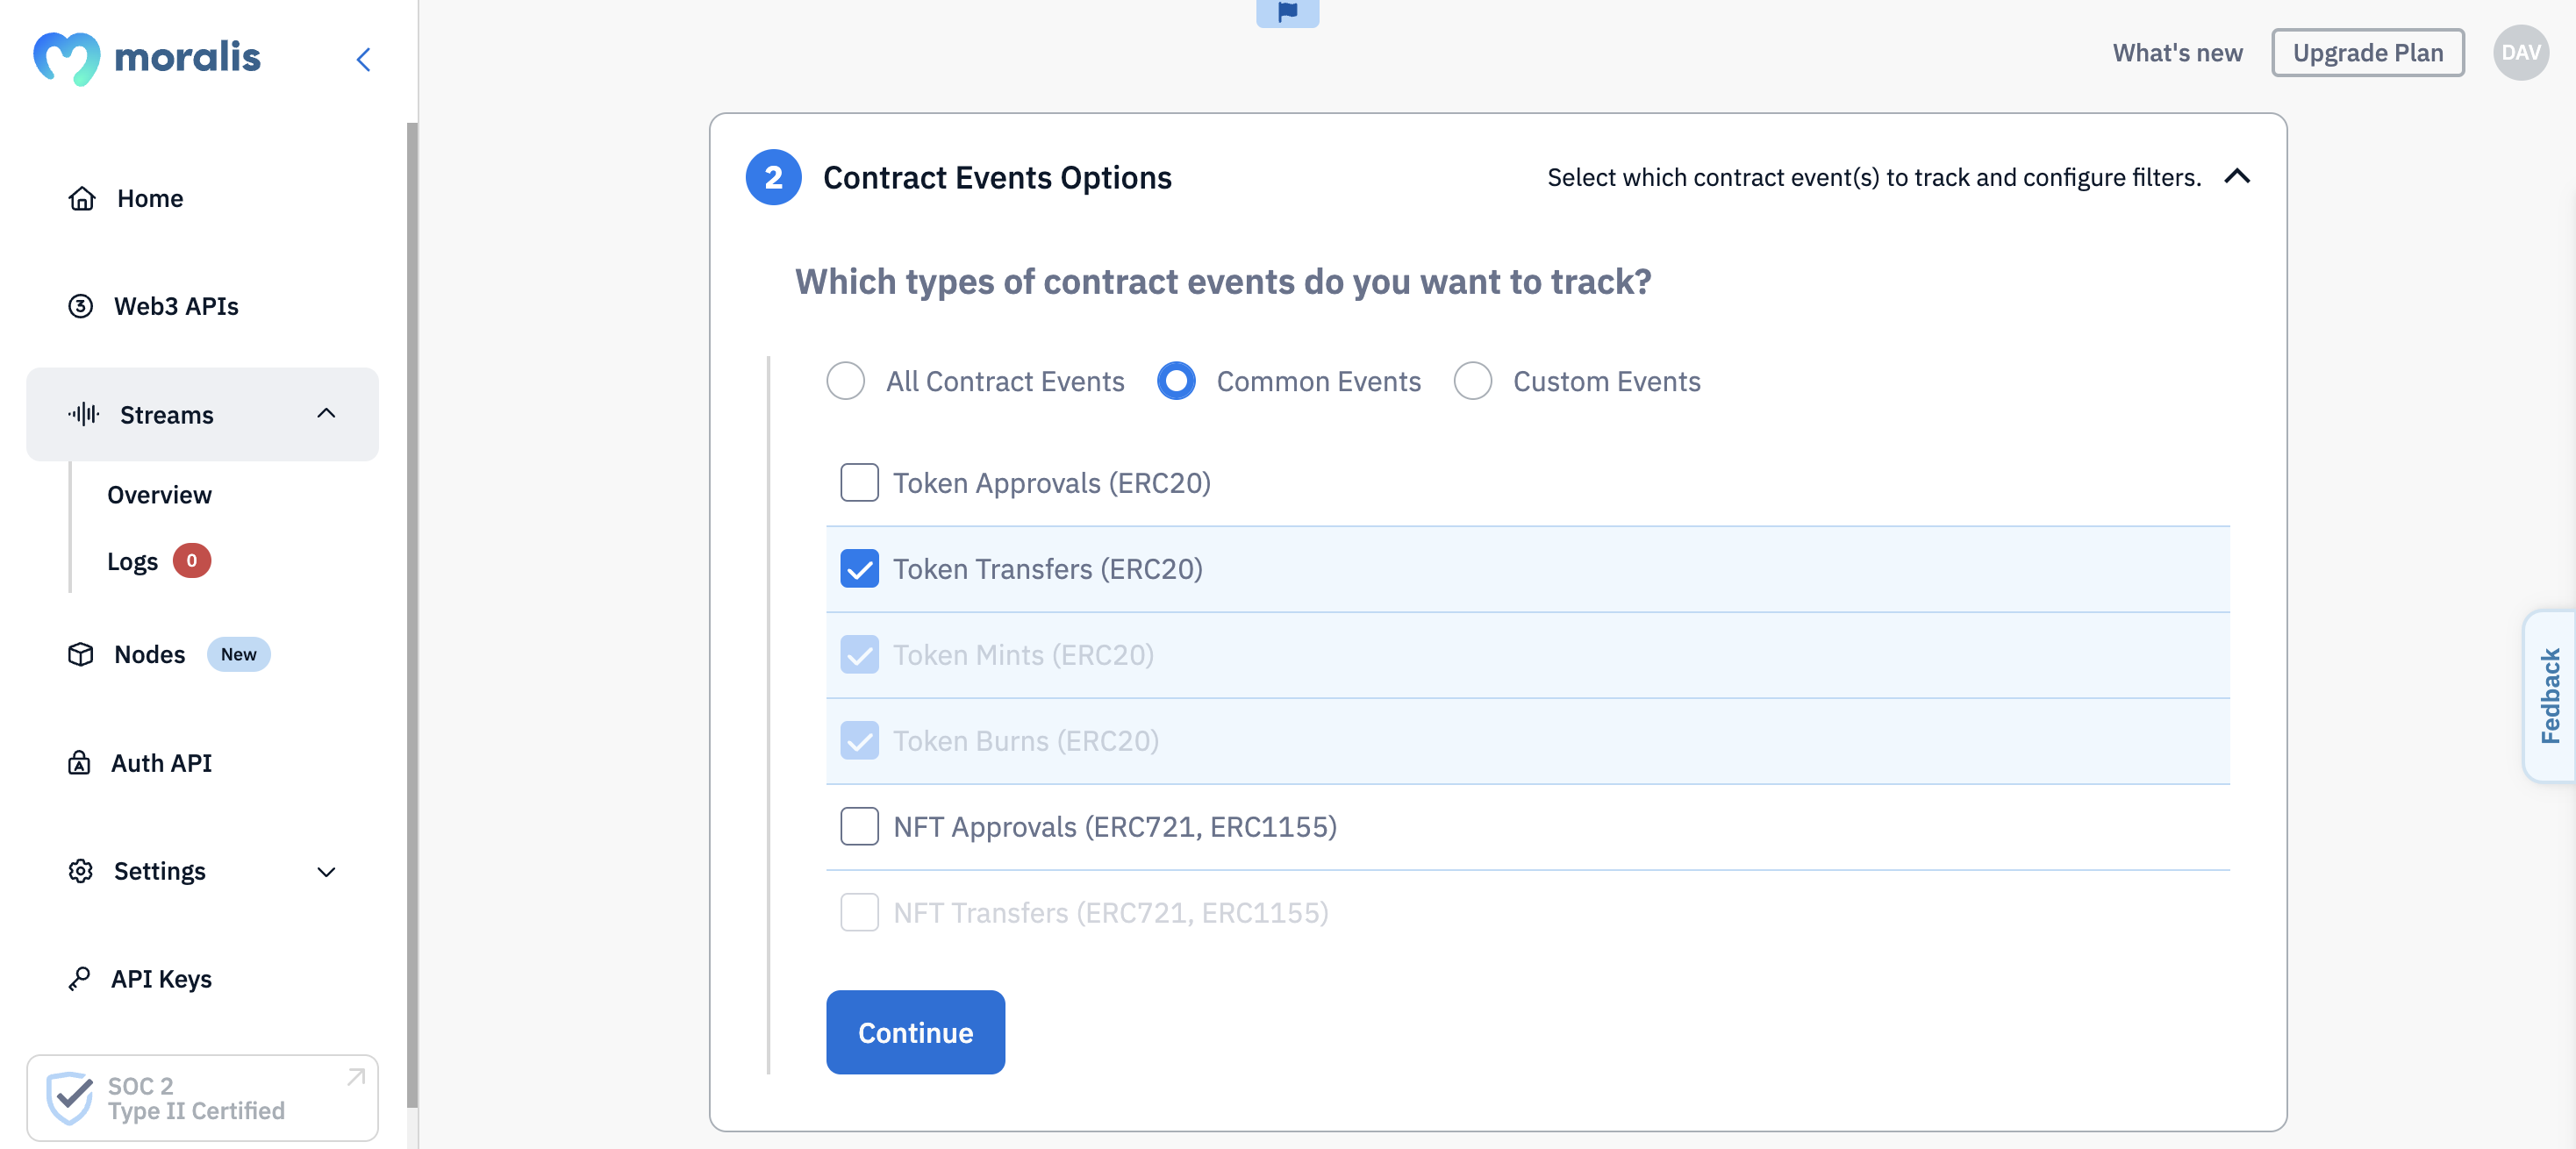
- Step 3: Select the events you wish to track. We’ll choose “Common Events” and “Token Transfers”:
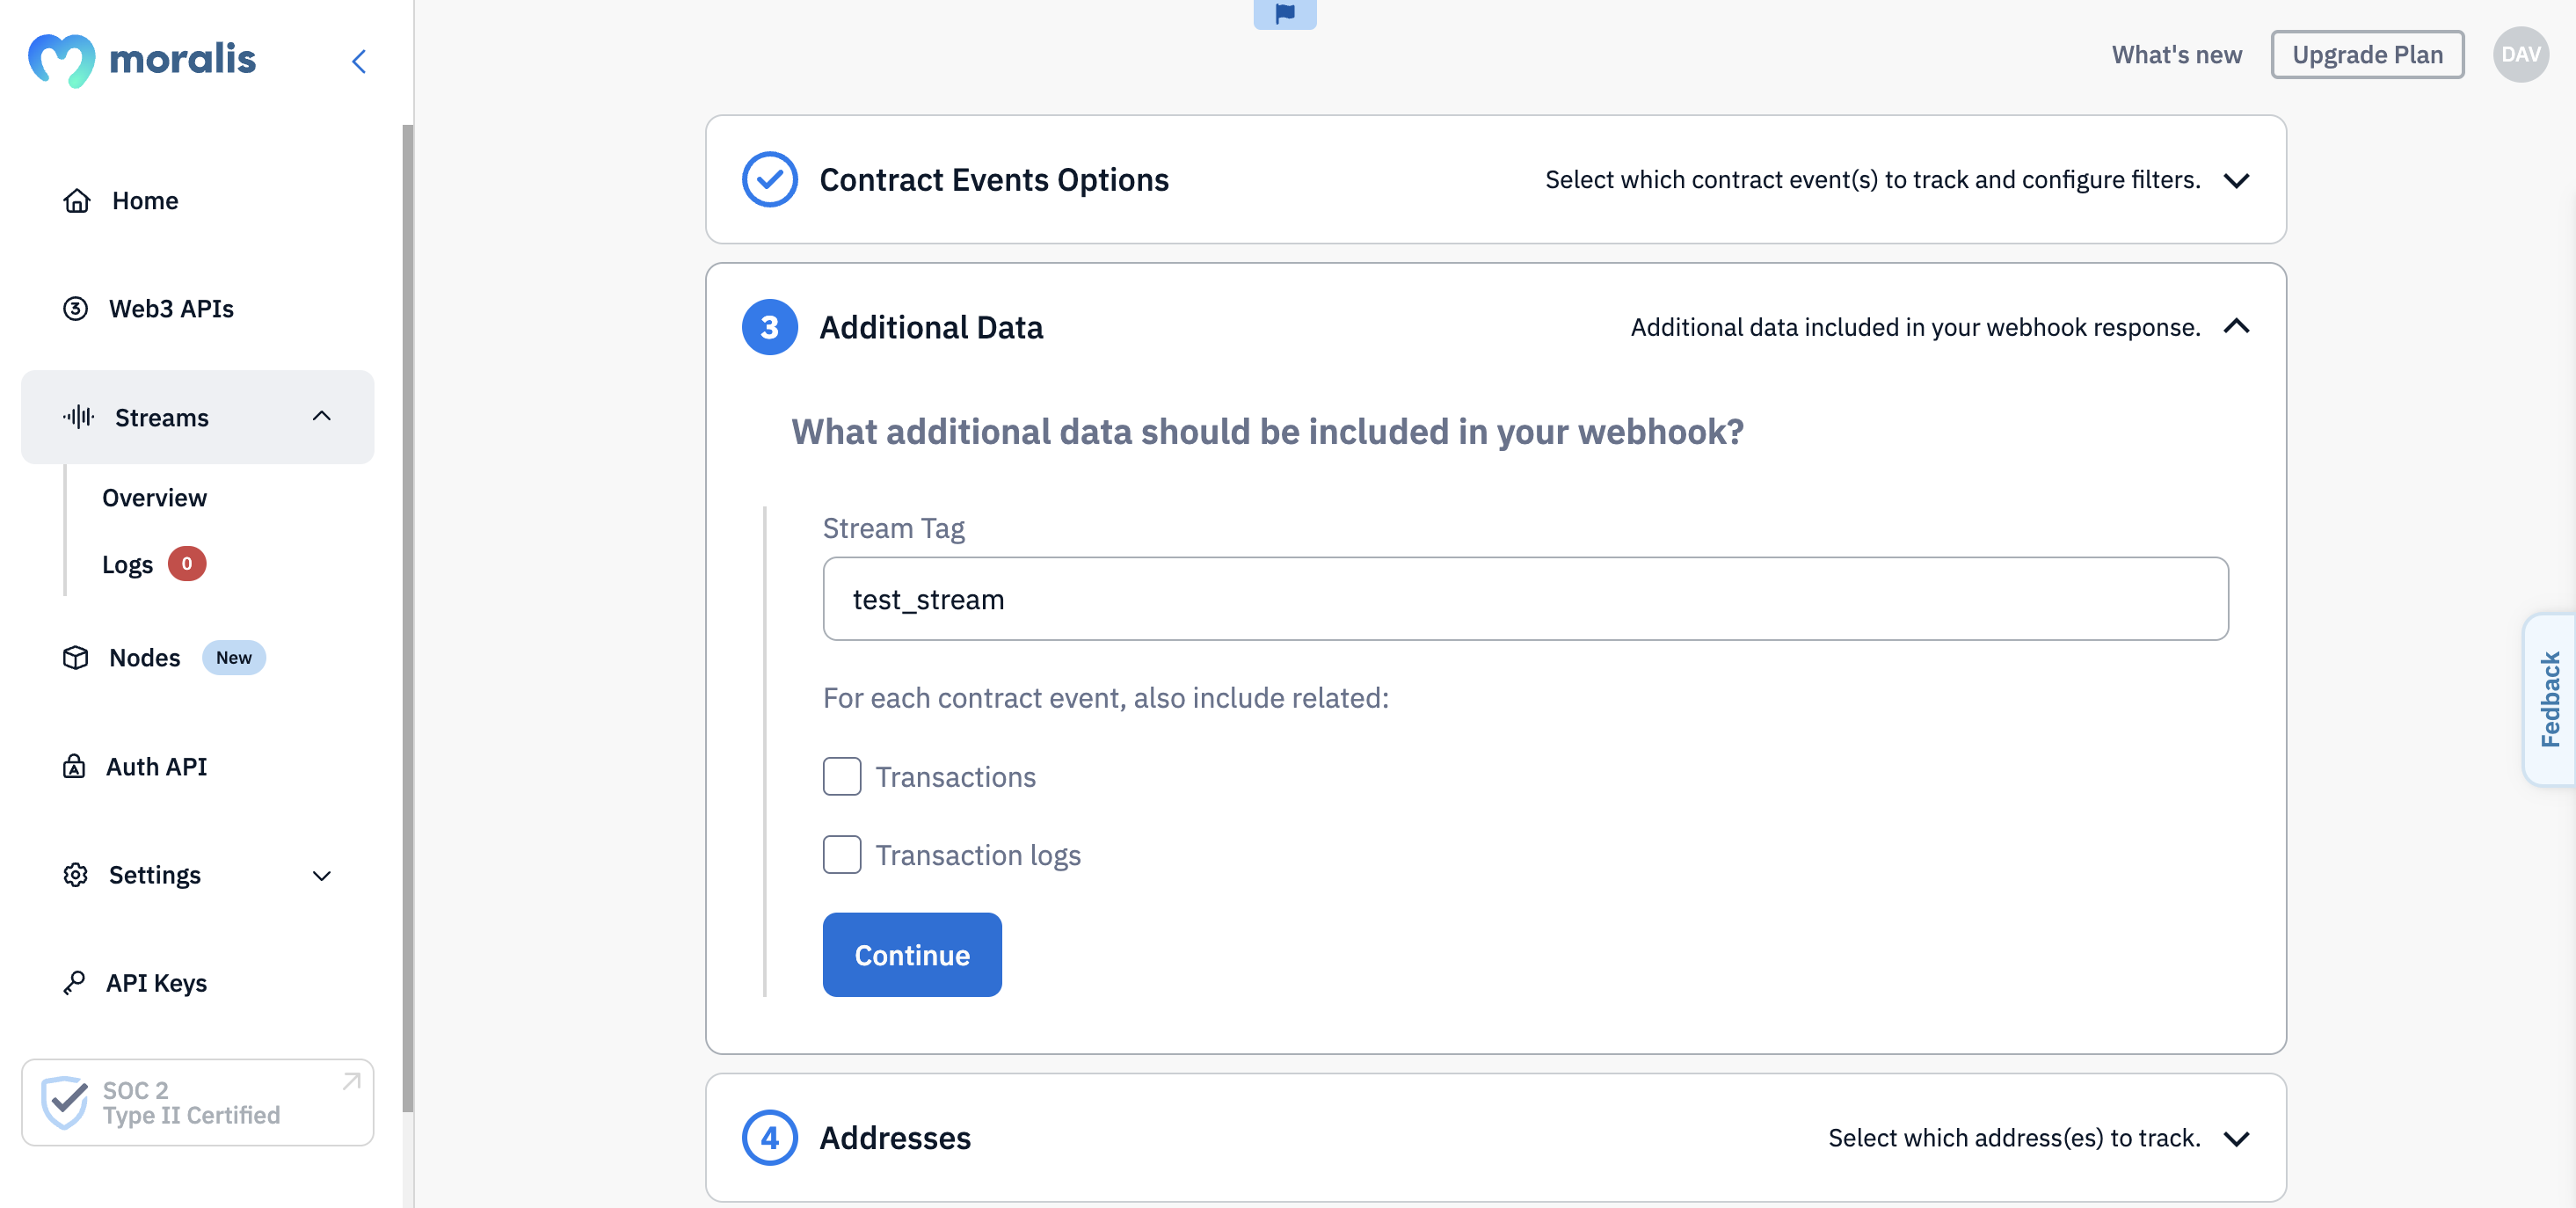
- Step 4: Give your stream a tag and select additional information to include in the Polygon webhooks:
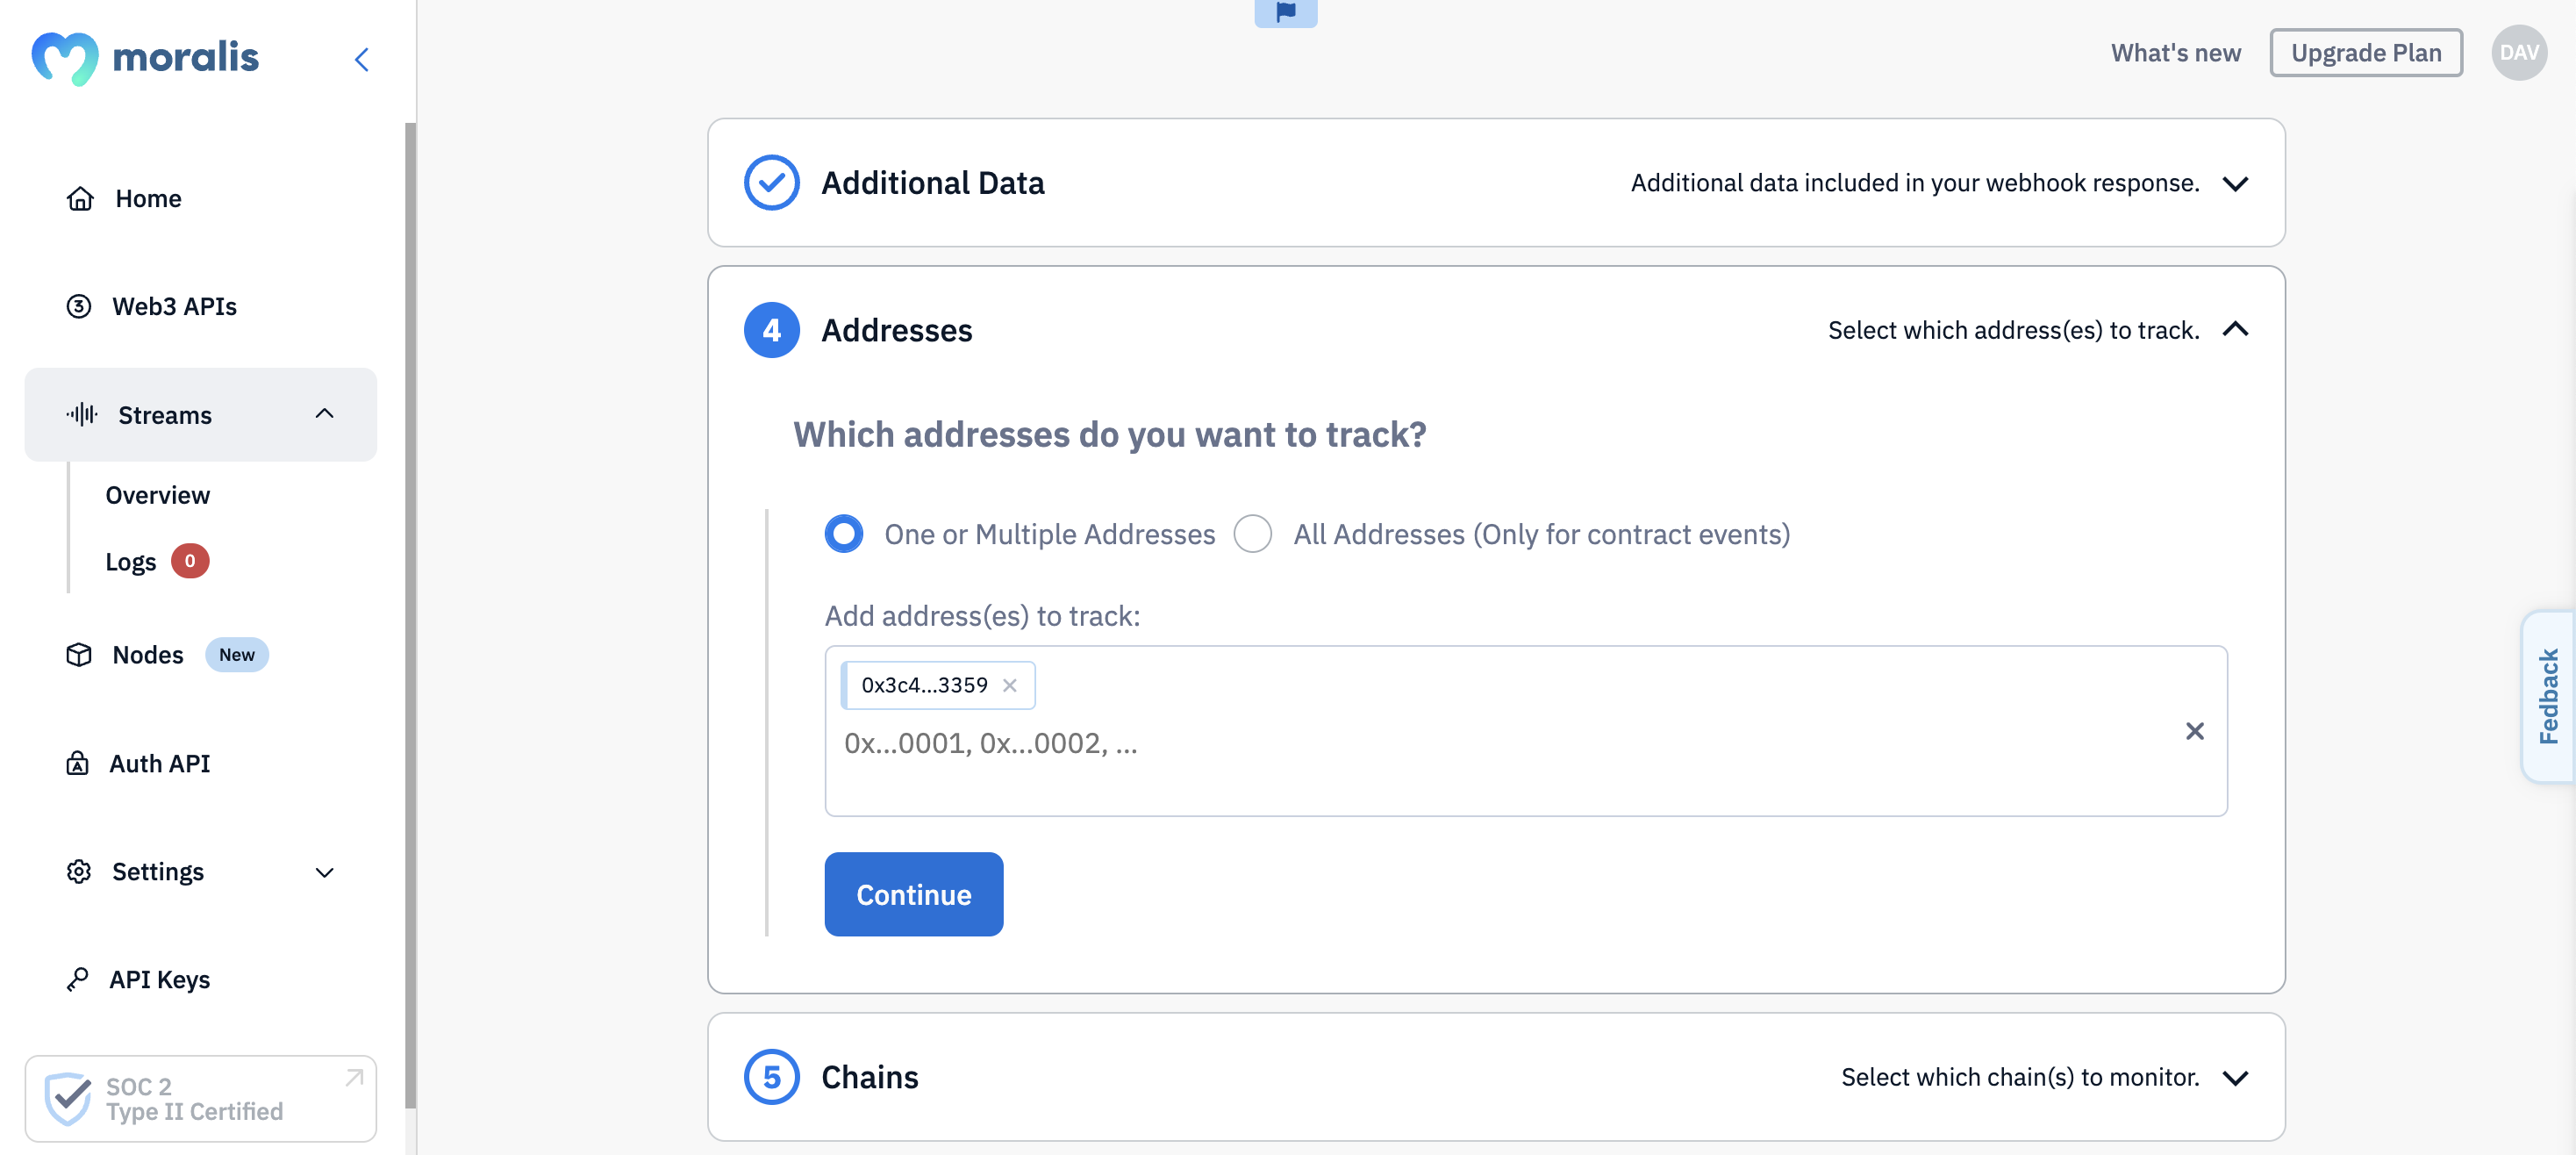
- Step 5: Add the address(es) you want to monitor. For this tutorial, specify the USDC contract:
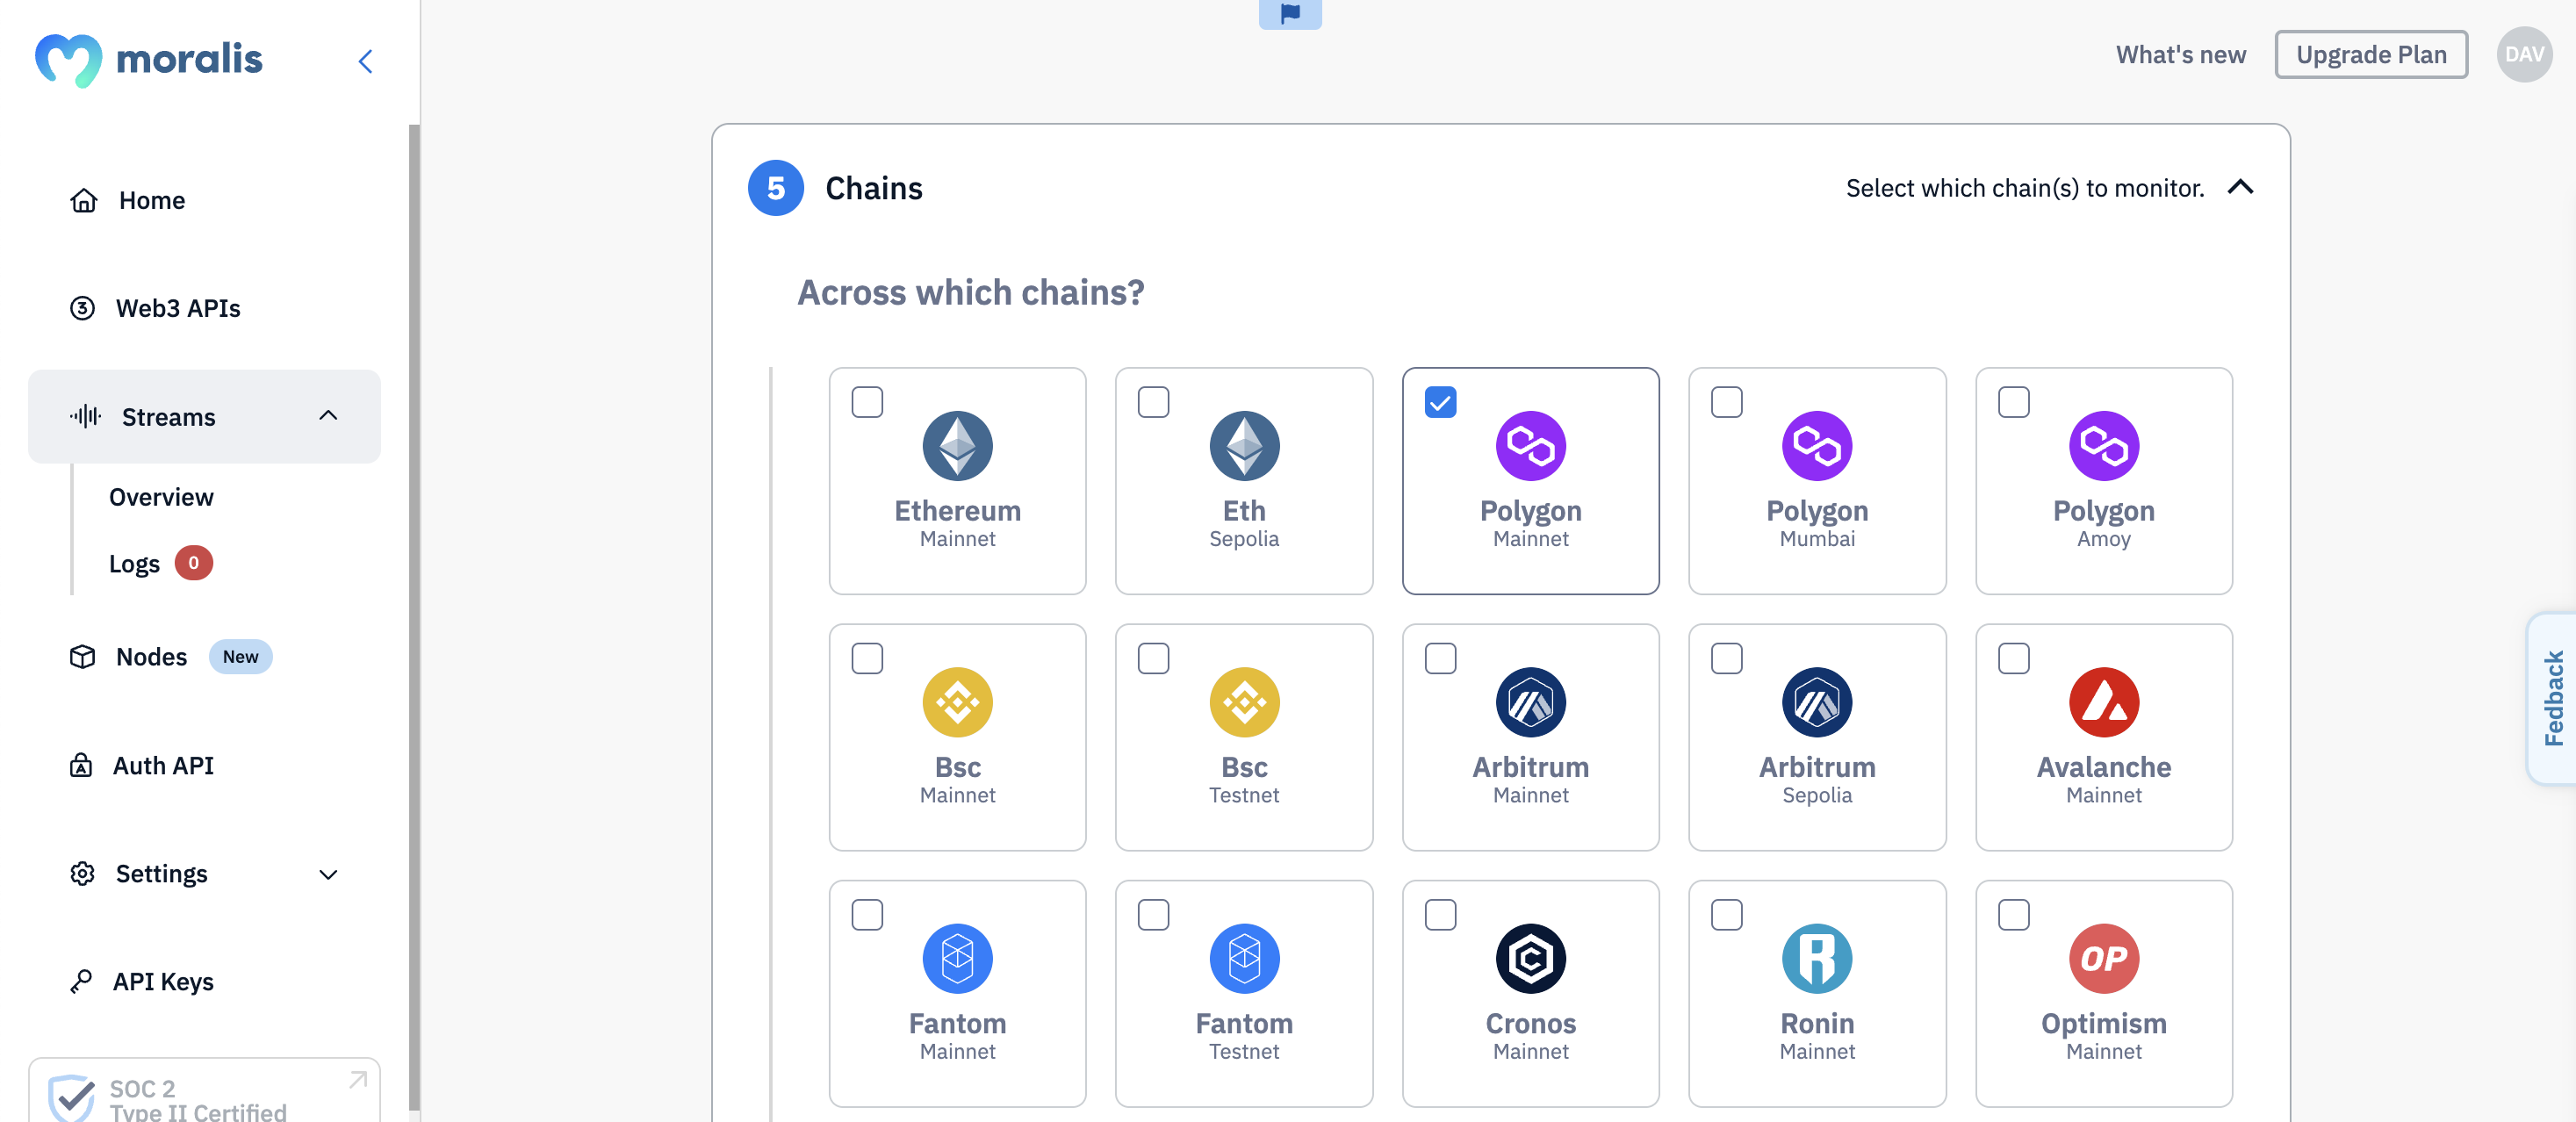
- Step 6: Select the blockchain(s) you want to track. We’ll pick Polygon:
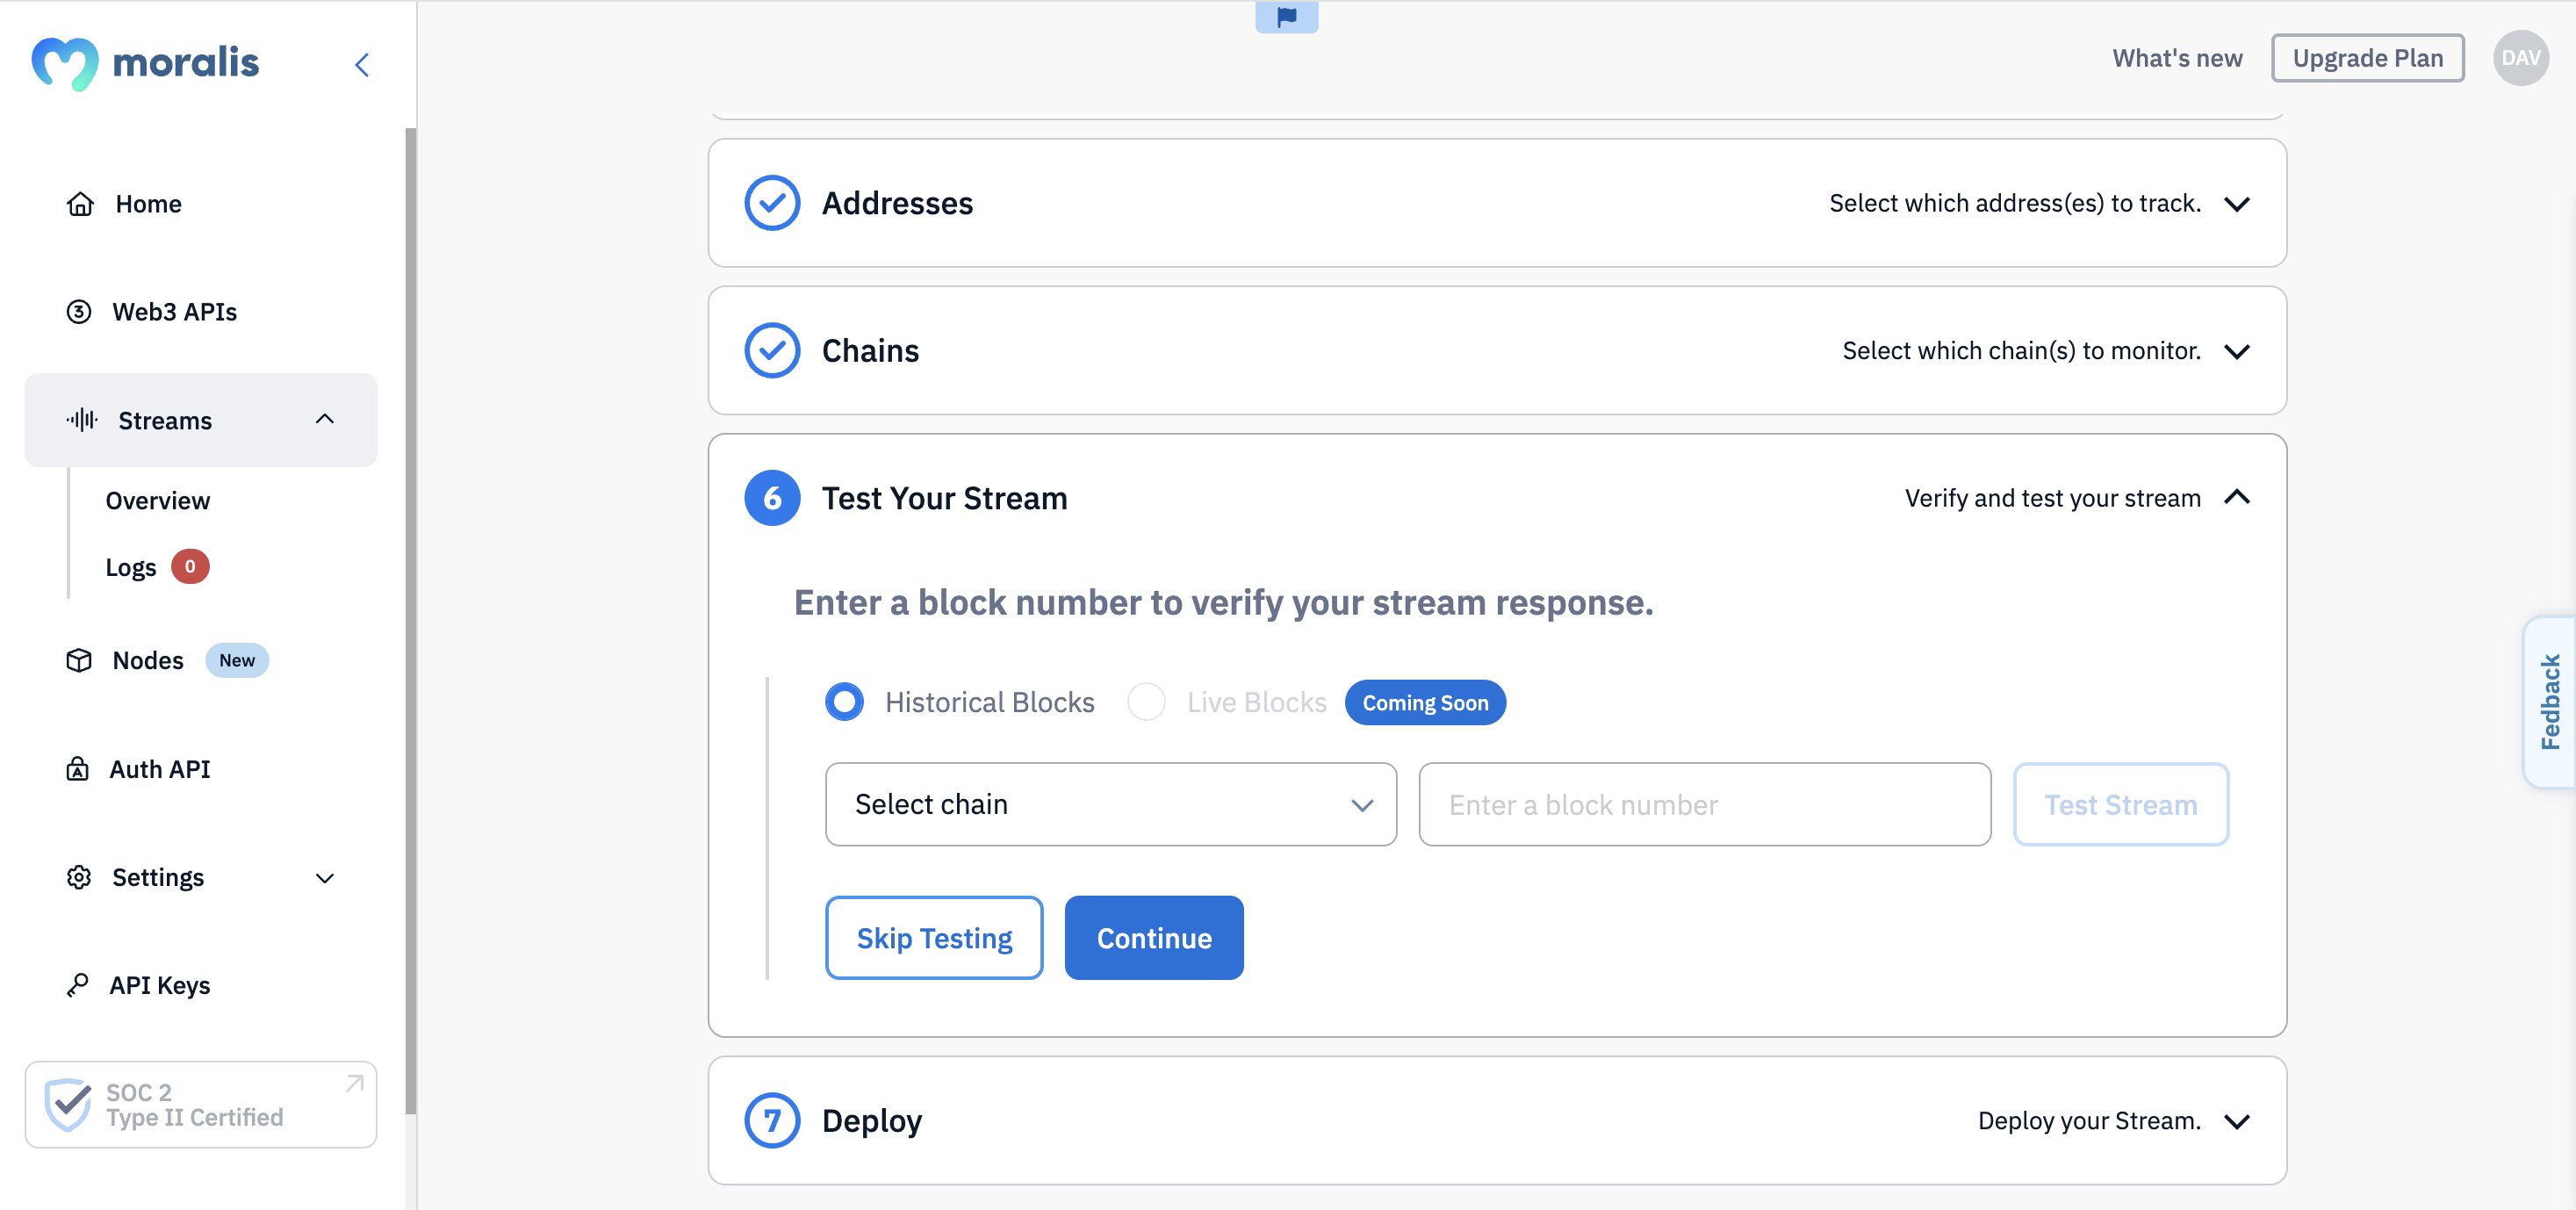
- Step 7: Test your stream:
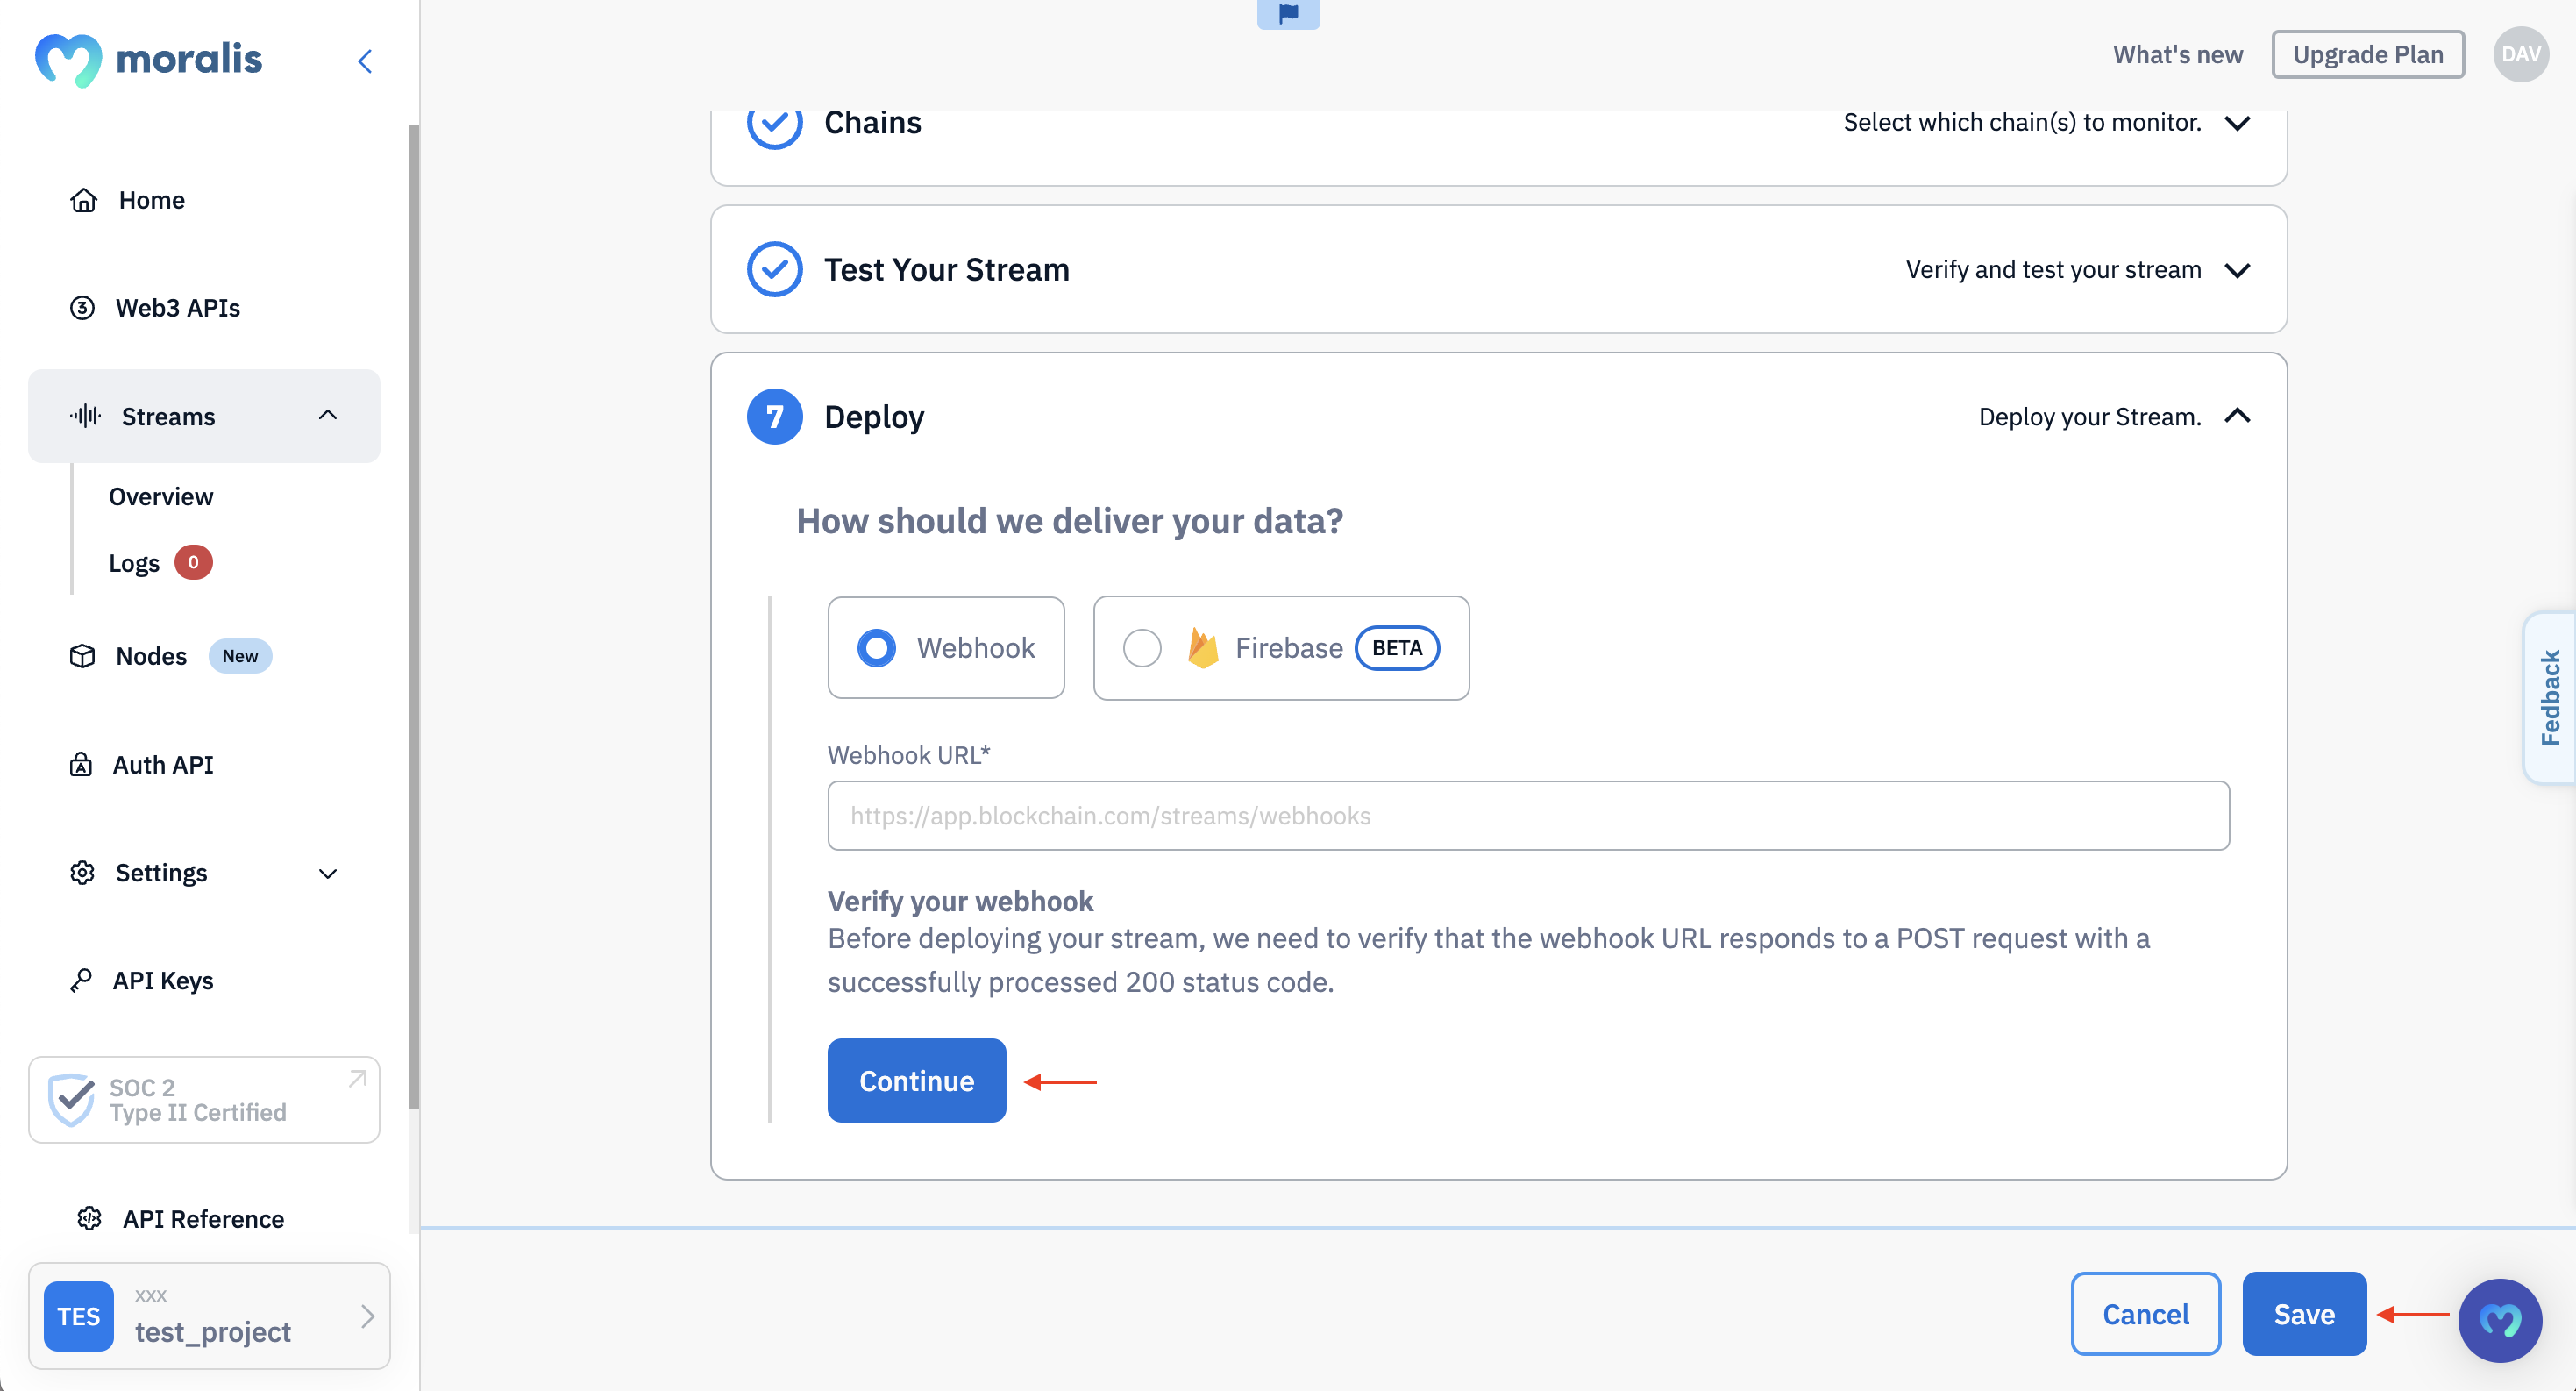
- Step 8: Add your webhook URL, click “Continue”, and hit “Save & Deploy”:
Once you deploy your stream, you’ll receive real-time alerts whenever a USDC transfer takes place. Here’s an example of what it might look like:
 //...
 {
   transactionHash: '0x613d56e7307f739966c45e3f515b56ed62dcab5d3157496a0078292d4d597e15',
   logIndex: '830',
   contract: '0x3c499c542cef5e3811e1192ce70d8cc03d5c3359',
   triggered_by: [Array],
   from: '0x68b3465833fb72a70ecdf485e0e4c7bd8665fc45',
   to: '0xd36ec33c8bed5a9f7b6630855f1533455b98a418',
   value: '24956911',
   tokenName: 'USD Coin',
   tokenSymbol: 'USDC',
   tokenDecimals: '6',
   logo: '',
   thumbnail: '',
   possibleSpam: false,
   verifiedCollection: true,
   valueWithDecimals: '24.956911'
 },
 //...
That’s it! You now know how to set up a stream with Moralis’ admin UI. You can follow the same process to run streams for other wallet and smart contract events!
If you want a more thorough explanation of the tutorial above, check out this Moralis YouTube video:
Required Polygon Test Webhooks
It does not matter if you create Polygon webhooks programmatically or via Moralis’ web UI; you will always receive a Polygon test webhook when launching a new stream. Consequently, to make the streams fully operational, you must return status code 200. You can find the test body down below:
{
  "abi": {},
  "block": {
    "hash": "",
    "number": "",
    "timestamp": ""
  },
  "txs": [],
  "txsInternal": [],
  "logs": [],
  "chainId": "",
  "tag": "",
  "streamId": : "",
  "confirmed": true,
  "retries": 0,
  "erc20Approvals": [],
  "erc20Transfers": [],
  "nftApprovals": [],
  "nftTransfers": []
}
When you return the status code, it should set up your streams, making them fully functioning. As such, when the wallet address you monitor sends or receives an asset, you will receive a Polygon webhook, including a request payload!
Nevertheless, if you joined us this far, you should now be able to create streams programmatically and via Moralis’ web UI to set up Polygon webhooks. Also, you are now familiar with Moralis’ Web3 Streams API and can use Polygon webhooks to stream on-chain data into the backend of all your future blockchain projects!
You will find the official documentation here if you have further questions regarding the Streams API. What’s more, if any questions came up during this tutorial, consider joining the Moralis Discord channel. There, you can receive assistance from our talented community engineers!
Summary – How to Use Polygon Webhooks
This article taught you the intricacies of webhooks and what they entail in the context of Polygon. You also learned how to create Polygon webhooks for streaming on-chain data via Moralis’ Web3 Streams API. In fact, you can create a Polygon webhook using the steps below:
- Provide an on-chain address. If it is a smart contract address, you list the events you want to monitor.
- Select conditions that determine when you receive Polygon webhooks.
- Specify the network(s) to want to monitor.
- Add a webhook URL.
- Receive webhooks when events trigger based on your filters.
Most of the accessibility of this tutorial originates from Moralis’ Streams API. That said, this is only one of many enterprise-grade APIs provided by Moralis, and all of Moralis’ tools facilitate the best Web3 infrastructure. If you want to learn more about this, you can, for example, check out Moralis’ Solana API. This tool makes Solana development more straightforward, enabling you to build dapps and tokens for the network more efficiently. For more information on Solana development, consider reading our articles on Solana smart contract examples or Solana smart contract building!
What’s more, if you have ambitions to become a more proficient blockchain developer, consider enrolling in Moralis Academy. The academy supplies some of the industry’s best development courses. For example, if you are new to the Web3 space, start your journey with the following course: ”Blockchain & Bitcoin 101”.
Nevertheless, sign up with Moralis immediately and begin building dapps smarter and more efficiently! Moreover, creating your Moralis account is free, so you have nothing to lose!
