In order for Web3 projects to launch quickly, devs must have an easy way to integrate Web3 into their tech stack. This is where having a capable NodeJS EVM API comes into the picture. If you’d like to create killer dapps (decentralized applications) without breaking a sweat with JavaScript, this Web3 API is key! Furthermore, Moralis streamlines the process of using this NodeJS EVM API and lets you utilize it for free. Herein, we demonstrate exactly how to get started using this API, but first, we need to make sure you all know the basics. Thus, we must first examine what NodeJS and EVM are. Then, we’ll briefly explain what APIs are. Finally, we illustrate how you can obtain your Moralis API key, which will be your gateway to using the ultimate NodeJS EVM API!
After covering the basics of Moralis’ NodeJS EVM API, we’ll do a walkthrough of how to use the NodeJS SDK. As such, make sure you create your free Moralis account so you can follow our lead. Moreover, with the knowledge and skills obtained in this article, you’ll be ready to tackle your own ideas easily.
Unless you’ve been living under a rock, you know that Moralis is the ultimate Web3 backend platform. It provides you with three core Web3 development features – Web3 authentication, Web3 syncs, and Web3 APIs. Furthermore, Moralis is cross-platform interoperable. Accordingly, you can use your favorite legacy platforms and Web2 development skills to join the Web3 revolution. Also, Moralis supports multiple blockchains, which enables you to deploy your dapps to various networks using the same lines of code. As a result, you gain more reach and future-proof your work.

What is NodeJS?
NodeJS, or Node.js, is a programming platform or environment that came to life in 2009. Its main purpose was to help manage some of the complexities of JavaScript. Furthermore, NodeJS is suitable for web development in the age of blockchain. This programming platform is built on Chrome’s JavaScript runtime. Moreover, NodeJS makes it easier for developers to build scalable, high-performance apps. It achieves that with its framework that has the following important characteristics:
- Utilizing an Event-Driven, Non-Blocking I/O Model – The latter ensures that the node process doesn’t lock up the entire web app when retrieving a sole response. Instead, it merely moves on to the next event and continually runs until the event queue is empty. Also, NodeJS introduces a unique event model. The latter doesn’t just use a library as a runtime constructor but also an event loop. Further, this model doesn’t require a blocking call to start an event loop. Thanks to this characteristic, NodeJS provides a framework that is lightweight, efficient, and highly fitting for real-time applications across decentralized networks.
- Running on Both Client-Side and Server-Side – This NodeJS characteristic enhances the use of JavaScript. By allowing web applications to run with real-time, two-way connections, both server and client can initiate communications and freely exchange data.
- Enabling Developers to Reuse Code – NodeJS packing manager (NPM) is known for code reuse. After all, there are over a million packages available for developers to use in programming tasks. Moreover, the ability to reuse code greatly benefits developers who run JavaScript-heavy applications. It enables them to avoid the added burden of context switching between edit and search tools.
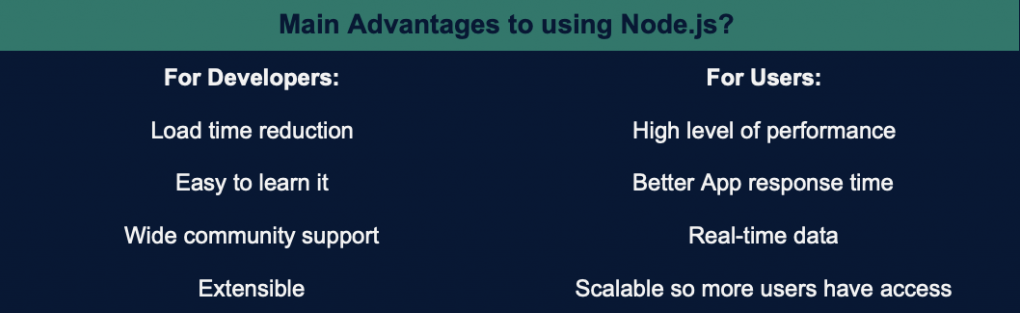
Ultimately, NodeJS enables real-time data exchange and communication, which is essential when dealing with public blockchains.
What is EVM?
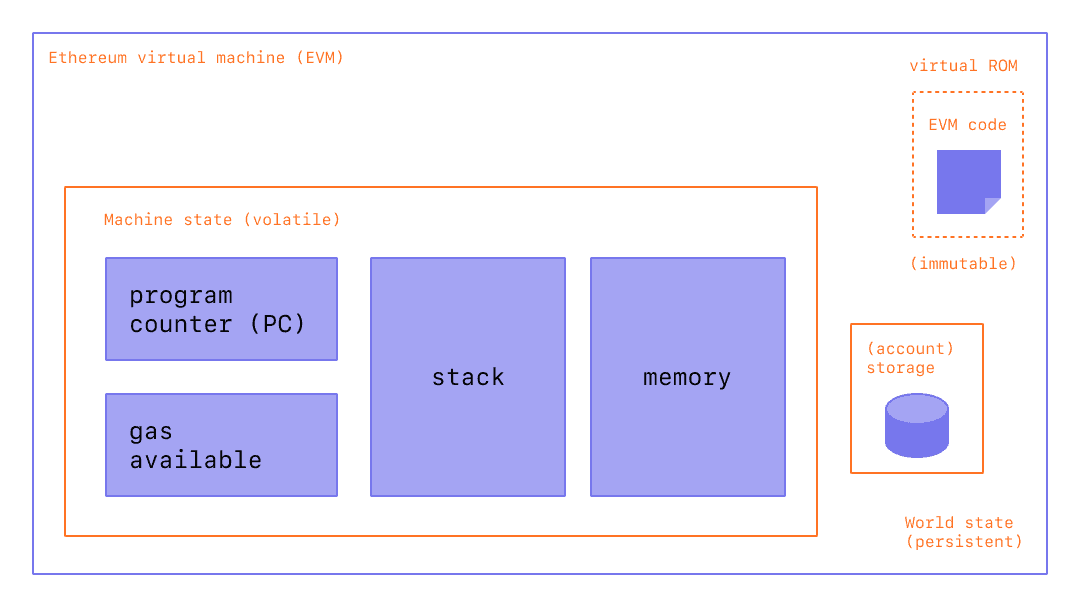
Ethereum Virtual Machine, or EVM, is a Turing-complete virtual machine that enables code execution exactly as intended. Thus, it is the runtime environment for all smart contracts on Ethereum and other EVM-compatible chains. This makes EVM the engine that powers Ethereum and other EVM-compatible chains; after all, smart contracts are the core programs behind all cryptocurrencies and dapps.
If this is your first time hearing about Turing-completeness and virtual machines, make sure to read our “EVM Explained” and “The Ultimate EMV API” guides. The latter will also provide you with a neat explanation of what smart contracts are.
Let’s also consider the following definition of APIs. API stands for “application programming interface”, which is an interface that enables software to interact with other pieces of software. Furthermore, APIs support this kind of communication by enabling different sets of instructions to be translated or somehow transferred for mutual understanding. Also, APIs enable devs to use existing API sets in their apps and avoid wasting time and money or reinventing the wheel.
Now we can tie it all together and conclude that a NodeJS EVM API is a set of instructions, definitions, and protocols that enables communication among pieces of software running on EVM and a JavaScript-based frontend.

Using the Ultimate NodeJS EVM API
As mentioned at the outset of this article, Moralis offer you the ultimate NodeJS EVM API. The latter is fully modularized and pretty easy to use. It is one of the simplest ways to integrate Web3 functionalities into any backend. Furthermore, it offers full TypeScript (TS) support. By using the NodeJS EVM API, you can effortlessly query all sorts of blockchain data. This includes NFTs (non-fungible tokens), fungible tokens, balances, transactions, and much more. Additionally, thanks to Moralis’ cross-chain interoperability, you can use this NodeJS EVM API on all leading programmable blockchains!
To use Moralis’ NodeJS EVM API, you must complete the following steps:
- Create a NodeJS Web3 application
- Import and setup the latest Moralis NodeJS SDK
- Setup a simple Express server
- Integrate your application with Moralis services
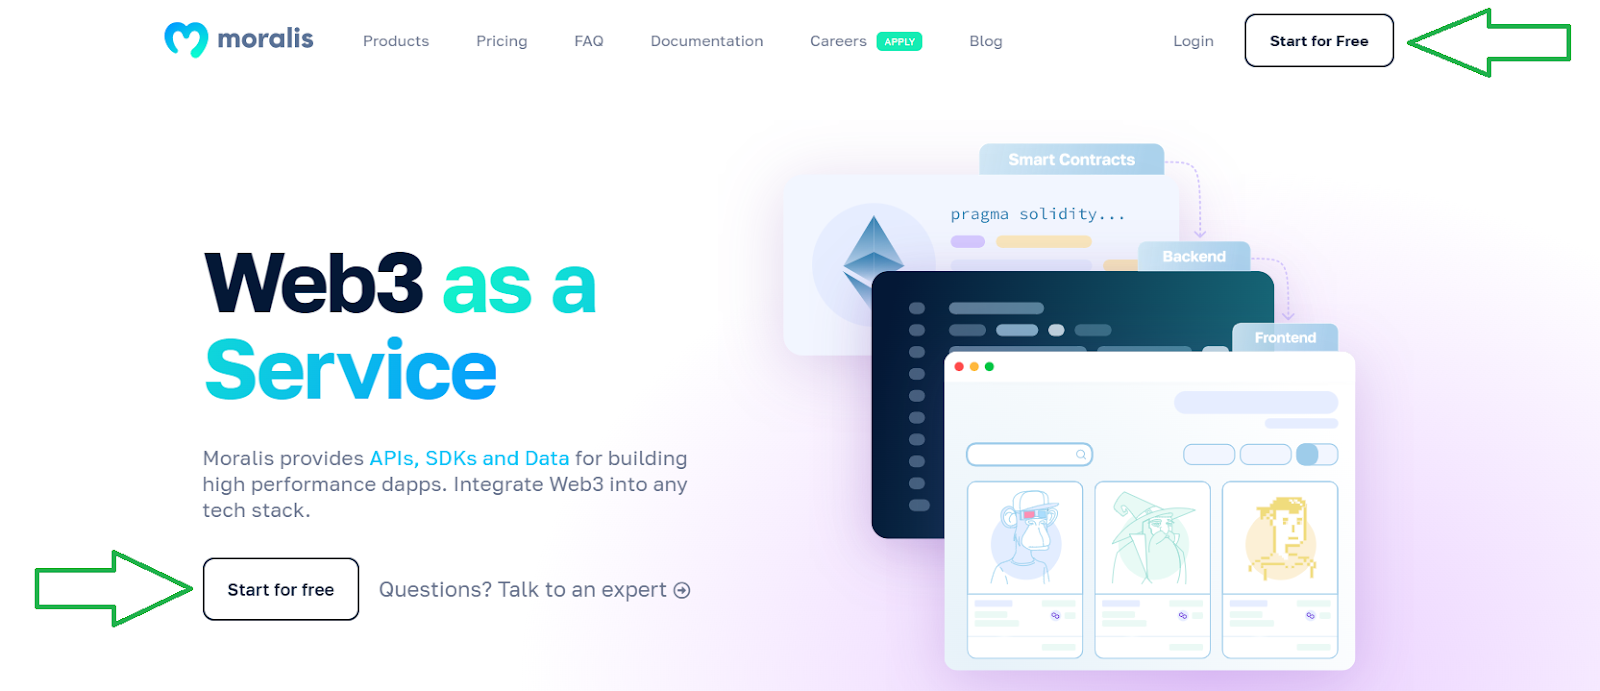
By completing the above steps, you’ll be able to read all sorts of data from all supported blockchains. Of course, we will go through some examples together. Also, to complete the above steps, you must create your Moralis account. You can use the “create your free Moralis account” link that we referred to initially in this article or visit the official Moralis website and click on the “Start for Free” button:
On the next page, enter your credentials:

Don’t forget to click on the confirmation link in the email sent to your email inbox. Next, you also need to install and set up your favorite code editor or IDE. If you want to follow our lead, feel free to use Visual Studio Code (VSC). Nonetheless, you’ll also need to install NodeJS:

Getting Started with the Ultimate NodeJS EVM API
Before you initialize a new project, make sure to create a new folder for your project. Then open that folder in VSC. Next, use VSC’s terminal and use the “npm init” command to initialize a new project. Following the setup, you must give your project a name and fill in the details according to your preferences. If you decide to go with default settings, you can press enter. After the initial setup, you should see the “package.json” file. Moreover, you also need to install the “Express” and “Moralis” dependencies. To do this, use the terminal again and enter the “npm install moralis express” command.
Next, create the “index.js” file that will take care of the Express server setup:
const express = require('express')
const app = express()
const port = 3000

app.get('/', (req, res) => {
  res.send('Hello World!')
})

app.listen(port, () => {
  console.log(`Example app listening on port ${port}`)
})
Also, make sure to add the following script to your “package.json” file:
"scripts": {
  "start": "node index.js"
},
You are now ready to run your Express server with the “npm run start” command. Then, you can check if your server is running by going to the following URL:
http://localhost:3000
To actually use Moralis’ NodeJS EVM API, you also need to add Moralis to your dapp. To do this, you need to get your Web3 API key from your Moralis dashboard, which you can only access if you’ve created your Moralis account (as instructed above). Once inside your Moralis dashboard, click on the profile icon in the top-right corner. Then, click on account settings and select the “Keys” tab. There, you’ll get to copy your Web3 API key:

Finally, you’ll need to paste your API key into your code.
Adding Moralis’ Web3 API Key to Your Code
You have several options when it comes to adding your Moralis Web3 API key to your code. For instance, you can follow the instructions in the official Moralis documentation and add it directly to the previously created “index.js” file. Or, you can have a separate “.env” file that will hold this value (for details, see the video at the bottom of this article):

In either case, you will need to import Moralis from ‘moralis’ and “EvmChain” data type form ‘@moralisweb3/evm-utils’. Moreover, you will also need the “Moralis.start” function.
The Ultimate NodeJS EVM API and “EvmChain”
Note: For a detailed video tutorial on how to handle EVM-compatible chains, use the video below, starting at 1:20.
Moralis’ NodeJS EVM API handles chains as a separate class instance called “Moralis dataTypes”. As such, you call “EvmChain” followed by a dot and then the chain. Here are some examples:
- EvmChain.ETHEREUM
- EvmChain.ROPSTEN
- EvmChain.BSC
- EvmChain.POLYGON
- EvmChain.AVALANCHE
- EvmChain.FANTOM
You can also do the above using “EvmChain.create()”, where you need to enter the chain name or ID into the parentheses. Here’s an example:
- EvmChain.create(“ETHEREUM”) or EvmChain.create(1)
To see how the above values are logged, use the video below starting at 2:05. There, you’ll also see the following utility methods in action:
- “.decimal”
- “.hex”
- “.name”
- “.currency”
- “.format” (for this one, you need to set your own formatting)
- “.equals()”

The Ultimate NodeJS EVM API and “EvmAddress”
Note: For a detailed video tutorial on how to use “EvmAddress”, check out the video below, starting at 3:51.
To use the ultimate NodeJS EVM API to create new addresses, you use “EvmAddress.create()”. Moreover, the address needs to come inside the parentheses, like so:
EvmAddress.create("0x1234567890123456789012345678901234567890")
In the example above, we use lowercase, but it also works with uppercase letters. Moreover, here are some common utility methods:
- “.lowercase”
- “.checksum”
- “.equals()”
- “.format()” (for this one, you need to set your own formatting)

“EvmAPI” and “Moralis.Auth”
Note: For a detailed video tutorial on how to use “EvmAPI”, check out the video below, starting at 4:33.
Using “EvmAPI” gives you the incredible power of our NodeJS EVM API. Just like with “EvmChain” and “EvmAddress”, “EvmAPI” follows “Moralis.” and is followed by types of APIs and API endpoints. Here’s an example that would get token balances for an account:
"Moralis.EvmApi.account.getTokeBalances()”

Using “.toJSON“, “.raw“, and “.result” data types enables you to select the format of return values.
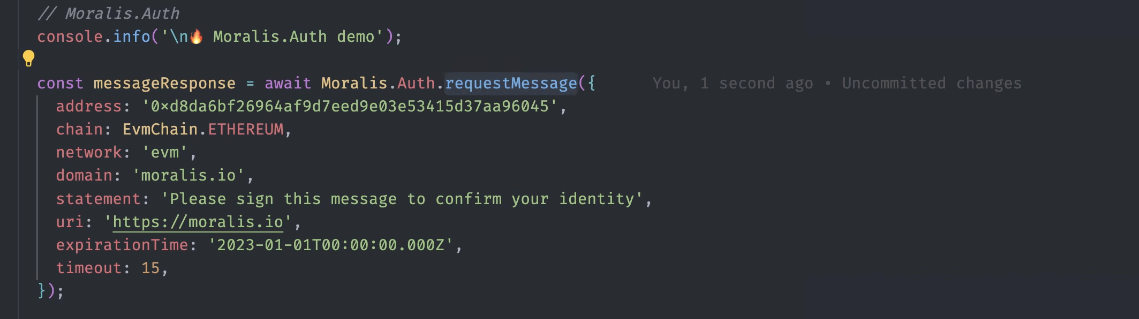
The NodeJS EVM API also gives you access to the Moralis Web3 Auth API (7:55). Furthermore, “Moralis.Auth” has two methods – “requestMessage” and “verify”.
In the future, we will release more info on how to utilize the Moralis Web3 Auth API. However, here’s an example on how the code would look like:
Last but not least, here’s the video tutorial where our in-house expert will provide you with more details about the Moralis NodeJS EVM API:
Exploring the Ultimate NodeJS EVM API – Summary
In this article, you had a chance to learn about the Moralis NodeJS EVM API. We started by explaining what NodeJS and EVM are. Plus, we went through briefly what an API is. With the basics under our belts, we focused on actually using this ultimate NodeJS EVM API. This is where we examined the steps you need to take to get started. As such, you discovered that one of the prerequisites includes obtaining your Moralis Web3 API key. Now you know that the latter awaits you in the “keys” tab inside the account settings of your Moralis dashboard. As we moved forward, you also had an opportunity to take a closer look at “EvmChain“, “EvmAddress“, “EvmAPI“, and “Moralis.Auth“.
We hope this article enables you to see that you can use your existing JavaScript proficiency and start creating Web3 apps effortlessly. By using Moralis’ NodeJS EVM API, you can devote your attention to creating the best possible frontend while Moralis covers your backend needs. If you already have some cool dapp ideas, make sure to roll up your sleeves and get to it. However, in case you are interested in tackling some excellent tutorials first, make sure to check out the Moralis blog and the Moralis YouTube channel. Essentially, these two outlets enable you to become a Web3 developer for free.
On the other hand, you might be interested in taking a more professional approach. If that’s your cup of tea, enrolling in Moralis Academy may just be the confidence boost you need. By becoming blockchain certified, you will significantly improve your chances of going full-time crypto sooner rather than later.
