Want to monitor an Ethereum address and receive notifications for on-chain activity? With Moralis’ Web3 Streams API, you can create this sort of crypto wallet tracking dapp in minutes. You can either set this up via Moralis’ admin UI or create a simple JavaScript script. If choosing the latter, the following lines of code are the key to the crypto wallet tracking functionality:
const newStream = await Moralis.Stream.add(options)

    const {id}=newStream.toJSON();

    const address=”wallet_address_you_want_to_track”

    await Moralis.Streams.addAddress({address,id})
To make the above snippet of code work, you also need to import and initialize Moralis. You must also define the options for your Web3 stream. If you want to learn how to properly implement the above lines of code and create a production-ready crypto wallet tracking dapp, dive into the “Monitor Ethereum Address” section below and follow our lead. But first, create your free Moralis account!
Overview
In today’s article, we’ll show you how to utilize Moralis’ Streams API to build crypto wallet tracking dapps (decentralized applications) with minimum effort. We will dive right into our tutorial and first demonstrate how to monitor an Ethereum address using Moralis’ admin UI. However, when working on production-ready dapps, you’ll most likely prefer to set up Web3 streams within your scripts. Thus, we’ll show you how to do that as well. This is where you’ll learn how to correctly implement the above-presented lines of code.
For those who prefer additional context, we’ll also answer what crypto wallet tracking is and provide the theory behind today’s tutorial. We’ll also do a quick overview of Moralis and its products so you can use them to level up your dapp development. Finally, we’ll outline the core benefits of the Web3 Streams API. After all, today’s tutorial reflects only a small portion of what this powerful tool is capable of.

Monitor Ethereum Address – How to Monitor a Wallet Address on Ethereum
Let’s first show you how you can set up a Web3 wallet tracker using Moralis’ admin UI. Since you need an active Moralis account to access the admin area, make sure to create your free Moralis account now in case you haven’t done so yet. You can use the link in the intro or hit the “Start for Free” button in the top-right corner of Moralis’ homepage:

If you want to test your progress as you proceed with today’s tutorial, you’ll also need your MetaMask and some “test” MATIC. In case you need help adding the Polygon Mumbai testnet to your MetaMask and some guidance on obtaining “test” MATIC, we explain all of that in our article exploring a Polygon Mumbai faucet.
Crypto Wallet Tracking with Moralis Admin UI
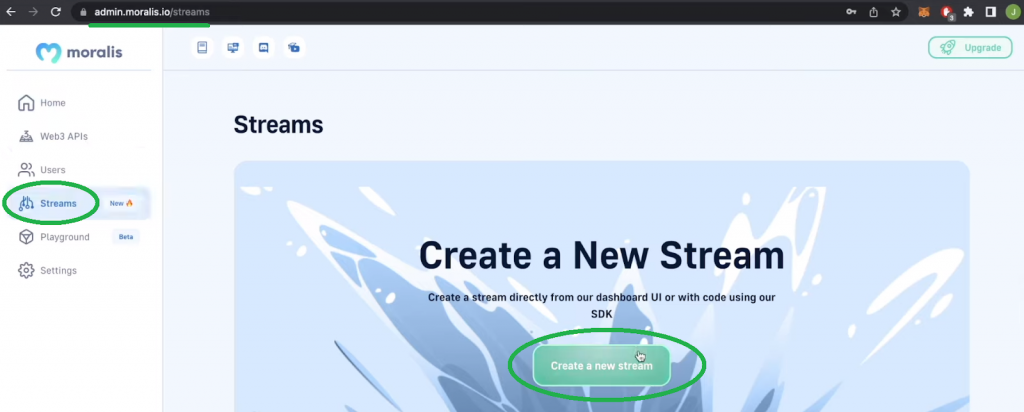
Once inside your Moralis admin area, select the “Streams” option from the side menu, followed by a click on the “Create a new stream” button:
Next, select the “Create it from Admin” option:
To monitor an Ethereum address, you need to provide an address. For testing purposes, the simplest way is typically to open your MetaMask and copy your address from there:
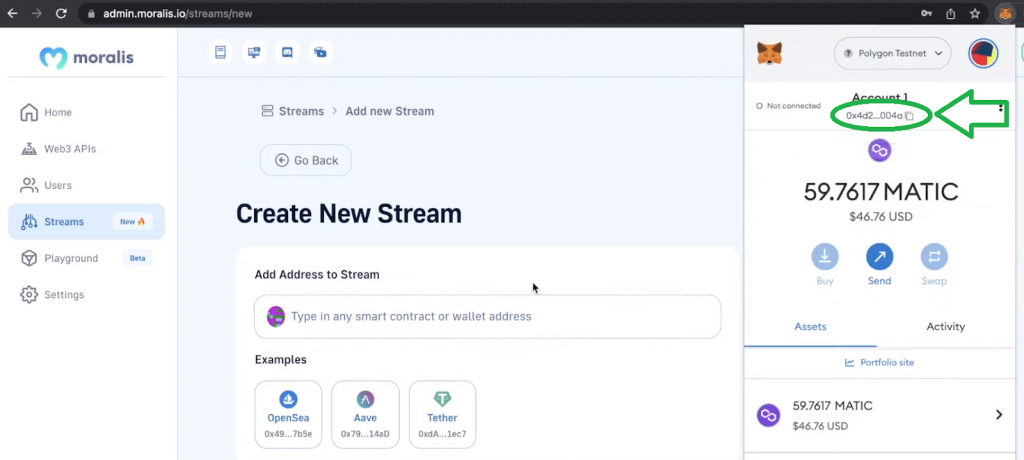
Then, paste it into the “Add Address to Stream” entry field:
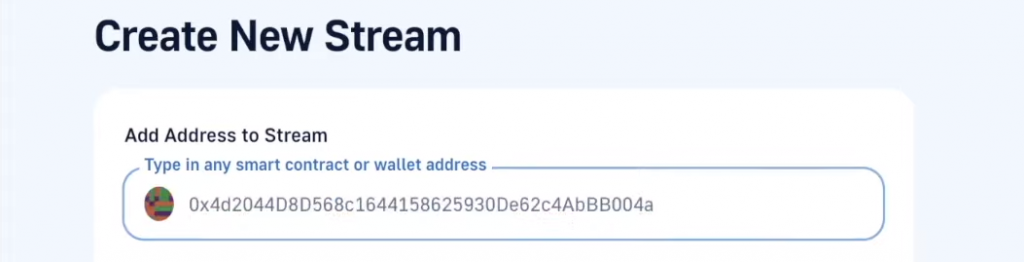
By entering a wallet address that you want to listen to, the UI will automatically present you with stream configuration options. To use your streams for production purposes, you need to provide a webhook URL and switch from “Demo” to “Prod”:
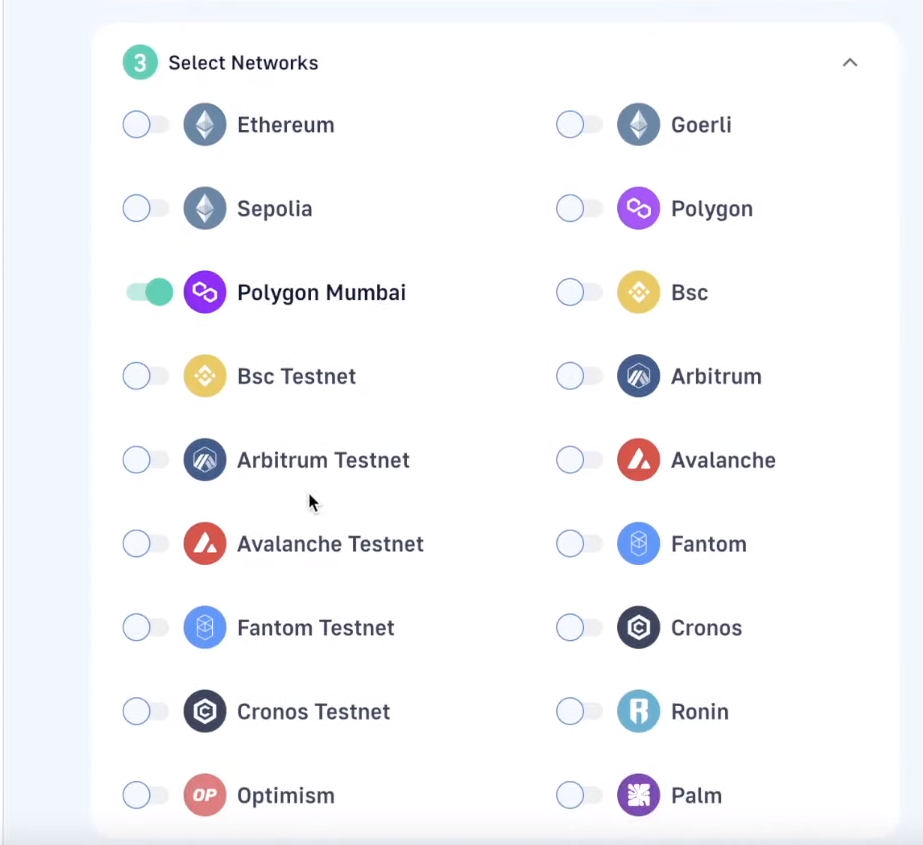
We do not need to provide a webhook URL. For the description and tag fields, we can use the default options. As such, we can proceed to network selection. Since Moralis is fully cross-chain interoperable, you can target all leading EVM-compatible blockchain networks. However, we will focus on the Mumbai testnet:
In the fourth step of our stream setup, we will only select the contract interactions since we are interested in tracking ERC20 tokens:

The “Advanced Options” enable you to filter your tracking agenda further. For example, you can use a smart contract’s ABI to target specific smart contract functions. You can also add multiple other filters, but for the sake of this demo, we won’t use any advanced options.
Example Transaction
Finally, we execute a transaction of Chainlink (LINK) tokens on the Mumbai testnet:
Our demo stream picks up the above transaction instantaneously:

The above screenshot shows that the stream not only detects the on-chain event but also fetches the related on-chain data. As such, you can see the transaction hash, the smart contract involved in the event, the “from” and “to” addresses, the transferred value, and more. Accordingly, you have a trigger plus a lot of useful details that you can neatly incorporate in all sorts of dapps or notifications/bots.

Crypto Wallet Tracking with Moralis’ JS SDK
As mentioned above, another way to use Web3 streams from Moralis is by incorporating them programmatically. For most production purposes, this tends to be a preferred method. Therefore, let’s look at the scripts that will make it possible to use NodeJS to create a backend dapp that detects and logs on-chain events.
Before we can focus on creating our stream, we need to have a server that will receive a webhook. For that purpose, we can create a simple NodeJS Express app with a “webhook” endpoint. These are the lines of code that you should copy-paste into your “index.js” file:
const express = require("express");

const app = express();

const port = 3000;

app.use(express.json());

app.post("/webhook", async (req, res) => {

  const {body} = req;

  try {

    console.log(body);

  } catch (e) {

    console.log(e);

    return res.status(400).json();

  }

    return res.status(200).json();

});

app.listen(port, () => {

  console.log(`Listening to streams`);

});
Note: If you are not experienced with creating NodeJS applications and setting up Express servers, use our “Quickstart NodeJS” guide.
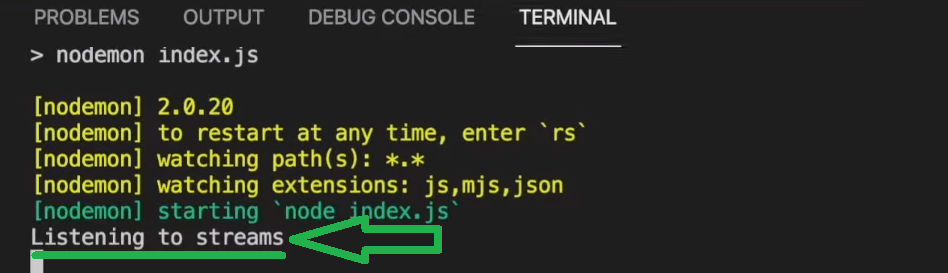
Once you have the above script set in place, use your terminal and run the following command:
npm run start
As a result, your terminal should return the “Listening to streams” message:
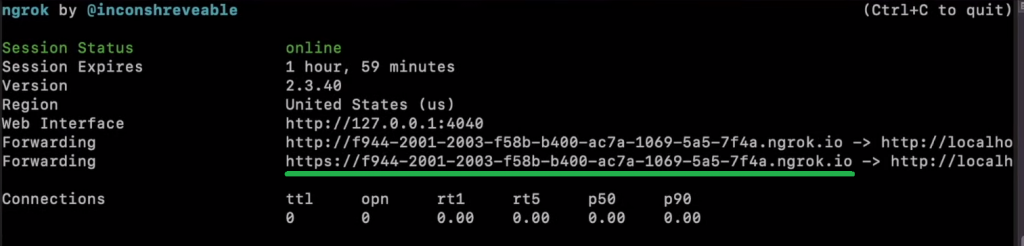
Then, open another terminal, and use “ngrok” to create a tunnel to port “3000“. This will generate a URL address serving your stream’s webhook URL. To do this, use the following command:
ngrok http 3000
Now that you have your local server and tunnel ready, it’s time to take a closer look at the code that will make crypto wallet tracking possible. This is also where you’ll learn to paste the above-marked URL address in the right place.
Crypto Wallet Tracking Script – Code Walkthrough
Initialize another NodeJS app. Then, create a new “index.js” file and first require Moralis and “dotenv”:
const Moralis = require("moralis").default;

const { EvmChain } = require("@moralisweb3/common-evm-utils");

require("dotenv").config();
You must also create a “.env” file and store your Moralis Web3 API key in that file under the “MORALIS_KEY” variable. At this point, you should have your Moralis account up and running, and you can obtain your Web3 API key from your admin area in these two simple steps:

With your API key in place, it’s time to initialize Moralis by adding the following lines of code below the “require (“dotenv”).config();” line:
Moralis.start({

    apiKey: process.env.MORALIS_KEY,

});
Next, you need to define the stream’s options. These are the lines of code to use:
async function streams(){

  const options = {

    chains: [EvmChain.MUMBAI],

      tag: "transfers",

  description: "Listen to Transfers",

    includeContractLogs: false,

    includeNativeTxs: true,

    webhookUrl: "your webhook url"

  }
Looking at the above code snippet, you can see that it defines a chain to focus on, a description, a tag, and a webhook URL. If you remember the Web3 Streams UI, you see that we are defining the same options as requested by the stream’s configuration. By setting “includeContractLogs” to “false“, we are not listening to ERC20 transactions. Also, by setting “includeNativeTxs” to “true“, we are focusing on native currency transfers. For the Mumbai network, that’s “test” MATIC. So, all you have to do is copy-paste the above lines of code to your “index.js” file and replace “your webhook url” with the above-obtained “ngrok” URL:

As highlighted in the above image, do not forget to add “/webhook” at the end of your URL.
Create a New Stream
At this point, you have everything ready to finally implement the lines of code provided in the introduction of today’s article. So, inside the stream’s “async” function of your “index.js” file below “webhookUrl“, add these simple lines of code:
const newStream = await Moralis.Streams.add(options)

  const {id} = newStream.toJSON();

  const address = "wallet_address_you_want_to_track";

  await Moralis.Streams.addAddress({address, id})

  console.log("Fin")

}

streams()
The “Moralis.Streams.add(options)” method takes the above-defined options and creates a new stream. Then, the code gets the ID of the new stream with “const {id}“. Next, it defines a wallet address to monitor. Here, make sure to replace “wallet_address_you_want_to_track” with your address (the one you can test). By using the “Moralis.Streams.addAddress” method, you add the wallet address to your stream based on its ID. Finally, the above code console logs “Fin“, which signals it has done its thing.
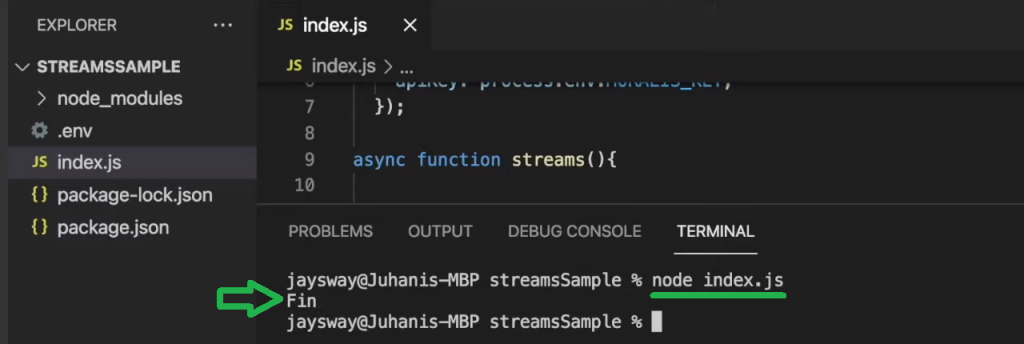
Again, use the “node index.js” command to run this “stream-creating” sample script. As a result, you should see “Fin” in your terminal:
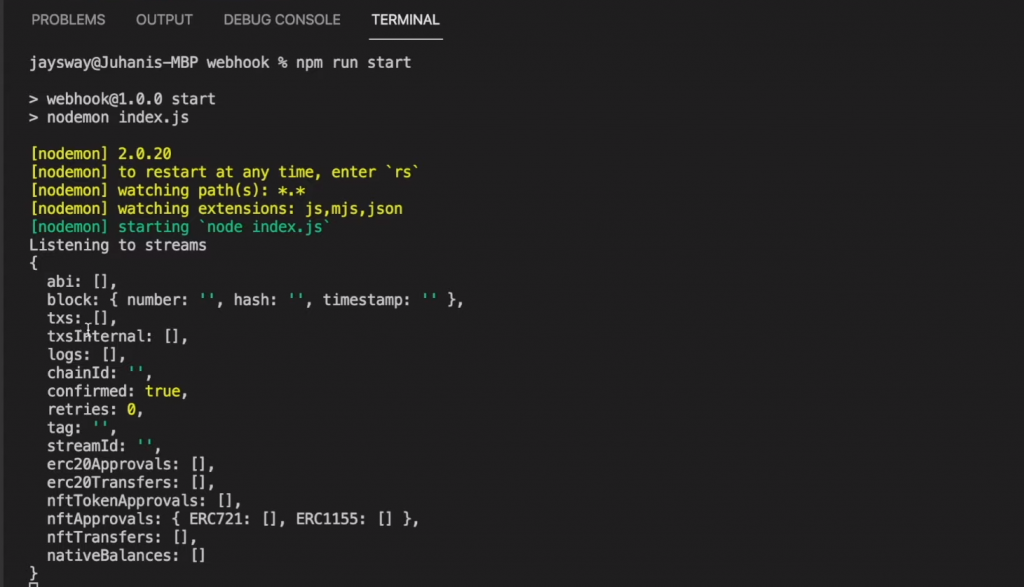
If you now open the terminal again where you are running your local Express server, you should see the empty webhook initializing:
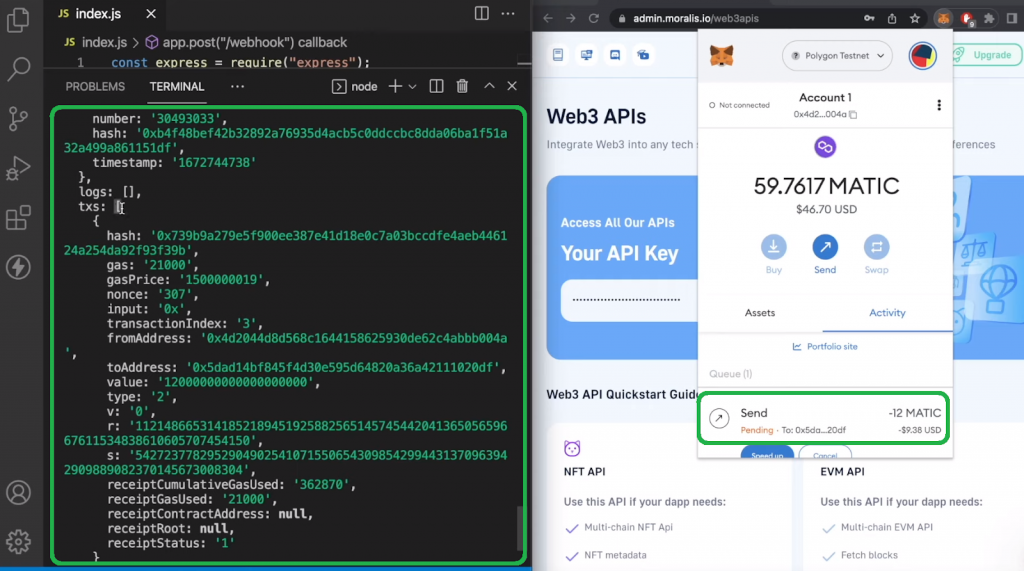
With everything set up correctly, we encourage you to test your stream – use your MetaMask and transfer some “test” MATIC from or to the address you added above. As a result, you’ll be able to see the details of your test transaction in your terminal:
Crypto Wallet Tracking Explained
Tracking crypto wallets is all about listening to real-time activities related to a specific public blockchain address and fetching the details of those activities. For instance, in the above tutorial, we focused on ERC20 transfers (when using the UI) and native transfers (when using the JS SDK). However, these are just two popular examples of on-chain events. All in all, countless dapps can greatly benefit from this sort of signaling and data fetching.
What is Crypto Wallet Tracking?
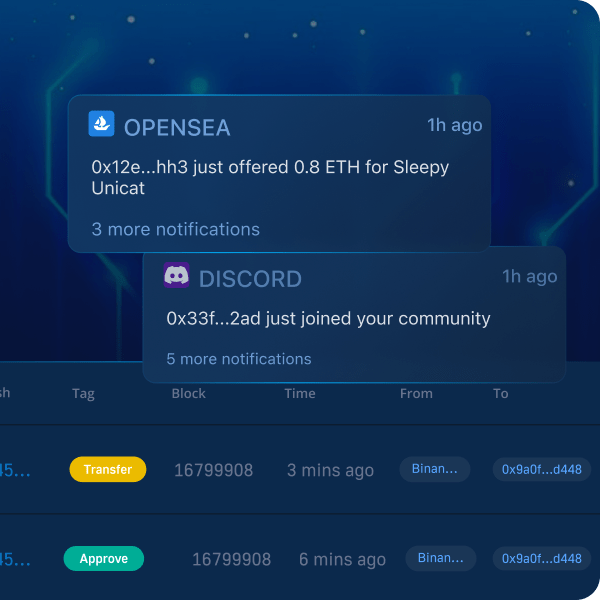
Crypto wallet tracking focuses on detecting the activity of Web3 wallets, and these signals can then be used in various ways. Essentially, the “monitor Ethereum address” feature enables devs to create dapps that detect activities on monitored wallets and do something useful based on those signals and related data. After all, detected activities can trigger all sorts of actions. For instance, they can trigger notifications or unlock special features of a dapp.
Best Crypto Wallet Tracking Tool
Crypto wallets are public blockchain addresses. In turn, anyone can track every wallet address. However, it can be challenging to register when events occur and fetch parsed data without the proper means. This is why Moralis’ Streams API is such a popular tool. In today’s tutorial, you saw this crypto wallet tracking tool in action. If you’d like to explore it further, you can review the main benefits of Web3 Streams API below.
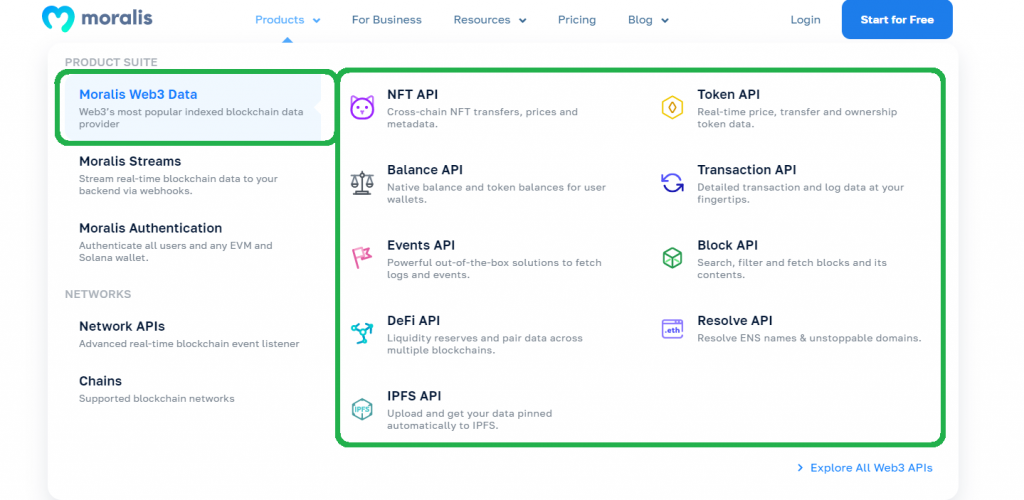
While detecting real-time, on-chain events is extremely useful, exploring past activities and crypto assets related to any Web3 wallet can also be of great value. It can be the key to creating the ultimate wallet tracking dapp. This is where Moralis’ Web3 Data API – the best Ethereum API in 2023 – enters the scene. This API enables you to fetch any type of on-chain data with a single line of code. It allows you to get Ethereum logs and events, get Ethereum transaction details, get contract logs, and much more.
Last but not least, Moralis also offers the ultimate Web3 Auth API. This tool lets you add all of the most popular Web3 login methods to your dapps. That way, your users can participate in a frictionless Web3 onboarding experience.

Web3 Streams API Benefits – Monitor EVM Chains, Not Just Ethereum
In our examples above, we exclusively focused on Polygon’s testnet: Mumbai. However, as you were able to see in the admin UI, Moralis supports all leading EVM-compatible chains. So, aside from monitoring an Ethereum address, you can monitor any other supported chain or multiple networks at once. In fact, cross-chain interoperability is one of the greatest benefits of all Moralis’ products. Not only does this allow you to target multiple chains, but it also future-proofs your work, as you’ll never be stuck to a particular chain.
Another significant benefit of the Streams API is its user-friendliness. We used NodeJS above, but you can work with other leading legacy programming languages and frameworks to make the most out of the Web3 Streams API. What’s more, you can access this power with a free Moralis account.
Since today’s objective was to monitor an Ethereum address, we focused on listening to wallet events. However, the Streams API enables you to listen to any smart contract address as well. This further expands the possibilities of utilizing on-chain events. For example, you can create a Twitter bot for crypto whale alerts.
Here’s a list of major Web3 Streams API benefits:
- ✅ Cross-chain interoperability
- ✅ User-friendliness (cross-platform interoperability)
- ✅ Listening to crypto wallets and smart contracts
- ✅ Speed and efficiency
- ✅ Advanced filtering options
- ✅ Accessible with a free account
Additionally, with the Streams API, there’s no more:
- ❌ Connecting and maintaining buggy RPC nodes
- ❌ Building unnecessary abstractions
- ❌ Wasting time building complex data pipelines
If you are still using ethers.js to listen to the blockchain and you need more than the above benefits to help you decide which tool is best for the job, check out our ethers.js vs Web3 streams comparison.
TRUSTED BY INDUSTRY LEADERS


Monitor an Ethereum Address – Crypto Wallet Tracking for EVM Chains – Summary
By tackling today’s tutorial, you had an opportunity to follow our lead and create your own Web3 streams. You explored how to do that via Moralis’ admin UI or with Moralis’ SDK. Each of the two methods has its benefits, one is more beginner-friendly, and the other is more suitable for production purposes. Still, they both provide the same results that support ultimate crypto wallet tracking. Today’s article also taught you that the Streams API allows you to implement the “monitor Ethereum address” feature on any EVM-compatible chain. You also learned what “crypto wallet tracking” is!
With all the main benefits of the Web3 Streams API in mind, you are probably eager to start building killer dapps. On your way, make the most out of Moralis’ docs and other Moralis resources. With our blockchain development YouTube channel, you can practice Web3 development by following our in-house experts’ steps. You can also expand your Web3 horizons with the content on our crypto blog. Among many other topics, this is the place to learn what danksharding is, why you need the best Ethereum faucet, and how to implement Supabase authentication. Additionally, if you want to go full-time crypto sooner rather than later, enrolling in Moralis Academy tends to provide the edge. There, you can complete a wide range of high-quality courses; however, we recommend building strong blockchain and Bitcoin fundamentals first.