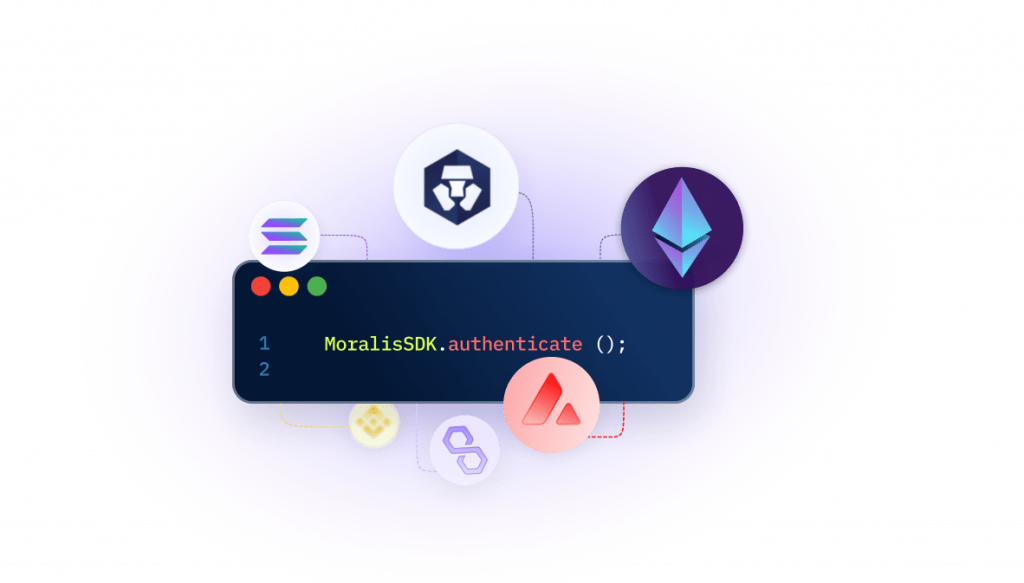
Are you looking for an easy way to authenticate users on Supabase? If so, you are exactly where you need to be, as this article covers the ins and outs of Supabase authentication! With Moralis and the Auth API, you can authenticate users by simply requesting a message and verifying the challenge!
Request message:
const result = await Moralis.Auth.requestMessage({

  address:””,

  chain:””,

  network:””,

  domain:””,

  statement””:,

  uri:””,

  expirationTime:””,

  timeout:””,

});
Verify challenge:
const verifiedData = Moralis.Auth.verify({

  message:””,

  signature:””,

  network:””,

});
Thanks to Moralis, Web3 authentication does not have to be more complicated than that! By familiarizing yourself with the Auth API’s ”requestMessage” and ”verify” endpoints, you can integrate Web3 authentication flows for all future blockchain projects!
If you want a more detailed breakdown of how this works with Supabase in particular, check out Moralis’ Web3 Supabase documentation. You can also join us throughout this tutorial as we cover the ins and outs of authenticating users on Supabase.
But before continuing, do not forget to sign up with Moralis, as you need an account to follow along!

Overview
In this tutorial, we will show you how to authenticate users on Supabase using Moralis in five steps:
- Setting up Supabase
- Cloning the project and adding environment variables
- Creating the Web3 authentication flow
- Verifying the message
- Making the client-side implementing the auth flow
If you complete the steps mentioned above, you will learn how to authenticate users on Supabase. From there, you can implement blockchain-based authentication into any future project. If you want to get going immediately, jump straight into the Supabase authentication tutorial by clicking here!
By following along in this article, you will familiarize yourself with Moralis’ Auth API. This tool provides a dynamic Web3 authentication workflow, meaning that it does not limit you to MetaMask.

In combination with industry-leading Web3 APIs, Moralis also provides other Web3 development resources. For instance, the blog features excellent guides to help your blockchain development endeavors. For example, learn what a Sepolia testnet faucet is, or check out our smart contract programming tutorial.
If you want access to these enterprise-grade development resources, remember to sign up with Moralis. Creating an account is entirely free and only takes a couple of seconds, so you have nothing to lose! What’s more, if you are unfamiliar with Supabase, you can update your knowledge base in the ”What is Supabase?” section below the fifth and final step of the tutorial!
Moralis Supabase Authentication
We will kickstart this article by jumping straight into the Supabase authentication tutorial. In the upcoming sections, we will show you how to set up a NodeJS application for combining Web3 authentication with Supabase!
The Web3 authentication flow is managed using Moralis’ Auth API, allowing users to sign in with their MetaMask wallets. Once authenticated, the app creates a JSON Web Token (JWT) to check if it is an existing user. If this is not the case, the app generates a new user and adds it to Supabase.
If this sounds interesting and you want to learn how to authenticate users on Supabase, join us throughout this tutorial as we cover the process from start to finish!
You also have the option to check out the video below if you prefer watching YouTube clips to learn. In this video, one of Moralis’ software engineers breaks down the entire process, providing an in-depth analysis of the application code:
Otherwise, join us here as we begin by covering the necessary prerequisites before jumping into the first step of this Supabase authentication tutorial!
Prerequisites
Before getting started with this Supabase authentication tutorial, you need to deal with the following prerequisites:
- Install the Moralis and Supabase SDKs – Open a new terminal and run the following command:
yarn add moralis @supabase/supabase-js jsonwebtoken
- Create a Moralis Account – If you have not already, sign up with Moralis straight away!
- Set Up a Supabase Account – Go to “https://app.supabase.com/” and create your account.
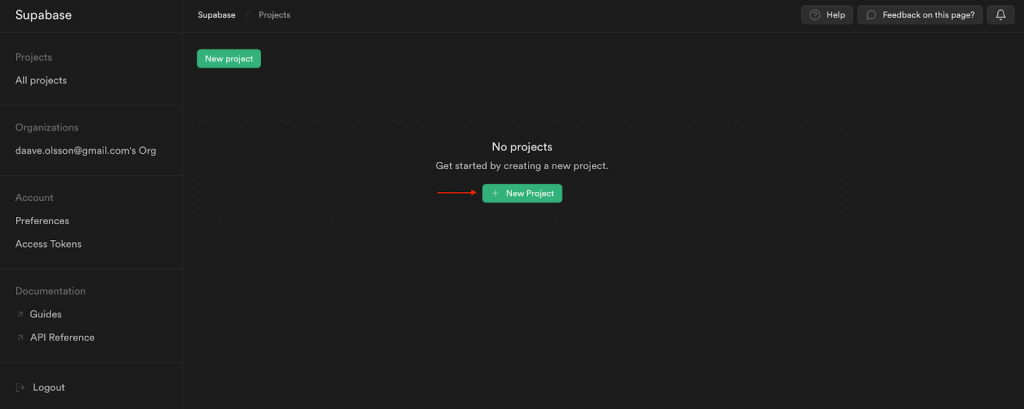
Step 1: Setting Up Supabase
The first step is to set up a new Supabase project. To do so, log in to Supabase and click on the ”+ New Project” button:
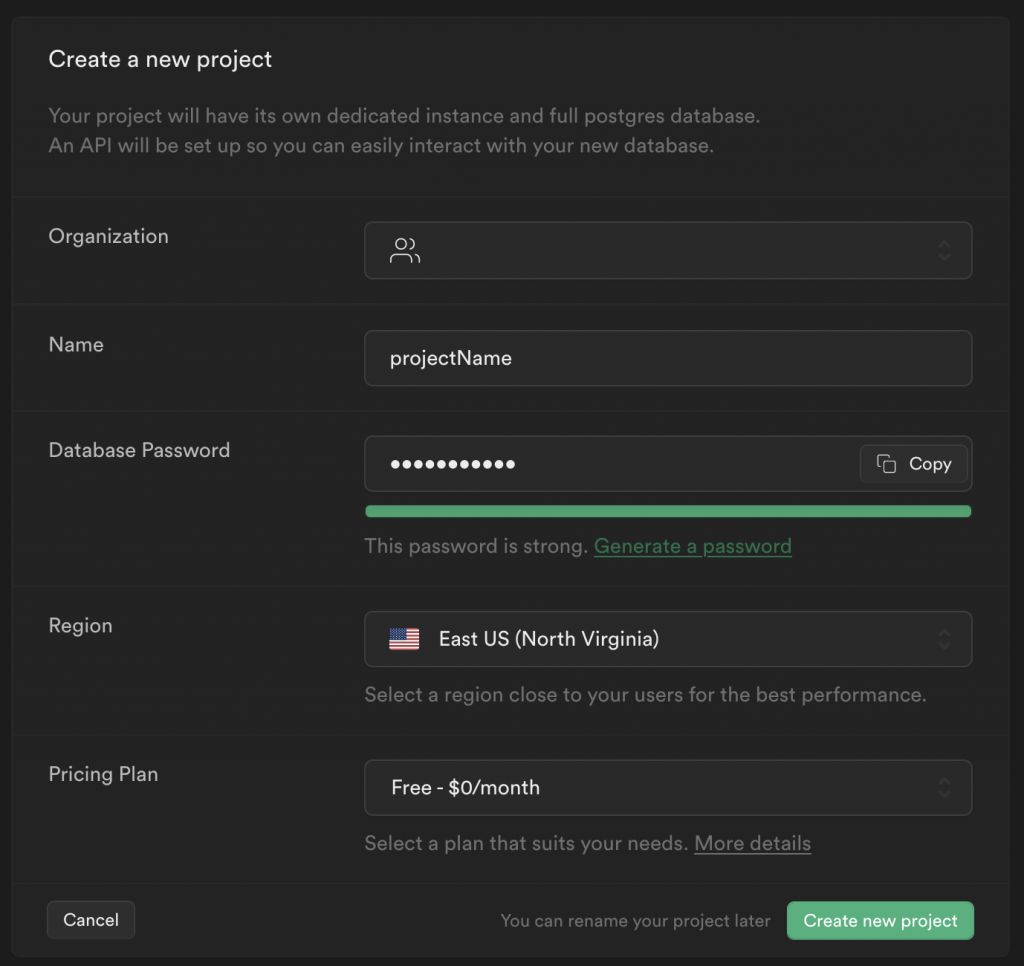
Fill in a name, select a password, region, and pricing plan:
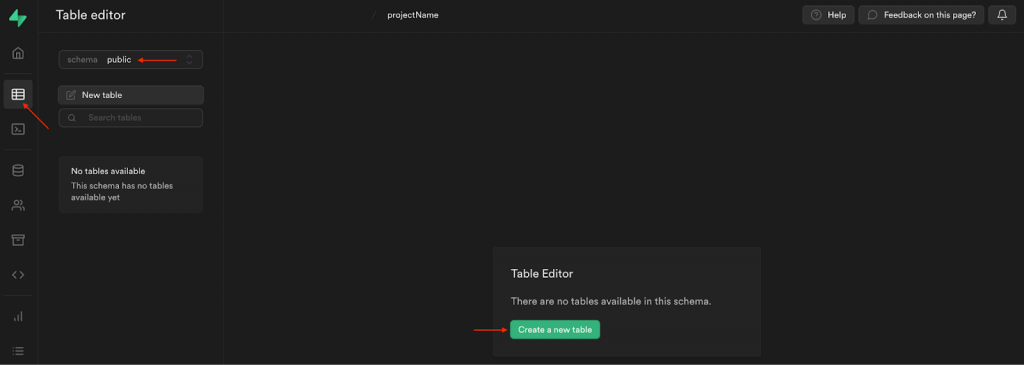
Next, go to ”Table editor”, choose ”public” for the schema, and hit the ”Create a new table” button:
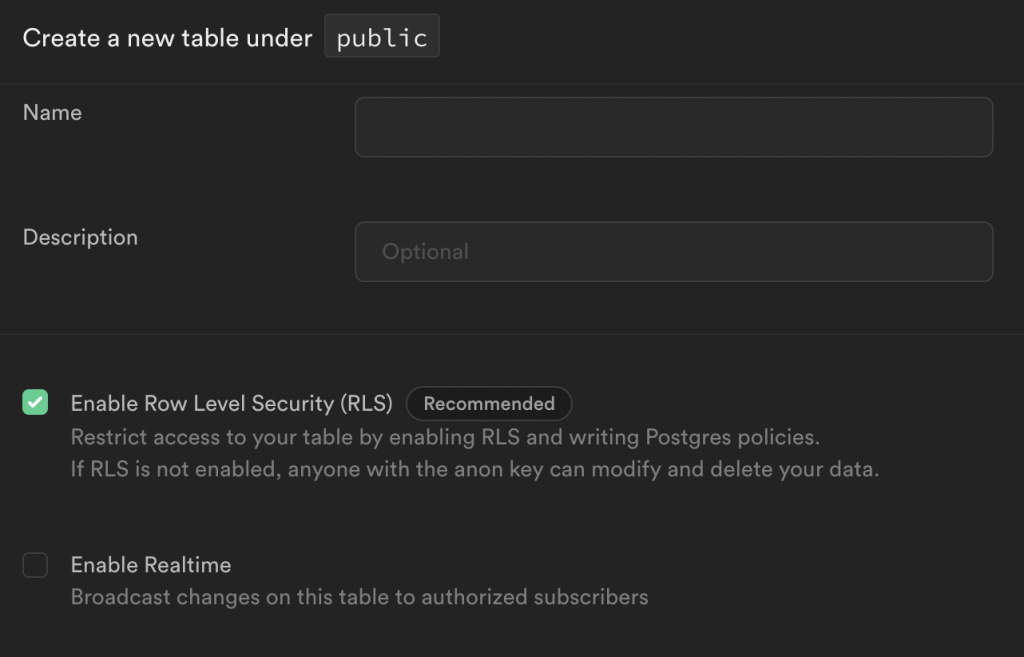
Add a name and description, and ensure you check the ”Enable Row Level Security (RLS)” box:
From there, you need to add two additional columns: ”moralis_provider” set to ”varchar” and ”metadata” set to ”json”:
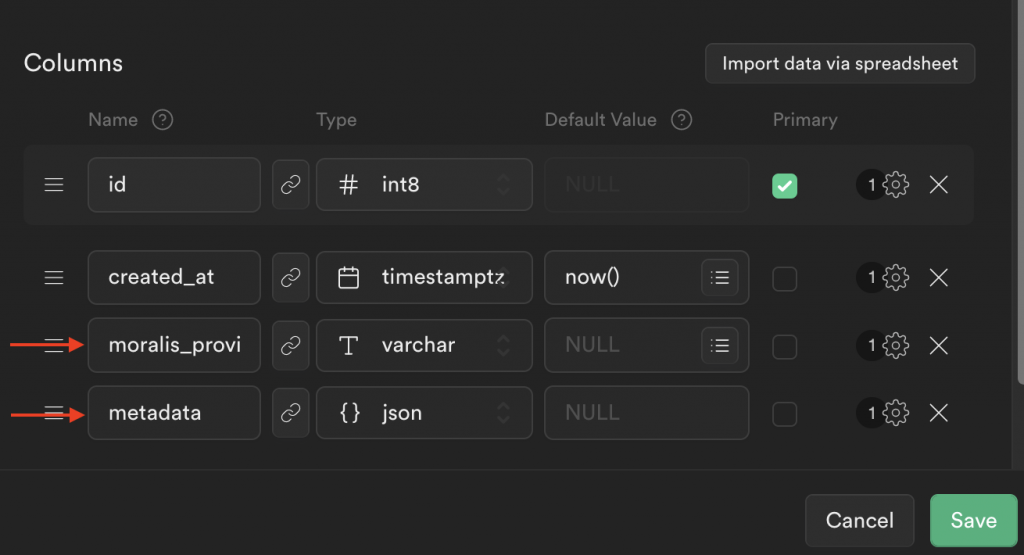
Once you hit ”Save”, you should now have a new table looking something like this:

Lastly, the final thing you need to do is configure the RLS policy for the table. As such, click on ”No active RLS policies” at the top right, followed by ”New Policy”:


You can then go for the ”For full customization” option:

Add a policy name, pick the ”SELECT” option, add ”authenticated” to the target roles, and set the expression to ”true”:

When you click on ”Review”, your policy should now look something like this:

Step 2: Cloning the Project and Adding Environment Variables
Now that you have configured your Supabase database, let us dive into the actual project. To make this Supabase authentication tutorial as straightforward as possible, we will use a pre-made app. So, the first order of business is visiting the GitHub repository below and cloning the project to your local directory:
Complete Supabase Authentication Docs – https://github.com/MoralisWeb3/Moralis-JS-SDK/tree/main/demos/supabase-auth
Next, with a local copy of the project, you need to make a few configurations to the code. Start by renaming the ”.env.example” file to ”.env”. When you open this file, you will quickly notice that you need to add a few environment variables:
SUPABASE_PUBLIC_ANON_KEY = ''

SUPABASE_SERVICE_KEY = ''

SUPABASE_URL = ''

# Your Moralis API key that can be found in the dashboard. Keep this secret!

MORALIS_API_KEY = ''

PORT = 3000

APP_NAME = 'supabase-demo'

SUPABASE_JWT = ''
First, go to the Supabase dashboard, and click on ”Project Settings”, followed by ”API”. Here you can find the project URL, API keys, and the JWT secret:

Let us copy each value and add them to the code. It should now look something like this:
SUPABASE_PUBLIC_ANON_KEY = 'eyJhb…'

SUPABASE_SERVICE_KEY = 'eyJhb…'

SUPABASE_URL = 'https://cscaffczpobedyxjwujy.supabase.co'

# Your Moralis API key that can be found in the dashboard. Keep this secret!

MORALIS_API_KEY = ''

PORT = 3000

APP_NAME = 'supabase-demo'

SUPABASE_JWT = 'o5+4…'
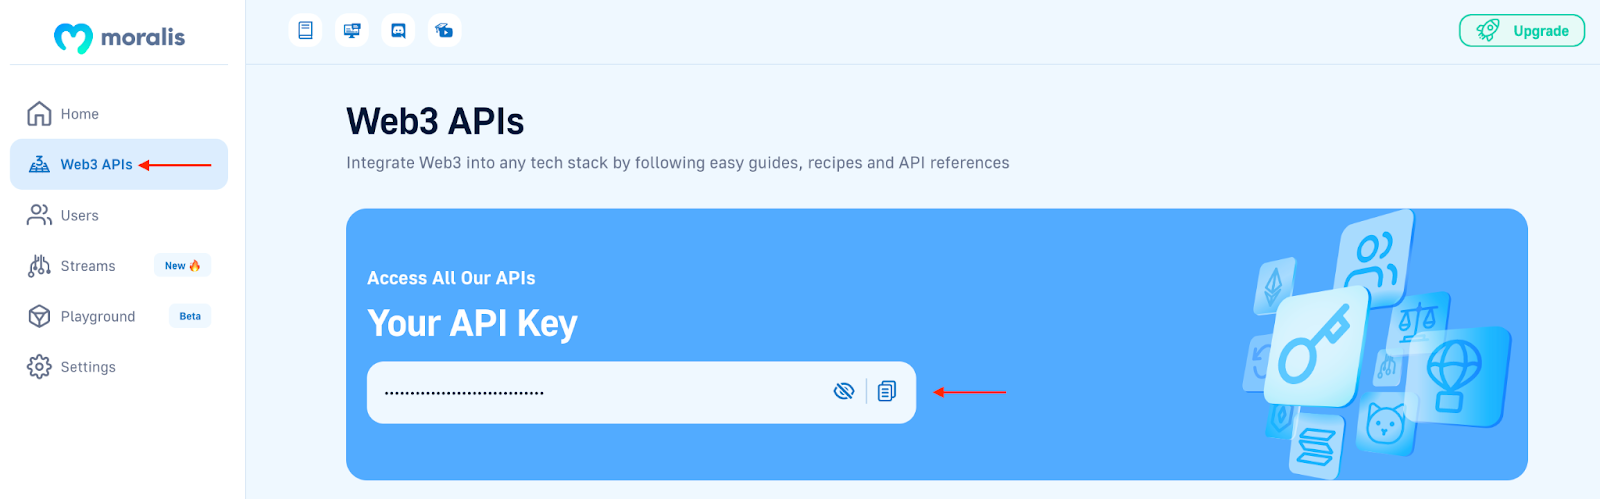
Lastly, you also need to add your Moralis API key to the ”MORALIS_API_KEY” variable. To find your key, log in to Moralis and click on the ”Web3 APIs” tab:
Since you copied the entire project to your local directory, you have all the required code. However, to make this more understandable, the remaining steps will break down the essential parts!
Step 3: Creating the Web3 Authentication Flow
To begin this code breakdown, let us start by navigating to the ”authServices.ts” file, where you can find the first function for the Web3 Supabase authentication flow:
export async function requestMessage({ address, chain, network }: { address: string; chain: string; network: 'evm' }) {

  const result = await Moralis.Auth.requestMessage({

    address,

    chain,

    network,

    domain: 'defi.finance',

    statement: 'Please sign this message to confirm your identity.',

    uri: 'https://defi.finance',

    expirationTime: '2023-01-01T00:00:00.000Z',

    timeout: 15,

  });

  const { message } = result.toJSON();

  return message;

}
This function is responsible for requesting a message from Moralis’ Auth API. It allows us to send a message to the users, prompting them to sign it using their MetaMask wallet.
Step 4: Verifying the Message
Since we are asking users to sign a message, verification of the signature must be established. For this, we create the ”verifyMessage()” function:
export async function verifyMessage({ network, signature, message }: VerifyMessage) {

  const result = await Moralis.Auth.verify({

    network,

    signature,

    message,

  });

  const authData = result.toJSON();

  let { data: user } = await supabase.from('users').select('*').eq('moralis_provider_id', authData.profileId).single();

  if (!user) {

    const response = await supabase

      .from('users')

      .insert({ moralis_provider_id: authData.profileId, metadata: authData })

      .single();

    user = response.data;

  }

  const token = jwt.sign(

    {

      ...user,

      aud: 'authenticated',

      role: 'authenticated',

      exp: Math.floor(Date.now() / 1000) + 60 * 60 * 24 * 7,

    },

    config.SUPABASE_JWT,

  );

  return { user, token };

}
This function uses the ”verify()” function from Moralis’ Auth API, passing ”network”, ”signature”, and ”message” as parameters. If the message is successfully verified, the function creates a JWT token and sends it to the frontend application. In addition, before issuing the token, the function checks for a current user. If none exists, it creates a new one.
Step 5: Making the Client-Side Implementing the Auth Flow
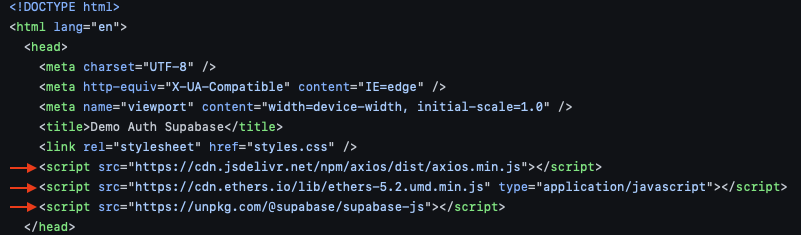
Now, let us take a closer look at the client-side implementing the authentication flow, starting with the ”index.html” file. In this file, we begin by adding dependencies using CDN for “axios“, ethers.js, and the Supabase SDK:
Next, go to ”script.js” to add your Supabase URL and anon key (go to Supabase, click on ”Project Settings”, and select the ”API” tab to get these values):

Further down in ”script.js”, we add the ”connectToMetamask()” function:
const connectToMetamask = async () => {

  const provider = new ethers.providers.Web3Provider(window.ethereum, 'any');

  const [accounts, chainId] = await Promise.all([

    provider.send('eth_requestAccounts', []),

    provider.send('eth_chainId', []),

  ]);

  const signer = provider.getSigner();

  return { signer, chain: chainId, account: accounts[0] };

};
This function uses a standard ethers.js provider to connect with MetaMask. What’s more, it fetches basic data about the user’s wallet.
That covers the necessary functions needed for the entire Supabase authentication flow. From here, we put it all together in the ”handleAuth()” function, which can look something like this:
const handleAuth = async () => {

  // Connect to MetaMask

  const { signer, chain, account } = await connectToMetamask();

  if (!account) {

    throw new Error('No account found');

  }

  if (!chain) {

    throw new Error('No chain found');

  }

  const { message } = await requestMessage(account, chain);

  const signature = await signer.signMessage(message);

  const { user } = await verifyMessage(message, signature);

  _supabaseAuthenticated = supabase.createClient(SUPABASE_URL, SUPABASE_PUBLIC_ANON_KEY, {

    global: {

      headers: {

        Authorization: `Bearer ${user.token}`,

      },

    },

  });

  renderUser(user);

};
After a user authenticates with this Supabase client, we can now access the users’ table using the token returned after verification:
const getUser = async (token) => {

  const { data } = await _supabaseAuthenticated.from('users').select('*');

  renderUser(data);

};
Congratulations! That’s it for this Supabase authentication tutorial. If you have followed along this far, you now know how to combine Web3 authentication with Supabase! If you at any point experienced trouble, check out the video at the top of the tutorial or read the Web3 Supabase documentation.
Now, before concluding this tutorial, let us take a closer look at the results of the Supabase authentication tutorial!
How to Authenticate Users on Supabase – Final Supabase Authentication App
Now that you have completed the required configurations and know how the code works, let us take a closer look at the end results. You can find the app’s landing page down below:
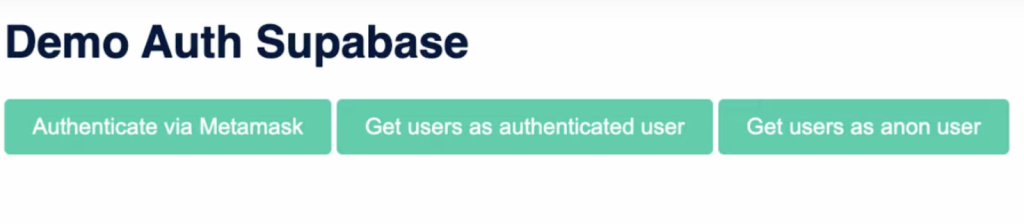
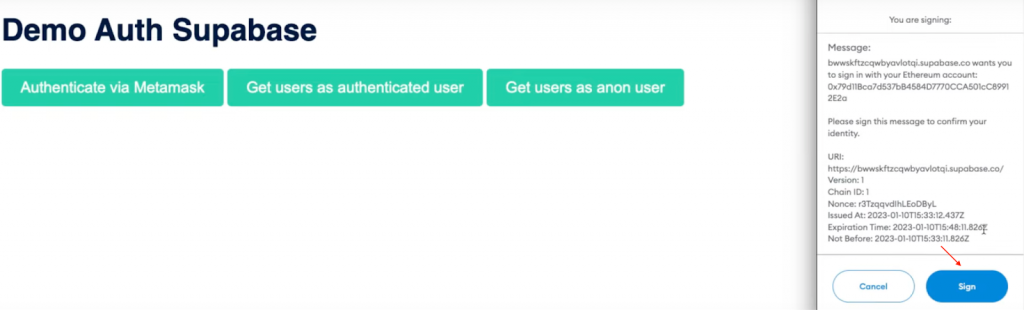
The app features three buttons: ”Authenticate via MetaMask”, ”Get users as authenticated user”, and ”Get users as anon user”. If you click on the former, it will automatically trigger your MetaMask wallet, requiring you to sign a message:
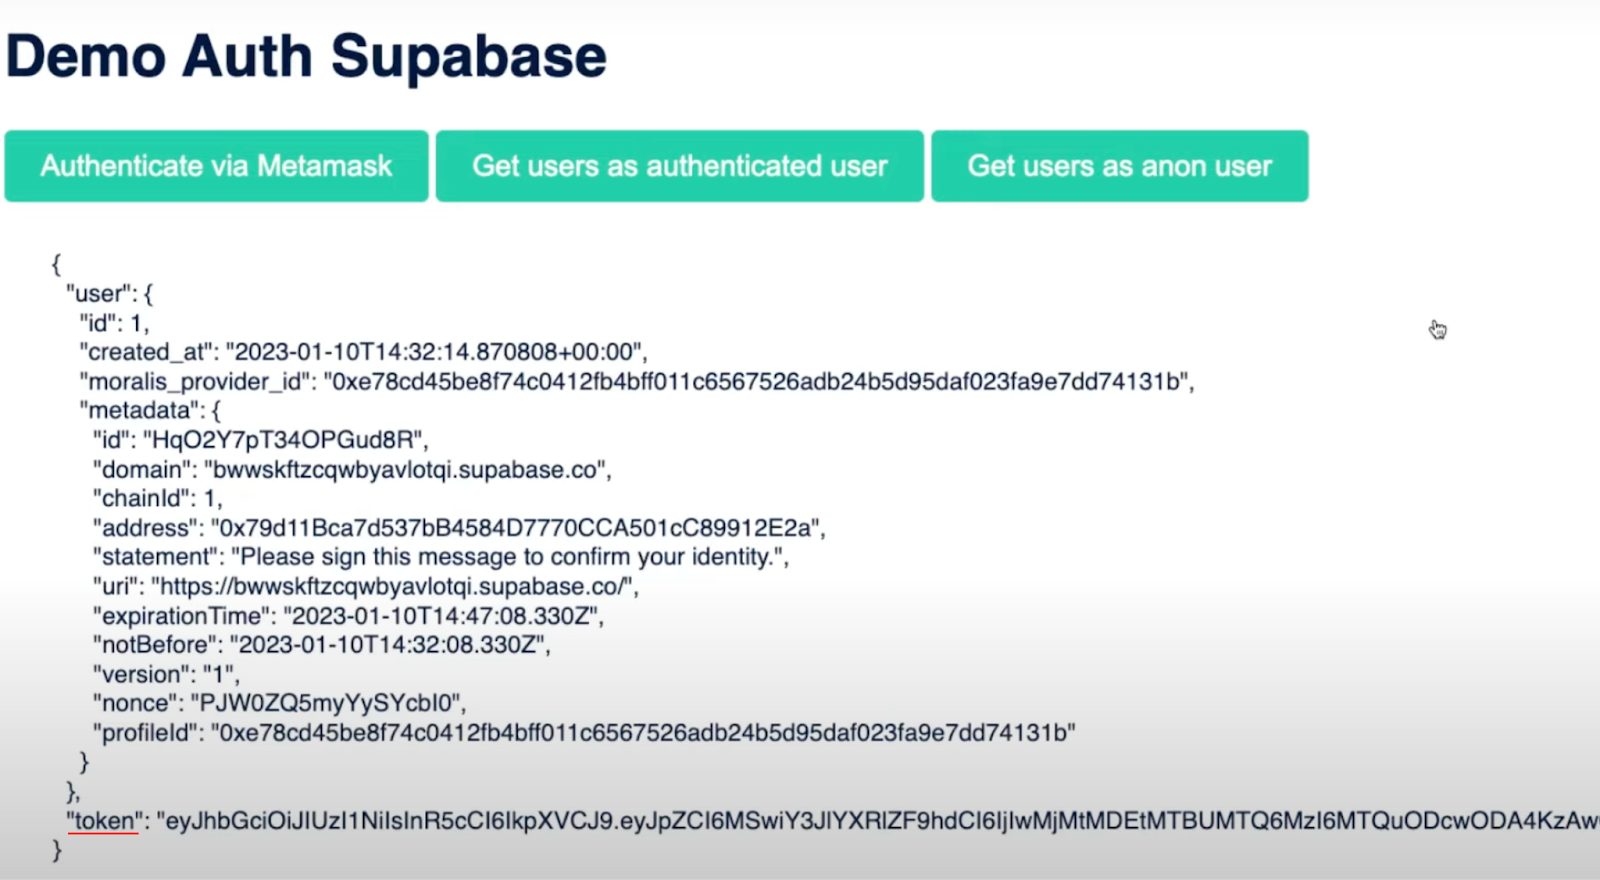
Once you sign the message, the code creates a JWT to verify if a user exists. If the user is nonexistent, we create a new one and add it to the Supabase database:
With the ”Get users as authenticated user” button, only authenticated users will be able to get information regarding all users of the database:

Lastly, the ”Get users as anon user” option illustrates that anonymous users will not be able to get the same information. Instead, this will only display an empty array:

That’s it for this Supabase authentication tutorial! You can now follow the same steps to implement similar functionality into future Web3 projects!
What is Supabase? – Supabase Authentication
Supabase was released in 2020 and is an open-source Firebase alternative. The platform promises to provide all the backend functionality required to build sophisticated projects. As such, you can initiate projects with authentication, instant APIs, real-time subscriptions, storage, Postgres database, and more through Supabase!

Supabase is often praised for providing an intuitive and user-friendly user interface (UI). With Supabase, it is easy to set up and manage servers, especially if you are a Firebase user preferring to utilize tables. In conclusion, Supabase is a “backend-as-a-service” (BaaS) solution similar to Firebase.
Nevertheless, with a brief introduction to Supabase, let us take a closer look at what it is used for!
What is Supabase Used For?
To understand what Supabase is used for, let us take a closer look at some of the platform’s core features. Here are four prominent examples:
- Database – All Supabase projects are full Postgres databases. Postgres is one of the world’s most trusted relational databases.
- Storage – With Supabase, you can organize, store, and serve large files. This includes any media, such as videos and images.
- Authentication – Supabase enables you to seamlessly add signups and logins. What’s more, this data is secured with row level security (RLS).
- Edge Functions – Through edge functions, Supabase enables you to write custom code without the need for scaling or deploying servers.
Through these services, the platform enables you easily manage your backend needs. To summarize, Supabase is used to simplify the setup and management of the backend infrastructure!
What is Supabase Authentication?
All Supabase projects come with a full user management system that works independently of any other tools. As such, Supabase offers services allowing developers to seamlessly manage application users and provide secure options for creating accounts and authenticating themselves.
When implementing authentication into your projects, Supabase uses a “box” method, making this process relatively straightforward. Moreover, here are three key features of Supabase authentication:
- Social Providers – Supabase authentication enables social logins with the click of a button. Some examples are Facebook, Google, Azure, etc.
- Integrations – Supabase features simple auth with built-in authorization, authentication, and user management.
- Own the Data – You can store data in your Supabase database, meaning you do not have to worry about third-party privacy concerns.
Auth Alternatives
In this tutorial, we taught you how to authenticate users with MetaMask. However, MetaMask is only one of many auth alternatives for you to choose from. Here are five other examples:

- Magic.Link
- Phantom
- RainbowKit
- WalletConnect
- Coinbase Wallet
You can also learn more about different wallet providers for the Solana network by checking out the following article: ”What is a Solana Wallet?”.
Nevertheless, if you want to integrate these Web3 auth alternatives with Supabase, you need a seamless workflow and tools from a blockchain infrastructure provider like Moralis!
Ultimate Auth Solution
Moralis offers the ultimate auth solution in the form of the Web3 Auth API! It does not matter if you are building a new Web3 application, you want to connect an existing database using Web3 auth, or leverage aggregators like Auth0, Moralis has you covered!
Moralis solves the Web3 authentication hassle as you no longer need to redirect users to third-party auth interfaces, understand Web3 authentication flows, learn how wallets sign or verify messages, etc. Instead, Moralis provides a unified API for all Web3 authentication methods. What’s more, the tool features a comprehensive SDK for seamless integrations and is compatible with authentication aggregators such as Auth0!
So, if you want to effortlessly authenticate Web3 users, sign up with Moralis right now to leverage the full power of blockchain technology!
Summary – Supabase Authentication with Moralis
In this article, we taught you how to authenticate users on Supabase with Moralis. Thanks to the Auth API, you were able to do so in five straightforward steps:
- Setting up Supabase
- Cloning the project and adding environment variables
- Creating the Web3 authentication flow
- Verifying the message
- Making the client-side implementing the auth flow
If you have followed along this far, you can implement similar functionality into future blockchain development projects!
Consider checking out other content here at Moralis’ Web3 blog. For example, read about what a BNB faucet is, learn how MetaMask authentication with Django works, or check out our article answering the question, ”what is Web3 technology?”. You should also consider enrolling in Moralis Academy if you are looking to become a more proficient Web3 developer. For instance, if you are new to the space, check out the Moralis Academy course on blockchain and Bitcoin fundamentals.

Lastly, it does not matter if you are looking to authenticate users on Supabase or any other platform; remember to sign up with Moralis. With Moralis, you can leverage the power of blockchain technology in all future projects and authenticate users with a single line of code!
