Decentralized applications (dapps) and other Web3 platforms are generally blockchain-based, meaning they are built and run on peer-to-peer (P2P) blockchain networks. This suggests that a vital aspect of Web3 development includes cross-system communications, allowing dapps and various blockchain networks to interact with one another. So, as a blockchain developer, how do you enable projects to interact seamlessly with the network they are built on? One option is to use ethers.js, an Ethereum JavaScript library. If this sounds exciting and you want to learn more about ethers.js, join us in this tutorial as we explore the intricacies of ethers.js dapp development!
To demonstrate how ethers.js dapp development works, this article walks you through an example showing you how to use the library to set up a blockchain listener. Specifically, the article demonstrates how to monitor transfer events for the USD Coin (USDC) smart contract. If you follow along, you can also apply the same principles to listen to any other smart contract event. Moreover, in combination with an ethers.js tutorial, we also present another alternative for setting up blockchain listeners: the Moralis Web3 Streams API. This is one of Moralis’ many Web3 APIs enabling a more seamless programming experience. What’s more, this is also one of several reasons why Moralis – the best Web3 provider – presents one of the quickest routes to build a Web3 app!
As such, if you are serious about getting into Web3 development, sign up with Moralis now. Creating an account is free, and it only takes a couple of seconds!
What is Ethers.js?
Ethers.js was released in 2016 by the developer known as Richard Moore, and it is an Ethereum JavaScript (JS) library. Ethers.js works similarly to conventional libraries as it’s a collection of prewritten code and functions helping Web3 developers perform everyday programming tasks. However, unlike traditional libraries, ethers.js is suited for blockchain development. As such, developers can use this library to interact more seamlessly with the Ethereum blockchain network!
Ethers.js was, in the beginning, initially created to work with ”ethers.io”. However, since its release, it has evolved to become a more general-purpose library and is one of today’s most prominent Web3 libraries on the market.
The library consists of four main modules: “ethers.utils“, “ethers.wallets“, “ethers.contract“, and “ethers.provider“, which are all essential for the library’s application programming interface (API). Moreover, ethers.js’ API structure is user-friendly, and the library is written in TypeScript. As such, it is intuitive to use, making it a top choice among blockchain developers.
However, what do developers use ethers.js for?
What is Ethers.js For?
The primary purpose of ethers.js is to enable seamless interaction with the Ethereum network. As such, developers can use this library to quickly and easily integrate Web3 functionality into their projects. A good example of what ethers.js can be used for is monitoring events on a blockchain network.
With ethers.js, you can easily set up blockchain listeners to monitor smart contract events that you are interested in. It is then possible to integrate this information into your Web3 projects to create a more compelling user experience. This is where we will direct our attention in this article. If this sounds interesting, join us as we show how to use ethers.js for dapp development in the following sections!
If you want additional information on the intricacies of this library, check out our article answering the question, ”what is ethers.js?”.
How to Use Ethers.js for Dapp Development
With a more profound understanding of ethers.js and what this Web3 library is used for, it is time for the central part of this tutorial. In the following sections, we will explore the intricacies of ethers.js dapp development. In doing so, we will provide a quick example of an ethers.js tutorial, showing you how to set up a blockchain listener using this library to monitor on-chain transfer events of the USD Coin (USDC) smart contract. However, by the end of this tutorial, you will be able to apply the same principles to listen to any smart contract events!
Furthermore, we will break down the tutorial into the following three steps:
- Prerequisites and Project Setup
- Creating the Blockchain Listener
- Running the Script
So, if you want to learn how to utilize ethers.js to listen to blockchain events, join us as we kick things off by covering the prerequisites and the initial project setup!
Step 1: Prerequisites and Project Setup
To kickstart this tutorial, we will cover the prerequisites and briefly show you how to set up the initial base project. To begin with, go ahead and create a new NodeJS project. From there, add two new files to the root folder: ”abi.json” and ”.env”. Let us quickly break down these files, starting with the former.
To the ”abi.json” file, you’ll want to add the application binary interface (ABI) of the smart contract you wish to monitor. Consequently, in this instance, you want to add the ABI for the USDC smart contract. To acquire the interface, visit “etherscan.io“, search for and click on the USDC smart contract, scroll down, hit the ”Contract” tab, and you will find the ABI under the ”Code” section:

From there, copy the ABI and input the code snippet into your ”abi.json” file.
Next up, when working with the ethers.js library, you need a separate node provider. For this ethers.js dapp development tutorial, we will use Alchemy, meaning that you must add your Alchemy key as an environment variable to the ”.env” file. To do so, open ”.env”, create a new variable called ”ALCHEMY_KEY”, and input your key, which you can acquire from the Alchemy website.
That concludes the two files; from here, all that remains is installing the required dependencies. Accordingly, open a new terminal and run the following command in your NodeJS project’s root folder:
npm i ethers dotenv
Step 2: Creating the Blockchain Listener
With the barebones state of the project all set up and the required dependencies installed, we will now show you how to create the blockchain listener. So, create a new ”index.js” file, open it, and add the following contents at the top:
const ethers = require("ethers");
const ABI = require("./abi.json");
require("dotenv").config();
These initial three lines of code ensure that the project knows to use ethers.js, along with importing the environment variables from the ”.env” file and the USDC smart contract ABI from ”abi.json”. From there, you’ll want to create a new function called ”getTransfers()”. This function is responsible for handling the logic of the blockchain listener, and it should look like this:
async function getTransfer(){
    const usdcAddress = "0xA0b86991c6218b36c1d19D4a2e9Eb0cE3606eB48"; ///USDC Contract
    const provider = new ethers.providers.WebSocketProvider(
        `wss://eth-mainnet.g.alchemy.com/v2/${process.env.ALCHEMY_KEY}`
    );

    const contract = new ethers.Contract(usdcAddress, ABI, provider);

    contract.on("Transfer", (from, to, value, event)=>{

        let transferEvent ={
            from: from,
            to: to,
            value: value,
            eventData: event,
        }

        console.log(JSON.stringify(transferEvent, null, 4))

    })
}
On the first two lines within the curly brackets of the function, we create two new variables: ”usdcAddress” and ”provider”. The ”usdcAddress” variable is set to the actual address of the USDC smart contract, which we acquired from Etherscan. The ”provider” variable uses the ”ALCHEMY_KEY” environment variable from ”.env” to specify the provider.
Next up, we create a new ”contract” object by using the ”usdcAddress”, ”ABI”, and ”provider” variables, passing them as arguments when calling the ”ethers.Contract()” function. From there, we use the ”contract” object to specify the topic of interest to be ”Transfers”. Consequently, when calling the script, it will return information regarding the USDC smart contract’s transfer events.
To top things off, we console-log the results. All in all, your ”index.js” file should now look something like this:
const ethers = require("ethers");
const ABI = require("./abi.json");
require("dotenv").config();

async function getTransfer(){
    const usdcAddress = "0xA0b86991c6218b36c1d19D4a2e9Eb0cE3606eB48"; ///USDC Contract
    const provider = new ethers.providers.WebSocketProvider(
        `wss://eth-mainnet.g.alchemy.com/v2/${process.env.ALCHEMY_KEY}`
    );

    const contract = new ethers.Contract(usdcAddress, ABI, provider);

    contract.on("Transfer", (from, to, value, event)=>{

        let transferEvent ={
            from: from,
            to: to,
            value: value,
            eventData: event,
        }

        console.log(JSON.stringify(transferEvent, null, 4))

    })
}

getTransfer()
Step 3: Running the Script
Now that you have completed the blockchain listener, the final step of this ethers.js dapp development tutorial revolves around running the script. As such, go ahead and open a new terminal, ”cd” into the project’s root folder, input the command below, and hit enter:
node index.js
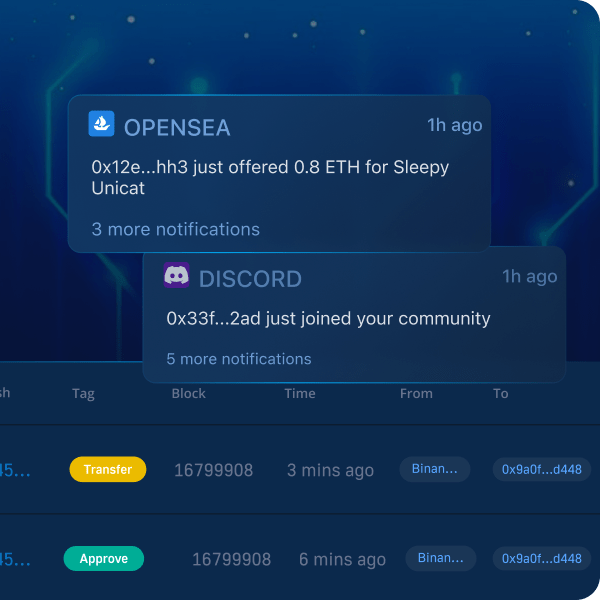
As soon as you run the command above, the script will autonomously console-log new transfer data associated with the USDC smart contract. To give you an idea of what it might look like, we have included an example in the image below:
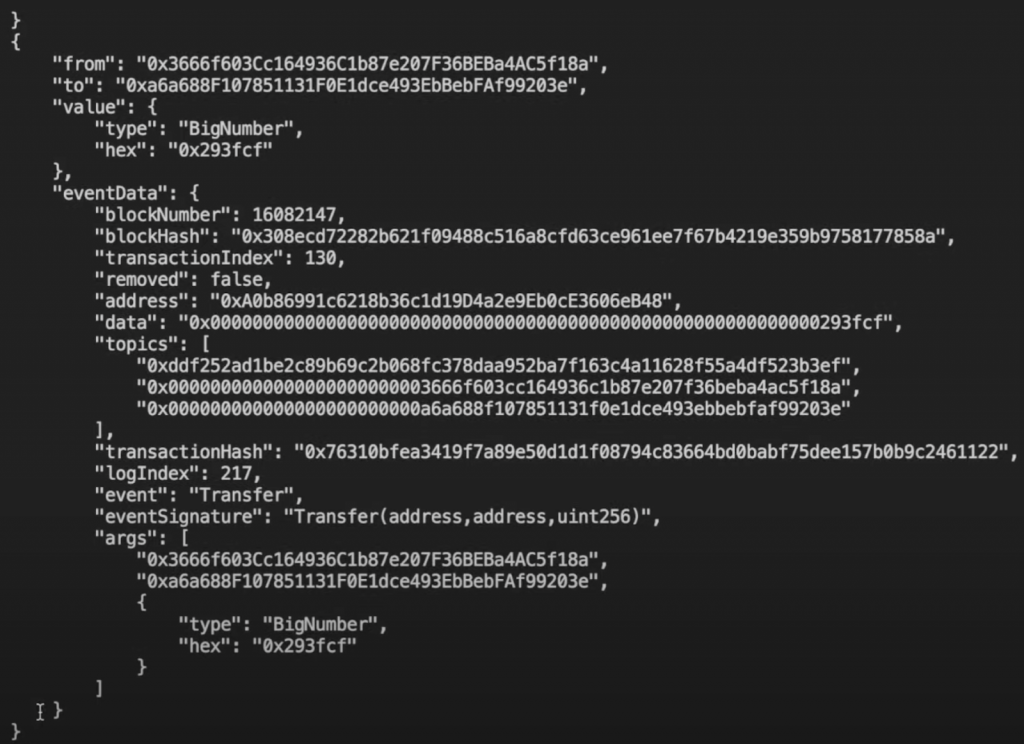
The blockchain listener returns a bunch of USDC transfer event information. This induces everything from the “to” and “from” addresses to event data, such as the block numbers, block hashes, etc.
That concludes this ethers.js tutorial. As such, if you have followed along this far, congratulations! You now know how to create blockchain listeners using ethers.js!
However, even though using ethers.js for monitoring smart contract events is a great start, you will, unfortunately, notice that the library has its limitations. For instance, the response above does not contain parsed data. As such, you can, for example, not directly determine from where the transfer information originates. Consequently, it is worth checking out some ethers.js dapp development alternatives!
Ethers.js Dapp Alternative
The best ethers.js dapp development alternative is Moralis’ Web3 Streams API. With this development tool, you can seamlessly set up Web3 streams, fulfilling the exact same function as the ethers.js-based blockchain listener from the previous sections and more. However, what exactly is Moralis’ Web3 Streams API, and why is this a better alternative than working with ethers.js?
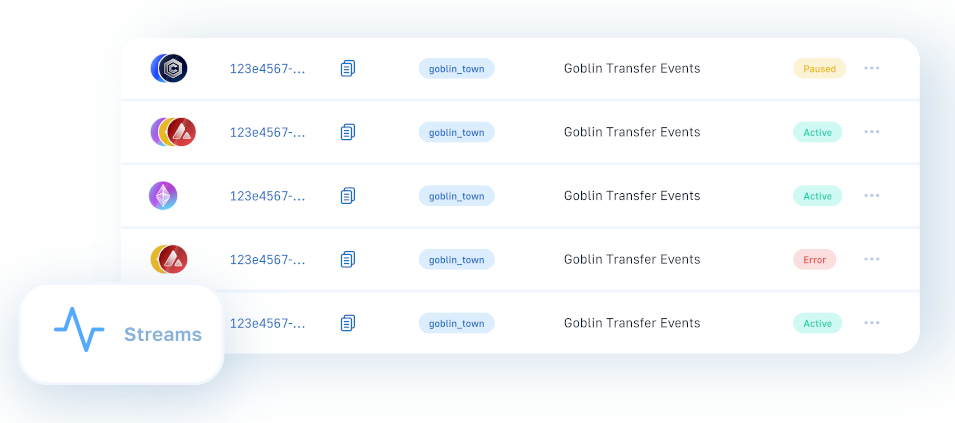
With the Streams API, you can effortlessly stream on-chain data into the backend of your Web3 projects using Moralis webhooks. As a result, you can monitor smart contract events and receive webhooks whenever a battle starts in your Web3 game, an address receives, stakes or trades an asset, or other blockchain events trigger based on your filters! Moreover, thanks to the Streams API, you can avoid redundant tasks, such as connecting to buggy RPC nodes, creating unnecessary abstraction, wasting time building data pipelines, and much more!
Nevertheless, with a somewhat better understanding of Moralis’ Web3 Streams API, let us compare this alternative to working with ethers.js. In doing so, we will highlight the similarities between the two and convince you why Moralis is the better alternative!
Ethers.js vs Moralis’ Web3 Streams
To begin with, let us briefly summarize the similarities and differences between ethers.js and Moralis in the table below:
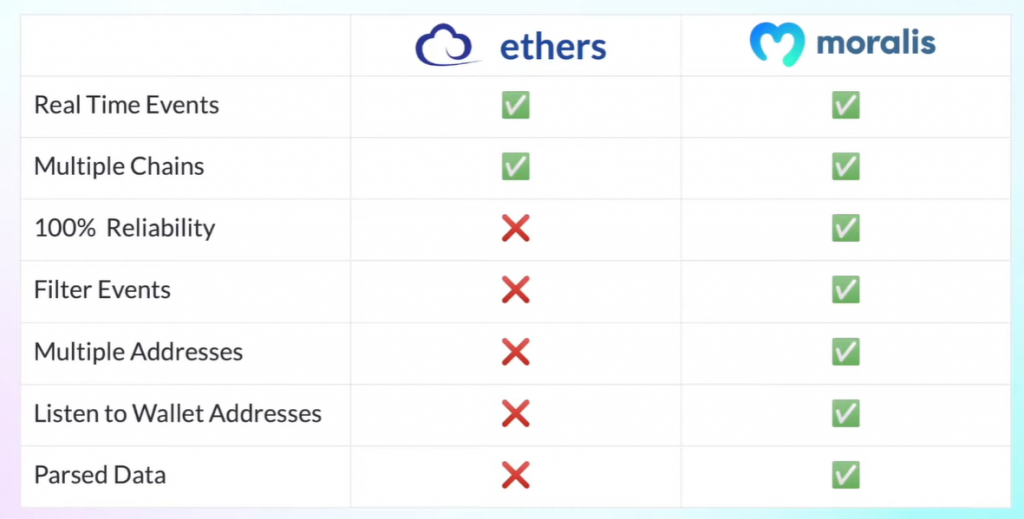
As the image above illustrates, Moralis provides everything that ethers.js has to offer and more. However, studying the table above can be somewhat cryptic. As such, let us break down the differences between the two options!
Moralis offers 100% reliability, which ethers.js does not offer, unfortunately. When using ethers.js, you need to supply your own separate node provider. This is problematic as you cannot, with 100% certainty, ensure that the nodes provided will remain maintained and operational at all times. With Moralis, this is not the case. The Streams API offers a single tech stack, and you receive alerts via Web3 webhooks instead.
Moreover, with ethers.js, you do not have the ability to filter events, a feature offered by Moralis. As such, when working with the Streams API, you can easily target events that are of particulate interest to you. In addition, Moralis also allows you to pool various smart contracts into a single stream. This is not possible with ethers.js, as you need to create new listeners for all separate smart contracts.
Additionally, with Moralis, you can monitor wallet addresses and receive webhooks when a wallet partakes in a transaction. Lastly, all the data fed to your webhook URL is parsed. This means you do not have to worry about formatting the data and can use it directly in your projects!
For more information about the similarities and differences, check out our guide on ethers.js vs Web3 streams. You can also learn how to create Web3 streams by watching the video below from Moralis’ YouTube channel:
Summary – Ethers.js Dapp Development
If you have followed along this far, you now know how to listen to smart contract events using ethers.js. Furthermore, you learned how to do so in three straightforward steps:
- Prerequisites and Project Setup
- Creating the Blockchain Listener
- Running the Script
By completing these steps, you learned how to set up a blockchain listener for monitoring the USDC contract’s transfer events. However, you can follow the same procedure to monitor any other ethers.js events that might be of interest to you in any future Web3 development endeavors!
If you are looking for content similar to what was presented herein, consider checking out the Moralis Web3 blog. The blog features amazing blockchain development content where you, for instance, can learn how to get all NFT transfers of any wallet. Or, you can delve deeper into other libraries with our article on Web3.js vs ethers.js! Plus, you can explore various Web3 networks, such as the Sepolia testnet!
What’s more, if you have ambitions to become a blockchain developer, sign up with Moralis now. Creating an account is free, and you can immediately leverage the power of blockchain technology to its fullest!