Are you looking to create your own Web3 business and want to explore Web3 marketplace development? If so, then look no further! This Web3 marketplace development tutorial will show you how to create a blockchain-based Amazon clone using Moralis. Sounds exciting? Join us as we cover the process of creating a Web3 marketplace from start to finish!
If you are eager to jump straight into the code, you can find the complete GitHub repo for the final product below:
Full Web3 Marketplace Repository – https://github.com/MoralisWeb3/youtube-tutorials/tree/main/moralis-amazon-clone
During this Web3 marketplace development tutorial, you will familiarize yourself with powerful features such as the Web3 Authentication API and other enterprise-grade blockchain solutions from Moralis. So, if you want to follow along and build your own Web3 business, remember to sign up with Moralis before moving forward!
Overview
In this Web3 marketplace development tutorial, we will initially teach you how to set up the baseline for a blockchain-based Amazon marketplace using Moralis in three steps:
- Set up Firebase
- Clone and configure the Amazon repository
- Run the app
Following the initial Web3 marketplace development setup process, we will hand you over to one of our Moralis software engineers. The engineer will take you through the remainder of the steps in an extensive video tutorial (the video from the intro). If this sounds interesting, read on as we cover this Web3 marketplace development tutorial from start to finish!
If you are unfamiliar with Amazon and what this platform might entail in a Web3 context, you will find a ”What is a Marketplace in Web3?” section below the tutorial. In this section, we explore the final product of this tutorial by providing a brief application demo. So, if you want to check out what you will be working towards, we recommend starting there.
Following the demo, you will find a section on the easiest way to get into Web3 marketplace development. In doing so, we will explore Moralis and some prominent Web3 APIs. However, there is more to Moralis than APIs. For example, you can learn how to use a Goerli faucet or an Arbitrum Goerli faucet to get free testnet tokens, which you can use during this tutorial!
Nevertheless, without further ado, let us jump straight into the Web3 marketplace tutorial to give you an idea of how to start your own Web3 business!
Web3 Marketplace Tutorial – Build a Web3 Business
In the following three sections, you will learn how to set up the base for a Web3 Amazon clone. Once you are done setting up the initial project, we will hand you over to our software engineer in the ”Video Tutorial – Web3 Marketplace Development Walkthrough” section, who will walk you through the remainder of the code in a comprehensive video!

Now, let us start by closely examining how you can set up Firebase!
Step 1: Set Up Firebase
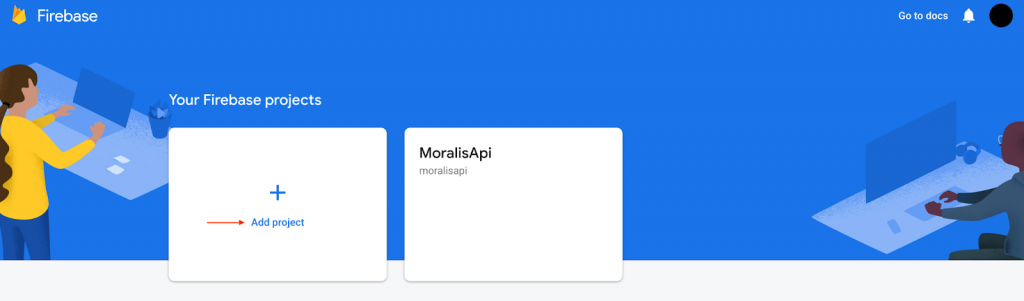
Setting up Firebase is the first thing you must complete in this Web3 marketplace development tutorial. As such, this initial step shows you how to set up a Firebase project. Head over to ”firebase.google.com” and create your account:

With an account at your disposal, log in and set up a new project by clicking on ”Add project”:
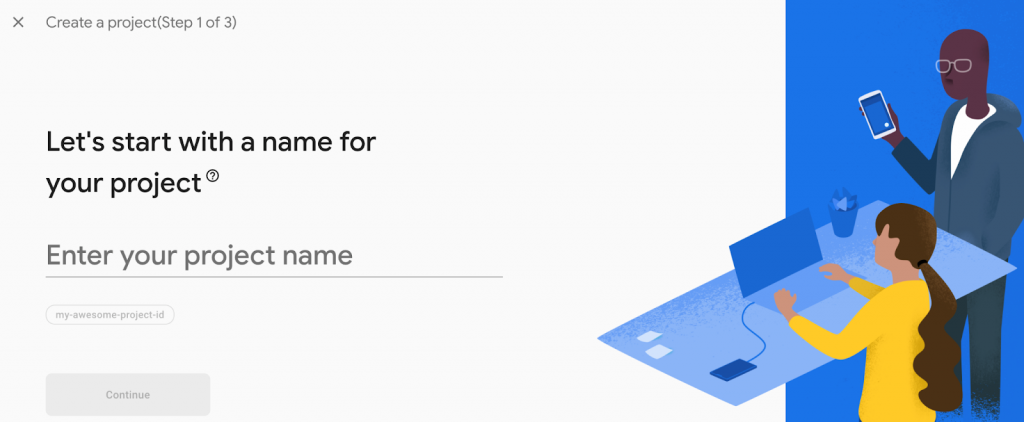
Input a project name and complete the remainder of the instructions:
All Firebase projects initially implement the free ”Spark” billing plan by default. However, the free plan does not give you access to all the required Firebase features. Consequently, you must swap to the ”Blaze” pay-as-you-go option. To do so, click on the ”Spark plan” button at the top and select the ”Blaze” alternative:

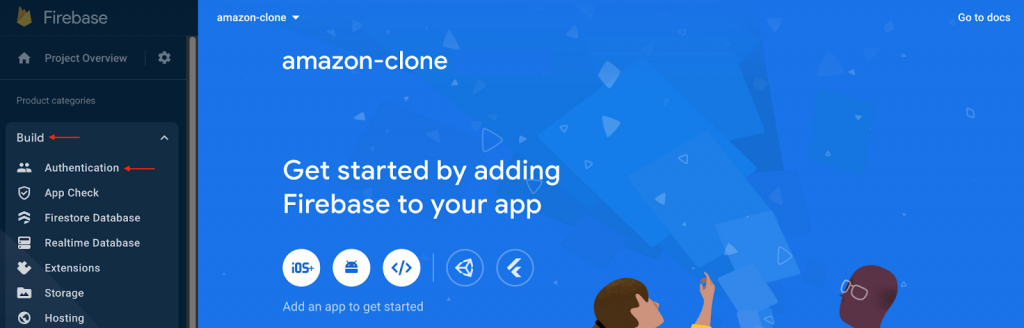
From here, you need to set up Firebase’s ”Authentication” feature. You can do this by clicking on ”Build” and then hitting ”Authentication” in the navigation menu to the far left:
Next, hit the ”Get started” button:

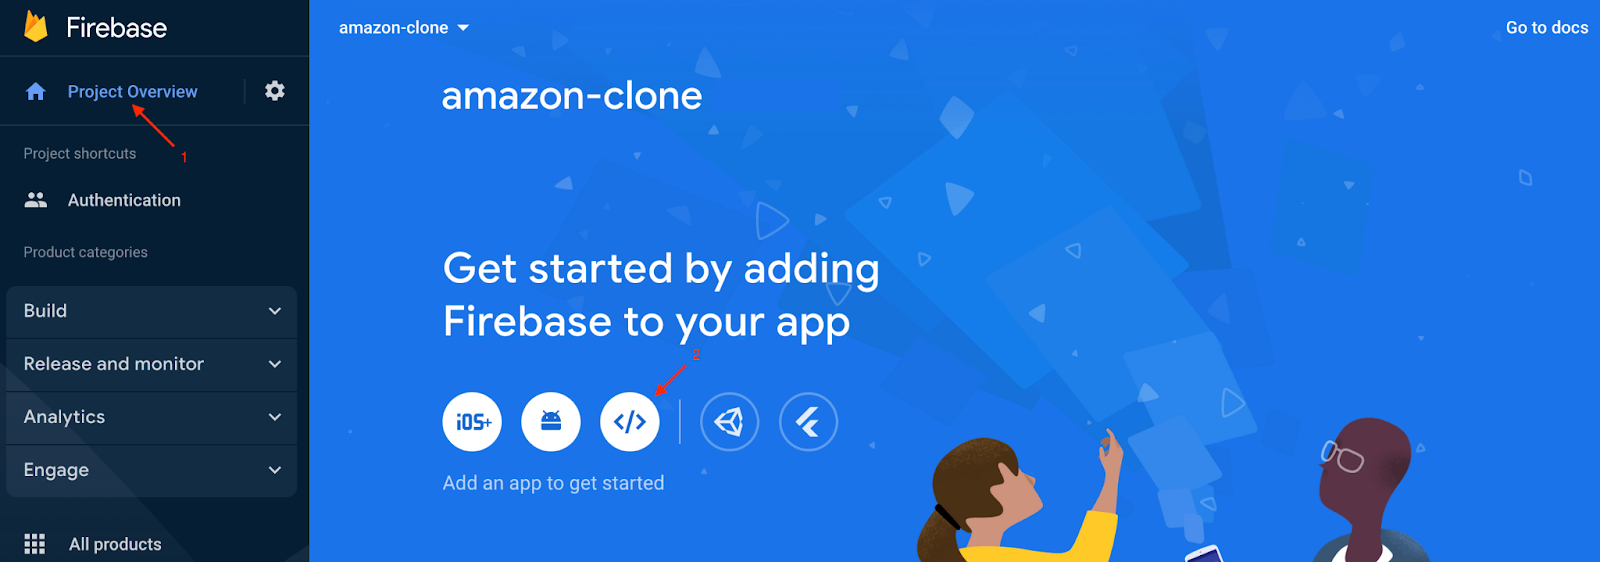
Now, with the ”Authentication” feature all set up, click on ”Project Overview” and create a new web app:
Input a name in the initial step and click on ”Register app”:

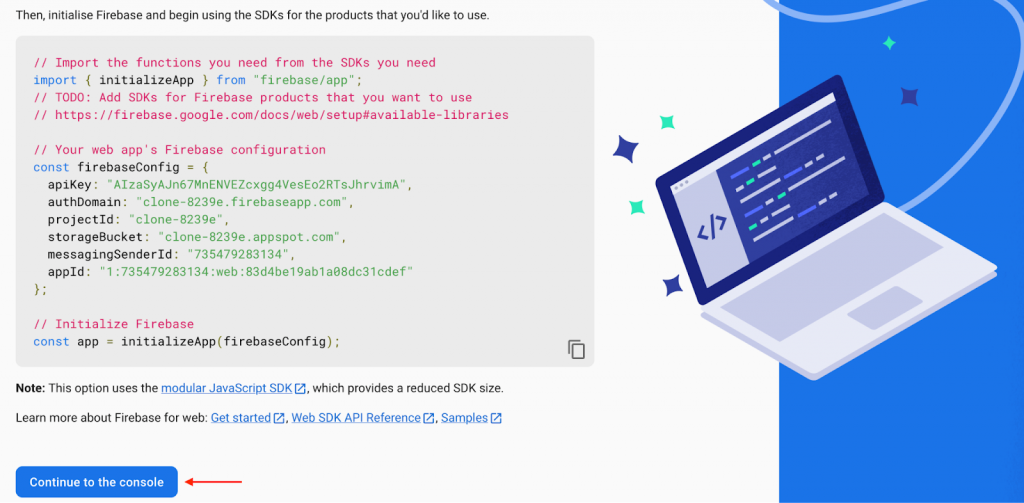
For the next step, scroll down to the bottom and click on ”Continue to console”:
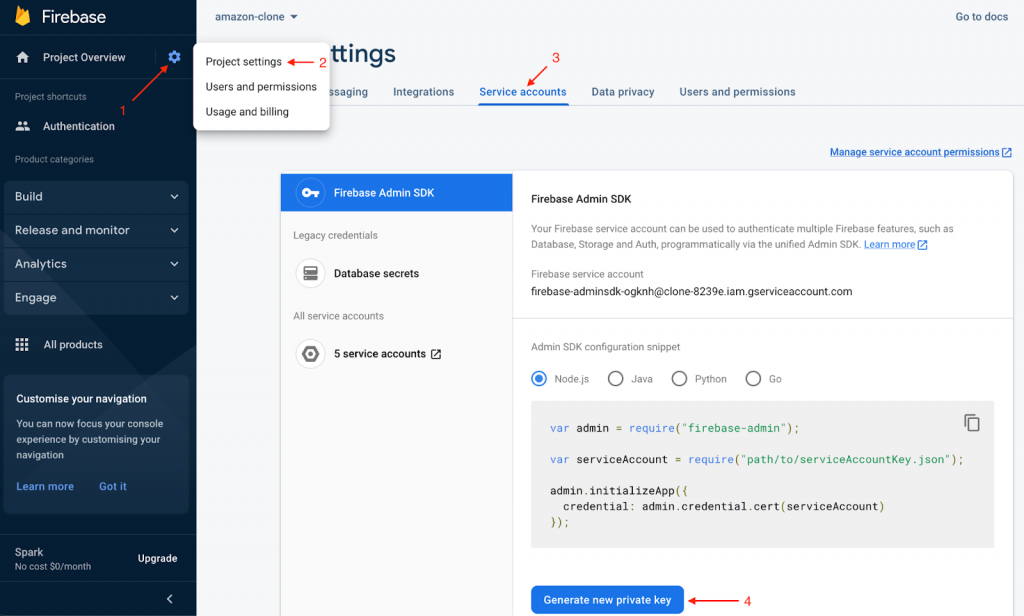
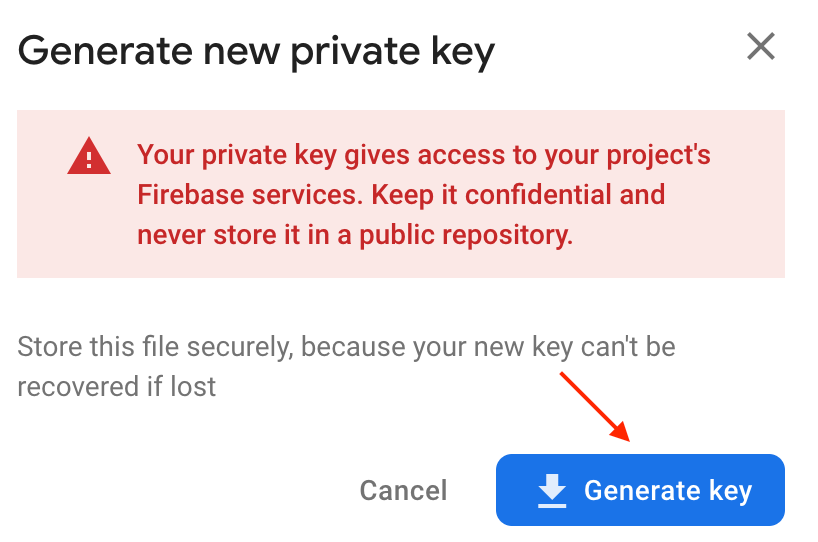
You need to generate a new ”Service Account” private key. As such, hit the cogwheel at the top left, click on ”Project settings”, navigate to the ”Service accounts” tab, and click on ”Generate new private key”:
Click on ”Generate key”, which should download a JSON file:
You can then use the Moralis converter to convert your certificate into extension variables. So, open the converter and select the file you downloaded:
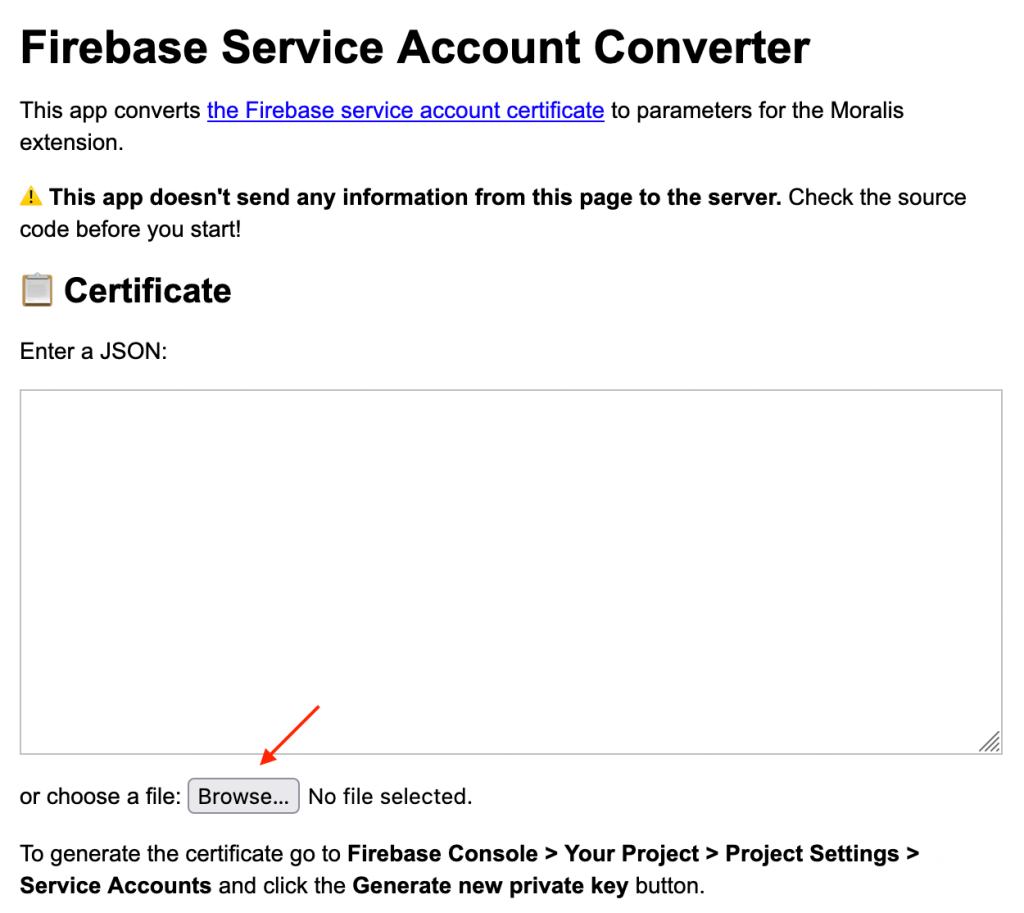
As soon as you upload the file, the converter autonomously creates three parameters:
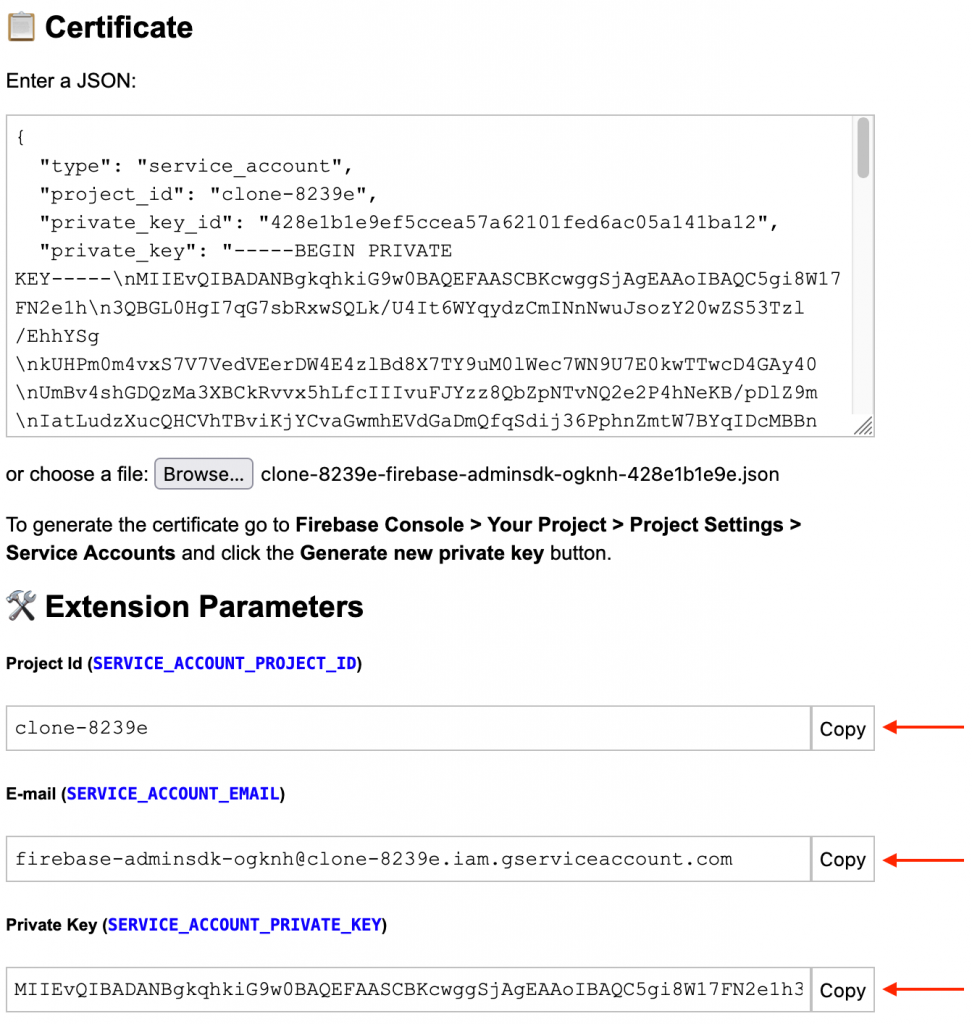
Keep the parameters for now, as you will need them in the next step!
Step 2: Clone and Configure the Amazon Repository
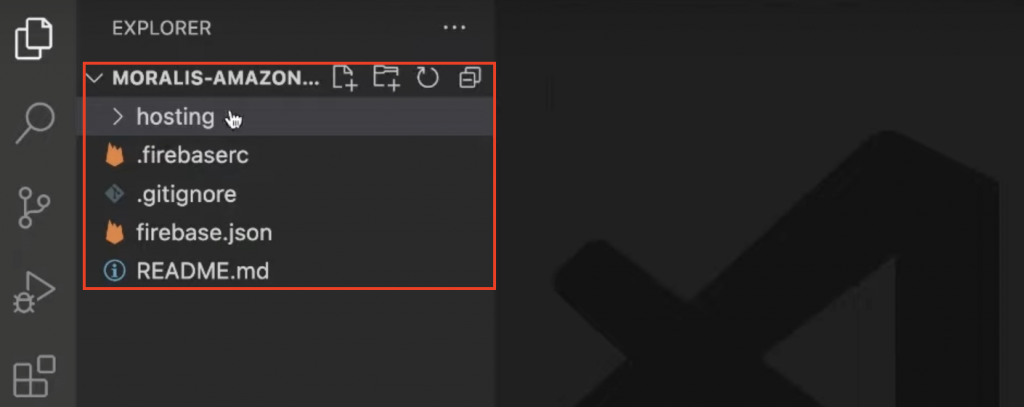
For this step, launch your preferred IDE and create a new project folder. We will be using VSC; however, you are free to use any IDE you prefer. With a new folder at hand, clone the app’s barebones template from the repository down below:
Web3 Marketplace Development Firebase Started GitHub Repository – https://github.com/MoralisWeb3/youtube-tutorials/tree/main/moralis-firebase-starter-template
As soon as you clone the project, you will find yourself with a file structure similar to this:
Next, you need to install the Firebase CLI. As such, open a new terminal in your IDE and run the following command:
npm install -g firebase-tools
From there, run firebase login in the terminal, which will prompt your browser, allowing you to log in. Once logged in, you can run the following command to list your Firebase projects:
firebase projects:list
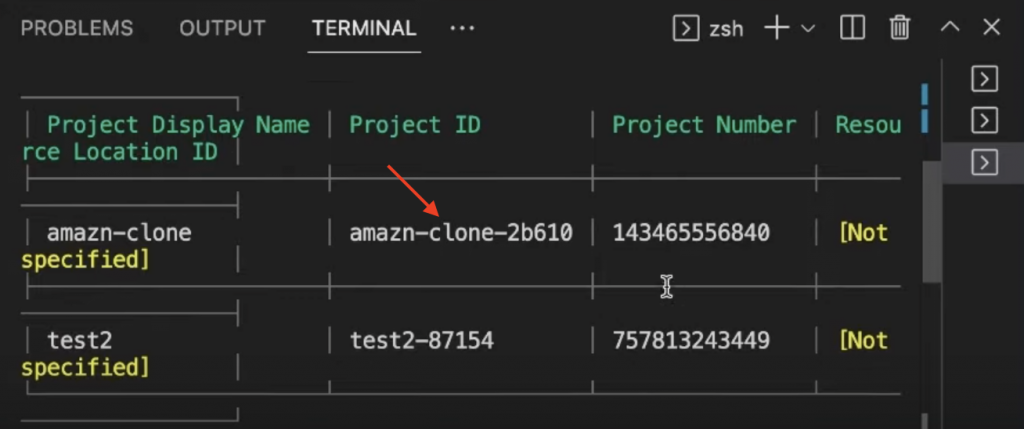
Running the above command lists all your projects, and you can go ahead and copy the ID for your Web3 marketplace:
You can then use the ID when running this terminal input to set the project ID:
firebase use <PROJECT_ID>
Next, enable the webframeworks feature using the command below:
firebase experiments:enable webframeworks
Enable Authentication with the Moralis Web3 Extension
From here, you now need to enable authentication with the Moralis Web3 extension. To do so, open a new terminal and run this command:
firebase ext:install moralis/moralis-auth
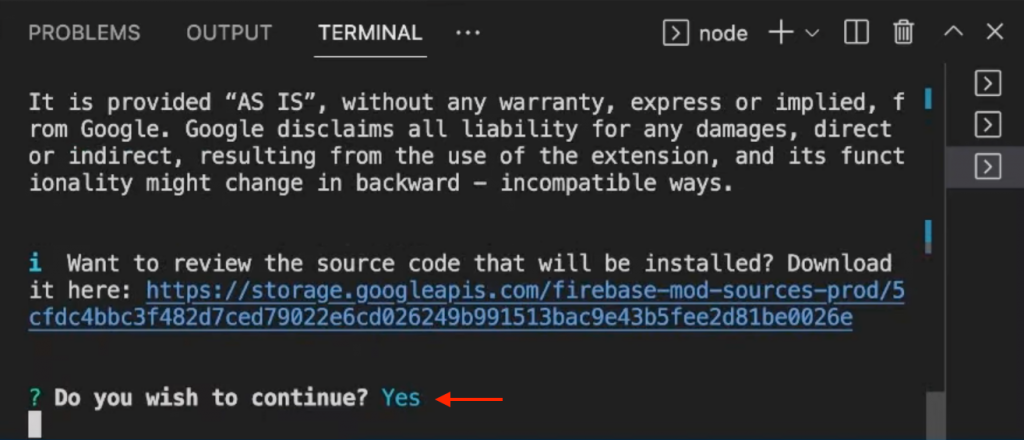
This will prompt your terminal, and you need to make some choices. For the initial prompt, input y and hit enter:
You can then select the Iowa alternative:

Next, choose the Google Cloud Secret Manager option:

Sometimes, you might come across this error:
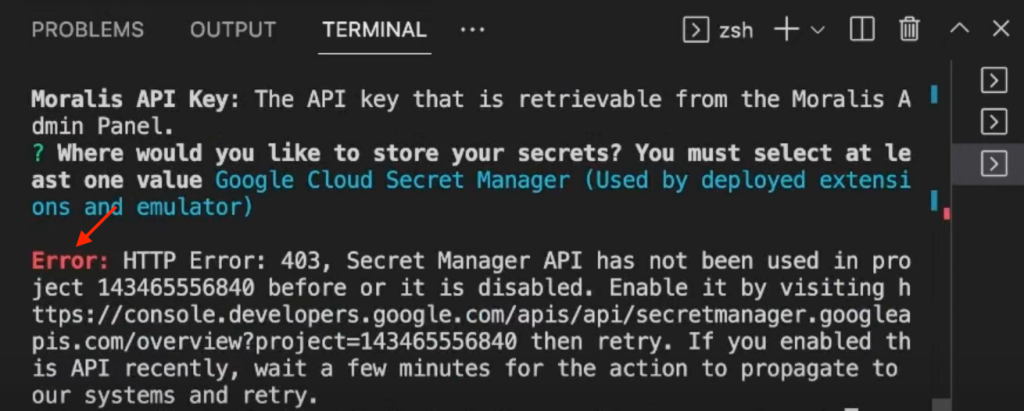
If this is the case, click on the link in the error message. This will take you to the following page, where you must enable the ”Secret Manager API”:
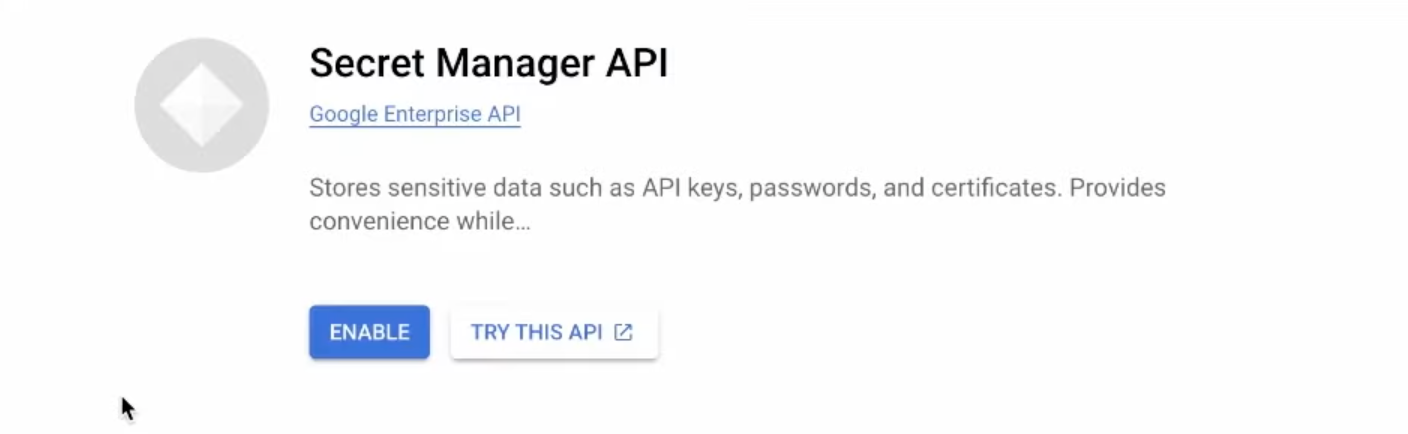
It might already be enabled. If so, disable and reenable it again. Once you have enabled the API manager, repeat the steps above by rerunning this command:
firebase ext:install moralis/moralis-auth
This time, when picking the Google Cloud Secret Manager option, you must input your Moralis API key. As such, if you have not already, sign up with Moralis right now. With an account at your disposal, log in to your account, click on the ”Web3 APIs” tab, and copy your key:

Input your secret API key and hit enter. From there, you will be prompted to add a URL. Input https://localhost and continue:

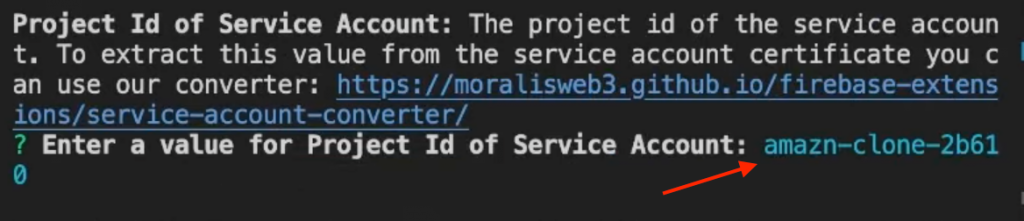
Next, you must add the extension parameters you got in the first step. So, follow the instructions in the terminal and input each converter value:

First, add the project ID:
Then, add the email:

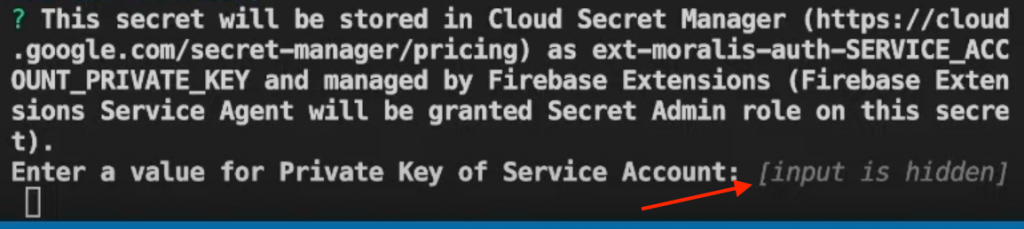
Choose Google Cloud Secret Manager once again:

Add the private key:
Finally, deploy the extensions by running the following terminal command:
firebase deploy --only extensions
This prompts your terminal again, and you can just hit enter for all the questions!
Configure Environment Variables
Lastly, the second step’s final part is configuring your environment variables. As such, start by renaming the ”.env.example” file to ”.env” and open it. It will look something like this:
NEXT_PUBLIC_FIREBASE_API_KEY = 'replace_me'
NEXT_PUBLIC_FIREBASE_AUTH_DOMAIN = 'replace_me'
NEXT_PUBLIC_FIREBASE_PROJECT_ID = 'replace_me'
NEXT_PUBLIC_FIREBASE_STORAGE_BUCKET = 'replace_me'
NEXT_PUBLIC_FIREBASE_MESSAGING_SENDER_ID = 'replace_me'
NEXT_PUBLIC_FIREBASE_APP_ID = 'replace_me'
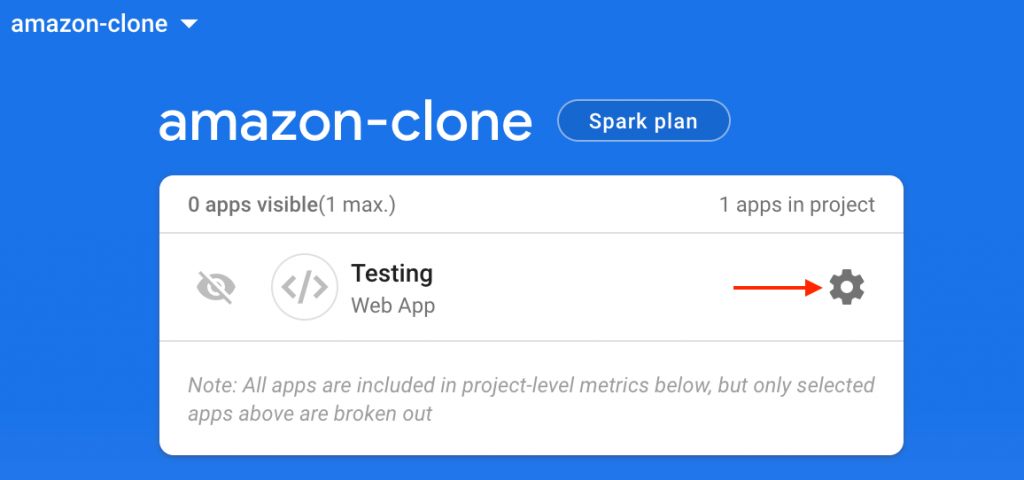
As you can see, you need to replace replace_me for each variable. To get these values, navigate back to your Firebase admin panel. From there, click on ”Project Overview” and hit ”app”:

You can then click on the cogwheel for the application in question:
Next, scroll down, and you can find all the needed values under the ”SDK setup and configuration” section:
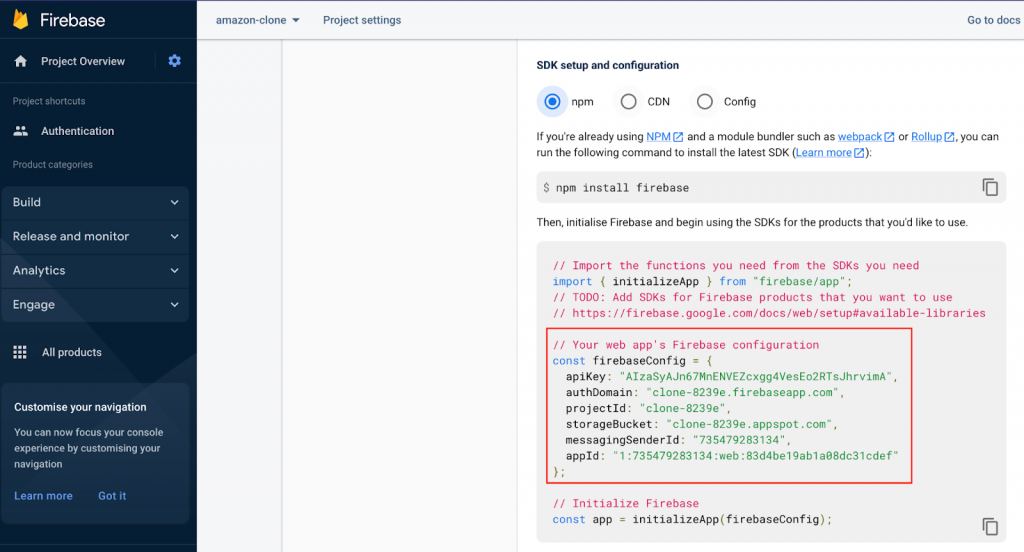
Copy each value and add them for all the parameters in the ”.env” file. All in all, it should look something like this:
NEXT_PUBLIC_FIREBASE_API_KEY = "AIzaSyAJn67MnENVEZcxgg4VesEo2RTsJhrvimA"
NEXT_PUBLIC_FIREBASE_AUTH_DOMAIN = "clone-8239e.firebaseapp.com"
NEXT_PUBLIC_FIREBASE_PROJECT_ID = "clone-8239e"
NEXT_PUBLIC_FIREBASE_STORAGE_BUCKET = "clone-8239e.appspot.com"
NEXT_PUBLIC_FIREBASE_MESSAGING_SENDER_ID = "735479283134"
NEXT_PUBLIC_FIREBASE_APP_ID = "1:735479283134:web:83d4be19ab1a08dc31cdef"
To top things off, open a new terminal, cd into the ”hosting” folder, and run npm i to install the required dependencies.
That is it for the initial application template! All that remains from here is running the app, which we cover in the third and final step of our Web3 marketplace development tutorial!
Step 3: Run the App
To start the app, open a new terminal, cd into the main folder, and run the following command:
firebase emulators:start
As soon as all processes finalize, you can start the application by visiting this URL: ”http://localhost:5555”. The website will initially look similar to this:

This is only the initial barebones state of the application, and there is still work to be done before the application is a complete Web3 clone of Amazon. However, this is a great starting point; you only need to add the remainder of the functionality and customize the layout. For this, we will hand you over to one of our software engineers for a complete video walkthrough in the next section!
Video Tutorial – Web3 Marketplace Development Walkthrough
Now that you have the project’s baseline setup, we will hand you over to our Moralis software engineer, who will walk you through the rest. In the video below, our expert initially covers the three steps above. From there, the remainder of the video covers the rest of the code for implementing the required functionality for a complete Web3 clone of Amazon. Here is a list of the various parts with timestamps:
- Home component (16:22)
- Header (18:45)
- Sub-header (28:45)
- Main component (31:10)
- Product page (42:10)
- Backend (1:01:10)
What is a Marketplace in Web3?
Like conventional online platforms, Web3 marketplaces can take many shapes and forms. Because of this, it becomes quite challenging to answer the question, ”what is a marketplace in Web3?”. However, to give you an idea of some core functionality and what one might look like, take a look at the following demo of the application you learned to create during the Web3 marketplace development tutorial!
First up, here is the final app’s landing page:
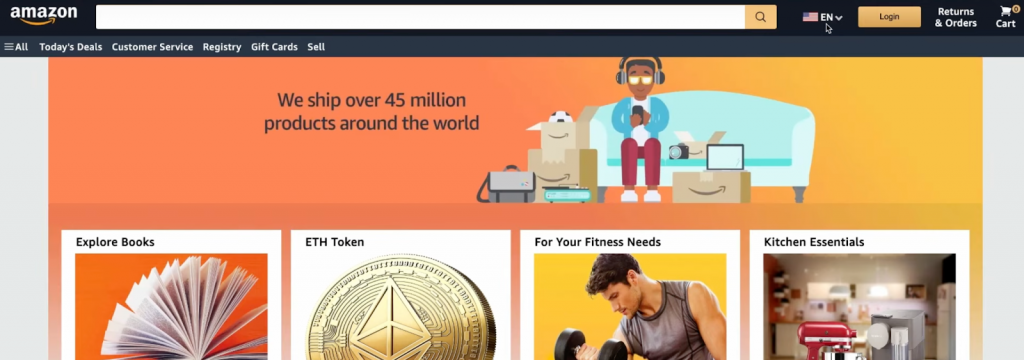
It looks quite similar to the original Amazon website, featuring a navigation bar at the top with a language drop-down menu, a shopping cart, a ”Login” button, etc.:

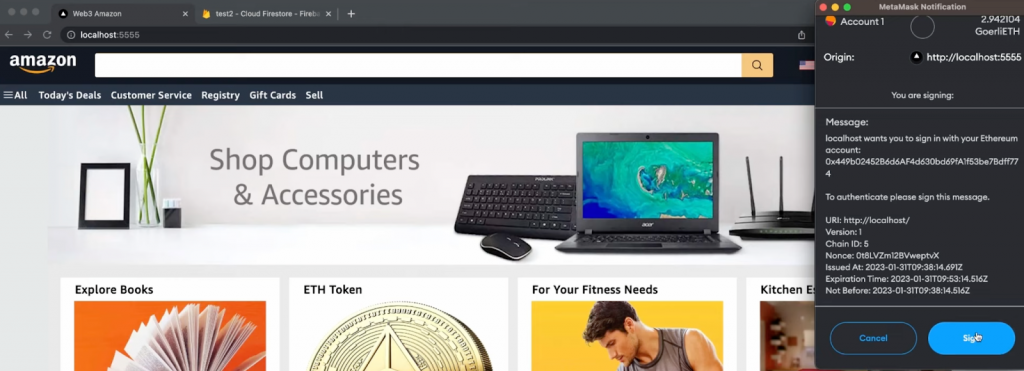
However, let us focus on the login functionality, as this is where Web3 marketplaces most differ from conventional platforms. As this is a Web3-based application, our Amazon clone features a blockchain authentication flow. This means that users can sign in with their Web3 wallets. As such, clicking on ”Login” will trigger users’ MetaMask wallets:
Buying an Item
Along with this functionality, the Web3 marketplace platform also features an image carousel and some categories such as books, tokens, etc.:

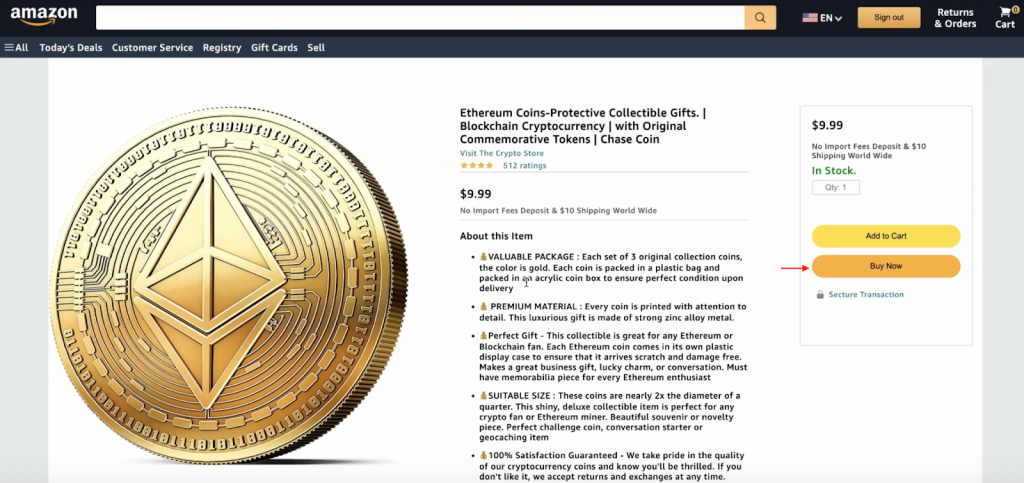
As soon as a user logs in, they can purchase items and use their wallet funds to pay. For example, let us showcase this functionality by clicking on ”Shop Now” for the ”ETH Token” alternative:

The product page features everything from a product rating to an ”Add to Cart” button. However, let us try to buy the token right now by hitting ”Buy Now”:
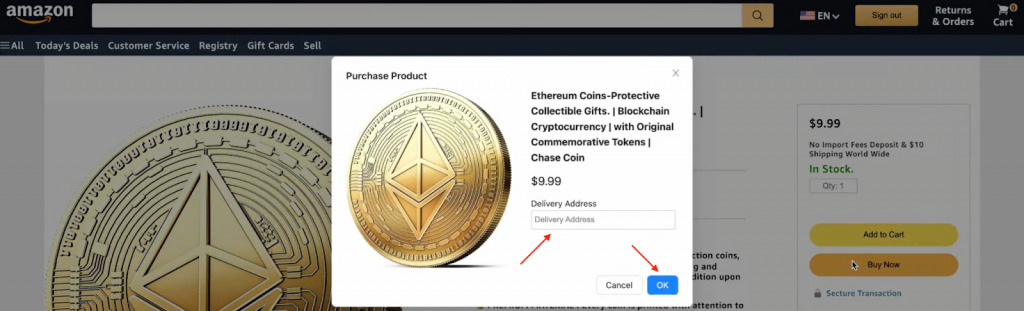
This will trigger a pop-up window, where we need to input an address and click on ”OK”:
Doing so will prompt the MetaMask wallet, enabling us to sign the transaction:

In combination with executing the transaction, it will also automatically be recorded in the application’s Firebase database:
All transactions will contain a delivery address, the product, and the buyer’s address. With this information, we can easily fulfill the order:
That is it for this demo! As you can see, the Web3 clone shares many similarities with the original Amazon platform. However, two major differences are that you can authenticate yourself with your Web3 wallet and pay for transactions using your cryptocurrency!
Nevertheless, how are we able to effortlessly create this Web3 business?
Easiest Way to Start a Web3 Business
If you are unfamiliar with the blockchain industry, it can be challenging to get into Web3 development as, from a conventional perspective, the entry barriers have been relatively high. Thus, to make blockchain development as seamless as possible, programmers are turning to Web3 infrastructure providers like Moralis!
Moralis is the easiest way to get started in Web3, and you can build everything from a portfolio app to a Web3 marketplace effortlessly. Furthermore, Moralis supplies a variety of industry-leading Web3 APIs making blockchain development as easy as Web2. As such, if you are serious about becoming a Web3 developer, sign up with Moralis right now!
Among some of Moralis’ most prominent APIs, you can, for instance, find the Moralis Streams API, Authentication API, and Web3 Data API. If you want to learn more about how these work, check out our tutorial on how to get blockchain data. You should also know that the APIs from Moralis are cross-chain compatible. This means you can easily build across some of the most popular blockchain networks. This includes Ethereum, Polygon, Avalanche, BNB Chain, Arbitrum, Optimism, etc.
So, if you are looking to start your Web3 development journey, go for Moralis’ scalable Web3 APIs and join industry leaders such as MetaMask, NFTrade, 1inch, and many others!
If you want further inspiration for your first blockchain project, check out our guide on how to build a block explorer!
Summary – Web3 Marketplace Development – How to Build a Web3 Business
In this tutorial, we taught you how to get into marketplace development for Web3 and build a Web3 business by showing how to set up a Web3 marketplace in three steps:
- Set up Firebase
- Clone and configure the Amazon repository
- Run the app
As such, if you have followed along this far, you now know how to build a Web3 clone of Amazon in no time!
If you found this tutorial instructive, consider checking out other content here on the Moralis Web3 blog. For example, learn about Ethereum scaling solutions, how to convert gwei to ETH, or explore the Arbitrum testnet. Also, remember to register with Moralis if you want to fully leverage the power of blockchain technology and build your own Web3 business. What’s more, creating an account is free, and you receive immediate access to the best APIs on the market!
