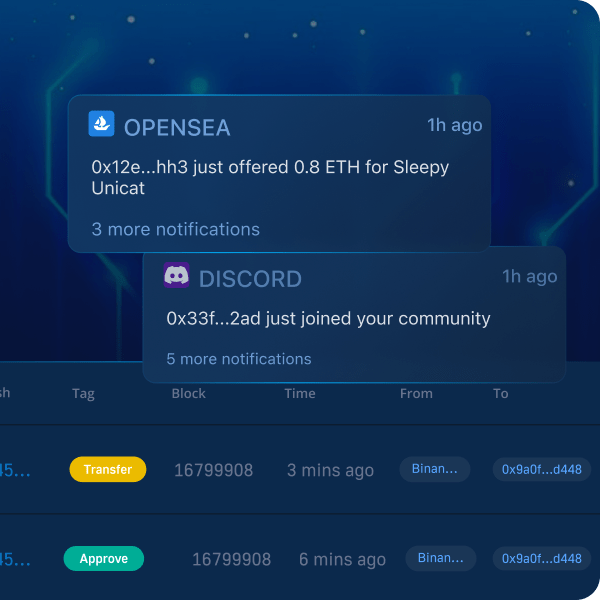
Listen to a smart contract address and create desktop Web3 notifications for on-chain events:
Track a Web3 wallet’s activity:
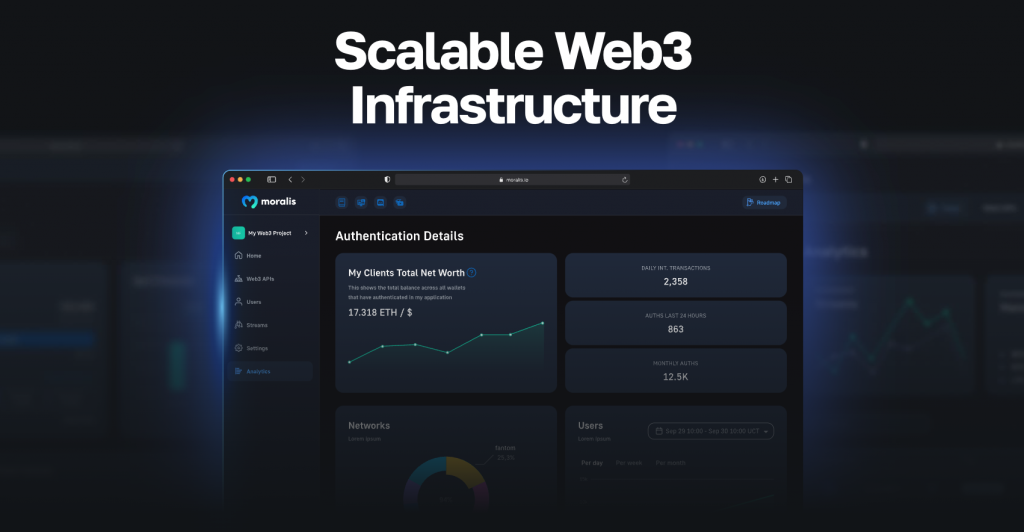
To integrate Web3 notifications, you must utilize tools such as the Notify API or its alternatives. While the Notify API is a great tool, it can’t match the speed and power of Moralis Streams. Moralis Streams is an enterprise-grade API that, for example, supports the implementation of blockchain notifications and enables devs to listen to any wallet or smart contract address. In fact, here’s how simple it is to create a new stream via the Moralis JS SDK to track a specific wallet:
const newStream = await Moralis.Streams.add(options)

const {id}=newStream.toJSON();

const address=”wallet_address_you_want_to_track”

await Moralis.Streams.addAddress({address,id})
It doesn’t get more straightforward than this when using the best Notify API alternative, and whether you’re listening to wallet addresses or smart contracts, the methods are pretty similar. In either case, we can use logged events and implement Web3 notifications in different forms. Our blockchain notifications can be built into dapps or social media (via bots) platforms as mobile or desktop notifications, etc. For example, the following lines of code use a USDT stream to create a desktop notification for every transfer of USDT above any specific threshold:
app.post('/webhook', (req, res) => {

  const webhook = req.body;
  for (const erc20Transfer of webhook.erc20Transfers){

      const addrs = `${erc20Transfer.from.slice(0, 4)}...${erc20Transfer.from.slice(38)}`;
      const amount = Number(erc20Transfer.valueWithDecimals).toFixed(0);

      notifier.notify({
          title: 'NEW USDT Transfer',
          message: `${addrs} just sent \n$${amount}`,
        });

  }

  return res.status(200).json();

})
If you wish to learn how to implement the above-presented code snippets correctly, create your free Moralis account and follow our lead!
Overview
In today’s article, we’ll first show you how to implement the code snippets above and use them with the best Notify API alternative. The first example will demonstrate how to create blockchain notifications by listening to a smart contract address. For that, we will use the Moralis Streams API via the Moralis admin UI. The second example will lean on using Moralis Streams via the JS SDK to implement crypto wallet tracking.
Below the two tutorials, we will also explore various Notify API alternatives, where you’ll have a chance to learn more about the Moralis Streams API and other tools that this ultimate Web3 API provider has to offer.
Easiest Way to Set Up Web3 Notifications with NodeJS
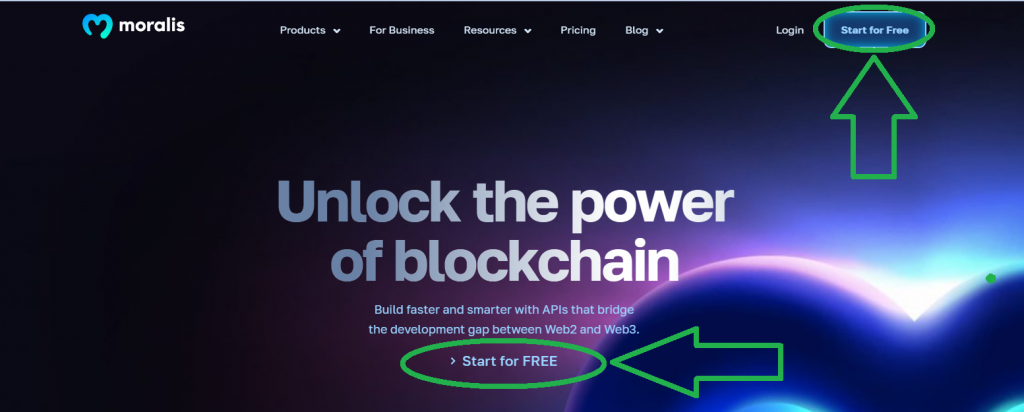
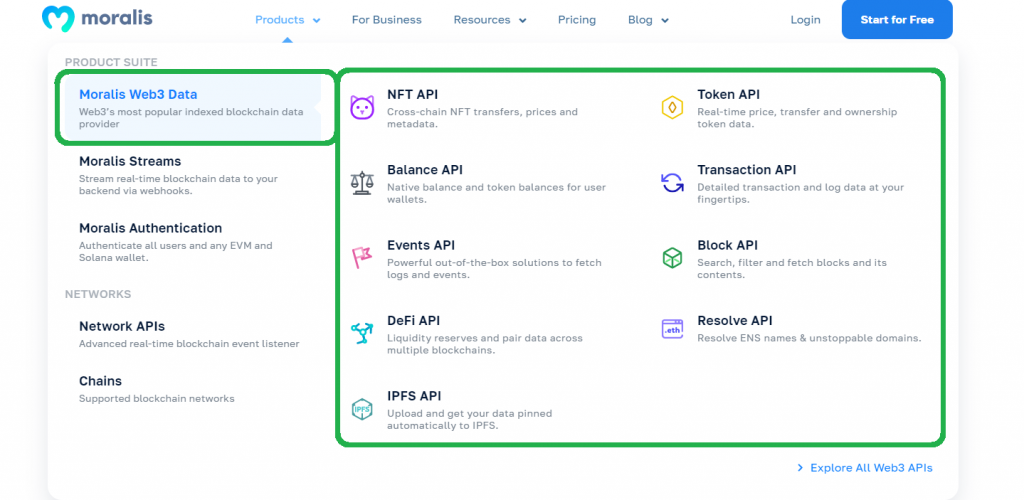
The easiest way to set up blockchain notifications with JavaScript (JS) is using the Moralis Streams API. So, before you dive into the following two examples, make sure you have your free Moralis account ready. To do this, use the “create your free Moralis account” link above or visit “moralis.io” and hit one of the “Start for Free” buttons:
Once you have your free account ready, you can access your admin area. This is where you can obtain your Web3 API key and access the UI for Moralis Streams:
- Obtaining your Web3 API key:
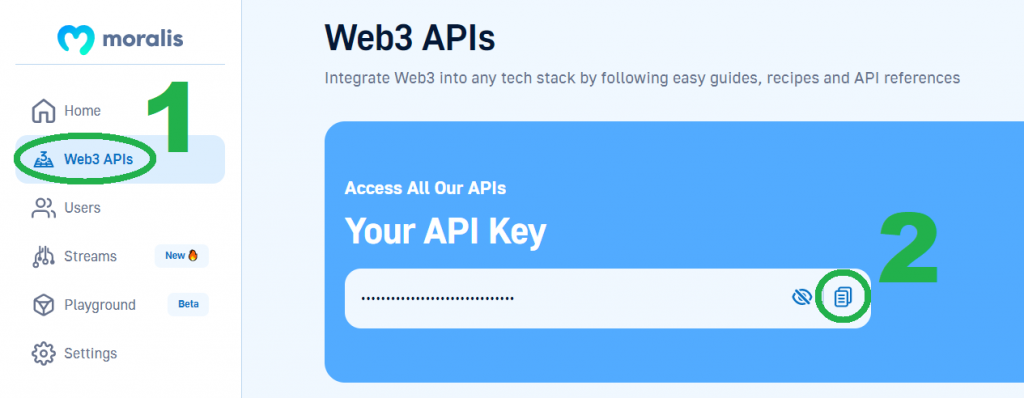
- Accessing the UI:

Tutorial 1: Blockchain Notifications for Desktop
Create a new project folder (“DesktopNotifications”) and open it in Visual Studio Code (VSC). Then, you may proceed by creating an Express dapp using NodeJS. This backend dapp will serve as a webhook, to which you will send on-chain events detected with your USDT stream.
To initialize a NodeJS project, use the following command:
npm init
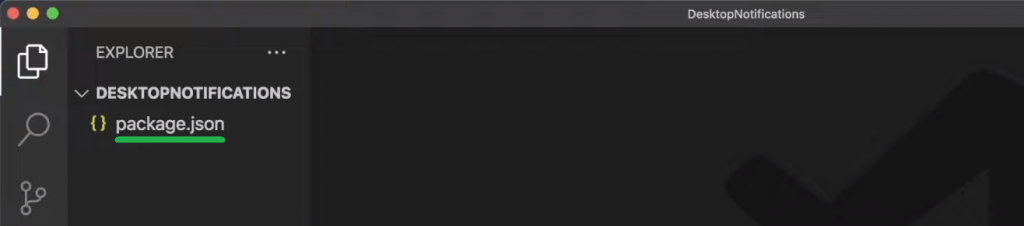
Then simply hit enter a couple of times to choose the default options. After confirming “Is this OK?” in your terminal, you’ll see a “package.json” file in your project folder:
Next, install the required dependencies by running this command:
npm i express nodemon node-notifier
Now, you have everything ready to create a new “index.js” file:
touch index.js
Open your “index.js” script and import Express and “node-notifier“. You must also define a local port you want to use and ensure that your dapp uses JSON. These are the lines that will cover these aspects:
const express = require('express')
const notifier = require('node-notifier');
const app = express()
const port = 3000

app.use(express.json())
Create Nodemon Script, Ngrok Tunnel, and Use the Post Endpoint
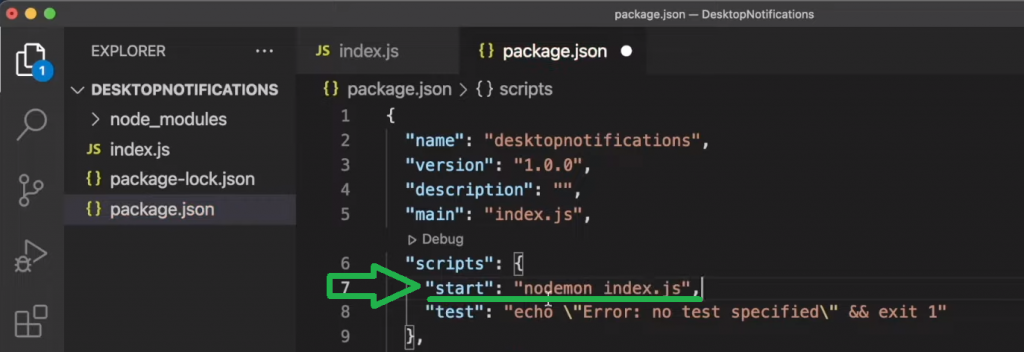
Open the “package.json” file and add a “start” script with “nodemon index.js”:
Use “ngrok” to create a tunnel to your local machine and get a URL you can use as a webhook. For that purpose, open a new terminal and enter the command below to install “ngrok“:
sudo npm i ngrok
Next, run the following command:
ngrok http 3000
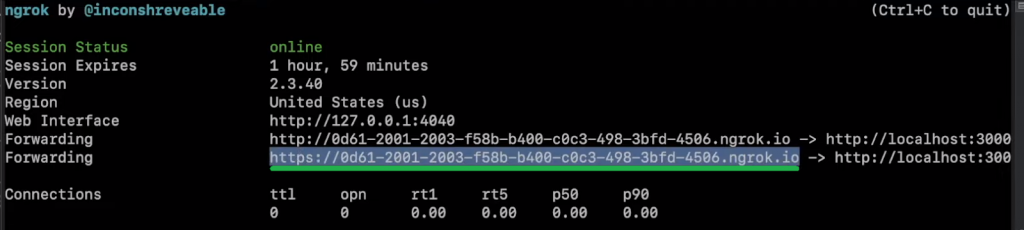
As a response, you’ll get a URL that you can use as a webhook URL:
Moving forward, you want to create a “post” endpoint that will be your webhook URL. The latter will read what your stream is sending and then fire up the appropriate logic. For starters, use the following lines of code:
app.post('/webhook', (req, res) => {

  const webhook = req.body;

  console.log(webhook)

  return res.status(200).json();

})
Finally, you want to initialize your Express dapp to listen to the local port:
app.listen(port, () => {

  console.log(`Listening to streams`)

})
With the above script in place, you can run your dapp:
npm run start
With your webhook URL ready and your backend NodeJS dapp running, you are ready to use the ultimate Notify API alternative to start listening to on-chain events.
Using the Moralis Admin UI to Create Triggers for Blockchain Notifications
Thanks to the screenshot presented earlier, you already know how to access the Streams tab. Once there, hit the “New Streams” button:

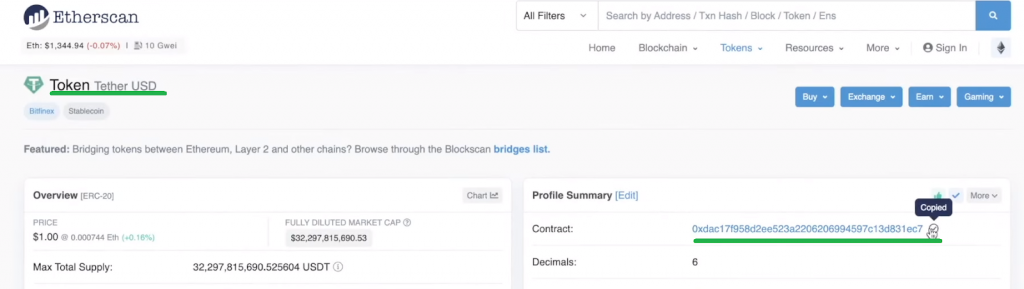
On the next page, you’ll get to set up a new stream. Since we want to listen to USDT transfers, you must paste the USDT contract’s address. You can copy it from Etherscan:
Then, you need to add a description, webhook URL, and a tag:
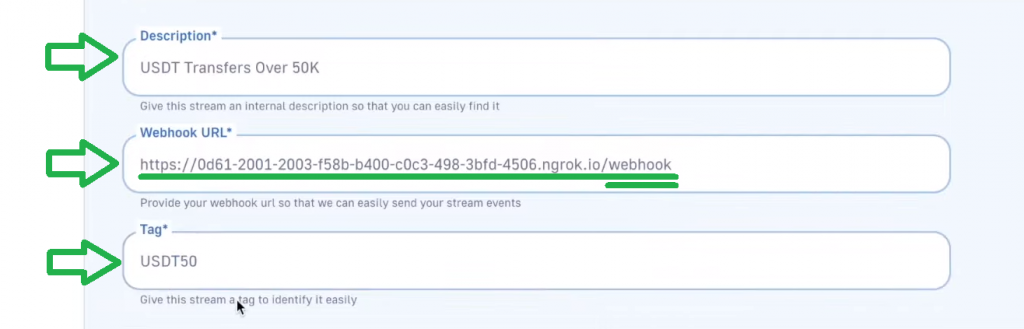
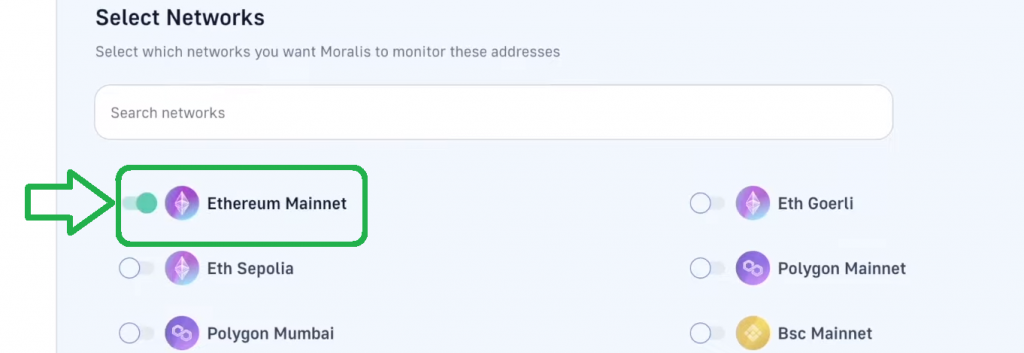
As far as the webhook URL goes, make sure to use your “ngrok” URL obtained above and add “/webhook” at the end. Next, select the “Ethereum Mainnet” network – this is where the USDT smart contract lives:
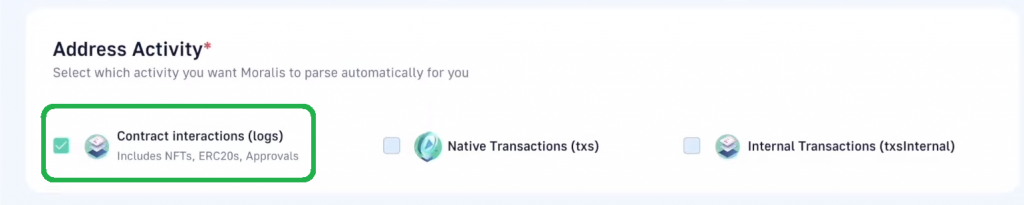
Transfers are specific events of contract interactions, so you need to choose the right type of activity:
You also need the USDT contract’s ABI, which you can also copy from Etherscan (“Contract” tab):
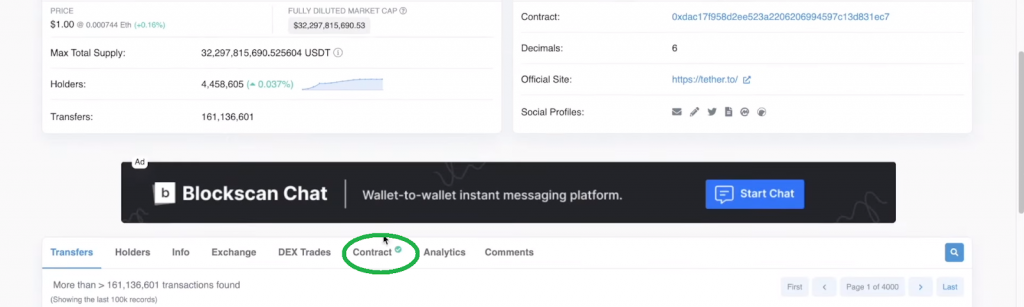
Once on the “Contract” tab, scroll down until you see “Contract ABI” and copy it:
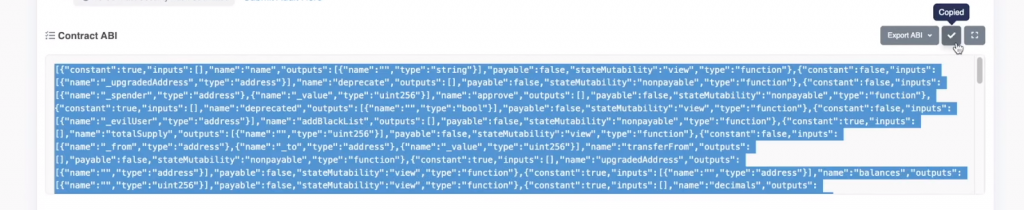
After pasting the above-copied ABI into the designated area in your setup, Moralis will automatically detect the available on-chain events. As such, you simply select the “Transfer” option:

Finally, you need to add a filter that will focus on transfers of more than 50 thousand USDT:

These are the lines of code presented in the above screenshot:
[

{

“topic0”: “Transfer(address,address,unit256)”,

“filter”: {“gt: [“value”, “50000000000]}

}

]
Note: You need to use “50000000000” because USDT uses six decimal places. You can explore different filters on our GitHub page in the “Filter Streams” section.
If you return to your terminal where you are running your “index.js” script, you should see detected USDT transfers in the following format:
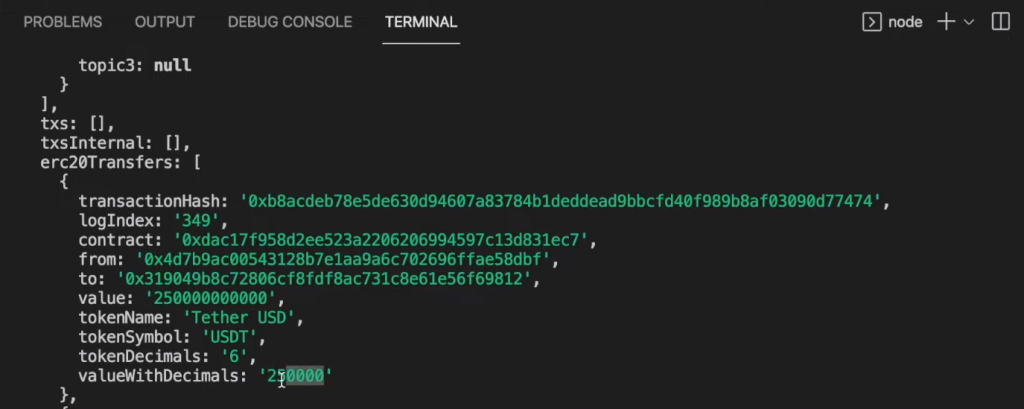
All that’s left to do is to present these results via neat desktop notifications, which we’ll look at next!
Displaying Web3 Notifications
To ensure that every new USDT transfer triggers a corresponding desktop blockchain notification, you need to tweak your “index.js” script. This is where the snippet of code from the intro comes into play. So, your updated “post” endpoint should contain the following:
app.post('/webhook', (req, res) => {

  const webhook = req.body;

  for (const erc20Transfer of webhook.erc20Transfers){

      const addrs = `${erc20Transfer.from.slice(0, 4)}...${erc20Transfer.from.slice(38)}`;
      const amount = Number(erc20Transfer.valueWithDecimals).toFixed(0);

      notifier.notify({
          title: 'NEW USDT Transfer',
          message: `${addrs} just sent \n$${amount}`,
        });

  }

  return res.status(200).json();

})
Note: You can access the final “index.js” script used above on GitHub.
This is what these USDT transfer notifications look like on a desktop:

Tutorial 2: Using the Notify API Alternative to Track Web3 Wallets
Note: To set up your Express dapp using NodeJS and create a “ngrok” tunnel, use the steps covered in the above tutorial.
In this example, we will show you how to use the Moralis JS SDK to create a new stream that tracks a Web3 wallet address. You need to initialize another NodeJS app and create a new “index.js” file. Inside that script, require Moralis and “dotenv“:
const Moralis = require("moralis").default;
const { EvmChain } = require("@moralisweb3/common-evm-utils");
require("dotenv").config();
Also, create a “.env” file where you want to paste your Moralis Web3 API key in the “MORALIS_KEY” variable. Next, initialize Moralis:
Moralis.start({
    apiKey: process.env.MORALIS_KEY,
  });
Then, you need to define the stream’s options (include the same details as inside the Streams UI):
async function streams(){

  const options = {
    chains: [EvmChain.MUMBAI],
    description: "Listen to Transfers",
    tag: "transfers",
    includeContractLogs: false,
    includeNativeTxs: true,
    webhookUrl: "your webhook url"
  }
Looking at the lines of code above, you can see that the options cover a chain to focus on, a description, a tag, and a webhook URL. You can also see that the script focuses on different on-chain events by setting “includeContractLogs” to “false” and “includeNativeTxs” to “true“. This way, you can focus on native currency transfers. For the Mumbai testnet, that’s testnet MATIC. To use the above lines of code, make sure to replace “your webhook url” with your “ngrok” URL. Don’t forget to add “/webhook” at the end of that URL.
Create a New Wallet-Tracking Stream
With the lines of code above set in place, it’s time to use the snippet from today’s introduction. So, add those lines of code inside the “async” function of your “index.js” file:
const newStream = await Moralis.Streams.add(options)

  const {id} = newStream.toJSON();

  const address = "wallet_address_you_want_to_track";

  await Moralis.Streams.addAddress({address, id})

  console.log("Fin")

}

streams()
To use this script, make sure to replace “wallet_address_you_want_to_track” with an actual wallet address. If you want to test this stream firsthand, we recommend you use one of your wallet addresses. In that case, you’ll be able to execute example testnet MATIC transfers to see the results in your terminal:

Note: To obtain testnet MATIC, you must use a reliable Polygon Mumbai faucet. If you want to target different testnets, you’ll need other crypto faucets. Fortunately, you can find an Ethereum faucet (Goerli faucet), Chainlink testnet faucet, Solana testnet faucet, and others on the Pure Faucets page.
Exploring Notify API Alternatives
If you completed the above two tutorials, you already have a decent sense of what the best Notify API alternative is all about. However, you can explore the Moralis Streams API in more detail in the upcoming sections. However, let’s first make sure you know what the Notify API is.

What is the Notify API?
In the realm of Web3, the Notify API refers to Alchemy’s product that allows developers to send real-time push notifications to users for critical on-chain events. Given the name “Notify”, it has raised awareness regarding Web3 and blockchain notifications. However, other products serve the same purpose more efficiently, and the Moralis Streams API is the ultimate Notify API alternative. It’s faster, covers all leading blockchains, and offers a lot more than just notifications.

The Best Notify API Alternative
The Streams API is the best alternative to Alchemy’s Notify API. One of its advantages is cross-chain interoperability. If you completed the first tutorial herein, you were able to see multiple chains in the “Select Networks” step of the Streams UI. But it’s worth pointing out that Moralis Streams support all leading EVM-compatible chains. As such, you can monitor any leading chain or multiple networks simultaneously. Aside from targeting multiple chains, this also future-proofs your work as it ensures you’re never stuck on any particular chain.

Another outstanding benefit the Streams API offers is user-friendliness. By offering an admin UI and an SDK to work with Moralis Streams, anyone can find a way to quickly set the backend in place required to listen to on-chain events. Plus, the Moralis SDK supports all leading legacy programming languages and frameworks. Hence, you can use your Web3 programming skills to listen to any smart contract and wallet address. What’s more, you can do so with a free Moralis account! All these advantages even make Web3 libraries obsolete in several ways.
TRUSTED BY INDUSTRY LEADERS
- ✅ Cross-chain interoperability
- ✅ User-friendliness (cross-platform interoperability)
- ✅ Listening to crypto wallets and smart contracts
- ✅ Speed and efficiency
- ✅ Advanced filtering options
- ✅ Accessible with a free account
- ❌ Connecting and maintaining buggy RPC nodes
- ❌ Building unnecessary abstractions
- ❌ Wasting time building complex data pipelines
Moralis – Beyond Web3 Notifications
Registering blockchain events and fetching parsed on-chain data is what all decentralized applications (dapps) need. While several devs still make the mistake of building an infrastructure to help them do that from scratch, you don’t want to waste time reinventing the wheel. This is where the Web3 APIs from Moralis change the game. With this toolbox in your corner, you don’t have to waste resources on building a unique backend. Instead, you can use short snippets of code to cover all your blockchain-related backend needs and then devote maximum attention to creating the best possible frontend.
With that in mind, make sure to explore the full power of Moralis. Aside from the Streams API, Moralis offers you the ultimate Web3 Data API and Web3 Auth API. The former supports your need to fetch any type of on-chain data with a single line of code. It allows you to use the Web3 get block timestamp function, token price API, the ultimate NFT API, and much more:
As far as Moralis authentication goes, it lets you add all the leading Web3 login methods to your dapps. Consequently, your dapp’s users can experience a frictionless Web3 onboarding experience while you unify Web3 wallets and Web2 accounts. To experience this tool firsthand, take on our Supabase authentication tutorial.
Nonetheless, aside from solutions for building dapps on Ethereum and leading EVM-compatible chains, Moralis also enables you to target Solana. The two most popular options for that network are the Solana Python API and the Solana JS API.
Notify API Alternatives – Easiest Way to Set Up Web3 Notifications – Summary
In today’s article, you had a chance to roll up your sleeves and take on two tutorials that taught you how to use the ultimate Notify API alternative to listen to on-chain events without breaking a sweat. The first tutorial offered you an opportunity to focus on listening to a smart contract address and using the Streams API via the Moralis admin UI. In the second tutorial, we showed you how to focus on Web3 wallet addresses while using the power of Moralis Streams via the JS SDK. After completing the tutorials, you were able to learn what Alchemy’s Notify API is and get a better sense of the Moralis Streams API and the rest of Moralis’ suite of tools.
Now that you know how to cover the backend aspect of using the best Notify API alternative, it’s time you start building some unique frontends incorporating blockchain notifications. Additionally, you may also use on-chain events to automate social media posts. For instance, you can create a Twitter bot, NodeJS Telegram bot, or a blockchain Discord bot.
On the other hand, you might be interested in exploring other blockchain development topics or getting the crypto basics under your belt, such as answering questions like “what is Web3 technology?“. In that case, you should explore our crypto blog further. That said, if you are ready to start BUIDLing and would like some guidance, make sure to check out the Moralis YouTube channel and documentation. If you plan on dealing with token prices in ETH, you’ll want to use a reliable gwei to ETH calculator.