Equipping in-game characters with unique outfits or apparel enables gamers to convey their identity on a virtual level. To do so, players must acquire tokens (in-game currency) that they can later use to purchase outfits within the game. But how “unique” are the items within traditional games? Well, not as much as the phenomenal components used in blockchain gaming, namely, NFTs. Buying NFT outfits in-game opens up a new level of depth to the blockchain gaming experience. For example, these NFT outfits can be bought within the game, not just for players to own or sell but also traded on NFT marketplaces. For developers, implementing a “buy NFT outfits in-game” feature is key. Thanks to Moralis’ Unity SDK, you can easily implement all kinds of Web3 features, including a buy NFT outfits component!
As far as Web3 games go, things usually start with Web3 authentication. This is where Moralis’ Web3 Auth API makes the verification process extremely straightforward. It enables you to have an efficient Web3 login method established in minutes. As a result, users can use any of their favorite crypto wallets to authenticate themselves. Also, Moralis is all about cross-platform and cross-chain interoperability. Hence, it enables you to use your favorite legacy tools and easily implement Web3 functionality to numerous applications. Accordingly, these applications can become dapps (decentralized applications). Furthermore, Moralis enables you to focus on various blockchains and expand your reach to future-proof your work. With that said, we invite you to create your free Moralis account and follow our lead. As such, you’ll learn how to create your own instance of our example game that lets players buy NFT outfits.
Buy NFT Outfits – Demo of Our Example Web3 Game
Before we move on, we want to ensure that you have a clear picture of what to expect from our example project. Thus, let’s look at a demo of our Web3 game that enables players to buy NFT outfits. Like most dapps, our game starts with Web3 authentication. On the following screen, players need to click on “connect”:
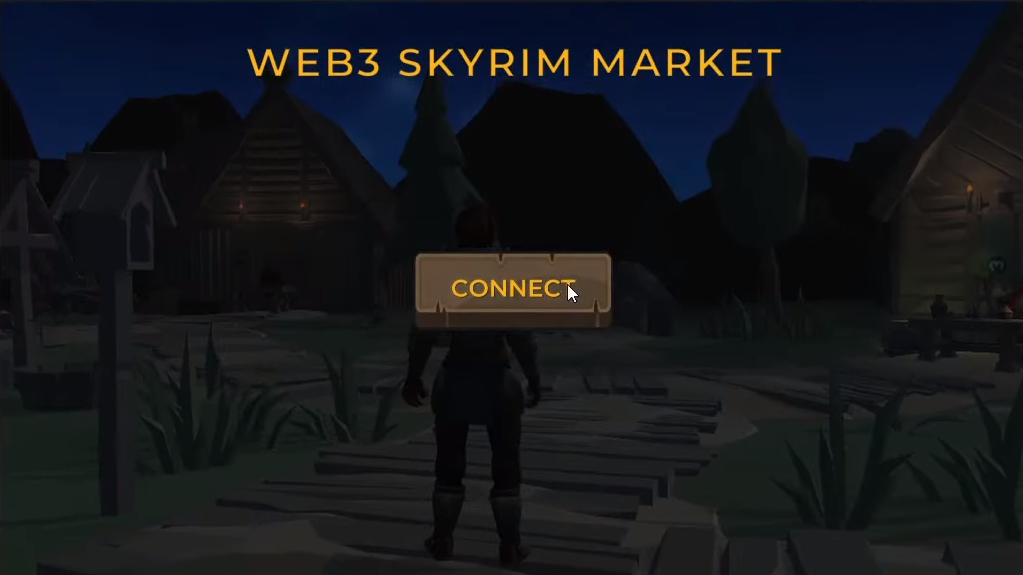
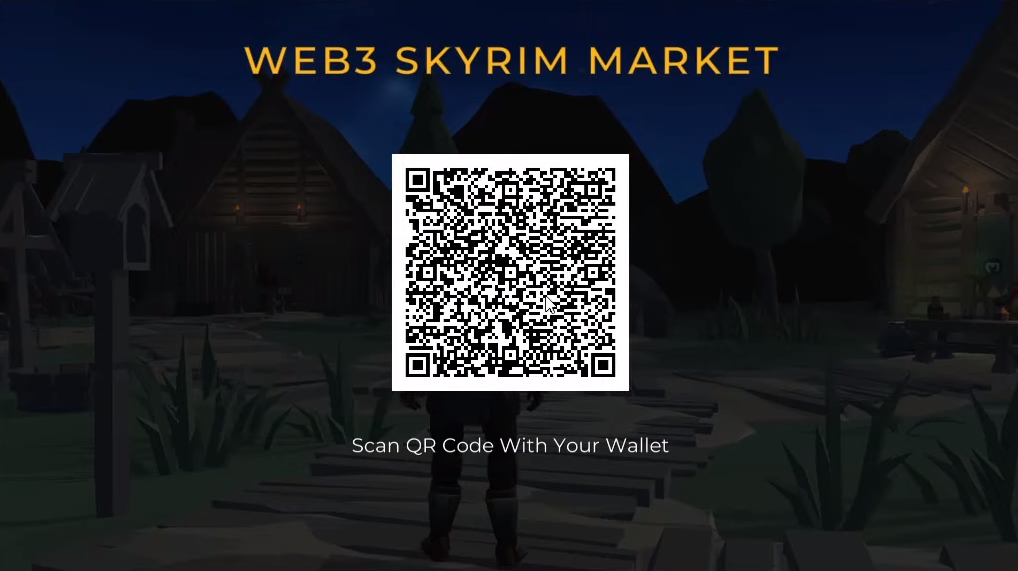
The above screenshot also includes the name of our example game: “Web3 Skyrim Market”. Once the players click the “connect” button, a QR code will be displayed. As such, they need to use their favorite mobile crypto wallet to scan the code and authenticate themselves:
After confirming their login, users can control the avatar. Moreover, they can see the initial part of their wallets’ address displayed above the character’s head:

Since this is a night scene, it is a bit dark. Of course, players can explore the scene freely. By doing so, they can soon discover two shop counters. Furthermore, as soon as their avatar enters these counters’ collider, they see more details. In the case of our “exchange” counter, they see the following screen:
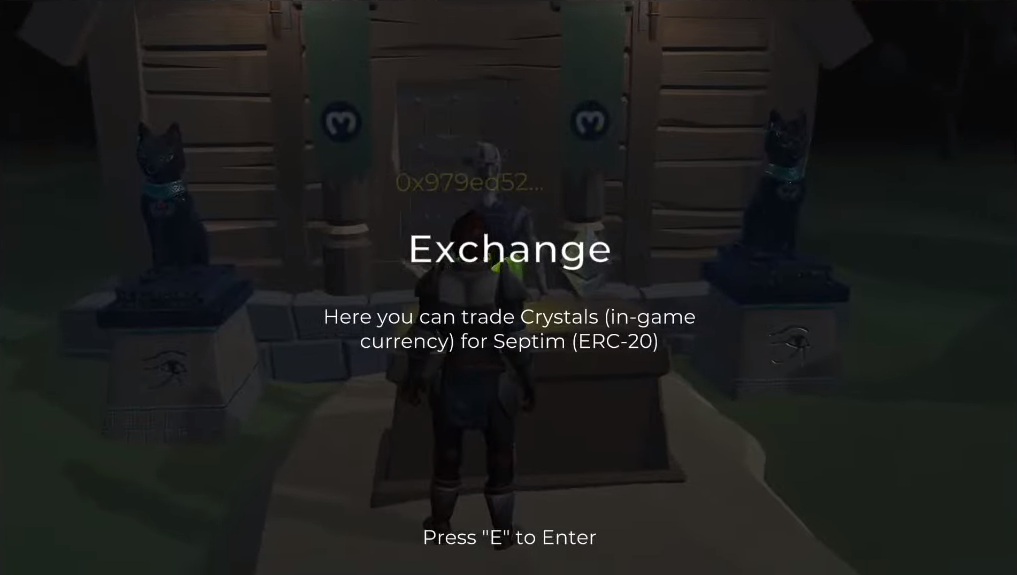
As you can see, the game tells players that they can use the exchange counter to trade their in-game currency (the currency in our game is called “crystals”) for “Septim” (coin name taken from Skyrim). The latter, in our case, is an ERC-20 token, which means it is an on-chain asset and, therefore, there’s a smart contract behind it (more on that later on). So, let’s say that another scene of this game enables players to collect crystals by completing some sort of mission. Then, with a sufficient amount of crystals, players can exchange them for Septim. So, if players want to exchange their in-game currency, they need to press “E”, which opens the following screen:
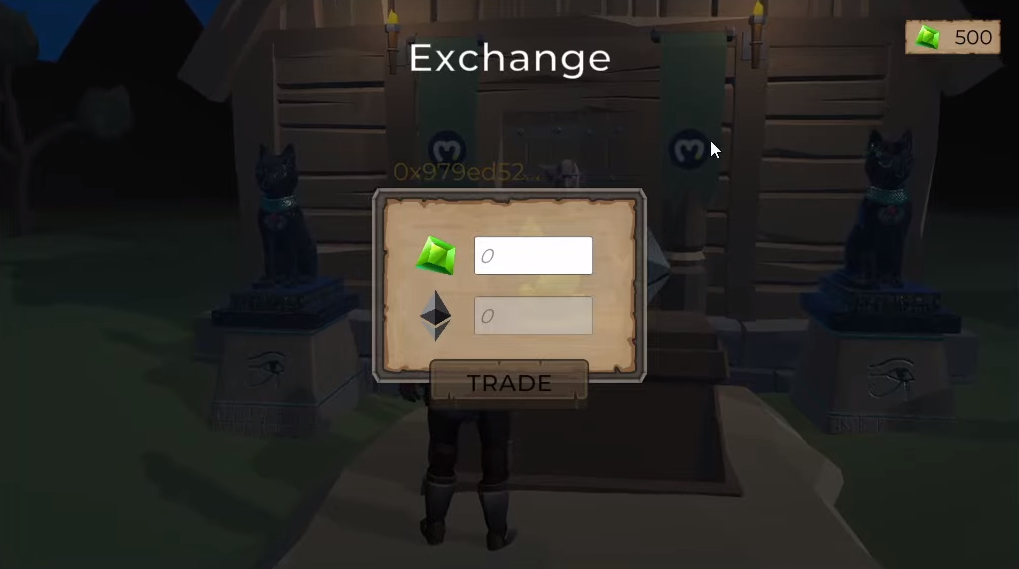
Exchanging Web2 Currency for ERC-20 Tokens
Looking at the above screenshot, you can see that players can see their crystals balance in the top-right corner. Moreover, in the center of the screen, they can enter the number of crystals they want to exchange for Septim. By the way, one Septim is worth 50 crystals:
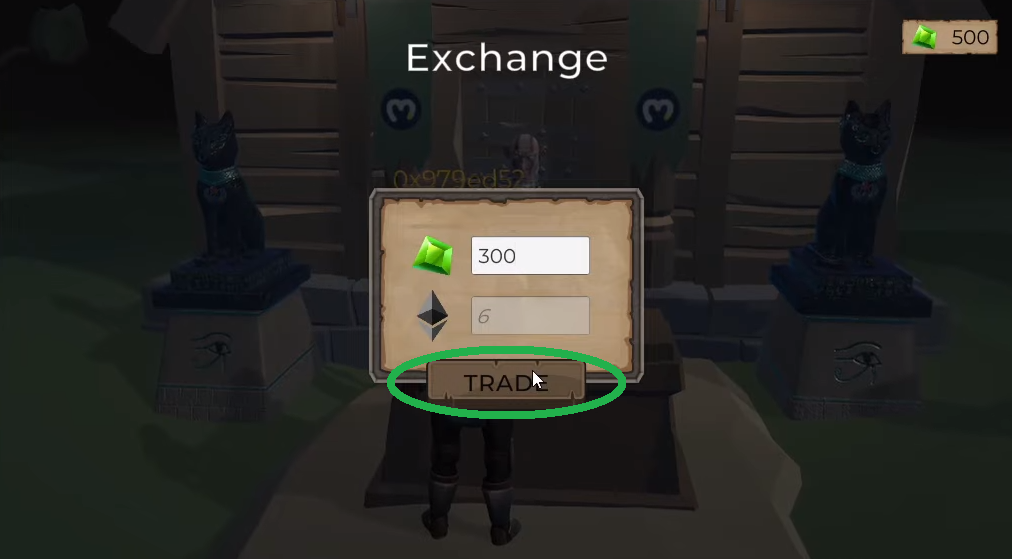
After the players click on the “trade” button, their crypto wallet will prompt them with a message to confirm the “exchange” transaction:
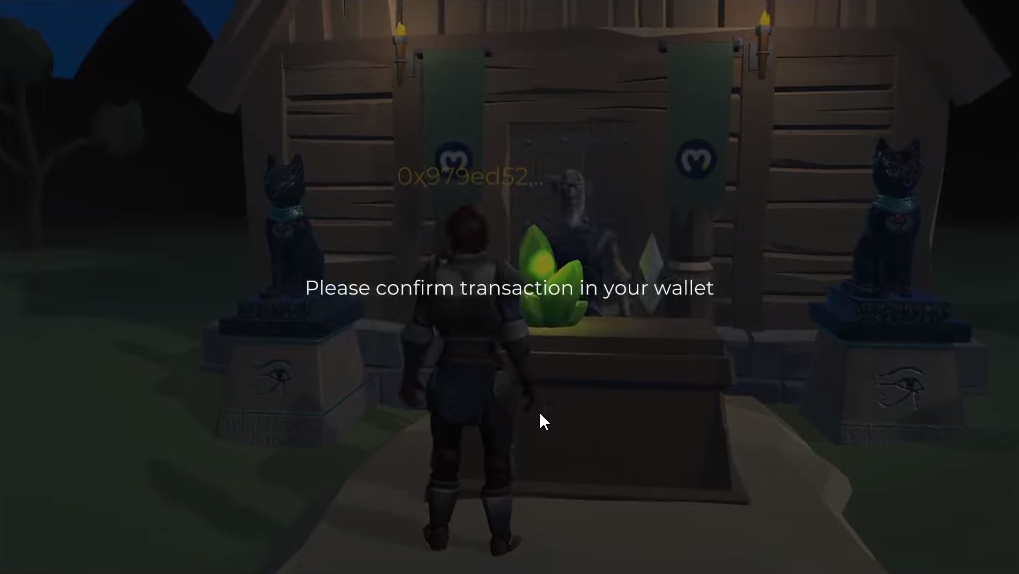
Once they confirm the transaction in their wallet, the game informs them that the transaction was successful:
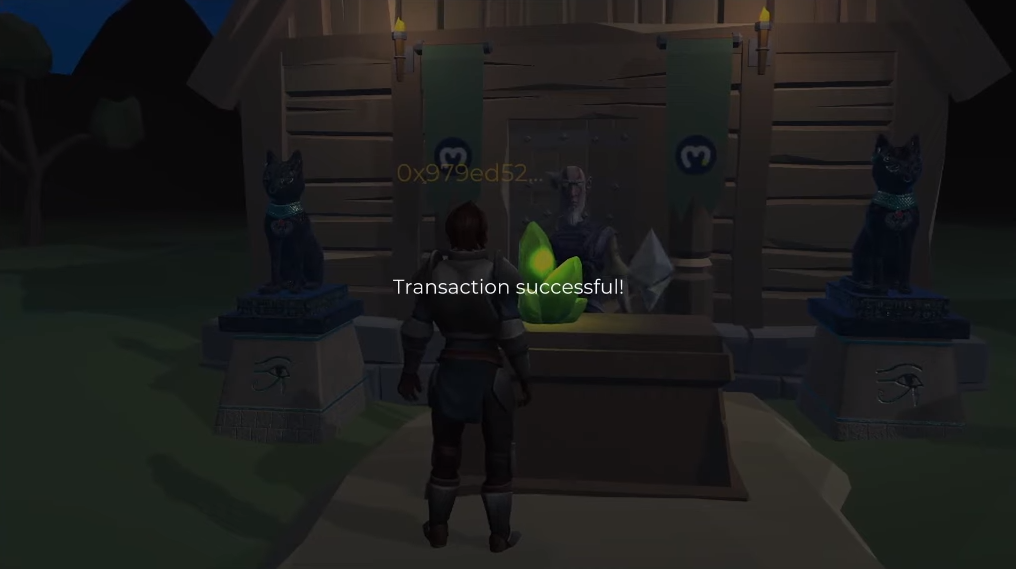
Players can now step away from the exchange counter and press “M” to access the menu. There, they will see the updated balance of their crystals and Septim:
The above on-chain transaction called our smart contract and minted six Septim tokens to the player’s wallet address. With a sufficient Septim balance, the player can use the shop to buy NFT outfits.
Buy NFT Outfits with ERC-20 Tokens
Just like the exchange counter, players can see the following information once they enter the outfit shop’s collider:
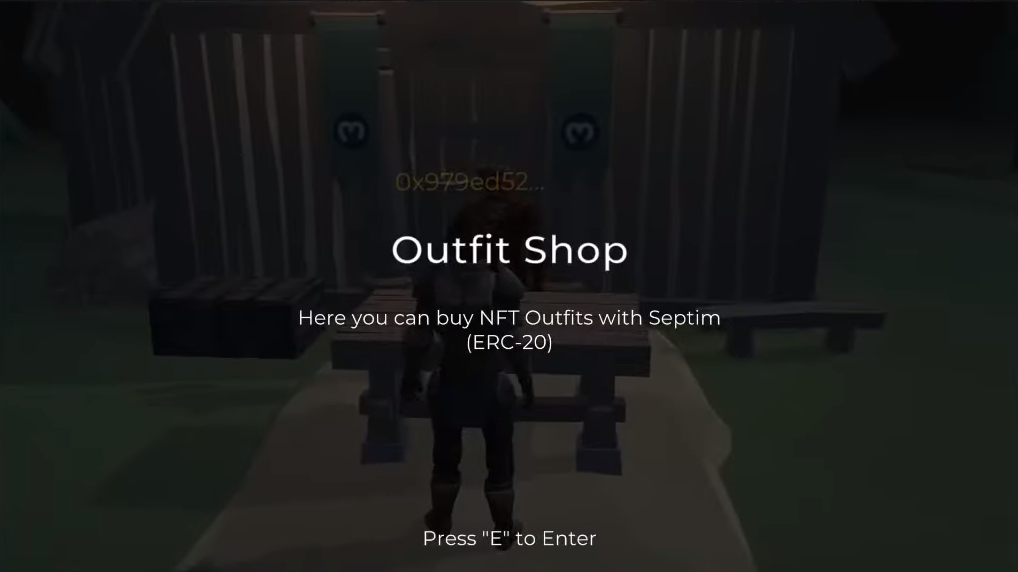
As the above message indicates, this is the place where the player can buy NFT outfits with Septim. So, once a player press “E” on their keyboard, the player can enter the outfit shop:
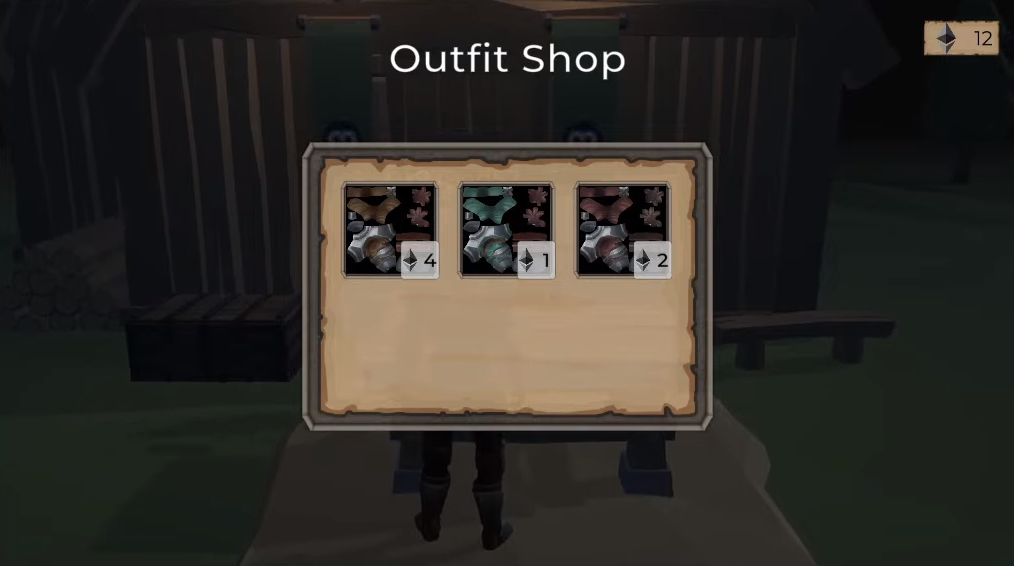
The outfit shop displays three outfits, including their prices in Septim. The player can click on the outfit that they want to buy, which again triggers the player’s Web3 wallet:
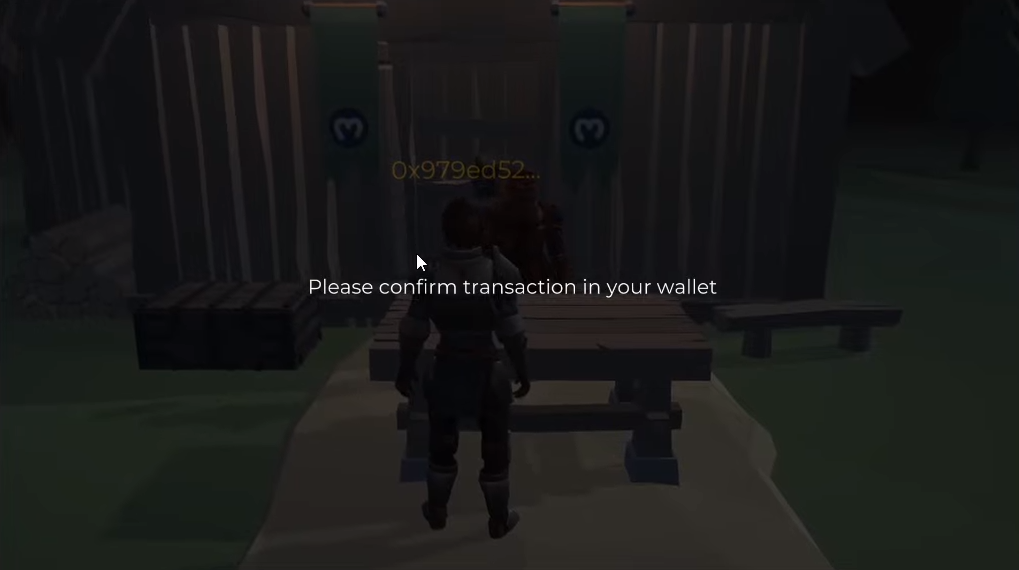
After confirming the transaction, the player receives that NFT outfit into their wallet. Moreover, the player’s Septim balance will update. This means that the “buy NFT outfits” transaction triggered both of our smart contracts. Our ERC-721 smart contract took care of minting an NFT outfit into the player’s wallet. Our ERC-20 contract ensured that a sufficient amount of Septim tokens got burned.
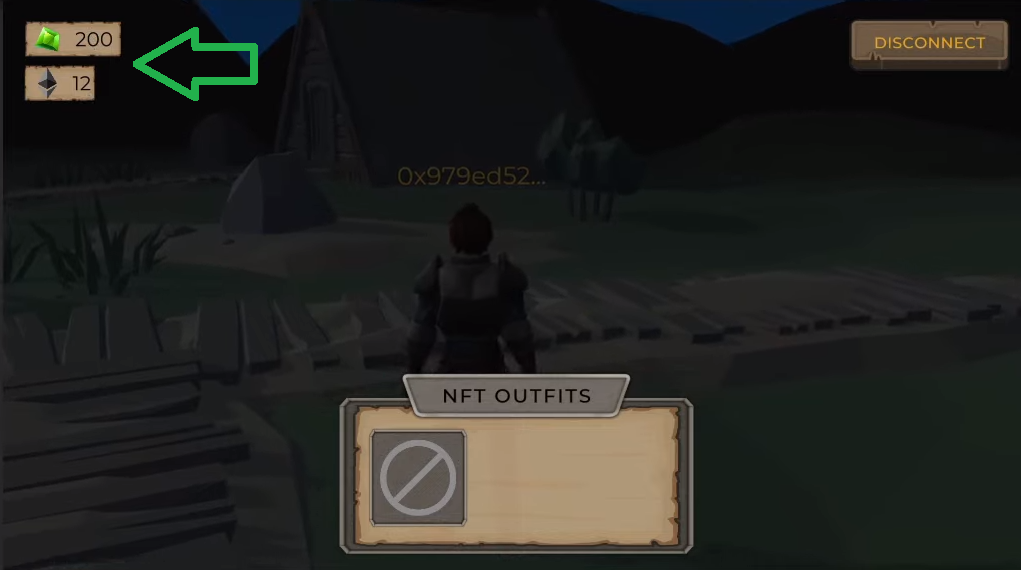
If the players now step away from the outfit shop and press “M”, they see their new outfit inside the “NFT Outfits” panel:
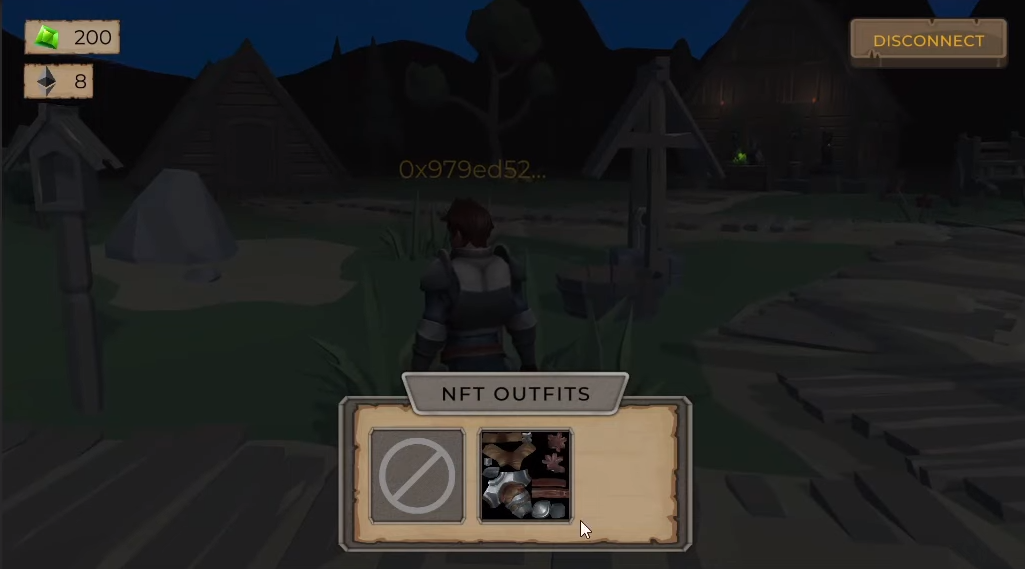
If the player wants to wear the new NFT outfit, the player only needs to click on it.
That’s it for the demo of our example game that enables players to buy NFT outfits. As you can see, there are quite many aspects to such a feature. However, by using the right tools, you can implement such ERC-20 token and NFT use cases rather effortlessly.
Implementing the “Buy NFT Outfits In-Game” Feature
You can use different game engines to create a Web3 game that lets players buy NFT outfits. However, you must use Unity to create your own instance of our above-presented game. Moreover, thanks to Moralis’ Unity SDK, you can cover all sorts of Web3 functionality just by entering your Moralis credentials. As such, we will show you how to do that in the next section!
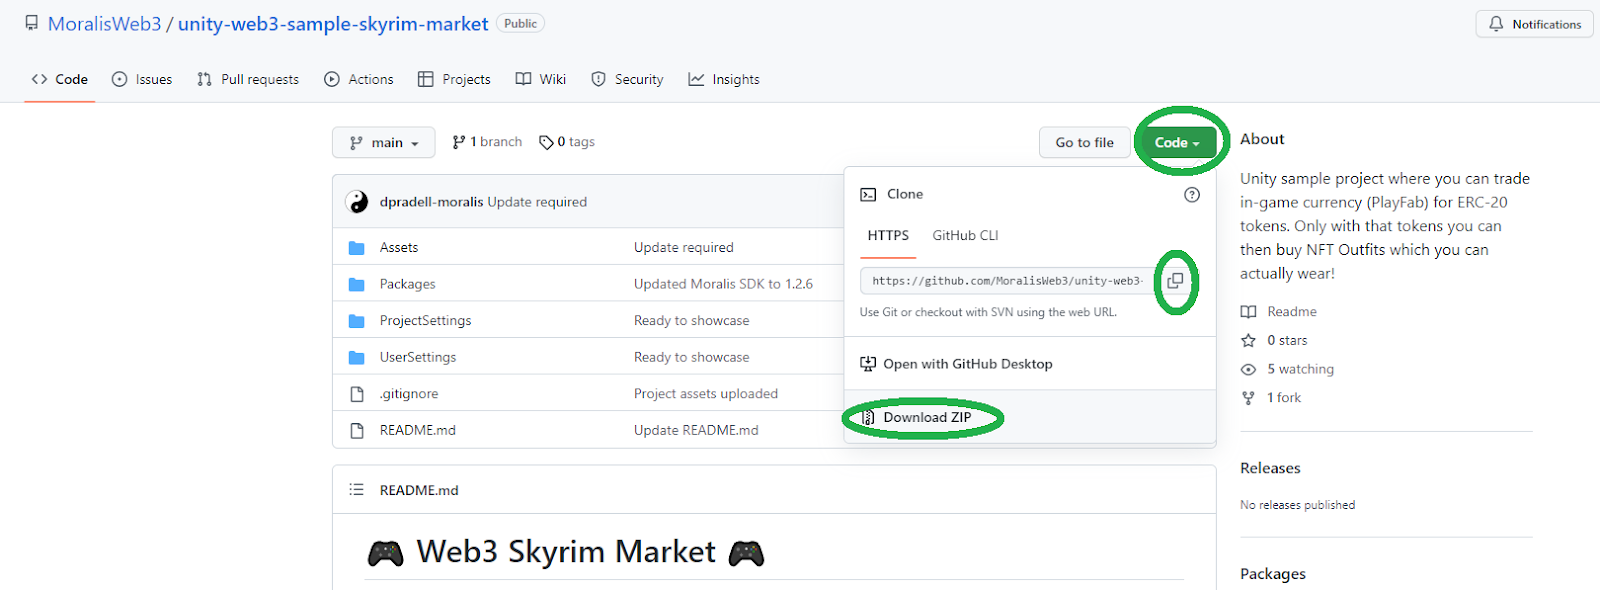
In addition to Unity and Moralis, you will also need your PlayFab account. The latter will enable you to manage in-game assets easily. However, another significant part of the above-presented functionality is proper smart contracts. Fortunately, many neat tools are at your disposal that enables you to deploy smart contracts without being a Solidity expert. In this tutorial, you will learn how to do so with Hardhat. Essentially, you will just need to follow a detailed step-by-step guide to tweak the necessary default files. Of course, you will not need to create smart contracts yourself. Instead, you will just copy our code. So, start by cloning our code or downloading the ZIP file that awaits you on GitHub:
Then, open the project in Unity, where the “Moralis Web3 Setup” window should open automatically:
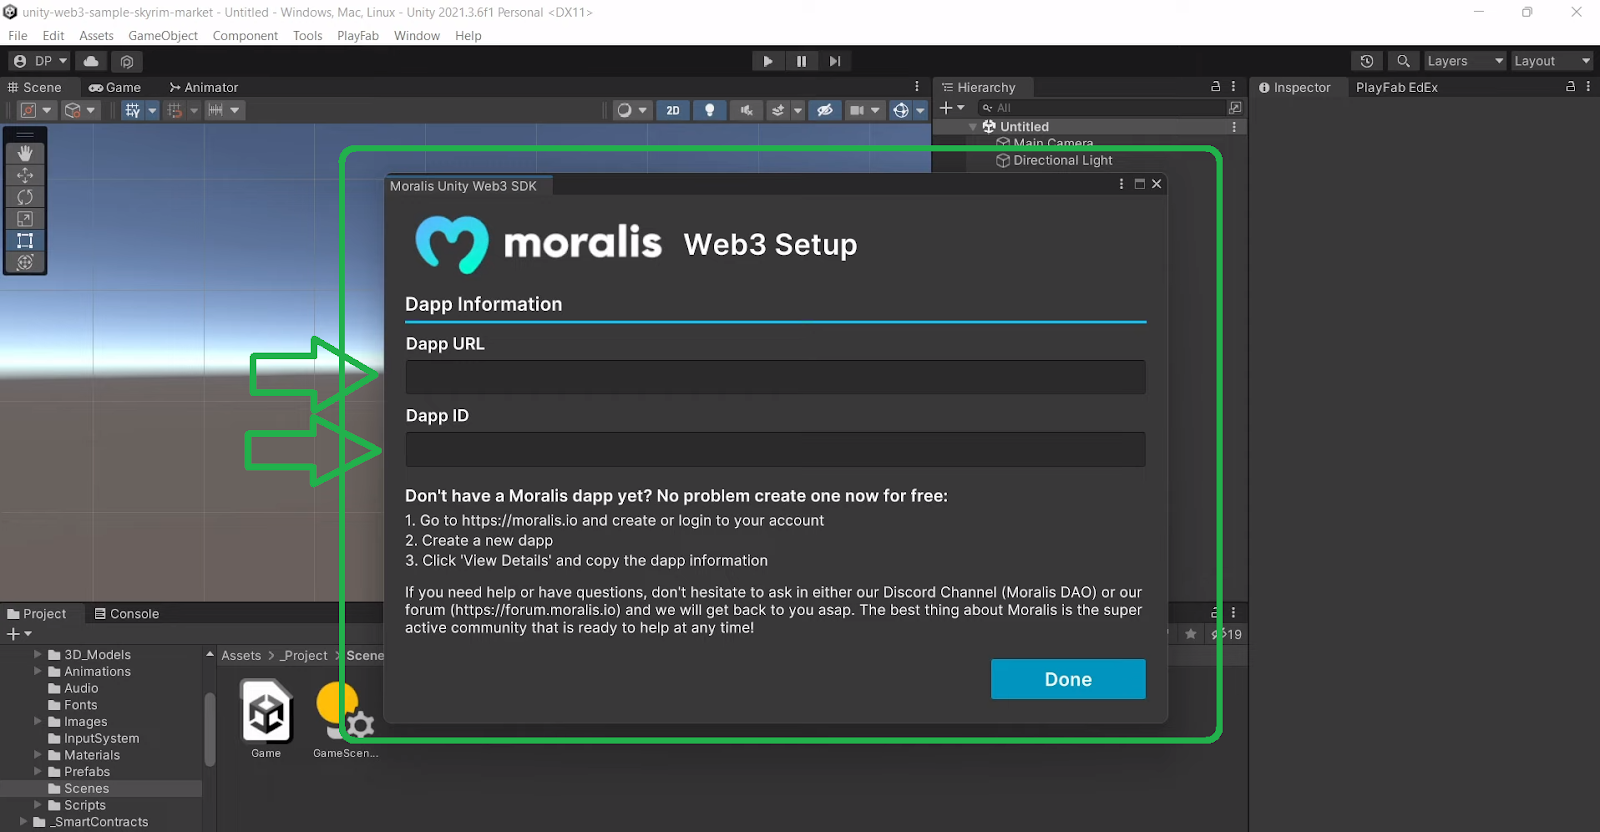
This is where you need to enter your Moralis dapp credentials. As such, this is the cue to take care of the initial Moralis setup.
Activate the Moralis Unity SDK
These are the steps you need to complete to use Moralis’ Unity SDK:
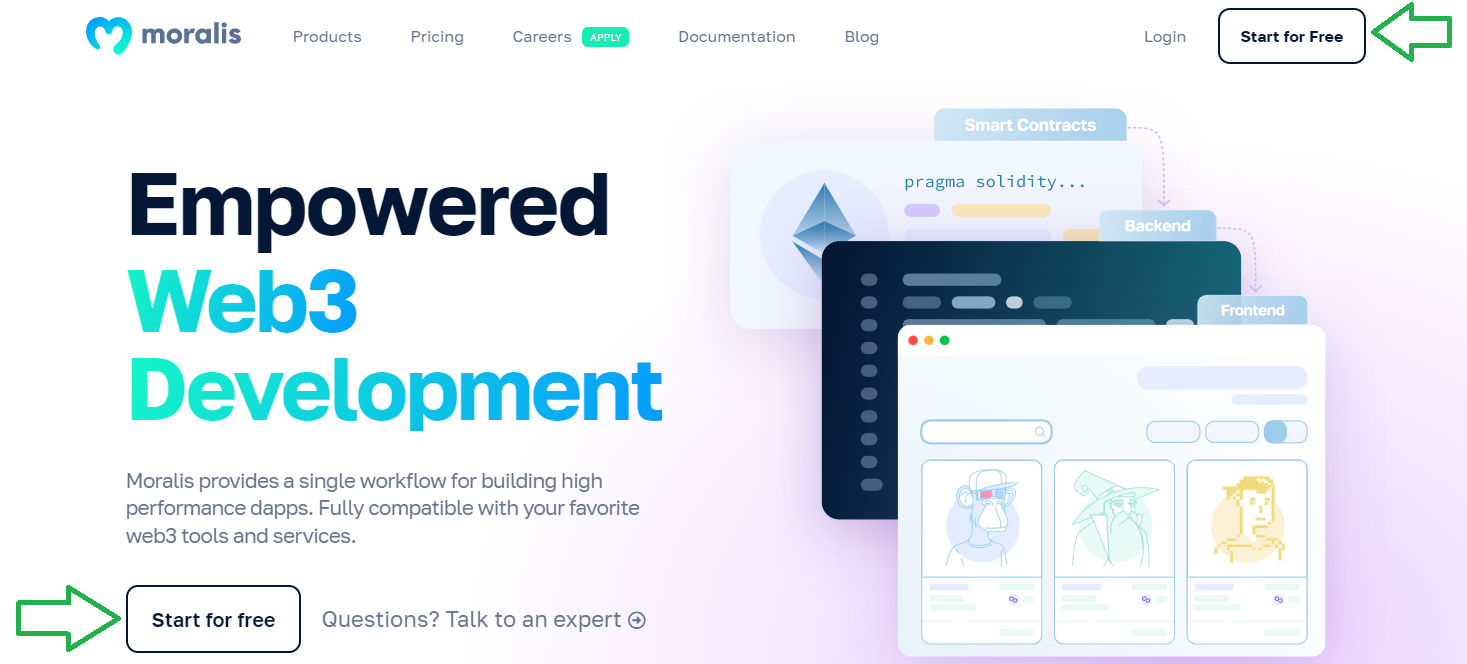
- Click on “create your free Moralis account” mentioned at the outset of this article or visit Moralis’ homepage and click on “Start for Free”:
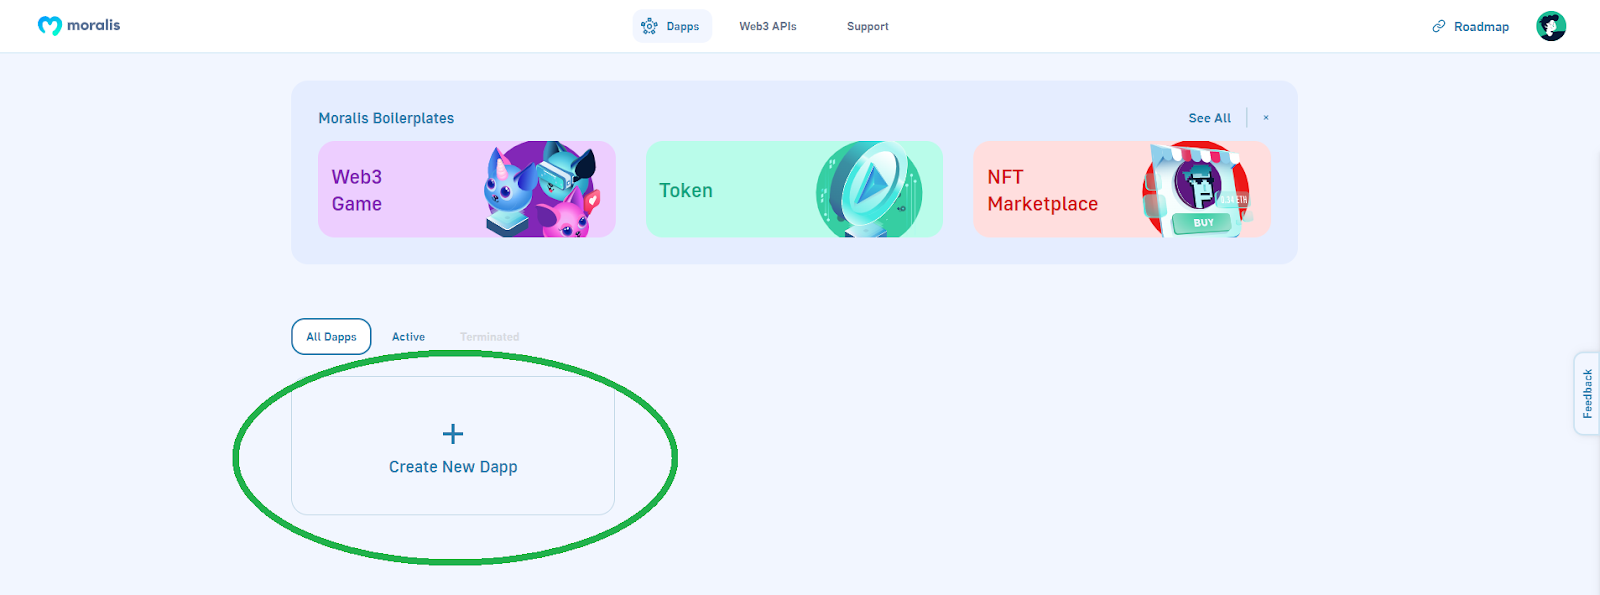
- After creating your account, you must enter your Moralis admin area. There, you need to create a new dapp by clicking on the “Create New Dapp” button:
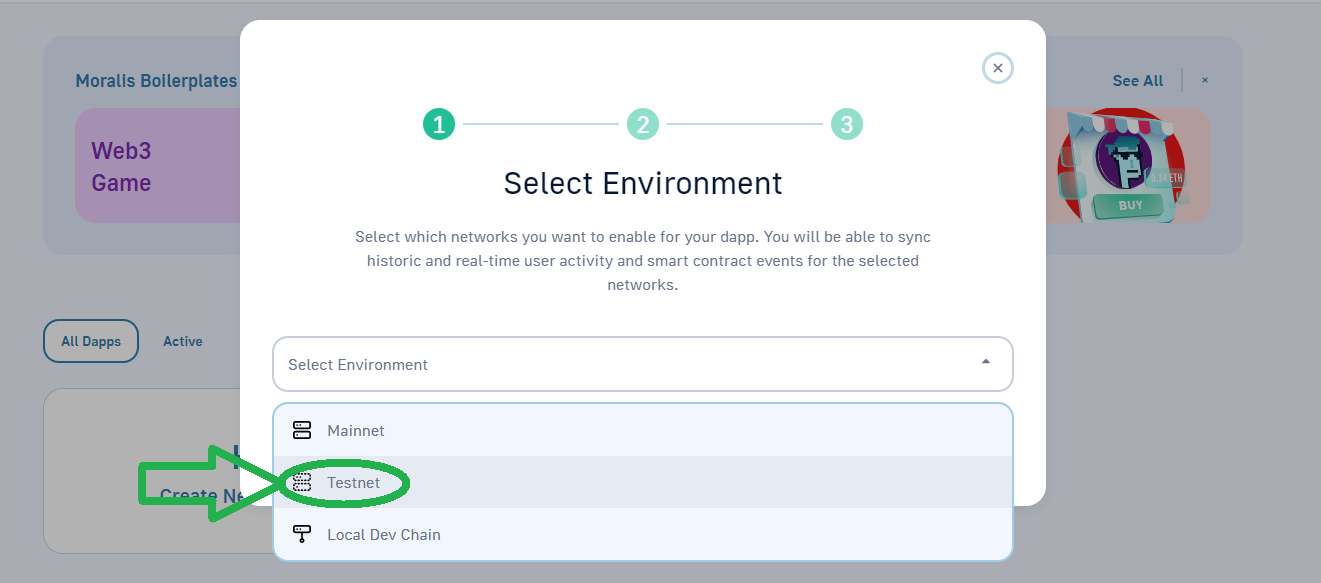
- The above button will initiate the dapp setup. First, you’ll need to select your environment. Since this is an example project, go with the “Testnet” option:
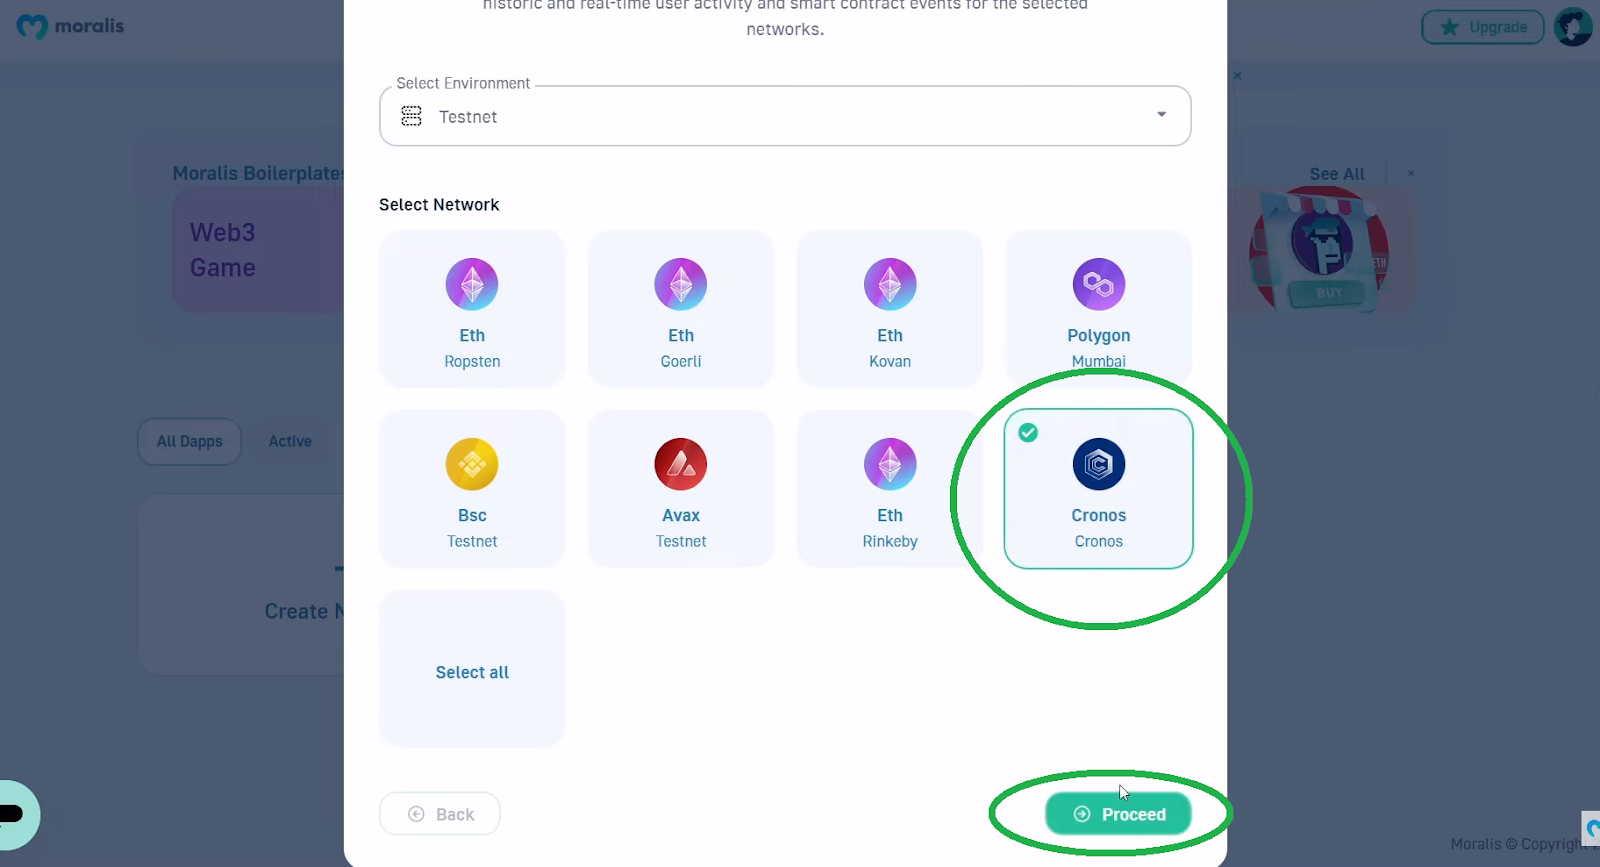
- Then, select the chain you want to focus on. You can select multiple chains; however, for the sake of this tutorial, we will focus on Cronos. After selecting the network of your choice, move on by clicking on “Proceed”:
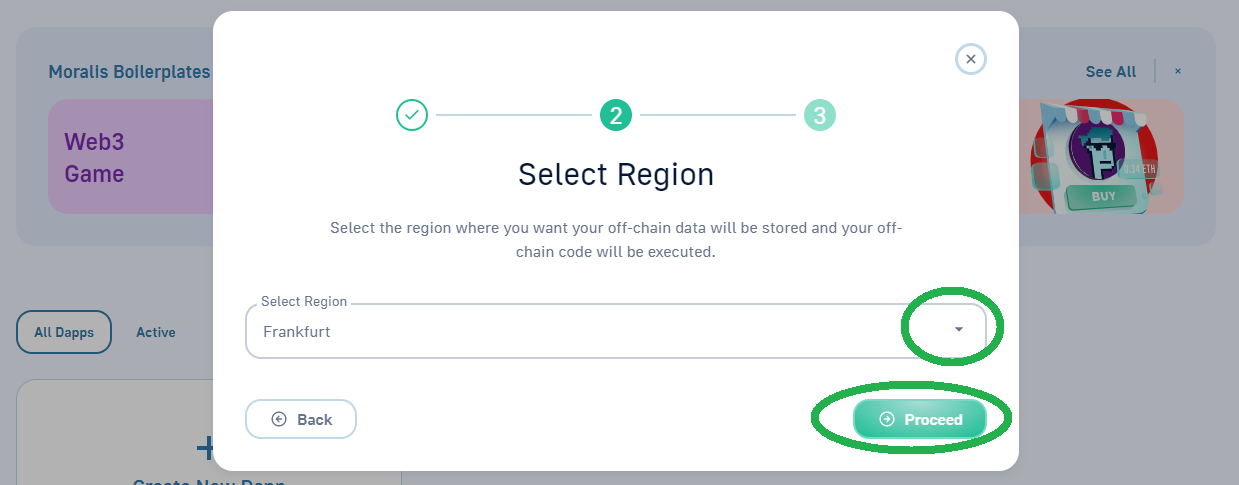
- Next, select your region. Simply use the drop-down menu and select a city that is closest to your actual location:
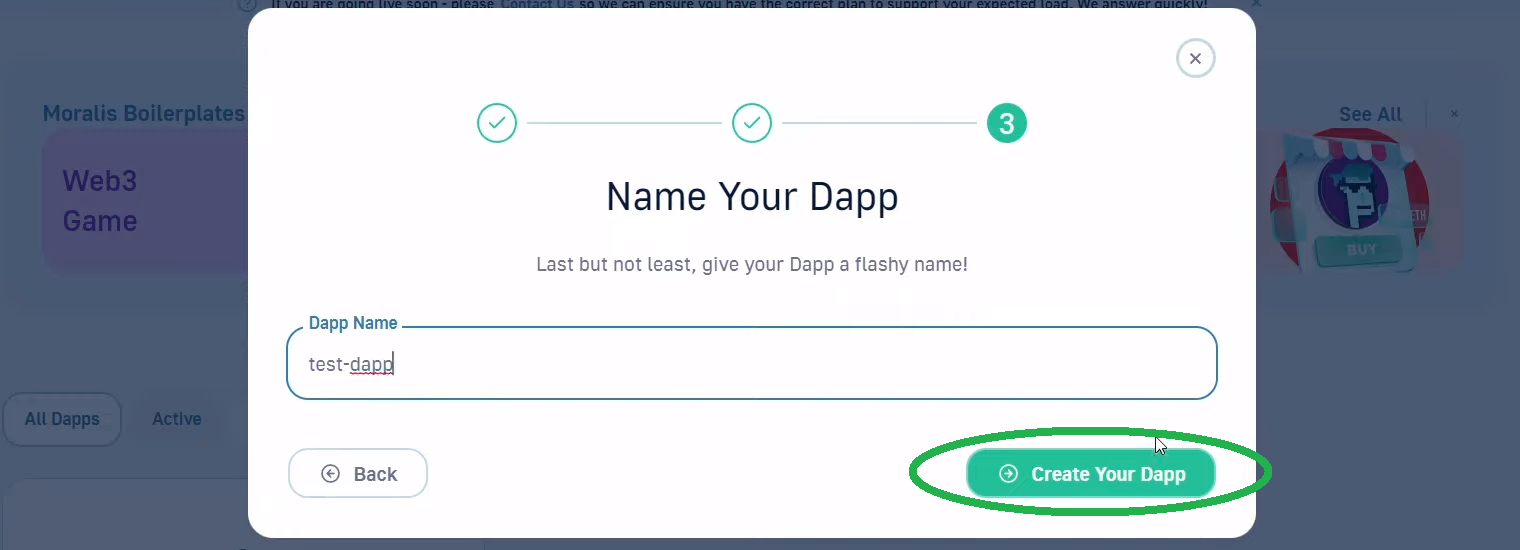
- In the third step of your dapp setup, you need to name your dapp. Fortunately, this can be anything you want, so do not overthink it. You can follow our lead and go with “test-dapp”. Then, spin up your dapp by clicking on the “Create Your Dapp” button:
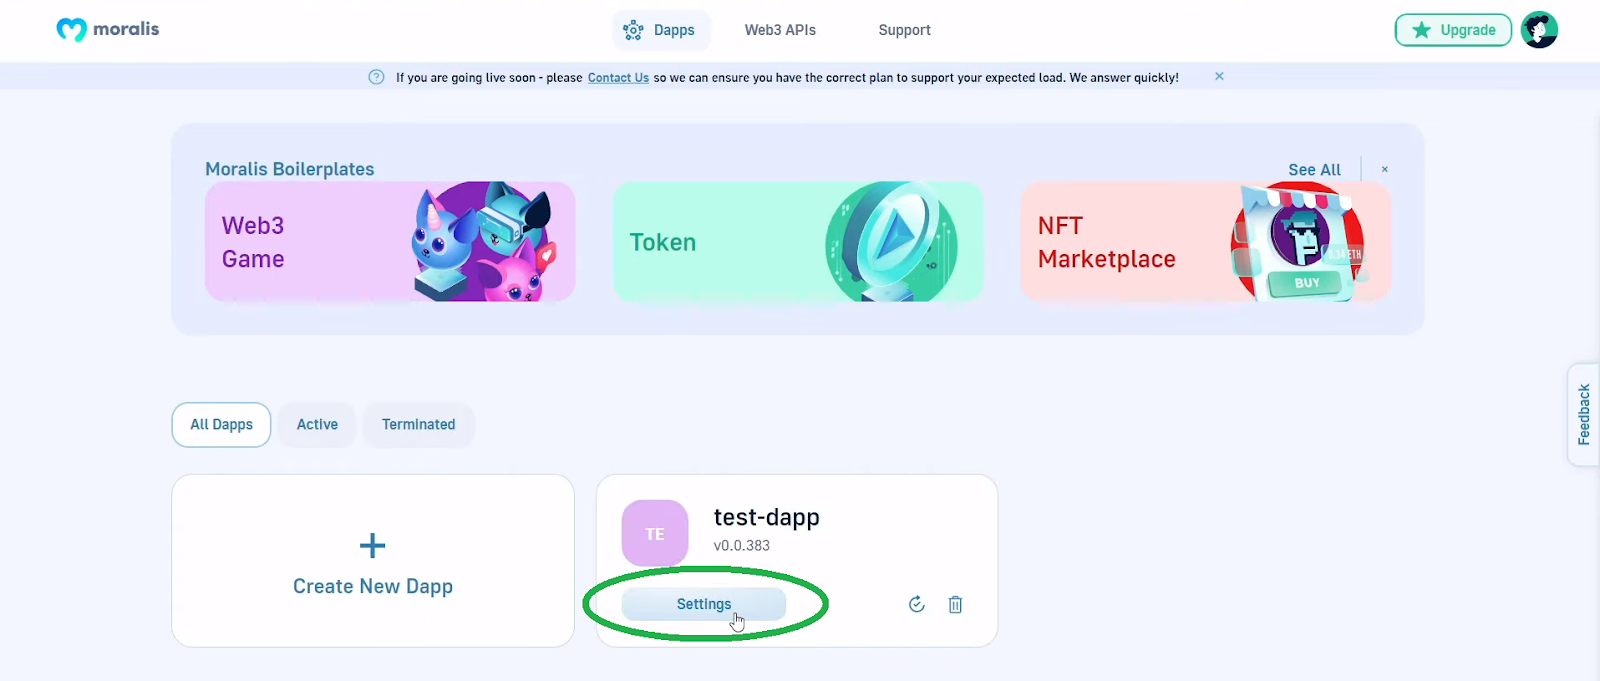
- It usually takes a couple of seconds before your dapp is up and running. Then, you can view its credentials (URL and ID) via the “Settings” button:
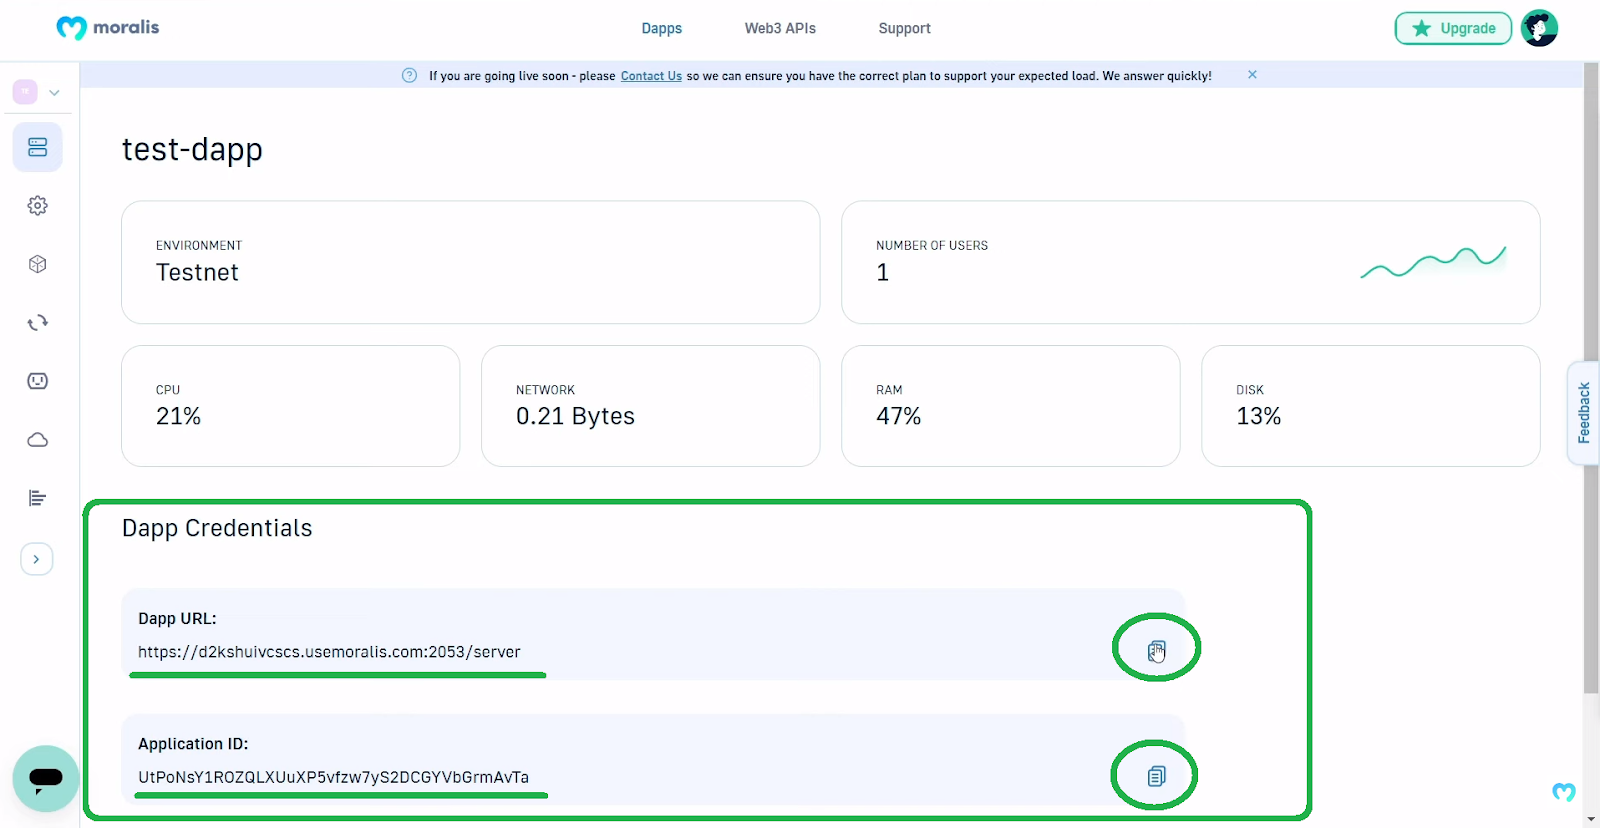
- To copy your dapp URL and ID, use the “copy” icons:
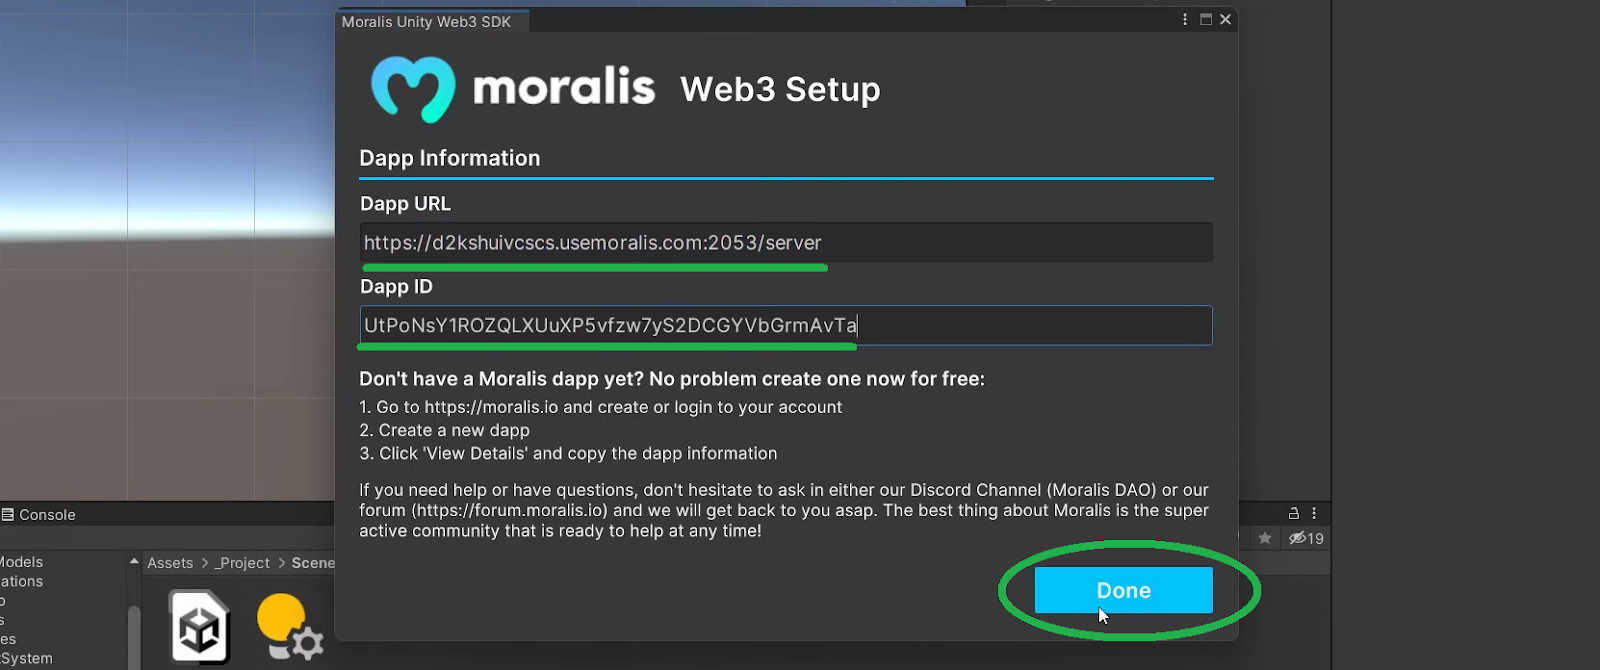
- Finally, return to Unity and paste the above-copied credential into the designated entry fields. With the credentials in place, complete the setup by clicking on “Done”:
PlayFab Setup
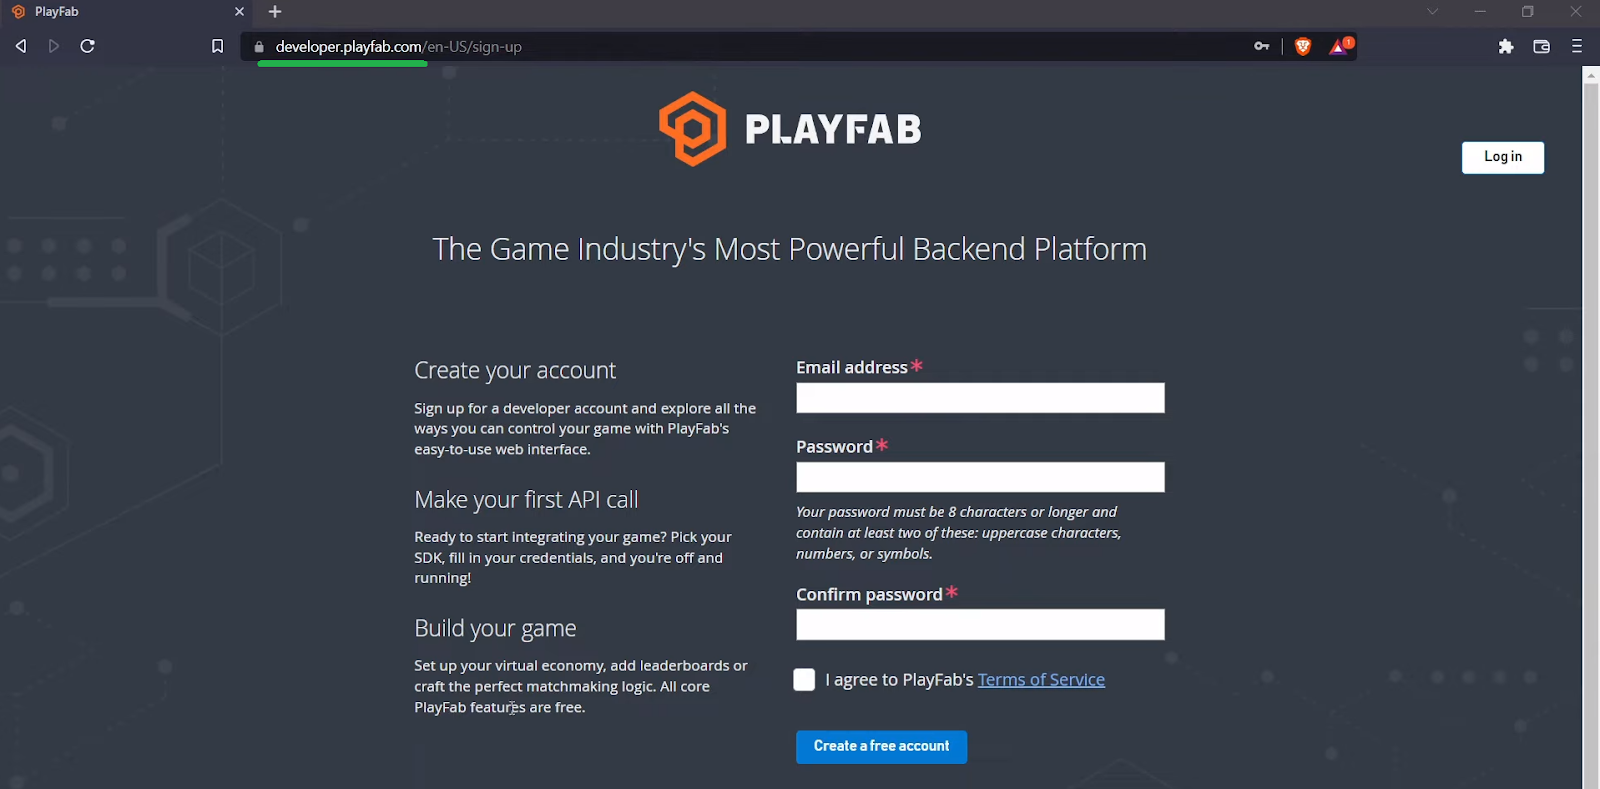
As mentioned above, we will use PlayFab to manage our in-game assets, which is one of the keys to offering the “buy NFT outfits” option. As such, go to PlayFab’s homepage and create your account or log in to your existing one:
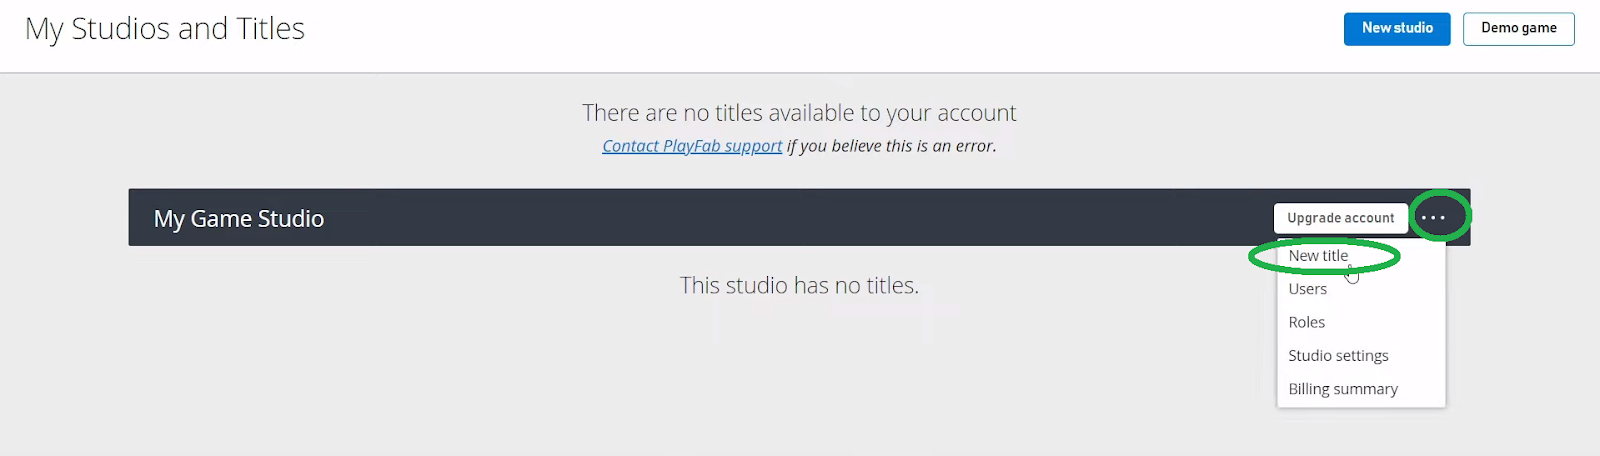
First, create a new studio. You can follow our lead and name it “My Game Studio”:

Next, click on the three dots in the “My Game Studio” menu and select “New title”:
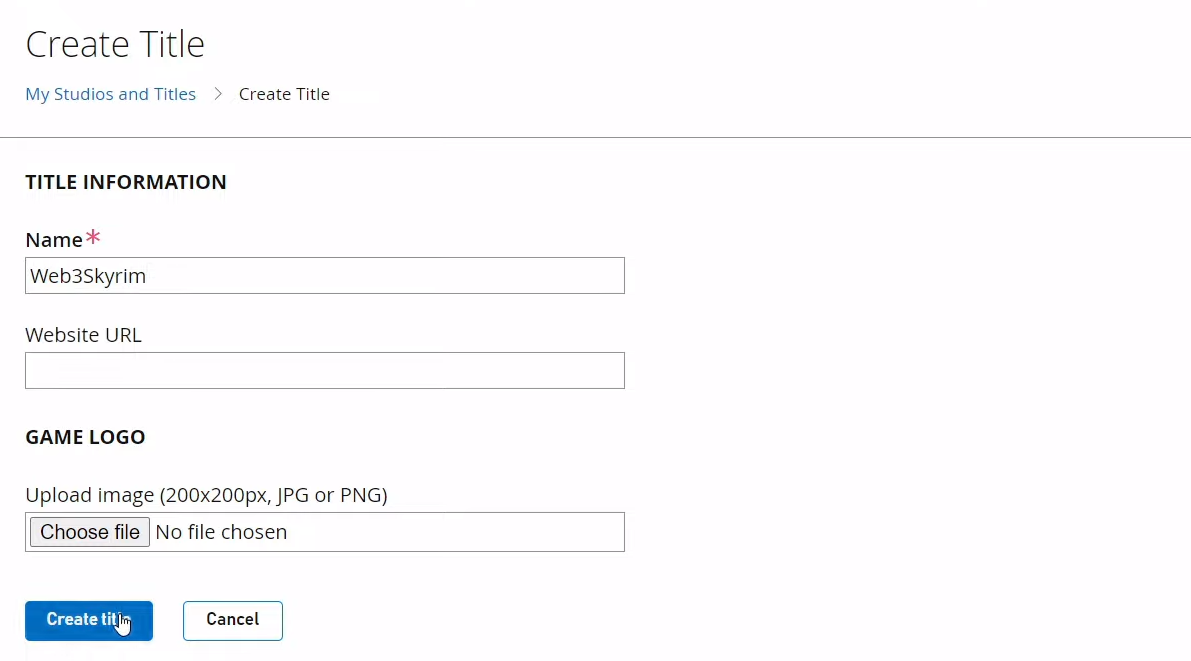
Then, enter the name and click on the “Create title” button:
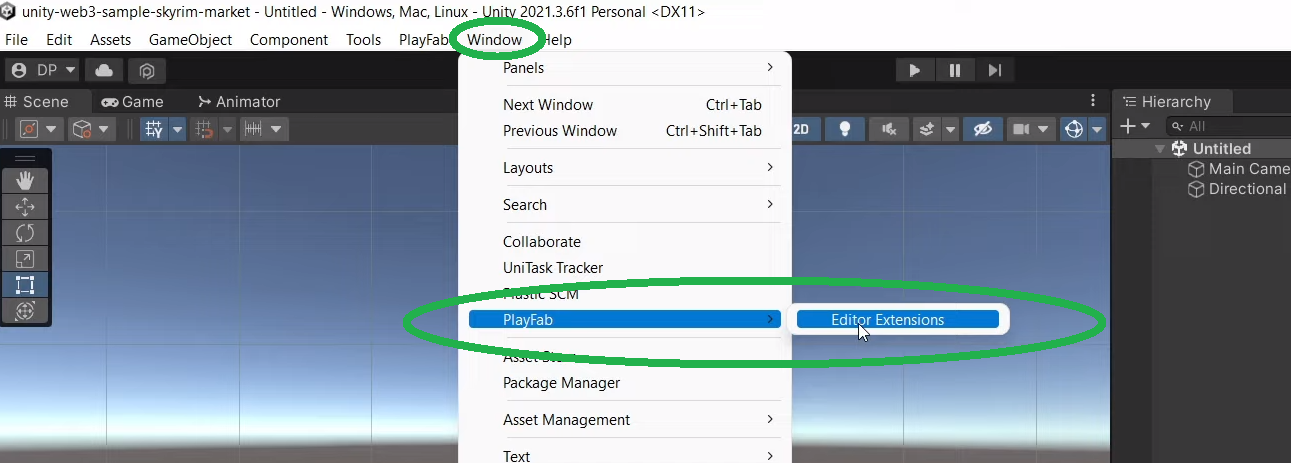
Moving forward, you need to go back to Unity and go to “Window” > “Playfab” and open “Editor Extensions”:
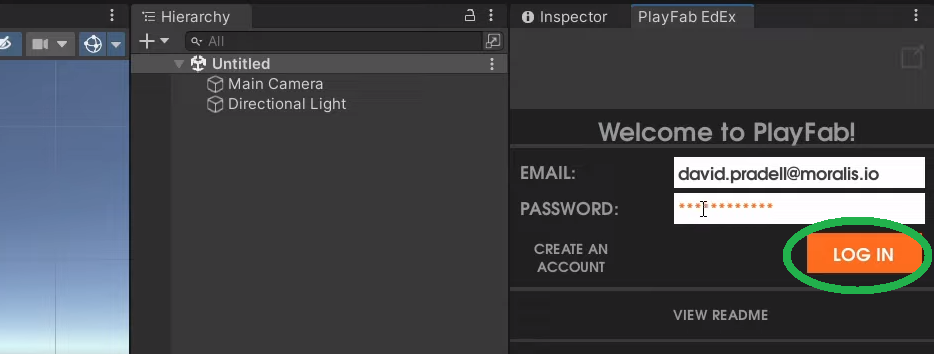
Next, click on “login”:

Then, enter your PlayFab credentials:
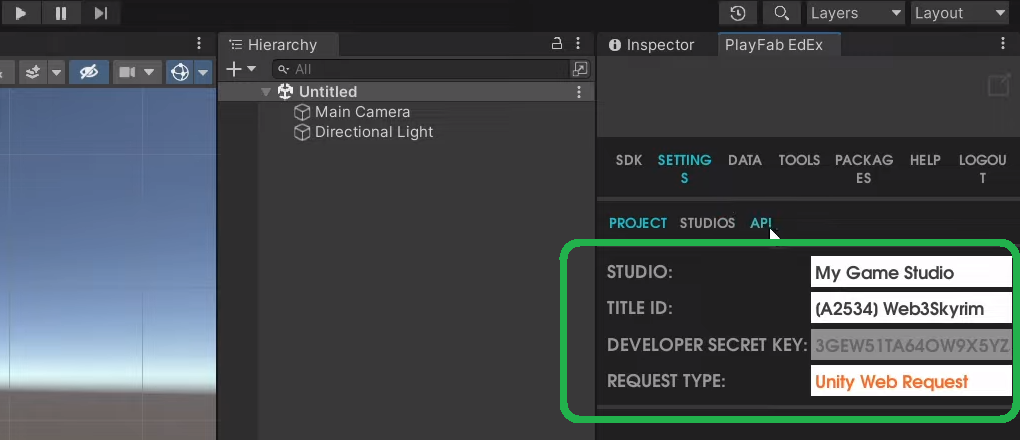
Once logged in, go to the “settings” tab and select your studio:
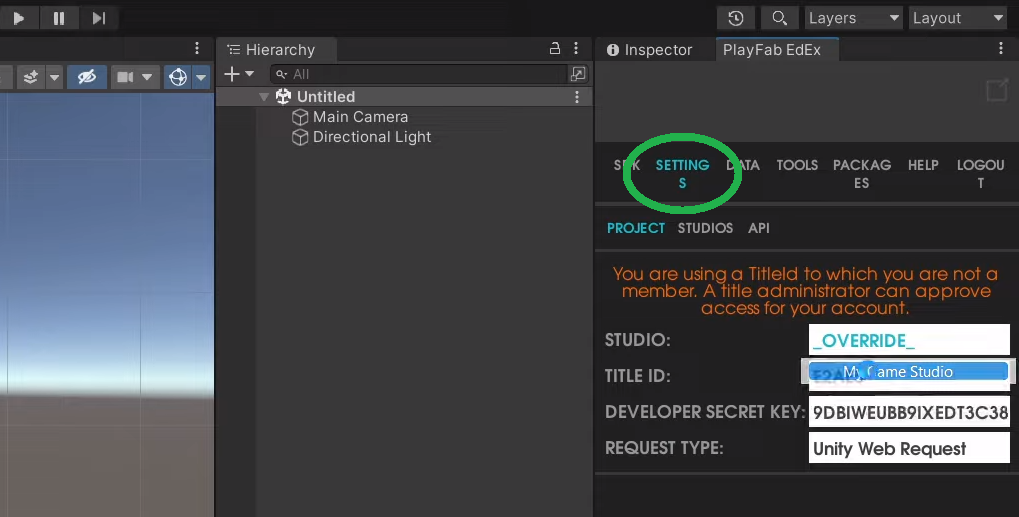
Moreover, make sure that the title ID matches the one you created above. Also, make sure to select “Unity Web Request” next to “request type”:
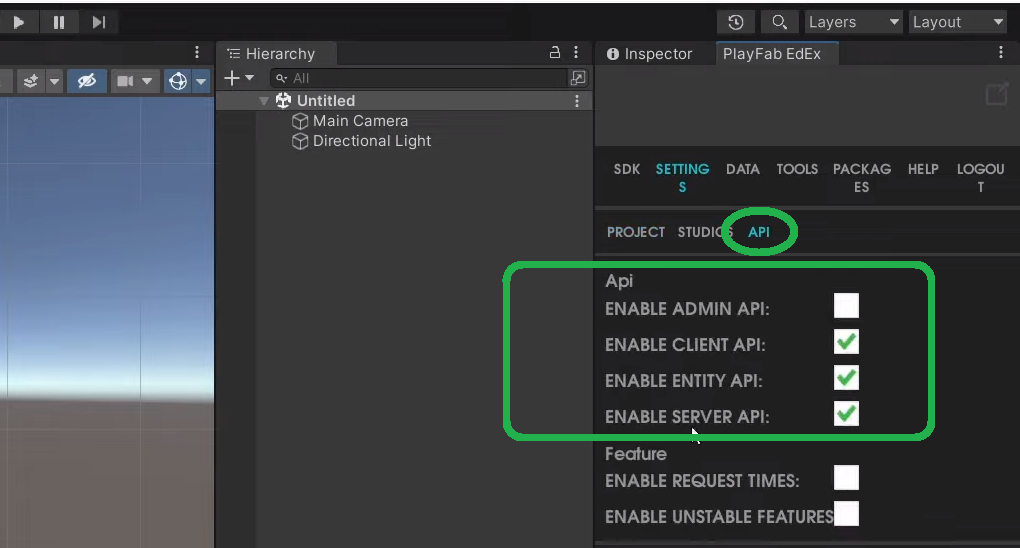
In addition, click on the “API” tab and make sure that you have all the following APIs enabled:
After completing the above setup, PlayFab is able to obtain all the users’ data, including their Web3 wallet addresses. To see how it accomplishes that, watch the video tutorial at the bottom of this article, starting at 8:53.
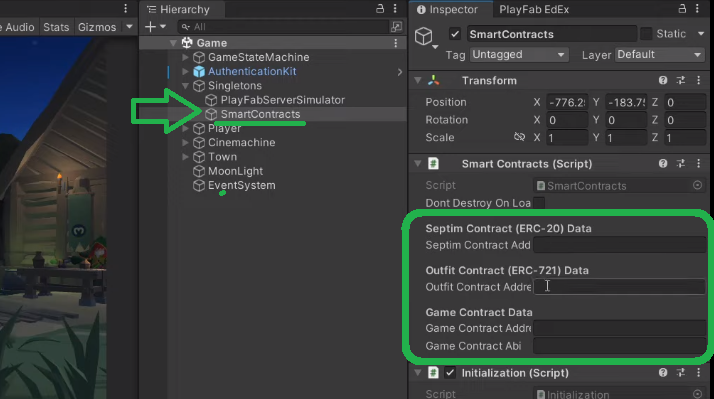
Smart Contracts to Buy NFT Outfits
As mentioned earlier, smart contracts are essential when implementing the “buy NFT outfits” feature. Fortunately, platforms such as OpenZeppelin provide verified smart contracts that we can use. However, for this example, you can use our smart contracts. Moreover, this is where you’ll learn to use Hardhat via Visual Studio Code (VSC). For detailed instructions, use the video below, starting at 10:59. This is also where you’ll learn where in Unity you need to enter your smart contracts’ details:
To use Hardhat efficiently, use the “Instructions.txt” file. Also, make sure to copy and delete the correct files (15:14). Starting at 16:07, you will get to look at the smart contracts in more detail. This is where you’ll also learn that in addition to the two contracts in charge of minting our in-game tokens, you will also deploy a third contract. The latter will ensure that your game properly communicates with the other two contracts.
After successfully deploying our smart contracts, you will take a closer look at the scripts behind our game (24:18). Our in-house expert will show you how to complete the necessary settings in your PlayFab dashboard. So, use the video below to properly implement the “buy NFT outfits” feature!
How to Buy NFT Outfits In-Game – Summary
We covered quite a distance in this article. After all, enabling players to buy NFT outfits is quite an advanced feature. However, if you followed our lead, you discovered how to use Moralis and PlayFab to do that quite effortlessly. Ultimately, you had to complete the following five stages:
- Initial Moralis (Web3) and PlayFab setup (Web2)
- Deploying smart contracts
- Implementing the “in-game-assets-to-ERC20-tokens” exchange functionality
- Establishing the NFT outfit shop functionality
- Applying NFT outfits to the avatar
If you enjoyed this tutorial, we encourage you to visit the Moralis YouTube channel and the Moralis blog. There you can find a ton of other Unity Web3 example projects. These are also the places to explore other Web3 development aspects. Essentially, you can use these two outlets to become a Web3 developer for free!
However, if you want to land a crypto job sooner rather than later, becoming blockchain certified can help greatly. As such, you may want to consider enrolling in Moralis Academy. Aside from top-tier blockchain development courses, this is the place to get a personalized study path and expert mentorship. This is also where you can join one of the most advancing communities in the industry!
