Are you looking for an easy and straightforward Web3 programming tutorial on creating decentralized applications (dapps)? If so, you are exactly where you need to be! This tutorial will show you how to create a NodeJS dapp from scratch, enabling you to get the native balance of any crypto address using Moralis. Furthermore, thanks to the accessibility of Moralis’ Token API and the “getNativeBalance” endpoint, you will be able to build this dapp in three short steps:
- Setting up the project and an Express server
- Adding Moralis
- Creating the “get native balance” function
However, before diving into the central part of this guide, we will begin by exploring the intricacies of Web3 programming tutorials. In doing so, you will learn what they entail, why they are beneficial, and what defines a good tutorial. From there, the article dives straight into this article’s Web3 programming tutorial, teaching you how to create an application in no time!
By completing this tutorial, you will learn how to set up a basic dapp allowing you to get the native balance of any crypto address. From there, you can combine your newly acquired skills with other Moralis tools to create more sophisticated projects. If this sounds interesting, check out the Web3 Streams API. With this tool, you can seamlessly stream on-chain data into the backend of your projects through Moralis webhooks.
Nevertheless, no matter what blockchain development journey you embark on, sign up with Moralis! The various Web3 APIs from Moralis facilitate a more seamless developer experience, enabling you to fully leverage the power of blockchain technology.
What is a Web3 Programming Tutorial?
A Web3 programming tutorial is – like a conventional tutorial – an account/explanation of a particular task or subject. However, the main difference between a traditional and a Web3 programming tutorial is that the latter is related to the blockchain development space. Consequently, a Web3 tutorial can teach you everything from the intricacies of a smart contract programming language such as Solidity or introduce you to the ins and outs of an Ethereum Web3 API!

To give you another prominent and highly relevant example, this Web3 programming tutorial will teach you how to create a dapp using Moralis and NodeJS. The functionality of the dapp is relatively straightforward. It will allow you to get the native cryptocurrency balance of a particular blockchain address. As such, by following along in this Web3 programming tutorial, you will learn how to create a Web3 application and explore the utility of one of the best blockchain infrastructure companies: Moralis!
If you want additional examples of Web3 programming tutorials, check out Moralis’ Web3 blog. The blog is full of excellent blockchain development content. For instance, explore the Sepolia testnet or get an introduction to danksharding.
Nonetheless, now that you are more familiar with what a Web3 programming tutorial entails, let us briefly explore why they are beneficial!
Why are Web3 Programming Tutorials Beneficial?
As a relatively new and unexplored development space, the entry barrier into Web3 can be quite high, which is why we need Web3 programming tutorials. Furthermore, many new and confusing concepts can be challenging to understand. For instance, someone just entering the space might not be familiar with smart contracts or dapps.
Through clear and informative Web3 programming tutorials, people can gain a more straightforward route into blockchain development. Moreover, programmers already proficient in Web3 development can share their knowledge through tutorials, which contributes positively to innovation within the space!
So, now that you know why Web3 programming tutorials are beneficial, what defines a good tutorial?
What Defines a Good Tutorial?
Web3 programming tutorials can vary, ranging from video guides to written tutorials. As you imagine, these various types require different characteristics to be defined as ”good”. However, we have summarized and outlined three central traits that most tutorials need:
- Informative – First, a Web3 programming tutorial must be informative. The tutorial needs to adequately cover the topic so that the reader learns everything in accordance with the learning objective.
- Clear Structure – Second, any tutorial needs to have a clear structure. This can, for instance, be achieved by dividing the tutorial into sections or steps. What’s more, it can also be a good idea to summarize and outline the structure of the tutorial in an introduction.
- Visuals – In combination with text or speech, it is highly beneficial to include visuals. This can be images, videos, etc., helping the reader/listener follow along as the tutorial progresses. Moreover, when it comes to programming tutorials, code snippets can be highly effective!
That covers three examples of key characteristics most tutorials need. Nevertheless, now that we have explored the intricacies of Web3 programming tutorials, let’s jump straight into the central part of this guide and show you how to create a dapp using Moralis!
Easy Web3 Programming Tutorial
With a better understanding of Web3 programming tutorials, we will walk you through one in the coming sections. Specifically, we will teach you how to set up a server-side NodeJS dapp enabling you to query the native balance of a crypto address in the following Web3 programming tutorial!
To make this tutorial as straightforward as possible, we will be using Moralis and the Token API. In doing so, you will be able to fetch the native token balance with a single API call to the ”getNativeBalance” endpoint. Also, as mentioned earlier in this article, thanks to the power of Moralis, we can divide the tutorial into three straightforward steps:
- Setting up the project and an Express server
- Adding Moralis
- Creating the “get native balance” function
By covering the steps above, you will learn how to create your first dapp, and you can then apply the same principles to create more advanced projects in the future. However, before jumping straight into the first step of the tutorial, you need to cover a few prerequisites!
Get Started: Prerequisites
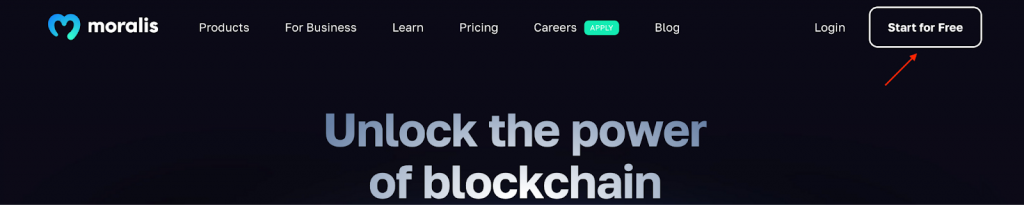
Before getting started with the dapp itself, there are a few prerequisites you need to take care of. First of all, you must have an active Moralis account. So, if you still need to, visit the following link and sign up with moralis immediately: “https://admin.moralis.io/register”.
With a Moralis account at hand, you must install and set up an editor/IDE of your choice. For this tutorial, we will be using Visual Studio Code (VSC); however, you can pick any IDE you prefer. Please be aware that by opting for another alternative, the process might differ slightly on occasion.
Lastly, before jumping into the first step of this Web3 programming tutorial, you must install NodeJS. To do so, click on the following link, select the latest version of NodeJS, and follow the instructions: “https://nodejs.org/en/”.
That covers the prerequisites of this tutorial. It is now time for the first step, where we will show you how to set up the project and create an Express server!
Step 1: Setting Up the Project and an Express Server
To kickstart this Web3 programming tutorial, go ahead and create a new project folder and open it with your IDE. Next, you’ll want to initialize a new project via the ”npm” command. To do so, open a new terminal and run the following:
npm init
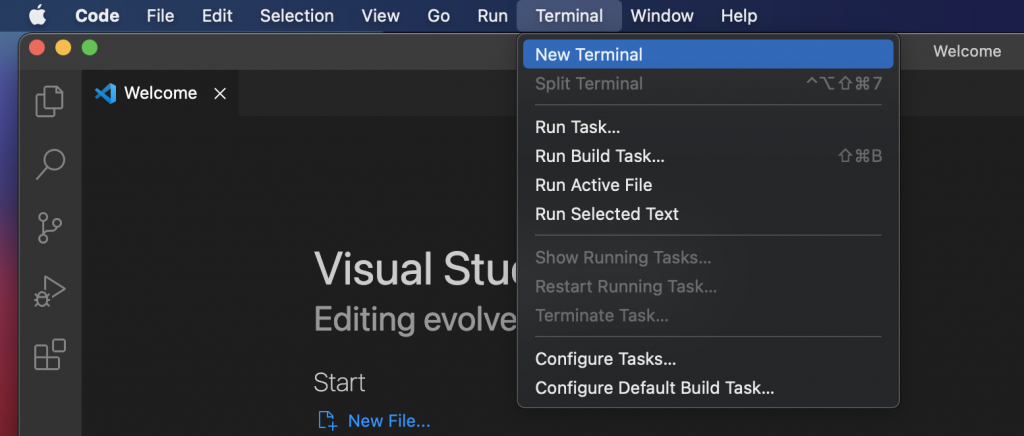
If you opted for VSC, launch a new terminal by clicking on ”Terminal” at the top, followed by ”New Terminal”:
Once you run the aforementioned command, you should find a ”package.json” file in your project’s root folder. It should look something like this:
{
  "name": "simple-nodejs-demo",
  "version": "1.0.0",
  "description": "",
  "main": "index.js",
  "scripts": {
    "test": "echo \"Error: no test specified\" && exit 1"
  },
  "author": "",
  "license": "ISC"
}
From there, you can once again navigate to the terminal to install the ”express” and ”moralis” dependencies by inputting the following and hitting enter:
npm install moralis express @moralisweb3/common-evm-utils
Next, you can set up the Express server. To do so, create a new ”index.js” file and input the contents below:
const express = require('express')
const app = express()
const port = 3000

app.get('/', (req, res) => {
  res.send('Hello World!')
})

app.listen(port, () => {
  console.log(`Example app listening on port ${port}`)
})
Finally, open the ”package.json” file and add a new script called ”start”:
"scripts": {
  "start": "node index.js"
}
You should now be able to run the server through the following terminal input:
npm run start
You can ensure everything works as intended by clicking on this link: “http://localhost:3000“. Moreover, it should display a ”Hello World!” message.
Now that you have created your Express server and ensured that it works, let’s move on to the next step in this tutorial, where we will show you how to add Moralis to the project!
Step 2: Adding Moralis
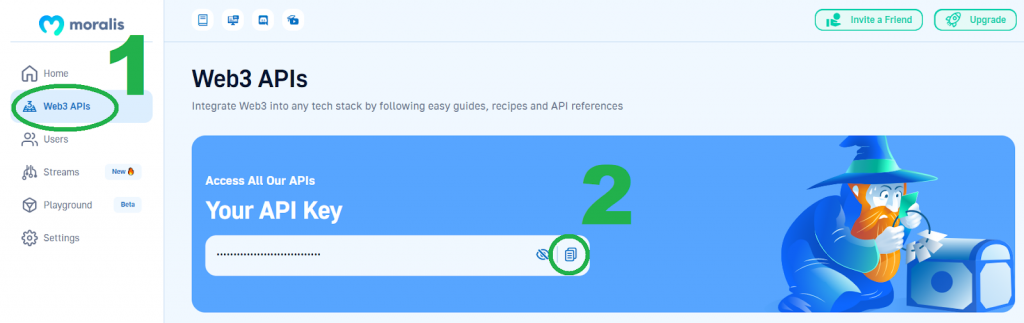
With your Express server up and running, the next step is to add Moralis to your project. In order to do so, you must add a suitable API key. That is why you had to join Moralis since Moralis provides the key. Nevertheless, to get the key, log in to the admin panel, click on the ”Web3 APIs” tab, and copy it:
From there, navigate to the ”index.js” file in your IDE and replace its contents with the following snippet (it includes the code for the Express server):
const express = require('express')
// Import Moralis
const Moralis = require('moralis').default
// Import the EvmChain dataType
const { EvmChain } = require("@moralisweb3/common-evm-utils")

const app = express()
const port = 3000

// Add a variable for the API key, address, and chain
const MORALIS_API_KEY = "replace_me"
const address = "replace_me"
const chain = EvmChain.ETHEREUM

app.get('/', (req, res) => {
  res.send('Hello World!')
})

// Add this a startServer function that initializes Moralis
const startServer = async () => {
  await Moralis.start({
    apiKey: MORALIS_API_KEY,
  })

  app.listen(port, () => {
    console.log(`Example app listening on port ${port}`)
  })
}

// Call startServer()
startServer()
Before proceeding, you need to make a few configurations to this code. First, make sure to add your Moralis API key to the ”MORALIS_API_KEY” variable by replacing ”replace_me”. Next up, do the same for the ”address” variable by inputting the crypto address you want to get data from. Finally, you can configure the ”chain” variable if you want to query another network rather than Ethereum. Check out Moralis’ supported chains if you want more information on this!
Nevertheless, that covers the process of adding Moralis to your project. All that remains from here is creating the functionality for getting the native balance of the crypto address!
Step 3: Creating the “Get Native Balance” Function
With Moralis added to the project, the last thing we have to do is create the function responsible for fetching the native balance of the address from the previous step. As such, go to the ”index.js” file and add the following ”getDemoData()” function below the ”chain” variable:
async function getDemoData() {
  // Get native balance
  const nativeBalance = await Moralis.EvmApi.balance.getNativeBalance({
    address,
    chain,
  })

  // Format the native balance formatted in ether via the .ether getter
  const native = nativeBalance.result.balance.ether

  return { native }
}
In this function, we call Moralis’ ”getNativeBalance” endpoint using the ”address” and ”chain” variables as arguments. We then get the native balance from the ”nativeBalance” object, store it in the ”native” variable, and finally return it.
From there, you also need to add the ”/crypto-data” endpoint directly below the function:
app.get("/demo", async (req, res) => {
  try {
    // Get and return the crypto data
    const data = await getDemoData()
    res.status(200)
    res.json(data)
  } catch (error) {
    // Handle errors
    console.error(error)
    res.status(500)
    res.json({ error: error.message })
  }
})
All in all, your ”index.js” file should now look something like this:
const express = require("express")
const Moralis = require("moralis").default
const { EvmChain } = require("@moralisweb3/common-evm-utils")

const app = express()
const port = 3000

const MORALIS_API_KEY = "replace_me"
const address = "0x9e8f0f8f8f8f8f8f8f8f8f8f8f8f8f8f8f8f8f8f"
const chain = EvmChain.ETHEREUM

async function getDemoData() {
  // Get native balance
  const nativeBalance = await Moralis.EvmApi.balance.getNativeBalance({
    address,
    chain,
  })

  // Format the native balance formatted in ether via the .ether getter
  const native = nativeBalance.result.balance.ether

  return { native }
}

app.get("/demo", async (req, res) => {
  try {

    // Get and return the crypto data
    const data = await getDemoData()
    res.status(200)
    res.json(data)
  } catch (error) {
    // Handle errors
    console.error(error)
    res.status(500)
    res.json({ error: error.message })
  }
})

const startServer = async () => {
  await Moralis.start({
    apiKey: MORALIS_API_KEY,
  })

  app.listen(port, () => {
    console.log(`Example app listening on port ${port}`)
  })
}

startServer()
To try it out, you can now call this endpoint using the following link: “http://localhost:3000/demo”. Opening this link should display an object with the native balance as a response:
{
    "native": "0.169421625822962794"
}
Congratulations, you have now covered the entire Web3 programming tutorial! As such, you now know how to create a dapp using Moralis. From here, you can customize the project in any way you want to build more sophisticated dapps!
However, if questions remain associated with this tutorial, check out the official build your first dapp with NodeJS documentation page. Not only will this answer any of your queries, but it will also show you how to get any token price or get token metadata!
Summary – Easy Web3 Programming Tutorial
In this Web3 programming tutorial, we taught you how to create a straightforward dapp, allowing you to get the native balance of any crypto address. Furthermore, thanks to the accessibility of Moralis, you were able to create this application in three steps:
- Setting up the project and an Express server
- Adding Moralis
- Creating the “get native balance” function
During this tutorial, you used Moralis’ Token API and the ”getNativeBalance” endpoint. However, this is only one use case for this application programming interface. As such, you can learn more about this amazing development tool by checking out our article on the best token price API in 2023!
Nevertheless, if you found this Web3 programming tutorial informative, make sure to check out additional Moralis content. For example, learn how to use ethers.js or check out the ultimate guide to token metadata!
What’s more, if you have ambitions to become a blockchain developer, consider enrolling in Moralis Academy. The academy offers excellent development courses for experienced and novice developers. For instance, check out the course exploring crypto for beginners.
Remember to sign up with Moralis if you want to create dapps (decentralized applications). Creating an account is free and only takes a few seconds, so you have nothing to lose!
