Thanks to Moralis’ Python SDK, integrating blockchain functionality into Python projects is an effortless process! Want to find out how to utilize the SDK to add this functionality? Follow along as this Web3 py tutorial explores the entire process from start to finish! In short, with the help of Moralis and the SDK, you can integrate Web3 into Python in two steps:
- Install the Python SDK from Moralis by running the following command in your terminal:
pip install moralis
- Make a Moralis API call. In the code snippet below, you will find an example of what the code might look like for fetching the native balance of a wallet:
from moralis import evm_api

api_key = "YOUR_API_KEY"

params = {
    "address": "0xd8da6bf26964af9d7eed9e03e53415d37aa96045",
    "chain": "eth",
}

result = evm_api.balance.get_native_balance(
    api_key=api_key,
    params=params,
)

print(result)
Check out Moralis’ official Web3 Python SDK documentation for additional information about the development kit! Moreover, by signing up with Moralis, you can start utilizing the code immediately. However, if you need further guidance on utilizing the above code snippet, complete this Web3 py tutorial!
Overview
In this tutorial, you will learn how to integrate blockchain functionality into your Python projects. Specifically, the tutorial will teach you how to create a straightforward application featuring two central components: a Python Flask backend app and a frontend React application. However, the core focus is directed toward the backend, as this is where you will learn the fundamental principles of combining Web3 and Python!
Moreover, thanks to Moralis and the Python SDK, you can create this app in only three straightforward steps:
- Create the Python Flask Application
- Start the App
- Set Up the React Application
If this sounds interesting, stay with us through this Web3 py tutorial!
Now, the Python SDK is only one of Moralis’ excellent development tools, and if you are serious about getting into blockchain development, we recommend you explore additional examples. For instance, check out the Streams API – one of Moralis’ many Web3 APIs. With this tool, you can easily stream on-chain data into the backend of your projects via Moralis webhooks!
Nevertheless, if you plan on following along during this Web3 py tutorial, join Moralis by creating an account, as you need an account to complete the journey herein!
Exploring Web3 Py – What is it?
Python is a general-purpose, object-oriented programming language featuring an abundance of different use cases. The general-purpose characteristic of Python makes the language flexible. That means developers can use it to create everything from machine learning projects to more straightforward web applications. In addition, Python has an easy-to-learn syntax, making this a top choice for emerging developers as this is an easy language to adopt.
The previous paragraph briefly summarizes what Python entails; however, what does it mean in the context of Web3? First, there are many similarities between Web2 and Web3 Python development, and the language does not change all that much. But, if you come straight from traditional Web2 development, there are a few minor differences you should consider.
First up, you might want to become familiar with the ”Web3.py” library. This is a Web3 Python library enabling you to interact more seamlessly with the Ethereum network. Furthermore, it facilitates a more accessible developer process, allowing you to use Python for Ethereum development.
Other than libraries, there are additional Web3 development tools and platforms you want to check out if you are getting into Web3 py. For instance, you must take advantage of Moralis, an industry-leading Web3 infrastructure provider. With Moralis, you gain access to Web3 APIs, SDKs, and much more, providing a more straightforward developer experience. Among Moralis’ features, you will find the Python SDK. With this development kit, you can easily integrate Web3 functionality into any of your Python applications. If you want to learn more about this amazing development tool, join us in the following sections of this Python and Web3 tutorial!
Application Demo – Web3 Py Tutorial Results
During this Web3 py tutorial, you will learn how to create an application allowing users to sign in with MetaMask. However, before breaking down this tutorial, we will provide a quick application demo. In doing so, you will gain a more profound understanding of what you will be working toward, making it easier to recognize what the underlying code eventually does. So, with no further ado, here is a print screen of the app’s landing page:

As you can see from the image, the app’s user interface (UI) features two core elements: a heading and a button with a ”Login” label. By clicking on this button, it autonomously triggers your MetaMask, prompting you to connect your wallet. As soon as you connect your wallet, the app sends a request to the Python backend, asking Moralis’ API to create a new Web3 login challenge.
Next up, the app sends another request responsible for validating the signature. If they match, a new user ID is generated and then displayed on the UI:
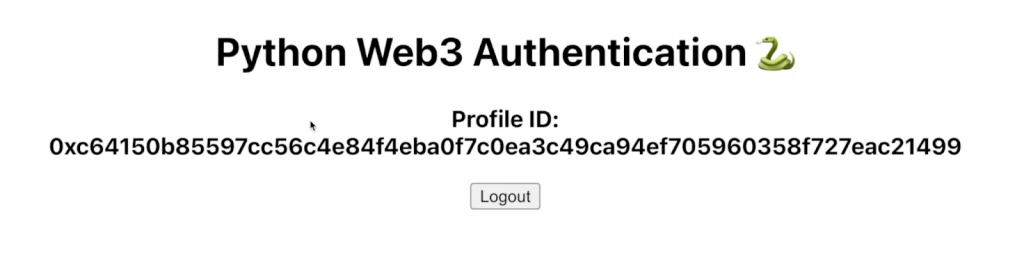
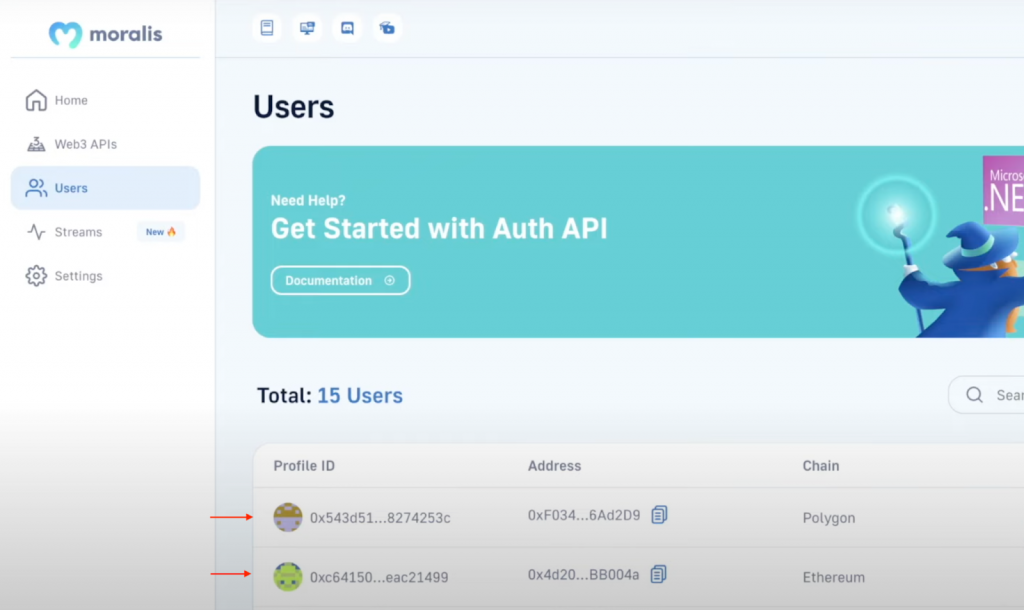
When you successfully authenticate, the app utilizes the ID to generate a new user and adds it to Moralis. Consequently, you can log in to the Moralis admin panel and view all users that have signed in under the ”Users” tab:
Now that’s it for this brief demo! Let us now jump straight into the Web3 py tutorial to show you how to create this application!
Web3 Py Tutorial
Now that you have familiarized yourself with what you will work towards, the following sections will teach you how to create the application from the previous section using Moralis and the Python SDK. As mentioned earlier, this app consists of two core components: a Python Flask backend application and a React frontend app.
The central part of this Web3 py tutorial is the Python Flask app. This app takes care of the logic for handling a Web3 authentication flow, allowing users to sign in with their MetaMask wallets. This is also where most of our focus is directed throughout the tutorial. However, to test out the backend, you will also learn how to set up the frontend app. From it, we will call the endpoints and test the Web3 authentication mechanism.
Although we outlined the steps earlier on how to complete this project, here is a brief reminder of them:
- Create the Python Flask Application
- Start the App
- Set Up the React Application
By completing the three steps of this Web3 py tutorial, you will learn how to set up a Web3 Python backend application for handling Web3 authentication flows! Nevertheless, with no further ado, let us jump straight into the first step and closely examine how to create the Python Flask application!
Step 1: Create the Python Flask Application
Before jumping into the Python Flask application code, this initial part of the Web3 py tutorial illustrates how to set up the barebones state of the project. As such, to begin with, open your integrated development environment (IDE) and create a Python folder.
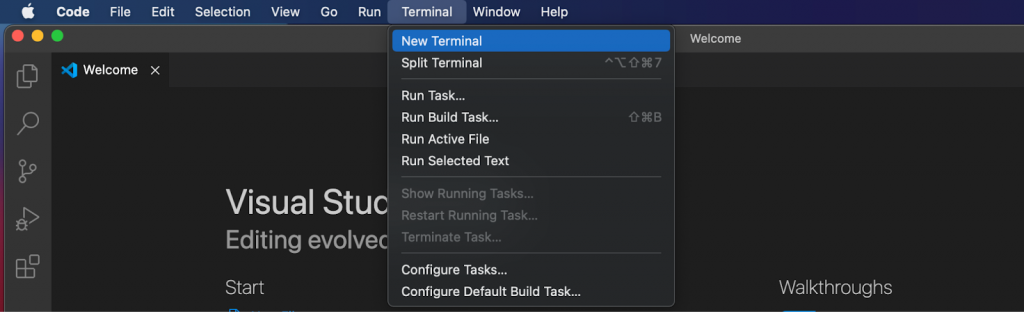
Furthermore, throughout this Web3 py tutorial, we will utilize Visual Studio Code (VSC). As such, if you prefer using another IDE, take into account that the process might differ sometimes. Nevertheless, with an empty project folder at your disposal, go ahead and launch a new terminal. If you, like us, are using VSC, click on the ”Terminal” tab at the top, followed by ”New Terminal”:
Next up, you need to ”cd” into the project’s root folder and run the following:
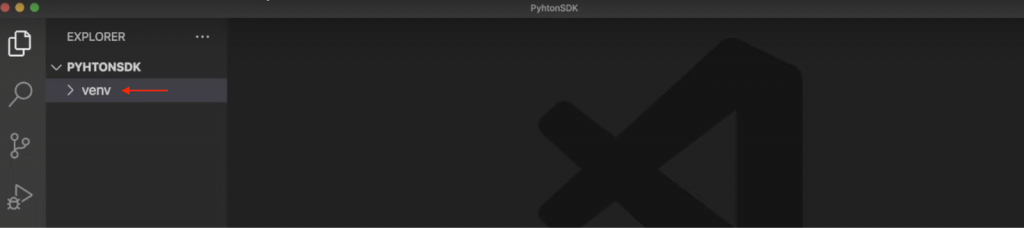
python3 -m venv venv
This will set up a virtual environment, and you should now find a folder called ”venv” in your local directory:
From there, initialize this virtual environment by inputting the command below into the terminal and hitting enter:
source venv/bin/activate
Once the environment has been initialized, make sure that you have the latest versions of ”pip” through this terminal input:
pip install --upgrade pip
Finally, to conclude the initial setup of the barebones state of the project, you need to install the required dependencies. There are three in total, and you can install them by running the commands below in consecutive order:
pip install flask
pip install flask_cors
pip install moralis
With the basic template for your project at hand, the next sub-section breaks down the code you need to implement to make the backend application work as intended!
Application Code
With the project all set up, we will take this sub-section of the Web3 py tutorial to explore the application code. As such, create a new ”app.py” file in the project’s root folder. Then, start by importing the necessary dependencies at the top:
from flask import Flask
from flask import request
from moralis import auth
from flask_cors import CORS
From there, initialize the app and wrap the app in ”CORS”. To do so, add this snippet of code below the imports:
app = Flask(__name__)
CORS(app)
Next up, create a new variable for your Moralis API key:
api_key = "xxx"
However, as you might have figured, you need to replace ”xxx” with your key. To get it, sign up with Moralis and log in to the admin panel. You can then find the key by navigating to the ”Web3 APIs” tab:
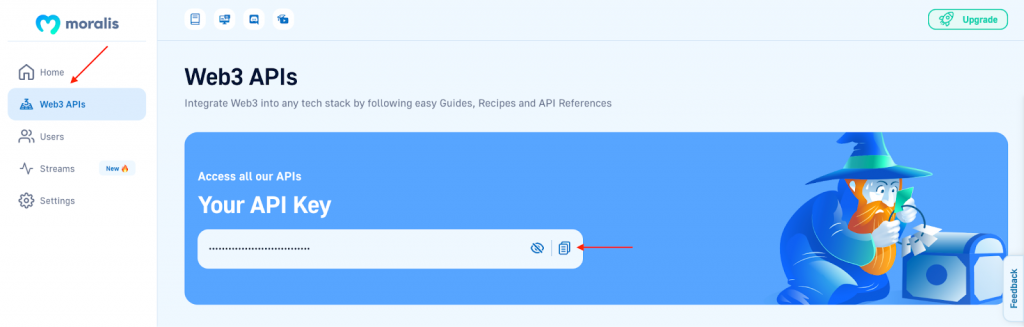
From there, you now need to create two routes that are responsible for handling the backend application logic!
Route – “/requestChallenge”
This initial route is responsible for requesting a challenge whenever a user wants to authenticate. The central part of this route is the ”reqChallenge()” function. Further, this function initially fetches the request arguments, sets up a new ”body” variable, acquires the results from the ”/requestChallenge” endpoint, and finally delivers the results to the client:
@app.route('/requestChallenge', methods=["GET"])
def reqChallenge():

    args = request.args
    body = {
        "domain": "my.dapp",
        "chainId": args.get("chainId"),
        "address": args.get("address"),
        "statement": "Please confirm login",
        "uri": "https://my.dapp/",
        "expirationTime": "2023-01-01T00:00:00.000Z",
        "notBefore": "2020-01-01T00:00:00.000Z",
        "resources": ['https://docs.moralis.io/'],
        "timeout": 30,
    }

    result = auth.challenge.request_challenge_evm(
        api_key=api_key,
        body=body,
    )

    return result
Route – “/verifyChallenge”
The second route is responsible for verifying the messages signed by users. This route contains the ”verifyChallenge()” function, which is responsible for getting the arguments from the requests, creating new ”body” variables, fetching the results from Moralis’ Auth API, and returning the results to the clients:
@app.route('/verifyChallenge', methods=["GET"])
def verifyChallenge():

    args = request.args
    body={
        "message": args.get("message"),
        "signature": args.get("signature"),
    }

    result = auth.challenge.verify_challenge_evm(
        api_key=api_key,
        body=body
    )

    return result
Finally, after the two routes, you need to specify where you want to run the application. To do so, input the following:
if __name__ == "__main__":
    app.run(host="127.0.0.1", port=3000, debug=True)
Nevertheless, that’s it for the application code! You should now have a file with code similar to the one shown below:
from flask import Flask
from flask import request
from moralis import auth
from flask_cors import CORS

app = Flask(__name__)
CORS(app)

api_key = "xxx"

@app.route('/requestChallenge', methods=["GET"])
def reqChallenge():

    args = request.args
    body = {
        "domain": "my.dapp",
        "chainId": args.get("chainId"),
        "address": args.get("address"),
        "statement": "Please confirm login",
        "uri": "https://my.dapp/",
        "expirationTime": "2023-01-01T00:00:00.000Z",
        "notBefore": "2020-01-01T00:00:00.000Z",
        "resources": ['https://docs.moralis.io/'],
        "timeout": 30,
    }

    result = auth.challenge.request_challenge_evm(
        api_key=api_key,
        body=body,
    )

    return result


@app.route('/verifyChallenge', methods=["GET"])
def verifyChallenge():

    args = request.args
    body={
        "message": args.get("message"),
        "signature": args.get("signature"),
    }

    result = auth.challenge.verify_challenge_evm(
        api_key=api_key,
        body=body
    )

    return result


if __name__ == "__main__":
    app.run(host="127.0.0.1", port=3000, debug=True)
Step 2: Start the App
With all the code added to the project, that concludes the initial step of this Web3 py tutorial. Now, in this second step, we will show you how to run the application. Running the app is easy, just open a new terminal, input the following command, and hit enter:
python3 app.py
Once you run the command above, it autonomously spins up your application on “localhost 3000” since this is what you specified in the first step. Consequently, you now know how Web3 py works and can create a backend application handling the logic for a Web3 authentication flow! However, let us also take a closer look at the third step of this Web3 py tutorial, where we will illustrate how to easily set up a React application for testing the endpoints and using the Web3 authentication flow in practice!
Step 3: Set Up the React Application
Now that you have completed the initial two steps of the Web3 py tutorial and know how to create a Web3 backend Python application, let us jump straight into the third step. This section will show you how to set up a straightforward React application for calling the endpoints and implementing the Web3 authentication flow in practice!
To make this more accessible, we have already built a React application that you can utilize. Hence, you only need to visit the GitHub repo below and clone the project to your device:
Full Web3 Py Tutorial Documentation – https://github.com/MoralisWeb3/youtube-tutorials/tree/main/Web3AuthPython
With a local copy of the repository, you should now have a similar file structure in your IDE as the one in the print screen below:
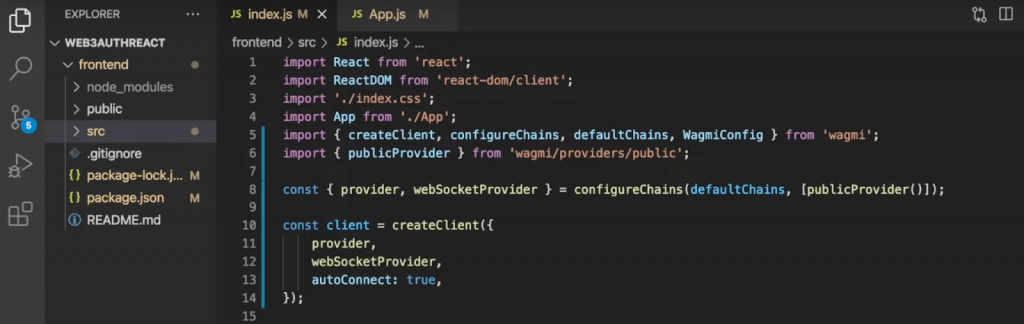
Finally, all that remains from here is starting the app. In order to do so, open a terminal and run this command:
npm run start
That’s it! Congratulations! You have now completed the three steps of this Web3 py tutorial! From here, you should now be able to launch the React frontend application and test it out to make sure everything works as intended!
If you are looking for a more detailed breakdown of the entire process and frontend code, check out the video below from the Moralis YouTube channel. In this clip, one of Moralis’ software engineers provides an even more extensive walkthrough of the entire Web3 py tutorial from start to finish:
Additionally, you can also check out the official Web3 Python SDK documentation for more information on the development kit’s capabilities!
Ultimate Web3 Py Tutorial – Summary
In this Web3 py tutorial, we taught you how to create an application allowing users to sign in with their MetaMask wallets. The application consisted of two core components: a backend Python application and a frontend React application. What’s more, thanks to Moralis’ Python SDK, you were able to create this app in only three steps:
- Create the Python Flask Application
- Start the App
- Set Up the React Application
If you have followed along this far, you now know how to implement Web3 functionality into Python applications!

If this tutorial for py development was helpful, consider checking out additional Moralis articles here on the Web3 blog. For instance, learn to get NFT collections using Python or set up automated Web3 notification emails! What’s more, do not forget to sign up with Moralis if you are looking to become a Web3 developer. Creating an account is free and only takes a couple of seconds, so you have nothing to lose!
