Are you looking to get into Web3 Ethereum Python development? If so, you should familiarize yourself with Moralis’ Python SDK! Thanks to this development kit, you can seamlessly integrate blockchain functionality into all your Python projects in only two steps:
- Install Moralis’ Python SDK with the following terminal command:
pip install moralis
- Make a Moralis API call. Down below, you will find an example of what it can look like for querying NFT metadata:
import json
from moralis import evm_api

api_key = "YOUR_API_KEY"

params = {
    "address": "0xb47e3cd837dDF8e4c57F05d70Ab865de6e193BBB",
    "token_id": "3931",
    "chain": "eth",
    "format": "decimal",
    "normalizeMetadata": True,
}

result = evm_api.nft.get_nft_metadata(
    api_key=api_key,
    params=params,
)

print(json.dumps(result, indent=4))
If you want additional examples and details regarding the SDK, check out Moralis’ official Web3 Python SDK documentation. Otherwise, join us in this tutorial as we cover all steps needed for building a Web3 Ethereum Python application to show the SDK in action!
Overview
Python is one of today’s most popular programming languages, and in this tutorial, we will show you how to integrate Web3 and blockchain functionality into Python projects with Moralis. Specifically, you will learn how to create an application where users can sign in with their Web3 wallets. Furthermore, you will learn how to handle Web3 authentication flows using Python by following along. Thanks to Moralis’ Python SDK, you will be able to create this application in only three straightforward steps:
- Build a Python Flask App
- Start the Application
- Set Up a React Frontend App
Before diving into the central part of this tutorial, we will cover the basics by exploring the intricacies of Python. In turn, you will discover what the programming language entails and why developers use Python for Ethereum development. However, if you are already familiar with this, feel free to skip straight into the ”Build a Web3 Ethereum Python App with Moralis” section of this article!
In combination with the Python SDK, you will also learn more about Moralis’ Auth API, which is used to integrate MetaMask authentication. Moreover, thanks to the Auth API, you can integrate many other authentication methods with only single code snippets. If this sounds interesting, check out our guides on how to add Coinbase Wallet login functionality or add a sign in with RainbowKit.
Nevertheless, before moving forward, sign up with Moralis, as you need an account to follow along. With an account, you can fully leverage the power of blockchain technology in all future Web3 development endeavors!
Exploring Python for Development
Python is one of the most popular programming languages used by developers all over the world. It is intuitive and easy to use, making it one of the top choices among both new and more experienced developers. Moreover, Python is a so-called ”general-purpose” language. As a result, it has many different use cases!
In fact, Python can be used for everything from machine learning to creating straightforward applications, and here are a few other examples:
- Data Science
- Web Development
- Computer Graphics
- Game Development
- Security Testing
The abundant number of use cases suggests that Python is relatively flexible, which is one of the language’s most significant benefits. As a result, it is possible to utilize Python in several different industries, ranging from finance and trading to scientific and mathematical computing. Consequently, proficiency in Python can be highly beneficial as it opens many doors and development opportunities.
Nevertheless, let us dive deeper into this programming language to better understand it in the following section, where we briefly answer the question, ”what is Python?”.
Python – What is it?
Python features dynamic semantics, high-level data structures, dynamic typing, dynamic binding, etc. Furthermore, it’s a high-level, object-oriented programming language with an easy-to-learn syntax emphasizing readability. Hence, it is one of the easiest languages to learn, contributing to Python’s high adoption.
Python has many benefits and advantages. In the following list, you will find three excellent examples:
- Modules and Libraries – Python features support packages and modules, enabling code reuse and program modularity.
- Community – The programming language has an extensive community of developers contributing to the significant pool of libraries and modules.
- Open-Source – Python is open-source. As such, you can both use and distribute the language for free, including in commercial contexts.
As we previously covered in the preceding section, Python is a so-called general-purpose programming language. As such, it has abundant use cases, ranging from creating straightforward applications to machine learning.
That covers this brief overview of Python. In the next section, we will look closely at why you should use Python for Ethereum development!
Why Use Python for Ethereum Development?
To understand why developers use Python for Ethereum development, we need to return to the benefits of this programming language. As such, let us explore three advantages of Python when it comes to Web3 development!
- Easy to Learn – Python is, as we previously touched on, an intuitive programming language. Consequently, it is easy for Web3 developers to learn and quickly master, making it easier for less experienced developers to contribute to the blockchain ecosystem.
- Python Can be Compiled or Uncompiled – Python simplifies Web3 developers’ lives as it is a scripted language, meaning it does not require compilation to be understood by machines.
- Packages and Libraries – Another reason for choosing Python in Ethereum development is that the language features free packages and libraries. As such, developers can easily use Python to write Web3-compatible code.
The benefits above are only a few examples, and there are several other reasons why you should use Python for Ethereum development. Make sure to explore them on your own!
How to Get Started
The easiest way to get into Web3 Ethereum Python development is with Moralis. Moralis is one of the best Web3 infrastructure providers offering enterprise-grade development tools such as SDKs, Web3 APIs, etc. Among these amazing development tools, you will find Moralis’ Python SDK!
The SDK is the ultimate Ethereum development tool, allowing you to integrate Web3 functionality into all your Python projects seamlessly. Also, thanks to Moralis’ interoperability capabilities, you can combine this development kit with any other Web3 APIs to create more complex projects on multiple chains. Moreover, the Python SDK has many use cases, including fetching native balances, all NFTs from a collection, NFTs from a wallet, NFT metadata, and much more. Consequently, with the SDK, your Web3 Ethereum Python development endeavors become more accessible!
Nonetheless, if you want to learn more about how the Python SDK works, follow along in the next section, where we show you how to build a Web3 Ethereum Python app with Moralis in only three steps!
Build a Web3 Ethereum Python App with Moralis
Now that you are more familiar with the tools required to get started with Web3 Ethereum Python development, this section will show you how to create a straightforward Web3 Python Flask app. The application is responsible for handling an authentication flow, allowing users to log in with their MetaMask wallets. In combination with the Python Flask application, you will also learn how to quickly set up a React frontend app for testing the auth flow in action. Nevertheless, thanks to Moralis and the Python SDK, you can create this application in only three steps:
- Build a Python Flask App
- Start the Application
- Set Up a React Frontend App
By completing the steps above, you can create a straightforward Web3 Ethereum Python Flask application in no time! Moreover, you will learn how to handle Web3 authentication flows and make API calls via the Python Flask server application. From there, you can apply the same principles in future development endeavors to seamlessly add various authentication methods to all your Web3 projects!
Nonetheless, before jumping into the first step of this tutorial, the following section closely examines the app you are about to create. Doing so will give you a more profound understanding of what you are working towards!
Demo – How Does the Web3 Ethereum Python App Work?
Before jumping into the first step of this tutorial, this section provides a quick demo of the Web3 Ethereum Python app. Consequently, you will get a better understanding of what we are working towards. Nonetheless, here is the app’s landing page:

The landing page features two elements: a ”Python Web3 Authentication” heading and a ”Login” button. Pressing the ”Login” button will automatically prompt your MetaMask wallet, asking you to sign a message. When you successfully connect your account, a ”challenge” request is sent to the application’s backend, asking Moralis’ Auth API to create a new Web3 login challenge.
Next up, an additional request is sent from the application to validate the signature. If it matches, it autonomously generates a new ID, which is displayed to the users:
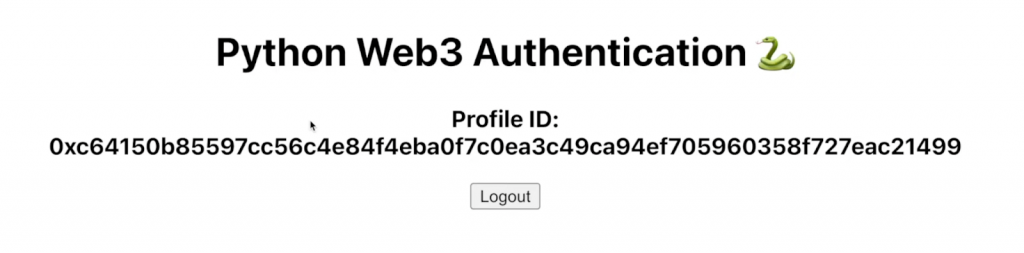
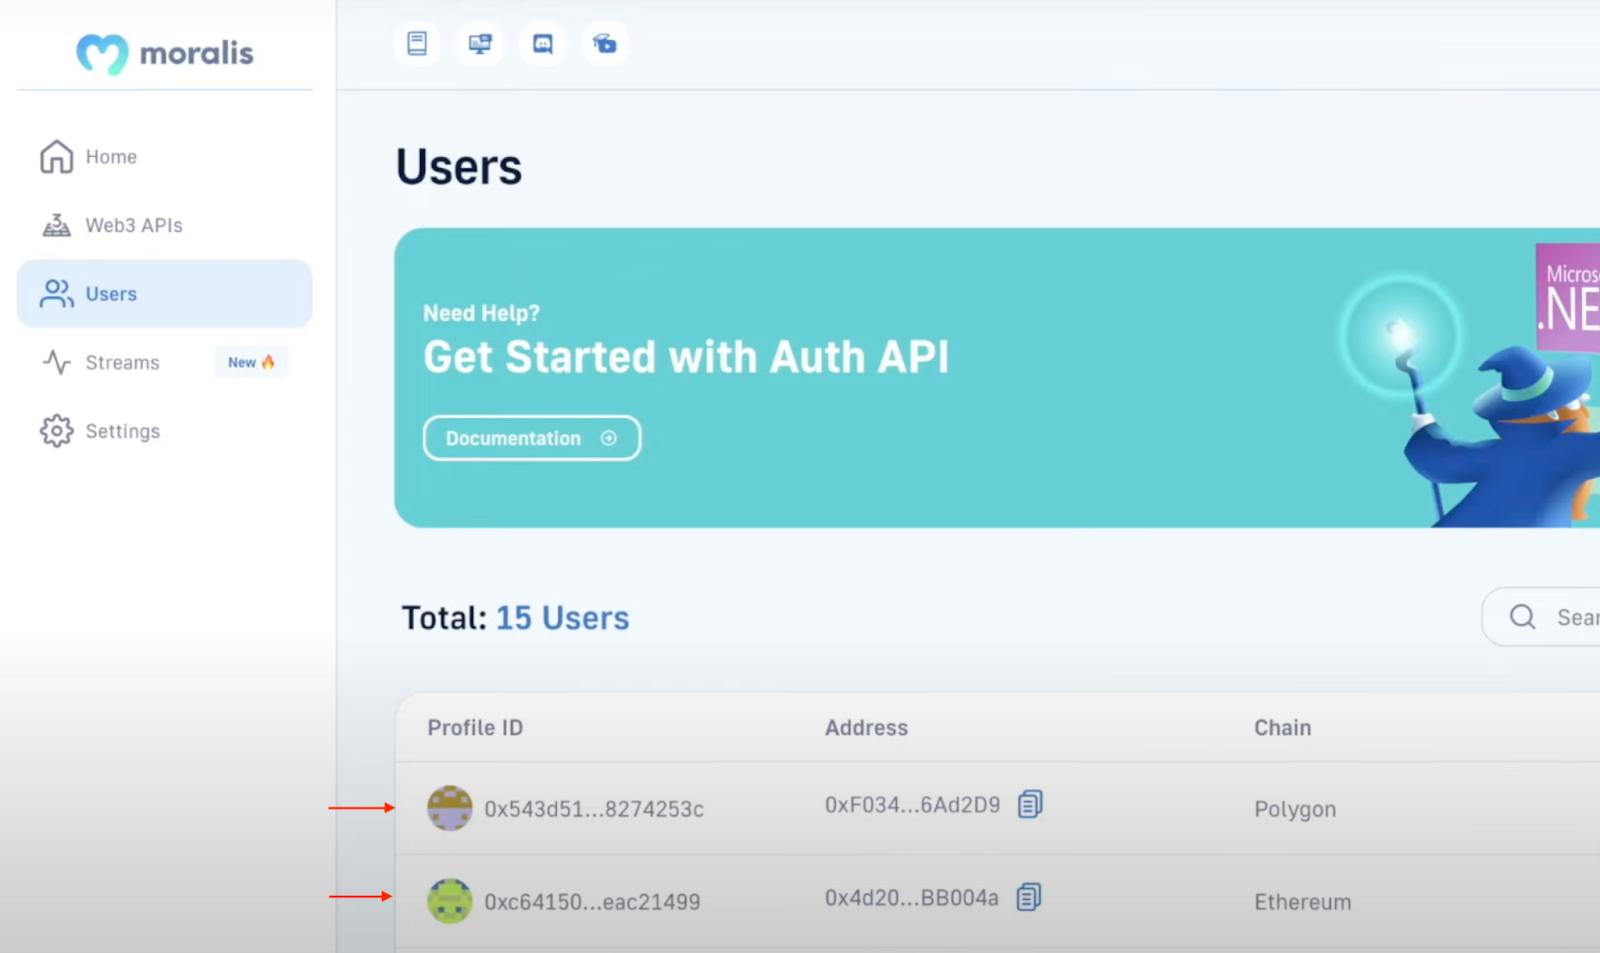
The application also uses the ID to generate a new user that’s added to your ”Users” tab in Moralis:
That’s basically it! If you are interested in learning how to create projects similar to this one, join us in the first step of this ”Web3 Ethereum Python” tutorial, where we show you how to create the Python Flask application!
Step 1 – Build a Python Flask App
This initial step of the tutorial includes two sections. First, we will show you how to set up the project. Second, we will cover the Python Flask application code. So, without further ado, let us take a closer look at setting up the project!
To kick things off, open your preferred integrated development environment (IDE) and create a new project folder. In our case, we will be using Visual Studio Code (VSC). However, you can choose the IDE you are most familiar with.
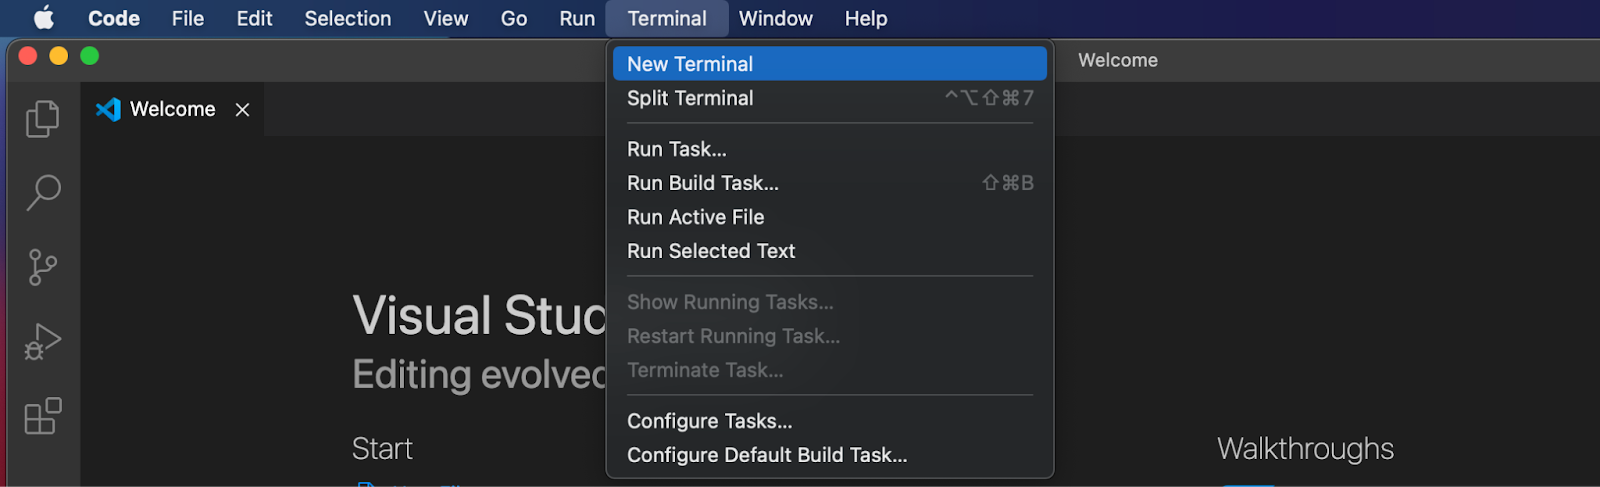
Now that you have a project folder at your disposal, open a new terminal. If you also went for VSC, you can do so by clicking on ”Terminal” at the top and then hitting ”New Terminal”:
Once you launch a new terminal, ”cd” into the project’s root folder and run the command below to create a new virtual environment:
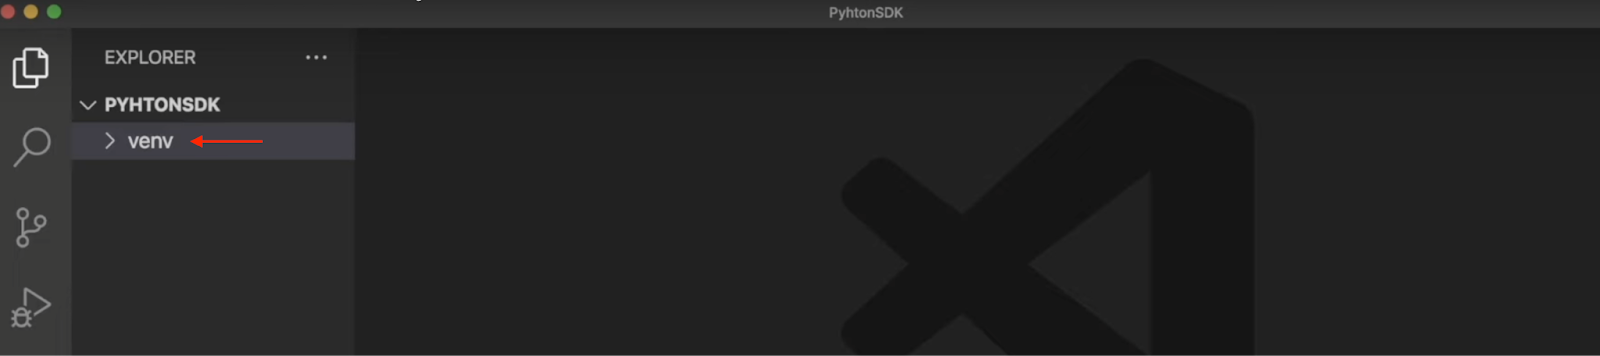
python3 -m venv venv
This should provide a new ”venv” folder in your local directory:
From there, you now need to initialize the environment, which you can do by running the following terminal command:
source venv/bin/activate
Next, ensure you have the latest ”pip” version available. You can check the current version and install any recent updates by inputting the following into the terminal and hitting enter:
pip install --upgrade pip
To top things off, install all the required dependencies by running each of the three terminal inputs down below in consecutive order:
pip install flask
pip install flask_cors
pip install moralis
Web3 Ethereum Python Application Code
With the project all set up, it is time to add the code for the endpoints and functions required for the app’s functionality. As such, to kick things off, create a new ”app.py” file in the project’s root folder. From there, open the file and add the required dependencies at the top:
from flask import Flask
from flask import request
from moralis import auth
from flask_cors import CORS
You can then add the code below to initialize the application and wrap it in ”CORS”:
app = Flask(__name__)
CORS(app)
Next up, add your Moralis API key:
api_key = "xxx"
Ensure that you replace ”xxx” within the code with your actual Web3 API key, which you can acquire if you have a Moralis account. So, if you have not already, sign up with Moralis. Then, log in to the Moralis admin panel, navigate to the ”Web3 APIs” tab, copy the key, and input it into the code:

From there, you need to add the two routes: ”/requestChallenge” and ”/verifyChallenge”.
- ”/requestChallenge” – The initial route is called ”/requestChallenge”, which creates a new request challenge whenever users want to authenticate. The central part of the route is the ”reqChallenge()” function that fetches the request arguments, creates a new variable called ”body”, gets the ”/requestChallenge” endpoint results, and finally passes it to the client:
@app.route('/requestChallenge', methods=["GET"])
def reqChallenge():

    args = request.args
    body = {
        "domain": "my.dapp",
        "chainId": args.get("chainId"),
        "address": args.get("address"),
        "statement": "Please confirm login",
        "uri": "https://my.dapp/",
        "expirationTime": "2023-01-01T00:00:00.000Z",
        "notBefore": "2020-01-01T00:00:00.000Z",
        "resources": ['https://docs.moralis.io/'],
        "timeout": 30,
    }

    result = auth.challenge.request_challenge_evm(
        api_key=api_key,
        body=body,
    )

    return result
- ”/verifyChallenge” – Once a user signs the message on the client side, this second route is responsible for verifying the challenge. Further, ”/verifyChallenge” contains a ”verifyChallenge()” function responsible for fetching the arguments from the request endpoint, creating another ”body” variable, getting the results from the Auth API, and finally passing the results to the client:
@app.route('/verifyChallenge', methods=["GET"])
def verifyChallenge():

    args = request.args
    body={
        "message": args.get("message"),
        "signature": args.get("signature"),
    }

    result = auth.challenge.verify_challenge_evm(
        api_key=api_key,
        body=body
    )

    return result
Lastly, add the code below following the two routes to specify where you want to run the app:
if __name__ == "__main__":
    app.run(host="127.0.0.1", port=3000, debug=True)
That’s it for the entirety of the code! Your ”app.py” file should now look something like this:
from flask import Flask
from flask import request
from moralis import auth
from flask_cors import CORS

app = Flask(__name__)
CORS(app)

api_key = "xxx"

@app.route('/requestChallenge', methods=["GET"])
def reqChallenge():

    args = request.args
    body = {
        "domain": "my.dapp",
        "chainId": args.get("chainId"),
        "address": args.get("address"),
        "statement": "Please confirm login",
        "uri": "https://my.dapp/",
        "expirationTime": "2023-01-01T00:00:00.000Z",
        "notBefore": "2020-01-01T00:00:00.000Z",
        "resources": ['https://docs.moralis.io/'],
        "timeout": 30,
    }

    result = auth.challenge.request_challenge_evm(
        api_key=api_key,
        body=body,
    )

    return result


@app.route('/verifyChallenge', methods=["GET"])
def verifyChallenge():

    args = request.args
    body={
        "message": args.get("message"),
        "signature": args.get("signature"),
    }

    result = auth.challenge.verify_challenge_evm(
        api_key=api_key,
        body=body
    )

    return result


if __name__ == "__main__":
    app.run(host="127.0.0.1", port=3000, debug=True)
Step 2 – Start the Application
Now that you have written all the code for the Web3 Ethereum Python Flask application, all that remains is to run the project. As such, open a new terminal once again, input the following, and hit enter:
python3 app.py
This is it! Your application should now launch on “localhost 3000“! That completely covers the Ethereum Python Flask application. However, to demonstrate how it works and test out the functionality, the following section will briefly show you how to set up a React application from which you can call the endpoints!
Step 3 – Set Up a React Frontend App
The final step of this ”Web3 Ethereum Python” tutorial is to set up a frontend React application. This app can call the endpoints and demonstrate how the Web3 authentication flow works in practice. Nevertheless, let us take a closer look at how to set it up!
To make this third step as accessible as possible, we will use an already-developed React application, and you can find the complete code in the GitHub repository down below:
Web3 Ethereum Python Application Docs – https://github.com/MoralisWeb3/youtube-tutorials/tree/main/Web3AuthPython
All you need to do is visit the repository and clone the project to your local directory. Once you clone the project, you should now have a file structure like the one shown in this image:

From there, you can now spin up this app by running ”npm run start” in a new terminal!
That’s it for this article! If questions remain or you experience trouble during the tutorial, feel free to check out the official Web3 Python SDK documentation, which will answer any of your queries! You can also watch the video below from the Moralis YouTube channel. The following clip breaks down the tutorial from start to finish, where one of our talented engineers walks you through the complete process:
Python for Web3 Ethereum Development – Summary
In this article, you learned how to create a straightforward Web3 Python application for handling a Web3 authentication flow with Moralis. What’s more, thanks to Moralis’ Python SDK, you were able to do so in only three steps:
- Build a Python Flask App
- Start the Application
- Set Up a React Frontend App
If you found this tutorial helpful, consider checking out additional guides here at Moralis’ Web3 blog. For instance, learn how to set up automated Web3 notification emails or read up on Ethers.js vs Web3 streams!
Moreover, if you want to become a more proficient blockchain developer, enroll in Moralis Academy immediately! The academy offers a selection of courses for new and more experienced developers. For instance, learn the basics of React development with the following course: ”React Web Development 101”.
Nevertheless, if you want to create Web3 Ethereum Python applications, make sure to sign up with Moralis. You can create your account for free; it only takes a couple of seconds!
