If you are wondering how to set up automated Web3 notification emails but need help figuring out where to start, this article is for you! Even if you’re a complete beginner in blockchain development, we’ll help you catch up. After all, we’ll start by explaining what Python and Flask are. Once we make sure you’re all up to speed, we’ll take on an example project where you’ll have a chance to set up automated Web3 notification emails with Python and Web3 webhooks.
Moralis is the ultimate Web3 provider of blockchain APIs. As such, it’s an indispensable tool if you want to create decentralized applications (dapps) quickly and easily. Furthermore, Moralis’ cross-chain interoperability enables you to create multi-chain dapps. You only need to tweak a single line of code to target another chain. In addition, Moralis enables you to join the Web3 revolution using the legacy tools you are familiar with. While we’ll focus on using Python in this article, Moralis supports all leading legacy dev platforms, frameworks, and languages. Essentially, Moralis enables you to build faster and smarter with APIs that bridge the development gap between Web2 and Web3.
Aside from its Streams API, which we’ll use to set up automated Web3 notification emails, Moralis offers a full scope of Web3 APIs. This includes the ultimate NFT API, Web3 Auth API, Token API, and more. So, create your free Moralis account and follow our lead!
What is Python and Flask?
Python is a clear and powerful object-oriented programming language. In many ways, it’s safe to compare Python to several other coding languages. These include Ruby, Scheme, Perl, and Java.
It’s worth pointing out that Python is not as popular and as widely used as JavaScript. However, it is still among the leading programming languages, and Python has a long history. After all, it first appeared on the scene back in 1991, thanks to its developer Guido van Rossum. The main goal of Python was to make things as straightforward as possible for developers. Based on the opinions of those who know and use this language, Python is rather easy to get started with, learn, and easy to use. Nonetheless, as “python.org” puts it, Python is a programming language that lets you work quickly and integrate systems more effectively.
Flask is a web framework, a Python module that lets you develop web applications easily. Further, Flask has a small and easy-to-extend core. After all, it is a microframework that doesn’t include an ORM (object relational manager) or features related to ORM. Still, Flask has many excellent features. For instance, it includes URL routing and a template engine. In addition, note that Flask is a web server gateway interface (WSGI) web app framework. Moreover, this Python framework was developed by Armin Ronacher, who led Poocco – a team of international Python enthusiasts. Hence, it’s not surprising that Flask is based on two other Poocco projects – the Werkzeg WSGI toolkit and the Jinja2 template engine.

Set Up Automated Web3 Notification Emails with Python and Moralis’ Streams API – Example Project
Now that you know what Python and Flask are, it’s time we show you the automated Web3 notification email setup process. However, we believe it is only fair if you first see the end result of using Python and Moralis for this purpose. Hence, let’s do a quick demo of our example backend dapp before illustrating how to set up automated Web3 notification emails!
Setup of Automated Web3 Notification Emails – Demo
To demonstrate the results of automated Web3 notification emails, we’ll use a Gmail account, a blockchain explorer (PolygonScan), and the most popular Web3 wallet – MetaMask.
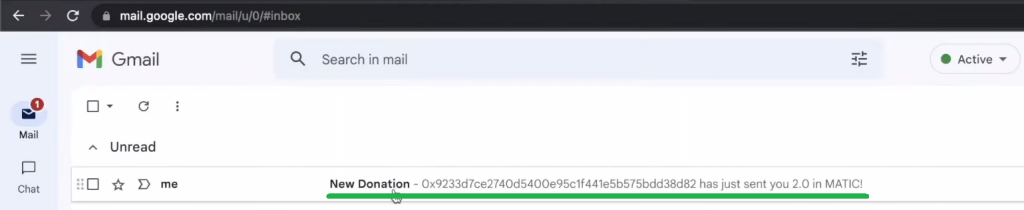
First, let’s look at the following screenshot, which demonstrates that we are starting with an empty email inbox:

We open the PolygonScan (for the Mumbai testnet) explorer since Mumbai is the testnet where our smart contract lives. As you may know, blockchain explorers also enable you to interact with deployed smart contracts. Hence, we open the page for our example smart contract’s address and select the “Write Contract” option inside the “Contract” tab:

Then, as you can see in the above screenshot, we enter “2” (this could be any amount our balance can cover) in the “newDonation” field and hit the “Write” button. This button triggers our MetaMask extension, which is connected to the Polygon Mumbai testnet. As you can see above, we need to confirm the transaction notification by clicking on the “Confirm” button. After this action, our terminal notifies us that an email has been sent:

When we return to our email inbox, we can see the “New Donation” email:
Finally, let’s also check the details of this example notification email:
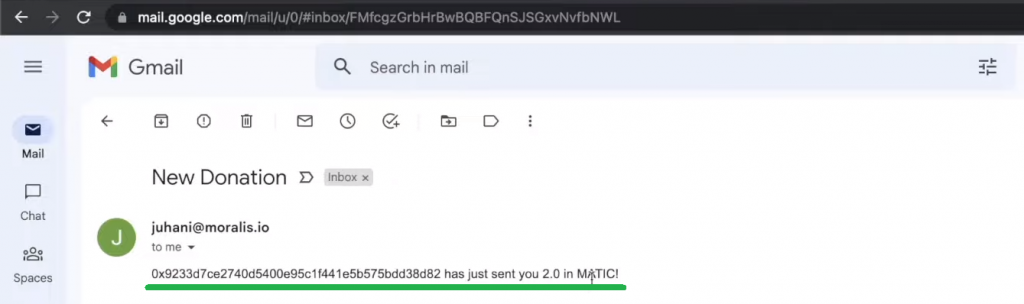
Looking at the above screenshot, you can see that we’ve set up automated Web3 notification emails that include donors’ wallet addresses and the amount they donated in MATIC (native currency for the Polygon chain).
If you’d like to set up this kind of email notification automation for on-chain events, make sure to roll up your sleeves and follow our lead throughout the sections below.
How to Set Up Automated Web3 Notification Emails with Python and Moralis’ Streams API – Step-by-Step Tutorial
In this part of today’s article, you’ll have a chance to follow our lead as we guide you through the following four stages:
- Set Up Flask
- Initial Setup of Moralis and the Streams API
- Receive Web3 Webhooks
- Automate Emails
We’ll provide you with screenshots to help you properly complete each of the above four stages. However, at the bottom of this article, you can also find a detailed video tutorial on how to set up automated Web3 notification emails. Note that we will occasionally refer to specific timestamps of that video moving forward.
Set Up Flask
For clarity, we encourage you to follow our example and use Visual Studio Code (VSC). Next, create the “automateEmails” folder and open it in VSC. Then, you can start your Python virtual environment by entering the following command:
python3 -m venv venv
The above command will create a “venv” folder inside the “automateEmails” folder:

Moving on, you want to run this command line:
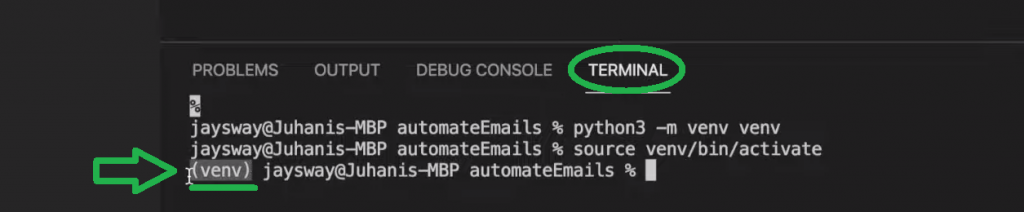
Source venv/bin/activate
As a confirmation that you’ve successfully activated your virtual environment, you should see “(venv)” in your terminal:
With your virtual environment running, continue by installing the latest version of “pip” with the following command:
pip install --upgrade pip
Next, it’s time to install all dependencies. Hence, enter this command:
pip install flask flask_cors
With the dependencies installed, go to your project tree and create a new Python file. Feel free to call it as you please. However, to avoid any confusion, it might be safer to use the same name as we – “backend.py”:

Then, import a sample Flask app using the following lines of code:
from flask import Flask
from flask import request
from flask import jsonify
from flask_cors import CORS

app = Flask(__name__)
CORS(app)

@app.route('/streams', methods=["POST"])
def streams():

   return jsonify(success=True)

if __name__ == "__main__":
    app.run(host="127.0.0.1", port=3000, debug=True)
The above template code includes an endpoint you can use as a webhook URL. As such, you can send blockchain events as webhooks to that endpoint using Moralis’ Streams API. By this point, you know that the latter is the key to setup automated Web3 notification emails the easy way.
Initial Setup of Moralis and the Streams API
Moving on, you’ll need to add proper functionality to handle the Web3 webhook you’ll receive from Moralis. As such, you’ll be adding most of the additional code inside “@app.route” (see above). However, first, you need to complete the initial Moralis setup. Thus, make sure you have your Moralis account up and running. In case you haven’t created it yet, you can use the link stated at the outset or click on the “Start for Free” button on Moralis’ homepage:

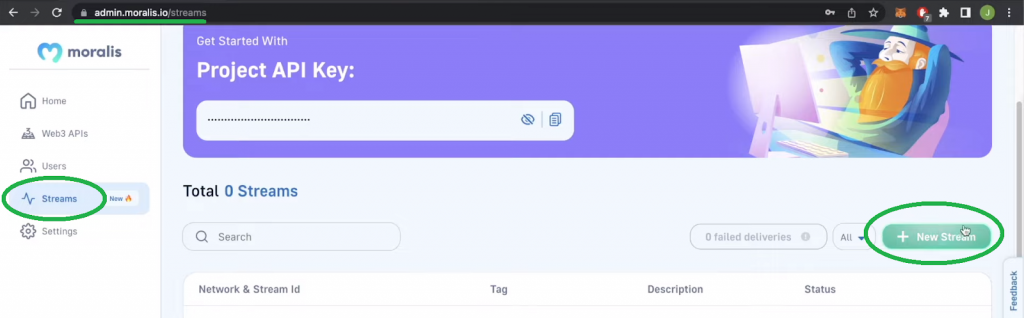
With your Moralis account ready, you’ll be able to access your admin area. There, you’ll want to select the “Streams” tab from the side menu. Once on the “Streams” page, you want to click on the “New Stream” button:
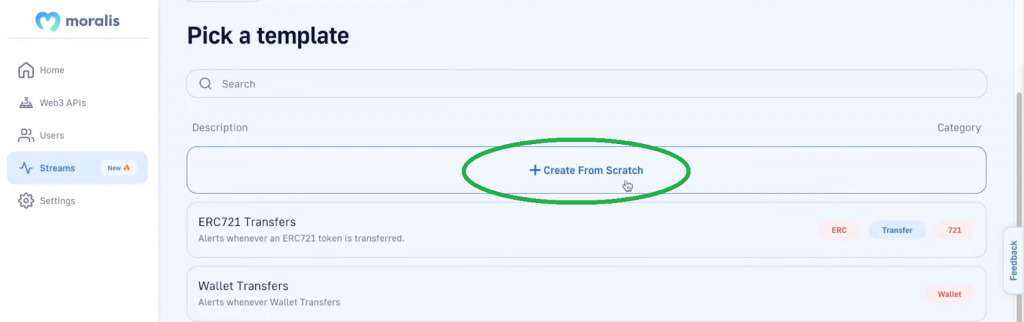
In the next step, you get to select one of the stream templates or create one from scratch, which is what we’ll do to set up automated Web3 notification emails. Hence, make sure to click on the “Create From Scratch” button:
Next, you’ll need to enter the details for the smart contract in question. Of course, you can use any smart contract you wish. However, for the sake of this example project, we recommend you focus on the above-presented “donationExample” smart contract (4:39). You can obtain all the details regarding this smart contract by using the above-seen PolygonScan page. At the top, you need to paste the contract’s address:

As you can see above, you also need to give your stream a description. Then, you also need to provide your webhook URL, add a tag, and select networks. With all the details in place, you’ll be able to hit the “Create Stream” button. For more details, use the video below, starting at 5:26.
Receive Web3 Webhooks
With the above stream created, you’ll be able to start receiving Web3 webhooks automatically. To see this in action, make sure to follow the video below (9:12) and execute an example donation. If you want to do this, you’ll need a MetaMask extension and some test MATIC, which you can get using the Polygon faucet. Essentially, you’ll get to execute the same steps as presented in the above demonstration.
Since you haven’t set up automated Web3 notification emails yet, you will only view the results in your terminal. However, you’ll see that you get all the information you need. Hence, you only need to trigger “email sending” and include the desired details (donor’s address and donated amount) in those notification emails.
At 11:57 of the video, you can also learn how to pause your streams while still developing your dapp:
Automate Emails: The Setup of Automated Web3 Notification Emails
To complete the final stage of today’s tutorial, you need to refocus on the “backend.py” script. First, you need to import “EmailMessage“, “ssl“, and “smtlib” at the top. Next, you must initialize some key variables. Ultimately, this is how the top twelve lines of “backend.py” should look like:
from flask import Flask
from flask import request
from flask import jsonify
from flask_cors import CORS
from email.message import EmailMessage
import ssl
import smtplib

emailPass = ""
email = ""
emailReceiver = ""
subject="New Donation"
Looking at the lines of code above, you can see that you need to provide your email address next to “email” and “emailReceiver”, like so:

Of course, you could send notification emails to any email address (or list of addresses) you want. Nonetheless, make sure to use the video below, starting at 13:13, and learn how to obtain your “emailPass” from Gmail.
Finally, it’s time to add the necessary lines of code inside “@app.route”:
@app.route('/streams', methods=["POST"])
def streams():

    if (request.json['confirmed']):
        return jsonify(success=True)


    details = request.json["txs"]

    for donation in details:

        amount = int(donation['value'])/1000000000000000000
        em = EmailMessage()
        em['From'] = email
        em['To'] = emailReceiver
        em['Subject'] = subject

        em.set_content(donation['fromAddress'] + " has just sent you " + str(amount) + " in MATIC!")

        context = ssl.create_default_context()

        with smtplib.SMTP_SSL('smtp.gmail.com', 465, context=context) as smtp:
            smtp.login(email, emailPass)
            smtp.sendmail(email, emailReceiver, em.as_string())

    print("Email Sent")

    return jsonify(success=True)
Again, we recommend you use the video below for a more detailed code walkthrough. Moreover, you can access the final code on GitHub. Last but not least, here’s the video tutorial containing all the details required to successfully set up automated Web3 notification emails:
How to Set Up Automated Web3 Notification Emails with Python – Summary
We covered quite a distance in today’s article. Starting with the basics, we answered the “what is Python and Flask?” question. Then, we dove right into the process of setting up automated Web3 notification emails. As such, you saw that an email is sent informing us about that on-chain event as soon as an on-chain transaction is executed. Lastly, we also took you through the four main stages you need to complete to set up automated Web3 notification emails. As a result, you now know how to easily listen to smart contract events and ensure that those events trigger notification emails.
If interested, use the Web3 Python SDK documentation, our blockchain-development videos, and our crypto blog to expand your knowledge of blockchain development further. These outlets provide you with countless tutorials and blockchain development topics. For instance, some of the latest articles cover Web3 Python development, blockchain infrastructure companies, blockchain infrastructure as a service, and much more. Plus, the blog also covers newly launched blockchain networks. With newly launched blockchain networks, many are wondering if another chain will push Ethereum off the leaderboard among programmable blockchains. If you are one of those, check out our articles exploring the Palm network and the next-gen L2 blockchain for Ethereum – Optimism. You can also enroll in Moralis Academy to become blockchain certified. You can start with blockchain fundamentals at the academy or focus on more advanced courses, such as Ethereum dapp programming.
