Building your first Cronos dapp might seem cumbersome and daunting. However, the process does not have to be difficult with proper guidance and great development tools. In fact, with Moralis, you now have the potential to build Cronos dapps in minutes! Moreover, Moralis provides enterprise-grade Web3 APIs and the Cronos boilerplate, enabling developers to build dapps efficiently. If you want to know more about the fastest way to build Cronos dapps, follow along as we provide a complete walkthrough of the process!
For the uninitiated, we will start by briefly explaining the Cronos network. Following this, we’ll present a quick walkthrough of Moralis’ Cronos boilerplate, where we cover the main features of the dapp you will create. Moreover, suppose you do not want to follow along and immediately inspect the project’s code. In that case, you will find the link to the GitHub repository in the “Exploring the Cronos Boilerplate” section. Once you are familiar with what you are working towards, we will demonstrate the power of Moralis by creating a Cronos dapp in no time!
The accessibility of the process partly stems from the Cronos boilerplate. However, there are additional Moralis tools aiding in the process. For example, the Web3 Auth API allows us to easily integrate various authentication mechanisms. By default, the Cronos dapp will use MetaMask, but you can, for instance, add Coinbase Wallet login functionality if you so desire. Moreover, Moralis’ various APIs are not limited to the Cronos boilerplate and can allow you to connect any tech stack to multiple networks!
Consequently, it does not matter if you plan to create dapps with the Cronos boilerplate or take on any other Web3 project; Moralis is at your service. Hence, sign up with Moralis immediately and reward yourself with a more accessible developer experience!
What is the Cronos Network?
The Cronos network was initially introduced in 2021, and since then, it has been running parallel to Cronos POS Chain (formerly Crypto.org Chain), powering its ”Pay” feature. Furthermore, the organization behind the aforementioned chains is Crypto.com, which has been around since June 2016.
The Cronos blockchain is EVM-compatible and supports IBC (inter-blockchain communication) networks based on the Cosmos SDK. Consequently, the network is compatible with Ethereum and Cosmos-based ecosystems. Moreover, this allows for easy porting of Ethereum smart contracts and dapps.
Ethermint fuels Cronos, a scalable, high-throughput blockchain framework that is interoperable and compatible with Ethereum. Ethermint is the source of the ability to easily and rapidly port both dapps and smart contracts from EVM-compatible chains, which of course, includes Ethereum. This is the primary difference between Cronos POS Chain and Cronos since the former is not based on Ethermint. Consequently, Cronos POS Chain does not support dapps created for EVM-based platforms and other frameworks.
Furthermore, Cronos uses a PoS (proof-of-stake) consensus mechanism. Hence, the network’s validators stake a portion of their assets to induce good behavior while validating transactions. The primary benefit of a PoS system is that it offers higher scalability than other alternatives, such as PoW (proof-of-work).
Nevertheless, this covers the basics of Cronos and how the network operates. With a more profound understanding of the Cronos network, it is almost time to dive deeper into the process of creating dapps with Moralis’ Cronos boilerplate. However, before doing so, we will explore the Cronos boilerplate in further detail, as this will provide a good idea of what you will be working towards!
Exploring the Cronos Boilerplate
Moralis’ Cronos boilerplate provides an excellent foundation for dapps with some essential features most dapps require. In this section, we will cover some of the central functionality of the Cronos boilerplate, and let’s begin with the template’s landing page:
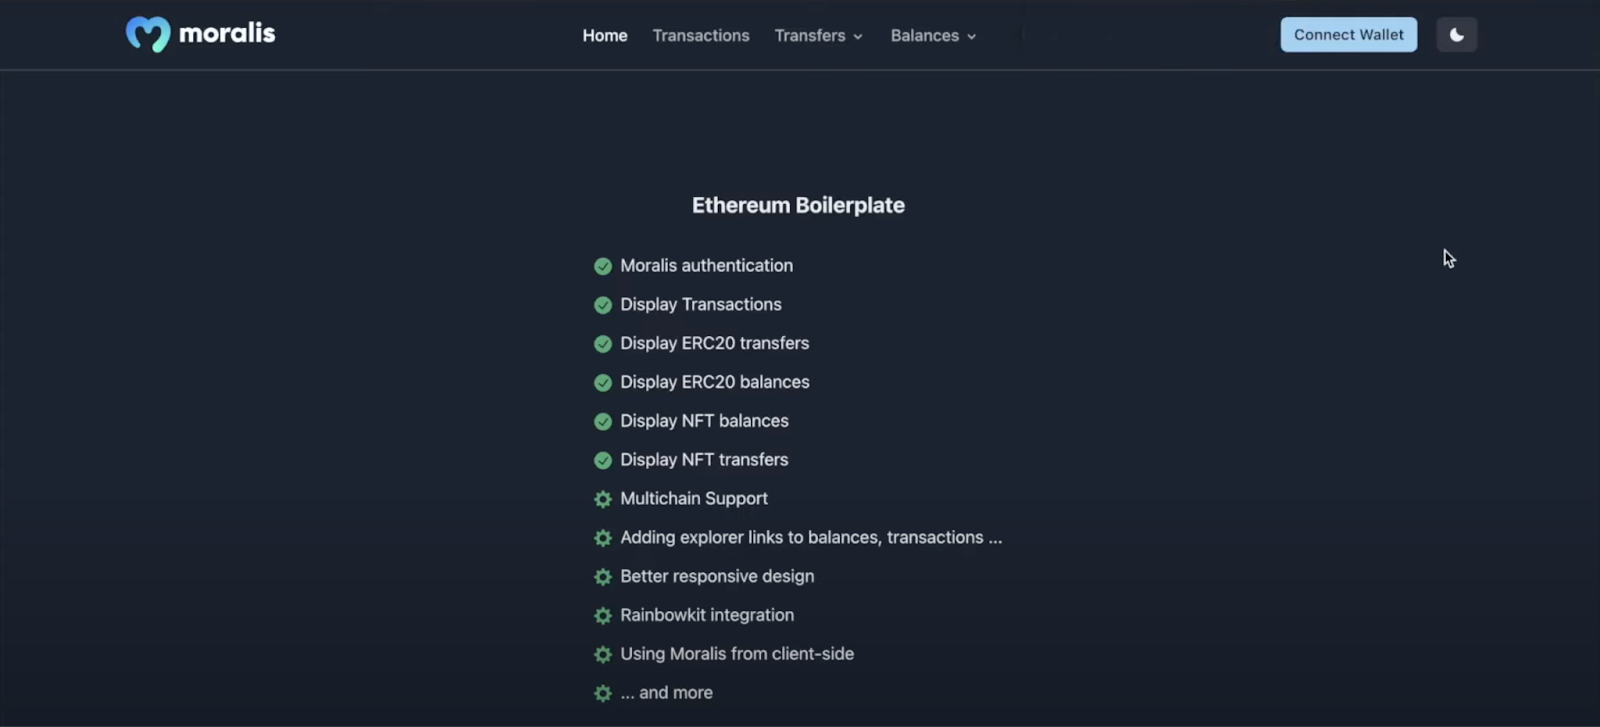
The image above illustrates where you will land once you launch the Cronos dapp. As you can see at the top, there are a few tabs that we can explore further. However, before we get into those, you will need to authenticate yourself using the ”Connect Wallet” button at the top:

This will prompt your MetaMask wallet, allowing you to sign a message. Once signed, the Cronos dapp will automatically populate the various tabs with information relating to your wallet. For example, if you click on the ”Transactions” tab, it will look something like this:
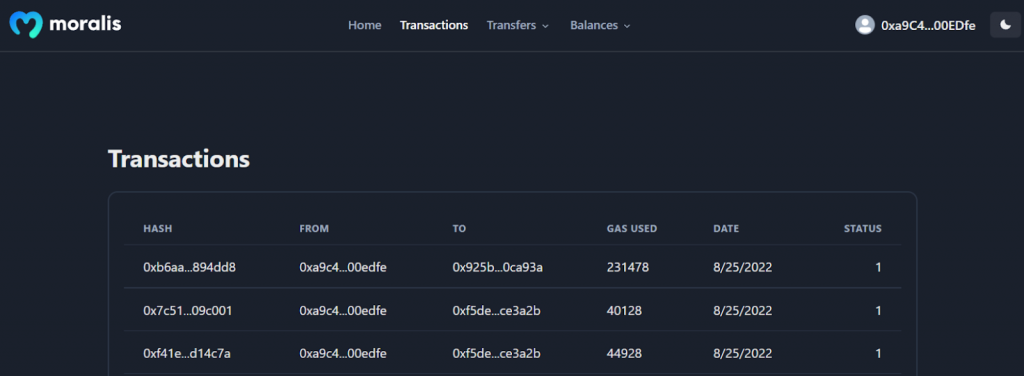
The image above shows a table displaying previous transactions conducted with the wallet. The table shows information relating to each transaction, such as addresses, dates, etc. Moreover, you can additionally check out the ”Transfers” tab featuring a drop-down menu:
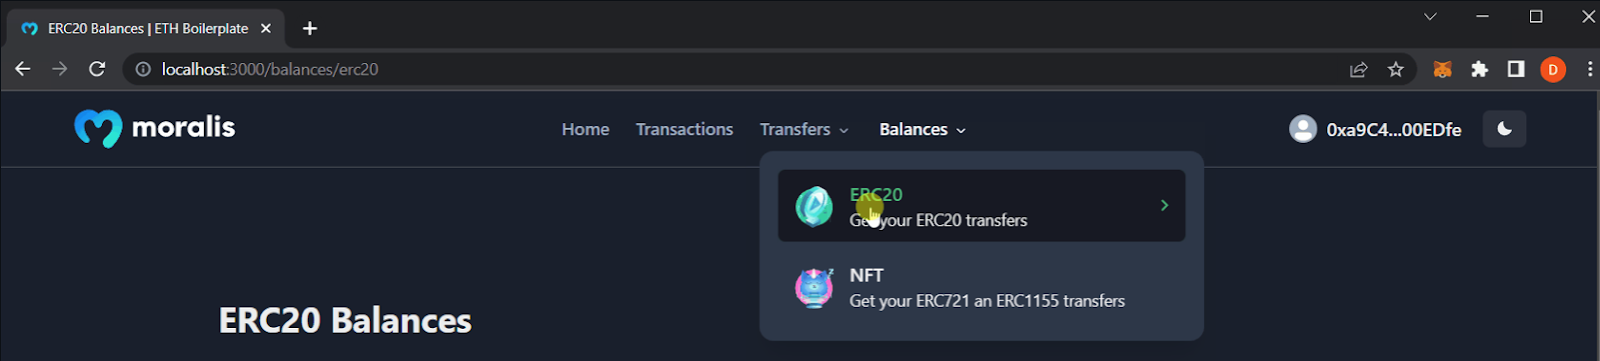
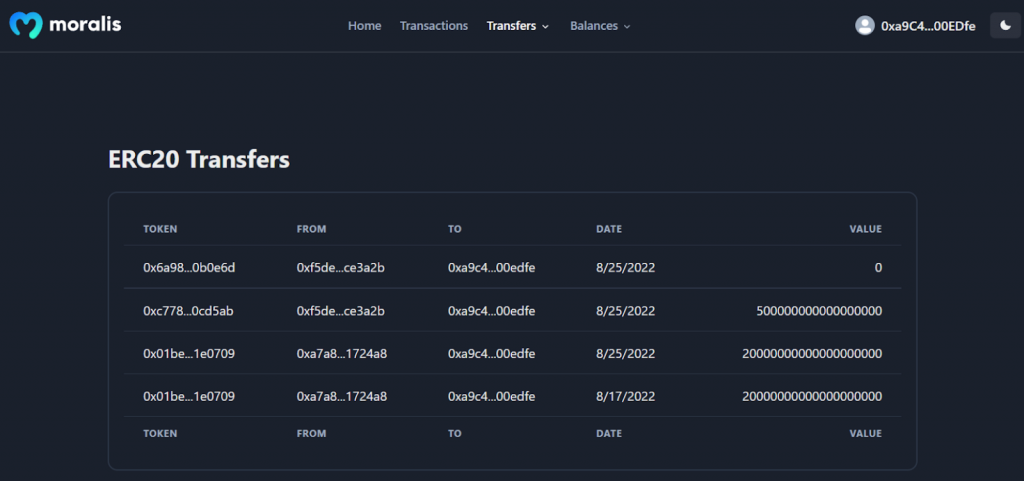
As you can see, the boilerplate will allow you to filter between ERC-20 tokens and NFTs. So, if you, for example, click on the ”ERC-20” alternative, it will show the transfer history of this token type:
Nevertheless, if you want to skip the tutorial and jump straight into the code for the Cronos boilerplate, you will find the link for the GitHub repository below. However, you might quickly notice that the repo’s name is ”ethereum-boilerplate”, which might throw you off. Nevertheless, the boilerplate is cross-chain compatible, which means it works just as well for building Cronos dapps!
Complete Cronos Boilerplate Documentation – https://github.com/ethereum-boilerplate/ethereum-boilerplate
Build Cronos Dapps with Moralis’ Cronos Boilerplate
If you decide to follow along, the following sections will illustrate how to build a dapp using Moralis’ Cronos boilerplate. Moreover, to make this guide more straightforward, we will divide this article into three steps:
- Cloning the Cronos Boilerplate
- Configure the Boilerplate Code
- Running the Cronos Dapp
Following these steps will allow you to build a Cronos dapp with the features described in the section above in minutes! Moreover, all you need to complete this tutorial is basic programming knowledge and a Moralis account. So, if you have not already, go ahead and create your Moralis account immediately. All you need to do is click on the ”Start for Free” button at the top of Moralis’ website and follow the instructions:
If you prefer watching videos to learn, check out the following video from the Moralis YouTube channel:
In the clip above, a Moralis developer takes you through the process of creating a dapp using the boilerplate. However, it is not directly compatible with the Cronos network. So, if you need help configuring the code, follow along, and we will provide you with a complete walkthrough for building Cronos dapps with Moralis’ Cronos boilerplate!
Step 1: Cloning the Cronos Boilerplate
Cloning the Cronos boilerplate is relatively straightforward. First, open your preferred IDE (integrated development environment) and create a new folder for the project. In this case, we will use VSC (Visual Studio Code). If you opt for another alternative, note that the process might be slightly different on occasion.
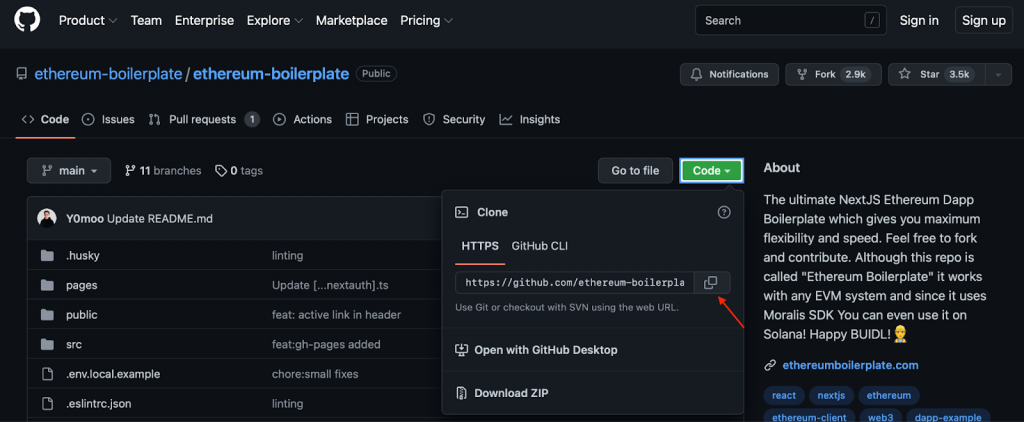
Once you open your IDE, the next step is to fetch the repository URL. You can find the GitHub repo using the link at the end of the ”Exploring the Cronos Boilerplate” section. Once you open this repo, you can copy the URL by clicking on the green ”Code” button, followed by the copying icon:
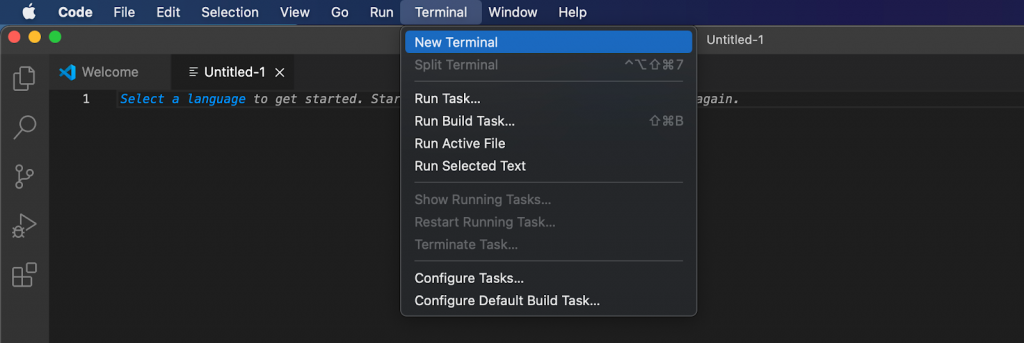
With the URL at hand, navigate back to your IDE and open a new terminal. If you are using VSC, open a new terminal by clicking on ”Terminal” at the top and hitting ”New Terminal”:
Following this, make sure you are in the right location, corresponding to the folder you just created, and input the following command with the repo URL into the terminal:
git clone “BOILERPLATE_URL”
If you run the command above, it should clone the GitHub repo to your local directory. From there, make sure to navigate to the correct folder again through the command below:
cd ethereum-boilerplate
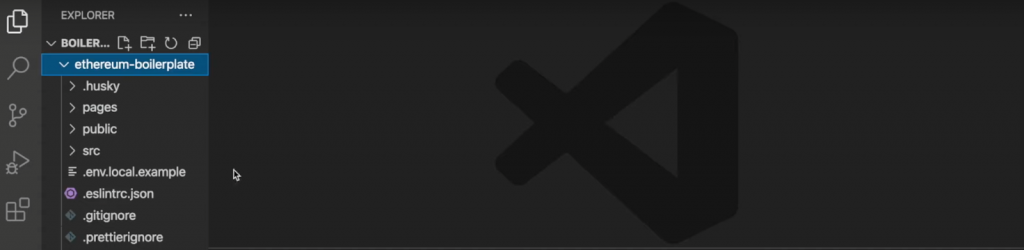
If you execute all of these commands correctly, it should result in a structure similar to the one illustrated in the image below:
Step 2: Configure the Boilerplate Code
Next up, with the project in your local directory, it is time to make a few necessary configurations to the code. More specifically, you must open the ”.env.local.example” file and, to begin with, change the file’s name to ”.env.local”. Here is the initial code of the file:
APP_CHAIN_ID=0x1
APP_DOMAIN=ethereum.boilerplate
MORALIS_API_KEY= # Get your KEY https://admin.moralis.io/account/profile
NEXTAUTH_SECRET= # Linux: `openssl rand -hex 32` or go to https://generate-secret.now.sh/64
NEXTAUTH_URL=http://localhost:3000 # replace for production
There are five environment variables in total. However, you only need to configure three of them for now, and the first one we will look closer at is ”APP_CHAIN_ID”. This variable is, by default, set to ”0x1”, which is the Ethereum chain ID. Consequently, you must change this variable if you are looking to build a Cronos dapp. The Cronos chain ID is ”0x19”, and you can go ahead and change the variable to equal this value.
Next, you need to add a value to the ”MORALIS_API_KEY” variable. You can acquire your key by signing in to Moralis, clicking on the ”Account” tab, navigating to ”Keys”, and copying the Web3 API key:
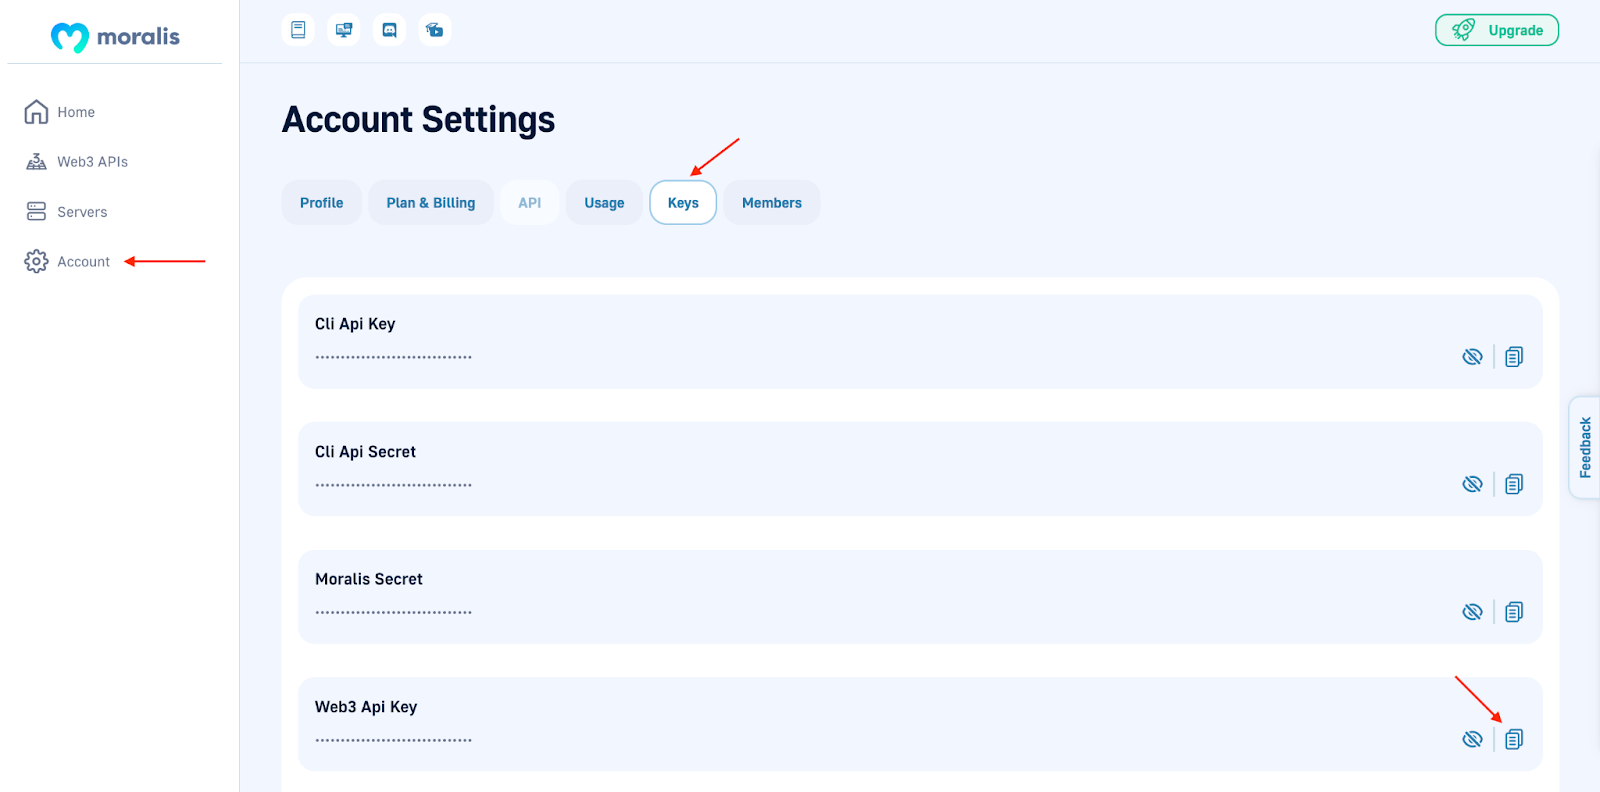
With the key at hand, all that remains is to paste this into the code. Lastly, you must add a secret key to the ”NEXTAUTH_SECRET” variable. Moreover, if you need help generating the value, use the following link: “https://generate-secret.now.sh/32“.
The last of the variables is ”NEXTAUTH_URL”, which you can leave unaltered for now. The variable is set to ”http://localhost:3000”, allowing you to test your Cronos dapp on a local host. However, when you plan to launch the dapp, you will need to change this value so that it equals your dapp’s URL.
That covers all of the configurations you will need to deal with! In the end, your ”.env.local” file should look something like this:
APP_CHAIN_ID=0x19
APP_DOMAIN=ethereum.boilerplate
MORALIS_API_KEY= "YOUR_API_KEY"
NEXTAUTH_SECRET= b8e786967d7bcbc0f920d35bcc3f891c
NEXTAUTH_URL=http://localhost:3000
Step 3: Running the Cronos Dapp
With all the configurations completed, that is about it for the Cronos dapp. However, before running the dapp, you must also install several dependencies. To do so, run one of the following commands in the terminal, depending on if you use “npm” or “yarn”:
npm i
yarn
From there, all that’s left is for you to run the dapp on a local host through one of the following commands:
npm run dev
yarn run dev
Lastly, to launch the dapp and make sure everything works as intended, use the link you specified earlier to start your Cronos dapp: “http://localhost:3000”.
This covers the complete process of creating a dapp using Moralis’ Cronos boilerplate. All that remains is for you to implement or remove features from the boilerplate to ensure it fits the needs of your customer segment!
If questions remain, we recommend checking out the previous video or the official documentation in the GitHub repository. Doing so should hopefully answer any of your questions. Otherwise, consider joining Moralis’ Discord channel and contact one of our talented community engineers, as they will be able to help with most of your troubles!
Summary – Building Dapps with Moralis’ Cronos Boilerplate
Creating Cronos dapps does not have to be difficult, especially when working with Moralis. In fact, thanks to the many tools of Moralis, and the Cronos boilerplate, it is possible to set up a dapp in only three steps:
- Cloning the Cronos Boilerplate
- Configure the Boilerplate Code
- Running the Cronos Dapp
If you follow the steps above, you will create a Cronos dapp where users can sign in with their Web3 wallets. Once authenticated, they can view information such as their transaction history, balances, etc. This provides a great foundation for any Web3 project; all you need to do now is put your spin on it!
If you found the tutorial on building dapps with Moralis’ Cronos boilerplate helpful, check out other guides here at Moralis’ Web3 blog. For example, you can learn how to build an Avalanche dapp or build an Ethereum dapp in five steps! You can also read up on other exciting areas within the Web3 industry. If you are into Web3 gaming, learn how to connect to PlayFab with Web3 or build a Web3 FIFA clone.
So, if Web3 development is of interest and you want to access the faster way to build a Web3 app, sign up with Moralis. Creating an account is free and only takes a few clicks, so you have nothing to lose!
