Did you know that Moralis is the easiest way to connect to PlayFab with Web3? If you want to learn more about how Moralis makes Web3 game development straightforward, read on as we show you how to easily connect to PlayFab with Web3 using Azure Functions!
This article illustrates how to create a simple Unity application allowing users to log in with their Web3 wallets. Further, once signed in, it will autonomously populate your PlayFab backend with information regarding users’ Web3 wallets. Moreover, in five simple steps, we quickly demonstrate how to connect to PlayFab with any Web3 project!
The accessibility originates from the many tools offered by Moralis, such as Moralis’ Web3 APIs. For example, one of the tools is Moralis’ Web3 Auth API, which allows you to implement several different authentication mechanisms into your projects quickly. For instance, you can read more about how to add a sign in with RainbowKit or add Coinbase Wallet login functionality.
So, if you are interested in Web3 game development – or any other development area – make sure to create a Moralis account. Signing up is free, and you can start developing dapps (decentralized applications) in no time!
What is PlayFab?
PlayFab is a backend platform for games with real-time analytics, LiveOps, and managed game services. These services allow anyone to boost their revenue and increase engagement, all while cutting costs.

The backend services provided by PlayFab make game development more accessible. Accordingly, it becomes easier to develop games, and PlayFab offers both small and more significant studios cost-effective development solutions. Here are some of the main features of PlayFab:
- Eliminates challenges of managing and running low latency multiplayer servers with a complete backend solution.
- PlayFab uses multiple forms of built-in authentication, allowing you to track players across devices.
- Provides users with the ability to communicate within games via in-game chats.
However, these are only a few examples of prominent features offered by PlayFab. If you want to learn more about this platform, visit the official website. Nevertheless, let’s jump straight into the central part of this tutorial and explore how to connect to PlayFab with Web3!
How to Connect to PlayFab with Web3
With a more profound understanding of PlayFab and what the platform entails, it is time to illustrate how to connect to PlayFab with Web3. In doing so, we will create a simple application where users can log in with their wallets. Once authenticated, you can access on-chain data regarding the user in your PlayFab backend. Furthermore, you can connect to PlayFab with Web3 in only five steps easily, thanks to Moralis:
- Creating Accounts for Moralis, PlayFab, and Azure Functions
- Setting Up PlayFab and Azure Functions
- Creating Azure Functions with VSC
- Deploying Azure Functions with VSC
- Setting Up Unity and Connecting Microsoft Azure PlayFab
However, if you prefer watching video tutorials, check out the clip from Moralis’ YouTube channel below. The video illustrates the entire process of connecting PlayFab with Web3. Also, in the video, a talented Moralis developer walks you through each step:
Nevertheless, you can additionally follow along here and join us as we show you how to set up all the necessary accounts in the first step!
Step 1: Creating Accounts for Moralis, PlayFab, and Azure Functions – Connect PlayFab with Web3
If you have not already, you will need to initiate this tutorial by creating a Moralis account. This is easy and only takes a couple of seconds. What’s more, creating a Moralis account is entirely free!
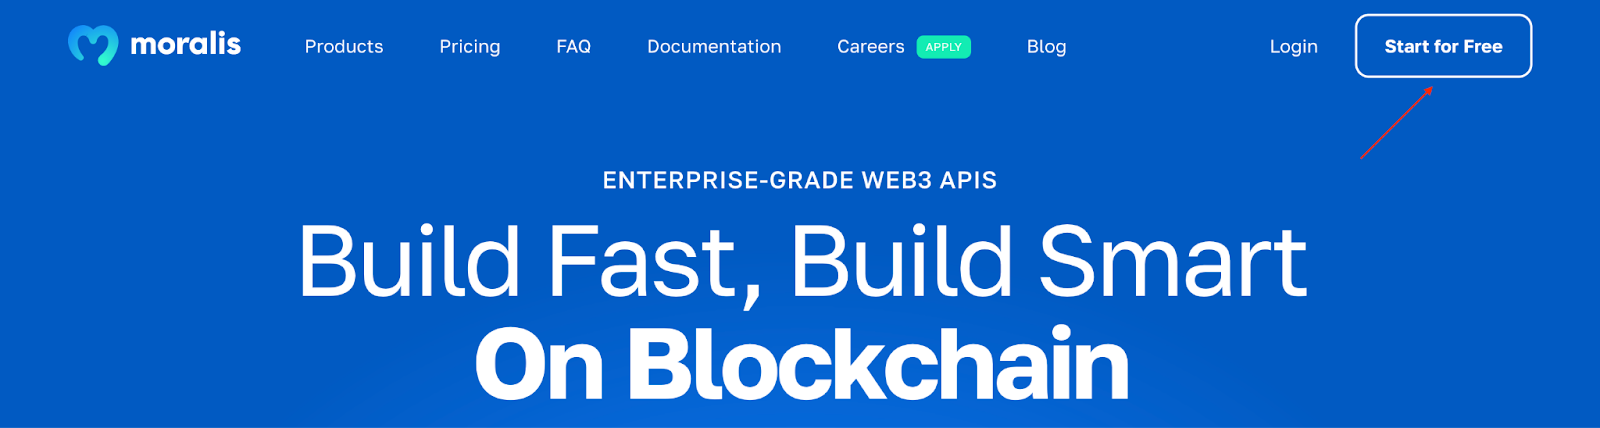
To create your account, all you need to do is click on the “Start for Free” button at the top of the Moralis website and fill in the necessary information:
Along with a Moralis account, you will need to set up accounts for PlayFab and Azure Functions. To make this as seamless as possible, we recommend that you create a Microsoft account as it can be used to set up both PlayFab and Azure. You can create an account here: https://outlook.live.com/.
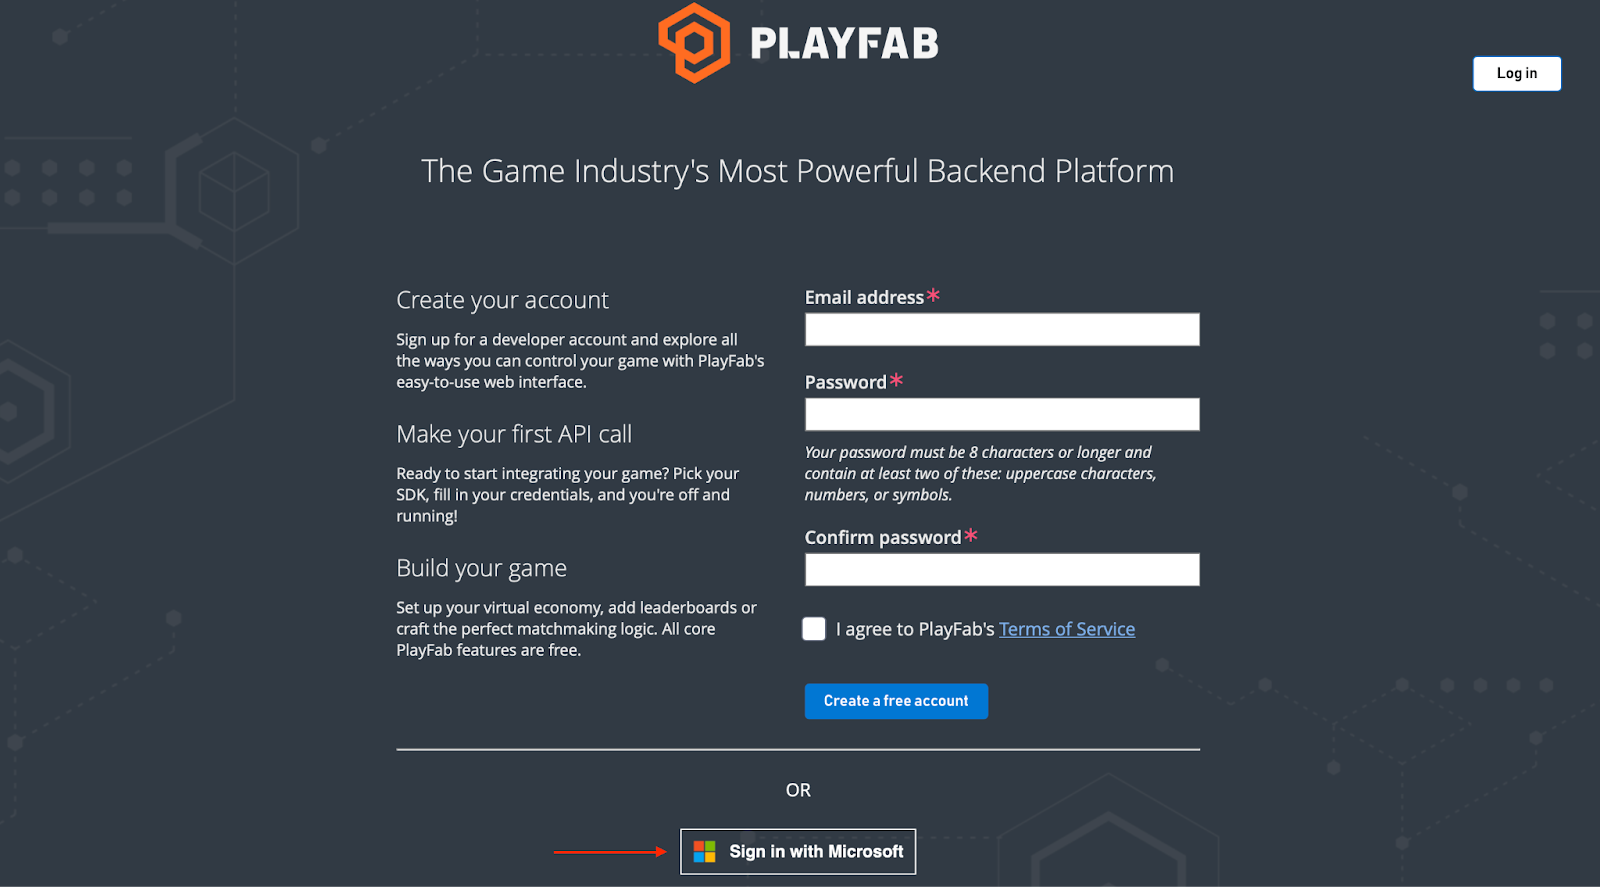
With a Microsoft account, you can now easily sign up to PlayFab. Opening this link will take you to the page below, and if you have a Microsoft account, you can click on the “Sign in with Microsoft” button down below:
Lastly, you also need an Azure Functions account. To create your account, use the following link: https://portal.azure.com/. This will allow you to use the Microsoft account you created earlier to sign in to Azure Functions.
That’s it; you now have the necessary accounts to connect to PlayFab with Web3. In the following section, we will look closely at how to set up both PlayFab and Azure Functions!
Step 2: Setting Up PlayFab and Azure Functions – Connect PlayFab with Web3
In this step, we will show you how to set up PlayFab and Azure Functions. To make the structure as straightforward as possible, we will divide this step into two separate parts, one for each, starting with PlayFab!
PlayFab
We will now briefly show you how to set up PlayFab. If you log into PlayFab, you will arrive at a page that looks something like this:

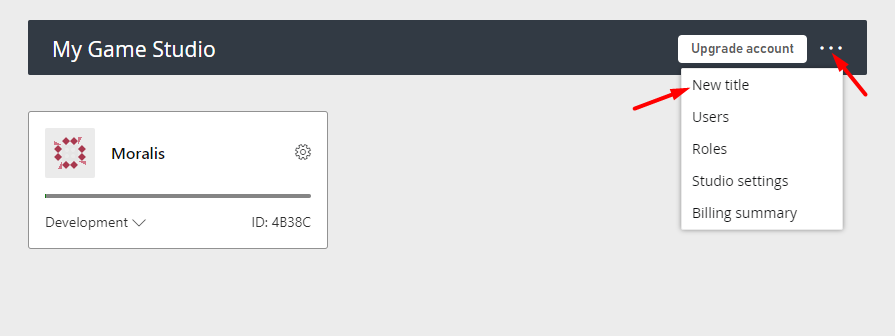
From there, you will need to create a new title. In our case, we will call it ”Moralis”, but you are free to name yours whatever you would like:
As soon as you create your new title, you will be directed to a new page which is the backend for your game. It should look something like this:

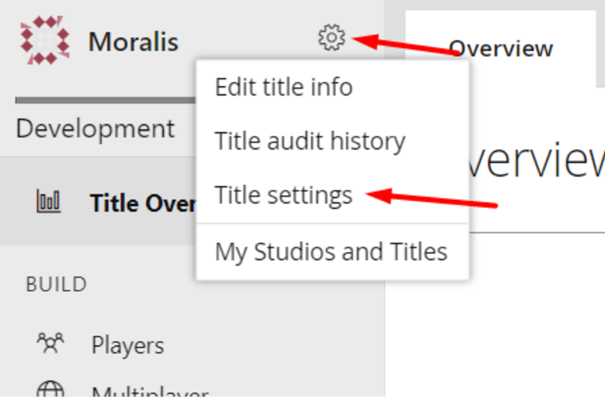
Moreover, to run Moralis on the backend of PlayFab, you need Azure Functions, which is why you created an account in the first step. However, to set up Azure Functions, you will need some information from PlayFab. Specifically, you will need the “Title ID” and “Secret Key” information. To get these, you can click on the cogwheel to the left and then hit “Title settings”:
From there, navigate to the “API Features” tab to get the “Title ID” and the “Secret Keys” tab to get the “Secret Key”. Save these two values as you will need them shortly.
Azure Functions
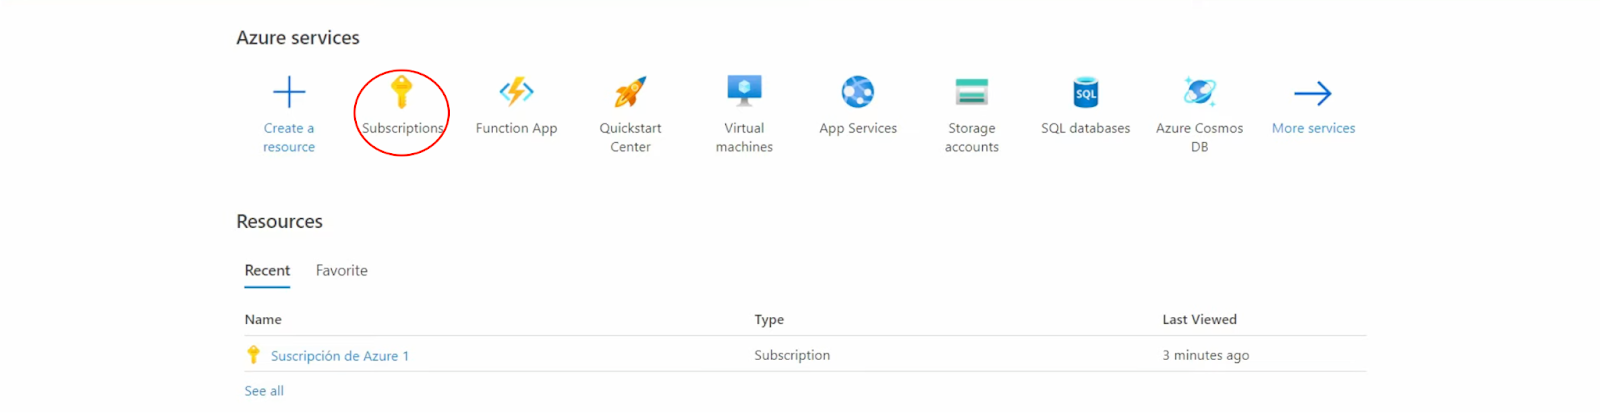
Next, you will need to launch Azure Functions and create a Microsoft customer agreement subscription. To do so, you can begin by clicking on “Subscriptions” at the top left:
Clicking on this tab will take you to the following page where you can add a subscription by pressing the “+Add” button:

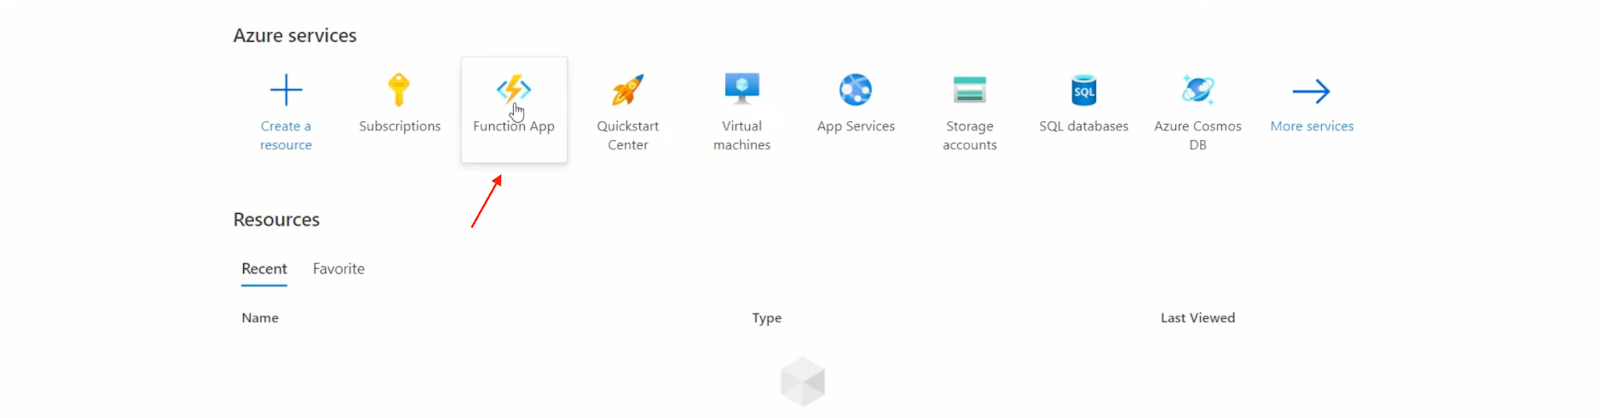
All you need to do from there is fill in all the necessary fields, hit “Review + create”, and then “Create”. Following this, you need to create a new “Function App” by navigating back to the home page and clicking on the following button:
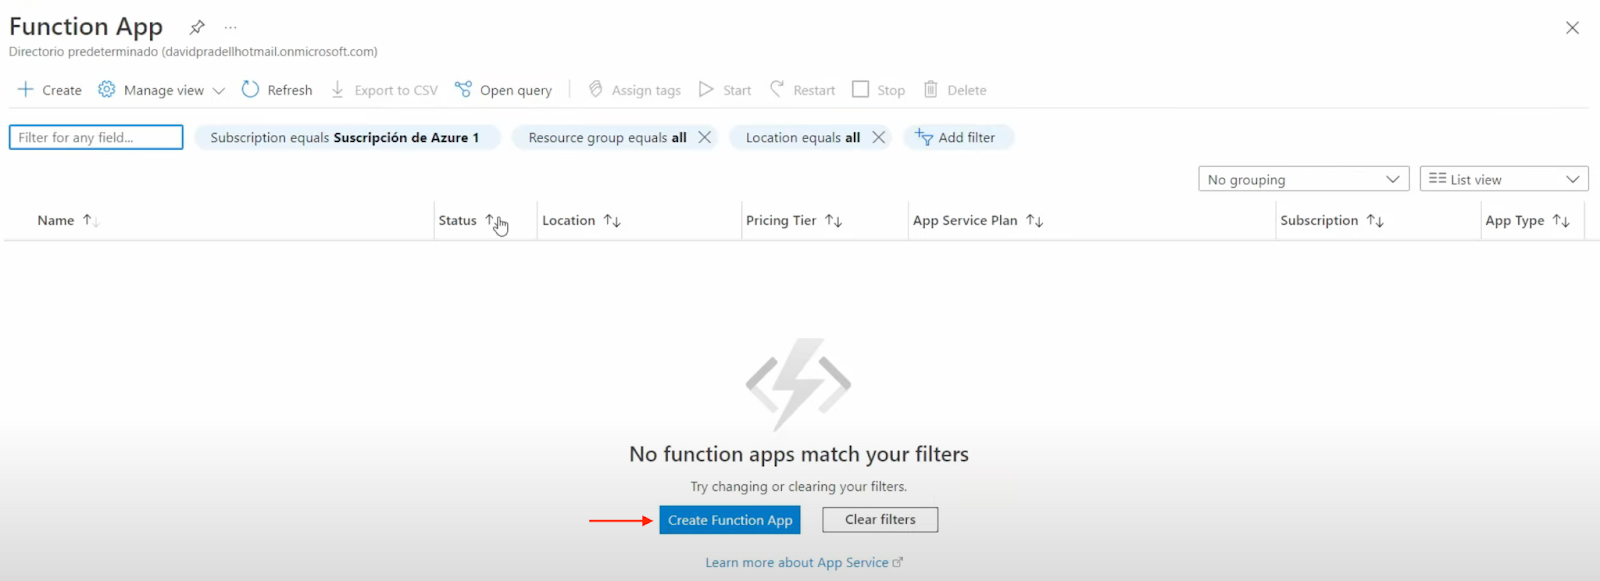
You can then proceed to create the “Function App” by pressing “Create Function App”:
From there, select the subscription you just created and fill in the remaining information. To make it easier for you, here is a print screen of the settings you will need to input:
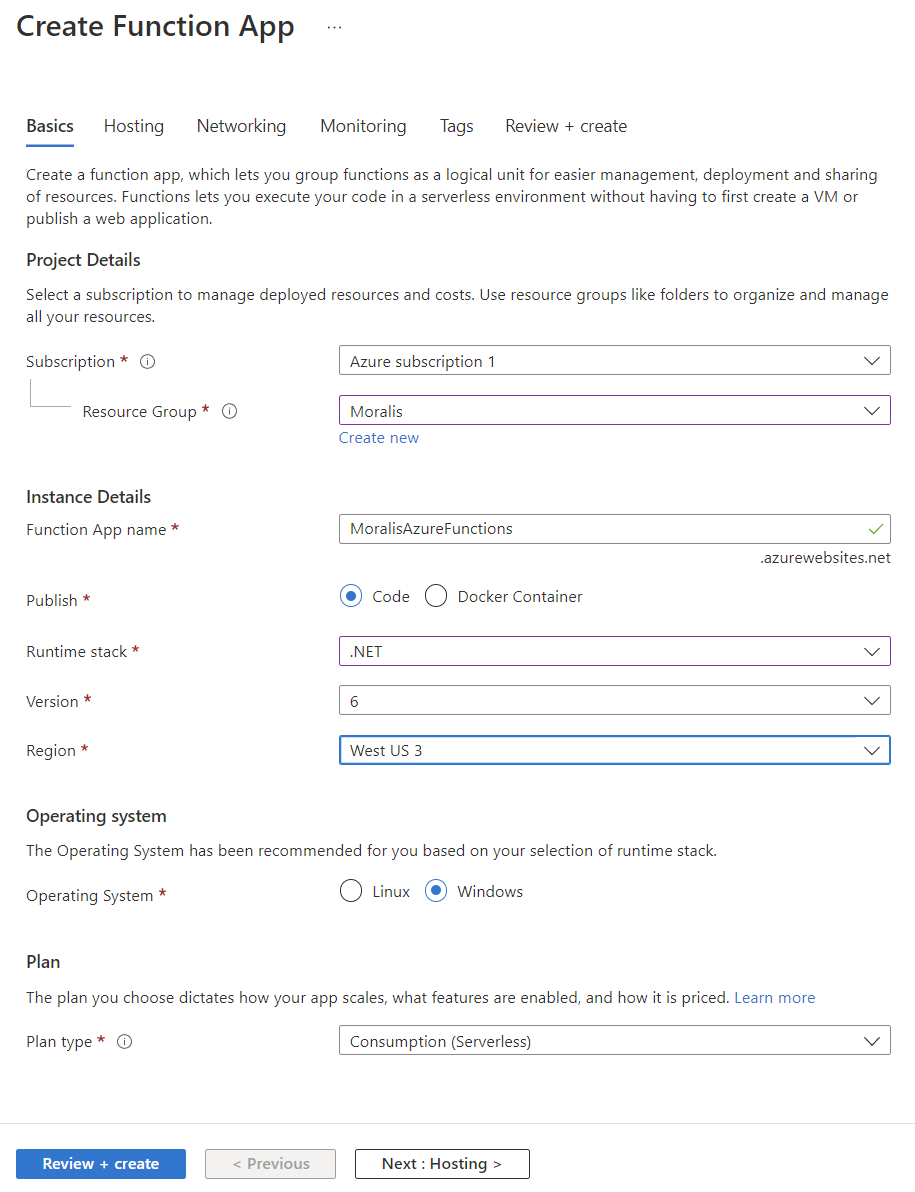
As soon as all settings are entered, proceed by clicking on “Review + create” and “Create”.
Add Application Settings
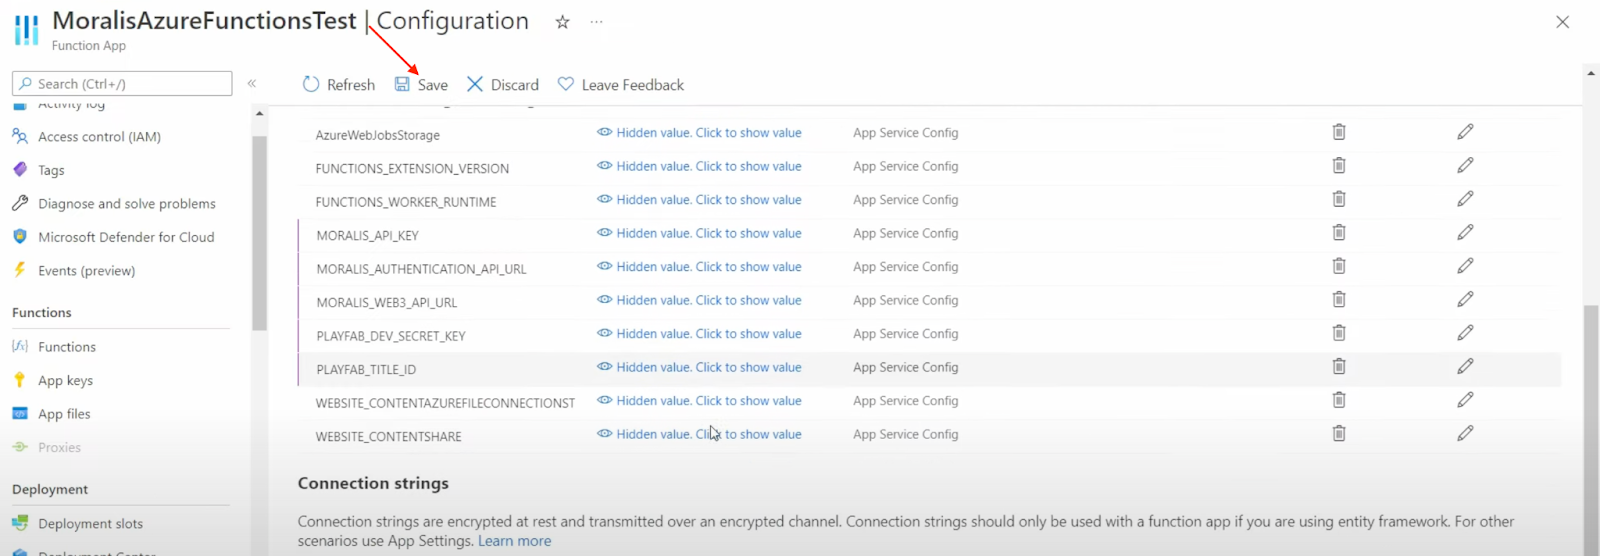
Inside this “Function App”, you will create your functions. As such, to proceed, navigate to your “Function App”, find the “Configuration” tab, and add new application settings:

You need to add several keys here. In total, you must add five new settings:
- First, you will need to add your Moralis API key. To do so, click on “+ New application setting”, set the name to “MORALIS_API_KEY”, and add your Moralis API key:
To find the key, you can navigate to the Moralis admin panel, click on ”Web3 APIs”, and copy ”Your API Key”: - Next up, create another setting and give it the name ”MORALIS_AUTHENTICATION_API_URL” and the value: “https://authapi.moralis.io/“.
- Name the third setting ”MORALIS_WEB3_API_URL” and add the following value: ”https://deep-index.moralis.io/api/v2”.
- You can name the fourth setting ”PLAYFAB_TITLE_ID” and paste your PlayFab ”Title ID”, which you saved earlier when setting up PlayFab.
- Lastly, the fifth and final setting should be named ”PLAYFAB_DEV_SECRET_KEY”, where you can set the value to your PlayFab ”Secret Key”, which you also fetched when setting up PlayFab.


Lastly, also make sure to click on ”Save” at the top:
Step 3: Creating Azure Functions with VSC – Connect PlayFab with Web3
This third step in connecting PlayFab with Web3 is divided into two parts. First, we will go over the necessary prerequisites. Second, we will show you how to create functions from Azure with VSC (Visual Studio Code). So, with no further ado, let’s look at the prerequisites you need to cover.
Prerequisites
Before creating the functions with VSC, you must take care of a few prerequisites. First, you must install the .Net 6.0 SDK using the following link: https://dotnet.microsoft.com/en-us/download/dotnet/6.0.
Following this, you need to install Azure Functions Core Tools, which you can do by clicking the link. Just scroll down and click on either of the following:

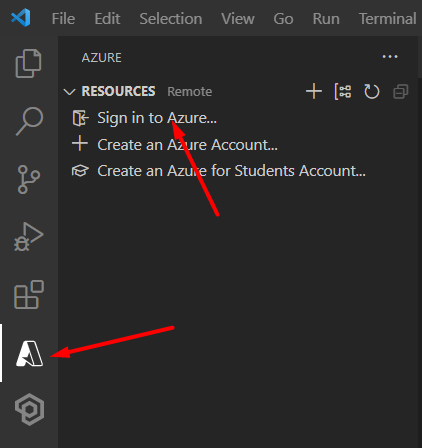
Finally, you need to install VSC. In addition, once you have VSC, add the C# and Azure Functions extensions. When installing the Azure Functions extension, it should add another tab to VSC:

Click on this tab, hit ”Sign in to Azure”, and sign into your account:
That is it for the prerequisites; let’s take the following section to create the functions!
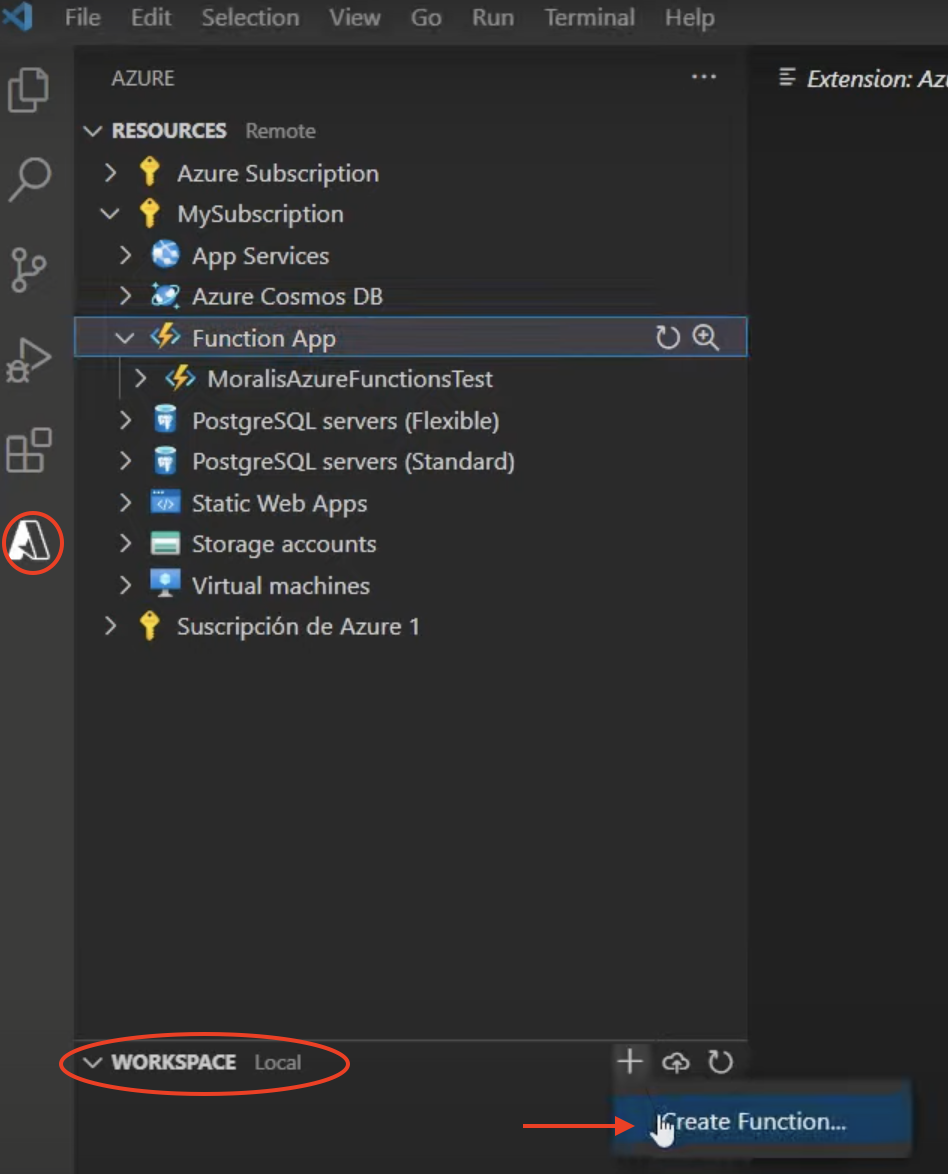
Creating Azure Functions
With all the prerequisites taken care of, we will now create methods from Azure Functions. As such, first, navigate to the “Azure” tab, click on “Workspace”, and create a new function:
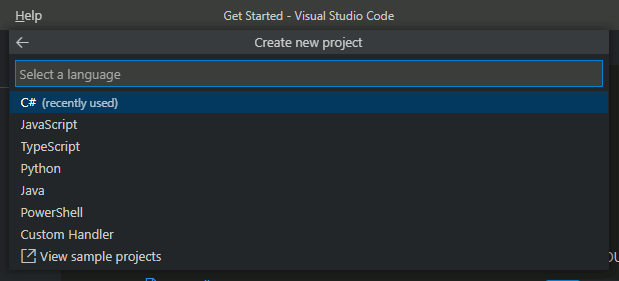
This allows you to create a new project using an already existing folder or a completely new one. Moreover, we will create a new folder called “example-auth-azure-functions”. Once you create/select a folder, you will need to select a language. In this case, you should choose C#:
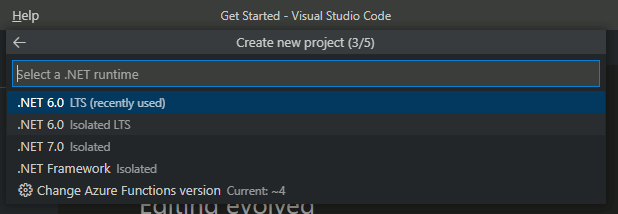
Next, you need to pick a “.NET runtime”, and we will choose ”.NET 6.0 LTS”:
Following this, select ”HTTP trigger”:

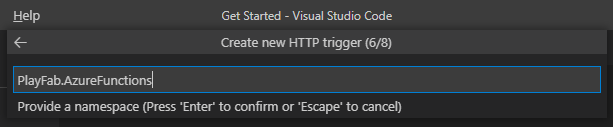
Provide a root namespace:
Finally, for ”AccessRights”, select ”Function”:

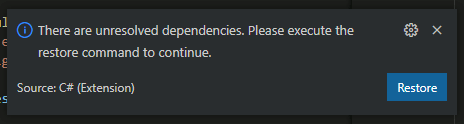
To top things off, choose ”Open in current window” and make sure to click on ”Restore” on the pop-up window that appears:
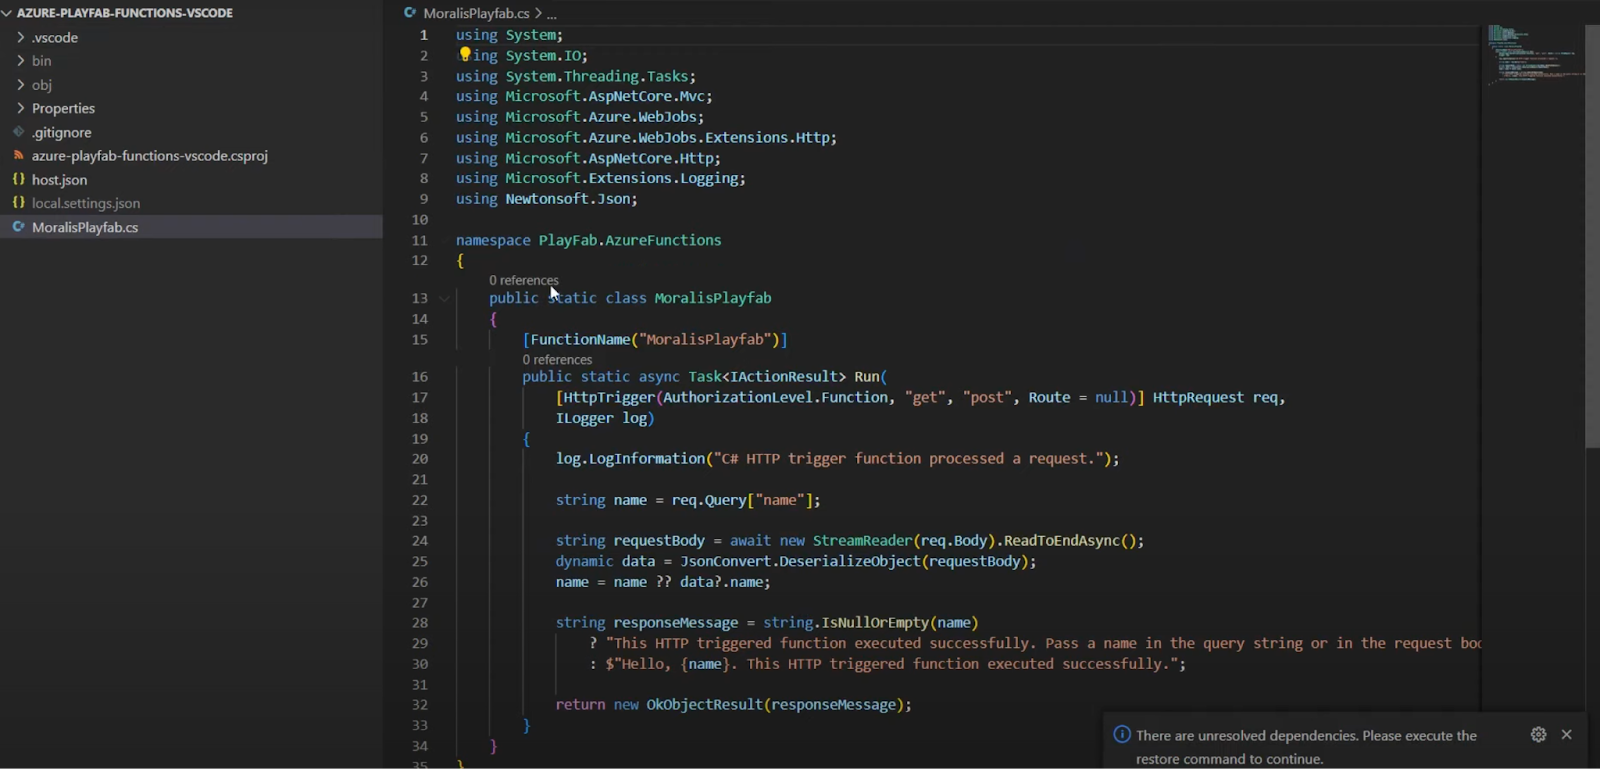
If you make these selections, it should create a new project with several files, and it should look like this:
With the project at hand, the next step is to add packages. To do so, open the “.csproj” file. The file will have an “ItemGroup” element with one or several “PackageReference”, which you can replace with the following code:
<ItemGroup>
    <PackageReference Include="Microsoft.NET.Sdk.Functions" Version="4.1.1"/>
    <PackageReference Include="PlayFabAllSDK" Version="1.127.220718"/>
    <PackageReference Include="PlayFabCloudScriptPlugin" Version="1.53.190627-alpha"/>
    <PackageReference Include="Moralis" Version="2.0.4-beta"/>
</ItemGroup>
Once you save this file, it should trigger another pop-up, and you can click on “Restore” once again.
Lastly, visit Moralis’ documentation for this tutorial and scroll down to the “Complete MoralisPlayFab.cs” section. You can copy the entire code and replace everything within the “MoralisPlayFab.cs” file.
Step 4: Deploying Azure Functions with VSC – Connect PlayFab with Web3
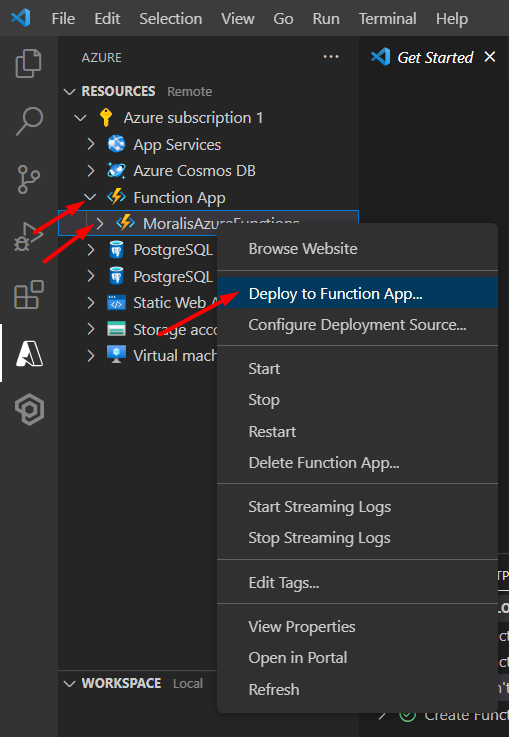
To deploy the functions with VSC, you need to right-click on ”MoralisAzureFunctions” and select the ”Deploy to Function App…” alternative:
From there, you need to click on ”Deploy”:

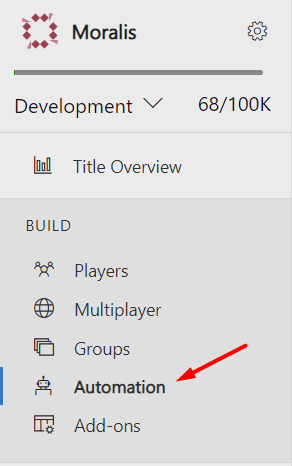
Next up, you can navigate to PlayFab, find the title ID dashboard, and click on the ”Automation” tab:
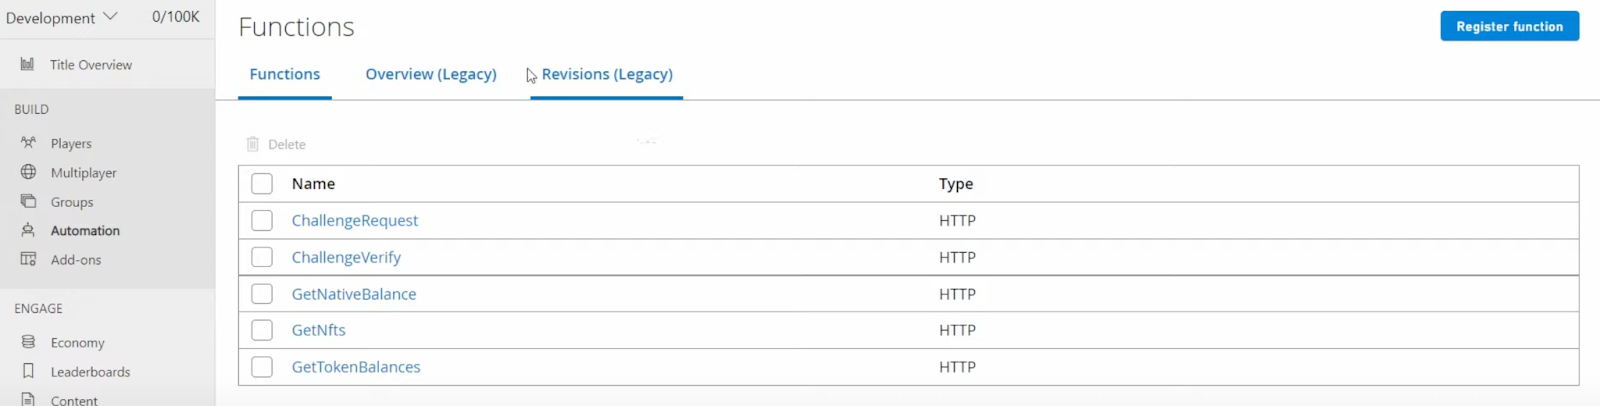
Now you need to register five functions. To do so, click on “Register function” and set the “Trigger” type to “HTTP”:
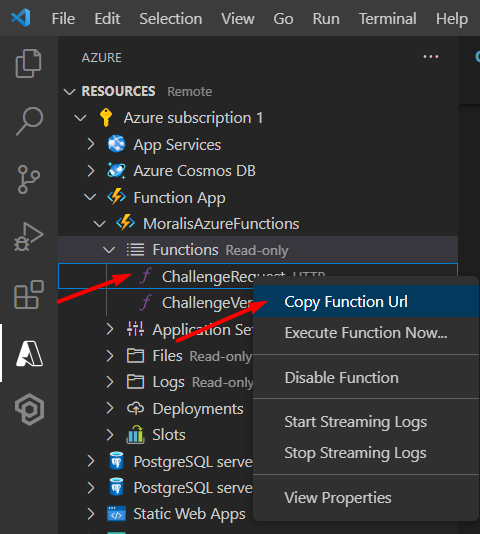
Put “ChallengeRequest” as the name and copy the function URL from VSC. You can get the URL by right-clicking on “ChallengeRequest” under “Functions” and pressing “Copy Function Url”:
Paste this URL into the URL field and select ”Register function”.
You can do the same for the additional four functions. As such, in the end, you should have something like this in your PlayFab admin panel:
Step 5: Setting Up Unity and Connecting Microsoft Azure PlayFab – Connect PlayFab with Web3
With the functions deployed, the last step is to call these functions from Unity. To make this process more accessible, we will be using a Moralis PlayFab Unity demo project. You can find the demo project at the following link: https://github.com/MoralisWeb3/demo-unity-moralis-auth-via-playfab/archive/refs/heads/main.zip.
If you download the project and open it with Unity, you will be presented with something like this:

You can then click on “Scenes” and “SampleScene”, which should look like this:

Next, you will need to log in. Hence, click on the “Window” tab at the top, then “PlayFab”, and then hit “Editor Extensions”:

From there, click on the “PlayFab” tab and then “MakePlayFabSharedSettings”:

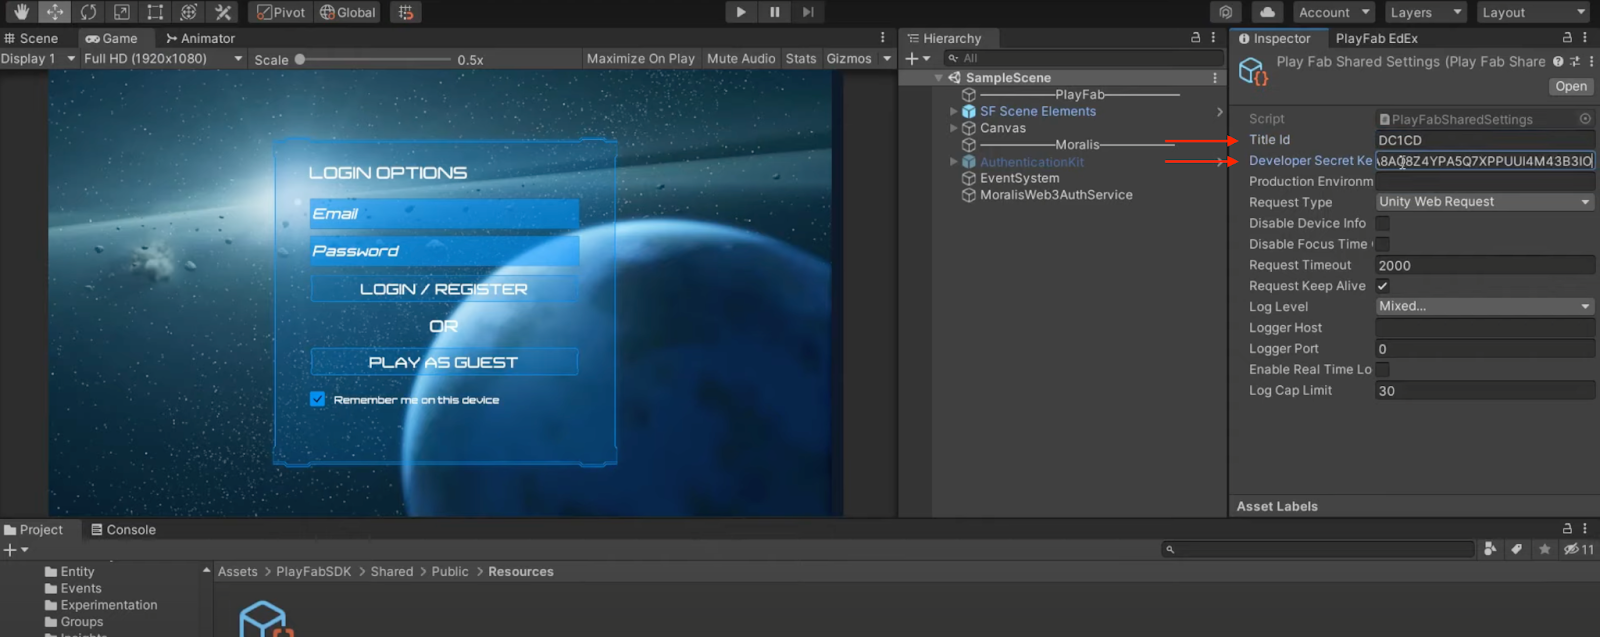
Following this, you can open this in the inspector and input the “Title ID” and “Secret Key” you fetched previously in the second step of this tutorial. As such, it should look like this:
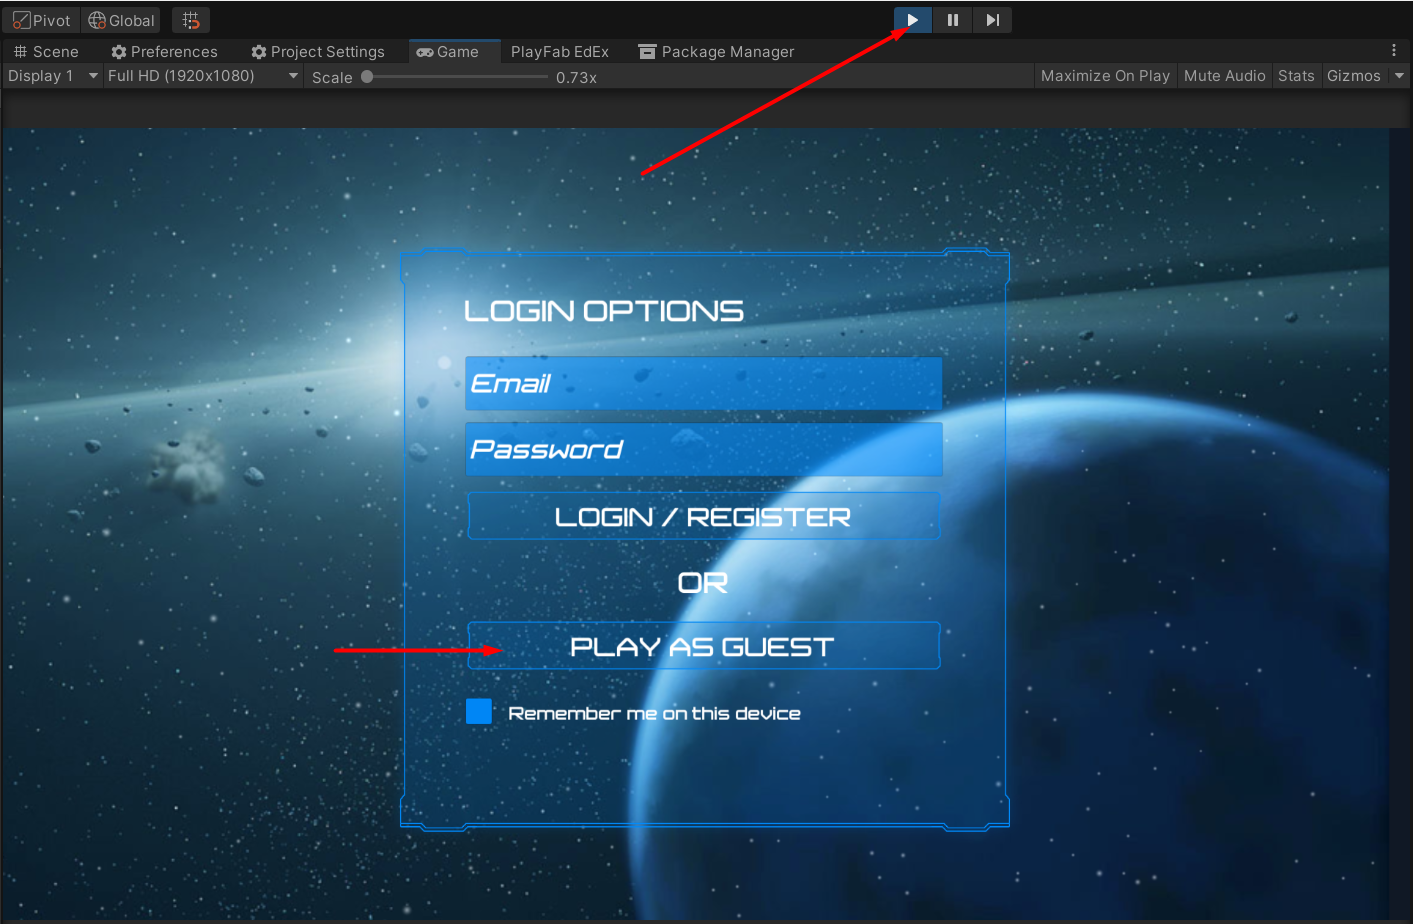
It’s now time to test if the application works. So, you can go ahead and run the application using the play button at the top and then select “PLAY AS GUEST”:
Next up, you can click on ”CONNECT WALLET” to connect your wallet:

This will display a QR code for you to scan. Furthermore, once you identify your Web3 identity, the wallet information should be added to the player’s profile in PlayFab. As such, to check this, navigate to “Players” in PlayFab, and then click on “Player Data”:

That is it! You now know how to connect PlayFab with Web3 and can start building amazing Web3 games in no time! If you had trouble during the tutorial, check out the video from earlier, as this might answer some of your questions!
How to Connect to PlayFab with Web3 – Summary
In this article, you managed to connect to PlayFab with Web3 easily using Azure Functions. Moreover, thanks to Moralis, you were able to achieve this in only five steps:
- Creating Accounts for Moralis, PlayFab, and Azure Functions
- Setting Up PlayFab and Azure Functions
- Creating Azure Functions with VSC
- Deploying Azure Functions with VSC
- Setting Up Unity and Connecting Microsoft Azure PlayFab
This allows you to create a simple Unity application where users can sign in using their Web3 wallets. Once they authenticate, your PlayFab backed autonomously populates with information regarding users’ wallets. As such, this tutorial presents an easy way to access on-chain data in your backend when it comes to Web3 game development.
If you found this tutorial helpful, we recommend checking out additional content here at Moralis’ Web3 blog. For example, learn to create a decentralized app in just three steps or how to build a Web3 FIFA clone.
Furthermore, if you want more information about Moralis’ capabilities, check out the platform’s other APIs. For example, learn more about Moralis’ Web3 Streams API, allowing you to stream blockchain data directly into your project’s backend.
Nevertheless, if you want to connect to PlayFab with Web3 or build a Web3 app, sign up with Moralis right now!
