Are you looking for the easiest way to build a crypto wallet timeline? If so, then you’re exactly where you need to be. In today’s tutorial, we’ll show you how to effortlessly build a comprehensive timeline of any address using Moralis’ Wallet API. With this premier tool, you only need our Wallet History endpoint to get all the data you need!
Say farewell to the hassle of numerous API calls and the complexity of stitching together ERC-20 transactions, NFT transfers, and other events. Our Wallet History endpoint simplifies this process, enabling you to create a detailed timeline of a wallet’s history with just a single API call. If you’re ready to dive into the coding, take a look at how the endpoint works in the example below:
import fetch from 'node-fetch';

const options = {
 method: 'GET',
 headers: {
   accept: 'application/json',
   'X-API-Key': 'YOUR_API_KEY'
 },
};

fetch(
 'https://deep-index.moralis.io/api/v2.2/wallets/0xd8da6bf26964af9d7eed9e03e53415d37aa96045/history?chain=eth&order=DESC',
 options
)
 .then((response) => response.json())
 .then((response) => console.log(response))
 .catch((err) => console.error(err));
Running the code above provides the complete history of the wallet in question, along with transaction categories, address labels, summaries, and much more for each event. As such, you get fully decoded data straight out of the box without having to deal with any interpretation logic yourself. Here’s an example of what it might look like:
{
  //...
  "result": [
    {
      "hash": "0xdb50bd448ddc61166989477545fc95c76edcf6febdac5d6f8eda26cc56ac1d92",
      "nonce": "14",
      "transaction_index": "159",
      "from_address": "0xc84d8afb525268cbc95b6edf6ca35d727c273e1c",
      "from_address_label": null,
      "to_address": "0x3d9a49862b9735e6050f9d8d5540115ed5e3eb77",
      "to_address_label": null,
      "value": "0",
      "gas": "5272110",
      "gas_price": "11434748692",
      "input": "",
      "receipt_cumulative_gas_used": "14298989",
      "receipt_gas_used": "3485907",
      "receipt_status": "1",
      "block_timestamp": "2024-04-12T05:18:11.000Z",
      "block_number": "19637388",
      "block_hash": "0x7a86e910045253947b85f8c0986c7413888faf8962349eed3d62d286ec43a8f4",
      "nft_transfers": [],
      "erc20_transfers": [
        {
          "token_name": "TOX",
          "token_symbol": "TOX",
          "token_logo": null,
          "token_decimals": "8",
          "from_address": "0x800feb2b1092b93434048a17ecc6a1fad2687842",
          "from_address_label": null,
          "to_address": "0xd8da6bf26964af9d7eed9e03e53415d37aa96045",
          "to_address_label": null,
          "address": "0x3d9a49862b9735e6050f9d8d5540115ed5e3eb77",
          "log_index": 685,
          "value": "744397568560311000",
          "possible_spam": false,
          "verified_contract": false,
          "direction": "receive",
          "value_formatted": "7443975685.60311"
        }
      ],
      "method_label": null,
      "native_transfers": [],
      "summary": "Received 7,443,975,685.6031 TOX from 0x80...7842",
      "possible_spam": false,
      "category": "token receive"
    },
    //...
  ]
}
Fetching the data you need to build a crypto wallet timeline doesn’t have to be more challenging than that when working with Moralis!
However, for a more detailed breakdown, check out the video below, read the documentation for our Wallet History endpoint, or join us in this article as we dive deeper into the process:
Also, if you wish to start using the Wallet API yourself, don’t forget to sign up with Moralis. You can create an account free of charge, and you’ll gain immediate access to our premier APIs!
Overview
Building a crypto wallet timeline has, from a conventional perspective, been a resource-intensive and time-consuming task. Fetching the data typically involves numerous API calls and stitching together NFT transfers, native transactions, smart contract interactions, and other events, causing headaches for developers and increasing the likelihood of errors. But surely there must be a better way, right?

In today’s article, we’ll introduce you to Moralis’ Wallet History endpoint. This endpoint is designed to simply the process of fetching the history of any wallet, allowing you to get all the data you need in a single endpoint. So, whether you’re building a portfolio tracker, cryptocurrency wallet, or any other platform, this read is for you. Let’s dive straight into it!
What is a Crypto Wallet Timeline?
A crypto wallet timeline chronologically organizes all the transactions, transfers, and interactions with smart contracts linked to a specific address. These timelines can vary in design and functionality, catering to a diverse set of applications, including Web3 wallets, portfolio trackers, and other projects!
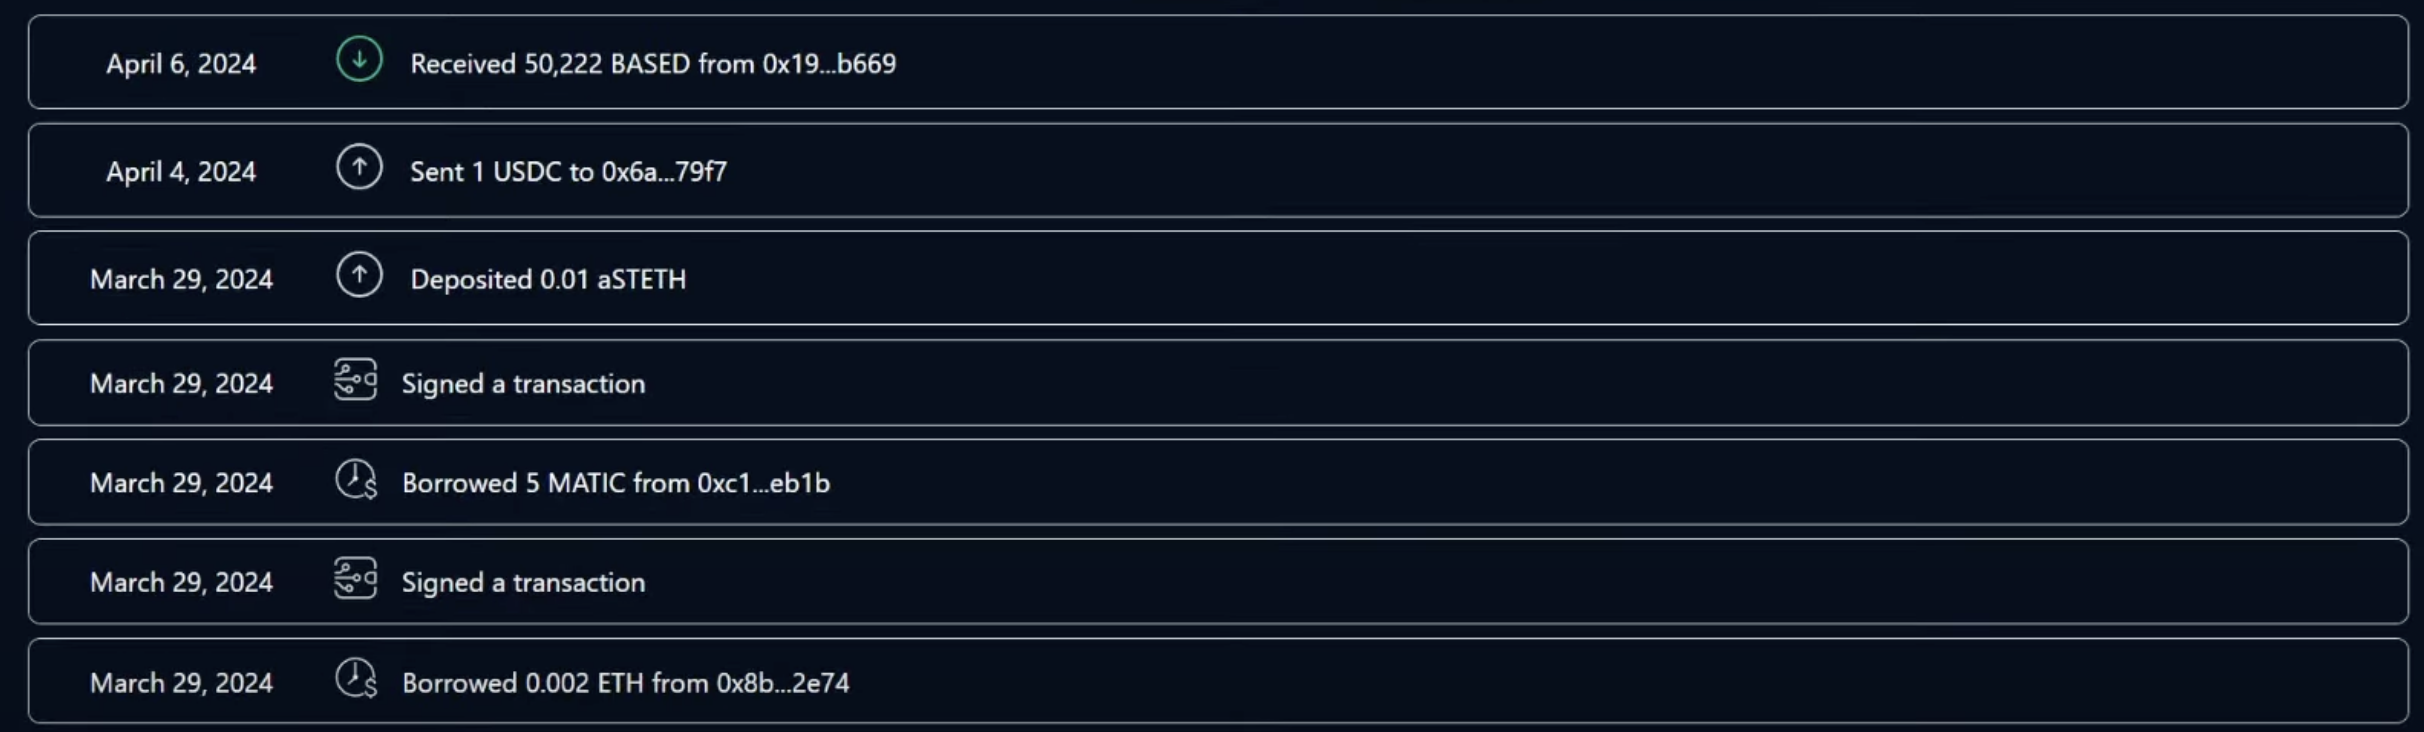
However, to give you a better understanding of what they are, let’s look at a simple crypto wallet timeline that we built:

The image above displays a straightforward crypto wallet timeline along with some additional information. First, you can see the date of each transaction on the far left:
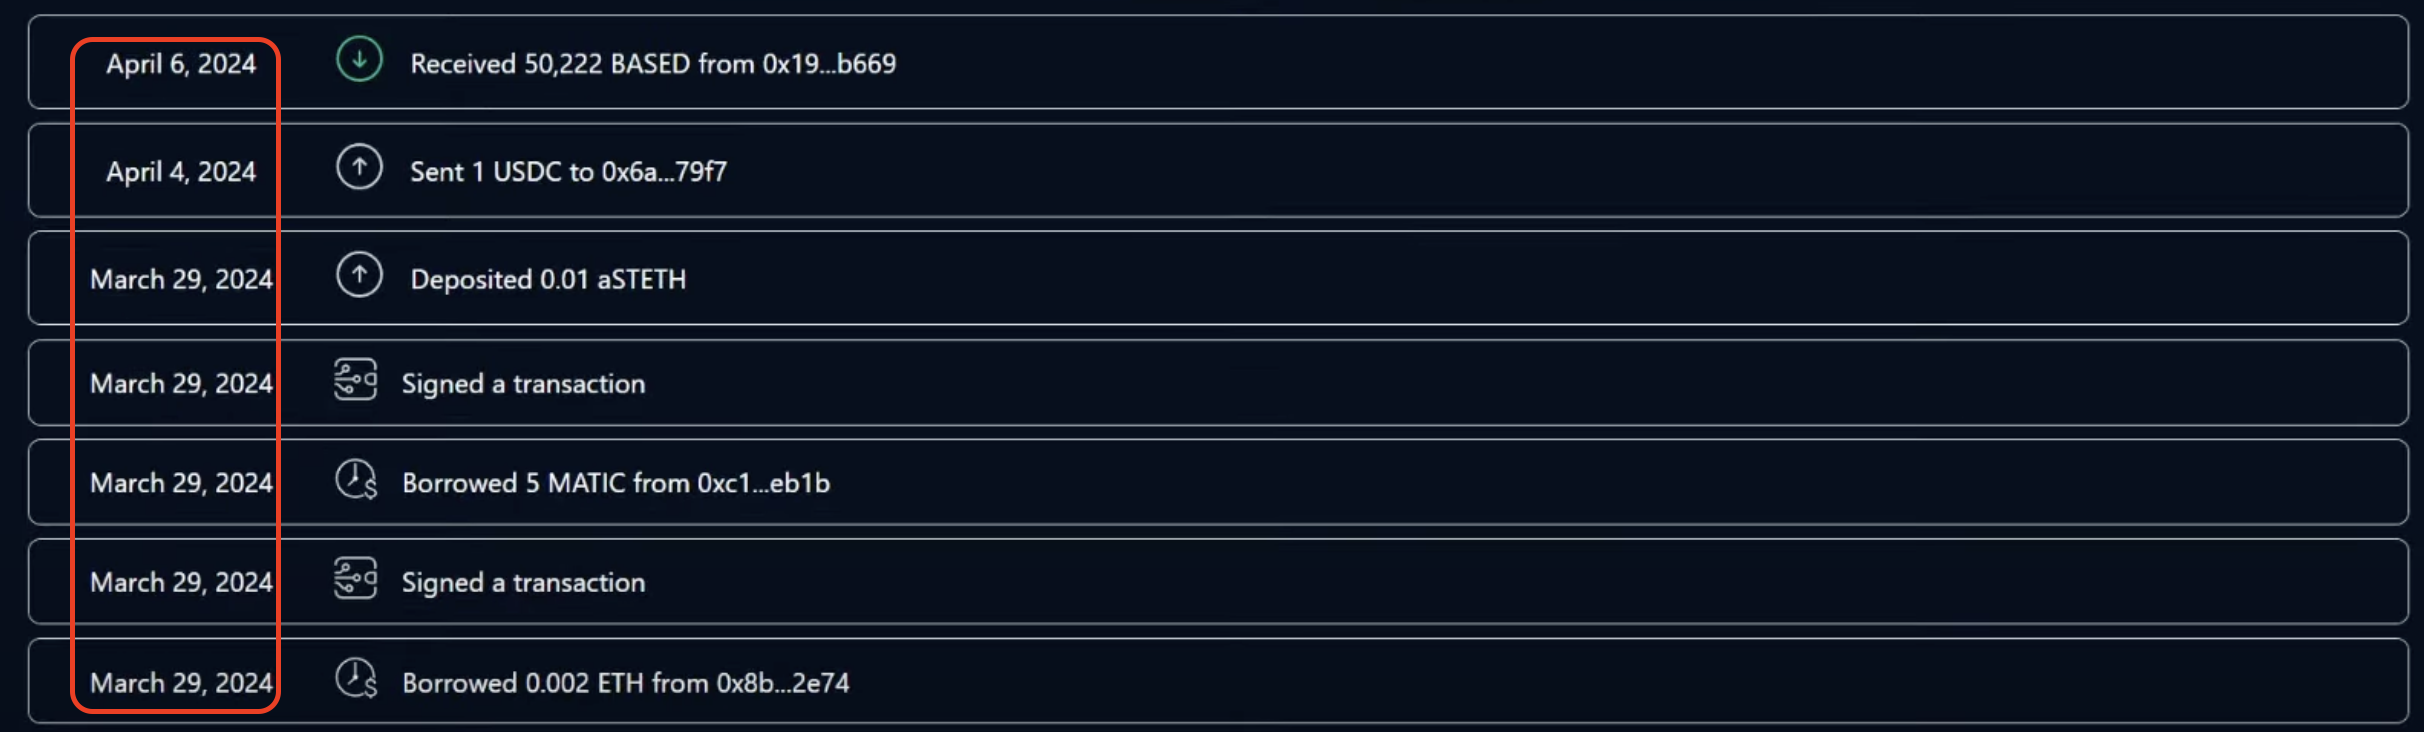
Additionally, we have included an icon corresponding to the event type for each transaction. For example, the event at the top represents a transaction where the wallet received tokens:
We also include a summary that briefly explains each event:
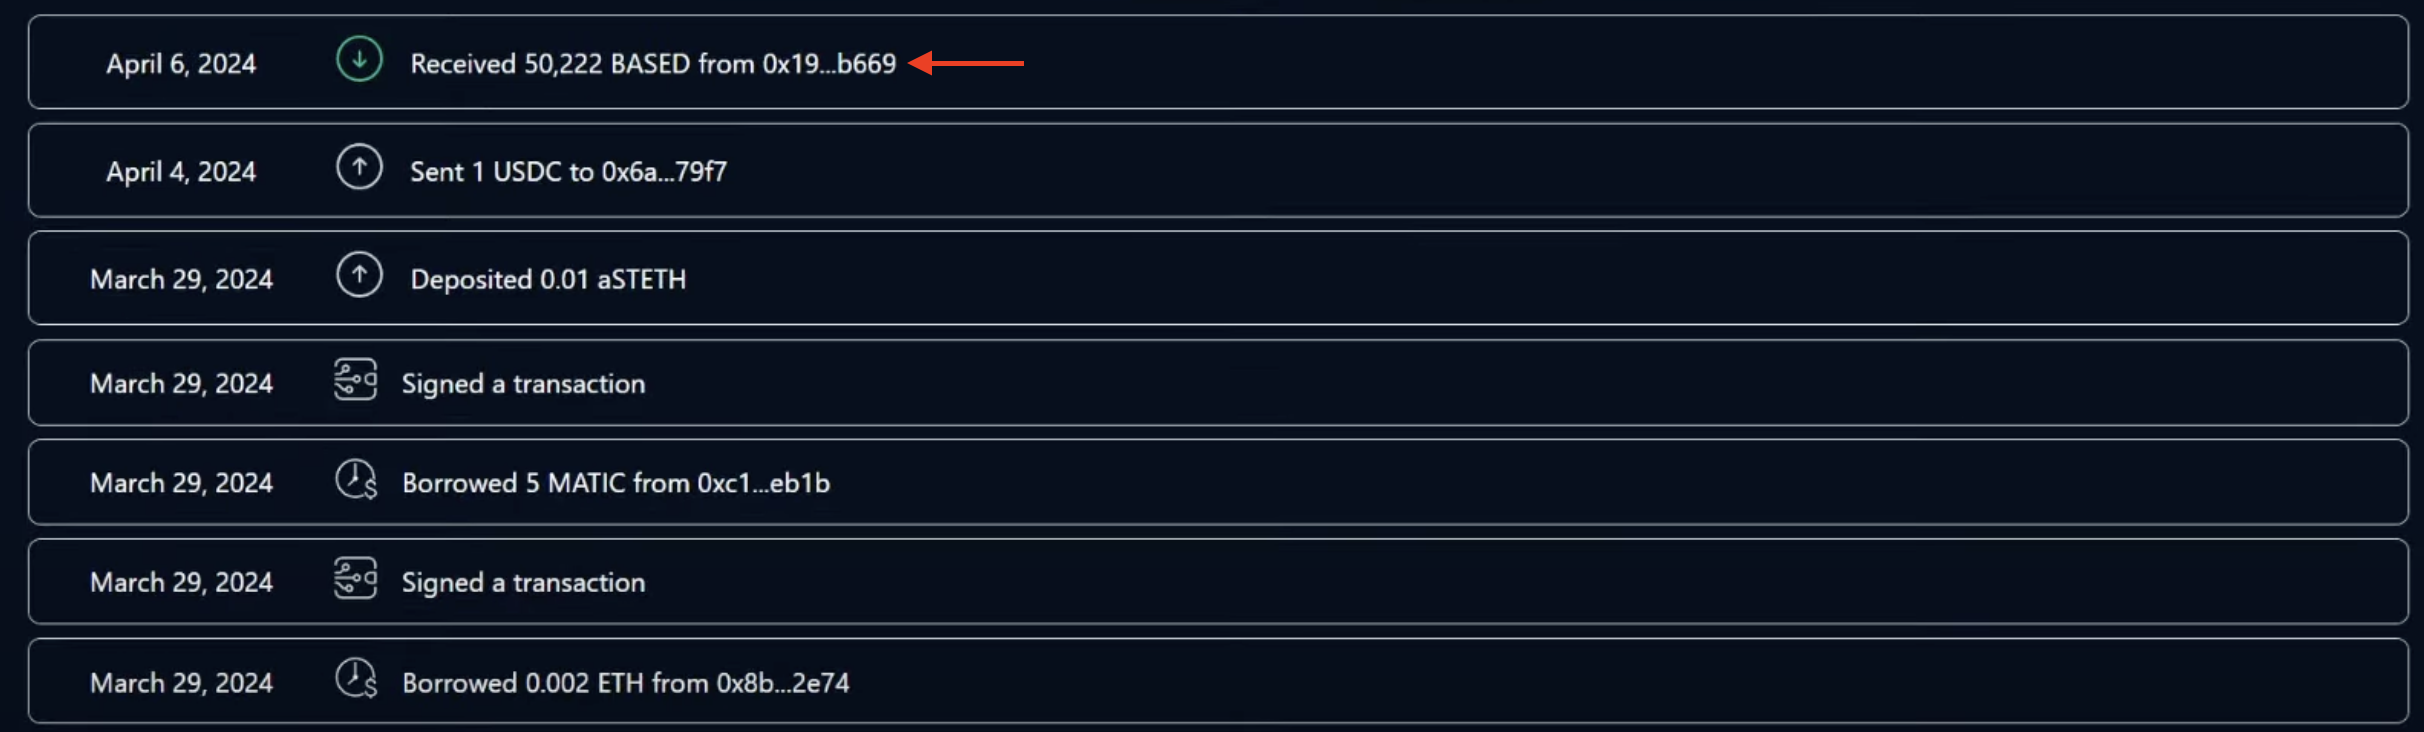
It’s also possible to click on each transaction to get more information. For this demo, we added the chain the event occurred on, the transaction hash, and the addresses involved:

So, what is the easiest way to get the data you need to build a crypto wallet timeline like this? Well, the answer to the question above is Moralis. But what exactly is Moralis?
What is Moralis?
Moralis is the industry’s premier Web3 infrastructure provider, and our suite of development tools comprises blockchain nodes, ten+ use case-specific APIs, and much more. Consequently, when leveraging Moralis, you get all the resources you need to build sophisticated Web3 projects that will blow the competition out of the water!
But why should you use Moralis to build a crypto wallet timeline?
To answer the above question, let’s explore four benefits of Moralis:
- Comprehensive: All our APIs are outcome-oriented and designed to minimize the requests you need to build dapps. This is why you only need a single endpoint to build a comprehensive crypto wallet timeline.
- Simple: With Moralis, you no longer need to bother with the complexities of integrating a new API provider for each chain. With our cross-chain compatible APIs, you now get a unified toolkit for all major networks, including Ethereum, BNB Smart Chain (BSC), Polygon, and many others.
- Secure: Leverage robust security features from Moralis to protect end users. With our advanced spam filters, you can seamlessly remove unwanted NFTs and ERC-20s. And with Moralis’ Security Score, you can help customers evaluate the security risks of tokens.
- Trusted: Moralis is trusted by 100,000+ developers and large enterprise customers, including MetaMask, Delta, Blockchain.com, etc.

That gives you an overview of Moralis. Let’s now introduce you to our Wallet API – the ultimate tool for building a crypto wallet timeline!
Introducing the Wallet API – The Easiest Way to Build a Crypto Wallet Timeline
Moralis’ Wallet API is the ultimate tool for wallet builders and anyone looking to integrate wallet functionality into their decentralized applications (dapps). This API boasts an impressive array of features, unparalleled scalability, and unmatched flexibility, giving you the tools you need to build top-tier dapps!
With the Wallet API, you can seamlessly fetch a wallet’s history, token balances, net worth, profitability, and much more with single endpoints. As such, when using this premier interface, you can seamlessly build everything from portfolio trackers to crypto tax tools without breaking a sweat.
With this quick introduction to the Wallet API, let’s now dive into our Wallet History API endpoint – the perfect solution for anyone looking to build a crypto wallet timeline!
The Wallet History Endpoint
The Wallet History endpoint is the easiest way for you to get a wallet’s entire transfer and transaction history. And with it, you only need a single API call to build a comprehensive crypto wallet timeline!
So, how does it work?
Calling our Wallet History endpoint returns the entire history of any address across all events in sequential order, including ERC-20 transactions, NFT transfers, contract interactions, etc. Furthermore, each event is enriched with address labels, summaries, and categories for over 15 transaction types. As such, all wallet activity is decoded straight out of the box, making it super easy for you to construct a comprehensive crypto wallet timeline.
To demonstrate how this works, let’s look at a brief script showing you the Wallet History endpoint in action:
import fetch from 'node-fetch';

const options = {
 method: 'GET',
 headers: {
   accept: 'application/json',
   'X-API-Key': 'YOUR_API_KEY'
 },
};

fetch(
 'https://deep-index.moralis.io/api/v2.2/wallets/0xd8da6bf26964af9d7eed9e03e53415d37aa96045/history?chain=eth&order=DESC',
 options
)
 .then((response) => response.json())
 .then((response) => console.log(response))
 .catch((err) => console.error(err));
Before you can run the script above, you need to replace YOUR_API_KEY with a Moralis API key and configure the parameters to fit your query. In return, you’ll get a comprehensive response that looks something like this:
{
  //...
  "result": [
    {
      "hash": "0xdb50bd448ddc61166989477545fc95c76edcf6febdac5d6f8eda26cc56ac1d92",
      "nonce": "14",
      "transaction_index": "159",
      "from_address": "0xc84d8afb525268cbc95b6edf6ca35d727c273e1c",
      "from_address_label": null,
      "to_address": "0x3d9a49862b9735e6050f9d8d5540115ed5e3eb77",
      "to_address_label": null,
      "value": "0",
      "gas": "5272110",
      "gas_price": "11434748692",
      "input": "",
      "receipt_cumulative_gas_used": "14298989",
      "receipt_gas_used": "3485907",
      "receipt_status": "1",
      "block_timestamp": "2024-04-12T05:18:11.000Z",
      "block_number": "19637388",
      "block_hash": "0x7a86e910045253947b85f8c0986c7413888faf8962349eed3d62d286ec43a8f4",
      "nft_transfers": [],
      "erc20_transfers": [
        {
          "token_name": "TOX",
          "token_symbol": "TOX",
          "token_logo": null,
          "token_decimals": "8",
          "from_address": "0x800feb2b1092b93434048a17ecc6a1fad2687842",
          "from_address_label": null,
          "to_address": "0xd8da6bf26964af9d7eed9e03e53415d37aa96045",
          "to_address_label": null,
          "address": "0x3d9a49862b9735e6050f9d8d5540115ed5e3eb77",
          "log_index": 685,
          "value": "744397568560311000",
          "possible_spam": false,
          "verified_contract": false,
          "direction": "receive",
          "value_formatted": "7443975685.60311"
        }
      ],
      "method_label": null,
      "native_transfers": [],
      "summary": "Received 7,443,975,685.6031 TOX from 0x80...7842",
      "possible_spam": false,
      "category": "token receive"
    },
    //...
  ]
}
The response contains valuable information about each event, including a transaction hash, address labels, the category type, a summary, etc. And with this data, you have everything you need to build a crypto wallet timeline without breaking a sweat!
Benefits of the Wallet History Endpoint
The Wallet History endpoint provides loads of benefits, and down below, you’ll find three prominent examples:
- Deep Wallet Insight: The Wallet History endpoint provides a wallet’s full history, including ERC-20 swaps, native transactions, NFT transfers, and contract interactions, with just a single API call. As such, this endpoint allows you to gain deep insight into a wallet’s history without breaking a sweat.
- Reduced Complexities: With the Wallet History endpoint, you no longer need to bother with the complexities of stitching together data yourself. Get a wallet’s complete history with just one endpoint and reduce the number of API calls you need.
- Categories and Summaries: The Wallet API provides fully decoded data, mapping each transaction, transfer, and contract interaction to one of 15+ categories. In addition, each event is equipped with an out-of-the-box summary, giving you immediate access to a brief explanation of the transaction in question.

That gives you an overview of the Wallet History endpoint. In the following sections, we’ll now dive into our main tutorial and show you how to build a crypto wallet timeline in three steps!
3-Step Tutorial: How to Build a Crypto Wallet Timeline
For this tutorial, we’ll be showing you how to get the data you need to build a crypto wallet timeline using Moralis’ Wallet API. And thanks to the accessibility of the Wallet History endpoint, you can get the information you need in three simple steps:
- Get a Moralis API Key
- Write a Script Calling the Wallet History Endpoint
- Run the Script
At the end of this brief tutorial, you’ll have all the data required to build a comprehensive crypto wallet timeline, similar to what we showed you in the ”What is a Crypto Wallet Timeline?” section:
However, before proceeding to the next step, you must take care of a couple of prerequisites!
Prerequisites
For this tutorial on how to get the data you need to build a crypto wallet timeline, we’ll be using JavaScript and Node.js. As such, if you haven’t already, make sure you have the following ready before you get going:
- Node.js v.14+
- Npm/Yarn
Step 1: Get a Moralis API Key
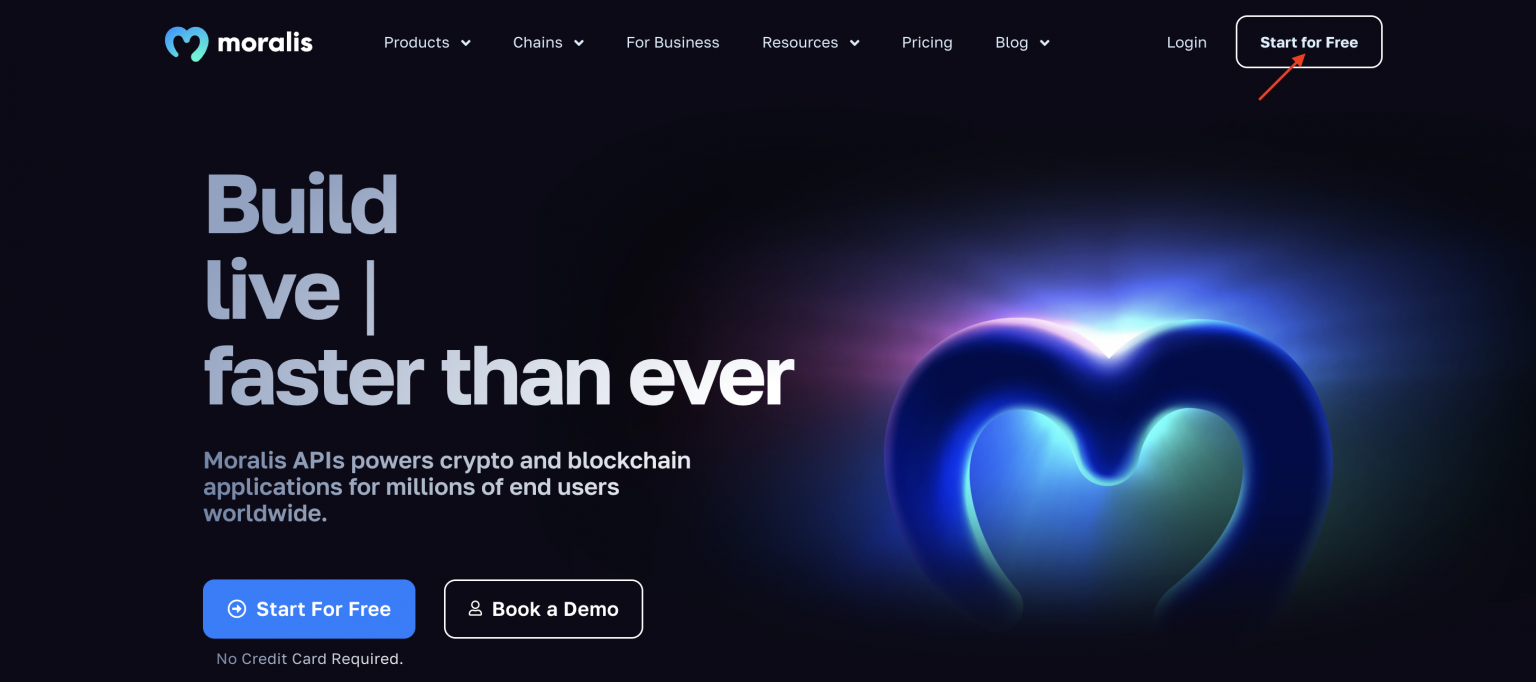
Start by clicking on the ”Start for Free” button at the top of Moralis’ homepage and create your Moralis account:
With an account at hand, copy your API key under the ”Home” tab:
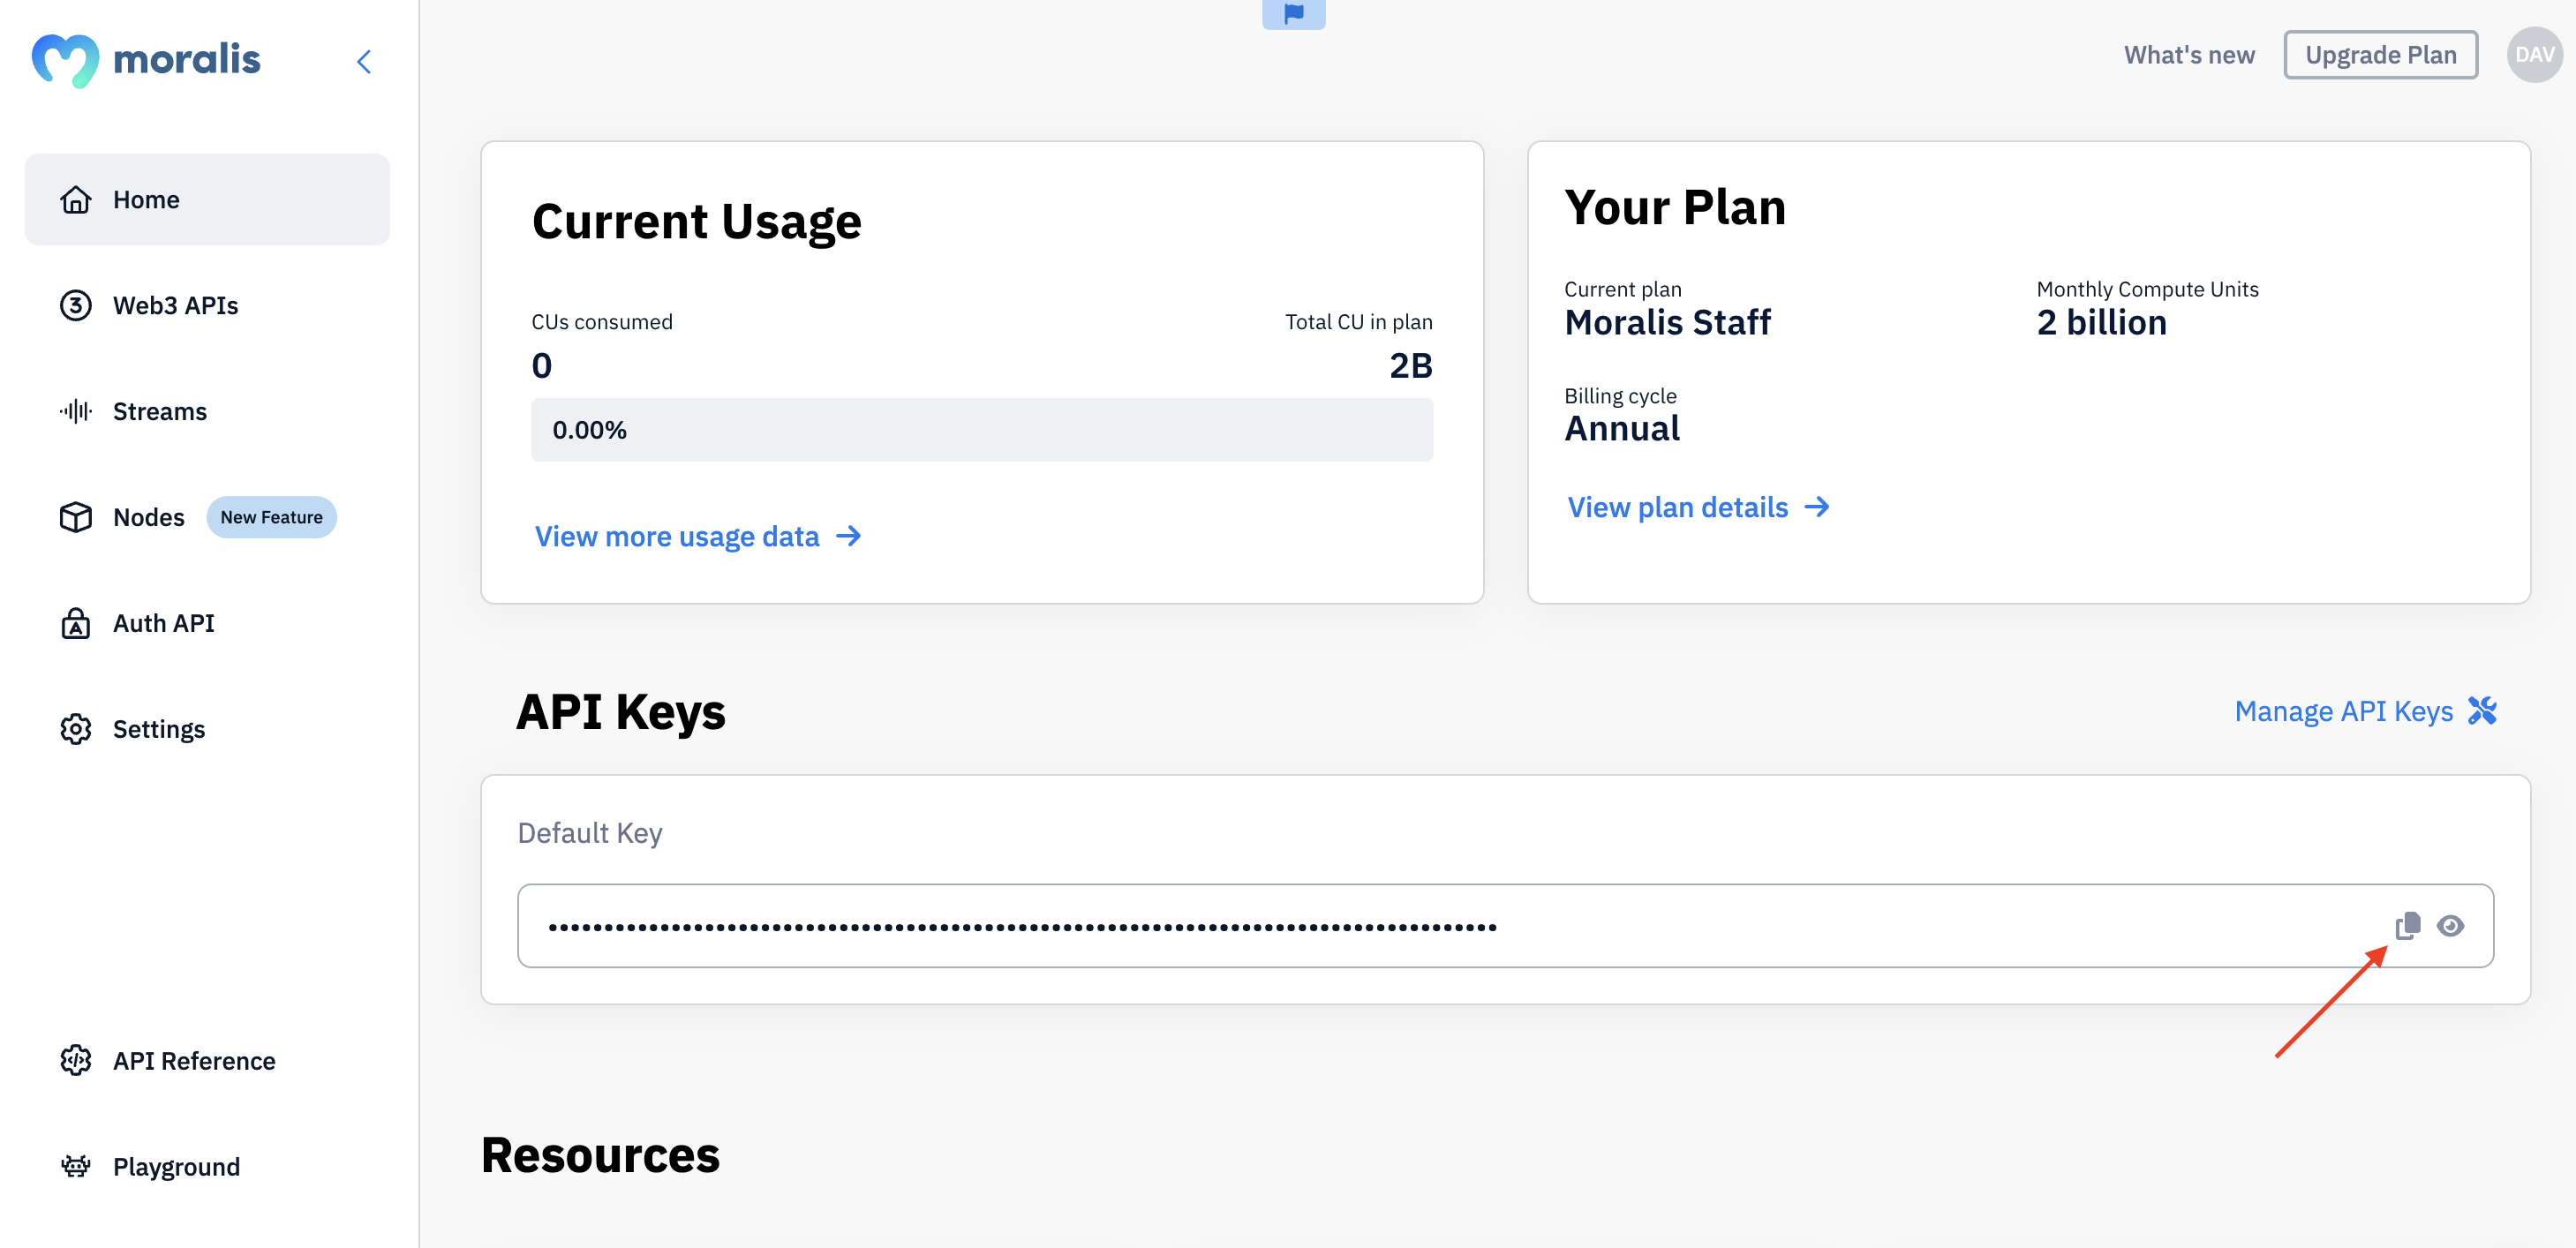
Keep your Moralis API key for now, as you’ll need it in the next section!
Step 2: Write a Script Calling the Wallet History Endpoint
Set up a project folder in your preferred IDE, open a new terminal, and initialize a project using the following command:
npm init
Next, install the required dependencies by executing the terminal commands below:
npm install node-fetch --save
npm install moralis @moralisweb3/common-evm-utils
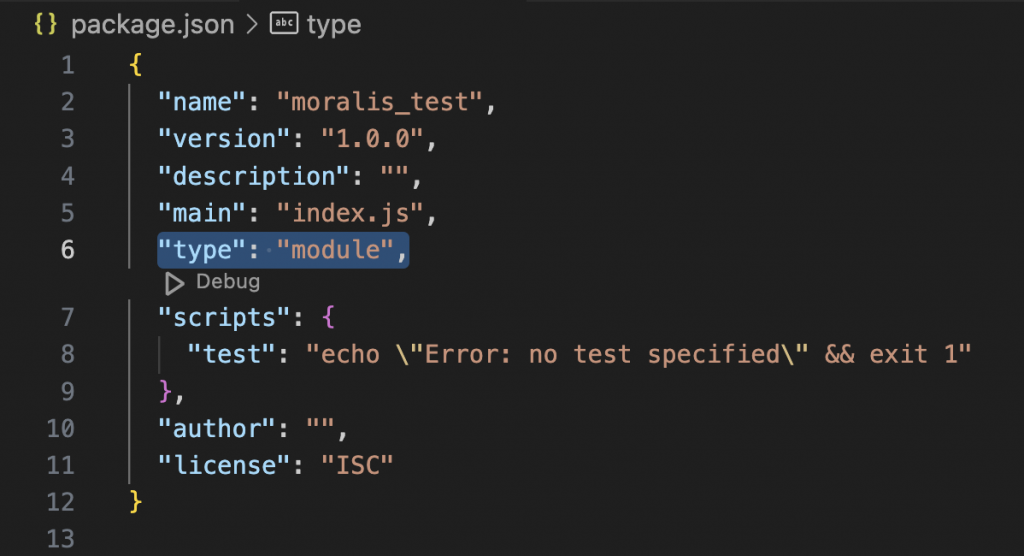
You can then open your ”package.json” file and add ”type”: ”module” to the list:
From here, create a new ”index.js” file and add the following code:
import fetch from 'node-fetch';

const options = {
 method: 'GET',
 headers: {
   accept: 'application/json',
   'X-API-Key': 'YOUR_API_KEY'
 },
};

fetch(
 'https://deep-index.moralis.io/api/v2.2/wallets/0xd8da6bf26964af9d7eed9e03e53415d37aa96045/history?chain=eth&order=DESC',
 options
)
 .then((response) => response.json())
 .then((response) => console.log(response))
 .catch((err) => console.error(err));
You then need to configure the code slightly. You can start by replacing YOUR_API_KEY with the key you copied in the first step. Next, you might want to configure the query parameters to suit your preferences.
That’s it for the code. All that remains from here is running the script!
Step 3: Run the Script
To execute the script, you need to open a new terminal, cd into your project’s root folder, and run the command below:
node index.js
In return, you’ll get a response looking something like this:
{
  //...
  "result": [
    {
      "hash": "0xdb50bd448ddc61166989477545fc95c76edcf6febdac5d6f8eda26cc56ac1d92",
      "nonce": "14",
      "transaction_index": "159",
      "from_address": "0xc84d8afb525268cbc95b6edf6ca35d727c273e1c",
      "from_address_label": null,
      "to_address": "0x3d9a49862b9735e6050f9d8d5540115ed5e3eb77",
      "to_address_label": null,
      "value": "0",
      "gas": "5272110",
      "gas_price": "11434748692",
      "input": "",
      "receipt_cumulative_gas_used": "14298989",
      "receipt_gas_used": "3485907",
      "receipt_status": "1",
      "block_timestamp": "2024-04-12T05:18:11.000Z",
      "block_number": "19637388",
      "block_hash": "0x7a86e910045253947b85f8c0986c7413888faf8962349eed3d62d286ec43a8f4",
      "nft_transfers": [],
      "erc20_transfers": [
        {
          "token_name": "TOX",
          "token_symbol": "TOX",
          "token_logo": null,
          "token_decimals": "8",
          "from_address": "0x800feb2b1092b93434048a17ecc6a1fad2687842",
          "from_address_label": null,
          "to_address": "0xd8da6bf26964af9d7eed9e03e53415d37aa96045",
          "to_address_label": null,
          "address": "0x3d9a49862b9735e6050f9d8d5540115ed5e3eb77",
          "log_index": 685,
          "value": "744397568560311000",
          "possible_spam": false,
          "verified_contract": false,
          "direction": "receive",
          "value_formatted": "7443975685.60311"
        }
      ],
      "method_label": null,
      "native_transfers": [],
      "summary": "Received 7,443,975,685.6031 TOX from 0x80...7842",
      "possible_spam": false,
      "category": "token receive"
    },
    //...
  ]
}
The response above contains all the information you need to build a comprehensive crypto wallet timeline. For instance, towards the bottom, you’ll find both the category and summary, which you’ll likely find very helpful:
     //...
      "summary": "Received 7,443,975,685.6031 TOX from 0x80...7842",
      "possible_spam": false,
      "category": "token receive"
       //...
Congratulations! You now know how to get any wallet’s history!
You can now use all this information to build a crypto wallet timeline without breaking a sweat. However, if you want more information on how to do so, check out the video at the top of the article, where we cover this in further detail.
Beyond the Wallet API – Exploring Moralis’ API Suite
Now that you know how to build a crypto wallet timeline using the Wallet API, let’s dive a bit deeper into Moralis. Moralis’ suite of development tools comprises over ten use case-specific APIs, meaning we won’t be able to cover them all in this section. As such, we’ll instead narrow our focus and look at three prominent examples you’ll likely find helpful when building dapps:
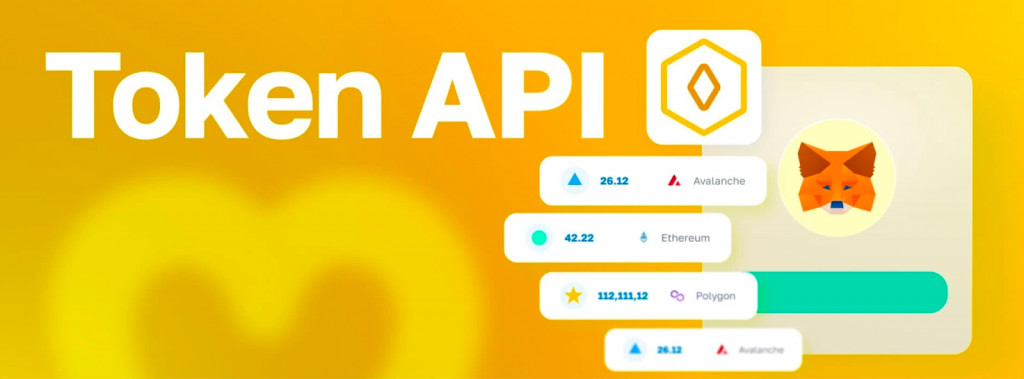
- Token API: The Token API is the ultimate tool for anyone looking to integrate ERC-20 token data into their dapps. With this premier interface, you can seamlessly get token balances, prices, metadata, and more using only a single endpoint.
- NFT API: Moralis’ NFT API supports over three million NFT collections across all major chains, including Ethereum, Polygon, BSC, and many others. With this top-tier API, you can seamlessly fetch NFT balances, metadata, price data, etc., without breaking a sweat.
- Streams API: The Streams API is the perfect tool for anyone looking to integrate real-time alerts into their projects. With this industry-leading interface, you can easily set up your own streams at the click of a button to get data sent directly to your project’s backend as soon as something important happens on-chain.

Nevertheless, that briefly covers three additional Moralis APIs. If you’d like to explore all our interfaces in further detail, please check out the official Web3 API page!
Summary: How to Build a Crypto Wallet Timeline
From a traditional perspective, building a crypto wallet timeline has been tedious and time-consuming. It generally requires making calls to multiple APIs and stitching together native transactions, NFT transfers, smart contract interactions, and other events. Fortunately, you can now leverage Moralis’ Wallet API to get all the data you need with one single API call.

With Moralis’ Wallet History endpoint, you now get a wallet’s history, along with address labels, transaction categories, summaries, and much more, without breaking a sweat. As such, it has never been easier to build a crypto wallet timeline!
If you liked this tutorial on how to build a crypto wallet timeline, make sure to check out more content here on the Moralis blog. For instance, learn how to get all owners of an ERC-20 token.
Also, if you want to leverage the Wallet API yourself, don’t forget to sign up with Moralis. You can create an account without paying a dime, so you have nothing to lose!
