In this article, we’ve outlined the exact steps to build a dapp. Now, if you already possess JavaScript proficiency, you can start using Moralis (the leading enterprise-grade Web3 API provider) and our Web3 website template on GitHub. Moreover, you can basically complete this article’s project and explore the easiest way to build dapps with these three steps:
- Clone our Ethereum boilerplate code
- Install dependencies using simple commands (more info below)
- Run your dapp
By using our template, you’ll explore the easiest way to build dapps, and your application will have the following features implemented by default:
✅ Web3 Authentication – MetaMask functionality is integrated by default. However, you can easily implement other authentication methods.
✅ Wallet Transactions – The finished dapp will have a page that displays transactions for the connected wallet.
✅ Token Transfers – Display token transfers from the connected wallet, such as ERC-20 and NFTs.
✅ Cross-Chain Support – When using Moralis, you can tweak specific parameters and connect to any of the supported EVM-compatible blockchains.
✅ And More – Moralis’ dev team is always improving the boilerplate, and new features are in the pipeline!

However, if you’re just an aspiring developer, we suggest following our instructions and watching the video at the end. As a result, you’ll see how to build dapps easily. Moving forward, we will first ensure you know what dapps are. Then, we’ll explore the Ethereum boilerplate and Moralis. With these basics, you’ll be ready for today’s demo project. Then, we’ll guide you through the simple three-step process, illustrating the easiest way to build dapps.
You’ll also obtain your Web3 API key – the gateway to using Moralis’ API. Also, thanks to Moralis’ cross-chain interoperability, you’ll see how to focus on other EVM-compatible chains. So, create your free Moralis account and follow our lead.
Decentralized Applications – What are They?
Since we’ll use the words “dapp” and “dapps” quite extensively, it’s important that you know what dapps actually are. Dapps is short for “decentralized applications”. But what exactly are decentralized applications? Well, if you know the basics of blockchain tech, you know that decentralization is the name of the game. Of course, the level of decentralization varies from chain to chain. However, they are all powered and governed by distributed nodes.
Furthermore, with the birth of Ethereum – the first programmable chain – pieces of software gained the ability to get deployed to blockchain networks. We know these pieces of software by the name “smart contracts”. This advancement in blockchain development enabled devs to start creating applications that in some way interact with blockchains. Of course, this was years ago. As such, back then, devs had to deal with all the limitations of RPC nodes when creating Web3 applications – the era before developers discovered the easiest way to build dapps.
Today, we use the term “dapps” for all web and mobile applications that in some way enable users to interact with one or multiple blockchains. Hence, dapps need to offer users a way to establish those connections. That is done using Web3 wallets, where MetaMask is still the leading solution. As such, it’s important to learn how to equip dapps with these Web3 authentication features. Fortunately, thanks to Moralis’ Auth API, Web3 authentication is implemented by default.
Nonetheless, it is also worth pointing out that most dapps are, in fact, some sort of Web2-Web3 hybrids. After all, not all data needs to be stored on-chain. This also means that there are countless opportunities. For instance, you can take basically any existing Web2 application and add certain Web3 functionalities to it.

How to Build Dapps the Easy Way
As mentioned above, Moralis is the ultimate Web3 API provider. It focuses on empowering legacy developers with tools to help them join the Web3 revolution with as little friction as possible. Moralis achieves that by offering three core solutions – Auth API, EVM API, and Streams API.
The Moralis Auth API enables you to easily implement various Web3 authentication methods. Moralis’ EVM API serves to fetch all sorts of on-chain data from Ethereum or other EVM-compatible chains with single lines of code. Moreover, Moralis’ Streams API enables you to effortlessly use webhooks to listen to blockchain accounts and smart contracts events and sync your dapps according to specific actions.
In addition, Moralis also offers an advanced Solana API. As such, you can even tackle this popular non-EVM-compatible chain. Aside from being cross-chain interoperable, Moralis is also all about cross-platform interoperability. Hence, you can work with Moralis’ APIs with different Web2 development platforms and programming languages.

Furthermore, our Ethereum boilerplate serves as a sort of Web3 website template to help you get started fast. In combination with Moralis, this boilerplate forms the easiest way to build dapps. When using this shortcut, you avoid dealing with any potential hurdles. As such, it is a great way to have your MVP (minimum viable product) up and running as fast as possible. Even though we displayed some of the core features of the ultimate Ethereum boilerplate earlier, let’s look at them briefly again:
- Web3 Authentication – A simple way for users to connect their Web3 wallets.
- Transactions – A page that displays transactions for a connected wallet.
- Transfers – A page that displays ERC-20 or NFT transfers for a connected wallet.
- Balances – A page that displays ERC-20 or NFT balances for a connected wallet.
Nonetheless, this template also includes multi-chain support and an improved responsive design.
Easiest Way to Build Dapps – Demo Project
As mentioned, we want to do a quick demo of our example dapp. As such, let’s look at the homepage of our boilerplate dapp:

In the screenshot above, you can see the gist of our dapp, which includes a top menu bar. The latter starts with a logo on the far left, followed by “Home”, “Transactions”, “Transfers”, and “Balances” options. There’s also the “Connect Wallet” button and the dark-light theme switch in the top-right corner:

Furthermore, as you might have guessed, users must click on the “Connect Wallet” button to complete their Web3 authentication. Here’s an example user choosing to connect with MetaMask:
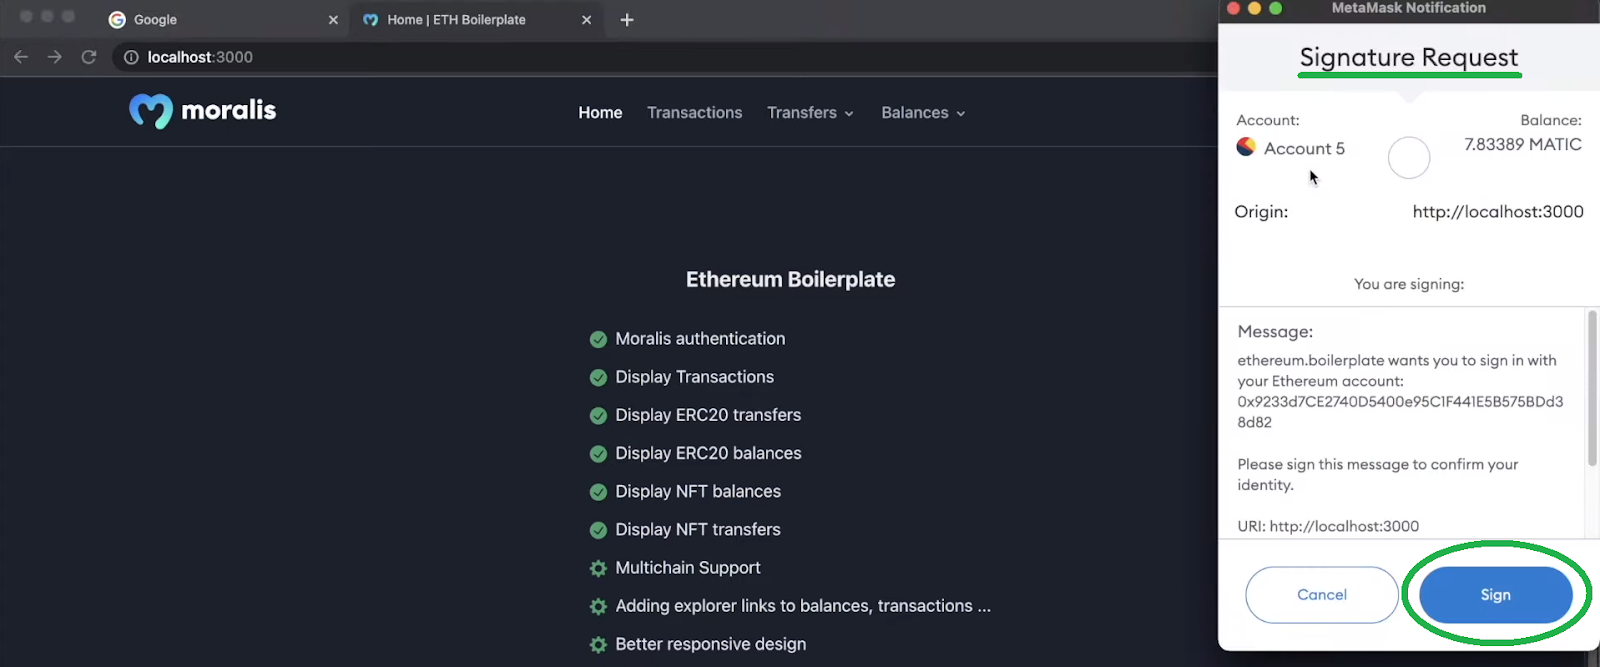
Looking at the above screenshot, you can see that the user’s MetaMask extension prompts with a signature request. As such, the user only needs to click on the “Sign” button to connect their wallets. By doing so, the user can see their wallet addresses in the spot where the “Connect Wallet” button was prior to authentication:

Furthermore, authenticated users can view their transactions via the “Transactions” top-menu option:

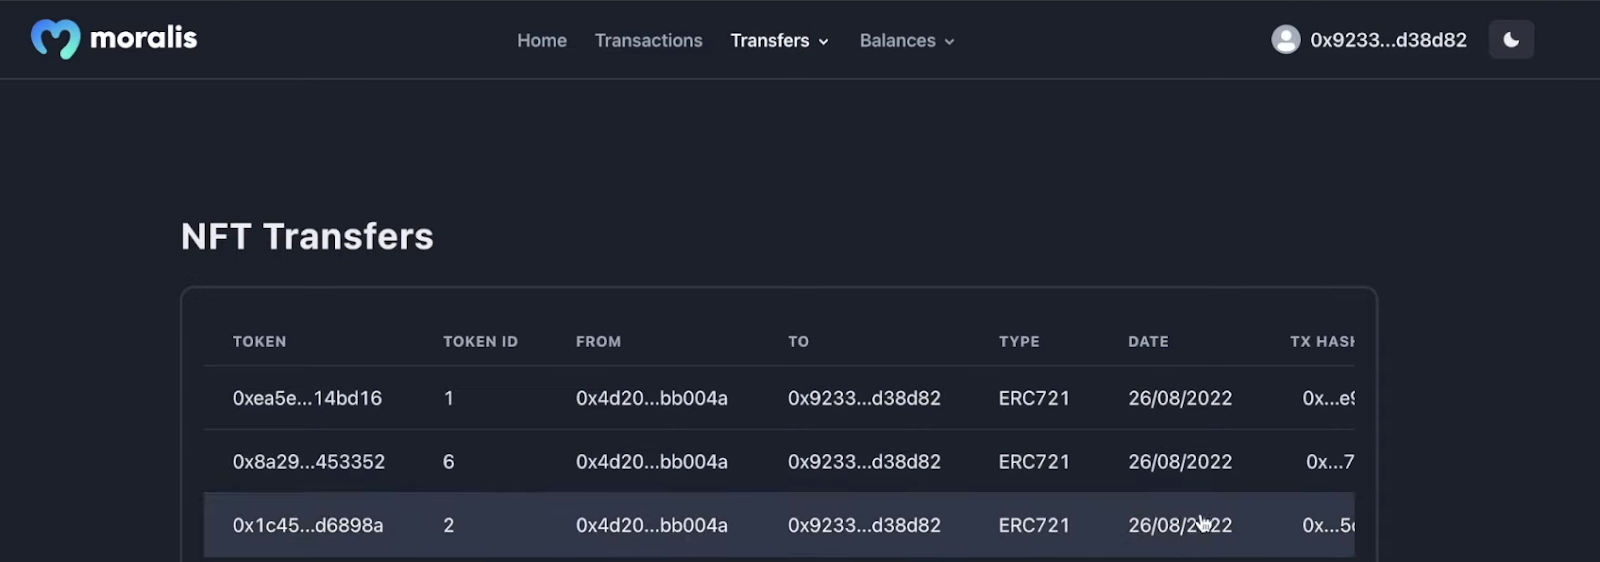
Moreover, users can also explore their ERC-20 or NFT transfers. They do this via a drop-down menu that appears when they select the “Transfers” option:

For instance, if users decide to view NFT transfers, they see the details arranged in this sort of table:
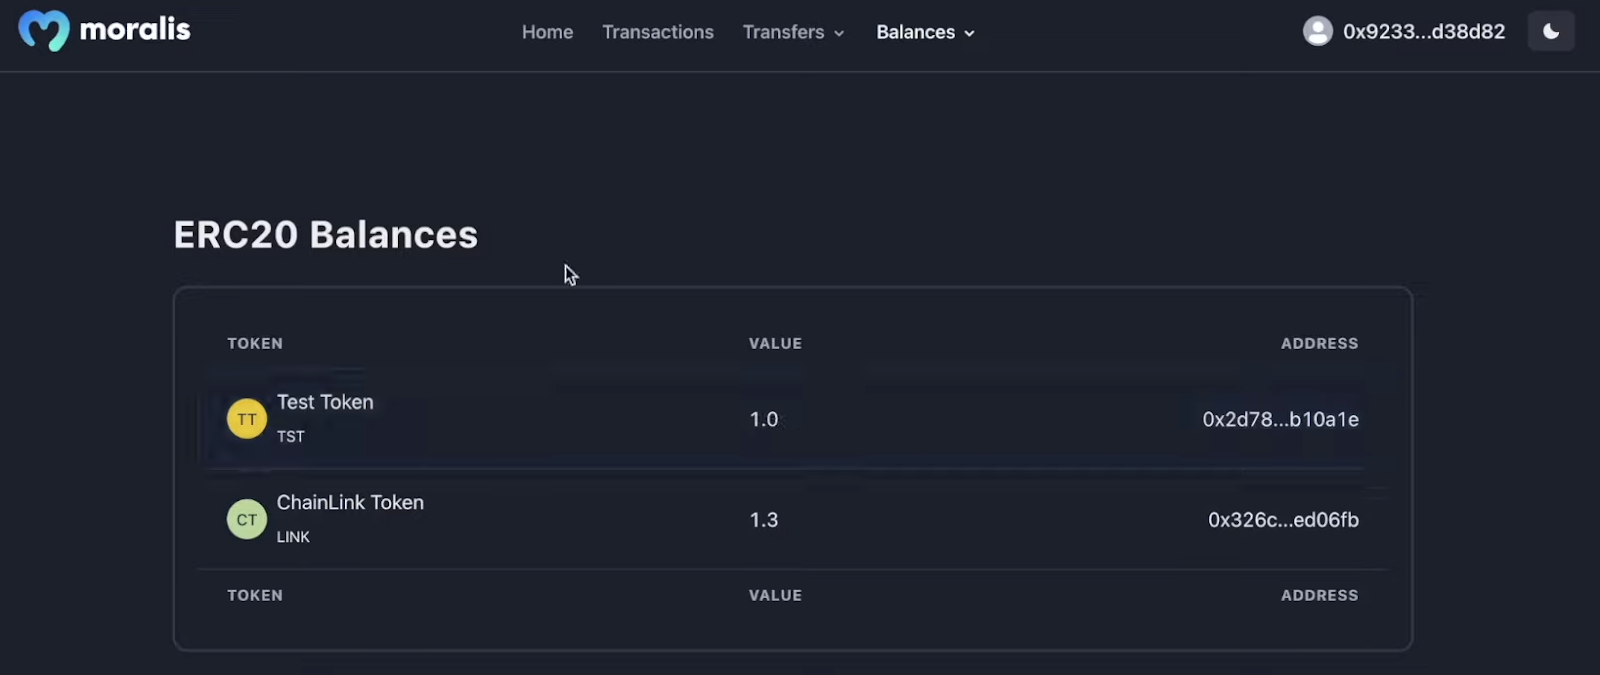
Nonetheless, users can also view their ERC-20 and NFT balances. To select what types of tokens they want to focus on, they must use the drop-down menu that appears when going with the “Balances” option:

If users choose to view their ERC-20 balances, they will see this sort of table:
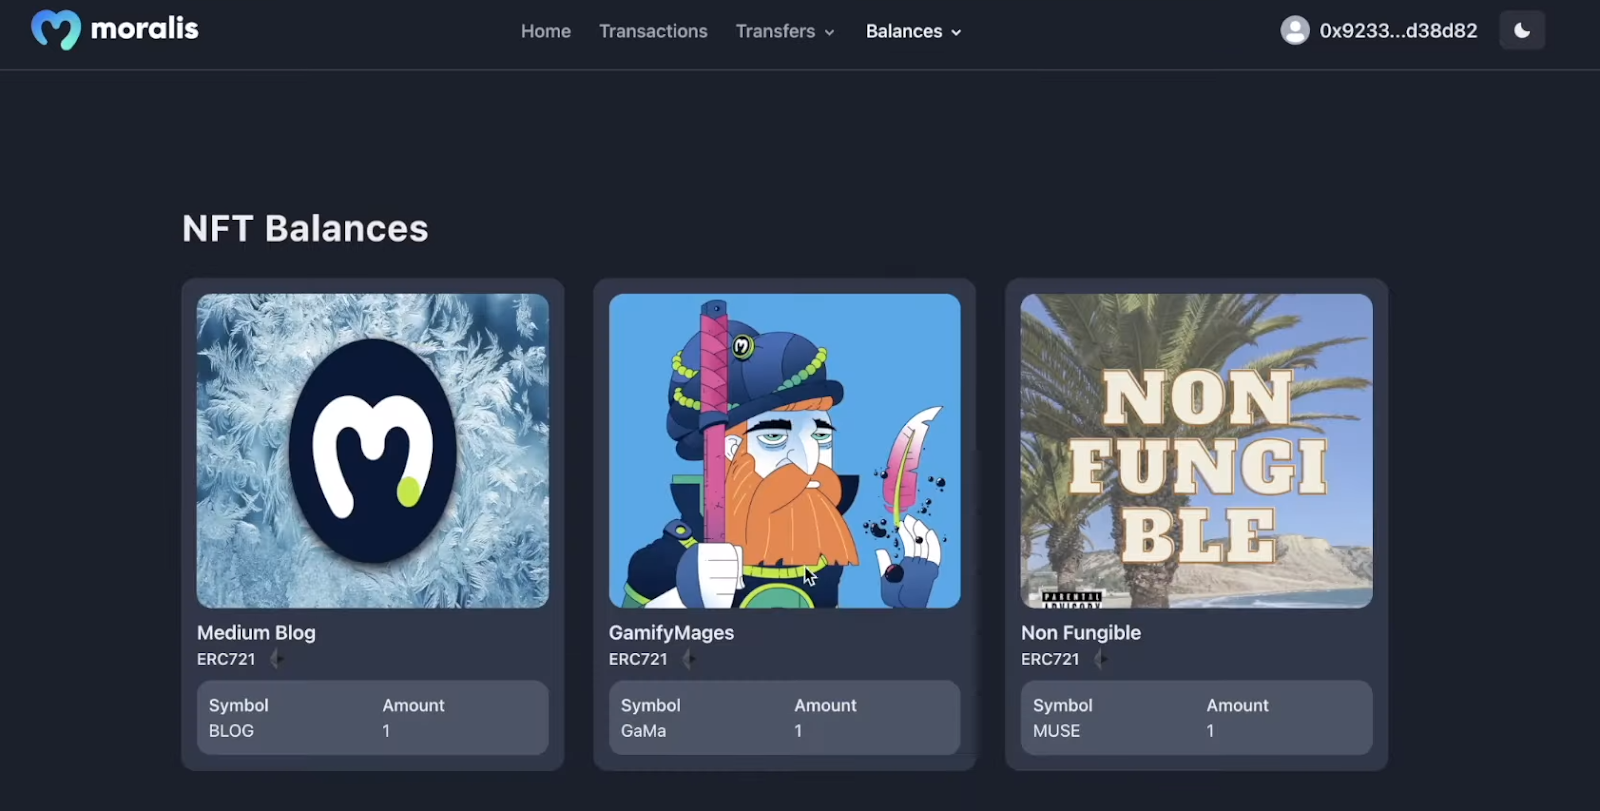
Moreover, if users decide to see their NFT balances, they’ll see them in the following manner:
Easiest Way to Build Dapps – Step-by-Step Instructions
Now that you’ve seen our boilerplate in action, you probably can’t wait to explore and use the easiest way to build dapps yourself. So, start by visiting the Ethereum boilerplate repo on GitHub. You can do so by using the “GitHub” link or querying Google for “Ethereum boilerplate”:

Once on the “ethereum-boilerplate” page, clone the code:

Next, create a folder (“Boilerplate” in our case) and open it in Visual Studio Code (VSC). Then, use VSC’s terminal to clone the code. To do this, you need to use the “git clone” command followed by the above-copied URL:

After successfully cloning the code, “cd” into the “ethereum-boilerplate” folder:

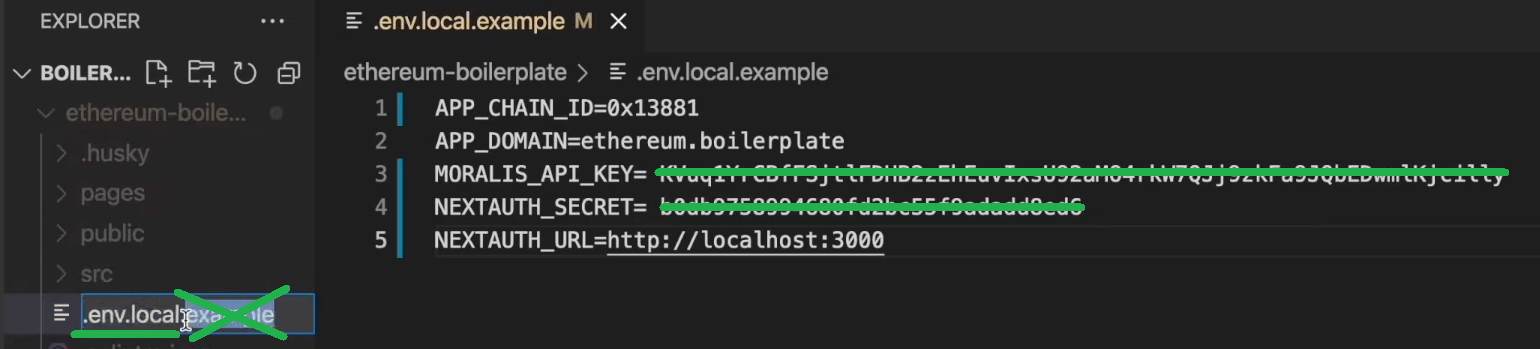
We’ve now arrived at the most important part when building dapps – tweaking the “.env.local.example” file. For more detailed guidance, use the video below, starting at 3:20. You will need to populate this file with environmental variable values:

Looking at the above screenshot, you can see that the top variable defines the chain you want to focus on. By default, our boilerplate targets Ethereum (0x1), hence the “Ethereum boilerplate” name. However, you can choose to connect your dapp to other supported EVM-compatible chains. For instance, our in-house expert in the video tutorial focuses on the Polygon testnet (0x13881).
After deciding which chain you want to connect to and entering the corresponding chain ID, you need to enter other values. The instructions regarding the “NEXTAUTH_SECRET” and “NEXTAUTH_URL” values are provided in the template’s “.env.local.example” file. As such, you should have no problems getting these values. On the other hand, you may need some assistance with obtaining your Moralis Web3 API key. Let’s take a brief look at how to get this key in the following section!

Get Your Web3 API Key in 2 Steps
An active Moralis account is the only prerequisite to getting your Moralis Web3 API key. As such, use the “create your free Moralis account” link in the introduction or click on the “Start for Free” button on Moralis’ homepage:

With your account up and running, you can access your admin area. Then, you’ll be able to obtain your Web3 API key by completing the following two steps, as seen in the following image:

Then return to your “.env.local.example” file and paste your API key next to “MORALIS_API_KEY” while replacing the place-holding content. With all the values in place, also rename “.env.local.example” to “.env.local”:
Next, install all required dependencies using the “yarn” or “npm i” command:

Finally, you can run your dapp by entering the “yarn run dev” or “npm run dev” command in your terminal:
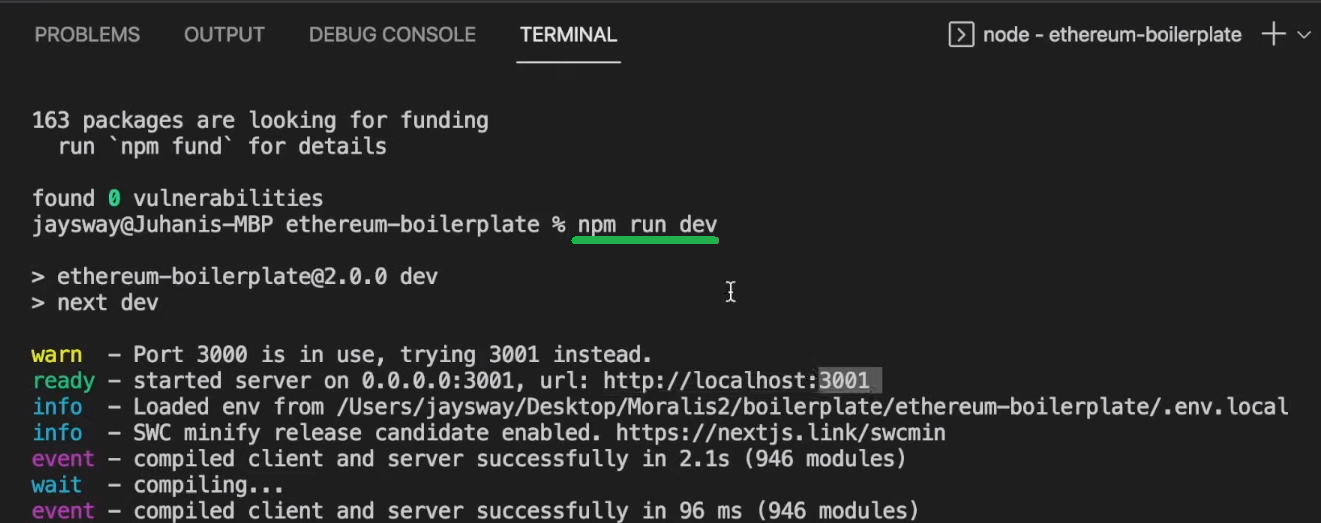
Note: As you can see in the screenshot above, we were using port 3000. Consequently, our dapp launched on port 3001. If that happens to you, make sure to adjust your “NEXTAUTH_URL” address inside the “.env.local” file accordingly.
Here’s the video tutorial we’ve been referencing throughout the last two sections:
Taking the Ethereum Boilerplate Further
In today’s tutorial, you had a chance to explore the easiest way to build dapps. You even had an opportunity to build a neat-looking dapp. The latter includes Web3 authentication and other basic features. As such, it is a great starting point for your projects or hackathons. However, you’ll want to add other features to make it unique. Thus, you’ll want to focus on the “pages” folder inside the “ethereum-boilerplate” folder:

In addition, make sure to check out the “src” folder. It hosts components (elements, layouts, modules, and templates) and “utils”. If nothing else, you definitely want to change the default boilerplate’s homepage. To do so, go to the “templates” folder. Ultimately, make sure to explore the “ethereum-boilerplate” repository deeper and put it to good use.
Explore the Easiest Way to Build Dapps – Summary
What’s the easiest way to build dapps? It comes in the form of the ultimate Ethereum boilerplate combined with the power of Moralis. This method enables you to have an eye-catching dapp ready in minutes. Also, this boilerplate dapp includes Web3 authentication and displays several details of the connected wallet. Furthermore, it lets users explore their transactions, transfers, and balances right from the gate. These neat features make this boilerplate a great starting point for a wide range of dapps.
You also learned how to obtain your Moralis Web3 API key by following along in this article. As such, you now hold the key to great power, which you can use to dive deeper into Web3 development. A great way is to focus on completing various tutorials that await you on the Moralis YouTube channel and the Moralis blog. For instance, some of the latest topics show you how to connect a dapp to Polygon, how to clone Zapper, how to connect to PlayFab with Web3 using Azure Functions, how to connect MetaMask to website with NextJS, and much more.
On the other hand, you may want to take a more professional approach by enrolling in the “Moralis Web3 Dapp Programming” course. In addition, enrolling will also provide you with access to other blockchain development courses at Moralis Academy. As a result, you’ll be able to level up your Web3 game and go full-time crypto in no time. As a bonus, you’ll become a member of one of the most advancing communities in the crypto realm.
