The next generation of the internet, Web3, is here to disrupt the status quo. However, we are still in the early stages of the Web3 revolution. Hence, now is an excellent time to start building decentralized applications (dapps). Furthermore, thanks to Moralis, anyone can get started and build a dapp using its Web3 template – the Ethereum boilerplate. With this shortcut, you can have a fully functional dapp up and running in minutes. In short, simply clone the Web3 website template on GitHub and add your Web3 API key. The latter awaits you inside the Moralis admin area, which you can access with a free account. Of course, moving forward, you’ll have a chance to follow our lead and create your first dapp without breaking a sweat. If that sounds interesting, create your free Moralis account and roll up your sleeves.
Are you new to Moralis? If so, let’s get you acquainted with this powerhouse platform. Moralis, the leading enterprise-grade Web3 API provider, empowers Web2 devs to transition effortlessly into Web3 development. You can think of it as a Web2-Web3 bridge. Furthermore, this Web3 dev toll is all about cross-platform interoperability. As a result, you can use a wide range of leading legacy platforms, frameworks, and programming languages to get involved.

Join Moralis Magazine for the Latest in Web3 Development
Additionally, Moralis is cross-chain interoperable and supports all the leading programmable chains. Accordingly, the Web3 template you’ll learn more about herein is a great place to start. The latter incorporates Web3 authentication – the starting point of all dapps. After all, enabling users to connect their Web3 wallets to your dapp is a gateway into the Web3 domain. Nonetheless, our Web3 website template on GitHub includes some neat features, which we’ll cover below.

Moralis’ Ethereum Boilerplate – The Ultimate Web3 Website Template
The Ethereum boilerplate from Moralis acts as a “Web3 website template”. It is the initial step for developers to create a dapp (or “Web3 website”) quickly and easily. It helps you overcome all initial hurdles and enables you to have your MVP ready in no time. Here are the features that this boilerplate incorporates:
- Web3 Authentication – Moralis’ Web3 authentication solution is a simple way for visitors to connect their Web3 wallets.
- Transactions – It showcases a page that displays transactions for a connected wallet.
- Transfers – It provides a page that displays ERC-20 or NFT transfers for a connected wallet.
- Balances – Display ERC-20 or NFT balances for a connected wallet.
In addition to the above-listed features, this Web3 template comes with multi-chain support. It also comes with an improved responsive design. Furthermore, you can easily add explorer links to balances, transactions, and more. Moreover, in this article, we’ll take you through all the setup steps for this Web3 website template. However, before we do that, we want to ensure you know what to expect from this ultimate Web3 boilerplate. As such, let’s do a quick demo of an example dapp that results from using Moralis’ Web3 website template.
The Results of Using the Web3 Website Template on GitHub – Demo
So, here’s the screenshot that shows our example dapp’s dashboard:
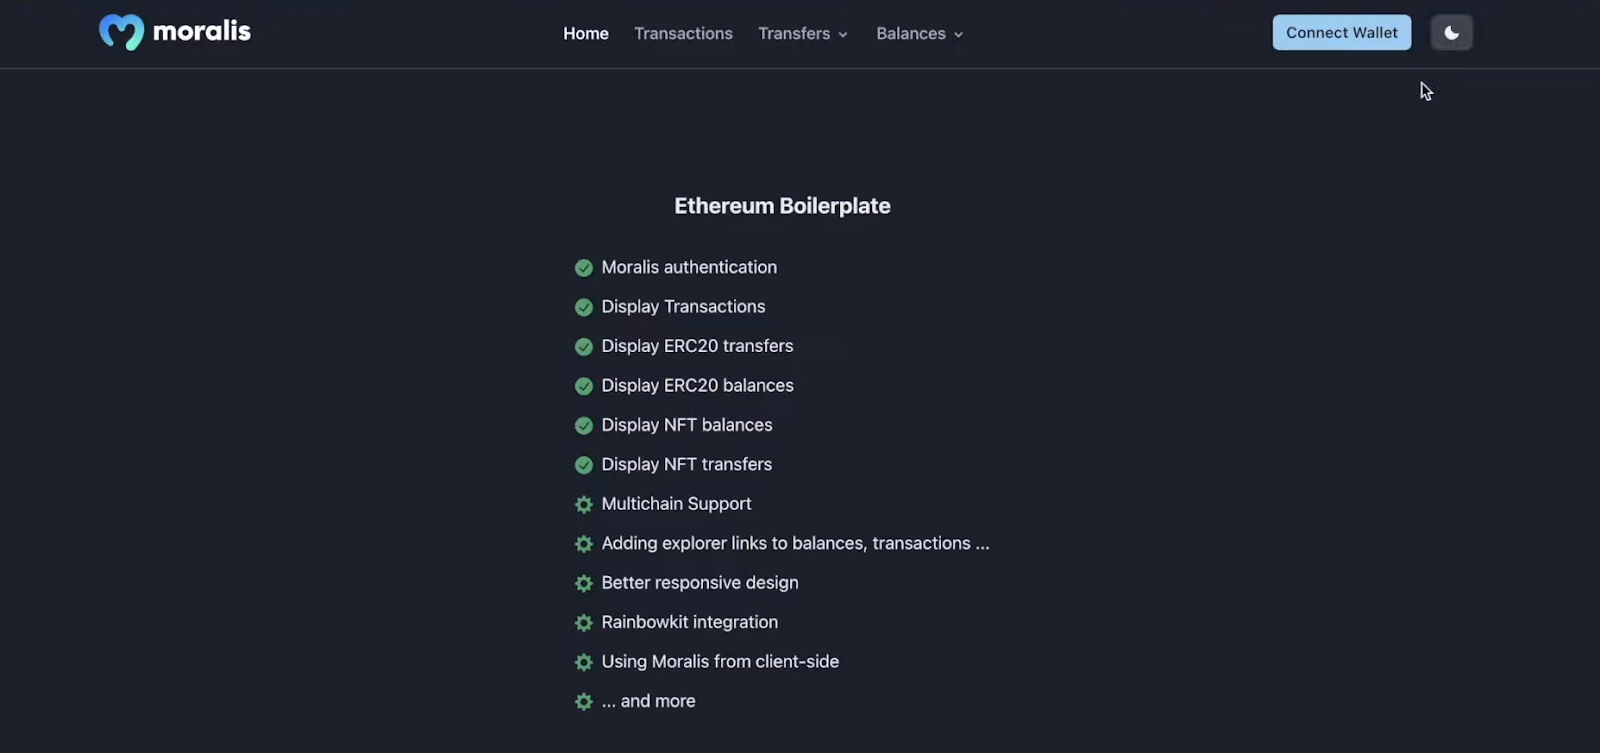
Looking at that top menu bar in the image above, you can see that we are currently on the “Home” page. Furthermore, on the far right-hand side of the top menu, users can switch between the dark and the light themes:

Next to the dark/light theme switch is the “Connect Wallet” button. Thanks to the Moralis Web3 Auth API, this button triggers users’ MetaMask extensions:
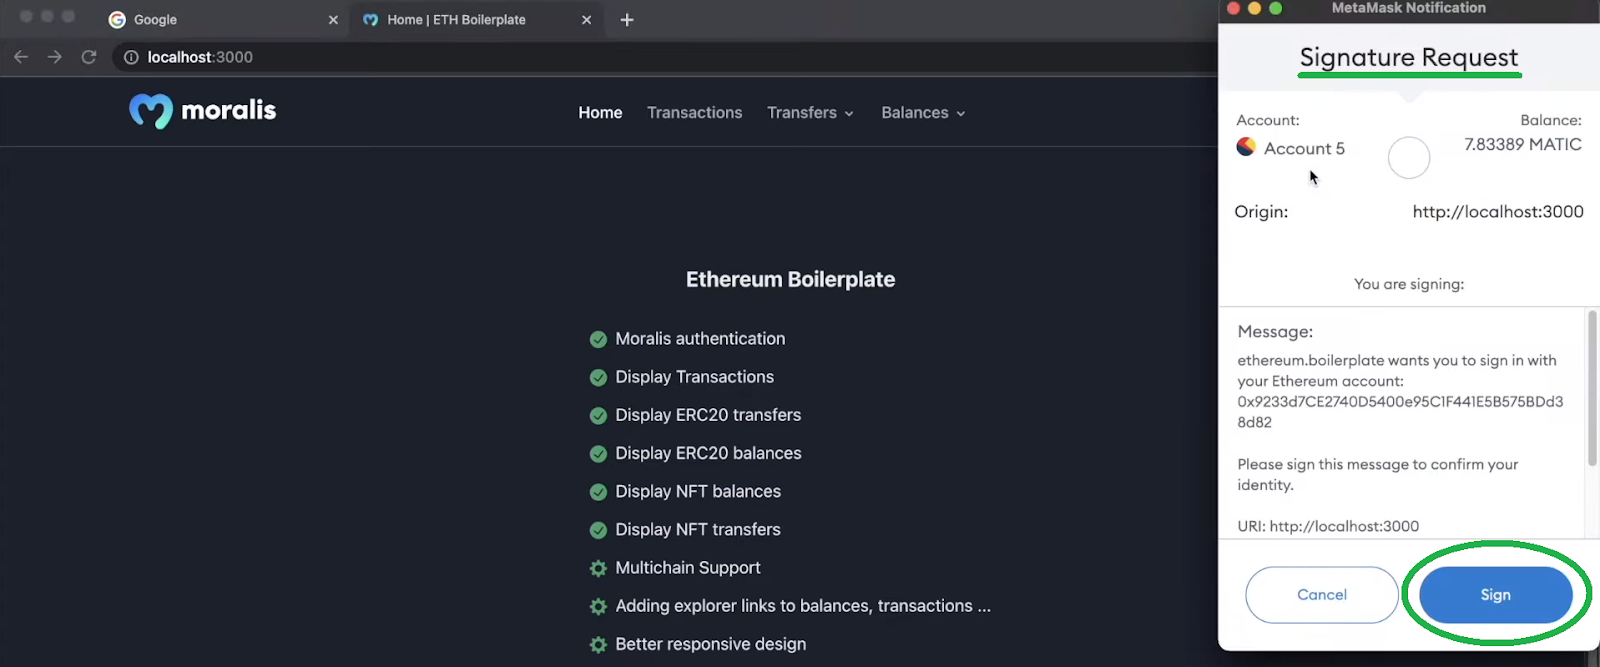
As you can see in the screenshot above, users need to sign the signature request via the “Sign” button. After signing the message, our example dapp displays users’ wallet addresses instead of the “Connect Wallet” button:

Moreover, once users authenticate, they can view their transactions on the “Transactions” page:

The transaction details include transaction hashes such as “from” address, “to” address, the amounts of gas used, dates of the transaction, and transactions’ status. Furthermore, users can focus on ERC-20 or NFT transfers by selecting one of the two options from the “Transfers” drop-down menu:

For instance, this is how NFT transfers for an example user look like:

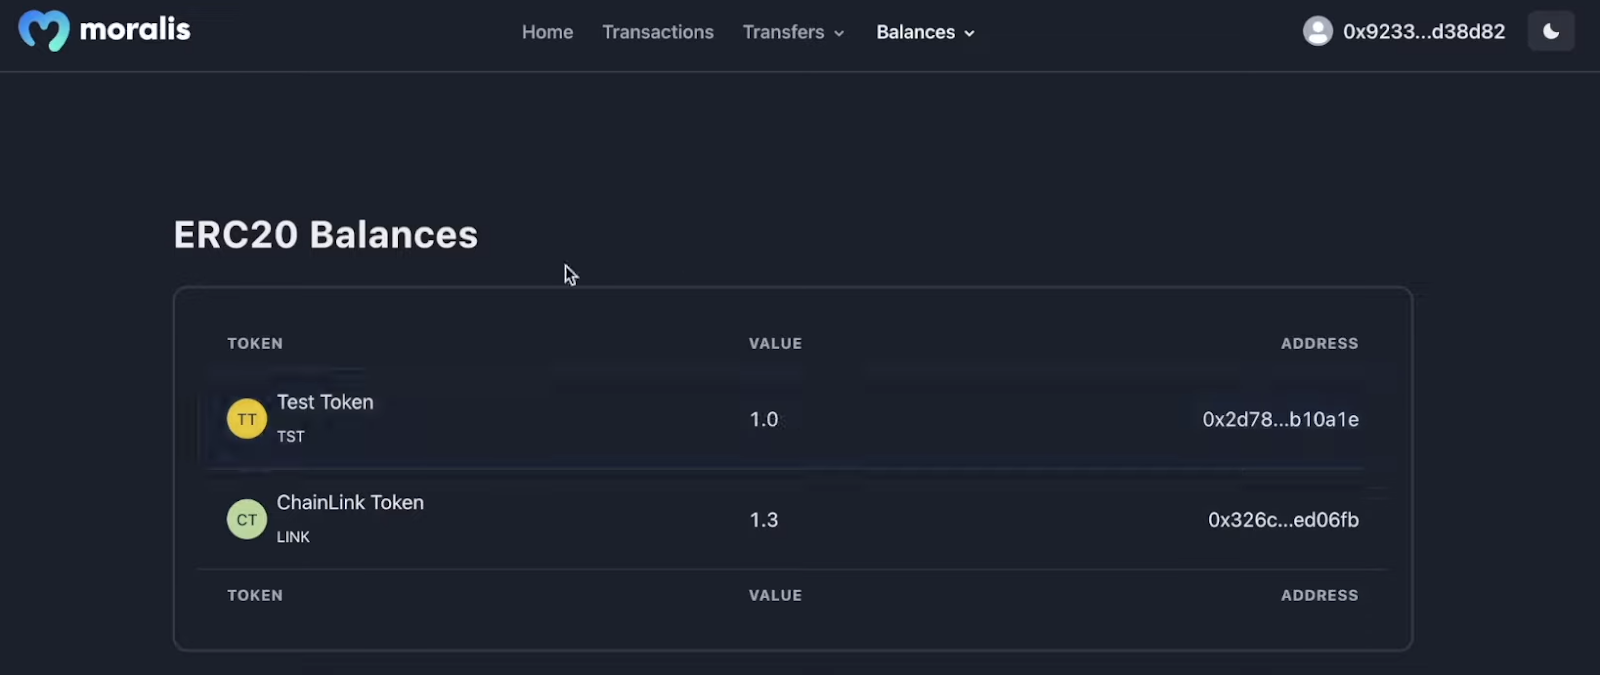
As you can see, our Web3 website template includes several details. Including token addresses, token IDs, “from” addresses, “to” addresses, type of NFTs (ERC-721 or ERC-1155), dates, and transaction hashes. Last but not least, users can also view their balance. Here, they again get to choose between ERC-20 tokens and NFT:

When it comes to displaying ERC-20 balances, our example dapp displays tokens’ names and tickers, the number of tokens in the connected wallet (“value”), and tokens’ addresses:
When it comes to NFTs, our Web3 template even ensures that the images related to NFTs are displayed:

Moreover, just like with ERC-20 balances, the “NFT Balances” page also displays NFT types, names, symbols, and amounts.
Build a Site Using a Web3 Website Template on GitHub
After seeing what an excellent dapp you can create with the ultimate Ethereum boilerplate, you’re most likely eager to take it for a spin. If so, start by using Google and enter the “Ethereum boilerplate” keyword:

Note: In most cases, the top result is the one you want to focus on. However, just in case, here is the link to the correct GitHub repository.
Once you’ve accessed our Web3 website template on GitHub, explore the “Read me” part for more details. The “About” section tells you that this template focuses on the NextJS framework. Furthermore, it’s worth pointing out that you can use this Web3 template with Ethereum and other supported EVM-compatible chains. To proceed, copy the repo’s URL address:

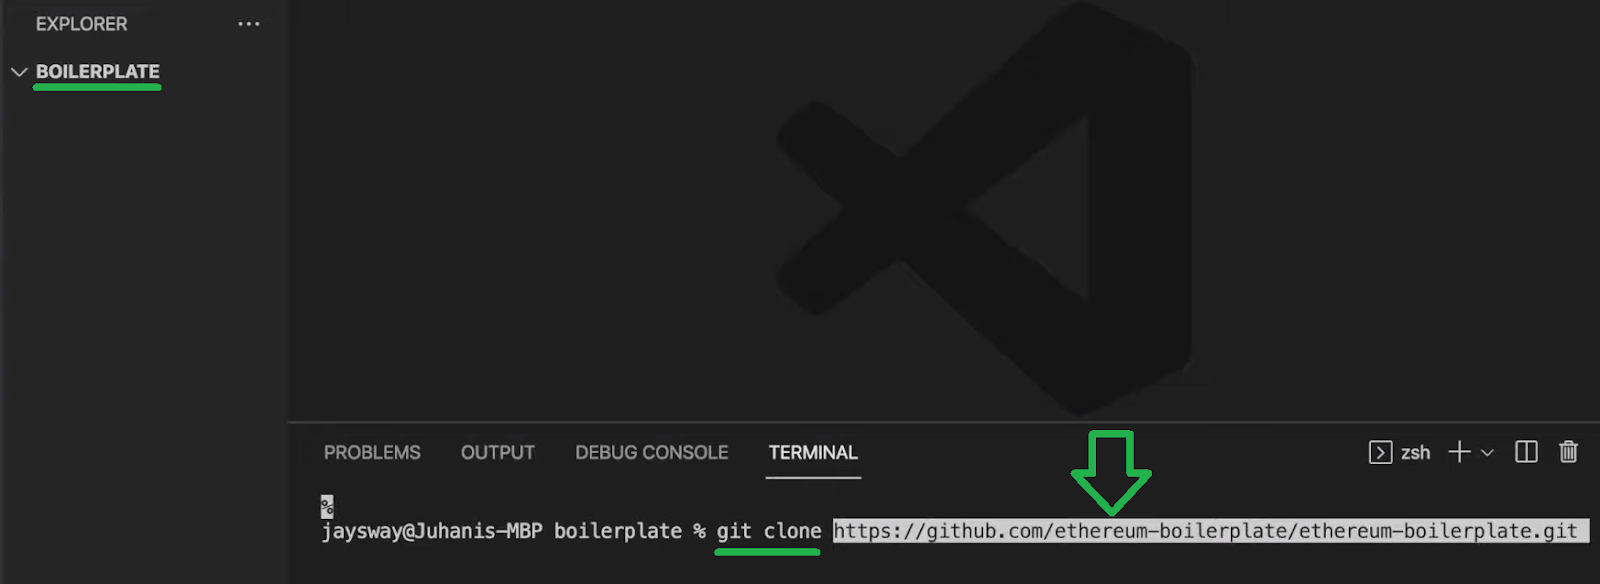
Then, open your favorite IDE. It might be easiest for you to follow our lead and use Visual Studio Code (VSC). Next, make sure you have a folder (“Boilerplate” in our case) into which you want to clone the code. Then, use VSC’s terminal to run the “git clone” command followed by the above-copied URL:
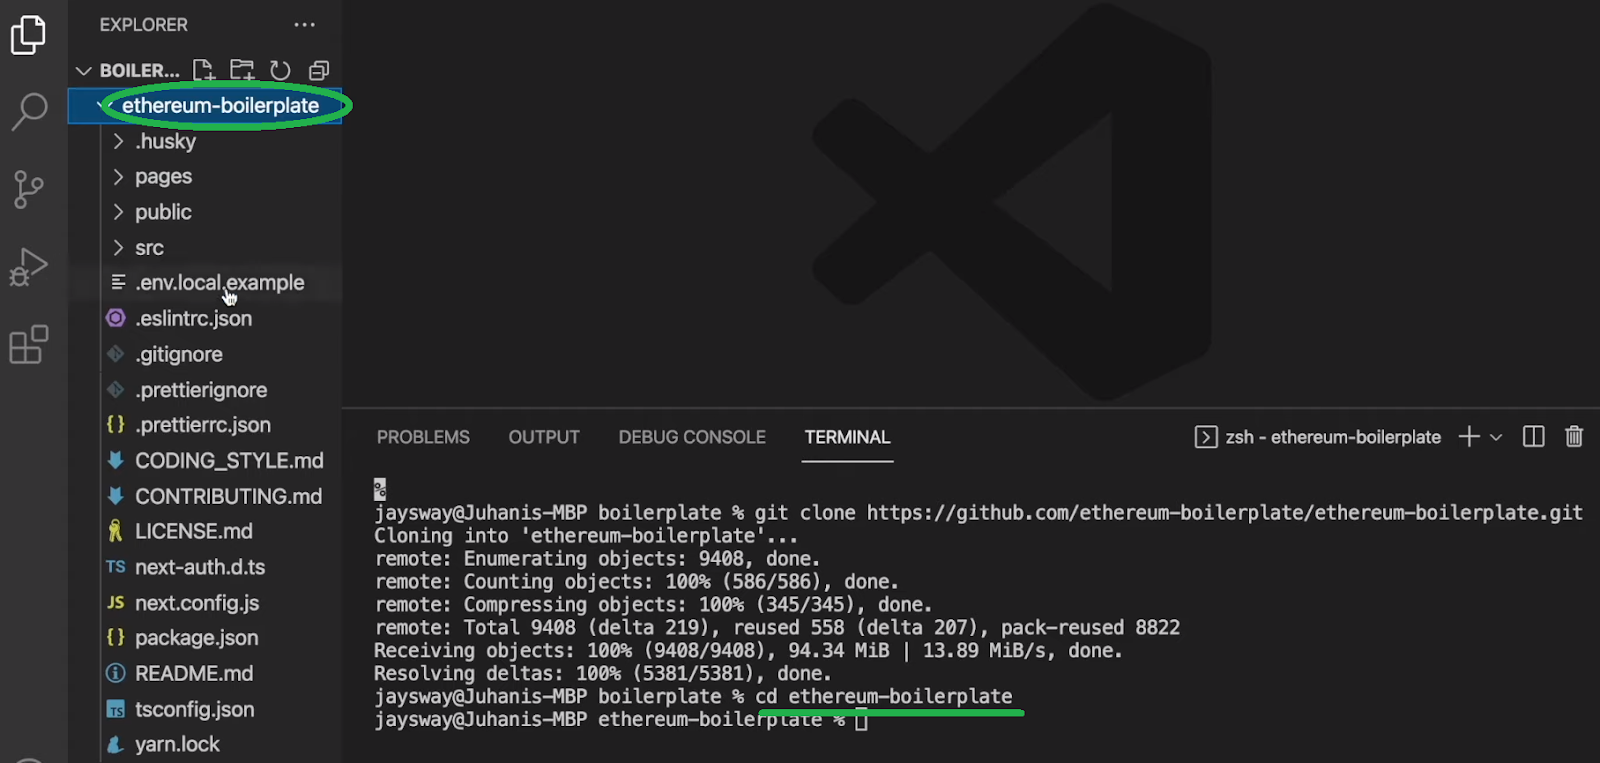
Once the cloning process is complete, “cd” into the “ethereum-boilerplate” folder:
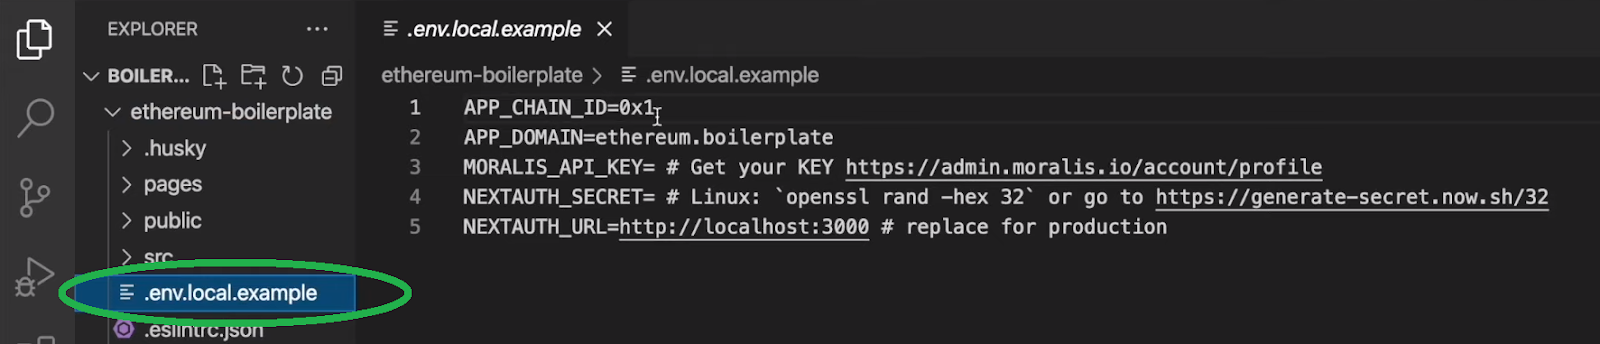
Again, feel free to explore the folders and files that are now at your disposal. However, to create the above-presented dapp, you must first focus on the “.env.local.example” file. This is where you’ll need to set up some environmental variables:
Choose Your Dapp’s Blockchain
Looking at the screenshot above, you can see that the top variable is “APP_CHAIN_ID“. So, the value for this variable will determine which chain you want to focus on. Further, “0x1” indicates that, by default, the code focuses on the Ethereum chain. However, as you might have noticed during the above demonstration, our example dapp runs on Polygon’s testnet (Mumbai). Thus, let’s focus on that chain. Though, keep in mind that you can build your dapp on any of the supported chains.
Note: You can find supported chains’ IDs by visiting the “supported chains” link.
As far as the Mumbai testnet goes, the ID is “0x13881”. Next, you need to paste your Moralis Web3 API key.

Obtain Your Moralis Web3 API Key
To obtain the API key, you need your Moralis account. So, in case you haven’t done so yet, use the “create your free Moralis account” link in the intro. Alternatively, you can also visit Moralis’ homepage and click on the “Start for Free” button:

With your account up and running, you’ll be able to access your Moralis admin area. There, you can obtain your Moralis Web3 API key in two simple steps. First, click on the “Web3 APIs” option from the side menu, and second, copy your API key:

Then, return to your “.env.local.example” file and replace the placeholder’s content with the above-copied key:

Get Your Next Auth Secret
Another environmental variable you need to take care of is “NEXTAUTH_SECRET“. Fortunately, you can obtain the value for this variable easily. Simply use the link in the “.env.local.example” file next to the variable in question. Then, use your browser to go to that URL address. Accordingly, you should get your “secret”:

Finally, replace the default content with your “NEXTAUTH_SECRET” value.
As far as the “NEXTAUTH_URL” value goes, you can stick to “localhost: 3000” (or 3001) while testing. However, once you are ready for production, you will need to use your dapp’s URL. So, if you’ve followed our instructions properly, you should now have your environmental variables ready:

Last but not least, make sure to rename the “.env.local.example” file into “.env.local”.
Installing Dependencies
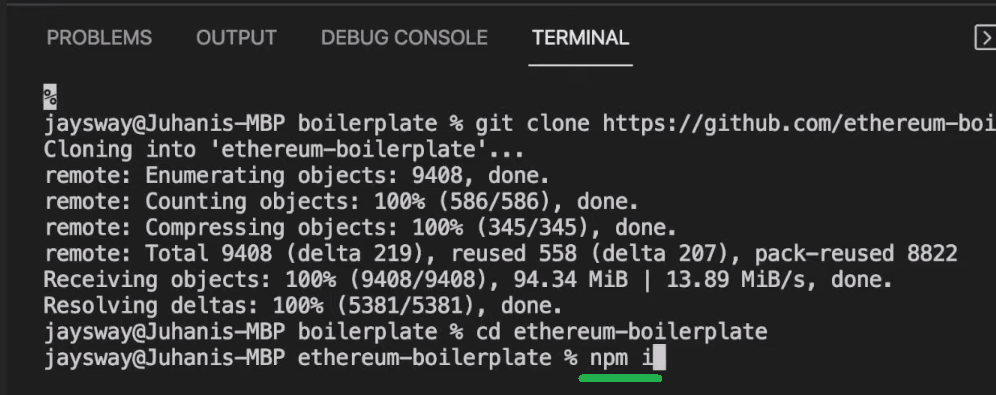
With your “.env.local” file ready, you must install all the required dependencies. Whether you are using yarn or npm, you need to enter the “yarn” or “npm i” command:
With all dependencies installed, you can run your dapp using the “yarn run dev” or “npm run dev” commands:

As you can see in the screenshot above, we are using port 3000; thus, our dapp was started on “localhost: 3001” instead. In case you have the same situation, make sure to change the “NEXTAUTH_URL” value in the “.evn.local” file accordingly:

Now, you can take your dapp for a test run. Just open your favorite browser and paste in the “NEXTAUTH_URL” address. Of course, ensure you have your MetaMask extension installed and at least one wallet account ready. As such, you’ll be able to use the “Connect Wallet” button to actually connect to your dapp. Though, by default, you’ll even be able to choose between MetaMask or Coinbase Wallet:

If you select MetaMask, you’ll also need to select the account you want to use (in case you have multiple accounts):
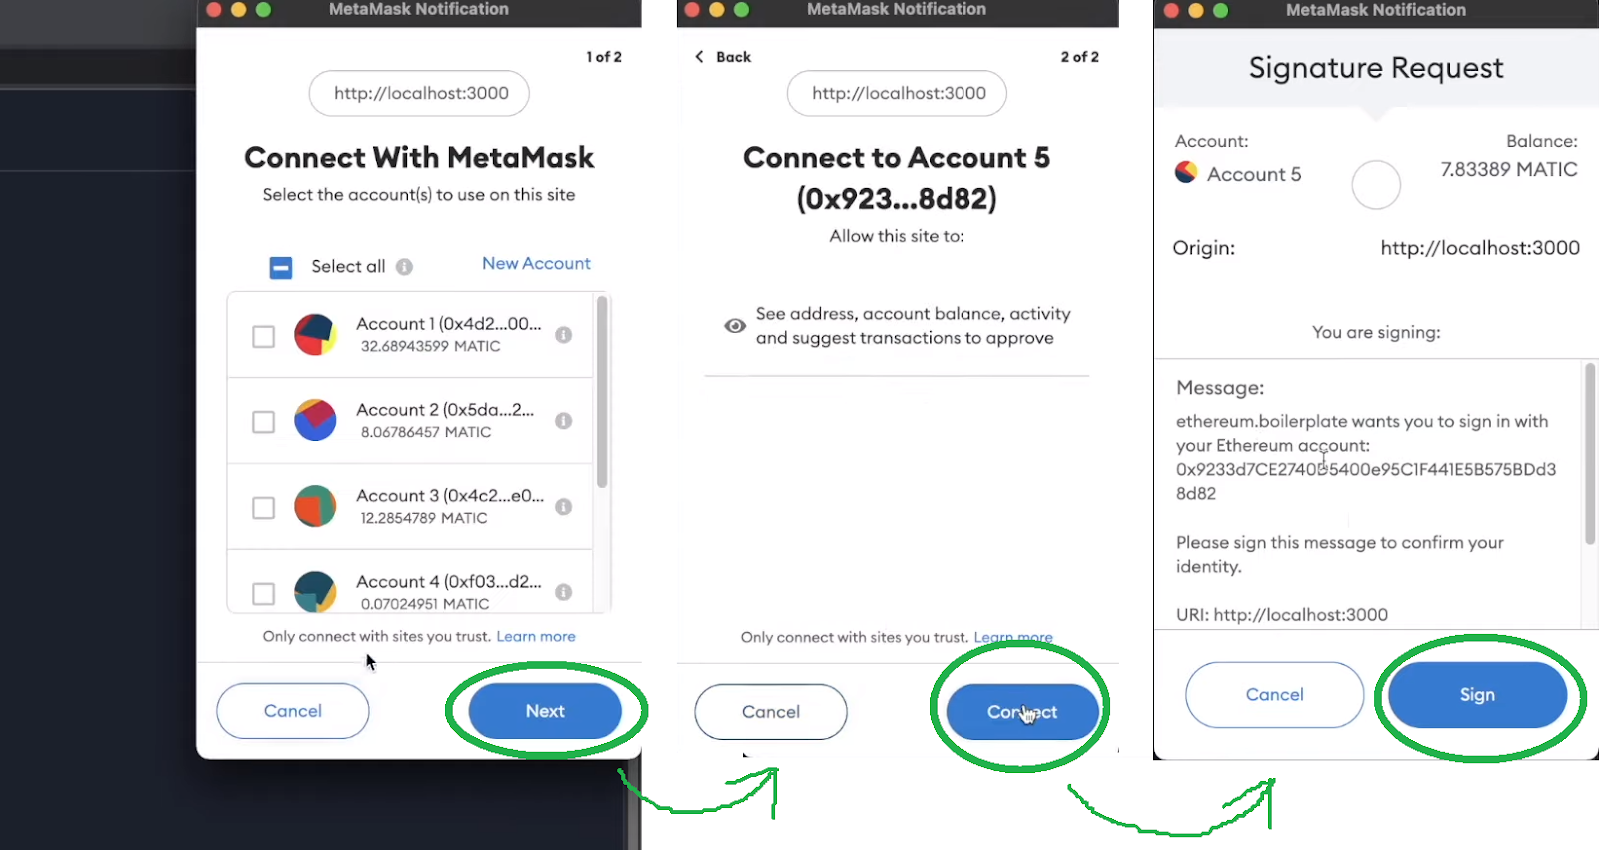
After selecting and connecting your account, you’ll need to sign the signature request, as presented in the demo section above. Once authenticated, make sure to explore all the pages of your dapp created using our Web3 website template on GitHub.
Taking Our Web3 Template Further
As pointed out previously, this boilerplate (or Web3 website template) is the simplest and fastest way to create a neat-looking dapp. As such, it may serve as a great starting point for your projects or hackathons. Of course, you will probably want to add other features to your dapp. In that case, you will need to focus on the “pages” folder inside the “ethereum-boilerplate” folder:

Moreover, you can also explore the “src” folder, where you can access all the components (elements, layouts, modules, and templates) and “utils”. For instance, if you want to change the default homepage, you can find it inside the “templates” folder. As such, make sure to explore this repository deeper and make good use of it.
Nonetheless, here’s also a video tutorial taking you through the demo and steps covered above:
Web3 Template – Build a Dapp Using a Web3 Website Template – Summary
In today’s article, you learned that with the power of Moralis and our Web3 website template on GitHub, creating a dapp can be done quickly and easily. The initial process includes cloning the Web3 template (or Ethereum boilerplate code). Moreover, as we moved forward, you discovered that you could deploy the dapp to Ethereum or any other supported EVM-compatible chain. You do this by simply entering the corresponding chain ID into the designated spot in the “.env.local” file. Aside from the chain ID, we also showed you how to obtain your Moralis Web3 API key in two simple steps. You also learned how to get your “NEXTAUTH_SECRET” and run your dapp locally.
We hope you got your hands dirty and tested your instance of our example dapp. It’s now up to you to make this decentralized application unique by adding additional pages and features. In case you need more practice or some fresh ideas, make sure to explore the Moralis blog and the Moralis YouTube channel. Both of these outlets cover a wide variety of example projects – from DeFi dapps to Web3 games. As such, you can use these tutorials to become a confident Web3 developer without prior Web3 development experience.
Furthermore, it’s worth pointing out that the blockchain industry offers many career opportunities. However, to land your dream crypto job, it helps a lot if you are blockchain certified. Thus, make sure to consider enrolling in Moralis Academy. Aside from top-notch blockchain development courses, this is the place to get expert mentorship, a personalized study path, and membership in one of the most advancing communities in the crypto realm.
