No matter what type of Web3 projects you set out to create, a central functionality most dapps (decentralized applications) require is the integration of blockchain-based authentication solutions. Moreover, it is highly beneficial to integrate your Web3 authentication flows with backend services like, for example, Firebase to store user information efficiently. With that in mind, did you know that Moralis presents the most accessible way to create a Web3 Firebase login with MetaMask? If this interests you, follow along as this tutorial covers the process of adding a Web3 Firebase login with MetaMask from start to finish!
The guide illustrates the entire process by showing you how to set up a straightforward React application where users can sign in with their MetaMask wallets. Furthermore, thanks to Moralis’ Auth extension, you can create a Firebase login with MetaMask in no time. Moreover, the process can be broken down into the following sections:
- Setting Up Firebase
- Initiating the Firebase CLI
- Setting Up Moralis’ Auth Extension
- Deploying the Extension
- Creating the React App
Moreover, if you want to learn more about Web3 authentication, check out Moralis’ Web3 Auth API. This excellent tool is one of the many enterprise-grade Web3 APIs supplied by Moralis. With this tool, you can add several authentication mechanisms with ease. For example, learn to add a sign in with RainbowKit in minutes!
Nevertheless, no matter what type of blockchain-related project you are looking to create, sign up with Moralis to build faster and smarter with excellent development tools bridging the gap between Web2 and Web3 development!
What are You Working Towards? – Adding Firebase Login with MetaMask
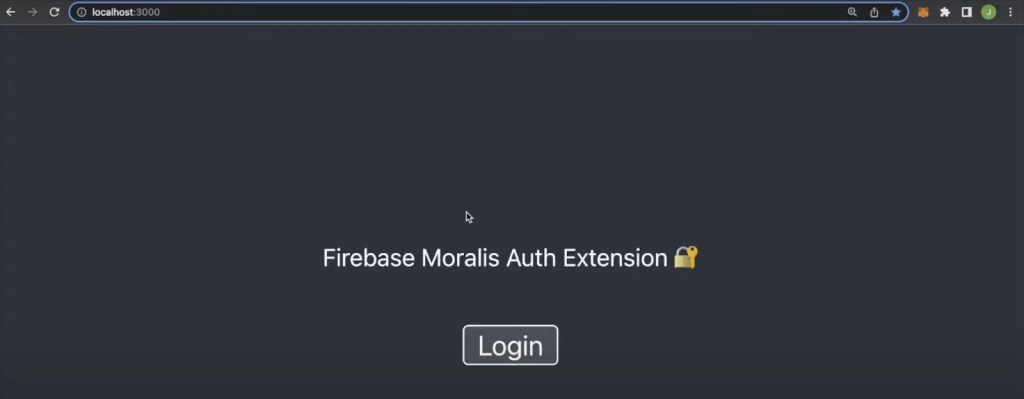
As mentioned earlier, this tutorial demonstrates how to create a Web3 Firebase login with MetaMask. To illustrate the process, we will show you how to create a straightforward React application where you can sign in with your Web3 wallet. Moreover, this is what the landing page will look like:
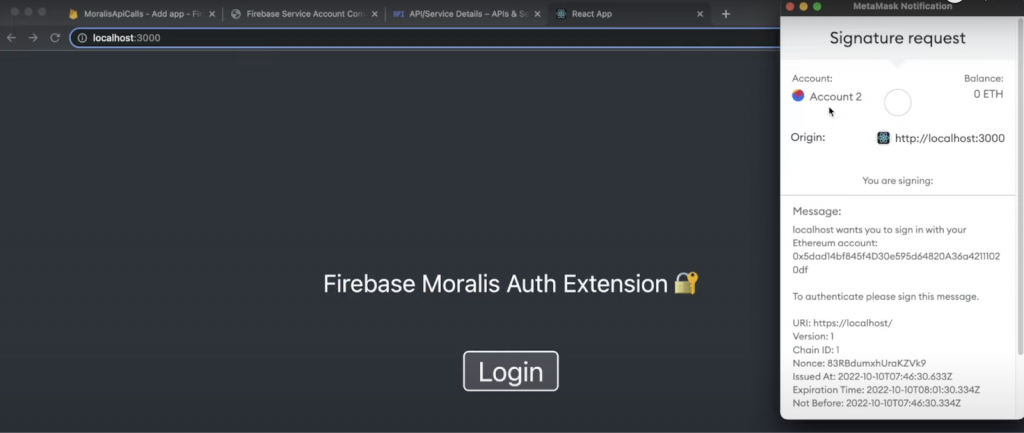
Once you click on the ”Login” button, it should prompt your MetaMask wallet, assuming you have the browser extension installed:
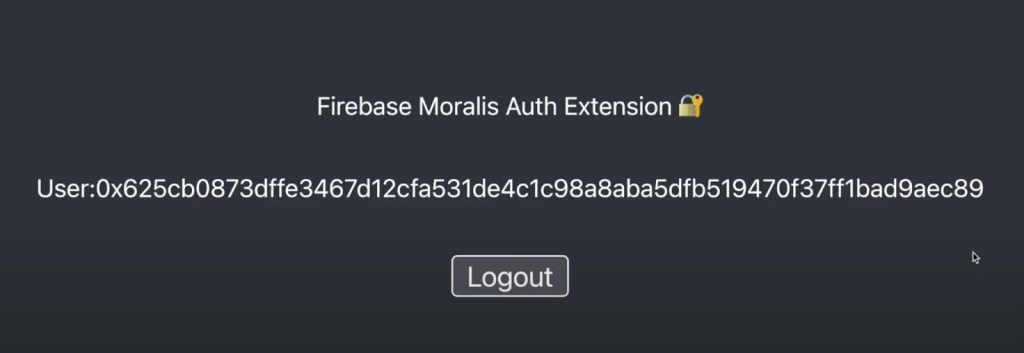
When you sign the message and authenticate yourself, the app will display a user ID:
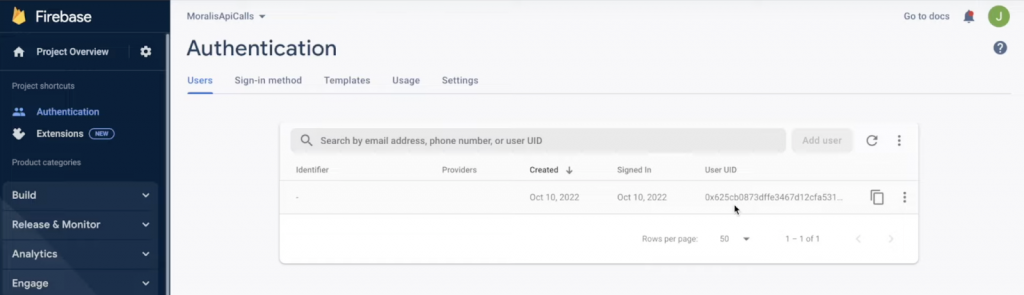
In addition to this, the app will add a new user with the same ID to Firebase under the ”Authentication” tab:
You can then integrate this functionality with additional Firebase services like the database. If this sounds interesting and you want to learn how to create a Web3 Firebase login with MetaMask, join us, as the following sections cover the entire process step by step!
Add Firebase Login with MetaMask – Complete Breakdown
With a better idea of what you are working towards, it is time to jump into the central part of this tutorial and show you how to create a Web3 Firebase login with MetaMask. We will use Moralis’ Auth extension for this brief guide, allowing you to accomplish this article’s task in no time!
Thanks to the accessibility of Moralis, you will be able to implement this amazing feature by setting up Firebase, initiating the Firebase CLI, setting up Moralis’ Auth extension, deploying the extension, and creating a straightforward React application. Moreover, to make the tutorial easier to follow, the guide will be split into various sections dependent on the steps we presented earlier!
Now, if you are more of a video learner, feel free to take a closer look at the following Moralis YouTube video outlining the process of creating a Web3 Firebase login with MetaMask in further detail:
Nevertheless, let us kick off this tutorial by taking a closer look at how to set up Firebase!
1. Setting Up Firebase
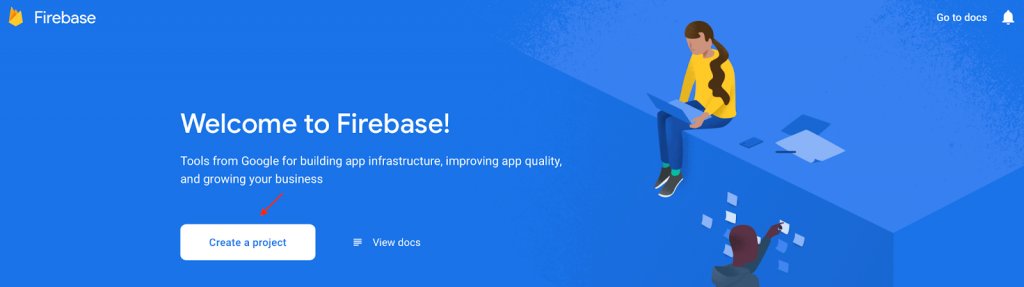
To begin this ”Create a Web3 Firebase Login with MetaMask” tutorial, you must initially set up Firebase. If you have not already, navigate to the Firebase website and click on the ”Get Started” button:

Clicking on the button above allows you to create an account, and once you log in, create a new project using the button below and follow the instructions:
Once you create your project, you will arrive at the Firebase admin panel. The first thing you must do from here is to change the billing plan. Firebase projects include the ”Spark plan” by default; however, you want to switch from ”Spark plan” to “Blaze”. Accordingly, click on the ”Upgrade” button at the bottom and select ”Blaze”:
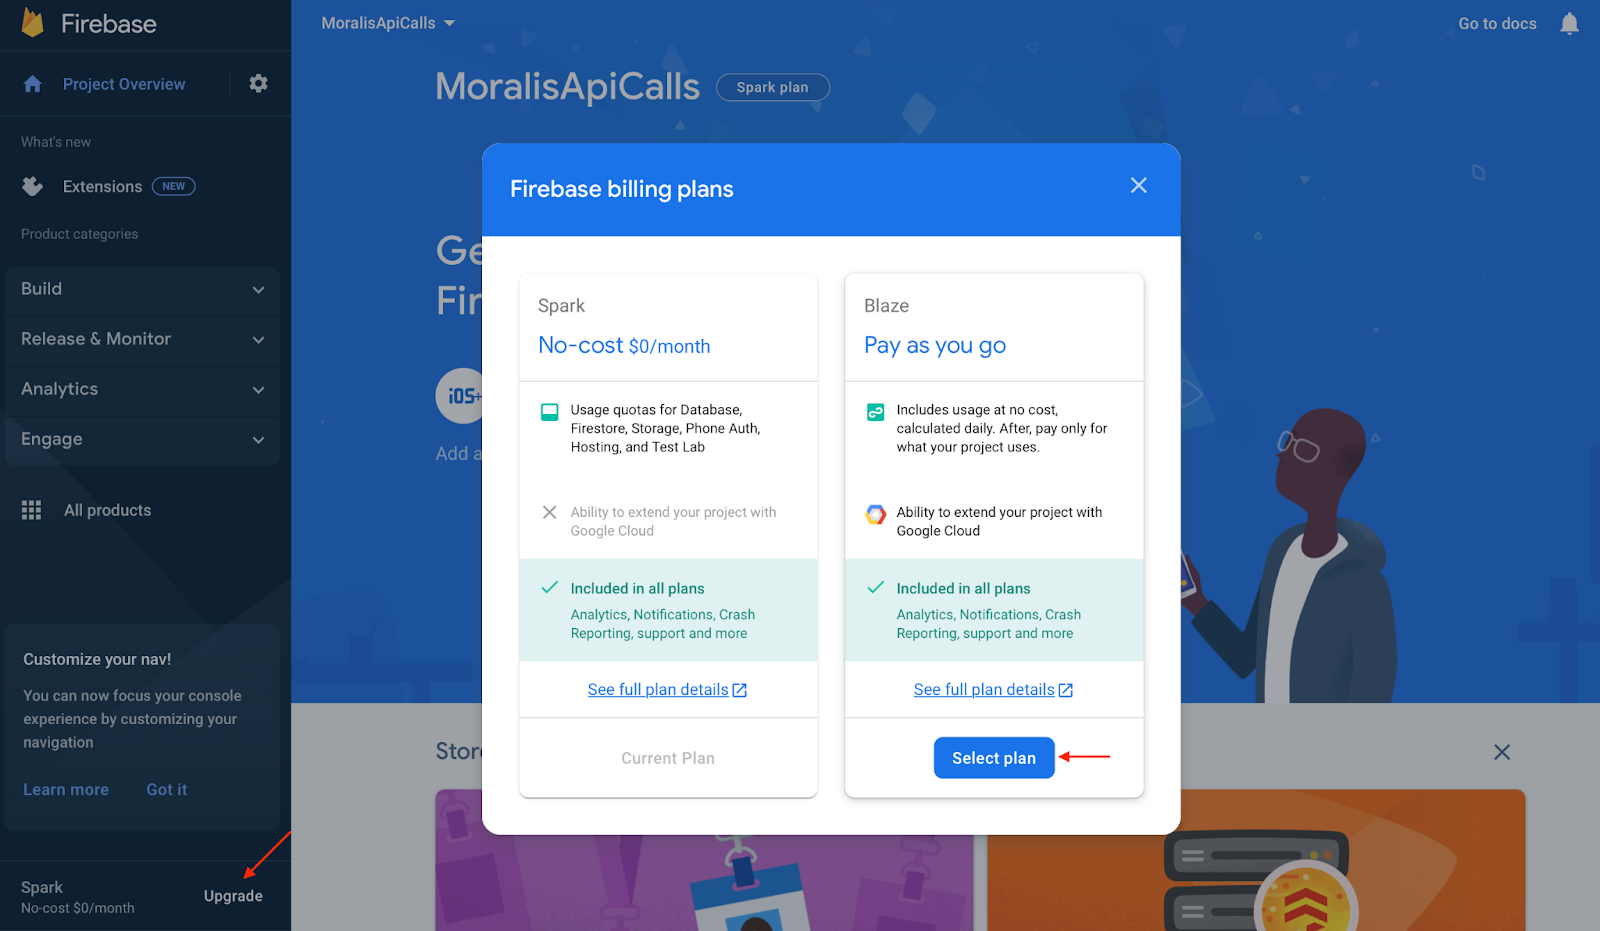
Moreover, you will quickly notice that ”Blaze” is a ”Pay as you go” billing plan. However, you still have a free limit and will only be charged once your app gets a lot of traction, which you do not have to worry about for now during the tutorial.
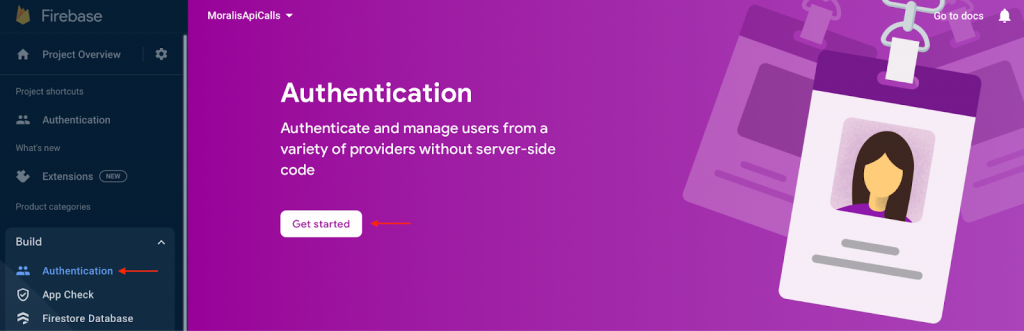
Next up, click on the ”Build” tab to the left of the Firebase admin panel, press ”Authentication”, and hit ”Get Started”:
Lastly, click on the cogwheel at the top of the admin panel, press ”Project settings”, select the ”Service accounts” tab, and generate a new private key:
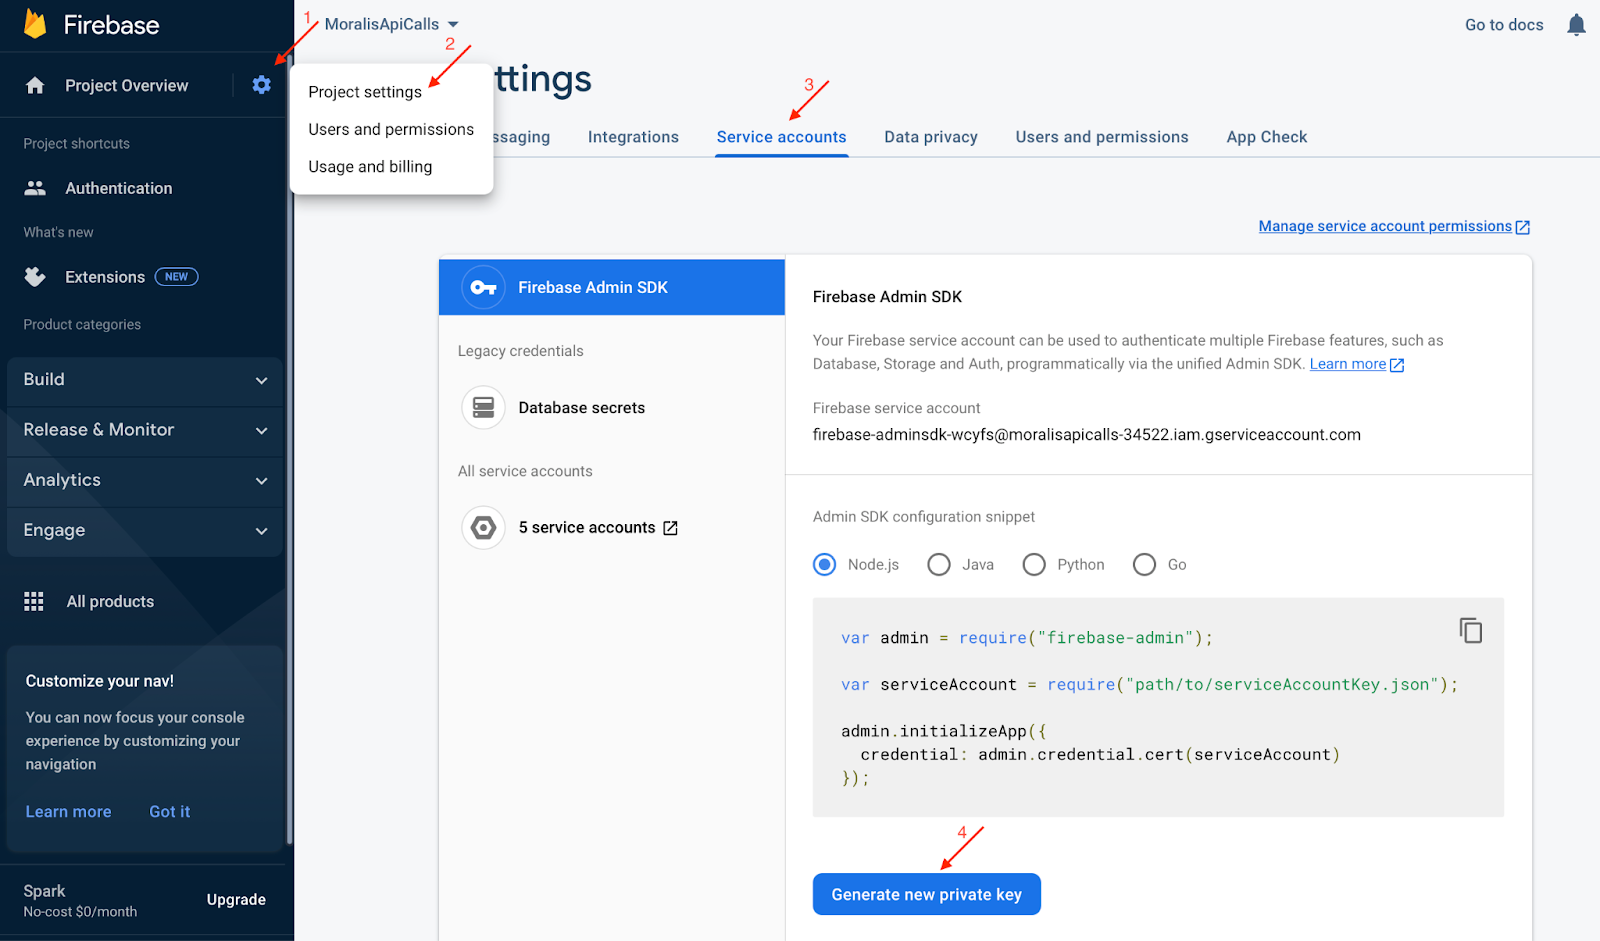
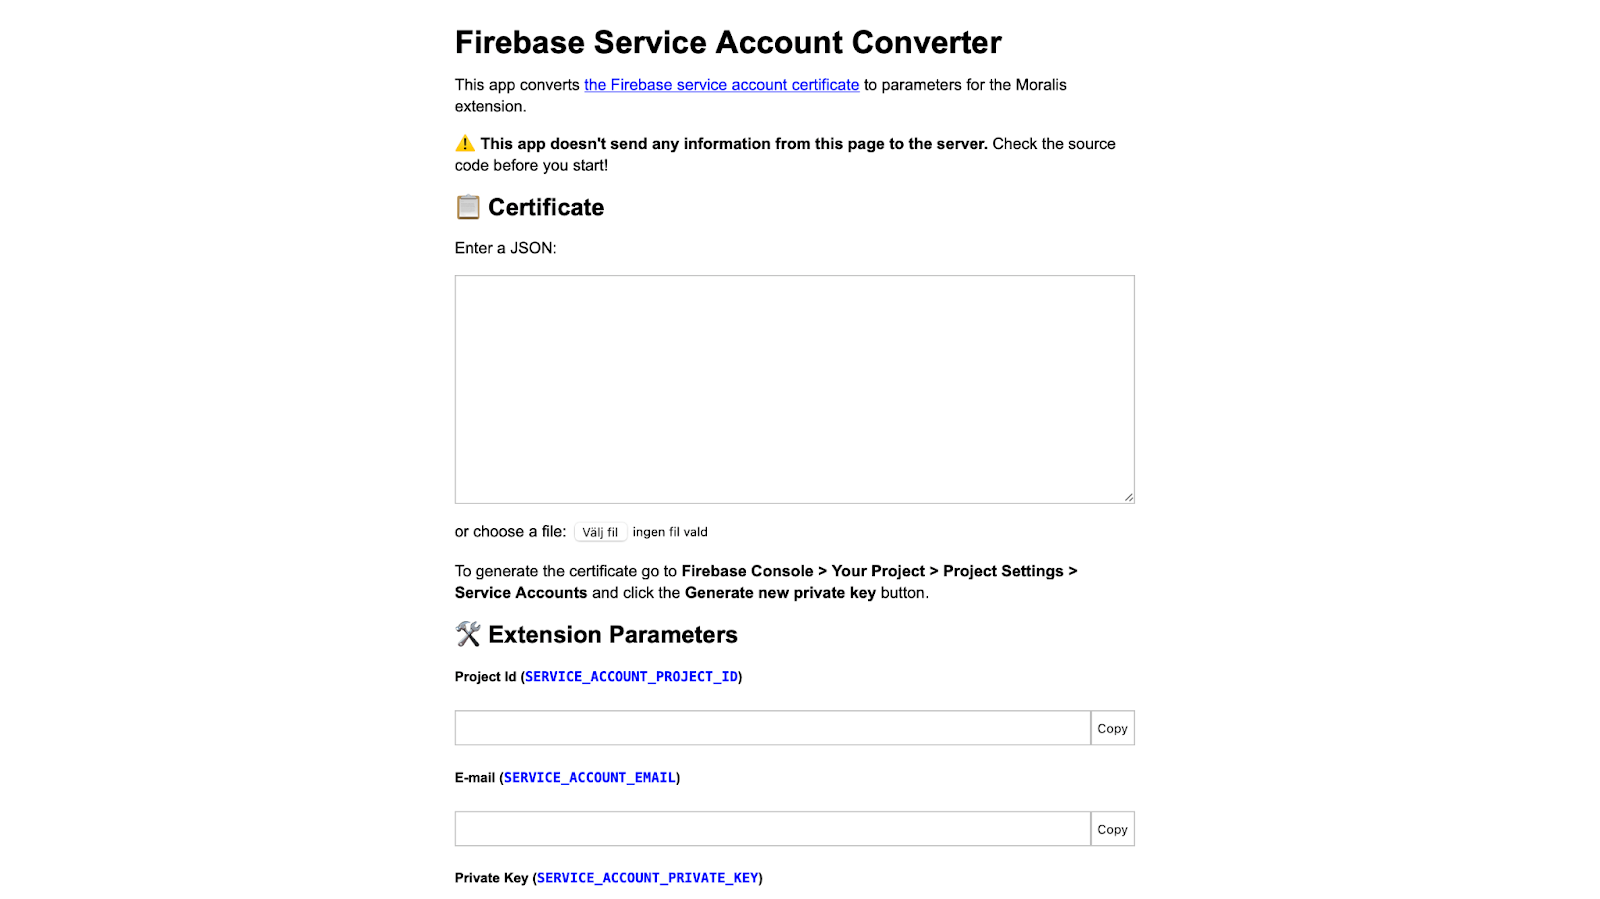
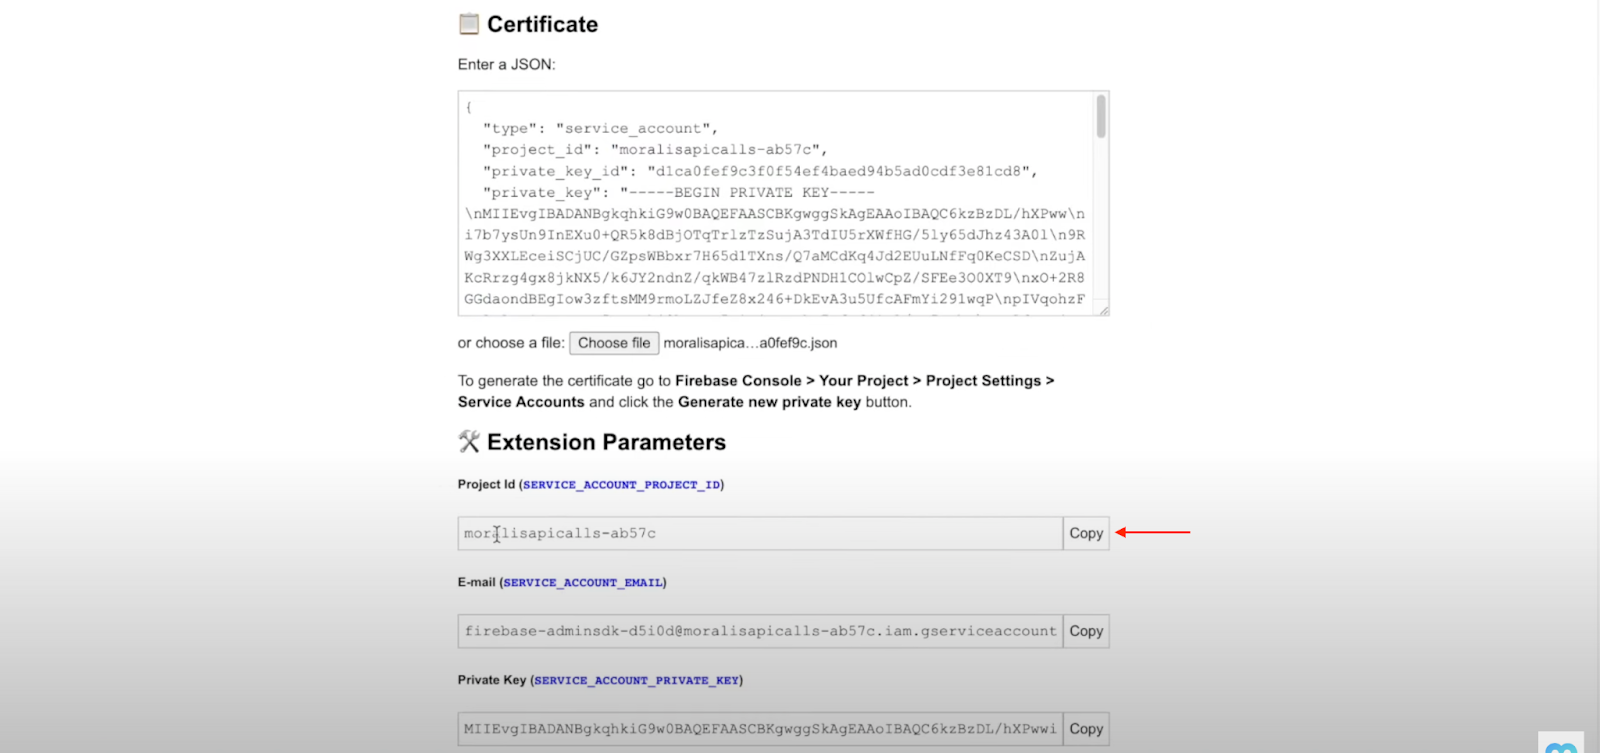
Generating a new private key will download a file to your device. You can then paste the contents of the file into Moralis’ Firebase Service Account Converter and receive the necessary extension parameters that you’ll need to set up a Firebase login with MetaMask:
This covers the preliminary Firebase setup and the first part of this ”Create a Web3 Firebase Login with MetaMask” tutorial. The following section will illustrate how to set up the Firebase CLI (command line interface)!
2. Initiating the Firebase CLI
The next step to implement a Firebase login with MetaMask into your project is installing the Firebase CLI. To do so, go ahead and open an IDE (integrated development environment) and set up a new folder/repository. We use VSC (Visual Studio Code) for this Web3 Firebase authentication tutorial. If you opt for another alternative, note that the workflow might differ.
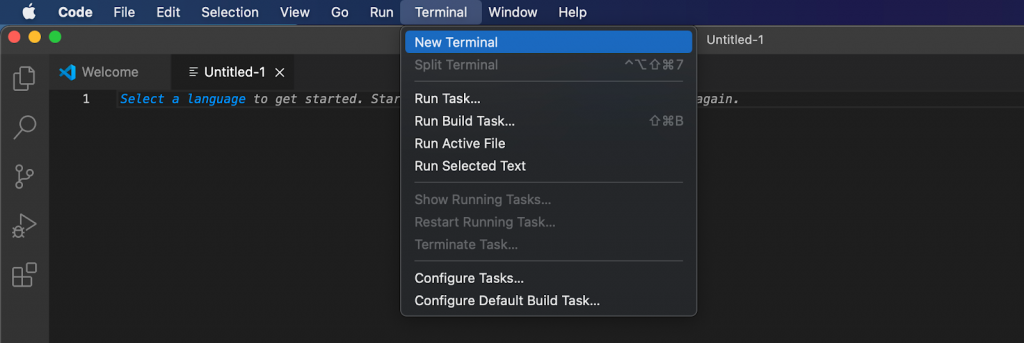
With your IDE open, you must launch a new terminal. If you are using VSC like us, click on the ”Terminal” tab at the top, followed by ”New Terminal”:
With a terminal open, make sure to install Firebase tools on your local machine by inputting the following command into the terminal:
For macOS:
sudo npm install -g firebase-tools
For Windows:
npm install -g firebase-tools
Next up, log in to Firebase using the command below:
firebase login
Once logged in, go ahead and initiate your Firebase project by running the following command in the terminal:
firebase init hosting
From there, you can select an existing project, which should correspond to the Firebase project you set up in the previous section:

You can then choose what you want to use as your public directory, and in this case, you can input the following and hit enter:
frontend/build
Lastly, select ”No” for both the ”Configure as a…?” and ”Set up automatic builds…?” questions:

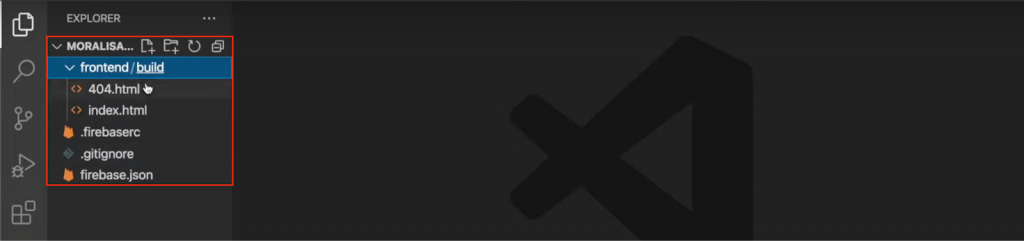
That covers the Firebase CLI setup process! If you followed along and executed the proper commands, you should now have a structure similar to this in your local directory:
3. Setting Up the Firebase Authentication Extension
It is time to set up Moralis’ Firebase Auth extension, as this is how you will add a Web3 Firebase login with MetaMask. As such, jump straight back into the terminal and run this command:
firebase ext:install moralis/moralis-auth
For the first prompts, select ”Yes”, pick the ”Iowa…” option, and choose to store your secrets on ”Google Cloud Secret Manager”:

Once you select the ”Google Cloud Secret Manager” option, it might result in an error similar to the one presented in the image below:

If you experience this issue, visit the link presented in your terminal, which brings you to a page looking like this:
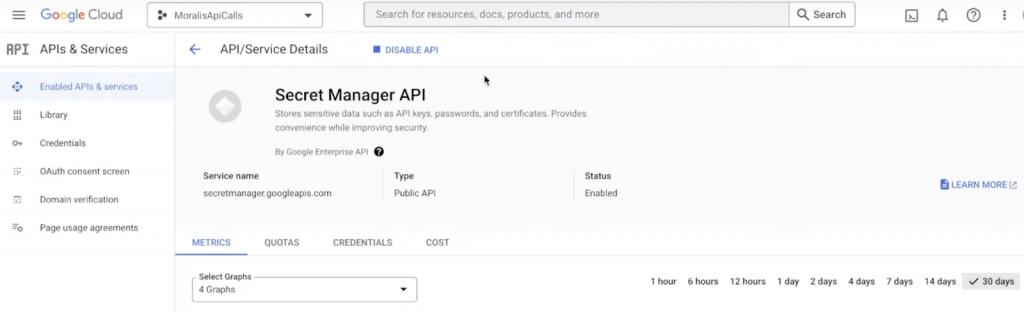
From there, you need to disable and reenable the API by clicking on ”DISABLE API”:

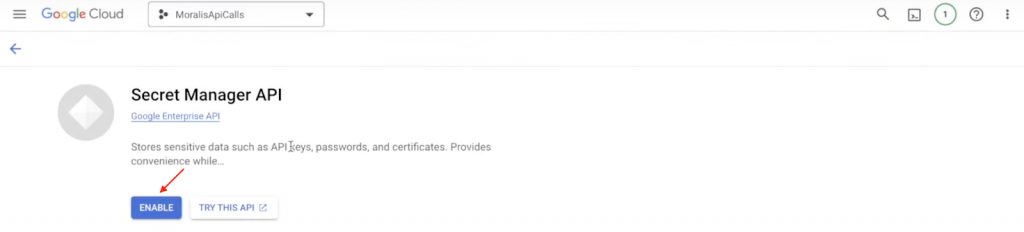
This should bring you to the ”Secret Manager API” page, where you can enable the API:
Now, wait a few minutes. Then, repeat the process by inputting the command from above into the terminal once again:
firebase ext:install moralis/moralis-auth
This time, it should not result in an error. Instead, you will now need to enter your Moralis API key:

As such, if you have not already, make sure to set up your Moralis account immediately. With an account at your disposal, you can fetch the API key by logging in to Moralis, clicking on the ”Account” tab, hitting ”Keys”, and finally copying the Web3 API key:

After inputting the API key and hitting enter, you will need to add a website URL. In this case, input the following:
https://localhost
From there, the terminal will prompt you for the ”Project ID of Service Account”, which you can acquire from Moralis’ Firebase Service Account Converter you explored previously:

Lastly, the terminal will ask for the ”Email of Service Account” and ”Private Key of Service Account”, which you can acquire from the Firebase Service Account Converter:
4. Deploying the Extension
This section will show you how to deploy the Moralis Auth extension. So, to deploy the extension, input the following command into the terminal:
firebase deploy --only extensions
Once you run the command above, it will prompt some questions, and you can select ”Yes” for all of them. Moreover, it might take a couple of minutes; however, worry not; the extension will deploy shortly.
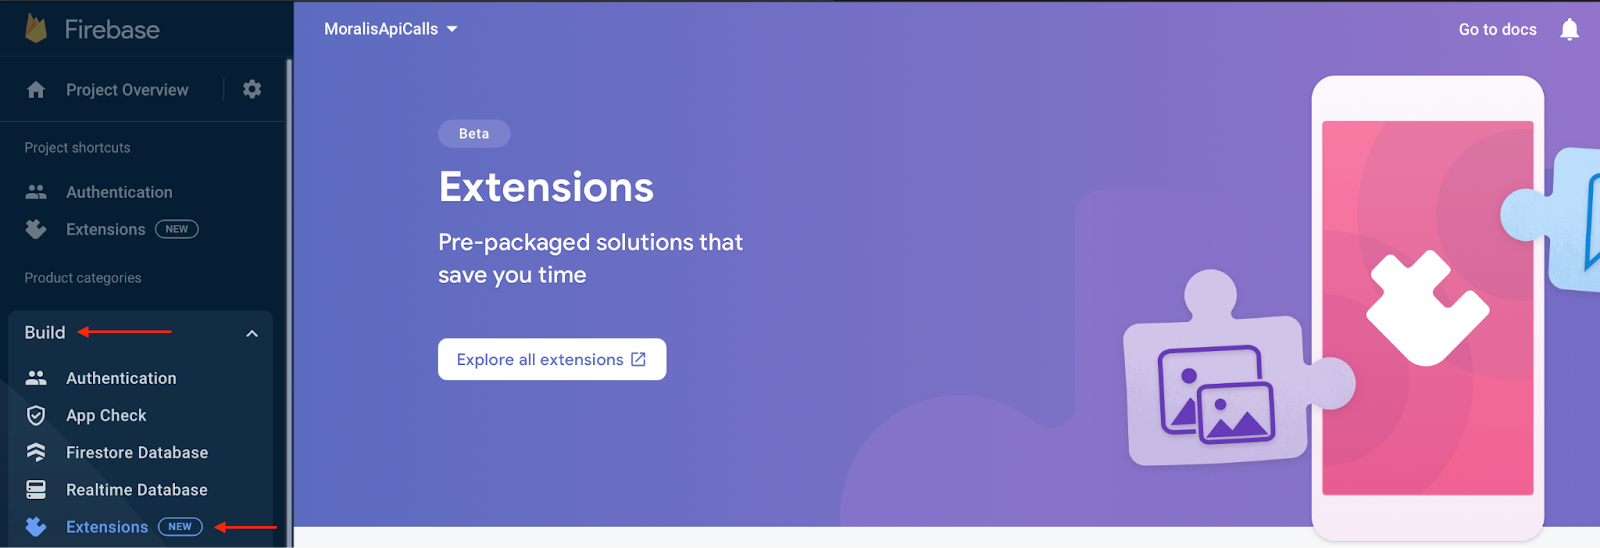
If everything is deployed successfully, you should now be able to find the Moralis Auth extension in your Firebase admin panel. To check, click on the ”Build” tab, followed by ”Extensions”:
Now, with the Moralis Auth extension at your disposal, you must try it out with a React app. As such, the following section will delve deeper into how you can create the app and test that everything works as intended.
5. Creating the App
If you look closely at your local directory, you will notice the ”frontend/build” folder. This originally contains two files; however, we want to replace these with a React app instead. In this case, we will use an already prepared template, and you can find the entire code for the project below:
Complete React App Documentation – https://github.com/MoralisWeb3/youtube-tutorials/tree/main/FirebaseAuthExtension
Copy all the files from the repository above and implement them into the ”frontend” folder. Consequently, your IDE should now look something like this:

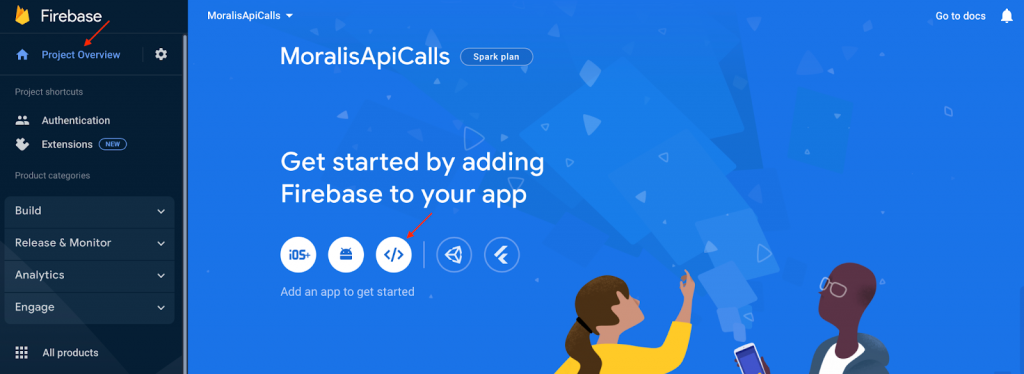
From there, all you need to do is add your Firebase configurations to the ”src/App.js” file on the eighth line, where you will find the ”firebaseConfig” object. To acquire the configurations, go to the Firebase admin panel in your browser, hit ”Project Overview”, and set up a web app:
From there, enter a name and hit ”Register app”, which should bring you to the second stage of the registration process called ”Add Firebase SDK”. It will look something like this, and you can go ahead and copy everything within the ”firebaseConfig” object:
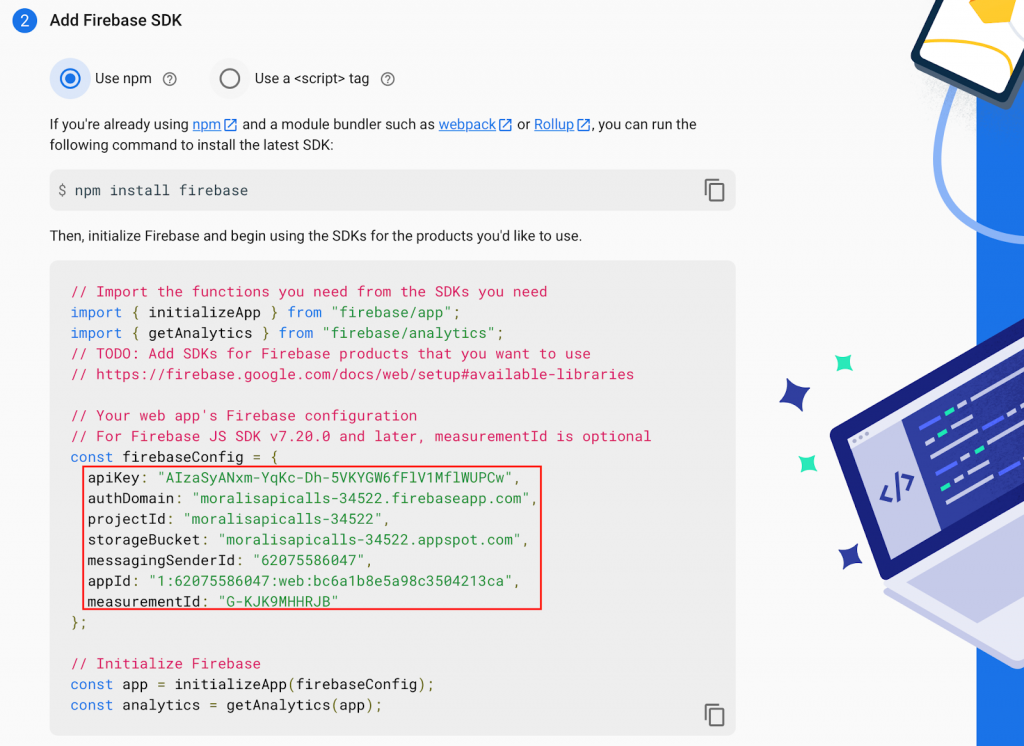
All that remains is to paste this information into your local directory’s ”firebaseConfig” object. Next up, go to the terminal once again and ”cd” into the ”frontend” folder with the following command:
cd frontend
Install all the necessary dependencies with this command:
npm i
Lastly, you should now be able to run the application locally with the following command:
npm run start
You should now be able to access the application on ”localhost:3000”. That’s it for this tutorial! You will now be able to create a Web3 Firebase login with MetaMask for all future projects!
If you experienced trouble during the tutorial, check out the video from before or join Moralis’ Discord channel and ask our talented community engineers for assistance!
Summary – Create a Web3 Firebase Login with MetaMask
Did you know that Moralis offers the most accessible way to create a Firebase login with MetaMask? If not, you should know that the Moralis Auth extension allows you to create a React app where users can log in with their MetaMask wallets in only five simple steps:
- Setting Up Firebase
- Initiating the Firebase CLI
- Setting Up Moralis’ Auth Extension
- Deploying the Extension
- Creating the React App
Following the steps above results in an application where users can sign in with their Web3 wallets. What’s more, thanks to the Firebase integration, the app generates user IDs and allows you to store valuable user information on your app’s backend!
If you learned something from the article and want to expand your Web3 proficiency, check out additional content here at the Moralis Web3 blog. For example, check out other Firebase integrations by learning how to use Firebase as a proxy API for Web3. Moreover, you can also explore other areas of Web3 development, such as smart contract development. If this interests you, we recommend our guide on how to write Solana smart contracts!
So, sign up with Moralis immediately if you want to create a Firebase login with MetaMask. Joining the platform is entirely free, so you have nothing to lose!

What is ERC-4337? Full EIP-4337 Guide