Are you interested in Avalanche development and want to leverage the platform to build sophisticated Avalanche dapps? If this is the case, you should know that Moralis’ Avalanche boilerplate – combined with the platform’s enterprise-grade Web3 APIs – presents the fastest and most accessible way to create Avalanche dapps! If this interests you, join us in this tutorial as we provide a complete breakdown of building dapps using the Avalanche boilerplate.
Before demonstrating how to build Avalanche dapps, we will first explore the intricacies of the Avalanche network and Moralis’ Ethereum boilerplate. Following this, we will jump straight into the tutorial and illustrate how you can build Avalanche dapps with Moralis’ Avalanche boilerplate. So, if you are looking to develop Avalanche dapps both efficiently and effectively, join us and learn all you need to know about launching your first project in no time!
Moreover, it does not matter what network you are looking to build projects on. When you opt to use Moralis, you will be able to save valuable resources and time. To learn more about the capabilities of Moralis, we highly recommend you check out some of Moralis’ most prominent tools. For example, learn more about the Web3 Streams API, allowing you to stream on-chain data directly into any backend! So, if you want to access a more seamless developer experience, sign up with Moralis immediately!
What is Avalanche? – Avalanche Explained
Avalanche is one of the most significant Ethereum alternatives for building dapps, and it is a programmable smart contract platform for Web3 applications. The platform set out to solve some of the most well-known problems with Ethereum’s congestion issues, focusing on transaction speed and costs.
The organization behind Avalanche is Ava Labs, and they suggest they have built the faster smart contract platform within the industry in terms of “time-to-finality”. Consequently, the network offers excellent opportunities to build fast, low-cost applications. What’s more, Avalanche is EVM-compatible, allowing you to build Solidity-compatible dapps.
Here are some of the central features of Avalanche:
- Speed – Avalanche utilizes a novel consensus protocol that can continuously confirm transactions in less than one second.
- Security – The network can ensure strong security guarantees that exceed the 51% standard implemented by some alternative networks.
- Scalability – Avalanche is able to process 4,500 transactions per second (TPS).
- Sustainability – The network uses a PoS (proof-of-stake) consensus mechanism instead of a PoW (proof-of-work). This is generally a more economically friendly alternative.
- Private/Public Blockchains – Avalanche allows you to create your own blockchains, either public or private.
Nevertheless, this briefly covers Avalanche and some of the network’s most central features. With a better understanding of the Avalanche network, we will explore Moralis’ Avalanche boilerplate in the following section. Let’s first cover some of the main features of the boilerplate to illustrate what you are working towards!
What Are You Working Towards? – Exploring Moralis’ Avalanche Boilerplate
You will find a link below if you want to skip the tutorial and jump straight into the code for the Avalanche boilerplate. However, as soon as you click on the link or inspect it further, you will quickly notice that it is called ”ethereum-boilerplate”, which might be confusing since you are setting out to build Avalanche dapps. However, the template is EVM-compatible and works just as well for the Avalanche network!
Avalanche Boilerplate Documentation – https://github.com/ethereum-boilerplate/ethereum-boilerplate
Nevertheless, the dapp you are about to create based on Moralis’ Avalanche boilerplate will have the following landing page:
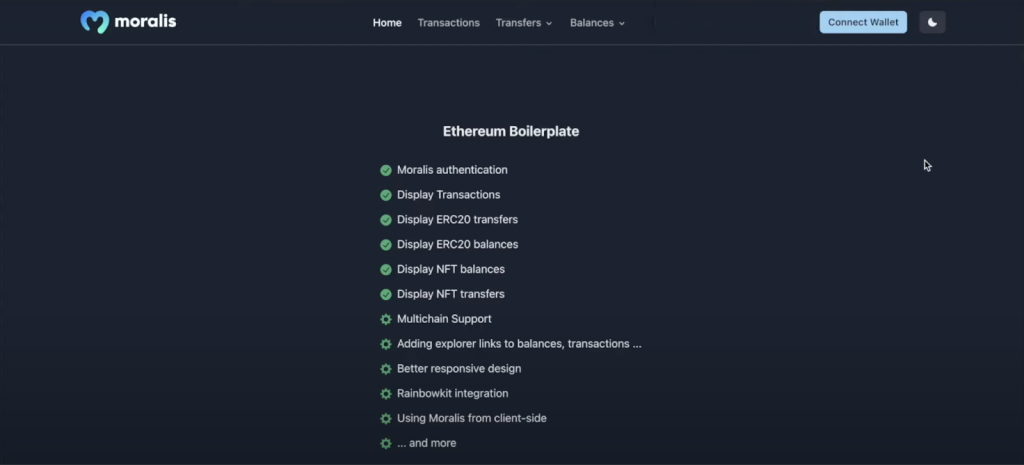
At the top of the dapp, you will find four tabs: ”Home”, ”Transactions”, ”Transfers”, and ”Balances”. These tabs will contain various information regarding users’ Web3 wallets. However, before exploring these tabs further, users must authenticate their Web3 identity by clicking on ”Connect Wallet”:

Clicking on this button will prompt their MetaMask wallets and them to sign a message. Once the message is signed, the dapp will autonomously add information to the various tabs. As such, if users, for example, would click on ”Transactions”, it will display the individual user’s transaction history in a table:

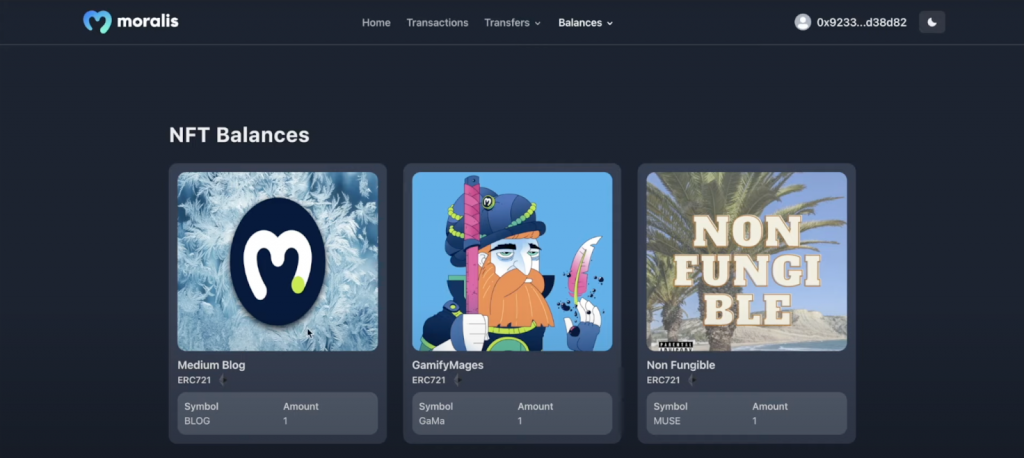
Moreover, the ”Transfers” and ”Balances” tabs feature drop-down menus. These menus allow users to filter between token types. As such, it will, for instance, be possible to click on the ”Balances” tab and select the ”NFTs” option:

If users do so, it will display all NFTs contained within their wallets neatly:
Furthermore, the same principles apply to the ”Transfers” tab. Nevertheless, this covers the essential features of the Avalanche boilerplate, including functionality such as fetching on-chain data, Web3 authentication, etc. With a more profound idea of what you will be working towards, it is time to jump into the process of creating dapps with Moralis’ Avalanche boilerplate.
How to Create Dapps with the Avalanche Boilerplate
In the following sections, the article will illustrate how to create dapps with the Avalanche boilerplate. To begin with, we will show you how to create a Moralis account, as this is necessary for the tutorial. Once you have an account, we will show you how to clone the Avalanche boilerplate to your local directory. With a copy of the project, we will cover the necessary configurations to make the dapp work as intended. Lastly, to top off the tutorial, we will demonstrate how to start the Avalanche dapp!
Moreover, if you prefer watching YouTube videos to learn, check out the clip below from Moralis’ YouTube channel. In the video tutorial, a Moralis developer walks you through the entire process from start to finish:
However, the video above does not cover all the configurations to make the boilerplate suitable for the Avalanche network. If you need help with this, follow along as we initiate the tutorial by showing you how to create a Moralis account!
Creating a Moralis Account
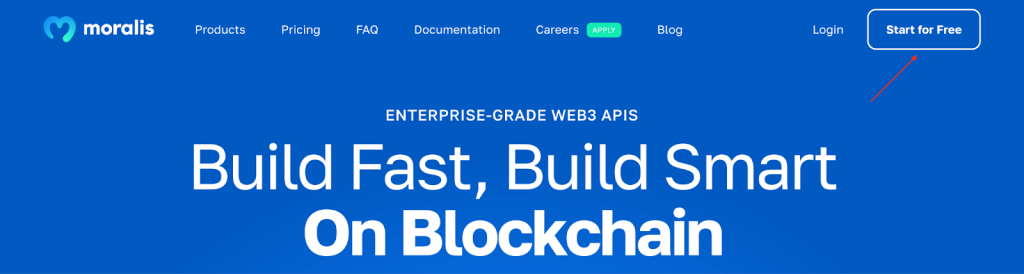
Before cloning the Avalanche boilerplate, we will take care of an essential prerequisite: creating a Moralis account. Creating your account is easy and will only take seconds. So, you can start by clicking on the ”Start for Free” button at the top of Moralis’ website:
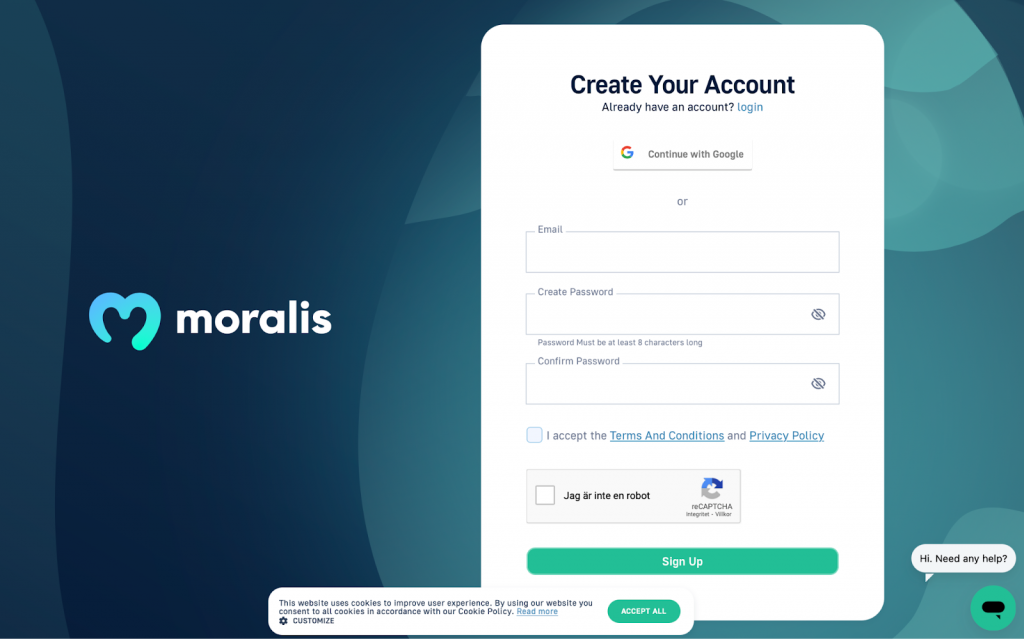
Clicking on this button will open the following page where you need to input an email address, create a new password, click on the ”I accept…” box, and hit ”Sign Up”:
As a result, you now have a Moralis account, and we will, in the ”Configure Environment Variables” section, explain further why you need an account in the first place. Nevertheless, let’s take a closer look at how you clone the Avalanche boilerplate to your local directory!
Cloning the Avalanche Boilerplate Explained
You can progress by opening your own IDE (integrated development environment). This tutorial will illustrate how to build an Avalanche dapp with Visual Studio Code (VSC). Remember, if you opt for another option, note that there might occasionally be slight differences in the process. Moreover, once you have opened an IDE, create a new folder for the project.
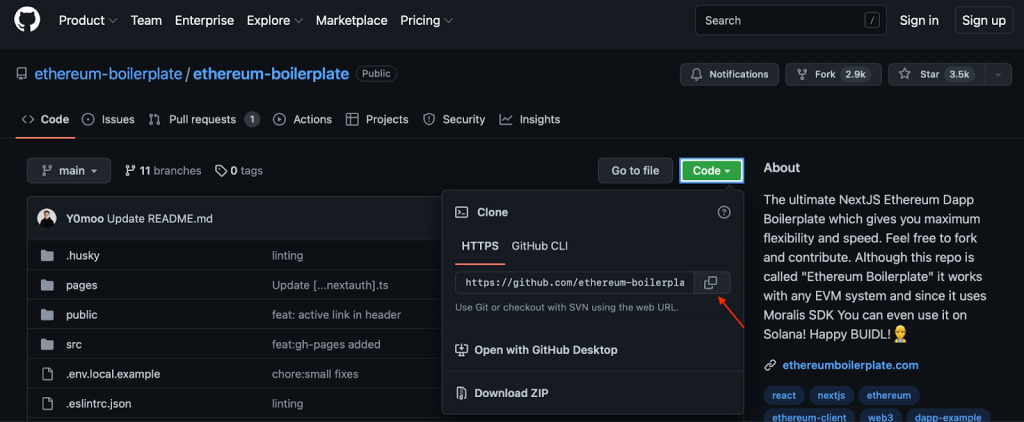
Next up, use the link from the ”What Are You Working Towards?…” section and open the GitHub repository for the Avalanche boilerplate. From there, you need to copy the repo URL by clicking on ”Code” followed by the copy button:
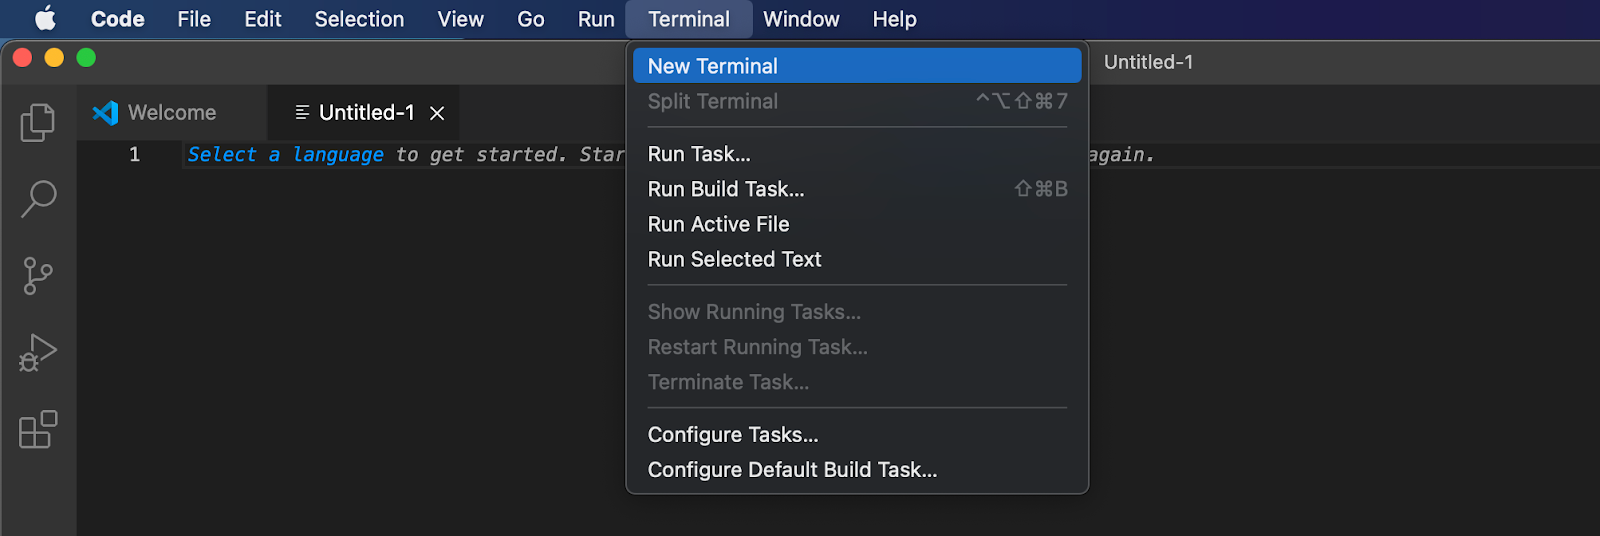
With the URL at hand, navigate back to your IDE and open a new terminal. If you, like us, decided to use VSC, you can do so by clicking on ”Terminal” at the top of the interface and hitting ”New Terminal”:
Once you open a new terminal, you can use the repository URL and run the following command (ensure you are in the location of the folder you previously set up):
git clone “BOILERPLATE_URL”
You can then navigate to the project’s folder by inputting the following into the terminal:
cd ethereum-boilerplate
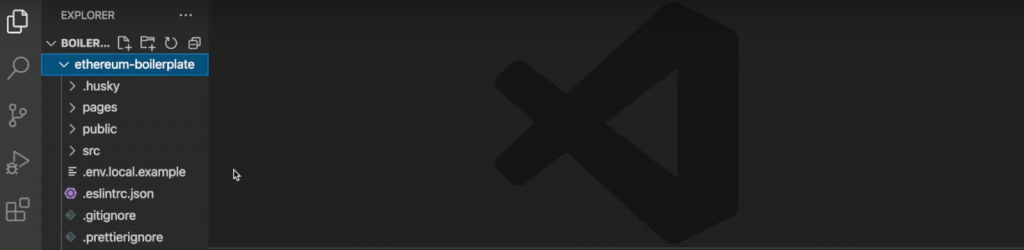
If you did everything correctly, you should have a similar structure to this on your local device:
Configuring Environment Variables
Now that you have the project in your local directory, you will need to make a few adjustments to the code. Accordingly, continue by opening the ”.env.local.example” and renaming it to ”.env.local”, removing the ”.example” at the end. This file will have the following code implemented by default:
APP_CHAIN_ID=0x1
APP_DOMAIN=ethereum.boilerplate
MORALIS_API_KEY= # Get your KEY https://admin.moralis.io/account/profile
NEXTAUTH_SECRET= # Linux: `openssl rand -hex 32` or go to https://generate-secret.now.sh/64
NEXTAUTH_URL=http://localhost:3000 # replace for production
The first of the variables above you need to configure is ”APP_CHAIN_ID”, which is initially set to ”0x1”. This is the chain ID for the Ethereum network. Thus, you will need to alter this to fit Avalanche. As such, go ahead and change the value to Avalanche’s ID: ”0xa86a”.
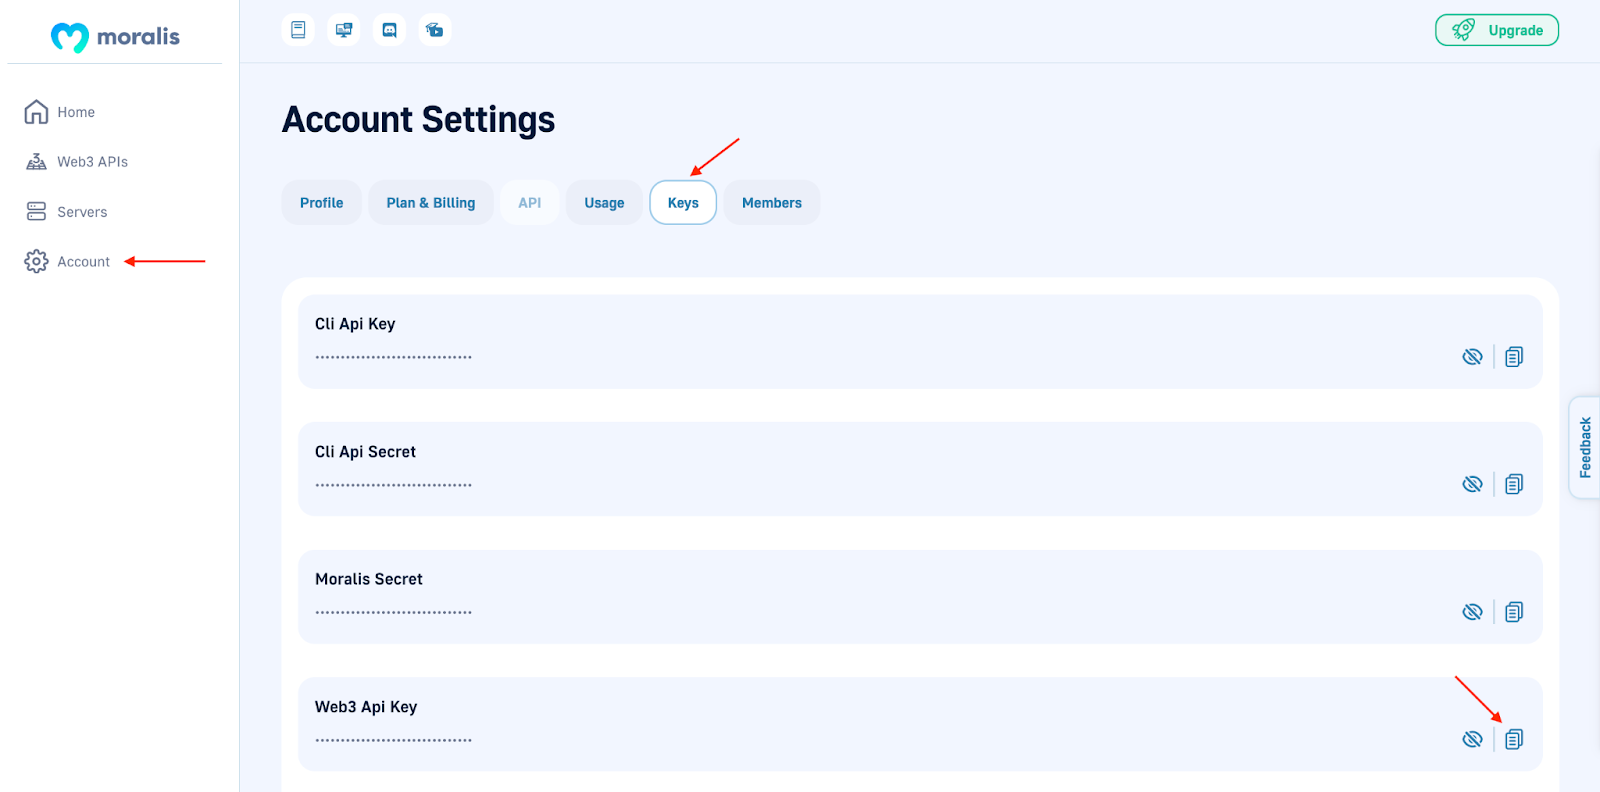
Next up, you will need to add an API key to the ”MORALIS_API_KEY” variable, and this is where your Moralis account enters the picture. To fetch the key, log in to Moralis, click on ”Account”, navigate to the ”Keys” tab, and copy ”Web3 API Key”:
From there, set ”MORALIS_API_KEY” to equal the value you just copied. Finally, you must add a secret key to the ”NEXTAUTH_SECRET” variable. Use the following link to create a value you can input into the code: “https://generate-secret.now.sh/32“.
That is it for the variable configurations; however, we quickly need to mention ”NEXTAUTH_URL”. This variable is set to ”http://localhost:3000” by default. This will allow you to run the Avalanche dapp on a local host. However, as soon as you plan to launch the dapp and make it publicly available, you must change this value to the dapp’s URL. Nevertheless, you can leave this unaltered for now!
The snippet below is an example of what the final version of the file might look like:
APP_CHAIN_ID=0xa86a
APP_DOMAIN=ethereum.boilerplate
MORALIS_API_KEY= "YOUR_API_KEY"
NEXTAUTH_SECRET= b8e786967d7bcbc0f920d35bcc3f891c
NEXTAUTH_URL=http://localhost:3000
How to Start the Avalanche Dapp
In this last section of the tutorial, we will illustrate how to start the Avalanche dapp. The first thing you will need to do is to install a couple of dependencies, which is pretty easy. Now, depending on if you are using the “yarn” or “npm” commands, open a new terminal and input either of the following:
npm i
yarn
Following this, all that remains is to run the application on your local host using one of these commands:
npm run dev
yarn run dev
That’s it! You should now be able to access and test the application using the URL you set in the previous section: “http://localhost:3000”.
Furthermore, if you encounter any hurdles during the process, you can join the Moralis Discord channel and get assistance from our talented community engineers! In addition, it might also help to check out the video from before or tune in to the Avalanche boilerplate’s official documentation using the GitHub link from a previous section.
Moreover, if you found this tutorial helpful and want to develop dapps for other networks, you will find additional guides here at Moralis’ Web3 blog. For example, you can learn how to build a Polygon dapp in three steps!
Avalanche Boilerplate – Summary
This article demonstrated how you could easily create a simple Avalanche dapp by creating a Moralis account, cloning Moralis’ Avalanche boilerplate, configuring environment variables, and starting the dapp. Moreover, thanks to Moralis, you were able to create an Avalanche dapp in only minutes!
Following the various instructions above results in an application where users can sign in with their Web3 wallets. Once signed in, they will be able to access information regarding their wallets, such as transaction histories, balances, etc. Accordingly, the Avalanche boilerplate supports some essential basic features most dapps implement. This suggests that the template is excellent as a barebones state of any application. All you need to do now is add more features or remove the ones you deem unnecessary!
If you found this article valuable, consider checking out more excellent content here at Moralis. For example, if gaming interests you, the blog supplies some amazing Web3 gaming content, such as how to connect PlayFab with Web3 or build a Web3 FIFA clone.
However, you might be more interested in NFT development instead of gaming. If this is the case, Moralis is still the number one choice! With Moralis’ NFT API, you now have the ability to easily acquire NFT on-chain data and build NFT projects in record time. For example, check out our guide on how to build a Solana NFT explorer with ease!
Moreover, no matter which sector of Web3 development you want to get involved in, you should sign up with Moralis. Creating your Moralis account is entirely free and only takes a few seconds!
