Would you like to know how to build a dapp with C#? Moreover, would you like to discover the fastest way to build a Web3 app with C# and .NET? If so, then this article is for you! When using Moralis’ enterprise-grade APIs and SDK for blockchain development, you can build a dapp with C# and .NET effortlessly. In fact, with Moralis, we can accomplish this development task in four simple steps:
- Create a C# app
- Import and set up the latest Moralis .NET SDK
- Integrate your application with Moralis services
- Fetch blockchain data from any supported chain
To tackle the above steps easily, you must also take care of two prerequisites. You must create your free Moralis account and install and set up Visual Studio. Furthermore, your Moralis account will give you access to your Moralis Web3 API key, which will be your gateway to Web3 development. As such, we will first show you how to obtain that key. Moreover, it’s worth pointing out that Moralis is all about cross-chain interoperability, letting you use the same lines of code to tackle all of the leading programmable blockchains. Also, you can reach a wider audience and never get stuck to a particular blockchain. As a result, you future-proof your dapp development.
Nonetheless, despite the fact that we will build a dapp with C# and .NET in this tutorial, you should keep in mind that Moralis is also cross-platform interoperable. So, you can use popular platforms such as Firebase, Supabase, Unity, and many others to dive into the Web3 domain.

Build a Dapp with C# and .NET – Taking Care of Prerequisites
We will first show you how to obtain your Moralis Web3 API key to initiate this article. After all, doing so is a vital piece of the “build a dapp with C#” quest. So, make sure to create your free Moralis account now. You may use the “create your free Moralis account” link above or visit the Moralis homepage. There, you’ll need to click on one of the “Start for Free” buttons:

Whichever of the two options you choose, you’ll land on this page:
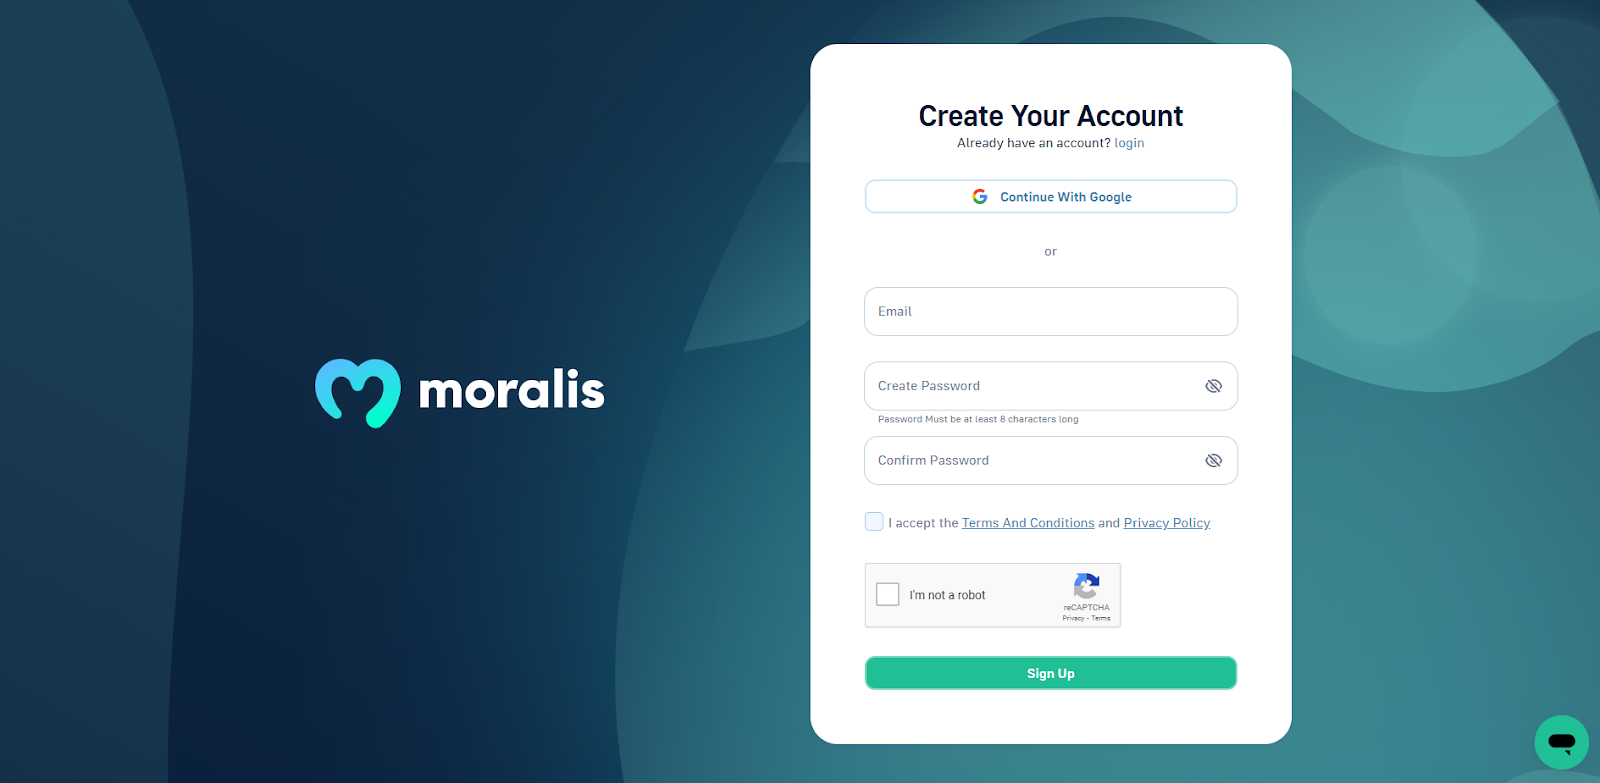
Looking at the above screenshot, you can see that you’ll need to enter your email address and create your password. But you may also use your Google account. In case you go with the former option, make sure to confirm your account. You do this by clicking on the confirmation link that will land in your email inbox.
With your Moralis account up and running, you’ll be able to access your Moralis admin area. From there, you’ll be able to access your Web3 API key in two ways.
First, you can just click on the “Web3 APIs” option in the side menu:

Then choose between “EVM API” and “Solana API”. When you want to focus on Ethereum or other EVM-compatible chains, the former will be your go-to option. Finally, click on “Copy API key” and then “Web3 Api Key”:
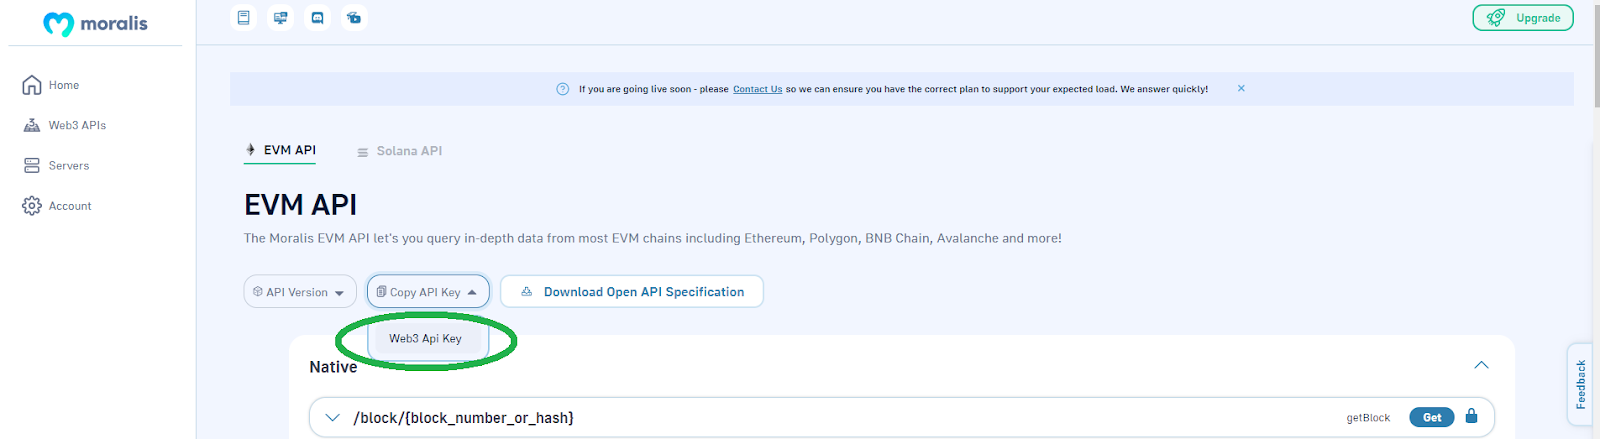
With the above click, you will copy your Web3 API key. As a confirmation of that action, you will see a notification in the top-right corner:

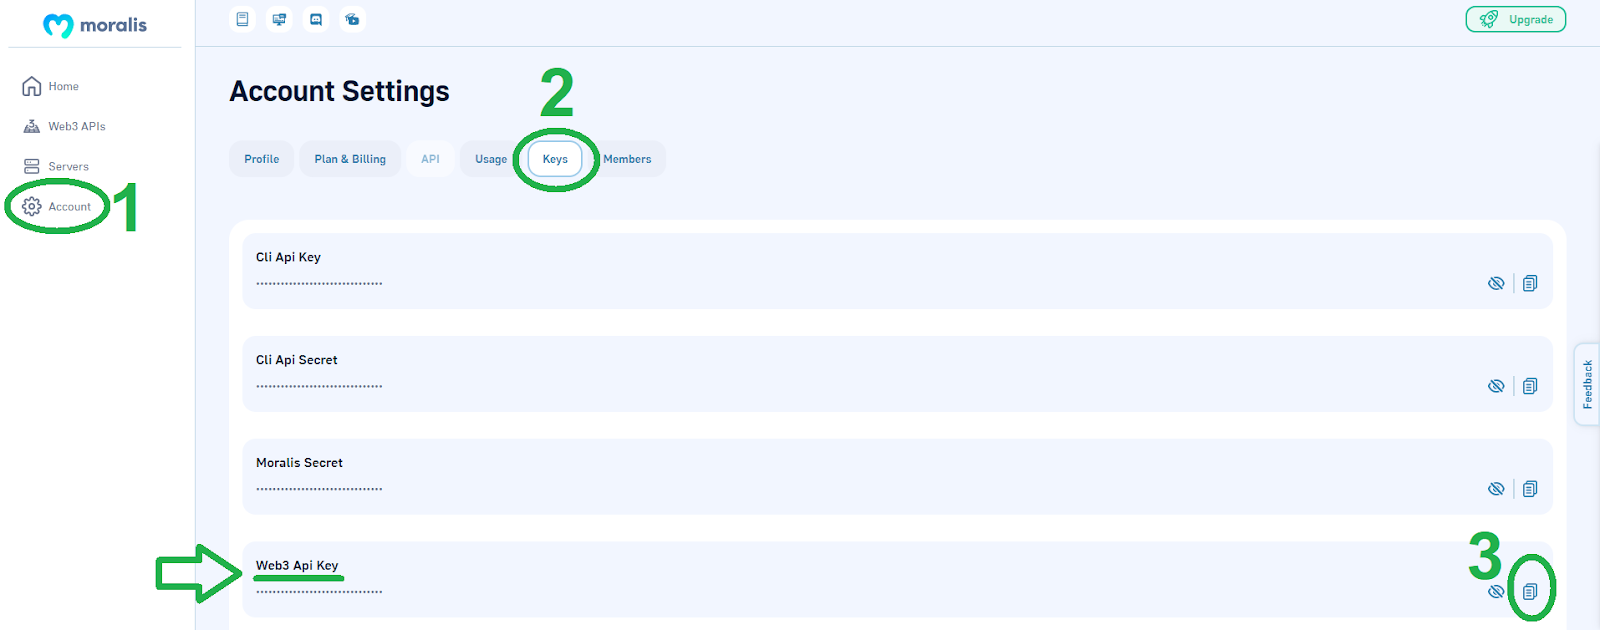
Second, you can copy your Moralis Web3 API key from your “Account Settings” page. To get there, click on the “Account” option in the side menu. Once on the “Account Setting” page, select the “Keys” tab and then copy your Web3 API key:
Install and Set Up Visual Studio
The next prerequisite is to install and set up Visual Studio. To use this free IDE, use your favorite browser and search engine to query it for “Visual Studio”:

Once you land on the official Visual Studio website, click on “Free Visual Studio”. This will take you to the “download” section, where you need to click on the “Free download” button:
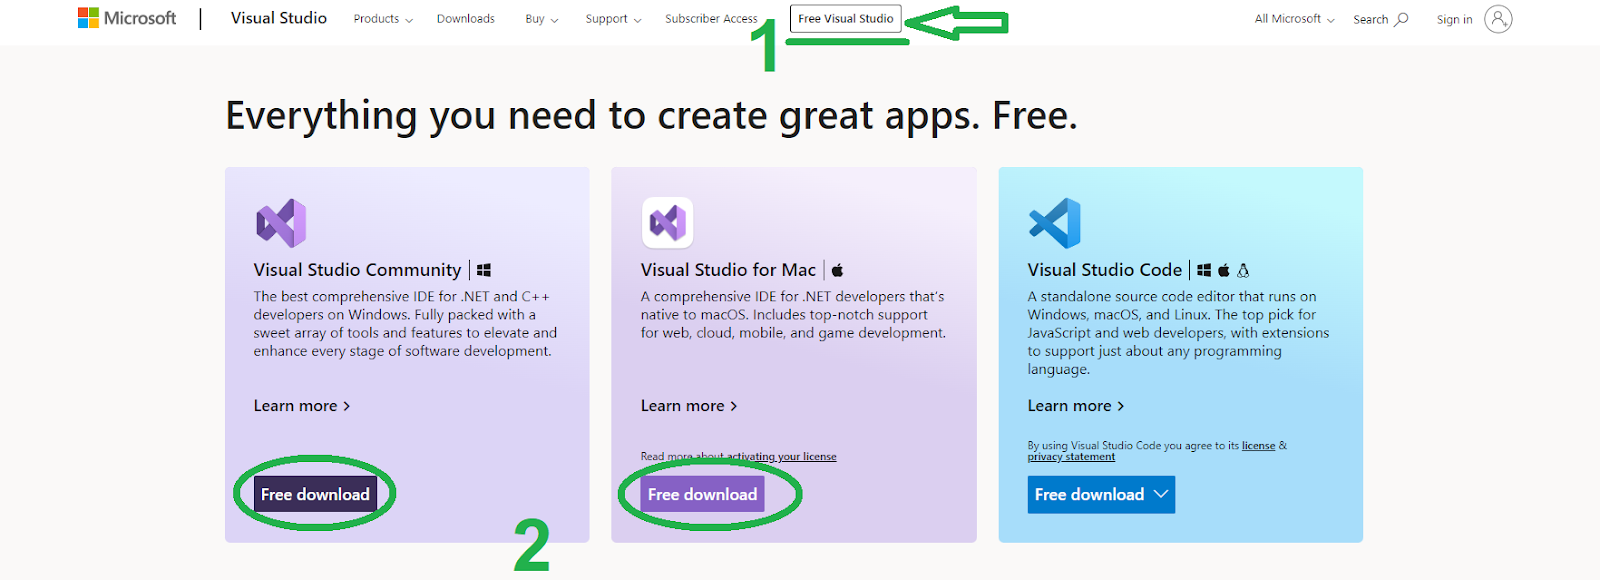
Finally, install Visual Studio on your computer.
Build a Dapp with C# and .NET – Step 1: Create a C# App
You will start this step of the “build a dapp with C#” task by opening Visual Studio. Next, create a new project. Moreover, make sure to select “C# Console” as the template:

Then, you need to configure your new project. You do this by entering your project name and location. Feel free to follow our lead and name your project “ConsoleDemo”:

Looking at the above screenshot, you can see that we used the “MoralisDemo” folder under location. Moreover, just like with the project name, feel free to follow our lead. Finally, select the “.NET 6.0” framework and click on the “Create” button:

By creating your C# application, Visual Studio will generate a basic “C# Console” project for you:

Moreover, as indicated by the above image, Visual Studio should create the “Program.cs” script on your behalf.
Build a Dapp with C# and .NET – Step 2: Import and Set Up the Latest Moralis .NET SDK
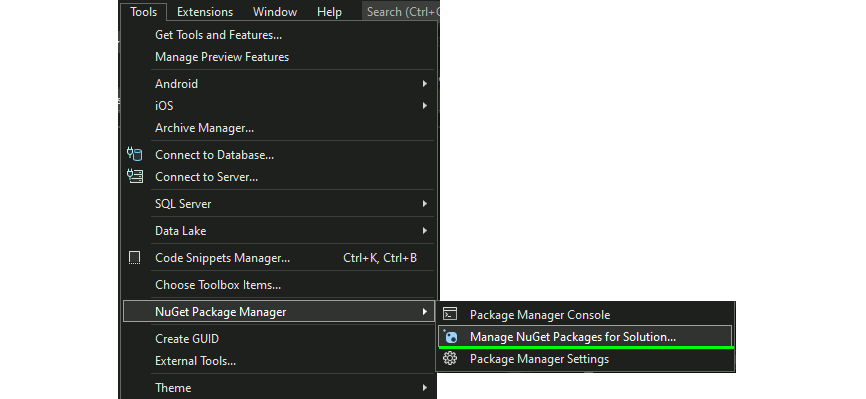
By adding Web3 functionality, you can convert the above-created C# app into a dapp. However, you need to import Moralis’ SDK to add that functionality. So, first, you need to manage “NuGet Packages”. You can find this option under “Tools” > “NuGet Package Manager” > “Manage NuGet Packages for Solution…”:
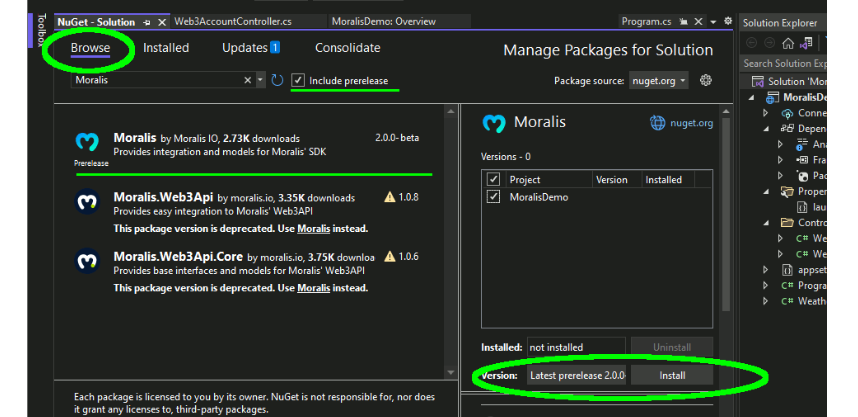
Once inside the “Manage NuGet Packages for Solution…” option, make sure to checkmark the “Include prerelease” box. Then, enter “Moralis” into the search bar. Among the given results, select the latest Moralis package and click on the “Install” button:
Build a Dapp with C# and .NET – Step 3: Integrate Your App with Moralis Services
With Moralis’ .NET SDK installed, you are ready to integrate your app with Moralis services. This step will enable you to build a dapp with C#. So, start by opening the “Program.cs” file in the “Solution Explorer” window. Then, select the current content of that file and delete it. Next, paste in the following two “using” statements:
using Moralis;
using Moralis.Web3Api.Models;
With the “using” statements in place, proceed by adding “namespace“, “class“, and basic public static “Main“. Furthermore, you need to make sure to set “MoralisClient.ConnectionData” with the previously obtained Moralis Web3 API key. So, just replace the “YOUR MORALIS WEB3API KEY” with your key. These are the lines of code you need to use to cover that:
namespace ConsoleDemo
{
    internal class Program
    {
        static void Main(string[] args)
        {
            // Setup Moralis
            MoralisClient.ConnectionData = new Moralis.Models.ServerConnectionData()
            {
                ApiKey = "YOUR MORALIS WEB3API KEY"
            };
        }
    }
}

Next, you must create the "DisplayCryptoData" static async function under the "Main" function. Moreover, this function should accept two parameters - "address" (string) and "chainId" (ChainList). Nonetheless, the return type should be "Task":

internal static async Task DisplayCryptoData(string address, ChainList chainId)
{

}
The above function also determines that your application will accept the same two arguments – the address and the chain ID. Since it is vital to ensure that these arguments are correctly passed and valid, we recommend adding the lines of code that will validate the arguments (see below). Finally, you must add the “Task.Run” statement to call the “DisplayCryptoData” async function.
Your “Main” Function
With all of the above in place, the following are the lines of code that your “Main” function should contain:
        static void Main(string[] args)
        {
            if (args.Length < 2)
            {
                Console.Write("Usage: ConsoleDemo.exe ADDRESS CLIENT_ID");
                return;
            }

            string address = args[0];
            int chainId = 1;

            if (!int.TryParse(args[1], out chainId))
            {
                Console.Error.WriteLine("CHAIN_ID must be a number.");
            }

            // Setup Moralis
            MoralisClient.ConnectionData = new Moralis.Models.ServerConnectionData()
            {
                ApiKey = "YOUR MORALIS WEB3API KEY"
            };

            Task.Run(async () =>
            {
                await DisplayCryptoData(address, (ChainList)chainId);
            }).Wait();
        }
With the above lines of code, you have everything in place to build a dapp with C# that will be able to fetch on-chain data. In the final step of this quest, you will have a chance to learn how to fetch and display the native balance, ERC-20 token balances, and NFTs’ metadata.

Build a Dapp with C# and .NET – Step 4: Fetch Blockchain Data from Any Supported Chain
To add Web3 functionality to your application, we will focus on the “DisplayCryptoData” function. Essentially, you’ll need to add the appropriate lines of code to this previously created async function. For starters, you will want to display the address in question:
Console.WriteLine($"For address: {address}...\n");

Fetching and Displaying Native Balance
You’ve now installed and integrated the Moralis SDK in the previous steps. As such, you can now utilize the Moralis Web3 API. Also, you can use intuitive endpoints to fetch all sorts of on-chain data. When it comes to fetching the native balance, the “GetNativeBalance” endpoint does the trick. So, this is the line of code you need to add to the “DisplayCryptoData” function:
// Load native balance for address
NativeBalance bal = await MoralisClient.Web3Api.Account.GetNativeBalance(address, chainId);
In addition, you also need the following lines of code to properly format and display the native balance:
double nativeBal = 0;

double.TryParse(bal.Balance, out nativeBal);

Console.WriteLine($"Your native balance is {nativeBal / Math.Pow(10,18)}");
Fetching and Displaying ERC-20 Token Balances
When it comes to fetching and displaying ERC-20 token balances, you get to follow the same principles as with the native balance. Of course, you need to use a different endpoint. In this case, it will be “GetTokenBalances“:
// Load ERC-20 Token List for address
List<Erc20TokenBalance> erc20Balnaces = await MoralisClient.Web3Api.Account.GetTokenBalances(address, chainId);
Furthermore, unlike the native balance, there can be multiple ERC-20 token types in a wallet address. As such, we need to use a list and display it properly. Nonetheless, you should also keep in mind that there might not be any ERC-20 tokens in a particular Web3 wallet. These are the lines of code that will properly display ERC-20 token balances:
Console.WriteLine("\n\nYour ERC 20 Tokens:");

if (erc20Balnaces != null && erc20Balnaces.Count > 0)
{
    // Print out each token with symbol and balance.
    foreach (Erc20TokenBalance tb in erc20Balnaces)
    {
        Console.WriteLine($"\t{tb.Symbol} - {tb.Name}: {tb.NativeTokenBalance}");
    }
}
else
{
    Console.WriteLine("\tNone");
}

Fetching and Displaying NFTs
When it comes to fetching NFTs, or should we say their metadata, things follow the same principles as in the above two examples. Of course, we need to use an appropriate endpoint. In this case, “GetNFTs” does the trick:
// Load first 10 NFTs for the address
NftOwnerCollection nfts = await MoralisClient.Web3Api.Account.GetNFTs(address, (ChainList)chainId, "", null, 10);
These are the lines of code displaying the name, balance, and metadata for each of the above-fetched ten NFTs:
        // Load first 10 NFTs for the address
        NftOwnerCollection nfts = await MoralisClient.Web3Api.Account.GetNFTs(address, (ChainList)chainId, "", null, 10);

        Console.WriteLine("\n\nYour NFTs:");

        if (nfts != null && nfts.Result.Count > 0)
        {
            // Print out each token with symbol and balance.
            foreach (NftOwner nft in nfts.Result)
            {
                Console.WriteLine($"\t{nft.Name}: {nft.Amount}\n\tMetaData: {nft.Metadata}\n\n");
            }
        }
        else
        {
            Console.WriteLine("\tNone");
        }
Note: It is the NFTs’ metadata that contains URLs of the files (e.g., PNG). So, by creating a proper frontend, you could easily display fetched NFTs.
Last but not least, you can view the entire code to build a dapp with C# on GitHub. Moreover, you should use the Moralis documentation for further assistance.
Run Your Dapp and Debug
With all the code in place, you can run your dapp in Visual Studio. If you use the code as provided herein, the output will be:
Usage: ConsoleDemo.exe ADDRESS CLIENT_ID
As such, we encourage you to click on “Open debug launch profiles UI” (inside “Solution Explorer” > “Properties” > “Debug” > “General”):

Then, populate the “Command line arguments” entry field with a wallet address and chain ID:
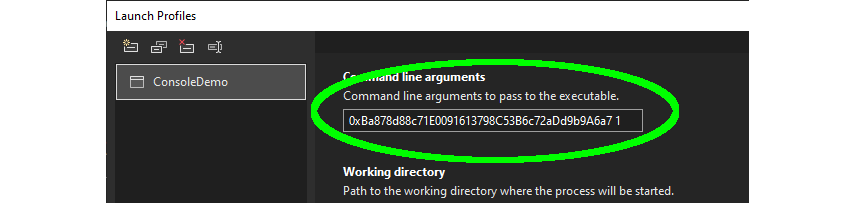
Note: We recommend you use your wallet address. Also, use the chain ID that matches the chain on which you have some balance. To find ID numbers for the programmable blockchains, use the “Supported Chains” page in the Moralis documentation. For example, the number “1” used above corresponds to the Ethereum chain.
If you run your dapp again after entering your wallet address and a chain ID, it will work properly. Accordingly, the console will display the native balance, ERC-20 token balances, and NFTs’ metadata for a given address and chain. Furthermore, this also means that you’ve successfully created a backend dapp with C# and .NET!
How to Build a Dapp with C# and .NET in 4 Steps – Summary
This article demonstrated how to build a dapp with C# and .NET. Furthermore, it showed you how to do that by taking you through these four steps:
- Create a C# app
- Import and set up the latest Moralis .NET SDK
- Integrate your application with Moralis services
- Fetch blockchain data from any supported chain
With the skills and knowledge obtained herein, you now know how to create basic backend dapps. So, you might be ready to take your C# and Web3 basics to the next level. Hence, we encourage you to use one of our tutorials and build a full-stack killer dapp. Remember that you can use other programming languages and legacy development platforms. Whether you want to dive deeper into C# and .NET dapp development or if you’d like to explore Firebase, for example, you should use the Moralis documentation. However, for even more advanced example projects, the Moralis blog and the Moralis YouTube channel should be your go-to outlets. These two places can help you become a Web3 developer for free.
Additionally, we should inform you that to go full-time crypto, becoming blockchain certified can be your entry ticket. This is where Moralis Academy enters the scene. This is where you attend top-notch blockchain development courses, receive a personalized study path, and experience expert mentorship. What’s more, Moralis Academy provides you with a membership in one of the most advancing communities in the crypto realm!
