Explore the easiest way to get a wallet balance on Aptos with the Web3 Data API from Moralis. With this API, you can effortlessly query data with only a few lines of code! All you need is a single API call, and it can look something like this:
import fetch from 'node-fetch';

const options = {
  method: 'GET',
  headers: {
    accept: 'application/json',
    'Bearer': 'YOUR_API_KEY'
  },
};

fetch('https://mainnet-aptos-api.moralis.io/wallets/coins?limit=10&owner_addresses%5B0%5D=ADD_WALLET_ADDRESS', options)
  .then(response => response.json())
  .then(response => console.log(response))
  .catch(err => console.error(err));
Calling the endpoint above provides a JSON response containing all the coins the specified wallet holds. Here is an example of what it might look like:
{
  "cursor": "eyJhbGciOiJIUzI1NiIsInR5cCI6IkpXVCJ9.eyJhZGRyZXNzIjoiMHhkODUwOTQyZWY4ODExZjJhODY2NjkyYTYyMzAxMWJkZTUyYTQ2MmMxIiwiY2hhaW4iOiJldGgiLCJkaXNhYmxlVG90YWwiOiJ0cnVlIiwiYXBpS2V5SWQiOjM2NTg5LCJsaW1pdCI6MTAwLCJ0b3BpYzMiOiI9Om51bGwiLCJ0b19ibG9jayI6IjE0NjgxNTM3IiwicGFnZSI6MSwidG90YWwiOjAsIm9mZnNldCI6MSwidWMiOnRydWUsImlhdCI6MTY3MTk3ODQwNH0.XM9IN3wRJgWzSvQCy-K4Asgs_j8p9xTM1pY7UnHEhs4",
  "hasNextPage": true,
  "result": {
    "amount": "324933484",
    "coin_type": "T0xa911c7236486be921f6cc9227b09afe4a4ad14d291ba1bb8a9b7c4d628759de::gegg::GEGG",
    "coin_type_hash": "6993fb8b5688d392a2d94127b9926519d6327e69f2bcf3dc0c5df2c060aec97d",
    "last_transaction_timestamp": "2022-09-17T22:03:32.000000Z",
    "last_transaction_version": "210373856",
    "owner_address": "0x9125e4054d884fdc7296b66e12c0d63a7baa0d88c77e8e784987c0a967c670ac"
  }
}
Getting a wallet balance on Aptos does not have to be more challenging than that when working with Moralis. As such, if your ambition is to build on Aptos, do not forget to sign up with Moralis. Creating an account is free, and you can immediately start leveraging the full power of blockchain technology!

Overview
In this tutorial, we will be showing you how to create an application for continuously querying wallet balances on Aptos. Thanks to the accessibility of the Moralis Web3 Data API, you will be able to create this NextJS app in three steps:
- Set Up Moralis and Clone the App
- Backend Code Breakdown – How to Get a Wallet Balance on Aptos
- Frontend Code Breakdown – Call the Endpoint
By covering the aforementioned steps, you will learn how to get a wallet balance on Aptos with Moralis in no time. If you are excited to get going, click here to immediately get into the central tutorial!
In combination with the tutorial on how to get a wallet balance on Aptos, the article also features a breakdown of Aptos and Aptos Labs. As such, if you are new to the Web3 industry or are unfamiliar with Aptos, we encourage you to start with the ”What is Aptos?” section.
Additionally, if you are looking for similar guides on Aptos development, we have other articles you might also be interested in. For example, check out our tutorial on how to get all transactions for an Aptos account or learn how to mint NFTs on Aptos!
Now, remember to sign up with Moralis before continuing. Creating an account is free, and you need an account to interact with the enterprise-grade APIs from Moralis and to follow along in this tutorial!
Tutorial: How to Get a Wallet Balance on Aptos
In this tutorial, we will show you how to get a wallet balance on Aptos using Moralis. We will briefly show you how to set up a NextJS application with an Express backend server. This app will leverage the Moralis Web3 Data API, allowing you to get a wallet balance on Aptos by inputting an address and hitting a submit button. What’s more, thanks to the accessibility of this industry-leading interface, we can add this logic with only a few lines of code!
We will utilize an already-developed application template to make the tutorial as straightforward as possible. As such, to make the application operational, all that’s required are some minor code configurations. We will also break down the backend and frontend code to show you how to implement the necessary logic to get a wallet balance on Aptos.
Nevertheless, we will cover a quick application demo before we get into the first step. In doing so, we will show you how the app works, giving you a better idea of what you will be working towards!
Get a Wallet Balance on Aptos – Application Demo
To kickstart this tutorial, let us take a closer look at the application you are aiming to build. This is what the app’s landing page looks like:
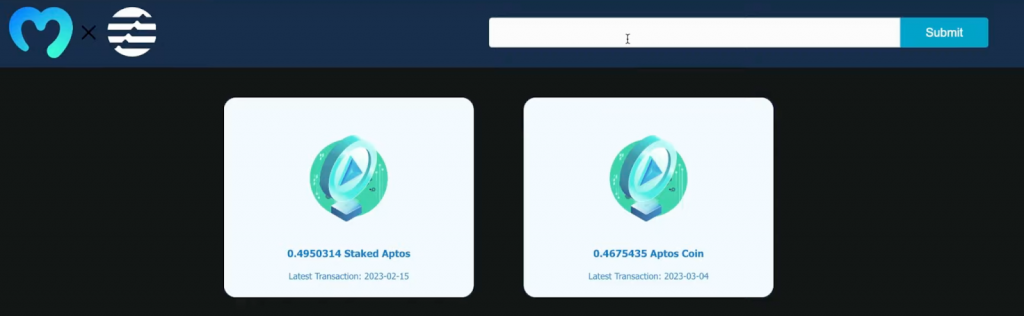
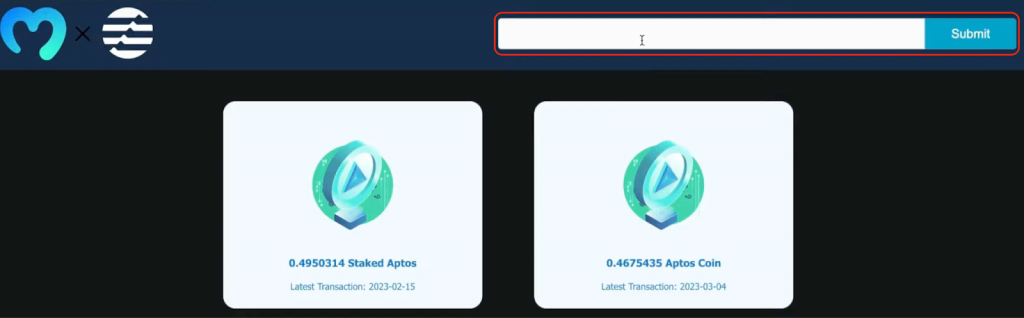
As you can see at the top, the header features two central elements, an input field, and a ”Submit” button:
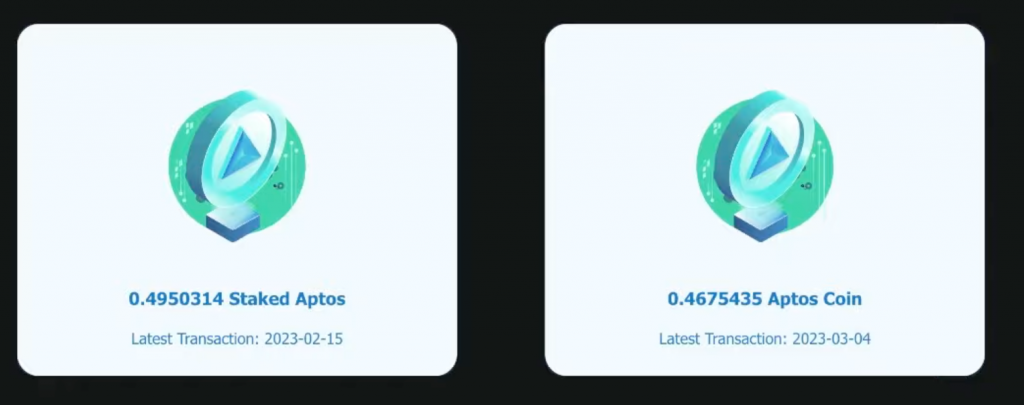
To use the app, we need to input an Aptos wallet address into the form and click on the submit button. In return, the app makes a Moralis API call to fetch that account’s wallet balance from the Aptos blockchain. From there, the response is neatly displayed, covering all the tokens held by the wallet:
That’s it; if you want to know how this works behind the scenes, join us as we start by showing you how to set up Moralis and clone the app!
Step 1: Set Up Moralis and Clone the App
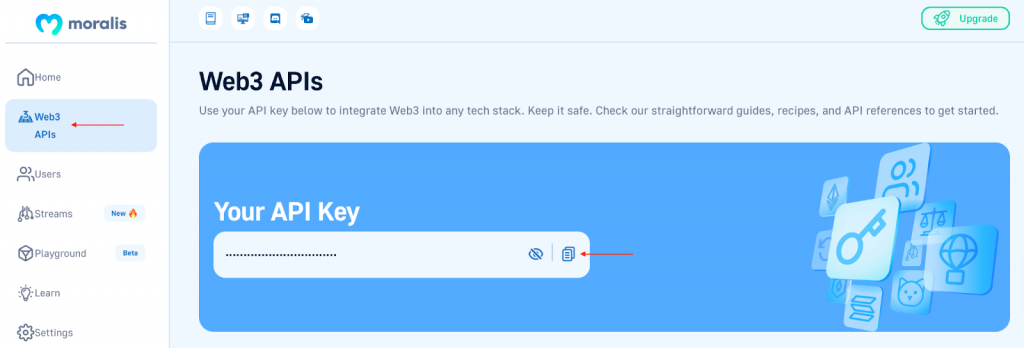
To begin with, the first thing you need to do is register with Moralis. With an account at hand, you can go ahead and log in to the Moralis admin panel, navigate to the ”Web3 APIs” tab, and copy your API key:
Next, set up a project folder and open it in your integrated development environment (IDE). From there, you can progress by cloning the app using the GitHub repository below:
Full Get Wallet Balance on Aptos Repo – https://github.com/MoralisWeb3/youtube-tutorials/tree/main/get-aptos-wallet-coin-balance
With a clone of the app in your directory, you now need to add your Moralis API key as an environment variable. To do so, open the backend folder and create a ”.env” file. You can then input the following and replace replace_me with your key:
MORALIS_API_KEY = “replace_me”
As soon as you add your Moralis Web3 API key, you are essentially ready to start the application. However, so far, we have not really explained how you actually get a wallet balance on Aptos. Therefore, let us take the following two steps to break down the backend and frontend code, starting with the former!
Step 2: Backend Code Breakdown – How to Get a Wallet Balance on Aptos
In our backend code breakdown, we will direct our attention to the ”index.js” file. This is where the central code is featured. In the ”index.js” file, we start by importing the required dependencies. This includes fetch, express, dotenv, etc. What’s more, we also set up an Express server on port 5001:
import fetch from "node-fetch";
import express from "express";
const app = express();
const port = 5001;
import cors from "cors";
import dotenv from "dotenv";
dotenv.config();

app.use(cors());
app.use(express.json());
From there, we import the MORALIS_API_KEY environment variable from the ”.env” file:
const MORALIS_API_KEY = process.env.MORALIS_API_KEY;
Next, we utilize the API key to create a new options object:
const options = {
  method: "GET",
  headers: {
    accept: "application/json",
    "X-API-Key": MORALIS_API_KEY,
  },
};
We then create a new get endpoint where we first fetch the wallet address from the frontend. From there, we pass along the address as a parameter when calling the Web3 Data API endpoint to get the wallet balance from the Aptos network. Finally, we send the response to the frontend, where we can get the required values and display them to users:
app.get("/getwalletcoins", async (req, res) => {
   const { query } = req;
    try {
     fetch(
       `https://mainnet-aptos-api.moralis.io/wallets/coins?owner_addresses%5B0%5D=${query.address}&limit=10`,
       options
     )
       .then((response) => response.json())
       .then((response) => {
         return res.status(200).json(response);
       });
   } catch (e) {
     console.log(e);
     return res.status(400).json();
   }
 });
Lastly, we make sure that we start listening to our server with the app.listen() function while passing the port variable as an argument:
app.listen(port, () => {
   console.log(`Listening for API Calls`);
});
That covers the essential part of the backend code; let us now take a closer look at the frontend!
Step 3: Frontend Code Breakdown – Call the Endpoint
The central part of the frontend code can be found in the ”main.js” file. In this file, we initially make the required imports, including useState, axios, Image, and so on:
import { useState } from "react";
import axios from "axios";
import Image from "next/image";
import { Card, Illustration } from "@web3uikit/core";
import styles from "@/styles/Home.module.css";
import MoralisLogo from "../public/assets/moralis.png";
import AptosLogo from "../public/assets/aptos_white.png";
After the imports, we continue by defining the Main() function, where we start by creating three state variables: walletAddress, result, and showResult:
export default function Main() {
   const [walletAddress, setWalletAddress] = useState("");
   const [result, setResult] = useState([]);
   const [showResult, setShowResult] = useState(false);
Next, we add handleChange() that executes whenever a user types in the input field to update walletAddress:
const handleChange = (e) => {
   setWalletAddress(e.target.value);
};
From there, we create the handleSubmit() function that runs whenever a user clicks on the button on the app’s user interface. This is the function making the request to our backend Express server using Axios, and finally handles the response:
const handleSubmit = async () => {
  document.querySelector("#inputField").value = "";

  const response = await axios.get(`http://localhost:5001/getwalletcoins`, {
    params: { address: walletAddress },
  });

  setResult(response.data.result);
  setShowResult(true);
};
The remaining code takes care of rendering the results.
Nevertheless, that’s it for this brief code breakdown covering the vital parts of the app’s backend and frontend.
Congratulations, you have now successfully created the app allowing you to get a wallet balance on Aptos in a heartbeat. From here, you must install all dependencies, start the Express server and spin up the application!
Now, if you want a more in-depth explanation of the backend and frontend code, please check out the video below. In this Moralis YouTube clip, one of our talented programmers gives a more detailed breakdown of the entire application:
What is Aptos?
The Aptos ”Autumn” mainnet officially launched last year in 2022, and it is a proof-of-stake (PoS) layer-1 (L1) network with the ambition of becoming the world’s fastest and most scalable blockchain network.

The Aptos blockchain utilizes the Move programming language and the Move virtual machine for Web3 development. The network features innovations in smart contract design, decentralization, performance, system security, and consensus. In combination with this, Aptos was designed with scalability, security, usability, and reliability as core principles. Through these factors, Aptos is looking to make the Web3 space ready for mass adoption!
The native currency of the Aptos network is called APT, and the coin plays an essential role in the chain’s ecosystem. To begin with, APT can be staked, giving those who stake the right to participate in transaction validation. In addition, APT is also used to pay for network transactions and gas fees on the Aptos network.
Aptos Labs Explained
The organization behind this blockchain network is called Aptos Labs. This is an organization made up of strategists, developers, and engineers led by co-founders Avery Ching and Mo Shaikh.
Ching and Shaikh met while working on Meta’s Diem blockchain project, and they started Aptos Labs in 2021. Within a year of founding the organization, they managed to launch the ”Aptos Autumn” mainnet in October 2022.
If you want further information on the network and Aptos Labs, check out our article answering the question, ”What is Aptos?”.
Build on Aptos with Moralis
With a more comprehensive understanding of Aptos, let us explore the easiest way to build on this network: Moralis. Moralis is the premier Web3 infrastructure provider, supplying industry-leading development tools like Web3 APIs, SDKs, and much more!

In the Moralis toolbox, you can, among other things, find the Web3 Data API and the Streams API. With these tools, you can build decentralized applications (dapps) and other Web3 platforms in a heartbeat. Moreover, these tools are Aptos-compatible, meaning that Moralis provides a significantly more accessible developer experience for the Aptos network. Consequently, you can avoid reinventing the wheel and beat your competition to market when working with Moralis!
Along with industry-leading Web3 APIs, Moralis can also aid you in acquiring testnet tokens for the Aptos network. If you want more information about this, check out our guide on how to get testnet APT from an Aptos faucet!
Lastly, you should also know about Moralis’ cross-chain capabilities. Moralis supports a variety of the most prominent blockchain networks. This includes popular chains like Ethereum, Polygon, Avalanche, Optimism, BNB Chain, and, of course, Aptos. As a result, when working with Moralis, you can build chain-agnostic projects across multiple networks simultaneously!

So, if you are looking to get into Aptos development, join industry leaders such as MetaMask, Delta, Polygon, etc., in using Moralis! Also, did we mention that you can create your account entirely for free? So, sign up with Moralis right away; you have nothing to lose!
Summary – Get a Wallet Balance on Aptos with Moralis
In this tutorial, we taught you how to get a wallet balance on Aptos using the Moralis Web3 Data API. In doing so, we showed you how to set up a NextJS application allowing users to continually query the balance of a wallet based on its address. With the help of Moralis and an already-prepared project template, you were able to create this app in only three steps:
- Set Up Moralis and Clone the App
- Backend Code Breakdown – How to Get a Wallet Balance on Aptos
- Frontend Code Breakdown – Call the Endpoint
Consequently, if you have followed along this far, you now know to get a wallet balance on Aptos in no time! From here, it is now time to get creative and apply your newly acquired skills to build more sophisticated projects.
If this is your ambition and you want some inspiration, feel free to check out additional content here on the Moralis blog. For instance, dive into Web3 marketplace development or learn how to create your own crypto dashboard project! Also, if you’d like to take your blockchain development game to the next level, make sure to enroll in Moralis Academy! By getting blockchain certified, you can future-proof your career within Web3!
Finally, remember that you can sign up with Moralis entirely free and start leveraging the full power of Web3 technology in no time!

What is ERC-4337? Full EIP-4337 Guide