The Web3 Data API from Moralis enables developers to get all transactions for an Aptos account in a straightforward way. With this interface, you can seamlessly get Aptos account transactions through a single API call. All you need to do is add your API key and specify the address you want to query:
import fetch from 'node-fetch';

const options = {
 method: 'GET',
 headers: {
   accept: 'application/json',
   'Bearer': 'YOUR_API_KEY'
 },
};

fetch('https://mainnet-aptos-api.moralis.io/accounts/:address/transactions', options)
 .then(response => response.json())
 .then(response => console.log(response))
 .catch(err => console.error(err));
By calling the endpoint above, you will receive a JSON response with information such as the transaction hash, the sender address, a timestamp, and much more. Here is a sample of what the response might look like:
{
   "hash": "0x88fbd33f54e1126269769780feb24480428179f552e2313fbe571b72e62a1ca1",
   "sender": "0x88fbd33f54e1126269769780feb24480428179f552e2313fbe571b72e62a1ca1",
   "sequence_number": "32425224034",
   "max_gas_amount": "32425224034",
   "gas_unit_price": "32425224034",
   "expiration_timestamp_secs": "32425224034"
 },
When working with Moralis, Aptos development does not have to be more difficult than that! So, if you want to build on Aptos, remember to sign up with Moralis immediately. Creating an account is free and only takes a couple of seconds!
Overview
In today’s article, we will show how easy it is to get Aptos account transactions when working with Moralis. To illustrate the accessibility of Moralis, we are going to create an application in only three steps, allowing you to continuously get all transactions for an Aptos account:
- Clone the App and Set Up Moralis
- Backend – Get All Transactions for an Aptos Account
- Frontend – Handle the Response
By completing these steps, you will learn how to create a NodeJS application to get Aptos account transactions using the Moralis Web3 Data API. If you are eager to get into the code, click here and jump straight into the tutorial!
If you are new to the Web3 development space, you might not be all that familiar with Aptos. For this reason, we have dedicated a few sections toward the end of the article to exploring this network in further detail. As such, if you are new to Aptos or want to refresh your memories, we recommend starting in the ”Aptos 101 – What is Aptos Labs?” section.
Along with industry-leading, enterprise-grade Web3 APIs, Moralis provides additional blockchain development resources. For instance, with Moralis, you can easily find the best and most accessible cryptocurrency faucets. If you want to learn more about this, check out our guide on what a Goerli testnet faucet is, or learn how to get testnet APT using an Aptos testnet faucet!
Also, before continuing, remember to register with Moralis straight away. You can create an account for free; you will need one to follow along in this tutorial!
Tutorial: How to Get Aptos Account Transactions
In this tutorial on how to get all transactions for an Aptos account, we will show you how to create a straightforward NextJS app with an Express backend server. The app will allow you to continuously get Aptos account transactions by simply inputting an address and hitting a button.
To fetch the associated blockchain data, we will use the Web3 Data API from Moralis. In doing so, we only need a single API call to get all the necessary information; it does not get more accessible than that!
What’s more, to make this guide as seamless as possible, we will be using an already prepared application template to which you only need to make a few configurations. In combination with this, we will cover the essential parts of the backend and frontend code to give you an idea of how the app works behind the scenes.
However, before jumping into the first step of this tutorial, we will provide a brief application demo. This will give you an idea of what you will be working toward, making it easier to visualize what the code does!
Application Demo – Get Aptos Account Transactions Continuously
Let us jump straight into the Aptos account transactions demo and take a look at the app’s landing page:
The top of the app features two main components, an input field and a submit button:

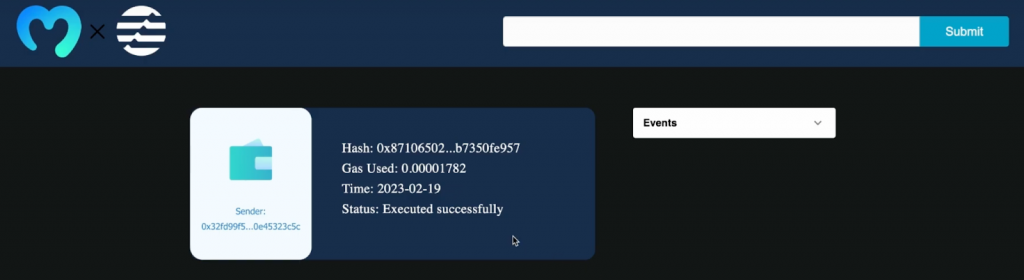
By inputting an address and hitting ”Submit”, the application calls the Moralis Web3 Data API to fetch the transaction details. From there, the information for each transaction is neatly displayed on the app’s user interface:
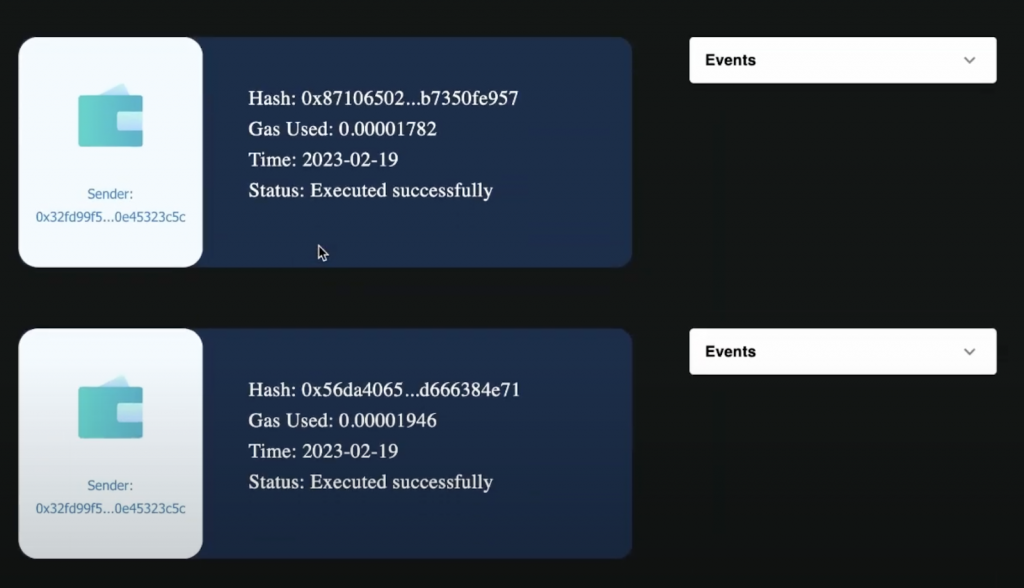
First up, we have a card with transaction details. This includes the sender address, transaction hash, gas used, etc.:
Next, the app also features an ”Events” drop-down menu. This menu lists all the events associated with the particular transaction:
That’s it for this Aptos account transactions application demo! Now that you know what you will be working towards, let us jump straight into the first step, where we will show you how to clone the app and set up Moralis!
Step 1: Clone the App and Set Up Moralis
To begin with, set up a new project folder and open it in your preferred integrated development environment (IDE). With a project folder at your disposal, you can go ahead and clone the application using the GitHub repository down below:
Complete Aptos Account Transactions App – https://github.com/MoralisWeb3/youtube-tutorials/tree/main/get-aptos-account-transactions
With a copy of the app in your local directory, you should now find yourself with a frontend and a backend folder:
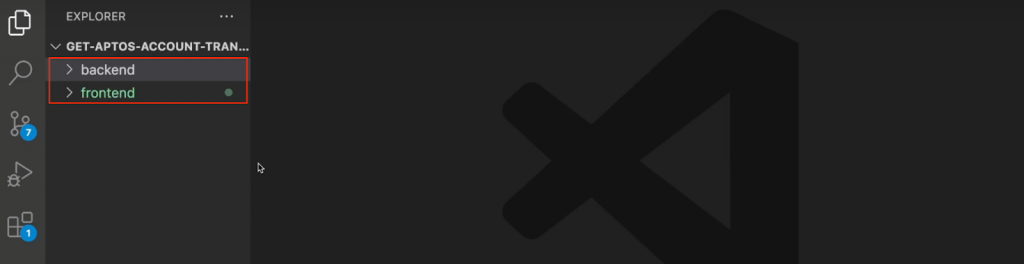
Open the backend folder and create a new ”.env” file. This file will host your environment variables, and in this case, you only need to add a Moralis API key. As such, open this file and add the following code:
MORALIS_API_KEY = “replace_me”
As you can see, you need to replace replace_me with your actual key. So, if you have not already, create your Moralis account now. With an account at hand, you can find your key by logging in to the admin panel and navigating to the ”Web3 APIs” tab:
Once you add your API key as an environment variable, you are now technically ready to start the app. However, in the proceeding steps, we will break down the essential parts of the frontend and backend code to give you a better understanding of what happens behind the scenes!
Step 2: Backend – Get All Transactions for an Aptos Account
For the backend code, we will focus on the ”index.js” file, as this is where we find most of the application logic. In this file, we start by importing the necessary dependencies. This includes fetch, express, cors, dotenv, etc.:
import fetch from "node-fetch";
import express from "express";
const app = express();
const port = 5001;
import cors from "cors";
import dotenv from "dotenv";
dotenv.config();
Next, we also import the Moralis API key environment variable from the ”.env” file with the following line of code:
const MORALIS_API_KEY = process.env.MORALIS_API_KEY;
We then use the API key to create an options object:
const options = {
   method: "GET",
   headers: {
     accept: "application/json",
     "X-API-Key": MORALIS_API_KEY,
   },
 };
From there, we set up a get endpoint where we initially fetch the wallet address from the frontend and use this as a parameter when calling the Web3 Data API endpoint to get all transactions from the Aptos account. Lastly, we send the response to the frontend, where we can extract all the values and display them to the users:
app.get("/getaccounttransactions", async (req, res) => {
   const { query } = req;
    try {
     fetch(
       `https://mainnet-aptos-api.moralis.io/accounts/${query.address}/transactions`,
       options
     )
       .then((response) => response.json())
       .then((response) => {
         return res.status(200).json(response);
       });
   } catch (e) {
     console.log(`Something went wrong ${e}`);
     return res.status(400).json();
   }
 });
That’s it for the essential parts of the backend code; let us now move on to the frontend!
Step 3: Frontend – Handle the Response
For the frontend code, we take a closer look at the ”main.js” file. In this file, we start by making the required imports, including useState, axios, Image, etc.:
import { useState } from "react";
import axios from "axios";
import Image from "next/image";
import { Card, Illustration } from "@web3uikit/core";
import {
 Accordion,
 AccordionSummary,
 AccordionDetails,
 Typography,
} from "@mui/material";
import ExpandMoreIcon from "@mui/icons-material/ExpandMore";
import styles from "@/styles/Home.module.css";

import MoralisLogo from "../public/assets/moralis.png";
import AptosLogo from "../public/assets/aptos_white.png";
Next, we move on to the Main() function, where we start by adding three state variables: walletAddress, result, and showResult:
export default function Main() {
   const [walletAddress, setWalletAddress] = useState("");
   const [result, setResult] = useState([]);
   const [showResult, setShowResult] = useState(false);
From there, we add the handleChange() function that runs when the user types in the input field to update the walletAddress variable:
const handleChange = (e) => {
   setWalletAddress(e.target.value);
 };
Next, we have the handleSubmit() function that executes whenever the user clicks on the ”Submit” button. This function is responsible for making the request to the backend Express server using Axios and then handling the response:
const handleSubmit = async () => {
   document.querySelector("#inputField").value = "";

   const response = await axios.get(
     `http://localhost:5001/getaccounttransactions`,
     {
       params: { address: walletAddress },
     }
   );

   setResult(response.data);
   setShowResult(true);
 };
Lastly, the remainder of the code takes care of rendering the result.
That’s it for this brief code breakdown covering the essential parts!
Congratulations! You have now successfully created an application allowing you to get all transactions for an Aptos account! All that remains from here is spinning up the Express server and launching the application!
If you want a more detailed explanation of each part, please check out the clip below. In this Moralis YouTube video, one of our talented software engineers covers the code in even further detail:
Aptos 101 – What is Aptos Labs?
Aptos is the brainchild of Aptos Labs, the organization behind this blockchain network. The Aptos Labs team consists of a diverse set of developers, engineers, and strategists led by the two co-founders: Mo Shaikh and Avery Ching.
Shaikh and Ching met while working together on Meta’s Diem project, and they started Aptos Labs in 2021. Within a year of creating the organization, Aptos Labs successfully launched their ”Autumn” mainnet in 2022.
The central goal of Aptos Labs is to produce products and build applications on the Aptos network to redefine the user experience in Web3. The Aptos Labs team is set to develop improved network usability and tooling. Through this, they are looking to make the decentralized web ready for the masses!
What is the Aptos Network?
The Aptos mainnet is called ”Aptos Autumn” and was officially launched last year in October of 2022. Aptos is a layer-1 (L1) proof-of-stake (PoS) network with the goal of becoming the most scalable and fastest blockchain in the world.
Aptos was designed with scalability, usability, security, and reliability as the network’s four core principles. Furthermore, it is through these principles that Aptos aims to bring the decentralized web to the masses.
Aptos features innovation in system security, smart contract design, consensus, and decentralization. In addition, the network leverages the Move virtual machine and Move programming language, both optimized for Web3 use cases.
The native currency of Aptos is called ”APT”. This token is essential for the network’s ecosystem as it is used to pay for transactions on Aptos. APT can also be staked, providing those who stake a right to participate in transaction validation on the network. As a reward, stakers receive additional APT for their work.
Nevertheless, if you want a more detailed breakdown of this network, please check out our article answering the ”what is the Aptos blockchain?” question!
Develop on Aptos with Moralis
Now that you are more familiar with the Aptos network, you might be asking yourself, ”what is the easiest way to build on Aptos?”. The answer to this question is Moralis! Moralis is the premier Web3 infrastructure provider, enabling you to build decentralized applications (dapps) and other Web3 platforms in a heartbeat!
Through industry-leading, enterprise-grade APIs and real-time blockchain data, Moralis is able to make Web3 development as easy as Web2. Moreover, in this article, you got to familiarize yourself with the Web3 Data API, the most popular indexed blockchain data provider. With this tool, you can seamlessly query data regarding everything from NFTs to transactions with only a few lines of code.
Another great example is the Web3 Streams API. With this programming interface, you can easily set up a Moralis stream to get notified whenever something of interest occurs on-chain. This means you can get instant, customizable updates when events trigger based on your filters.
You should also explore Moralis’ cross-chain capabilities. Moralis supports multiple different networks, including Aptos, enabling you to build chain-agnostic projects. This means you do not limit yourself to one network and can easily port projects across networks with minor code configurations. As such, if you are serious about becoming a Web3 developer, make sure to sign up with Moralis!
Also, if you are interested in Aptos development, check out our Aptos NFT tutorial!
Summary – Get All Transactions for an Aptos Account
Today’s article showed you how to create an application allowing you to continuously get all transactions for an Aptos account. When using the app, all you need to do is input a wallet address and click a button. Moreover, thanks to the accessibility of the Web3 Data API from Moralis, you were able to set up this application in three steps:
- Clone the App and Set Up Moralis
- Backend – Get All Transactions for an Aptos Account
- Frontend – Handle the Response
So, if you have followed along this far, you are now familiar with how to get Aptos account transactions. From here, you can hopefully integrate similar functionality into any future Aptos projects!
If you found this tutorial informative and instructive, you can further learn Web3 development here on the Moralis blog. For instance, if you want to build more sophisticated projects, check out our guide on Web3 marketplace development or learn how to create a DAO!
Also, if you are serious about becoming a blockchain developer, do not forget to sign up with Moralis. With an account, you get free access to enterprise-grade Web3 APIs from Moralis and can leverage the power of Web3 to the fullest!
