If you want to get free LINK testnet tokens from a Chainlink faucet, you’re exactly where you need to be! In this tutorial, we will show you how to get LINK tokens using a Chainlink faucet in just three simple steps:
- Get a Web3 Wallet – Download a browser extension for a wallet of your choice and set up an account (we use MetaMask for this tutorial).
- Configure Your Wallet – Add the Goerli testnet and the Chainlink token (LINK):
- Get Tokens Using the Chainlink Faucet – Visit Moralis’ testnet faucet page and click on the ”Try Now” button for the Chainlink option. From there, connect your wallet and claim your free LINK tokens:
It does not have to be more challenging than that to get testnet LINK from a Chainlink faucet! That said, if you want a more in-depth guide on the above steps, read on!
As you might have noticed when visiting the testnet faucet page, Moralis also features faucets for several other networks. So, by familiarizing yourself with this page and Moralis in general, you can follow the same fundamental steps to get testnet tokens for any other network!
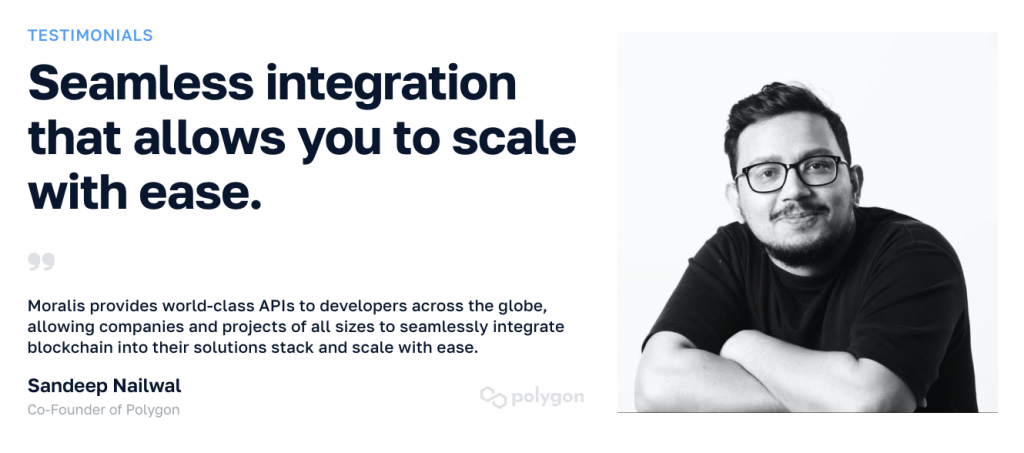
TRUSTED BY INDUSTRY LEADERS


Overview
This tutorial will show you how to get testnet LINK from a Chainlink faucet in three steps:
- Get a MetaMask Wallet
- Configure Your Wallet
- Get Tokens Using the Chainlink Faucet
By following the steps above, you can quickly get testnet LINK from a Chainlink faucet yourself. From there, you can use the tokens to develop sophisticated Web3 projects on the Chainlink network in no time!
Following the Chainlink faucet tutorial, we will also dive a bit deeper into the Chainlink network and the intricacies of faucets. This will give you an overview of the network and explain why faucets are essential for Web3 development. So, if you are unfamiliar with either, we recommend scrolling down to the ”Chainlink and Faucets Explained” section and starting there.
Once you complete this tutorial and have testnet LINK at your disposal, it is time to use these tokens to build Web3 projects. If this is your ambition, then you must check out Moralis’ Web3 APIs. The enterprise-grade application programming interfaces provided by Moralis enable you to fully leverage the power of Web3 technology. With tools such as the EVM API and Streams API, you can build Chainlink-compatible projects smarter and more efficiently!
What’s more, in combination with industry-leading APIs, Moralis also offers additional blockchain development resources. For instance, on the Web3 blog, you can find excellent guides to assist your Web3 career. For example, learn to create an ERC20 token or convert wei to gwei!
Also, did we mention that you can access all these tools and resources entirely for free? All you need to do is sign up with Moralis right now!
How to Get Testnet LINK from a Chainlink Faucet
In the following sections, we will jump straight into the tutorial, showing you how to get testnet LINK from a Chainlink faucet in no time. To demonstrate how this works, we will be using a MetaMask wallet and the Goerli testnet. Fortunately, this process is not exclusive to these options. As such, you can follow the same steps for any other wallets or Chainlink’s supported networks.

Remember, if you are unfamiliar with Chainlink or crypto faucets or simply need to refreshen your memory, you can read more about these concepts in the sections following the tutorial. This will give you an overview of Chainlink and explain the purposes of faucets.
Also, the initial step of this tutorial will show you how to set up MetaMask. As such, if you already have a Web3 wallet, feel free to jump straight into the second step. Otherwise, join us as we begin this Chainlink faucet tutorial by showing you how to get a MetaMask wallet!
Step 1: Get a MetaMask Wallet
The first thing you need in order to get testnet LINK from a Chainlink faucet is a cryptocurrency wallet. You can opt for any Chainlink-compatible wallet, but we will be using MetaMask to illustrate the process. So, if you go for another alternative, note that the first and second steps might differ slightly on occasion.
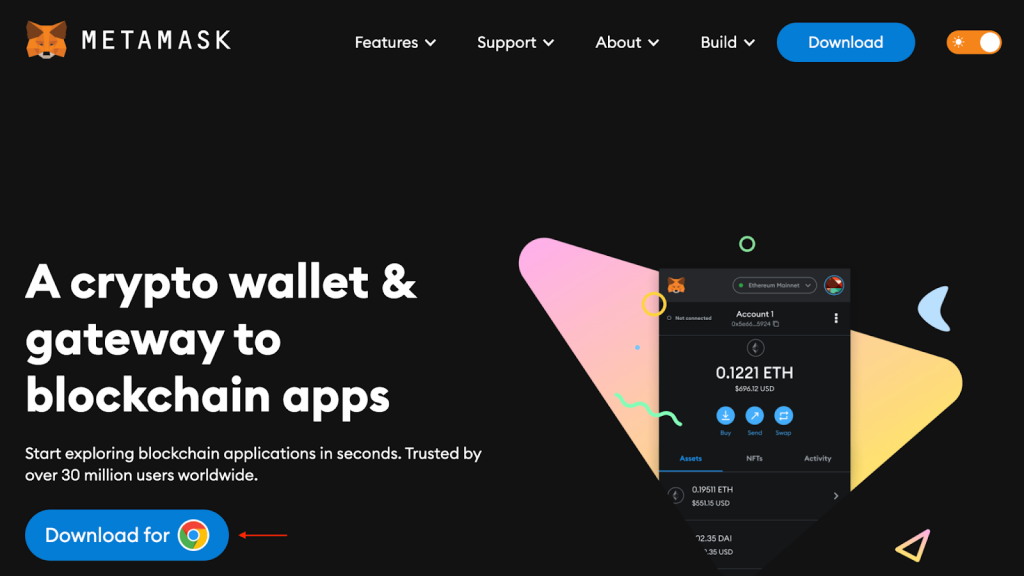
To begin with, visit “metamask.io” and click on the ”Download” button at the bottom of the page:
Next, add MetaMask as a browser extension:

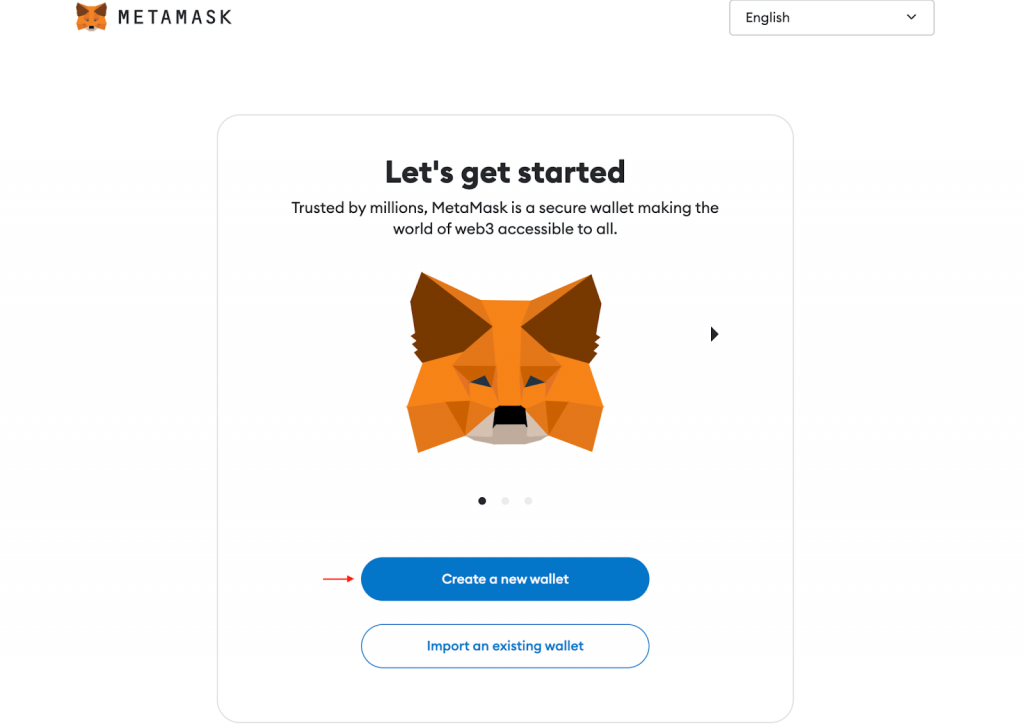
Once you add MetaMask as an extension, your browser will automatically redirect to the page below. From there, click on the ”Create a new wallet” button and follow the instructions to set up your account:
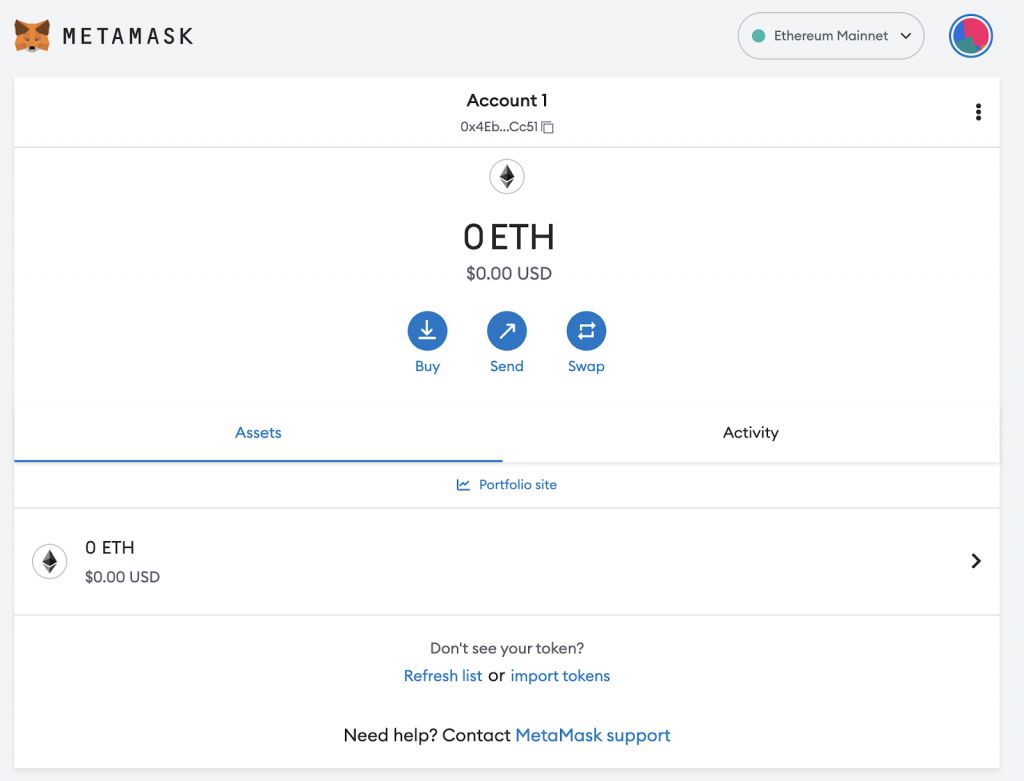
As soon as you finalize the setup process, you should have something that looks like this:
Step 2: Configure Your MetaMask Wallet
With a MetaMask wallet at your disposal, the next step is to configure your wallet by adding the Goerli network and the Chainlink token. Let us start with the former and show you how to add new networks to your wallet.
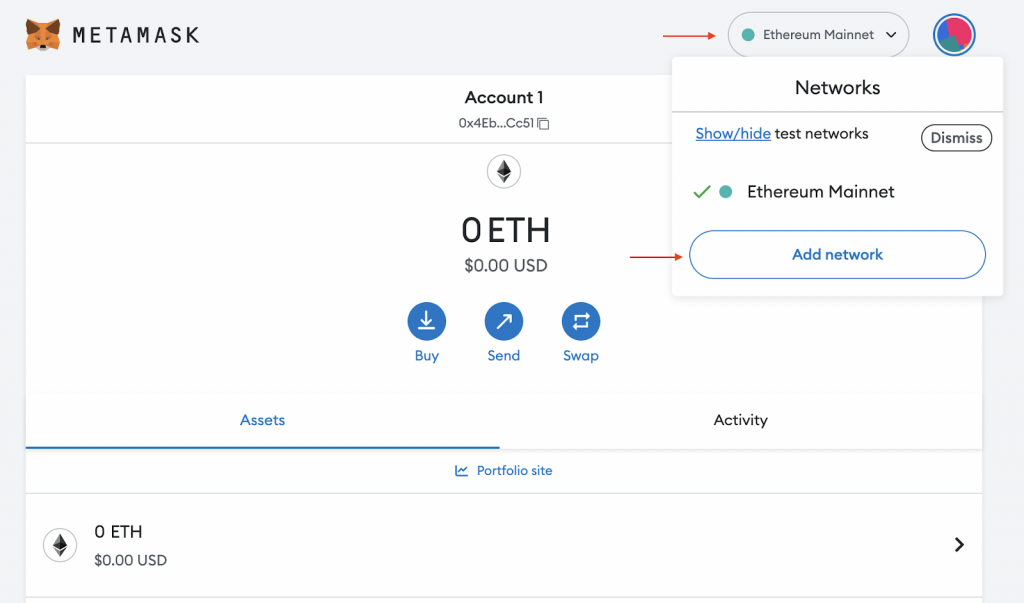
To begin with, click on the Networks drop-down menu at the top right, followed by ”Add network”:
Next, click on ”Add a network manually” at the bottom:
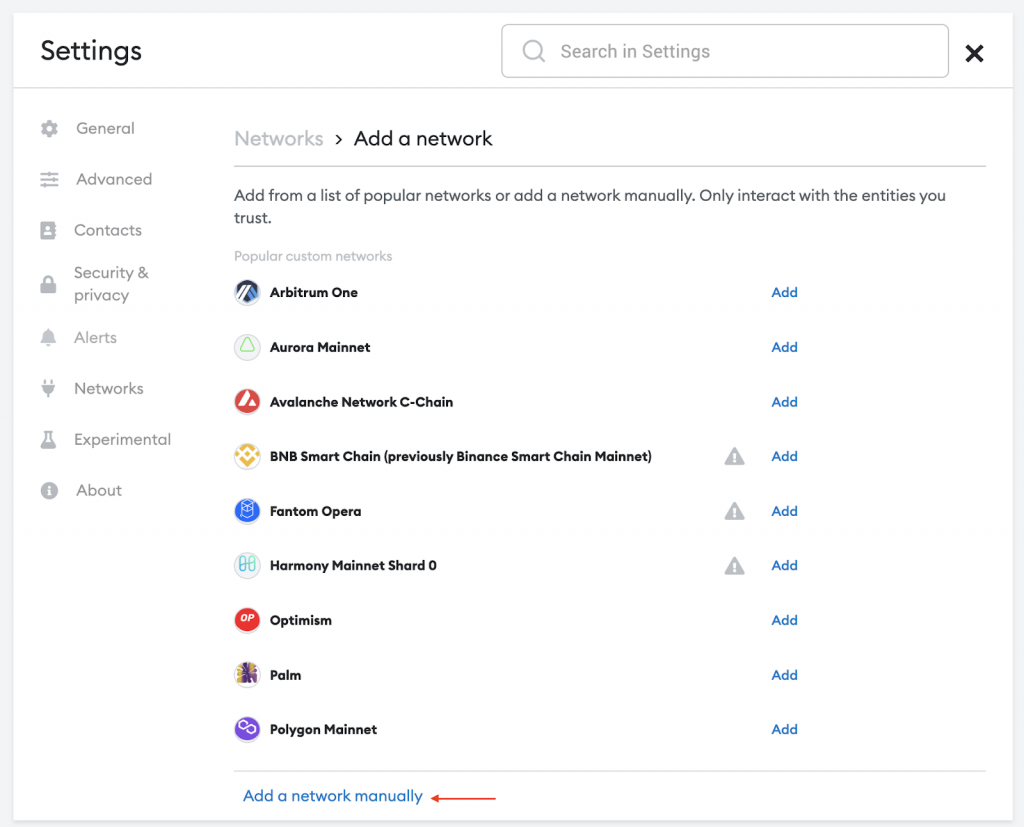
Clicking this button takes you to the following page:
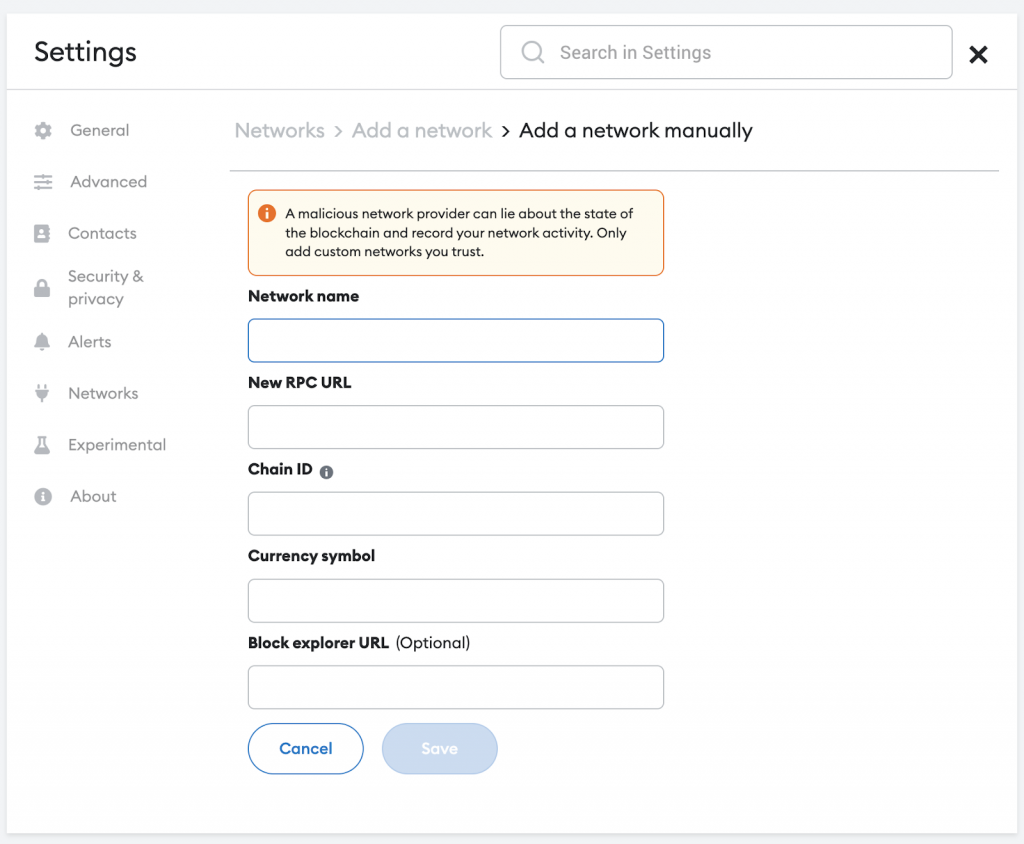
From here, fill in the information for the Goerli testnet and hit ”Save”:
- Network name: Goerli test network
- New RPC URL: https://goerli.infura.io/v3/9aa3d95b3bc440fa88ea12eaa4456161
- Chain ID: 5
- Currency symbol: GoerliETH
- Block explorer URL (optional): https://goerli.etherscan.io
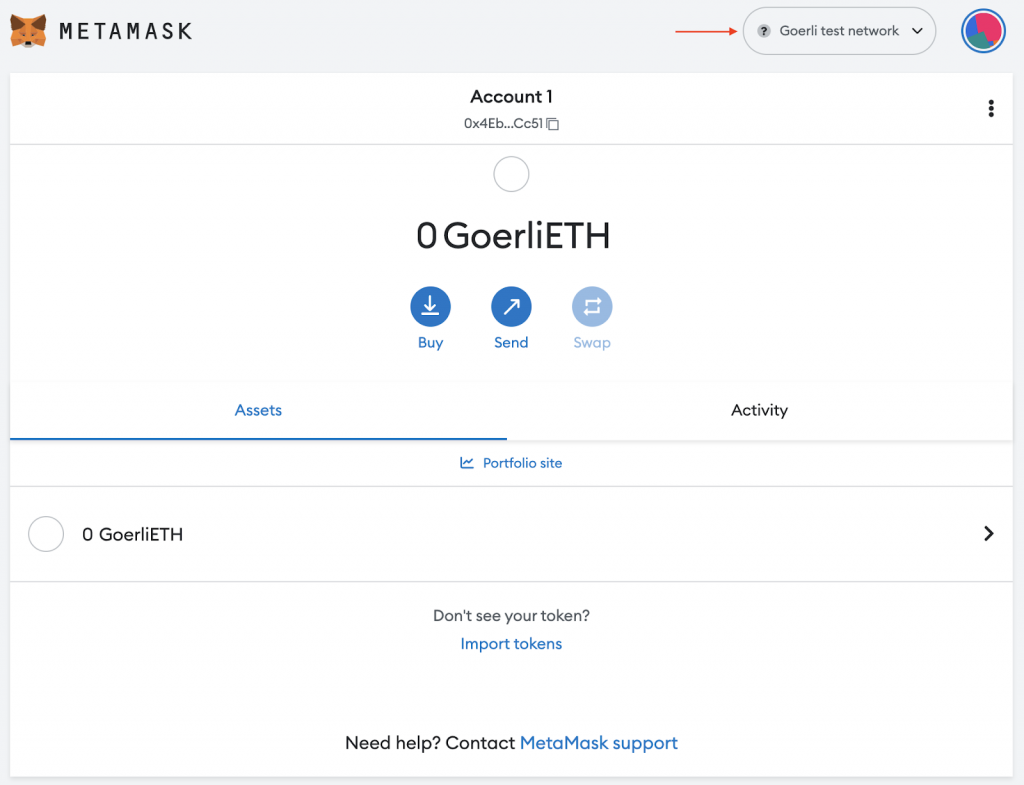
Hitting ”Save” should add the Goerli testnet to your wallet, and it should now look something like this:
Next, let us now add the Chainlink token (LINK) to your wallet. To do so, click on ”Import tokens”:
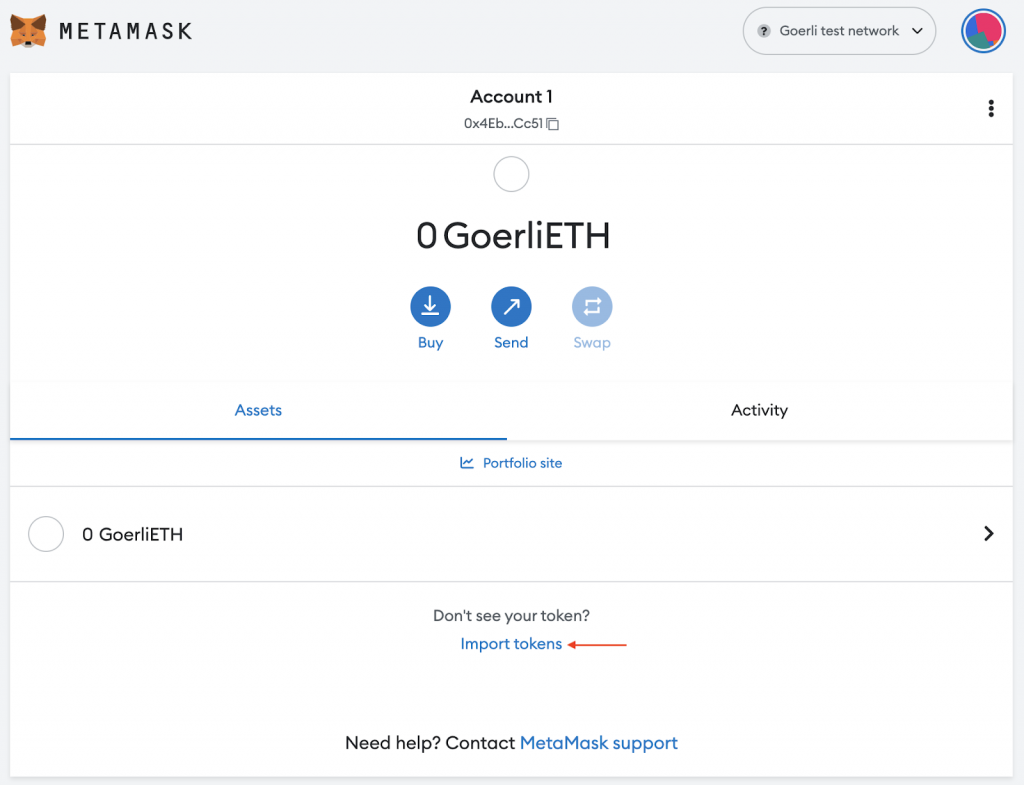
Clicking this button will allow you to import a token manually. As such, you need to add the token contract address, symbol, and decimal:
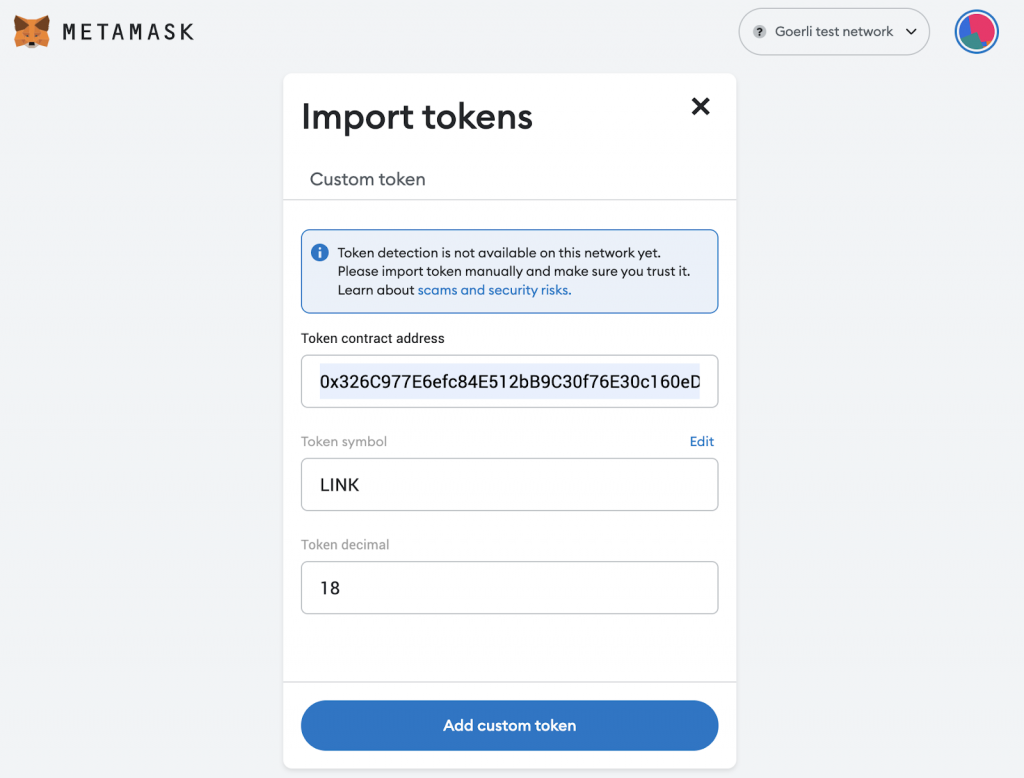
You can find the correct values here:
- Token contract address: 0x326C977E6efc84E512bB9C30f76E30c160eD06FB
- Token symbol: LINK
- Token decimal: 18
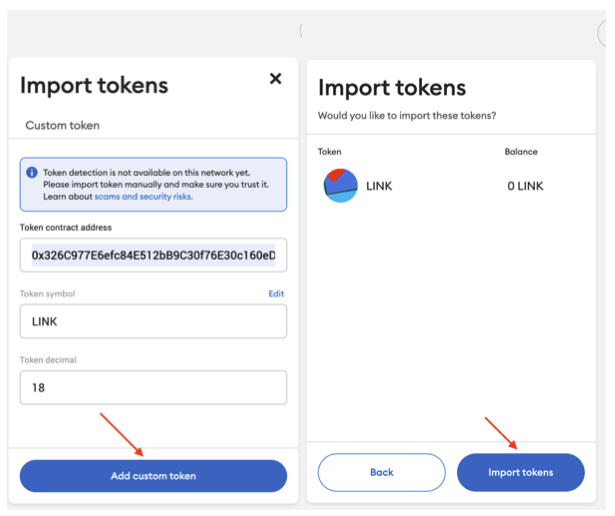
Once you have inputted the correct information, click on ”Add custom token” followed by ”Import tokens”:
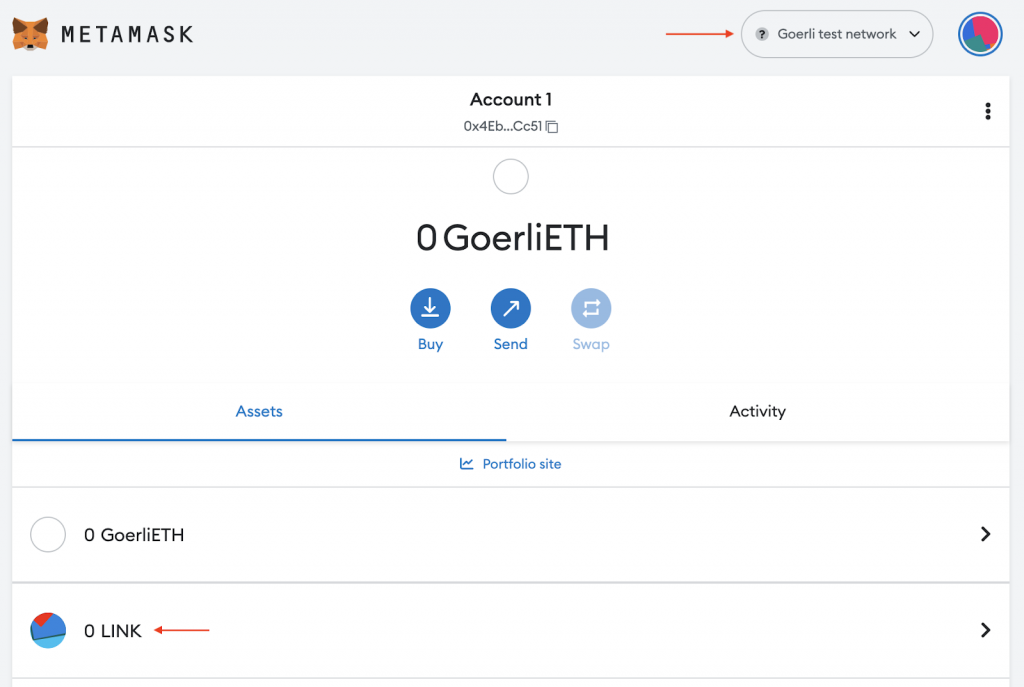
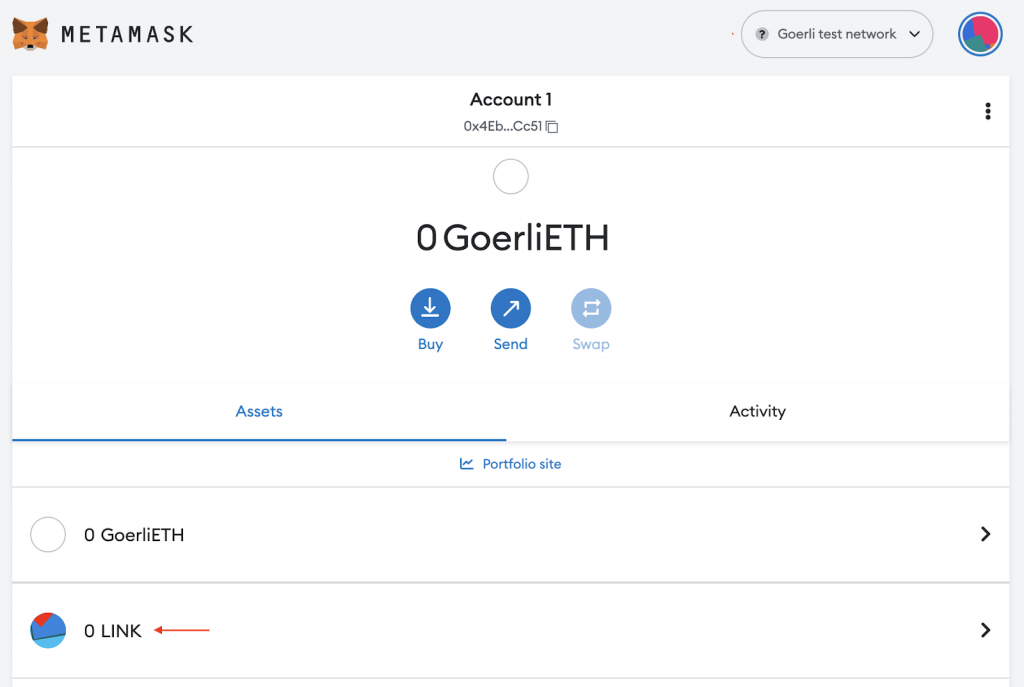
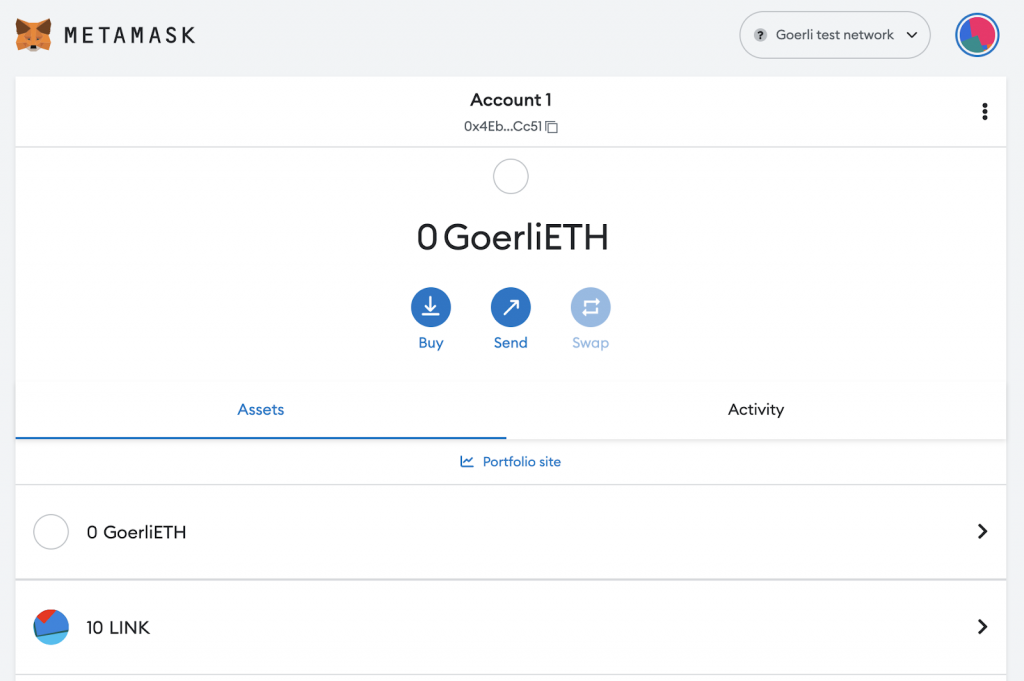
You should now see ”LINK” among your wallet’s assets:
Step 3: Get Tokens Using the Chainlink Faucet
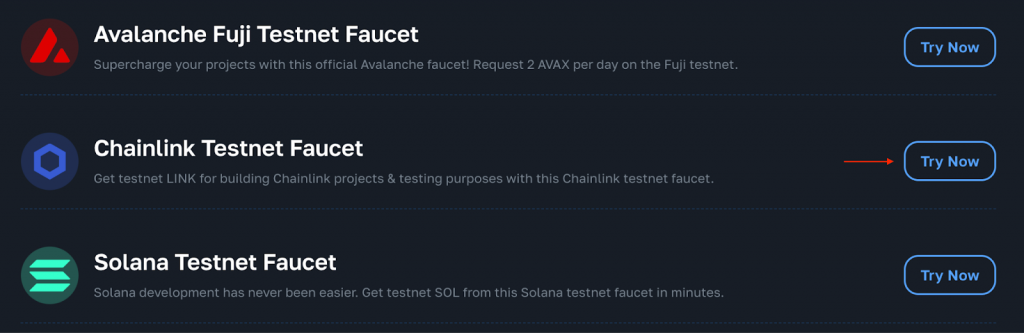
Lastly, all that remains from here is using the Chainlink faucet to get some testnet LINK tokens. As such, navigate to Moralis’ testnet faucet list, scroll down, and click on the ”Try Now” button for the Chainlink testnet faucet:
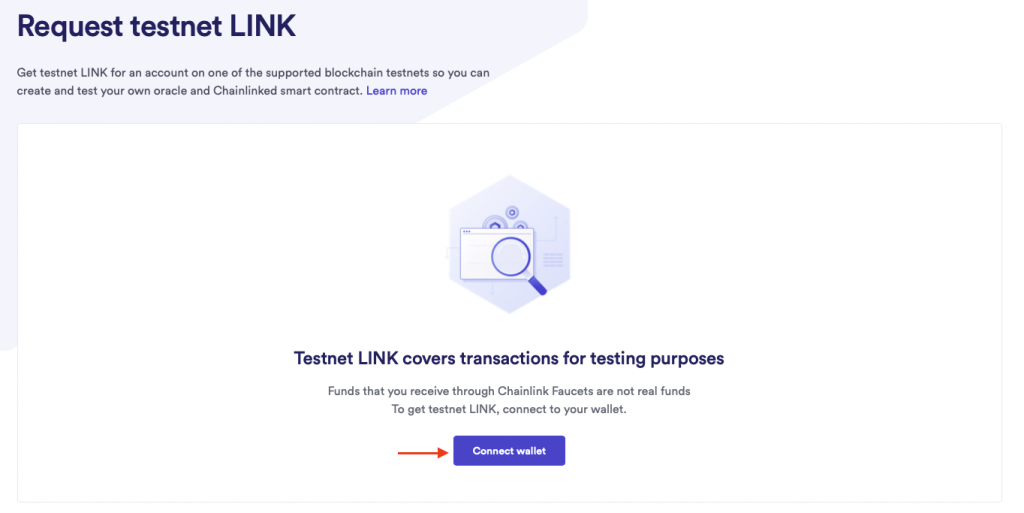
This will take you to the following page, and you can proceed by clicking on ”Connect wallet”:
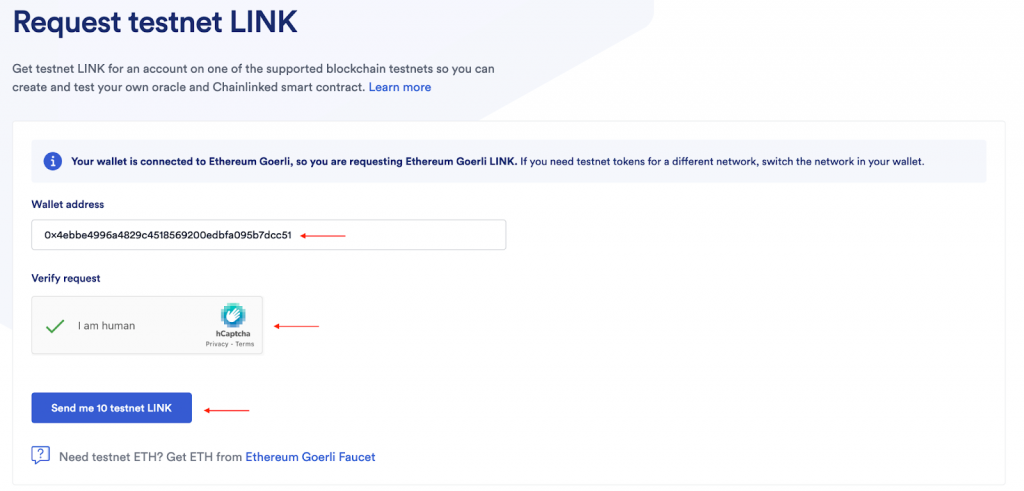
Once you connect your wallet, you need to input your wallet address, verify the captcha, and finally click on ”Send me 10 testnet LINK”:

When you click on this button, the transaction will initiate, and you should receive testnet LINK from the Chainlink faucet shortly. To confirm the transaction, go back to your wallet, and your LINK balance should now have been increased by ten:
Congratulations! You have now successfully acquired testnet LINK on the Goerli testnet through a Chainlink faucet. From here, you can now use these tokens to pay for transactions during your development endeavors!
Chainlink and Faucets Explained
If you are new to the blockchain development space, you might not be familiar with either Chainlink or faucets. For this reason, we will, in the following sections, dive deeper into these concepts. So, without further delay, let’s start with the former and answer the question, ”what is Chainlink?”
What is Chainlink?
Chainlink launched in 2019 and is a blockchain-based, decentralized oracle network. The purpose of the Chainlink network is to bridge the gap between real-world applications and blockchain-based smart contracts!

This interconnectivity is achieved through oracles that connect external systems to blockchains, enabling smart contracts to execute based on off-chain inputs and outputs. This includes everything from events such as the weather to various off-chain payment networks. As you can imagine, oracles play a central role in enabling the full potential of smart contract utility.
Conventional oracles are generally centralized; however, Chainlink is able to decentralize the workflow by moving data off and on blockchains through something called ”hybrid smart contracts.” To achieve security, Chainlink operators are incentivized with LINK tokens for retrieving and formatting data from off-chain feeds.
Holders of LINK need to stake their tokens into smart contracts to become nodes. In doing so, they ”lock up” their assets, serving as collateral and a deterrent against submitting false data or misbehavior. Consequently, the ultimate purpose of LINK tokens is to pay for and ensure the accuracy of the Chainlink network’s oracle services.
Now, with a better understanding of Chainlink, let’s take a closer look at testnet faucets!
What is a Chainlink Faucet?
In order to pay for services provided by the Chainlink network, whether on a mainnet or testnet, you require LINK tokens. During the development stages of your oracles, Chainlink smart contracts, and projects, you generally do not want to use the mainnet. Why? Because it requires you to commit real LINK tokens whenever testing the functionality of your projects. This is where testnets and faucets enter the equation!
Testnets are some of the Web3 industry’s most critical development tools. These networks mimic their respective mainnets, providing a safe and secure environment for testing a project’s or smart contract’s performance.
Even though testnets are closely related to the main networks, they generally operate through separate ledgers. This means that testnet tokens do not have a connection to mainnet transactions. As such, on a testnet, developers do not need to commit mainnet tokens to pay for transactions, making Web3 development more economically friendly.
But, even though they do not need to use mainnet tokens, they still need to pay for testnet transactions. Fortunately, this is where faucets enter the equation, enabling you to get testnet tokens for free!
Faucets are usually web-based applications requiring a single input in the form of a wallet address. In turn, with the click of a button, a faucet transfers a fixed amount of testnet tokens to the wallet in question. So, in conclusion, a Chainlink faucet provides this functionality to the various Chainlink testnets!
The Best Chainlink Faucet Option
If you have some prior Web3 development experience, you will, unfortunately, know that it can take a lot of work to find good and legit faucets. Some providers require account signups and tweet verifications, making the simple task of getting testnet tokens quite annoying. Also, in some extreme instances, bad-faith actors might even abuse faucets to gain sensitive wallet credentials.
To avoid unnecessary hassles and bad-faith actors, Moralis compiled a testnet faucet list consisting of definitive and trusted faucets. None of the listed faucets require you to sign up or share any personal data. All you need to do is input your wallet address, click a button, and receive tokens without any bother!
Among the featured alternatives, you can find the best Chainlink faucet available, which is the one used in this tutorial. Consequently, if you want to get into Web3 Chainlink development, make sure to check out Moralis’ testnet faucet page right now!
For more information regarding some of the other faucet alternatives, check out the “What is a Sepolia Faucet?” and “What are Avalanche Faucets?” guides on our blog!
Summary – Get Testnet LINK From a Chainlink Faucet
During this tutorial, you learned how to get testnet LINK from a Chainlink faucet in just three straightforward steps:
- Get a MetaMask Wallet
- Configure Your Wallet
- Get Tokens Using the Chainlink Faucet
If you have followed along this far, you now know how to get testnet LINK from a Chainlink faucet in no time! From here, you can now use these tokens in your Web3 Chainlink development endeavors to create sophisticated projects! Also, if you found this tutorial helpful, consider checking out more development content here at Moralis. The Web3 blog features excellent articles. For example, you can learn how to create an ERC721 token or explore Web3 libraries. Also, you can learn which the best Ethereum faucet in 2023 is!
Moreover, if you want to become a blockchain developer, you should definitely check out Moralis Academy. The academy supplies industry-leading blockchain development courses for both new and more experienced developers. For example, learn more about Chainlink development with the following course: ”Chainlink 101.”
Also, if you are serious about getting into blockchain development, remember to sign up with Moralis right now! Creating an account is free, and it only takes a couple of seconds!
