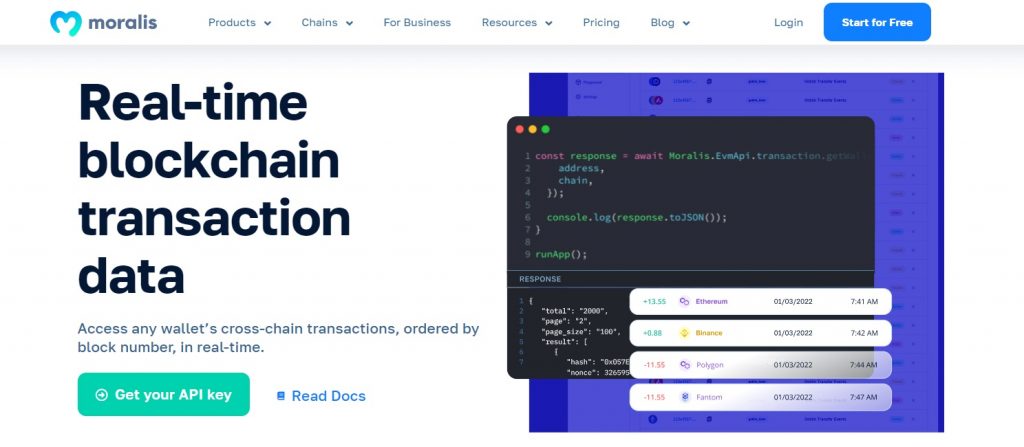
If you are a developer building a portfolio dapp, the next big Web3 wallet, or any other Web3-related project, then you need to know how to get EVM transactional history. So, if this is you, then you’ve come to the right place! In this article, you’ll learn how to use a single line of code to get the history of EVM transactions. Here’s the snippet of code that gets the job done:
const response = await Moralis.EvmApi.transaction.getWalletTransactions();
The line of code above shows how to get EVM transactional history using Moralis’ getWalletTransactions endpoint. Now, if you’ve used the power of Moralis before, you already know how to implement the above method. However, if this is your first rodeo with the ultimate Web3 API provider, dive into the following sections or watch the above video.
Overview
Moving forward, we’ll first cover the basics of today’s topic. This is where you’ll get a chance to learn all you need to know about transactional history in crypto. After all, thanks to the power and transparency of public blockchain networks, this data is available to everyone.
However, for Web3 developers, the trick is to fetch that data with minimum fuss and with time and resources to spare. Fortunately, with the right tools, fetching EVM transactional history in such a manner can be done pretty easily, and we’ll focus most of today’s article on showing you how to do so with the ultimate Web3 API provider. This is where you’ll learn how to implement the above-outlined getWalletTransactions endpoint. Plus, we’ll showcase some additional Moralis endpoints that make fetching and utilizing details about on-chain transfers super straightforward.
Once you learn how to get EVM transactional history, we’ll look at some popular use cases for this skill. And although any type of dapp can benefit from this feature, there are specific types of dapps that must include these types of insights.
What is Transactional History?
Transactional history stored on programmable blockchains, such as Ethereum, is an important part of decentralized networks. It provides a transparent and immutable record of all on-chain activities. At its core, transactional history refers to a comprehensive ledger of every transaction ever conducted within the blockchain’s ecosystem. These transactions can involve various types of records, from simple token transfers to complex smart contract executions.
At the heart of transactional history are Web3 wallet addresses, serving as unique digital identities for participants within the blockchain network. Each address is associated with a specific user, organization, or entity and plays a pivotal role in recording the flow of digital assets and information. Furthermore, wallet addresses have their own individualized transaction history, showcasing the entirety of their on-chain interactions.
As you may know, every action within each blockchain is meticulously recorded. This is done in a decentralized and distributed manner across a network of nodes. This ensures that the history remains both trustworthy and tamper-proof. Consequently, once the blockchain adds a transaction, it becomes immutable, meaning it cannot be altered or erased. This immutability is a foundational feature of blockchain technology. It is the key to providing a high level of trust and security for all network participants.
Transactional history is accessible to anyone with an internet connection, enhancing transparency. Using block explorers, anyone can explore the transactional history of Web3 wallet or smart contract addresses. Moreover, anyone can access a detailed account of all the transactions associated with that address, including timestamps, amounts, and transaction hashes. This openness ensures that blockchain networks are not just secure but also accountable, as participants can audit and verify transactions independently.
The Importance of Transactional History in Web3
The importance of transactional history goes beyond mere financial tracking. It underpins the functionality of decentralized applications, where smart contracts rely on these historical records to automate various processes and decision-making.

By referencing the transaction history, smart contracts can determine the legitimacy of an action, trigger specific events, and enforce rules coded into the contract. This interplay between transactional history and smart contracts is what empowers programmable blockchains to execute complex, self-executing agreements and applications autonomously.
All in all, transactional history on programmable blockchains like Ethereum is the digital record of all on-chain activities, with wallet addresses serving as the custodians of individual transaction histories. This transparent, immutable, and accessible ledger is the bedrock of blockchain technology. It enables trust, security, and the execution of decentralized applications that reshape industries and how we interact with digital assets and information.
How to Get EVM Transactional History – getWalletTransactions Endpoint Tutorial
So, how to get EVM transactional history? Well, thanks to Moralis and its getWalletTransactions endpoint, developers can easily get transactional EVM history. And it all boils down to these three core steps:
- Set up Moralis
- Implement the
getWalletTransactionsEndpoint - Run Your Script
The great part of the above three-step process is that the first and the third steps are exactly the same for all Moralis endpoints. As such, this tutorial will enable you to move beyond the getWalletTransactions endpoint with ease. Even the second step is pretty similar among all endpoints – you only need to make the necessary tweaks regarding the particular Web3 API endpoint.
That said, let’s cover the details of the above-outlined steps.
Step 1: Set Up Moralis
Whether you wish to use the getWalletTransactions endpoint or any other Moralis tool, you must complete this initial step of setting up Moralis. Fortunately, it is a simple one, and it can be broken down into three sub-steps.
First, you need to create your Moralis account. This is as simple as entering your name, email, and setting up your password:
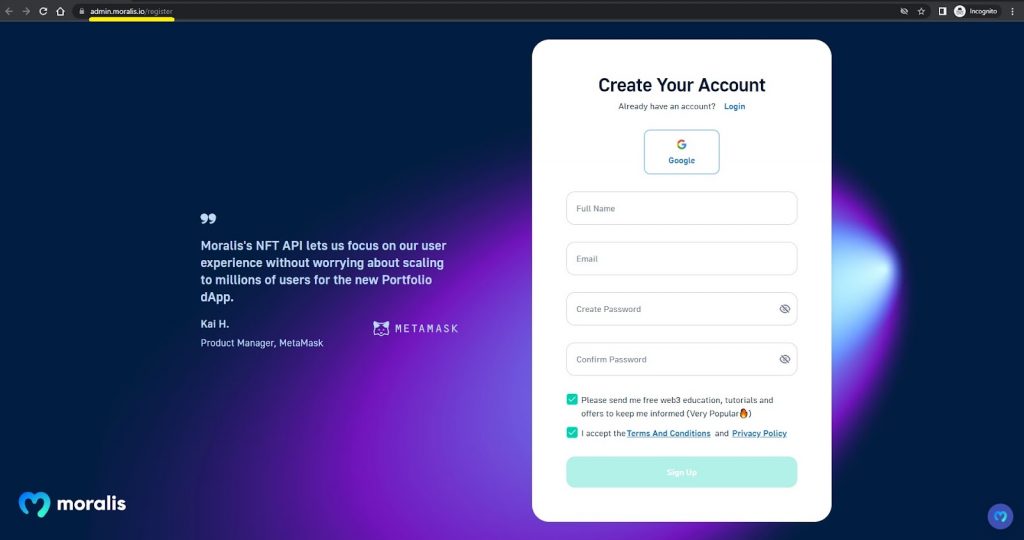
Don’t forget to confirm your account by clicking on the confirmation link you’ll receive in your email inbox.
With your Moralis account up and running, you can access your admin area. This is where you get to complete the second sub-step: getting your Web3 API key. So, once inside your Moralis admin area, hit the “Create a project” button, name your Web3 project, and confirm it by clicking on “Create Your Project”:

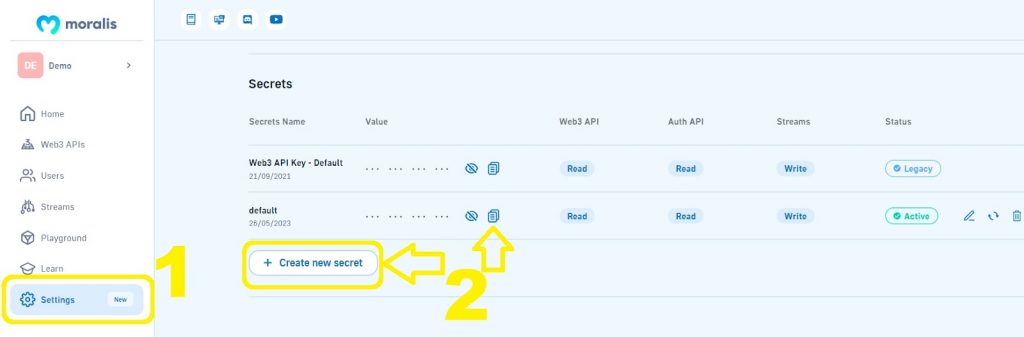
After confirming the project, you will see all the available options in the side menu bar. From there, select the “Settings” option. Once on the “Project Settings” page, you’ll be able to copy your default API key or create a new one:
The final sub-step of the setting up Moralis process revolves around installing the Moralis SDK. This part has some prerequisites: you must install NodeJS v14 or higher or Python and NPM/Yarn or Pip.
With the prerequisites completed, we can set up the SDK. Since JavaScript, TypeScript, and Python are the most popular options, you’ll most likely want to use one of the following commands:
- NPM:
npm install moralis @moralisweb3/common-evm-utils
- Yarn:
yarn add moralis @moralisweb3/common-evm-utils
- Pip:
pip install moralis
Step 2: Implement the getWalletTransactions Endpoint to Get EVM Transactional History
This step is the core of the “how to get EVM transactional history” quest. Moreover, this is where you’ll learn how to implement the snippet of code from the intro.
First of all, you need to keep in mind that the getWalletTransactions endpoint takes in two essential parameters: address and chain. As such, you must decide which Web3 wallet address and what EVM-compatible chain you want to focus on.
As you build your dapp, you can take a more advanced approach to target more addresses and networks. For instance, you can program your dapp to target the address of the wallet connected to your dapp. As for multiple networks, thanks to Moralis’ cross-chain interoperability, you can easily build dapps that can work across all the leading networks.
The getWalletTransactions endpoint offers additional optional parameters. They include from_block, to_block, from_date, to_date, cursor, include, and limit. If you want to explore these parameters and take the endpoint for a test spin, make sure to visit its reference docs page:

For the sake of our example in this article on how to get EVM transactional history, we’ll focus exclusively on two essential parameters. However, in the video tutorial at the top of the article, you can see the from_date parameter in action.
In the code walkthrough below, we focus on utilizing JavaScript. In case you prefer to work with TypeScript or Python, visit our designated page that shows you how to get all transactions of an address with all three programming languages.
Code Walkthrough
Create a new index.js script and first import Moralis and its EVM utils with these two lines of code:
const Moralis = require("moralis").default;
const { EvmChain } = require("@moralisweb3/common-evm-utils");
Next, you need to ensure that your script starts Moralis using your Web3 API key. To that end, use the following lines of code and make sure to replace the YOUR_API_KEY placeholder with your actual API key:
const runApp = async () => {
  await Moralis.start({
    apiKey: "YOUR_API_KEY",
    // ...and any other configuration
  });
Staying within the above-defined runApp async function, define the address and chain parameters:
const address = "0xd8da6bf26964af9d7eed9e03e53415d37aa96045";

const chain = EvmChain.ETHEREUM;
Note: Make sure to replace the above address with an address you can control and also test it properly. As far as chain goes, you can target any other supported chain by replacing ETHEREUM accordingly.
Inside the runApp function, it’s time to implement the line of code from the introduction. You also want to log the response. Plus, do not forget to close the function:
  const response = await Moralis.EvmApi.transaction.getWalletTransactions({
    address,
    chain,
  });

  console.log(response.toJSON());
};

runApp();
So, how to get EVM transactional history? Simply use this script (the above lines put together):
const Moralis = require("moralis").default;
const { EvmChain } = require("@moralisweb3/common-evm-utils");

const runApp = async () => {
  await Moralis.start({
    apiKey: "YOUR_API_KEY",
    // ...and any other configuration
  });

  const address = "0xd8da6bf26964af9d7eed9e03e53415d37aa96045";

  const chain = EvmChain.ETHEREUM;

  const response = await Moralis.EvmApi.transaction.getWalletTransactions({
    address,
    chain,
  });

  console.log(response.toJSON());
};

runApp();
Step 3: Run Your Script
This step is again as simple as running a single command. And if you use JavaScript, node index.js will do the trick. However, when using TypeScript or Python, you must use ts-node index.ts or python index.py respectively.
In any case, the response will come in JSON format. Here’s an example response for the above-used wallet address:
{
  "total": "2000",
  "page": "2",
  "page_size": "100",
  "result": [
    {
      "hash": "0x057Ec652A4F150f7FF94f089A38008f49a0DF88e",
      "nonce": 326595425,
      "transaction_index": 25,
      "from_address": "0xd4a3BebD824189481FC45363602b83C9c7e9cbDf",
      "to_address": "0xa71db868318f0a0bae9411347cd4a6fa23d8d4ef",
      "value": 650000000000000000,
      "gas": 6721975,
      "gas_price": 20000000000,
      "input": "string",
      "receipt_cumulative_gas_used": 1340925,
      "receipt_gas_used": 1340925,
      "receipt_contract_address": "0x1d6a4cf64b52f6c73f201839aded7379ce58059c",
      "receipt_root": "string",
      "receipt_status": 1,
      "block_timestamp": "2021-04-02T10:07:54.000Z",
      "block_number": 12526958,
      "block_hash": "0x0372c302e3c52e8f2e15d155e2c545e6d802e479236564af052759253b20fd86"
    }
  ]
}
Looking at the above response, you can see that it offers a ton of useful details. These details come in a neat format, making it easy to utilize them further. So, with proper frontend programming skills, you should have no problem creating a neat UI to display these details in a user-friendly manner.
How to Get EVM Transactional History – Beyond the getWalletTransactions Endpoint
As mentioned, the getWalletTransactions endpoint is just one of several Moralis tools for the “how to get EVM transactional history” task. So, we encourage you to explore other valid and efficient solutions. Here are some top suggestions:
- Get all ERC-20 transfers by contract
- Get all ERC-20 transfers by wallet
- Get NFT transfers by block
- Fetch NFT transfers by collection
- Get NFT transfers by token ID
Unlike getWalletTransactions – which is part of Moralis’ Blockchain API – the above five endpoints belong to the powerful Token API and NFT API solutions.

EVM Transactional History Use Cases
The accessibility of EVM transactional history is a treasure trove for decentralized applications (dapps) and projects. Whether you’re crafting a portfolio management dapp, a trading analytics tool, the next big Web3 wallet, or any other EVM-based application, unlocking EVM transactional history opens doors to a wealth of opportunities.
For example, in portfolio management dapps, this type of data equips users with a comprehensive, real-time view of their asset history. Hence, it enables smart and up-to-the-minute portfolio management. On the other hand, for trading analytics endeavors, transactional history acts as a compass, guiding traders through market trends, liquidity patterns, and pricing nuances.
All decentralized exchanges and lending platforms depend on transactional history for the secure and transparent execution of smart contracts. They are essential aspects of ensuring user trust.
Essentially, EVM transactional history serves as the bedrock for a wide range of dapps. It paves the way for data-driven decisions, robust financial services, and an array of innovations. Its boundless potential extends far beyond the specific types of applications mentioned in this article, making it a cornerstone for EVM’s ecosystem.
Summary: Get Transactions – How to Fetch EVM Transactional History
We started today’s article by explaining what EVM transaction history is all about. As such, you now know that this type of on-chain data is important for decentralized applications (dapps) and Web3 projects. However, the main portion of today’s “how-to” guide revolved around the getWalletTransactions endpoint. And we explained exactly how to get EVM transactional history using this powerful Moralis Web3 API endpoint.
By taking on our tutorial, you learned how to set up Moralis, what lines of code you need to implement, and how to run your script. Plus, you had a chance to see what kind of results you can expect from the getWalletTransactions endpoint.
We also shared five other powerful Moralis endpoints that make fetching EVM transactional history data straightforward. These are getTokenTransfers, getWalletTokenTransfers, getNFTTransfersByBlock, getNFTContractTransfers, and getNFTTransfers, and they are part of Moralis’ Token API and NFT API.
All in all, you learned about the most powerful tools that help you get EVM transactional history data without breaking a sweat or the bank. And you now know that you can access these tools with a free Moralis account. As such, building killer dapps, such as portfolio tracker, is a whole lot simpler and more accessible than you might have thought!
If you want to learn more about other Moralis API solutions, make sure to explore the “Products” top menu option. We also recommend learning more about Web3 development by diving into the Moralis blog. Some of the latest topics there focus on the Base Goerly faucet, how to set up NFT sales notifications, NFT API providers, setting custom webhooks with Moralis Streams, and much more.
