Are you looking for an accessible way to mint tokens? If so, you are in the right place, as this tutorial will show you how to mint from Etherscan using a smart contract! Once minted, this article shows you how to verify the transaction using Moralis! If this sounds interesting, read on!
Overview
As we go into today’s tutorial, we’re going to break down the process into the following sections:
- Prerequisites
- How to Mint from a Contract Using Etherscan
- Mint from Etherscan Contract – Did it Work?
By covering the parts mentioned above, you can mint from any contract using Etherscan in a matter of moments. If you are eager to start, jump straight into the “How to Mint from Etherscan” tutorial below!
Unless you’ve been living under a rock, odds are you’ve stumbled upon NFTs in some context. However, even though you might be aware of what these tokens entail, you might still wonder how to create one of your own. If this is the case, we’ve got you covered. This tutorial shows you how to mint an NFT from Etherscan using a smart contract in just a couple of seconds! The article also shows you how to verify the minting transaction using Moralis! In verifying the transaction, you will learn how to use the best Ethereum Web3 API, which Moralis supplies.
After finishing the tutorial, we will also provide you with some basics and explain the intricacies of Etherscan. We will also cover what it means to mint a token, followed by why you should use Etherscan to do so.
In addition to excellent Web3 development tools, Moralis provides other blockchain resources, such as educational development content. For example, check out our guides on how to get contract logs or learn to use a Web3 JS call contract function.
To fully leverage these resources, sign up with Moralis. In doing so, you access a more seamless developer experience, enabling you to create Web3 projects smarter and more efficiently!
Now, without further ado, join us in the following section as we show you how to mint a token from Etherscan!
Tutorial: How to Mint from Etherscan
To demonstrate how to mint tokens, we will walk you through the process of minting an NFT on the Goerli testnet. If you follow along, you can apply the same principles to mint from Etherscan using a smart contract on any other network!
You can check out the clip below if you prefer watching YouTube videos to learn. In this video, one of our software engineers provides a full breakdown of the process from start to finish:
Otherwise, join us as we kickstart this mint from Etherscan using a smart contract tutorial by covering the necessary prerequisites!
Prerequisites
Before we start to mint from Etherscan using a contract, you initially need to deal with a few prerequisites, and there are three in total:
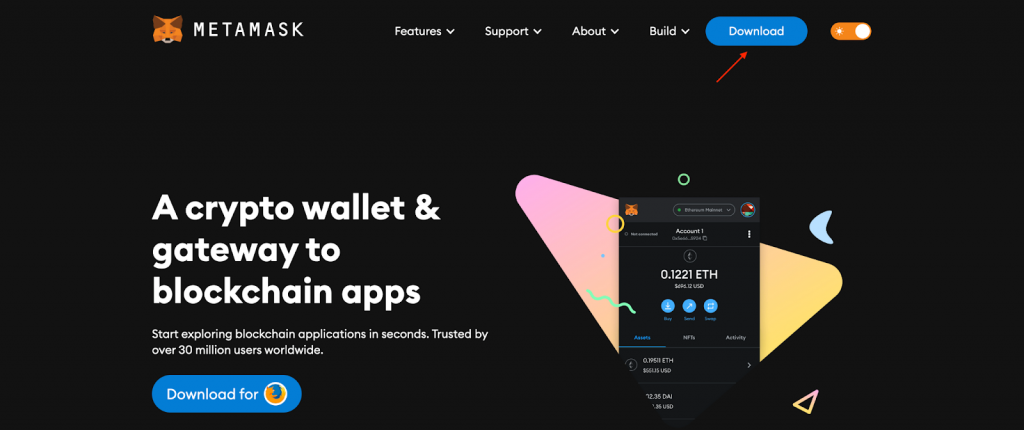
- Create a MetaMask Wallet – The first thing you will need is a Web3 wallet. For this tutorial, we will be using MetaMask. As such, if you plan on following along, we recommend you do the same. In combination with setting up the wallet, you also need to add it as a browser extension. To do so, visit “metamask.io” and click on the ”Download” button at the top right:
- Get Goerli Testnet Tokens – Since we plan to mint from Etherscan using a contract on Goerli, you also need testnet tokens. So, to get Goerli tokens, the easiest way is using Moralis’ testnet faucets page!
- Set Up a Moralis Account – The last prerequisite is a Moralis account. If you still need to, sign up with Moralis immediately!
That covers the required prerequisites. It is now time for the central part of the tutorial, where we will show you how to mint from Etherscan using a smart contract!
How to Mint from a Contract Using Etherscan
This section shows you how to mint from Etherscan using a smart contract address; let’s get straight into it!
The first thing you need is the smart contract address you wish to use. In our case, we will utilize a contract we have written ourselves. If you want to use the same to follow along, you can find the address down below:
0xf351614ff81C770CE245609cd3b3eD3dd6E72c2a
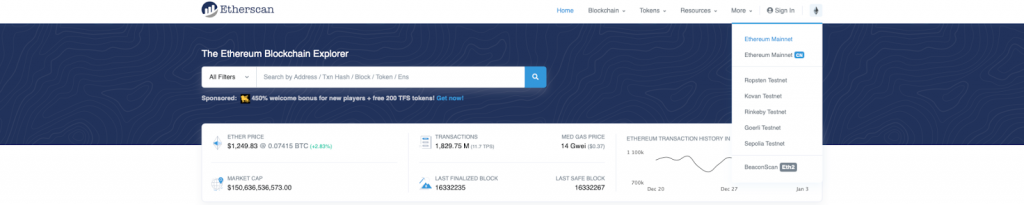
Once you have an address at your disposal, visit “etherscan.io“. From there, since you are going to mint from Etherscan with the contract on Goerli, you need to switch to this testnet. As such, click on the Ethereum icon at the top left, followed by ”Goerli Testnet”:
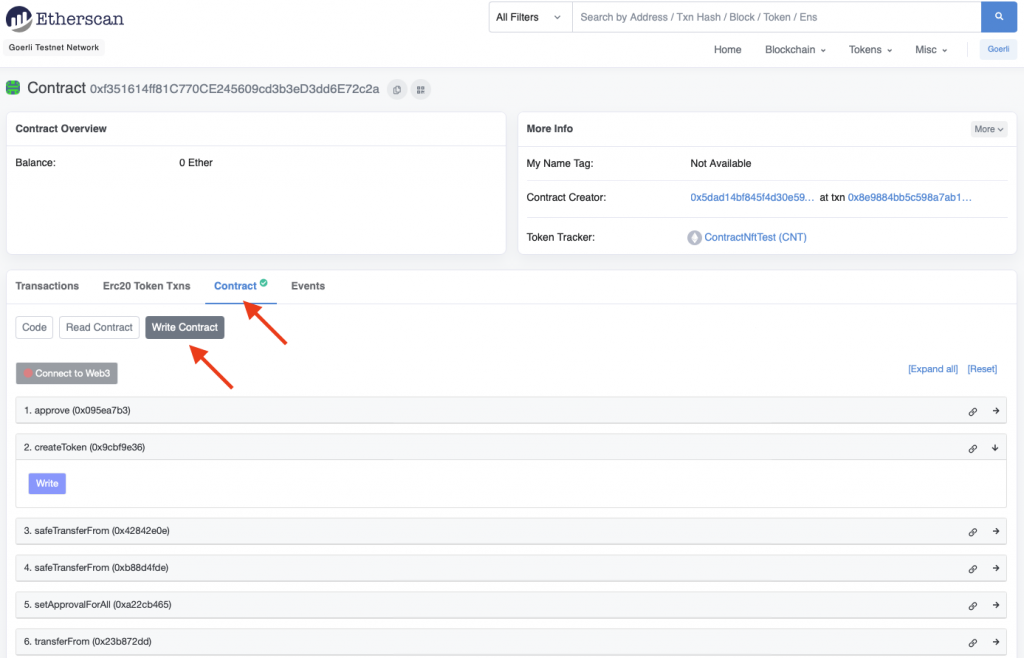
Next, navigate to the contract’s page by inputting the address in the search field and hitting enter. From there, go to the ”Contract” tab and click on ”Write Contract”:
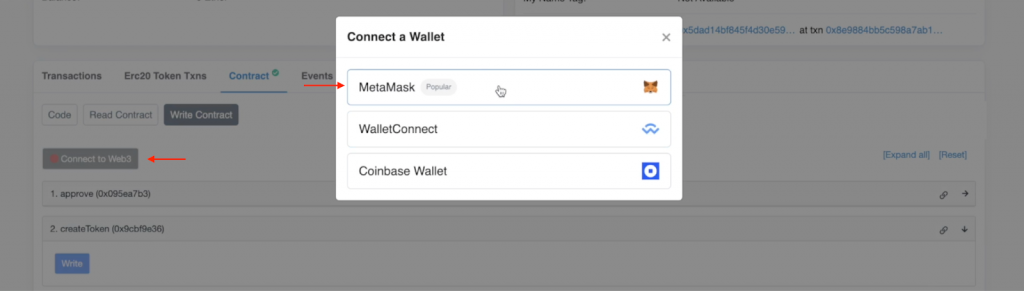
You will immediately notice the ”Connect to Web3” button with a red dot. Proceed by clicking on this button and selecting the MetaMask alternative. This will prompt your wallet, allowing you to connect to Web3:
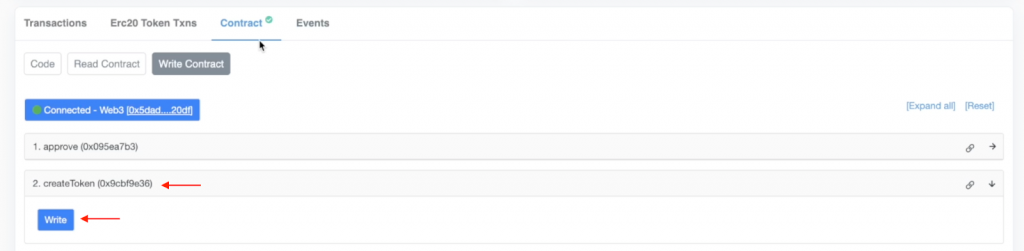
When connected, you can now interact with the function of the ”Write Contract” section. In this case, since you want to mint from Etherscan and this particular contract, click on the ”createToken” option, followed by ”Write”:
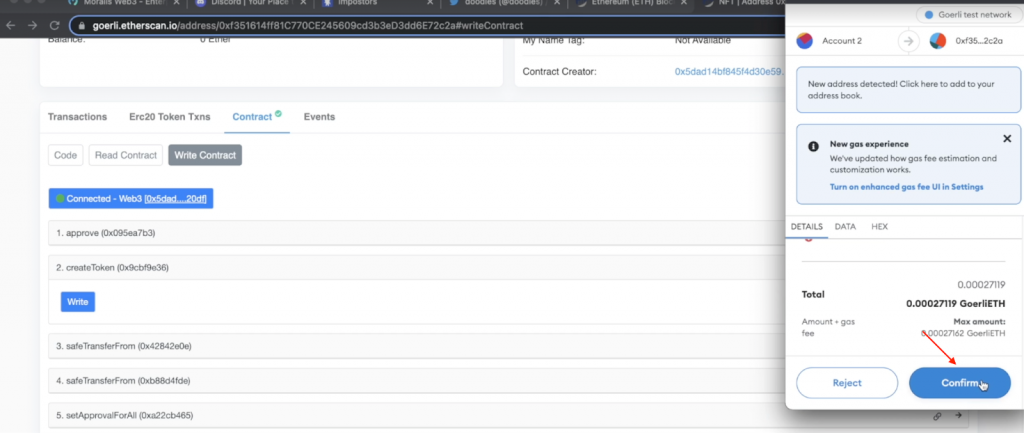
As soon as you click on ”Write”, Etherscan will prompt your wallet, allowing you to sign the transaction for minting the NFT (non-fungible token):
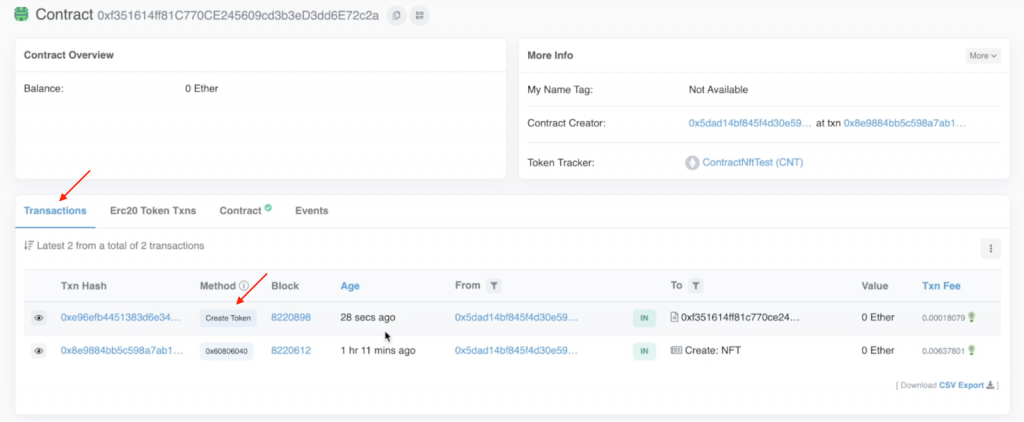
Now that’s it; congratulations! You successfully minted a token from Etherscan! You should now be able to view the transaction by navigating to the ”Transactions” tab:
Mint from Etherscan Contract – Did it Work?
Now that you successfully minted a token from Etherscan, this final section shows you how to double-check that everything worked using Moralis. As such, open your preferred integrated development environment (IDE) and set up a new NodeJS project. With the project at your disposal, create two new files in the root folder: ”.env” and ”index.js”.
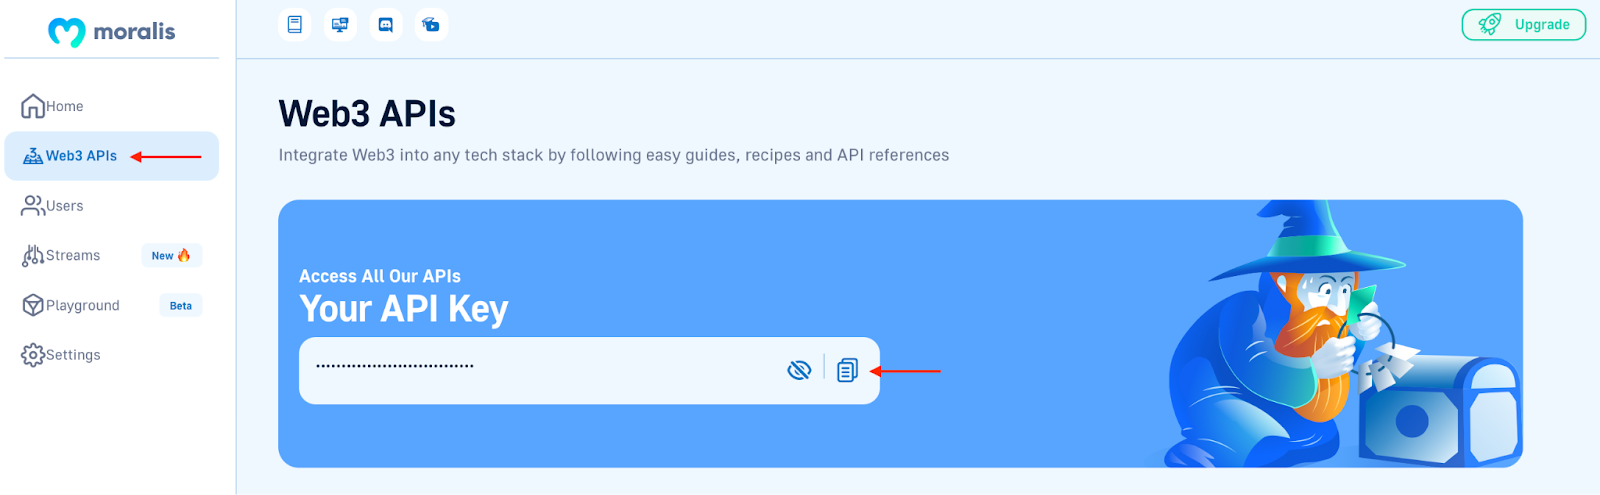
To begin with, add a ”MORALIS_KEY” environment variable to the ”.env” file. To do so, you need your Moralis API key, which is why one of the prerequisites was to create a Moralis account. So, log in to the Moralis admin panel, click on the ”Web3 APIs” tab, copy the key, and input it into the code:
From there, open ”index.js” and input the following code snippet:
const Moralis = require("moralis").default
const { EvmChain } = require('@moralisweb3/common-evm-utils')
require('dotenv').config()

Moralis.start({
    apiKey: process.env.MORALIS_KEY
}).then(async()=>{

    const response = await Moralis.EvmApi.nft.getContractNFTs({
        address:"REPLACE_ME",
        chain:EvmChain.GOERLI
    })

    consloe.log(response.raw.result)
})
In the code above, the central part calls the Moralis ”getContractNFTs” endpoint, passing the contract address as a parameter. However, make sure to replace ”REPLACE_ME” with the actual address of the smart contract.
Next, open a new terminal, ”cd” into the project’s root folder, and install the required dependencies using the following command:
npm i moralis @moralisweb3/common-evm-utils dotenv
Lastly, all that remains is to run ”node index.js” in the terminal. Doing so should return a response similar to the one shown down below:
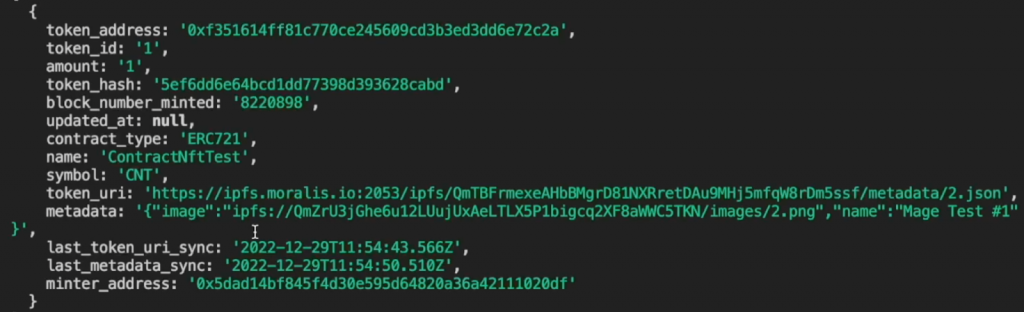
As you can see from the print screen above, the response contains many details regarding your latest transaction. You can now use this information to confirm that everything worked as intended!
We hope you enjoyed the tutorial presented above. Remember to watch the included video if you’d like a more in-depth guide. That said, the tutorial might have piqued your interest in Etherscan and what it actually is, and what features it offers. If so, follow along in the following sections as we explore Etherscan further, including what it is and why you should use this platform.
What is Etherscan?
Blockchain networks are distributed databases or ledgers shared among a collection of nodes. They keep a decentralized record of all transactions occurring on the respective networks, and the transparent nature of blockchain technology ensures that this information is publicly available. One way to access this information is through a block explorer. However, what exactly is a block explorer?
To adequately answer the question above, let us use the Ethereum network as an example, where Etherscan is the most prominent example. Etherscan is – as the name indicates – an Ethereum-based block explorer and analytical platform. It is a free-to-use website enabling developers to view and analyze all assets, balances, and transactions on the Ethereum blockchain.
Through Etherscan’s user interface (UI), you can also check gas fees, search for airdrops, find block data, and even interact with smart contracts. As such, Etherscan is essentially a search engine for the Ethereum blockchain.
As you can imagine, when developing dapps and other Web3 platforms, a tool such as this can be extremely valuable. It is a way for Web3 programmers to view their smart contracts, look up transaction histories, etc. Furthermore, developers can do so through a neat UI and avoid querying this information themselves from the Ethereum mainnet.
Etherscan does not only feature the Ethereum mainnet but supplies block explorers for the various testnets alike. You can, for instance, find an explorer for both the Goerli and Sepolia testnets! Learn more about the Sepolia testnet in the following article: “What is the Sepolia Tesnet?”.
These testnet Etherscan block explorers feature the same functionality as the mainnet alternative. They can be used to search for information, view assets, interact with smart contracts, etc. As you’ve already noticed, this article focused on the latter and showed you how to mint from Etherscan using a smart contract!
What Does it Mean to Mint?
The term ”minting” within the Web3 world refers to the process of creating a new fungible or non-fungible token (NFT). This is a process of verifying data, creating new blocks, and documenting the information on a blockchain network through a consensus mechanism such as proof-of-stake (PoS).

There are various ways in which you can mint tokens. Two prominent examples are through an NFT marketplace such as OpenSea or via a block explorer like Etherscan. In this article, we focused on the latter as we illustrated how to mint from Etherscan using a smart contract in the tutorial section. That said, how is this minting process possible?
As you might remember from the previous section, Etherscan allows us to interact with smart contracts that exist on-chain. Consequently, it becomes possible to access functions within a contract to perform certain actions, one of which might be minting a new token!
However, you might be asking yourself, ”why should I use Etherscan to mint a token?”.
Why Use Etherscan to Mint?
Now that you have a more profound understanding of Etherscan and what it means to mint a token, you might wonder why you should use Etherscan. Well, the primary reason is accessibility!

With Etherscan, you can mint a token directly through the block explorer’s UI, and it only takes a couple of seconds. Consequently, Etherscan presents a seamless workflow, enabling anyone with little or no prior development experience to mint tokens themselves.
Now that you have a solid understanding of Etherscan and how to use it, why not expand your development horizons further? For example, check out our article exploring how to get all NFT transfers!
Summary – How to Mint from Contract Using Etherscan
In this article, we taught you how to mint an NFT from Etherscan using a smart contract in a couple of seconds. To make the tutorial as comprehensible as possible, we broke it down into the following three sections:
- Prerequisites
- How to Mint from a Contract Using Etherscan
- Mint from Etherscan Contract – Did it Work?
If you have followed along this far, you now know how to mint a token using Etherscan. You also know how to verify the transaction using Moralis! From here, you can now apply the same principles in the future to mint any tokens from Etherscan using any smart contract!
Nonetheless, if you liked this tutorial and want to read similar content, feel free to browse the Moralis Web3 blog. For instance, learn how to get token metadata or get all NFT transfers. Moreover, if you are serious about becoming a blockchain developer, check out other Web3 APIs Moralis offers, such as the Streams API. With this development tool, you can seamlessly stream on-chain data into your dapps via Moralis webhooks.
No matter if you want to mint tokens or create more advanced Web3 projects, sign up with Moralis now! With an account, you can leverage the full potential of blockchain technology and access a significantly more accessible developer experience!
