This guide covers the intricacies of crypto wallet integration along with a demonstration of Moralis‘ Web3 Auth API. To demonstrate the power of the best crypto wallet API, you will learn how to create a straightforward web app implementing three authentication methods: MetaMask, WalletConnect, and Coinbase Wallet. If you want to jump straight into the central part of this tutorial, feel free to go directly to the “How to Add Crypto Wallet Integration” section! You can also access the code immediately in the GitHub repository below:
Full Crypto Wallet Integration Documentation – https://github.com/MoralisWeb3/youtube-tutorials/tree/main/MultipleWalletAuthentication
Web3 authentication is vital to Web3 development, allowing users to authenticate with their crypto wallets and providing a unified Web3 identification layer. This provides a more seamless user experience for the entire Web3 ecosystem and lowers onboarding friction, highlighting the need for accessible crypto wallet integration. Thus, with this being such an essential task for blockchain development, this article delves deep into crypto wallet integration and explores the best crypto wallet API!
Once you are familiar with crypto wallet integration and what it entails, we will show you how to create a simple web application allowing users to sign in with three different authentication methods. Moreover, thanks to Moralis’ Auth API, you can create this application in minutes! However, this is only one of Moralis’ Web3 APIs, making Web3 development more accessible. For example, you should also check out Moralis’ Streams API, allowing you to stream blockchain data into the backend of your projects via Web3 webhooks!
Nevertheless, if you are looking for an accessible crypto wallet integration workflow, sign up with Moralis and gain immediate access to the best crypto wallet API!
What is a Cryptocurrency Wallet?
For anyone interested in exploring the Web3 ecosystem or taking on blockchain development, an initial step is acquiring a crypto wallet. Crypto wallets, also called “Web3 wallets“, are often thought of as simple digital wallets for holding virtual assets. However, they are more than that and play an essential role in accessing various Web3 ecosystems!

Even though there is more to cryptocurrency wallets than simply holding virtual assets, they still come equipped with everything expected of a straightforward digital wallet. They provide the functionality for storing digital assets such as fungible tokens and NFTs (non-fungible tokens). In addition to holding assets, crypto wallets act as gateways to Web3’s extensive ecosystem of dapps. As such, they open the door to the crypto world, enabling you to interact with dapps, DeFi platforms, etc., on various blockchain networks.
Cryptocurrency wallets are often ”non-custodial”, suggesting that you, as the wallet owner, can handle assets without intermediaries. Consequently, you remain in complete control of all virtual assets. However, this exclusive access puts more responsibility on you. As such, keeping track of your private keys and not sharing them with anyone is crucial.
Since cryptocurrency wallets are gateways to the Web3 ecosystem, they are essential for the space’s unified identification layer. Furthermore, dapps and other Web3 projects implement authentication methods based on crypto wallets. This means users can sign in and authenticate their Web3 identity using one wallet on multiple platforms. This makes it easier for users to try out platforms and provides a more seamless user experience.
Moreover, since Web3 wallets are essential for the Web3 ecosystem, there is a need for easy crypto wallet integration, which is where crypto wallet integration APIs enter the picture!
What is a Crypto Wallet Integration API?
With a more profound understanding of crypto wallets and their importance within the Web3 space, it is time to explore the intricacies of crypto wallet integration APIs. However, before we get to the specifics, we will answer the question, ”what are APIs?”.
API is an abbreviation for ”application programming interface”, and they are tools facilitating the communication between software systems. Whenever you interact with an application or dapp, the software must transmit data to servers across the internet. Then, the receiving end must interpret the data and perform a set of actions before sending a response back. As such, your device receives the response and analyzes it before presenting it in a readable way.

This process above is generally facilitated by an API responsible for transferring or translating instructions for mutual understanding. Using an API provides a list of operations available to developers during the development process. As a result, developers do not need to build everything from scratch, enabling a more accessible developer experience.
So, in the context of crypto wallet integration, APIs make it easier for developers to add authentication methods from various crypto wallet providers to their Web3 projects. So, when working with a crypto wallet integration API, you do not need to worry about building an underlying infrastructure when setting up an authentication flow!
Now, before we take a closer look at the best crypto wallet API, let’s dive into the next section and look at some of the most popular crypto wallet providers!
Crypto Wallet Providers
This section explores some of the most prominent crypto wallet providers. However, since there are many alternatives on the market, we will only be able to cover some of them. With that said, this section focuses on MetaMask, Coinbase Wallet, and Trust Wallet!
- MetaMask – MetaMask is one of the most well-established cryptocurrency wallets, with over 30 million trusted users worldwide. In combination with providing the traditional functions of a digital wallet, such as holding, sending, swapping assets, etc., MetaMask acts as a gateway to an extensive ecosystem of blockchain apps.
- Coinbase Wallet – Coinbase Wallet is a self-custody, multi-asset cryptocurrency wallet supporting hundreds of thousands of dapps and tokens. Moreover, Coinbase Wallet provides everything you need in a Web3 wallet, such as the functionality to trade, buy, and sell NFTs and cryptocurrencies.

- Trust Wallet – Trust Wallet is Binance’s official non-custodial, multi-crypto wallet. The wallet supports millions of currencies and offers excellent features such as staking tokens, purchasing tokens, access to dapps, and more.
Now that we have briefly covered some examples of the market’s most prominent crypto wallet providers, it is time to explore the best crypto wallet API: Moralis’ Auth API!
Exploring the Best Crypto Wallet API for Developers
Moralis’ Web3 Authentication API is the easiest way to add crypto wallet integration to any dapp or Web3 project. Whether you are looking to build a new Web3 app, connect your existing Web2 user database with Web3Auth, or use authentication aggregators, Moralis’ crypto wallet integration API has you covered!
The Moralis crypto wallet integration API removes some of the common hassles associated with Web3 authentication. This includes redirecting users to third-party authentication interfaces, understanding Web3 authentication flows, learning how wallets sign and verify messages, etc. As such, when working with Moralis, you can save an abundance of time by avoiding these redundant tasks!
The Moralis Web3 Auth API supplies a unified API for all authentication methods, along with comprehensive SDKs for easy crypto wallet integration. What’s more, Moralis’ Web3 Auth API is continuously evolving. As such, in a fast-moving Web3 industry, the Web3 Auth API enables you to future-proof all authentication flows.
With a better understanding of the best crypto wallet API, let us take a closer look at how you can use this incredible tool to add crypto wallet integration!
How to Add Crypto Wallet Integration
Now that you are more familiar with Moralis’ Auth API, it is time to put it to use by showing you how to set up crypto wallet integration. In doing so, you will learn how to create a straightforward web application that allows users to authenticate with three crypto wallet alternatives: MetaMask, WalletConnect, and Coinbase Wallet.
You will find two screenshots below of the dapp’s UI (user interface) to illustrate what you are working towards. The first one shows the login page; meanwhile, the second image shows the user page that displays a user session containing an address, profile ID, and signature:
Login Page:

User Page:

Creating the web app above and setting up the crypto wallet integration is relatively simple when using the best crypto wallet API. To build the app, you can begin by visiting the crypto wallet integration GitHub repository page and cloning the project to your local directory. You can then install the necessary dependencies by running ”npm i” in your code editor’s terminal.
That is basically it for setting up the application. You should now be able to start the application on ”local host 3000” by running ”npm run dev” in the terminal.
However, you might still have questions regarding how the Auth API actually works. If so, the following sections dive deeper into the application’s code. If you follow along, you can apply the same principles to add crypto wallet integration to all future projects!
Unfortunately, since the project’s code is relatively extensive, we can only cover parts of it. As such, the following sections focus on the essential functions for adding crypto wallet integration.
Backend Code Walkthrough
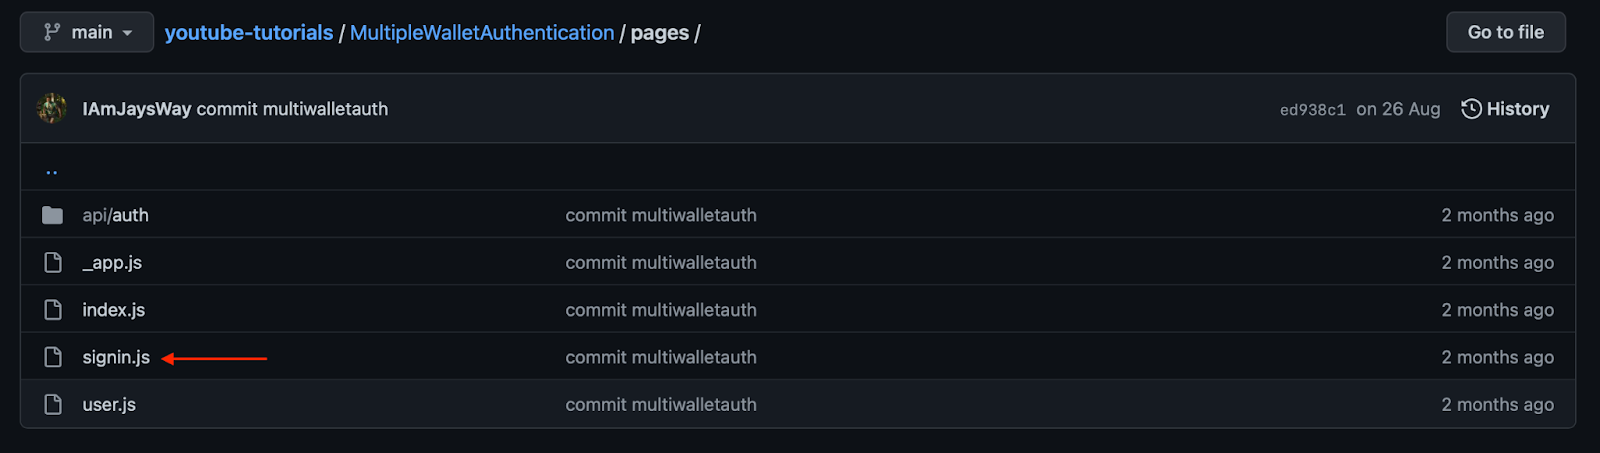
To kick things off, we will start by covering the backend code of the web app. The ”api/auth” folder contains the backend code, which consists of two files: ”[…nextauth].js” and ”request-message.js”:

This section dissects each file separately to provide a detailed overview of the backend functionality, starting with ”request-message.js”. Furthermore, this file contains the endpoint for requesting a message, and this is its entire code:
import Moralis from 'moralis';

const config = {
    domain: process.env.APP_DOMAIN,
    statement: 'Web Login.',
    uri: process.env.NEXTAUTH_URL,
    timeout: 60,
};

export default async function handler(req, res) {
    const { address, chain, network } = req.body;

    await Moralis.start({ apiKey: process.env.MORALIS_API_KEY });

    try {
        const message = await Moralis.Auth.requestMessage({
            address,
            chain,
            network,
            ...config,
        });

        res.status(200).json(message);
    } catch (error) {
        res.status(400).json({ error });
        console.error(error);
    }
}
The code above triggers Moralis’ ”Moralis.Auth.requestMessage()” function with the address and chain ID of the user. The code additionally creates a new message sent to the client side. As soon as a user signs the message, a post request is sent, which takes us to the ”[…nextauth].js” code:
import CredentialsProvider from 'next-auth/providers/credentials';
import NextAuth from 'next-auth';
import Moralis from 'moralis';

export default NextAuth({
    providers: [
        CredentialsProvider({
            name: 'MoralisAuth',
            credentials: {
                message: {
                    label: 'Message',
                    type: 'text',
                    placeholder: '0x0',
                },
                signature: {
                    label: 'Signature',
                    type: 'text',
                    placeholder: '0x0',
                },
            },
              async authorize(credentials) {
                try {
                  // "message" and "signature" are needed for authorization
                  // we described them in "credentials" above
                  const { message, signature } = credentials;

                  await Moralis.start({ apiKey: process.env.MORALIS_API_KEY });

                  const { address, profileId } = (
                    await Moralis.Auth.verify({ message, signature, network: 'evm' })
                  ).raw;

                  const user = { address, profileId, signature };
                  // returning the user object and creating  a session
                  return user;
                } catch (e) {
                  console.error(e);
                  return null;
                }
              },
        }),
    ],
    // adding user info to the user session object
    callbacks: {
        async jwt({ token, user }) {
            user && (token.user = user);
            return token;
        },
        async session({ session, token }) {
            session.user = token.user;
            return session;
        },
    },
});
As the file’s code illustrates, it sends another request to the ”Moralis.Auth.verify()” function with the response from the initial request. This is a message and the signature for singing the message on the client side.
Next up, the code generates a new ”user” object using ”next.auth” with a user address, profile ID, and signature. We then store the new user in a web session in a JWT (JSON web token).
That covers the essential parts of the backend code. So, let us progress by moving on to the frontend!
Frontend Code Walkthrough
The app’s frontend consists of several setup files such as ”_app.js”, ”index.js”, etc. However, for this tutorial, we will direct our attention to the ”signin.js” file since this is where you will find most of the logic for the authentication methods:
Initially, the file contains a few imports. In this case, we are especially interested in the connectors used to bring in the various authentication methods using wagmi. This is basically what you are using for the client-side Web3 connections:
import { signIn } from "next-auth/react";
import { useAccount, useConnect, useSignMessage, useDisconnect } from "wagmi";
import { useRouter } from "next/router";
import { MetaMaskConnector } from "wagmi/connectors/metaMask";
import { CoinbaseWalletConnector } from "wagmi/connectors/coinbaseWallet";
import { WalletConnectConnector } from "wagmi/connectors/walletConnect";
import axios from "axios";
The “handleAuth(wal)” Function
After the necessary imports, we will explore the “handleAuth(wal)” function. This function is responsible for connecting the different wallet connectors. The ”wal” parameter that the function takes as an argument specifies which alternative is to be used. Nevertheless, before the connections are established, the code creates a ”userData” object which stores information about the users. Here is what the initial part of the function looks like:
 const handleAuth = async (wal) => {
    if (isConnected) {
      await disconnectAsync();
    }

    console.log("Connect To Site Via Wallet");

    const userData = { network: "evm" };
Next up, the function includes three ”if” statements for the three alternatives used in this tutorial:
 if (wal === "meta") {
      const { account, chain } = await connectAsync({
        connector: new MetaMaskConnector({}),
      });
      userData.address = account;
      userData.chain = chain.id;
    }

    if (wal === "coin") {
      const { account, chain } = await connectAsync({
        connector: new CoinbaseWalletConnector({}),
      });
      userData.address = account;
      userData.chain = chain.id;
    }

    if (wal === "wal") {
      const { account, chain } = await connectAsync({
        connector: new WalletConnectConnector({ options: { qrcode: true } }),
      });
      userData.address = account;
      userData.chain = chain.id;
    }
Let us break down the first statement as an example. The first ”if (wal === ”meta”)” statement specifies that ”MetaMaskConnector” will be used as the authentication method. Once the user authenticates, the code gain access to the user’s wallet address and chain ID, which are added to the ”userData” object.
This information is used to send a post request to Moralis’ Auth API:
console.log("Sending Connected Account and Chain ID to Moralis Auth API");

    const { data } = await axios.post("/api/auth/request-message", userData, {
      headers: {
        "Content-Type": "application/json",
      },
    });
With the message at hand, the code uses wagmi once more to sign the message, send a final post request to Moralis for verification, and create the user JWT that is pushed to the user page:
console.log("Received Signature Request From Moralis Auth API");

    const message = data.message;

    const signature = await signMessageAsync({ message });

    console.log("Succesful Sign In, Redirecting to User Page");

    const { url } = await signIn("credentials", {
      message,
      signature,
      redirect: false,
      callbackUrl: "/user",
    });

    push(url);
Lastly, the code additionally includes three buttons connected to the various alternatives. Each button runs the “handleAuth(wal)” function with different parameters corresponding to the ”if” statements previously specified:
<div>
      <h3>Web3 Authentication</h3>
      <button onClick={() => handleAuth("meta")}>
        Authenticate via Metamask
      </button>
      <br />
      <button onClick={() => handleAuth("coin")}>
        Authenticate via Coinbase
      </button>
      <br/>
      <button onClick={() => handleAuth("wal")}>
        Authenticate via Wallet Connect
      </button>
    </div>
Ultimately, this is what the final ”signin.js” file looks like:
import { signIn } from "next-auth/react";
import { useAccount, useConnect, useSignMessage, useDisconnect } from "wagmi";
import { useRouter } from "next/router";
import { MetaMaskConnector } from "wagmi/connectors/metaMask";
import { CoinbaseWalletConnector } from "wagmi/connectors/coinbaseWallet";
import { WalletConnectConnector } from "wagmi/connectors/walletConnect";
import axios from "axios";

function SignIn() {
  const { connectAsync } = useConnect();
  const { disconnectAsync } = useDisconnect();
  const { isConnected } = useAccount();
  const { signMessageAsync } = useSignMessage();
  const { push } = useRouter();

  const handleAuth = async (wal) => {
    if (isConnected) {
      await disconnectAsync();
    }

    console.log("Connect To Site Via Wallet");

    const userData = { network: "evm" };

    if (wal === "meta") {
      const { account, chain } = await connectAsync({
        connector: new MetaMaskConnector({}),
      });
      userData.address = account;
      userData.chain = chain.id;
    }

    if (wal === "coin") {
      const { account, chain } = await connectAsync({
        connector: new CoinbaseWalletConnector({}),
      });
      userData.address = account;
      userData.chain = chain.id;
    }

    if (wal === "wal") {
      const { account, chain } = await connectAsync({
        connector: new WalletConnectConnector({ options: { qrcode: true } }),
      });
      userData.address = account;
      userData.chain = chain.id;
    }

    console.log("Sending Connected Account and Chain ID to Moralis Auth API");

    const { data } = await axios.post("/api/auth/request-message", userData, {
      headers: {
        "	": "application/json",
      },
    });

    console.log("Received Signature Request From Moralis Auth API");

    const message = data.message;

    const signature = await signMessageAsync({ message });

    console.log("Succesful Sign In, Redirecting to User Page");

    const { url } = await signIn("credentials", {
      message,
      signature,
      redirect: false,
      callbackUrl: "/user",
    });

    push(url);
  };

  return (
    <div>
      <h3>Web3 Authentication</h3>
      <button onClick={() => handleAuth("meta")}>
        Authenticate via Metamask
      </button>
      <br />
      <button onClick={() => handleAuth("coin")}>
        Authenticate via Coinbase
      </button>
      <br/>
      <button onClick={() => handleAuth("wal")}>
        Authenticate via Wallet Connect
      </button>
    </div>
  );
}

export default SignIn;
That is it for this ”Crypto Wallet Integration Using the Best Crypto Wallet API” tutorial! If you have any further questions regarding the code or want a more detailed breakdown of the process of adding a crypto wallet integration, check out the Moralis YouTube video below!
Crypto Wallet Integration – Summary
Web3 authentication is essential to blockchain development, allowing users to sign in and authenticate themselves using their Web3 wallets from various crypto wallet providers. As such, Web3 developers are in need of easy crypto wallet integration to make their blockchain development endeavors more accessible, which is where APIs enter the equation.
A crypto wallet integration API allows developers to quickly implement authentication methods from various crypto wallet providers. This article demonstrated the power of Moralis’ Web3 Auth API – the best crypto wallet API – by showing you how to create an application where users can sign in using MetaMask, WalletConnect, or Coinbase Wallet. Moreover, you could create this application in record time thanks to Moralis’ capabilities!
If you found this tutorial helpful and want to check out more great content brought to you by Moralis, tune in to Moralis’ Web3 blog featuring unique Web3 development content. For example, check out our article on Dogechain or learn how to upload files to IPFS!
Moreover, if you want to become a more proficient Web3 developer, consider checking out Moralis Academy. The academy supplies industry-leading blockchain courses for new and more experienced developers. For instance, enroll in the ”Blockchain & Bitcoin 101” course to kickstart your Web3 developer journey.
Nevertheless, are you looking to get into Web3 development and want to leverage the power of blockchain technology? If so, sign up with Moralis straight away and supercharge your Web3 projects with access to enterprise-grade development tools!
