The Web3 industry is constantly evolving, and developers frequently launch new, interesting projects on various chains. Furthermore, more and more people are showing interest in the blockchain industry, making it an attractive time to enter the market. What’s more, did you know that the easiest way to create a Web3 dapp (decentralized application) is with Moralis? If you want to learn more about this, follow along in this tutorial as we will show you how to create a Web3 dapp in only three steps!
Ethereum Boilerplate Documentation – https://github.com/ethereum-boilerplate/ethereum-boilerplate
If you are not interested in following along as we break down the three steps to create a Web3 dapp, you can use the link above instead and jump straight into the code. Otherwise, feel free to join us and learn everything you need to create a Web3 dapp from scratch. Moreover, most of the accessibility stems from Moralis’ Ethereum boilerplate, allowing you to create dapps in no time!
However, the Ethereum boilerplate is one of many advantages of working with Moralis. In addition, Moralis supplies leading enterprise-grade APIs. As such, Moralis provides a more compelling development experience allowing you to boost your efficiency. One such tool is Moralis’ Web3 Streams API. With this API, you can easily stream on-chain data into all your Web3 projects, which is a necessary component for Web3 dapps.
So, if you have ambitions to create a Web3 dapp, sign up with Moralis. You can access all of the platform’s tools immediately, and creating an account is free!
Web3 Dapps Explained
Before showing you how to create a Web3 dapp, it might be advantageous to briefly get back to basics and explore what Web3 dapps are. As such, this initial section will answer the question, “what is a Web3 dapp?”. So, if you are already familiar with dapps, feel free to scroll down and jump straight into the tutorial on how to create a Web3 dapp!

Web3 dapps (decentralized applications) are not all that different from traditional Web2 applications. They have the same purpose, but the most significant difference is that Web3 dapps are blockchain-based. Furthermore, Web3 dapps are, therefore, equipped with blockchain and Web3 functionality, providing some significant advantages over conventional applications. Here are a few examples:
- Open-Source – Many dapps are open-source, which is excellent for the entire Web3 ecosystem. It encourages development and drives innovation.
- Blockchain Technology – Since Web3 dapps are blockchain-based, it is easy to integrate cryptocurrencies into the functionality of this new generation of applications.
- Censorship-Resistant – Dapps generally do not have a single point of failure. Accordingly, it is difficult for entities or central authorities to sensor a network.
Many of these advantageous features or benefits often derive from a central characteristic of dapps: decentralization. Since Web3 dapps are decentralized, they remain outside the scope of central authorities. As such, it removes the single point of failure, which, among other things, supplies the benefit of being censorship-resistant.
Now that you have a brief understanding of dapps and their benefits, it is time to explore Moralis’ Ethereum boilerplate. This will provide a better understanding of what you are working towards before we explain how to create a Web3 dapp!
Moralis’ Ethereum Boilerplate – Create a Web3 Dapp
As soon as someone launches the Web3 dapp you are about to create; they will arrive at the following landing page:

First up, users must authenticate their Web3 identity using the “Connect Wallet” button to the right:

This allows users to sign in using their MetaMask wallet. However, MetaMask is only the default option, and you can easily add other authentication mechanisms. For example, thanks to Moralis’ Auth API, which makes Web3 authentication easily accessible, you can quickly add Coinbase wallet login functionality.
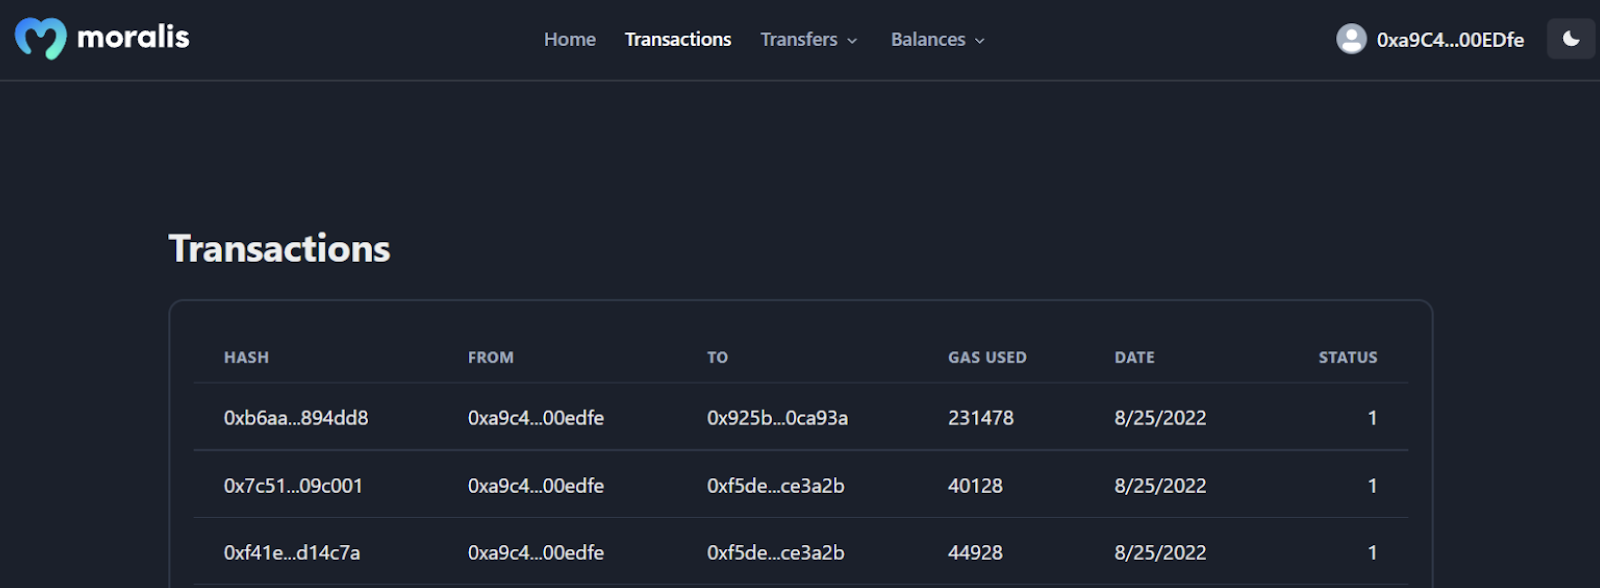
Nevertheless, once authenticated, the Web3 dapp will populate with information regarding the user’s Web3 wallet. This takes us to the additional four tabs users can find at the top of the dapp’s interface. As an example, if they click on “Transactions”, it will display the wallet’s previous transactions:
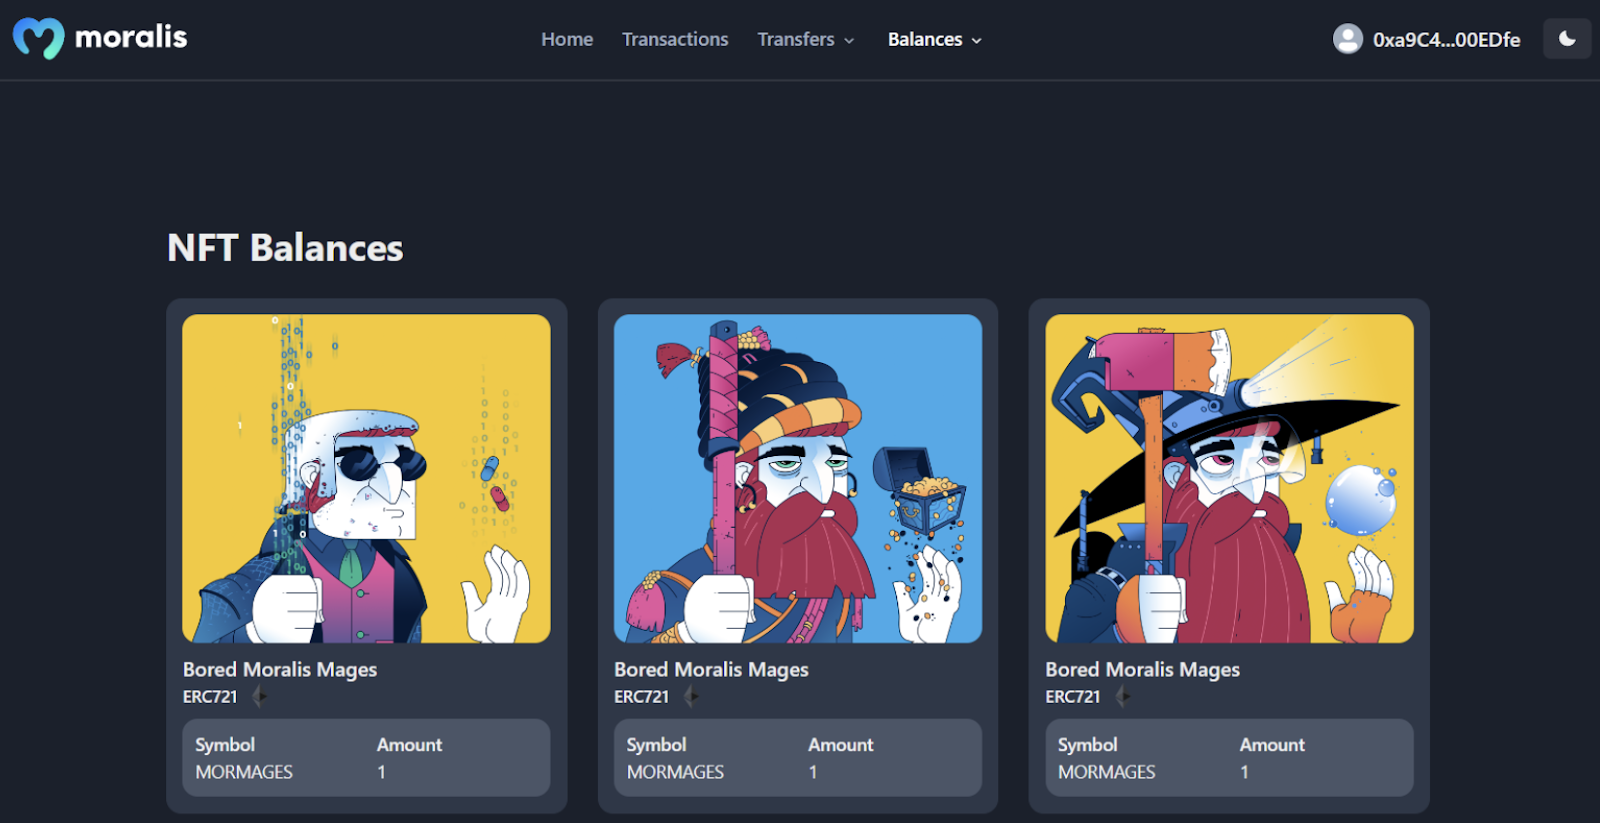
Moreover, the “Transfers” and “Balances” tabs have drop-down menus. Now, if users click on these options, they can choose between “ERC-20” or “NFTs”. This means that it is possible to filter between these two token types. Nevertheless, this is what it looks like:

If, for example, the “NFTs” option is selected for the “Balances” tab, it will display all NFTs contained within the wallet:
Lastly, the Ethereum boilerplate also features dark/light mode. Hence, users can toggle between these two alternatives using the button at the top right:

Now that you are more familiar with Moralis’ Ethereum boilerplate, it is time to explore the central part of this article. In the following few sections, we will show you how to create a Web3 dapp in only three steps!
How to Create a Web3 Dapp – Three Step Breakdown
In this section, we will go through all the necessary steps you need to cover to create a Web3 dapp. Since we will be using Moralis’ Ethereum boilerplate, you can create a Web3 dapp in only three steps:
- Cloning Moralis’ Ethereum Boilerplate
- Configuring Variables
- Starting the Web3 Dapp

Following these steps will result in a Web3 dapp like the one we examined in the previous section. Moreover, once you have the template at your disposal, it is up to you to tailor the boilerplate, making it fit your customers’ needs.
What’s more, if you have not already, you must create a Moralis account, as this is a requirement for the second step of this tutorial. Furthermore, creating an account is free, and you can get going by clicking on the “Start for Free” button at the top of Moralis’ webpage:

Step 1: Cloning Moralis’ Ethereum Boilerplate
To begin with, you must clone the Ethereum boilerplate to your local directory. To initiate the process of creating a Web3 dapp, you can open your favorite IDE (integrated development environment). In our case, we will utilize VSC (Visual Studio Code); however, feel free to use any other alternative. Just note that some steps might slightly differ if you are not using VSC.
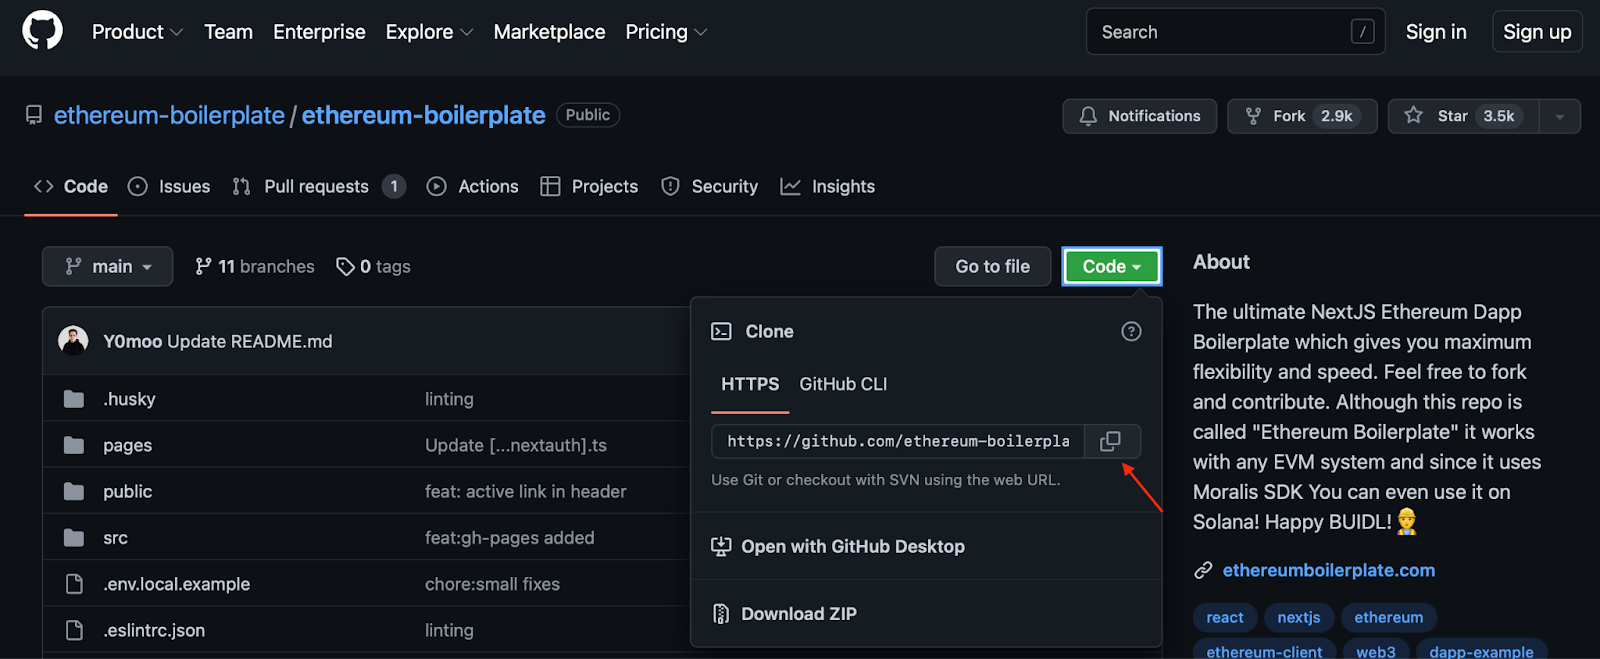
With your IDE open, you can continue by setting up a new folder. We are calling ours “BOILERPLATE”, but you can name yours whatever. Following this, you need to open the GitHub repository for the Ethereum boilerplate. You can find the link for this in the introduction. From there, go ahead and fetch the URL by clicking on “Code” and the copy button:
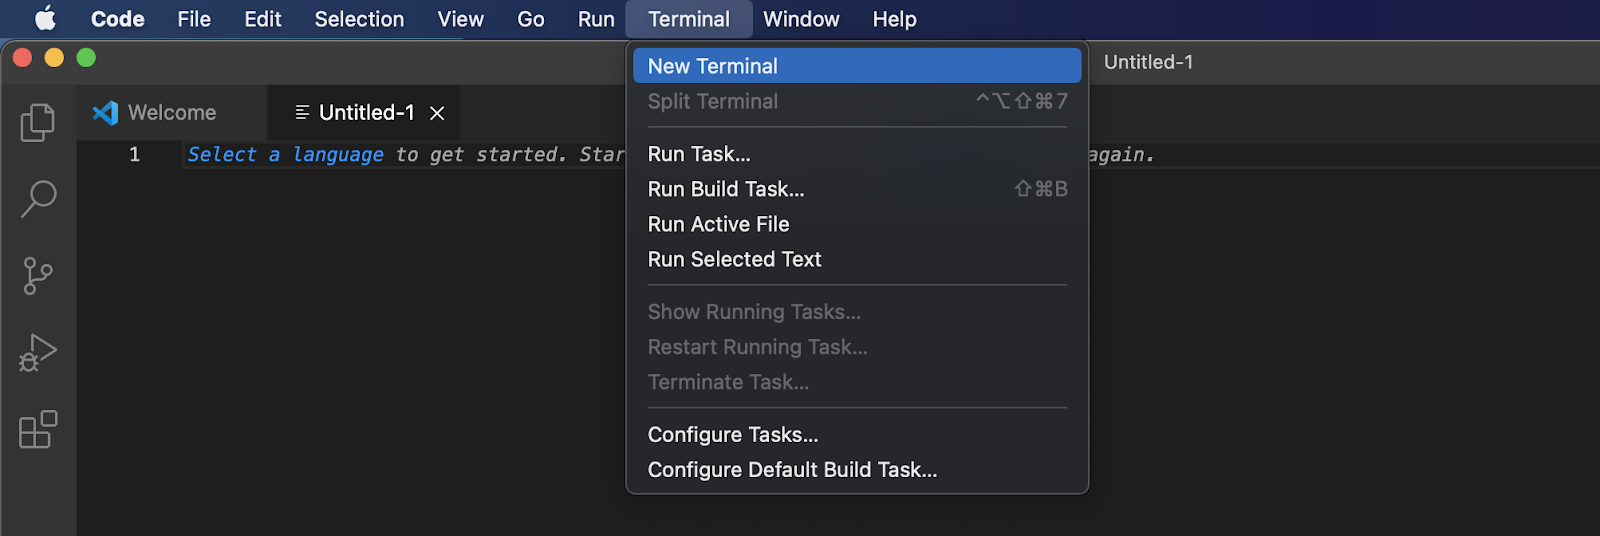
Next, navigate back to your IDE and open a new terminal. If you use VSC like us, you can open a terminal by pressing “Terminal” at the top and then hitting “New Terminal”:
Following this, you need to use the repo URL from before and run the following command (make sure you are in the location of the folder you created previously):
git clone “BOILERPLATE_URL”
That’s it; you should now have the project at your disposal. Furthermore, jump into the correct folder using this command:
cd ethereum-boilerplate
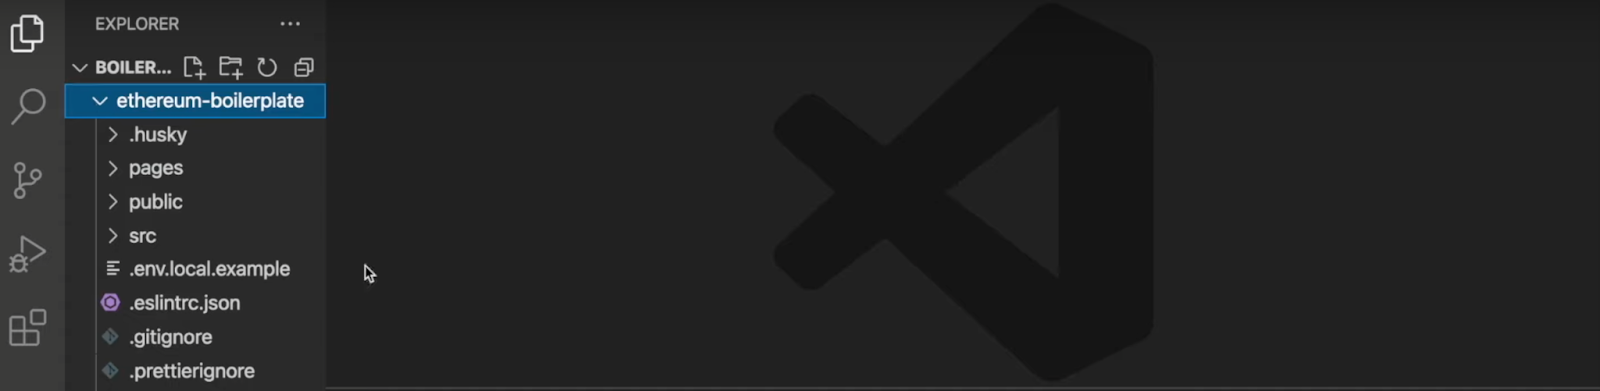
If you followed along and executed the proper commands in the right locations, you should now have a structure similar to this one in your local directory:
Step 2: Configuring Variables
For the second step of this brief tutorial, we will be configuring some environment variables. As such, you can go ahead and find your way to the “.env.local.example” file located in your IDE:

There are five variables in total, and you will need to configure three of them, depending on which chain you plan to launch the dapp on. So, let’s kick things off with the first variable, “APP_CHAIN_ID“, currently set to “0x1“. The “0x1” value references the Ethereum chain. Now, if you are looking to create a Web3 dapp for another network, this will need to be altered. However, in our case, we will leave it as is.
The second variable you will need to consider is “MORALIS_API_KEY“. You will need to add a value here. Moreover, to acquire the value, you need a Moralis account. As such, if you previously did not, now is the time to create your account. Once you log in, you can fetch the key by clicking on “Account”, then navigate to “Keys” at the top. Then, copy “Moralis Api Key” and paste it into the code.

Lastly, you will need a secret key for the “NEXTAUTH_SECRET“. If you need assistance generating a value, you can use the following link: “https://generate-secret.now.sh/32”. That’s it for the variables for now!
You can leave the “NEXTAUTH_URL” variable equal to “http://localhost:3000“. Doing so will allow you to test the Web3 dapp safely and securely. However, as soon as you plan on launching the dapp, you need to alter this variable and set it to equal the dapp’s URL.
To top everything off, you must change the file’s name to “.env.local”. Here is what the final code can look like:
APP_CHAIN_ID=0x1
APP_DOMAIN=ethereum.boilerplate
MORALIS_API_KEY= "YOUR_API_KEY"
NEXTAUTH_SECRET= b8e786967d7bcbc0f920d35bcc3f891c
NEXTAUTH_URL=http://localhost:3000
Step 3: Starting the Web3 Dapp
The final step in this tutorial, where we explore how to create a Web3 dapp, revolves around starting the dapp. However, you will need to install dependencies before you can actually start the dapp. So, to do so – depending on if you are using “npm” or “yarn” – you can input one of the following commands into the terminal:
npm i
yarn
Following this, you can start the dapp on a local host using this command:
npm run dev
yarn run dev
As soon as the dapp launches, you can access the dapp through the URL you specified earlier: “http://localhost:3000“. So, if you follow all the steps and click on this link, it should open your dapp, and that’s it! You now know how to create a Web3 dapp using Moralis and the Ethereum boilerplate.
If you have issues or questions regarding the process, you can check out the documentation from the GitHub repository for the Ethereum boilerplate. In addition, you can watch the video from before, which might clarify things.
Furthermore, suppose you found this article interesting and want to develop dapps for other networks. In that case, we recommend two of our articles explaining how to build a Cronos dapp and build a Polygon dapp. Moreover, you can also learn more about the chains Moralis supports from the official documentation.
Create a Web3 Dapp – Summary
By following along in this article, you created a Web3 dapp from scratch using the Moralis Ethereum boilerplate. Moreover, this template allows anyone to create a Web3 dapp in only three steps, and it only takes a couple of minutes:
- Cloning Moralis’ Ethereum Boilerplate
- Configuring Variables
- Starting the Web3 Dapp
These steps are relatively straightforward, allowing you to create a Web3 dapp where users can sign in with their Web3 wallet. As soon as they authenticate themselves, the application populates the UI with information regarding users’ wallet details. This includes everything from current balances to transaction histories.
If you found this tutorial helpful, feel free to explore Moralis’ Web3 blog further. At the blog, you will find exciting and fresh content helping you become a better Web3 developer. For example, you can check out our articles on how to build a Solana NFT explorer or build a decentralized social media profile.
In addition, to hone your Web3 development skills even further and become blockchain certified, you also have the option to enroll in Moralis Academy. The academy supplies exceptional blockchain-related courses for both novice and more experienced developers. For example, learn the basics about the Ethereum blockchain, how it differs from Bitcoin, and what smart contracts are with the “Ethereum 101” course.
So, if you want to create a Web3 dapp quickly and easily, sign up with Moralis. You can create your account for free, which only takes a couple of seconds. You have nothing to lose and can immediately become a more prominent Web3 developer!
