We have recently seen a number of reputable programmable blockchains emerge; however, Ethereum remains the go-to chain for most blockchain developers. Moreover, while the mainnet for Ethereum is the network to use once you have your dApps tested and ready for deployment, you should focus on Ethereum testnet options while developing Web3 applications. By using testing networks, you can avoid paying high transaction fees while developing and also ensure that all components are running smoothly before going live with your build. However, in order to make the most of Ethereum testnet networks, you need to know at least the basics of each Ethereum testnet. Therefore, follow along in this guide and get a solid foundation regarding Ethereum testnets. As such, you’ll discover what testnets are, which testnet for Ethereum you should use, and how to connect to Ethereum testnets.
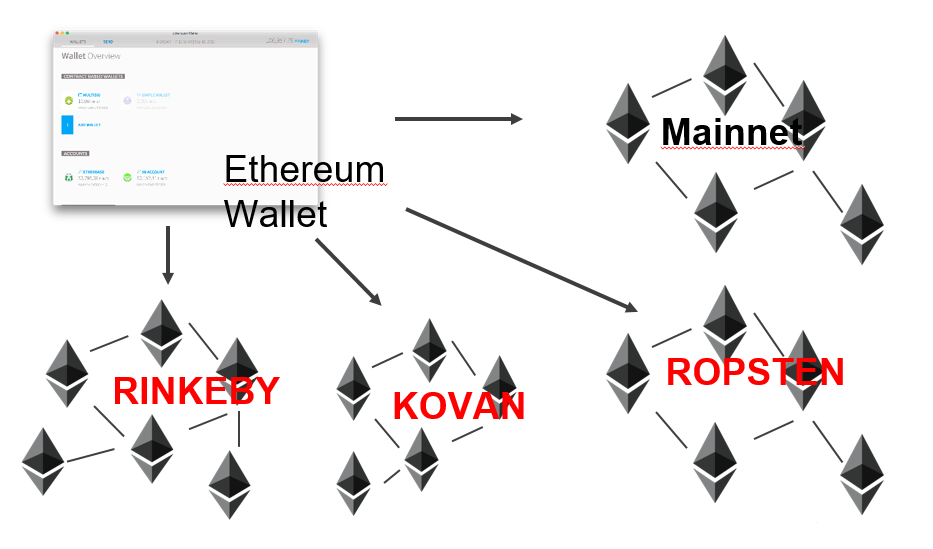
Aside from covering some useful details about Ethereum’s testing networks, namely Kovan, Ropsten, Rinkeby, and Görli (Goerli), you’ll also have a chance to get acquainted with Moralis’ Web3 development platform. The latter offers a straightforward way to connect to all testnets on Ethereum. Moreover, with cross-chain interoperability rooted in Moralis’ core, developers can also connect to other reputable chains’ testnets. For instance, you can utilize either the BEP20 testnet if you’re interested in developing on top of Binance Smart Chain (BSC) or the Mumbai testnet to develop on Polygon.
Aside from easy access to testing networks, Moralis provides a complete Web3 development arsenal, including the ultimate Web3 SDK, the greatest Ethereum API, including extensive and easy-to-use NFT API, Moralis Speedy Nodes, storage solution via IPFS integration, Ethereum authentication integrations, and one of the best documentation in the industry. On top of that, you get to join the most resourceful and supportive blockchain development community!

What are Ethereum Testnet Networks?
The word “testnet” is rather self-explanatory – it refers to a network that is intended for testing. As such, Ethereum testnets are networks set in place to support Ethereum developers. Moreover, all of the four Ethereum testnet networks mentioned earlier are public. Furthermore, they’re used by smart contract developers or protocol developers to test both potential smart contracts and protocol upgrades in a production-like environment before deploying updates and smart contracts to Ethereum’s mainnet. Keep in mind that in case you’re building a Web3 application, which integrates existing smart contracts, most of them already have copies deployed to Ethereum testnet networks. As such, you can easily interact with them in a testing environment.
Since it is imperative to test any contract code before deploying it to Ethereum’s mainnet, you want to have easy access to as many of Ethereum’s testing networks as possible. Why? Well, each testnet has its own features and its own advantages and disadvantages. As such, one testnet may be more suitable for a specific kind of project or task than the other. Fortunately, Moralis gives you a simple way to connect to any of Ethereum’s testing networks. Before we show you how to use Ethereum testnet networks, let’s take a closer look at each of the reputable testnets.
Ethereum Testnet: Kovan
Unlike Ethereum’s mainnet, which for now uses a proof-of-work (PoW) consensus mechanism, Ethereum’s testnet named Kovan uses proof-of-authority (PoA). This Ethereum testnet was originally initiated by the “Parity” team back in March of 2017, and it was named after a subway station in Singapore. Moreover, Kovan is available to those running “OpenEthereum” clients.
Kovan’s Pros and Cons:
- Immune to spam attacks since Ether supply is controlled by trusted parties.
- It is not supported in “Geth” (limited to certain clients).
- It doesn’t fully reproduce the current production environment due to the use of PoA.
- Ether on this testnet cannot be mined, but it has to be requested from the faucet.
Kovan’s Details:
- Network ID: 42
- Block Time: 4 seconds
- Command: openethereum –chain kovan
- Explorer: kovan.etherscan.io
Ethereum Testnet: Ropsten
Unlike the Kovan testnet on Ethereum, Ropsten uses a PoW consensus mechanism. This means that it mimics the Ethereum mainnet network even in that aspect. Moreover, this type of consensus also enables developers to acquire ETH on Ropsten by mining. Furthermore, the Ropsten network was started a couple of months before Kovan (in November of 2016). Furthermore, Ropsten received its name from a subway station located in Stockholm, Sweden.
Ropsten’s Pros and Cons:
- Thanks to its PoW nature, it best reproduces the current production environment of the live mainnet on Ethereum.
- It can be used with all clients.
- Developers can mine ETH on this testnet.
- It’s not immune to spam attacks, which also makes it less stable.
Ropsten’s Details:
- Network ID: 3
- Block Time: Sub 30 seconds
- Command:
- geth –ropsten
- Besu –network ropsten
- Explorer: ropsten.etherscan.io
Ethereum Testnet: Rinkeby
Just like Kovan, Rinkeby also uses a PoA consensus protocol; however, Rinkeby uses a PoA called “Clique PoA”. Moreover, the network was started by the Ethereum team in April of 2017. Following the lead of Kovan and Rinkeby testing networks, it was also named after a metro station. Rinkeby is intended for those running the Geth client.
Rinkeby’s Pros and Cons:
- Immune to spam attacks since Ether supply is controlled by trusted parties.
- Supported by Geth only.
- It doesn’t fully reproduce the current production environment due to the use of PoA.
- Ether on this testnet cannot be mined, but it has to be requested from the faucet.
Rinkeby’s Details:
- Network ID: 4
- Block Time: 15 seconds
- Command: geth –rinkeby
- Explorer: rinkeby.etherscan.io
Ethereum Testnet: Görli
Just like Kovan and Rinkeby, Görli is also an Ethereum testnet that uses PoA. Moreover, it went live with the Görli initiative in November of 2018, which makes it the youngest testnet. Furthermore, it also gets its name from a subway station, this time by the one in Berlin, Germany. The goal of Görli is to serve all clients that support the Clique PoA engine (EIP-225) and robust enough to ensure consistency in both availability and reliability.
Görli’s Pros and Cons:
- Supported by multiple clients (Geth, Besu, Patheon, Nethermind, and OpenEthereum).
- Relatively immune to spam attacks since Ether supply is controlled by trusted parties.
- It doesn’t fully reproduce the current production environment due to the use of PoA.
- Ether on this testnet cannot be mined, but it has to be requested from the faucet.
Görli’s Details:
- Network ID: 5
- Block Time: Approximately 15 seconds
- Explorer: goerli.etherscan.io
Which Ethereum Testnet to Use?
There are four reputable Ethereum testing networks available, so which one should you choose? Well, as you might have expected, there is, unfortunately, no simple answer here. It all depends on the type of project you are working on and your preferences. However, we recommend testing your projects on multiple Ethereum testnet networks. That way, you can ensure that you cover all angles before deploying to Ethereum’s mainnet.
Moreover, when choosing the most suitable testnet for your needs, you must consider the properties, including the pros and cons of each Ethereum testnet mentioned in the previous sections. For instance, if you were to best test the current production environment of Ethereum’s live mainnet, Ropsten would be your best option. However, as far as the consistent and timely manner of block creation goes, Rinkeby or Kovan are often perceived as the best options. Fortunately, you can make testing networks accessible to you with a few clicks when using Moralis. In order to learn the details of how to use Ethereum’s testing networks with Moralis, take a closer look at the content in the following section.
How to Use Ethereum’s Testing Networks with Moralis?
When you use Moralis, you also gain easy access to all of the above-described Ethereum testnet networks. Below, we will cover how to take care of the setup that will enable you to connect to Ethereum’s testing networks. Once you complete the initial setup, you are all set to start working on all sorts of projects. By using short snippets of code available in Moralis’ documentation, you will be able to take care of the blockchain-related backend without breaking a sweat. The only thing you must pay extra attention to is to define the testnet of your choice within the chain-specific functions (the default option is Ethereum’s mainnet). Moreover, you need to obtain some ETH for your particular testnet project to cover the transaction fees and be able to execute test transactions.
Furthermore, using MetaMask as an Ethereum authentication tool is the simplest solution. Plus, Moralis has full support for this popular wallet and all its features. Since MetaMask already supports all of the four Ethereum testnet networks covered herein, you only need to download the MetaMask browser extension and create your wallet or sign in using your current address.
ETH Testnets Connection – Setting Up Ethereum Testnet Connection
In order to use Moralis’ SDK and easily access Ethereum’s testing networks, you need to set up your Moralis server. To do so, complete the following steps:
- Create Your Moralis Account – To create your free Moralis account, click the link, enter your email address, and create your password. You will complete the process by confirming your email address (you’ll receive an email with a confirmation link). In case you already have an active Moralis account, just log in and visit your admin area.
- Create a New Server – After you log in, click the “Servers” tab inside your Moralis admin area. Next, use the “+ Create a new Server” option in the top-right corner. From the drop-down menu, select the “Testnet Server” option to ensure easy access to all Ethereum testnet networks.

A pop-up window asking for server info will appear next. Enter the required server details, including the server name (this can be anything you want), select region, network, chain(s) (you can select multiple chains at the same time), and click “Add Instance”. It may take some time for the server to spin up, so please be patient.
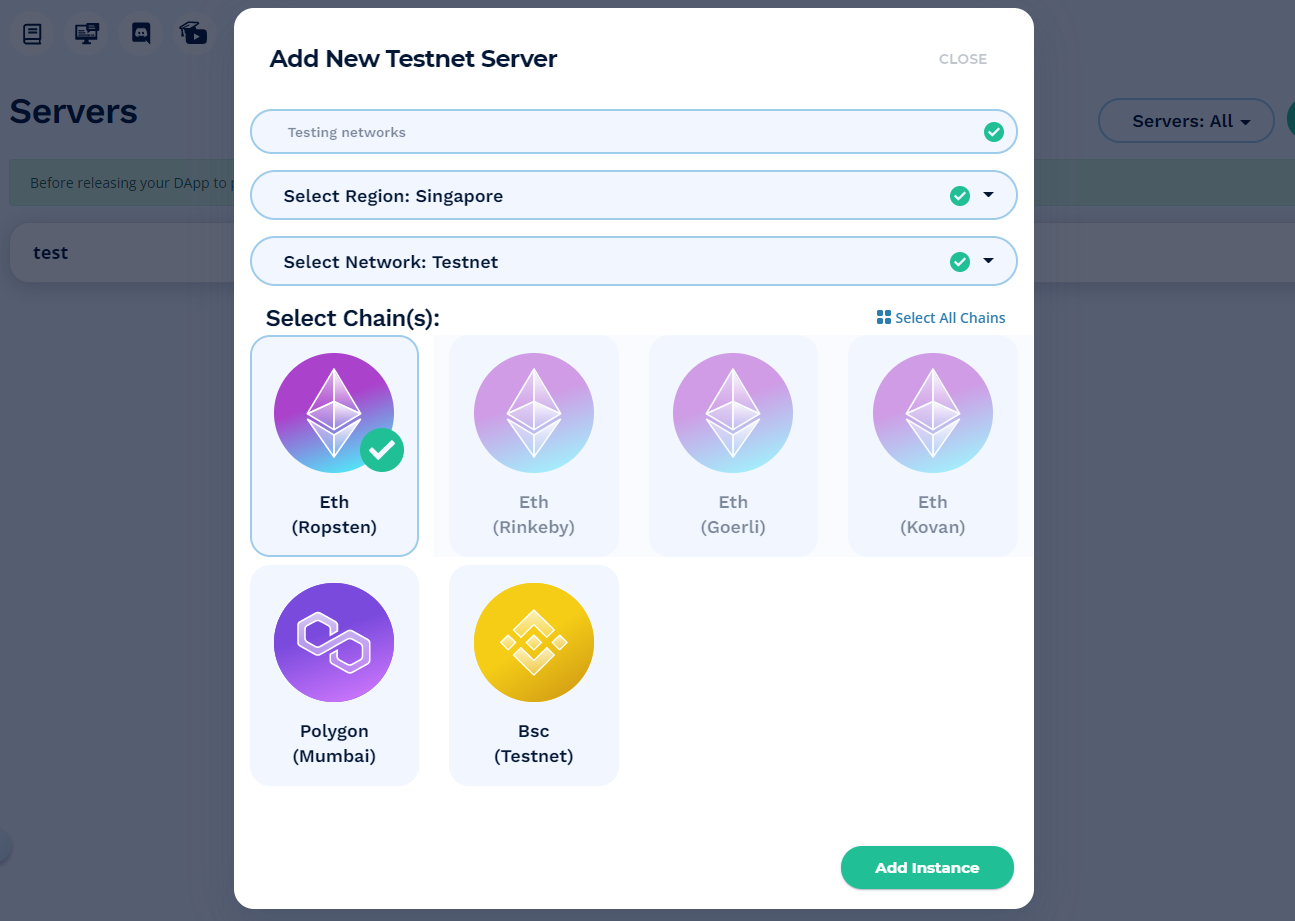
Note: You can only select one Ethereum testnet at a time. To cover different Ethereum testing networks, you’ll need to create multiple servers.
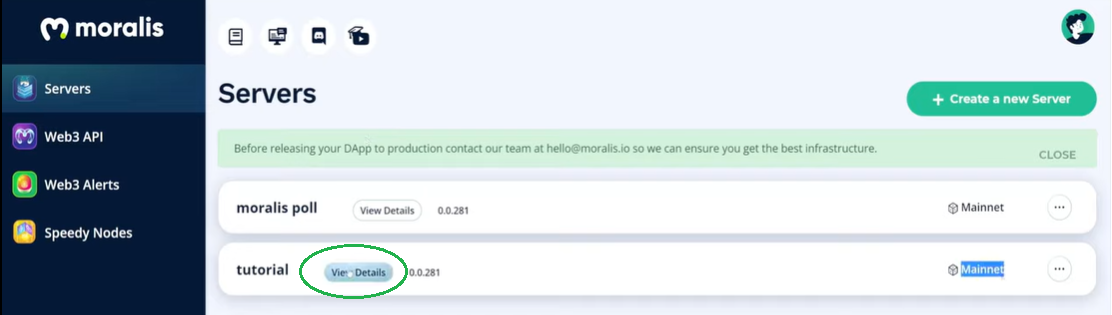
- Access Server Details – Once your server is ready, you can access its details. You do this by clicking the “View Details” button next to your server’s name.
After clicking the button, a pop-up window containing all the required information will appear:
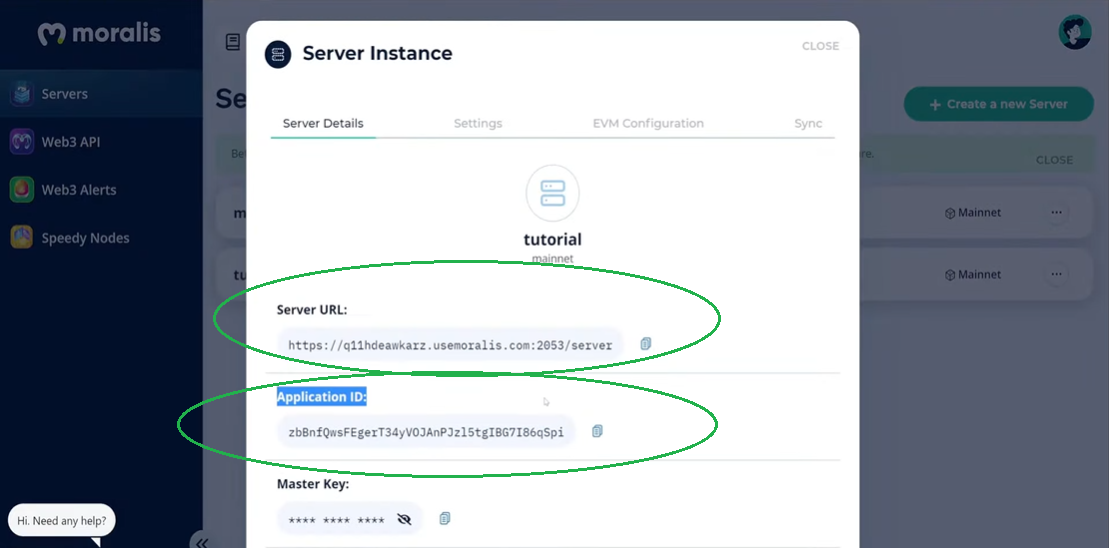
- Initialize Moralis – To finally obtain the required backend functionality and make use of your access to Ethereum’s testing networks, populate your “.js” or “.html” file with the Moralis server details (application ID and server URL):

Note: Use your server’s details and NOT the ones from the image above.
Obtain ETH for Ethereum Testnets
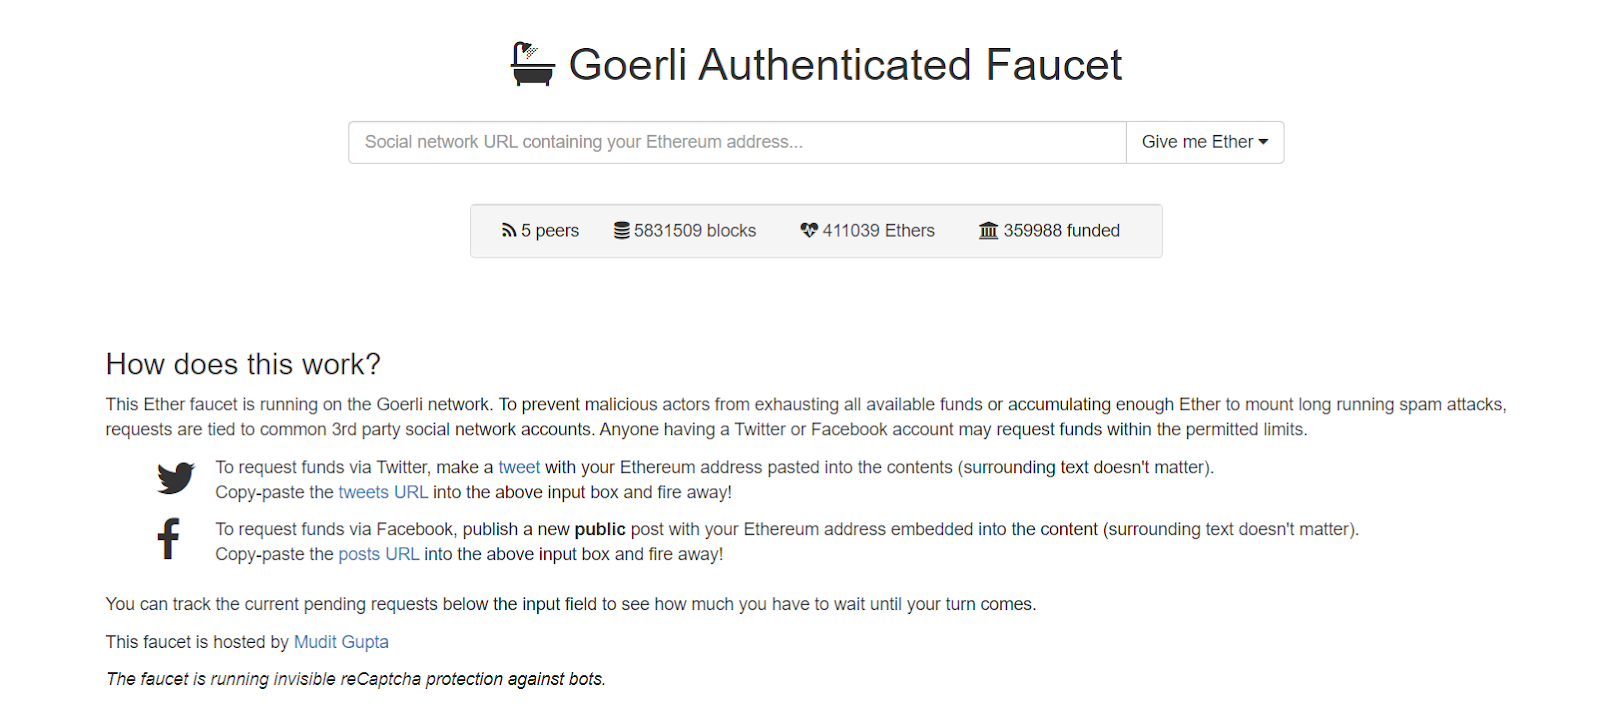
As mentioned above, you need to obtain some ETH for the particular Ethereum testnet for your test transactions and to cover transaction fees. Unlike ETH on Ethereum’s mainnet, which is a highly valuable asset, ETH on testnets doesn’t cost you anything. By using publicly available faucets, you can obtain enough ETH to cover all your testing. Below, you can find the links to faucets for each of the Ethereum testnet networks (as provided by Ethereum’s official website):
- Görli Faucet: https://faucet.goerli.mudit.blog/
- Kovan Faucet: https://faucet.kovan.network/
- Rinkeby Faucet: https://faucet.rinkeby.io/
- Ropsten Faucet: https://faucet.ropsten.be/
Each faucet has detailed on-site instructions to make things as simple as possible for you. In some cases, you will be able to obtain more ETH than in others. Thus, make sure to consider the amount you need in advance. Of course, you can come back anytime to get more test ETH (though some limitations may apply).
Ethereum Testnets Guide – Connect to Ethereum Testnets – Summary
As a blockchain developer, you need to get comfortable with testing. Moreover, ensuring that things are running smoothly is an important part of any sort of application, and dApps are no exception. As such, it is no surprise that there are multiple Ethereum testnet networks. Herein, you’ve learned about Görli, Kovan, Rinkeby, and Ropsten. Moreover, we’ve shown how to easily set things up in Moralis to test your Web3 applications on any of the four testing networks. Furthermore, you also know that MetaMask is a powerful tool, which you’ll be able to use as a gateway to Ethereum testnets. Finally, you’ve also been provided with links to different ETH faucets for each Ethereum testnet.
With that knowledge and powerful tools such as Moralis (aka the Firebase for crypto) and MetaMask on your side, you’re ready to take on some example projects. In case you need some inspiration and guidance, make sure to check out Moralis’ YouTube channel and Moralis’ blog. In some of our latest quests, we show how to launch an NFT marketplace, build an OpenSea clone, how to create a DeFi dashboard, and how to build your first dApp. Using the ultimate Ethereum dApp boilerplate, many tasks can be completed in minutes. Also, in case you are interested in creating your own tokens, make sure to have a look at the ERC-20 token standard a bit more closely. On the other hand, in case you’re a complete beginner, we strongly encourage you to enroll in some of the high-quality courses at Moralis Academy.