If you are getting started as a dApp developer, you must be eager to learn how to build your first dApp on Ethereum. Moreover, even if you’re not a novice developer, an Ethereum dApp tutorial can be highly beneficial and serve as an excellent refresher when developing dApps (decentralized applications). As such, this Web3 dApp tutorial will prove to be helpful for an experienced programmer and for someone aspiring to become a blockchain developer. So, for those wanting to create their first Ethereum-based dApp and have been asking “how to to build a dApp on Ethereum”, this tutorial will demonstrate how simple and easy the process of creating decentralized applications on the Ethereum blockchain can be when utilizing tools such as Moralis.
In this article, you will learn the basics of Moralis’ ultimate Web3 development platform. Using this platform makes building Ethereum dApps cross-chain operable. This means that you can build your first dApp on Ethereum’s chain, and it will also function on other leading chains, such as Binance Smart Chain (BSC), Polygon, and Avalanche. Aside from cross-chain interoperability, Moralis provides you with an ultimate Web3 SDK, including the Ethereum API, which makes blockchain development fun, quick, and straightforward.
Moralis also enables you to avoid dealing with the limitations of RPC nodes when using Moralis Speedy Nodes. Moreover, Moralis also serves as one of the best Infura alternatives. Using your JavaScript skills, you get to deploy phenomenal Web3 applications with ease. Furthermore, as Moralis covers your backend needs, you get to devote your efforts to the frontend and thus deliver the best user experience. So, are you ready to build your first dApp?

Build Your First dApp with Moralis
It would take you weeks or even months if you were to build Ethereum dApps around RPC nodes and create a proper infrastructure just to log in or authenticate users, display users’ coin or token balances, view their transactions, and enable them to send and receive crypto assets. However, when you use Moralis, you get to cover all those aspects with short snippets of code in minutes.
Moreover, getting started with Moralis is also straightforward, and it’s free to create an account. As a matter of fact, there are particular steps that you need to complete to use Moralis when building Ethereum dApps (provided below). Essentially, you need to create a Moralis server and then use that server’s details inside your code to gain access to Moralis’ backend functionalities.
With that set in place, you simply copy and paste single lines of code from Moralis’ documentation for different types of Web3 functionalities. The latter covers your backend needs. Of course, then it is up to your frontend creativity to ensure you build the best possible user interface (UI) around it. However, we provide you with some really great ideas on Moralis’ YouTube channel, which can serve as a great starting point.
So, here are the required steps of building Ethereum dApps with Moralis:
- Create your free Moralis account.
- Create your Moralis server.
- Connect to your Moralis server.
- Initiate Moralis’ SDK.
- Copy and paste short snippets of code from Moralis’ documentation.
- Make your dApps look great and user-friendly using your JavaScript proficiency.
Build Your First dApp – Example Project
Since this may be your first time on Moralis’ blog, we need to point out that we believe in learning by taking action. Therefore, we try to work around different aspects of blockchain development by taking on simple example projects, which you can easily follow along with. As such, we will be your guide as you build your first dApp. Essentially, we will go through each of the steps listed above and thus teach you how to set things up and get started properly. Then, you’ll be able to use this knowledge for building Ethereum dApps with more advanced features. Furthermore, thanks to Moralis’ cross-chain interoperability, you’ll also be able to use the same principles to create dApps on any other supported chain.
For the purpose of this example project, we will create a relatively basic dApp, with no special functionalities aside from being able to log in (authenticate) users. As you’ll see, this basic feature provides you with everything you need to add other functionalities. It is this basic functionality that onboards users to the blockchain realm.
So, here is the image of your first dApp:
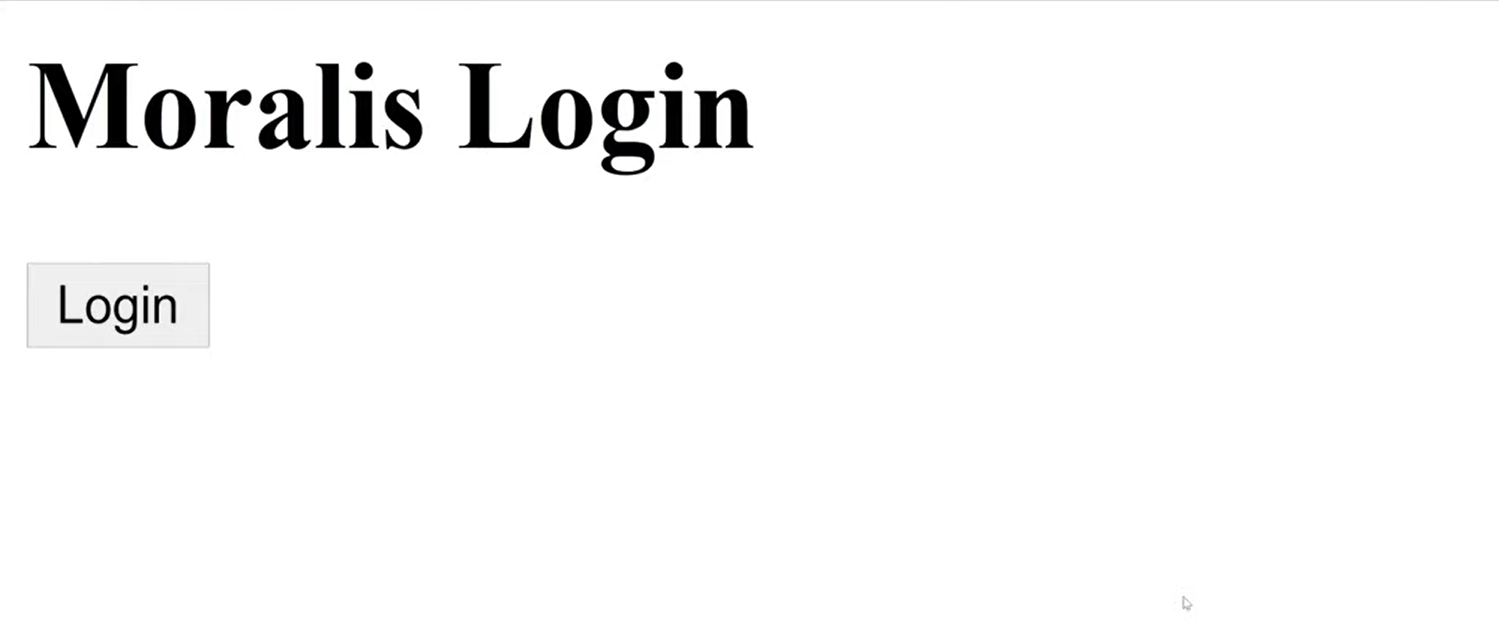
Fortunately, Moralis offers you multiple Ethereum authentication options that are easy to implement. For the purpose of this example project, we will be using MetaMask authentication. So, when the users land on the interface shown above, they get to click the “login” button, which prompts their MetaMask extension:

Next, they need to click the “Confirm” button. Moreover, for the purpose of this example, we will have our dApp display the users’ addresses after they successfully log in:

Moralis Setup – The Beginning of Building Ethereum dApps
Here are the steps you need to complete in order to use Moralis and build your first dApp in minutes:
- Create Your Moralis Account – If you haven’t created your free Moralis account yet, make sure to do so now. Click the link above, enter your email address, and create your password. Then, complete the process by confirming your email address (you’ll receive an email with a confirmation link). In case you already have an active Moralis account, just log in and go to your admin area.
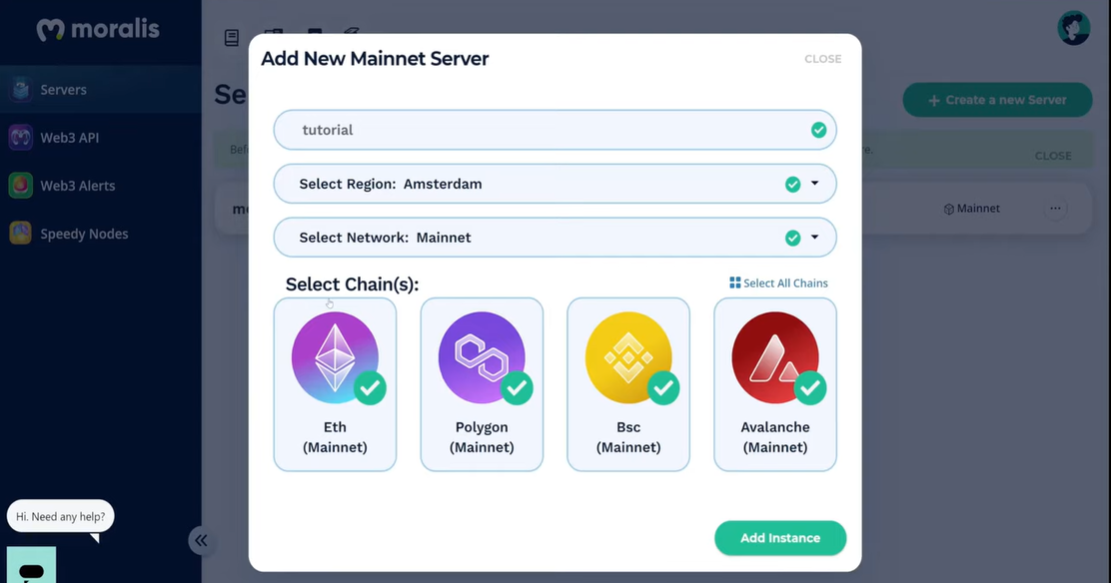
- Create a New Server – Within your Moralis admin area, click the “+ Create a new Server” button in the top-right corner. A drop-down menu will appear, offering several network-type options (see the image below). Since this is an example project, we recommend going with the “Testnet Server” option. However, you’ll need to select the “Mainnet Server” option once you’re ready to deploy fully functional dApps.

In the pop-up window that appears, enter the required server details. The latter include the server name (this can be anything you want), select region, network, chain(s) (you can select one or multiple options), and click “Add Instance”. It can take some time for the server to spin up, so please be patient.
- Access Server Details – Once your server is ready, you get to access its details. You do this by clicking the “View Details” button next to your server name.

Next, you’ll see a pop-up window containing all the information you need:

- Initialize Moralis – Now populate your “.js” or “.html” file with the Moralis server details (application ID and server URL) to obtain the required backend functionality:

Note: Make sure to use the details of your particular server and NOT the ones from the image above.
Build Your First dApp – The HTML Structure
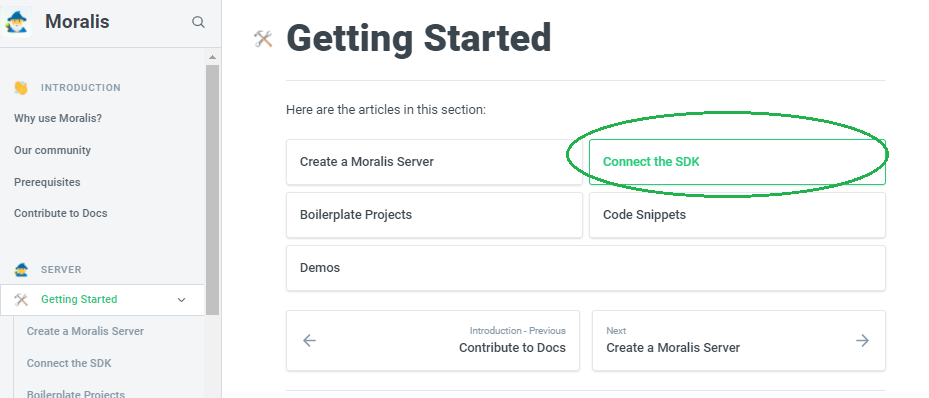
In order to provide the structure for our example dApp, we need to create an HTML file. This will also enable us to view it in browsers. Moreover, in order to help you make a habit of using Moralis’ documentation (which is one of the best documentation in the industry), we will use it to help you build your first dApp.
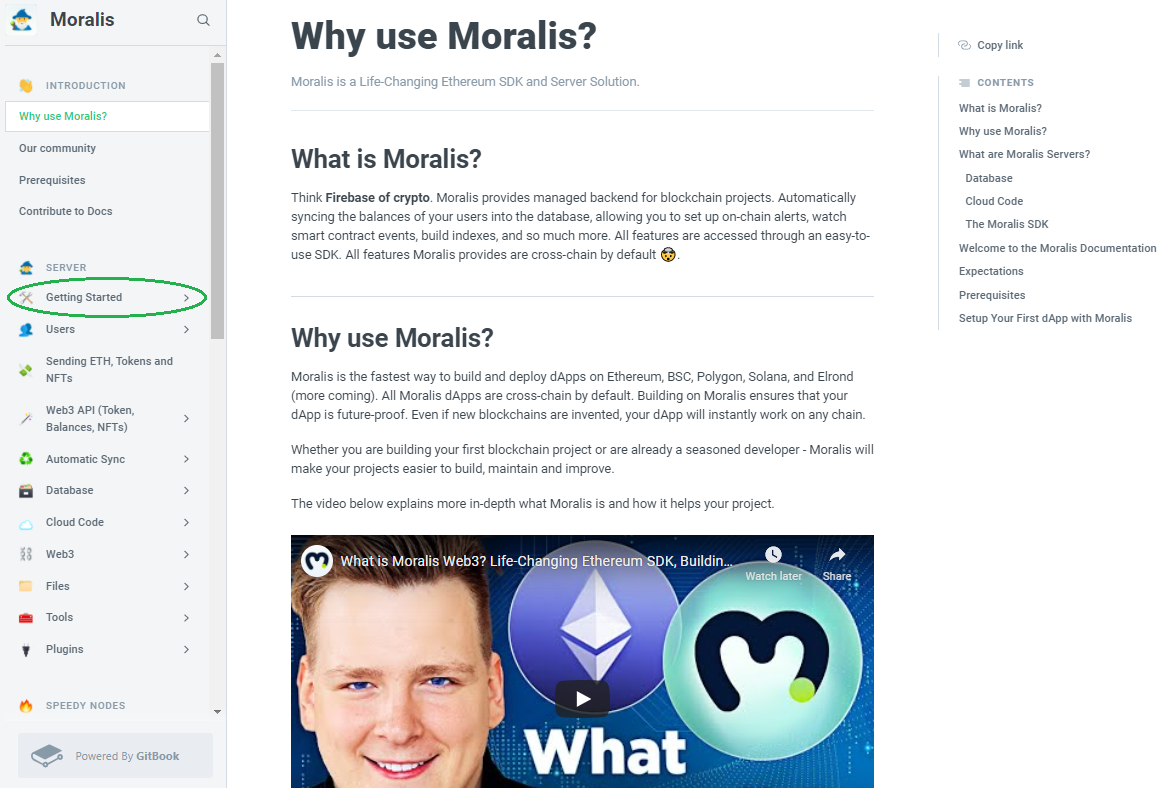
Looking at the image above, you can see the “Getting Started” section in the navigation menu on the left-hand side. This category provides you with all the details you need to build your first dApp, including detailed instructions on how to create a Moralis server, which we’ve already covered above. As such, let’s focus on connecting Moralis’ SDK:
On the next page, you’ll see detailed instructions on how to add Moralis to your web page. Moreover, there’s also HTML boilerplate code that you may use that already includes the scripts, login, and logout buttons. As such, you can simply copy and paste the code into your “index.html” file created inside your code editor (we use Visual Studio Code [VSC]). However, for the purpose of this example project, we will start with plain code. We will then add the necessary elements to get the basic functionality we are after.
Build Your First dApp – Code Walkthrough
As mentioned, we will start with a basic HTML structure:
<html>
  <head>
    <title>Moralis</title>
  </head>

  <body>
    <h1>Moralis Login</h1>

    <button id="login">Login</button>

  </body>
</html>
Next, we need to initialize the SDK. We’ve already done most of the work to cover this part in the “Moralis Setup” section above. However, since we didn’t have our HTML file ready then, it is now time to implement that step. Use Moralis’ documentation and copy the code in the “Initialize the SDK” section under the “Connect the SDK” section:
const serverUrl = "https://xxxxx/server";
const appId = "YOUR_APP_ID";
Moralis.start({ serverUrl, appId });
You must add the lines of code above inside “<script> </script>”. Moreover, make sure to populate the space-holding text with your actual server URL and application ID. Next, we need to add two scripts inside “<head></head>” to activate Moralis and Web3:
<script src="https://cdn.jsdelivr.net/npm/web3@latest/dist/web3.min.js"></script>
<script src="https://unpkg.com/moralis/dist/moralis.js"></script>
All that’s left is to add the “Moralis.authenticate” function, which will add the functionality to the “login” button. Also, we add “onclick=”login()”” to our button. Putting it all together, this is the HTML code that you should now have:
<html>
  <head>
    <title>Moralis</title>
    <script src="https://cdn.jsdelivr.net/npm/web3@latest/dist/web3.min.js"></script>
    <script src="https://unpkg.com/moralis/dist/moralis.js"></script>
  </head>

  <body>
    <h1>Moralis Login</h1>

    <button onclick=”login()” id="login">Login</button>

    <script>
       const serverUrl = "https://xxxxx/server";
       const appId = "YOUR_APP_ID";
       Moralis.start({ serverUrl, appId });

       async function login() {
           Await Moralis.authenticate()
       }

    </script>

  </body>
</html>
Now, run the code to access your dApp. In addition, make sure to have your MetaMask extension ready so that you’ll be able to check the functionality. So, if you’ve followed the steps accordingly, then you should now have a fully functional Web3 application available.
Building Ethereum dApps Using the Moralis Dashboard
We pointed out that we will help you build your first dApp, which would only have authenticating functionality. However, let us now show you the power that becomes available once you authenticate users. Make sure that you run your dApp and use MetaMask to log in before proceeding.
By using Moralis, you also get full access to the Moralis dashboard. This is where your users’ details, such as their token balances and transactions, get stored. Moreover, this is a live database, which means that it is constantly updated in line with the latest blockchain state. With access to all this information, you can easily add a ton of functionality to your dApps.
To access your Moralis dashboard, go to your Moralis admin area and then the “Servers” section. Then click the three dots on the right-hand side next to your server’s name, followed by clicking on the “Dashboard” button:
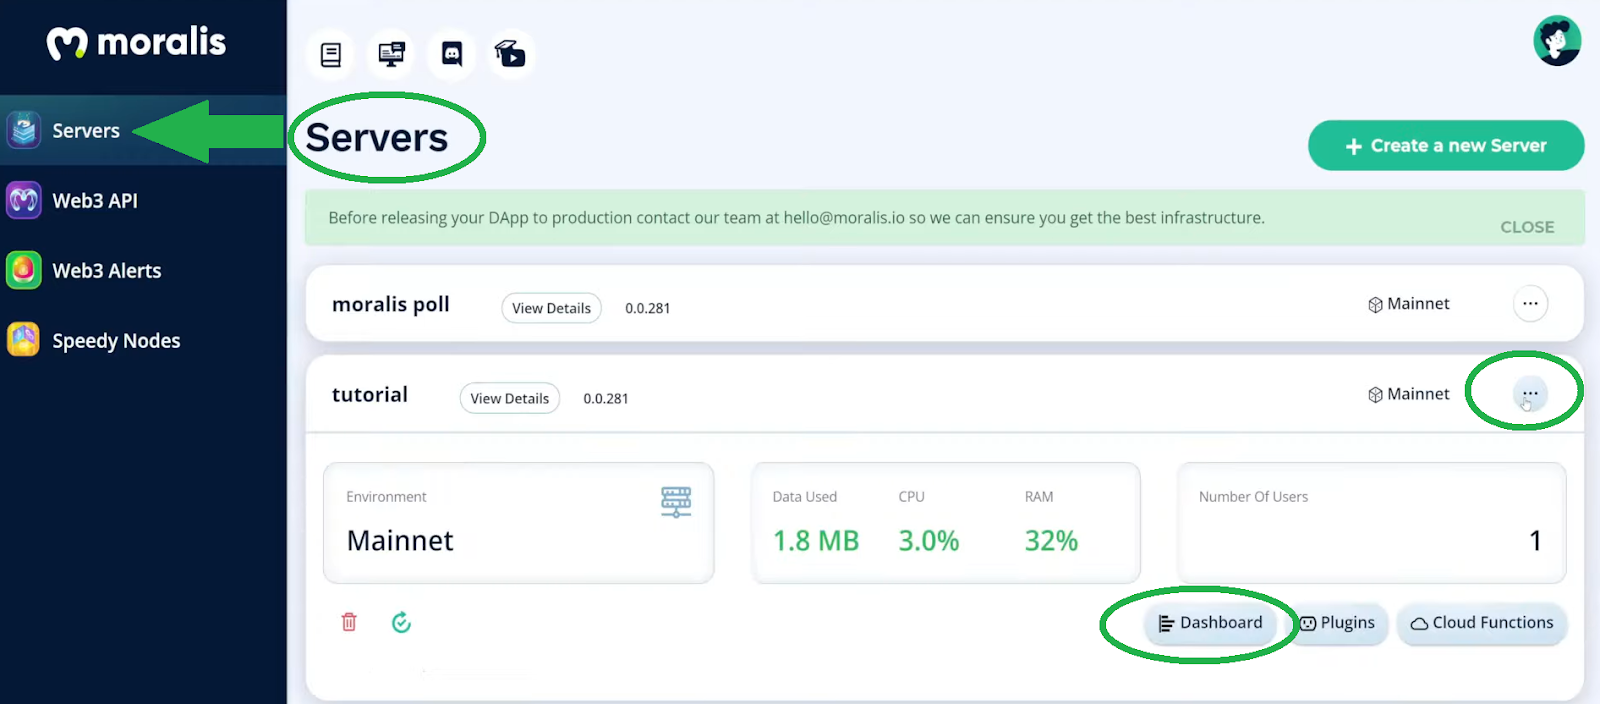
By following the steps above, you will access a Moralis dashboard for your dApp:

Looking at the sections on the left-hand side, you can see that the details for all supported chains (the ones selected when creating your Moralis server) are right there. Moreover, the dashboard automatically adds new options when a user who covers those options logs in. For instance, there are no NFT balances listed in our dashboard yet because there are no NFTs in the wallet we used to log in. However, if a user with NFTs on any of the supported chains were to log in, we’d have those sections available as well.
We hope that you can see the vast range of options that the Moralis dashboard provides you with. In combination with Moralis’ ultimate Web3 API, the latter provides everything you need to build the most advanced Ethereum application in record time.
Build Your First dApp – Ethereum Tutorial – Summary
Who said that building Ethereum dApps is difficult? In the sections above, we proved that you could build your first dApp in a matter of minutes. Sure, we focused on complete basics, yet, it was enough to show you the possibilities that become available once you onboard your users using one simple snippet of code – “Moralis.authenticate”. Moreover, by using Moralis, you get a chance to build cross-chain functional dApps markedly quicker. Thanks to the Moralis server and the Moralis dashboard, you have everything you need to access and work with live on-chain data. Thus, you get to focus on the users’ experience by creating an attractive and appealing UI.
If you are confident in your JavaScript capabilities, then you have what it takes to take on more advanced projects. For instance, you can create a DeFi dashboard, BEP20 tokens, generate NFTs, create an NFT marketplace, or bulk mint NFTs, just to list a few options. Moreover, you may also put your React Native skills to use to create mobile Ethereum dApps. When you combine your frontend development skills with Moralis, building Ethereum dApps becomes a straightforward process. In addition, you can even further simplify the process by using the ultimate Ethereum dApp boilerplate provided by Moralis.
Furthermore, in case you are not JavaScript proficient, we encourage you to take Moralis Academy’s 2021 JavaScript Programming for Blockchain Developers course. That way, you’ll learn this useful programming language and be ready to use it in the most promising industry. Moreover, feel free to explore other high-quality courses available at Moralis Academy.