Minting NFTs (non-fungible tokens) in bulk is an essential feature that developers should know how to do in order to scale their NFTs, such as NFTs using the ERC-1155 token standard. Instead of minting one NFT at a time, batch minting NFTs allows developers to bypass a time-consuming and somewhat expensive process. Therefore, creating multiple NFTs at once would be highly beneficial in some use cases, such as event tickets. Furthermore, there are many other use cases where bulk minting NFTs can be useful, such as NFT games, certifications, etc. Moreover, since NFT collectibles are all the rage right now and growing in popularity among celebrities, athletes, and crypto enthusiasts, most developers want to learn how to bulk mint NFTs. As such, this batch minting guide will equip you with the proper knowledge and tools so you can mint NFTs in bulk quickly and easily.
In case you are new to the crypto realm, the thought of batch minting NFTs alone may seem overwhelming. However, we assure you that bulk minting NFTs is a lot simpler than you may think. Of course, there are several reputable NFT marketplaces, with OpenSea leading the pack, where you can mint NFTs easily. However, options such as OpenSea are rather far from being decentralized, nor do they typically offer a batch minting feature. As such, you need to do some coding to get this done properly and in a decentralized manner. Fortunately, there are powerful tools available to simplify this process as much as possible. Moreover, the premier tool among developers that makes all the difference is Moralis – the ultimate Web3 development platform.

The Basics of How to Bulk Mint NFTs
In this article, we’re going to take on an example project that will show you how to bulk mint NFTs using Moralis and IPFS; however, before we do so, we need to cover some basics to get you up to speed. Knowing what NFTs are, what NFT minting is, what the most popular NFT standards are, and some basics about Moralis will serve you well as you move forward.
- What are NFTs? – Non-fungible tokens, or NFTs, are special kinds of crypto tokens that possess unique features. Essentially, an NFT is a unique and non-interchangeable unit of data stored on a digital ledger.
- What is NFT Minting? – Minting an NFT is the process of executing a transaction that stores the token’s metadata on the blockchain. Moreover, it is the action that creates an NFT. Without minting, you only have digital files and data.
- ERC-721 and ERC-1155 NFT Standards – The ERC-721 token standard is one of the primary standards for NFTs, while the ERC-1155 token standard is a novel multi-token standard (suitable for batch minting).
- What is Moralis? – Moralis is the ultimate Web3 development platform with incorporated cross-chain interoperability. As such, it offers full support for most major chains. Furthermore, Moralis’ SDK includes the most extensive Ethereum API, including an ultimate NFT API. Moreover, with Moralis Speedy Nodes, Moralis also serves as one of the most reliable node providers available to help you overcome all the limitations of RPC nodes. The latter makes it the best Infura for BSC and Infura for Avalanche alternatives. So, if you are serious about learning how to bulk mint NFTs in the quickest and simplest way, make sure to create your free Moralis account today!

How to Bulk Mint NFTs – An Example Project
We believe that the best way of learning something new is by taking action. As such, we invite you to take on the following example project with us. Moving forward, we will bulk mint three NFTs; however, we could have easily done hundreds or even thousands following the same principles. As mentioned previously, we’ll use Moralis to cover most of our backend needs. Moreover, we will use IPFS’s decentralized file storing solution. This will be seamlessly done since Moralis offers full integration with IPFS. In addition, the fact that we can upload folders to IPFS enables us to upload files in bulk (in our case, we’ll upload PNG and JSON files). This also means that all files will have the same hash. Furthermore, it is thanks to this option that we will essentially be able to bulk mint NFTs. Once we have images and metadata files uploaded in a decentralized manner, we will use a smart contract template to batch mint the NFTs. In addition, we’ll also show you how to display those NFTs on OpenSea.
The steps that we need to complete:
- Bulk upload PNG files to IPFS.
- Generate JSON files containing metadata for our NFTs.
- Bulk upload JSON files to IPFS.
- Bulk mint NFTs.
- Display minted NFTs on OpenSea.
Note: We’ll be starting with already generated PNG files. For the purpose of this example project, feel free to use any kind of PNG or JPEG files that are available to you. Moreover, in case you are interested in bulk generating images (the creative part of NFT collectibles), stick around as we will cover how to do that in the near future.
Batch Minting NFTs – Uploading Image Files to IPFS
We’ll be using Visual Studio Code (VSC) to write and edit the code. However, you may use any other code editor according to your preferences. Looking at the image below, we are starting off with a folder that holds one hundred PNG files:
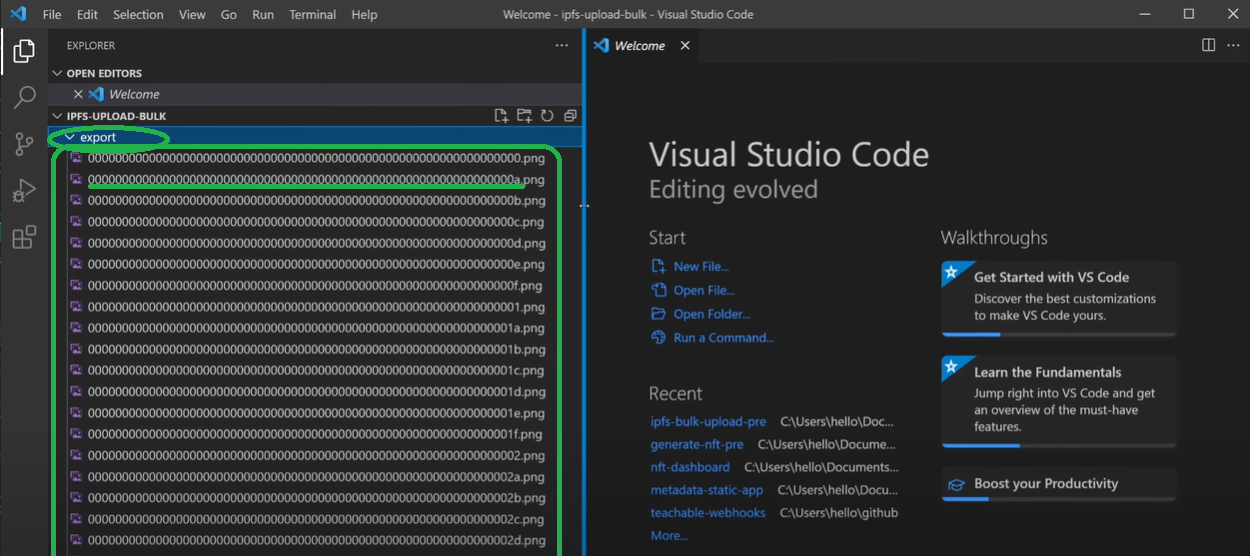
The names of the files contain 64 characters. As far as the file names go, you can use whatever you want. However, we went with 64-character naming because this is the standard for metadata of ERC-1155 NFTs. That way, we will be able to use file names when generating metadata.
In order to bulk upload the images to IPFS, we will create a new “.js” file (“images.js”). However, we must first ensure that our package manager (we use npm) installs all the tools we need. Thus, start by opening the terminal (see the image below). Next, type “npm init” in the command line. Once that is executed, enter “npm install fs”. Then complete this part by typing “npm install axios”.


Batch Minting NFTs – Uploading Image Files to IPFS – Code Walkthrough
Finally, we have everything ready to start writing the code inside our “images.js” file (see the actual code below). At the top of our code, we import the “npm packages” installed above. Moving on, we want our code to look through the images. The code must first read the images from the file to JavaScript. To accomplish this, we also need to have the images assigned to an array (we define the two arrays that we will use in lines three and four). We proceed by using a “for” loop (starting in line five). Within the loop, we ensure that the code will go through the image files and export them properly. This is also where we apply “paddedHex”, which takes care of the 64-character naming mentioned previously.
The last part of the code (starting with “Promise.all”) is where Moralis’ power comes to light. Here, the code needs to upload the images to IPFS. Fortunately, Moralis takes care of the heavy lifting with its endpoint called “upload folder”, which ensures our folder containing images is uploaded to IPFS.
Here is the entire code inside the “images.js” file:
let fs = require("fs");
let axios = require("axios");

let ipfsArray = [];
let promises = [];

for (let i = 0; i < 100; i++) {
    let paddedHex = ("0000000000000000000000000000000000000000000000000000000000000000" + i.toString(16)).substr("-64");

    promises.push(new Promise( (res, rej) => {
        fs.readFile(`${__dirname}/export/${paddedHex}.png`, (err, data) => {
            if(err) rej();
            ipfsArray.push({
                path: `images/${paddedHex}.png`,
                content: data.toString("base64")
            })
            res();
        })
    }))
}
Promise.all(promises).then( () => {
    axios.post("https://deep-index.moralis.io/api/v2/ipfs/uploadFolder",
        ipfsArray,
        {
            headers: {
                "X-API-KEY": '',
                "Content-Type": "application/json",
                "accept": "application/json"
            }
        }
    ).then( (res) => {
        console.log(res.data);
    })
    .catch ( (error) => {
        console.log(error)
    })
})
Moralis Endpoints and Your API Key
Looking at the “Promise.all” part of the code, you can see that you need to use Moralis’ endpoint for IPFS and also insert your API key within the quotation marks after “X-API-KEY”.
Here are the steps you need to follow to access Moralis’ endpoints:
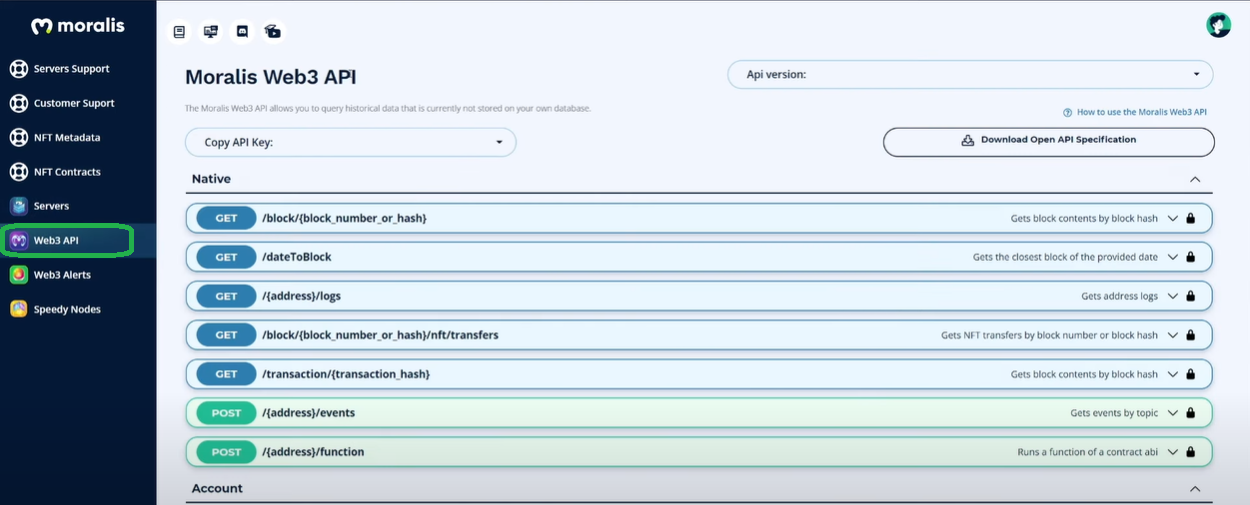
- Inside your Moralis’ admin panel, click the “Web3 API” option in the menu on the left-hand side:
- Scroll down until you get to the “Storage” section. At the top, you should see the “ipfs/uploadFolder” endpoint. To view the details, click on it:


Note: You can find more details regarding endpoints inside Moralis’ documentation.
Here are the steps you need to follow to obtain your API key:
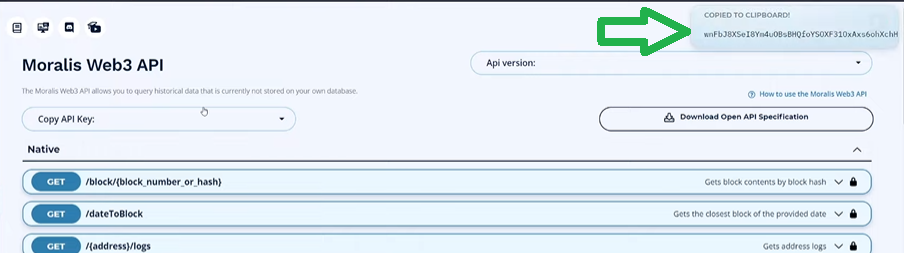
- Again, visit the “Web3 API” tab Inside your Moralis admin panel:

- First, click on “Copy API Key” and then “Default”. This will automatically copy your API key to your clipboard (a message in the top-right corner will confirm that).
Note: To obtain your API key, you’ll need to create your free Moralis account. If you’ve already done that, log in to get your API key.
Once you have copied your API key, insert it in the code above and save the file. Now it’s time to run the code by entering “node image.js” in the terminal:

In return, you will get paths for all of your images that have just been uploaded to IPFS:

By entering any of the paths into a browser, you should now be able to see the image related to that particular path. Furthermore, if you use a Web3 browser such as “Brave”, you may skip the “https://ipfs.moralis.io:2053/ipfs/” part:

Batch Minting NFTs – Generating and Uploading Metadata Files
We will cover this part similar to what we did for the images. We create another “.js” file (“metadata.js”). Due to many similarities, we can copy and paste the code from the “images.js” file. The part of the code that will take care of the upload to IPFS is essentially the same. We apply the main changes inside the “for” loop, where we must now add some details for our ERC-1155 tokens (image, name, and description). For the name and description, you can use whatever you want. However, to access the image that we uploaded previously, we need to use the matching hash (fortunately, it is the same for all images).
Here’s the entire code inside the “metadata.js” file:
let fs = require("fs");
let axios = require("axios");

let ipfsArray = [];

for (let i = 0; i < 100; i++) {
    let paddedHex = ("0000000000000000000000000000000000000000000000000000000000000000" + i.toString(16)).substr("-64");
    ipfsArray.push({
        path: `metadata/${paddedHex}.json`,
        content: {
            image: `ipfs://QmX1xfbKoUEHtnoiVY9uEtH3X6YuJx2yzPg6ggp3zrFUzz/images/${paddedHex}.png`,
            name: `My Youtube test NFT #${i}`,
            description: "Awesome NFT for my youtube video"
        }
    })
}
axios.post("https://deep-index.moralis.io/api/v2/ipfs/uploadFolder",
    ipfsArray,
    {
        headers: {
            "X-API-KEY": 'wnFbJ8XSeI8Ym4uOBsBHQfoYSOXF31OxAxs6ohXchHo7D7qvoJ66Qetxll5jrA46',
            "Content-Type": "application/json",
            "accept": "application/json"
        }
    }
).then( (res) => {
    console.log(res.data);
})
.catch ( (error) => {
    console.log(error)
})
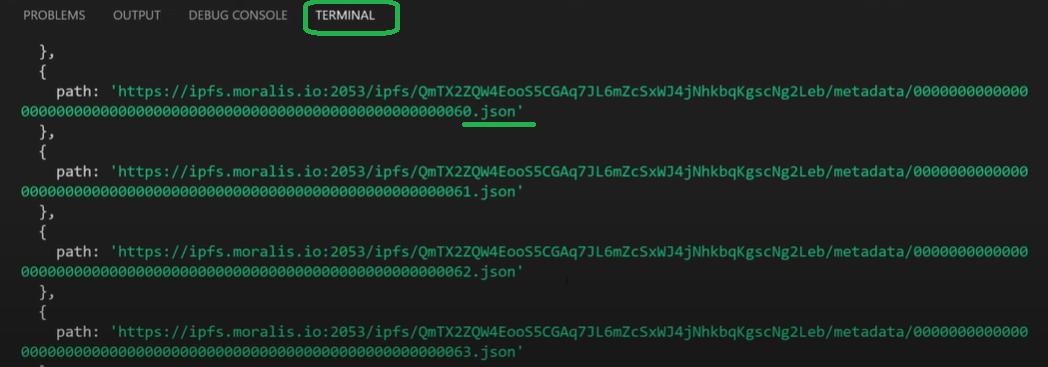
Now we need to run the code to execute the bulk upload to IPFS. Start by typing “node metadata.js” in the terminal’s command line. Now we can see that we get JSON files instead of PNG files:
We now have access to an array of IPFS paths containing the following details:

You can view the above details via any of the metadata paths.
Due to the bulk upload, they all have the same hash, which is one of the requirements of the ERC-1155 token standard. You’re about to see this used below in the actual “batch minting NFTs” step.
How to Bulk Mint NFTs
Everything we’ve done up until this point was just a preparation that will enable us to bulk mint NFTs. Now we have images and metadata that we’ll use when bulk minting our NFTs using the files now saved in a decentralized fashion on IPFS.
For the actual minting process, we’ll use Remix. Moreover, we’ll skip the creation of a smart contract (which we need to mint NFTs) by getting a smart contract template on OpenZeppelin. By using a standard ERC-1155 smart contract, we need to apply only a couple of minor tweaks. As shown below, we get to remove the lines that are crossed with the red lines, while we must apply changes to the parts marked with yellow color. The part above the yellow line must be replaced by our hash and “/metadata”. Moreover, for the part in the yellow rounded square, we need to add an additional two instances in order to mint three NFTs. If we were to mint all one hundred NFTs, we could add a loop to cover them all instead of manually adding one hundred instances.

This is what we are left with:

To execute the transaction (complete the minting part), you need to click the “Deploy” button. This will prompt your MetaMask, which you will use to confirm the transaction. You do this by clicking the “Confirm” button:

Also, note that we went with the Rinkeby testnet, but you may choose other options. However, be mindful of which option you choose because you’ll need to select accordingly to display your NFTs on OpenSea. Once your NFTs are minted, you will see the address of the NFTs displayed under “Deployed Contracts” at the bottom of Remix’s “Deploy & Run Transactions” navigation tab. Click the copy icon to copy the address:

How to Bulk Mint NFTs – Display NFTs on OpenSea
Since OpenSea is still the most popular NFT marketplace, it makes sense to display and then list your NFTs there. You do this by visiting “opensea.io/get-listed/”. Once there, you need to select the phase of our project (since we minted NFTs on the testnet, we select the “Live on a testnet” option):

Next, you want to select the testnet that we used for minting (Rinkeby in our case), enter our ERC-1155 contract address (paste what we’ve copied from Remix), and click the “Submit” button:

It can sometimes take a while for OpenSea to process your request. However, if you’ve followed the above steps properly, you’ll now be able to view the three minted NFTs on your OpenSea dashboard.
How to Bulk Mint NFTs – Batch Minting Guide – Summary
You should now know all the basics regarding batch minting NFTs. Moreover, if you’ve actually taken on the example project, you now know how to bulk mint NFTs with minimal effort. All-in-all, once you have the images (or other types of files) ready in a folder, you essentially need to complete these steps:
- Bulk upload image files to IPFS.
- Generate JSON files containing metadata for our NFTs.
- Bulk upload JSON files to IPFS.
- Bulk mint NFTs.
- Display minted NFTs on OpenSea.
Using VSC, Moralis, MetaMask, Remix, and OpenSea, you get to complete the steps above without breaking a sweat.
Moreover, in case you are looking for additional inspiration or guidance on your blockchain development path, we recommend checking out Moralis’ blog and Moralis’ YouTube channel. On both of these outlets, you will be able to find a ton of quality content, including countless example projects. Furthermore, in case you are a complete beginner but would like to become a successful blockchain developer, we encourage you to enroll in one of the high-quality courses at Moralis Academy.

