Ethereum Boilerplate GitHub w/ Full Code and Info – https://github.com/ethereum-boilerplate/ethereum-boilerplate
Ethereum Boilerplate w/ Instructions on Getting Started Quickly – https://ethereumboilerplate.com/
With the surge of Ethereum-based dApps (decentralized applications), many programmers are now realizing the advantages of becoming a blockchain developer. Specifically, learning Ethereum development for building Ethereum dApp is quickly becoming a top skill among programmers. However, without the proper tools, creating Web3 applications on Ethereum is a time-consuming and resource-intensive process. This is why programmers are flocking to Moralis and its plug-and-play functionality when building Ethereum dApps. As such, Moralis offers an Ethereum dApp boilerplate that makes the development process easier than ever. So, in this full Ethereum React boilerplate tutorial, we’ll access React components and utilize the Ethereum dApp boilerplate combined with Moralis so you can develop Web3 applications on Ethereum markedly quicker!
We at Moralis spent quite some time searching for a solid Ethereum dApp boilerplate just to find out that there was none. As such, we decided to roll up our sleeves and create the greatest and most comprehensive Ethereum dApp boilerplate. Of course, we decided to make it available for free to everyone at GitHub. Moreover, we will cover all the details of this lightweight modular Ethereum dApp boilerplate herein. However, if you are eager to start using this ultimate shortcut, getting started only requires four simple steps. Nonetheless, let us also point out that this ultimate Ethereum dApp boilerplate works with any EVM system.
Furthermore, to help out as many blockchain developers as possible, we encourage you to share your comments and any ideas for improvement. Also, don’t forget to leave a star on our GitHub if you appreciate our contribution.

The Ultimate Ethereum dApp Boilerplate
What would you expect from the ultimate Ethereum dApp boilerplate? Would you want it to cover all your backend development needs fully? You got it! Would you want it to offer a crypto wallet enabling Ethereum authentication for your dApp? You got it! Are you interested in providing your dApp’s users with a DEX (decentralized exchange)? That is also covered! Of course, token balances, NFT balances, and transaction history are also there. You can also easily generate NFTs and much more! Moreover, it offers the simplest ways for users to choose among Ethereum, Avalanche, Binance Smart Chain, and Polygon (other chains to be added).
Even though many other dApps and projects often offer these features, it takes them weeks, if not months, to finalize and implement the functionalities mentioned above. Moreover, projects quickly realize the limitations of RPC nodes as they tend to take the outdated approach of building directly on top of RPC nodes. That results in a prolonged process when building the infrastructure to cover the above-mentioned basic features, making the Web3 application’s users leave the dApp for the competition as the functionalities are not available in time. However, using Moralis’ Ethereum dApp boilerplate shortcut enables you to deploy dApps in record time. As such, you can present your functionalities to your users and get instant feedback.

Ethereum dApp Boilerplate – The Components
We included as many components as possible and will continue to add new ones. As a matter of fact, this is just the beginning. Yet, there are already more than ten components included. These components are the following:
- Address Input: <AddressInput />
- Address: <Address />
- Chains: <Chains />
- Coin Price: <CoinPrice />
- ERC-20 Balance: <ERC20Balance />
- ERC-20 Transfers: <ERC20Transfers />
- DEX: <DEX />
- Wallet: <Wallet />
- Blockie: <Blockie />
- Native Balance: <NativeBalance />
- Contract: <Contract />
Moreover, all components of the easiest-to-use Ethereum dApp boilerplate include finished UI (user interface) elements. You can easily access these React components inside the “src/components” folder. You can use them anywhere in your dApp. Of course, many components include different parameters, such as “chain”, “address”, “size”, etc. In the upcoming sub-section, we cover the most commonly used components in more detail.
Ethereum dApp Boilerplate Components – Address Input
This particular component is beneficial since it enables you to capture users’ addresses anywhere in your dApp. The “<AddressInput />” component also enables you to display the blockie avatar for the entered address.

Moreover, after all of the 42 characters of a particular wallet address have been entered, it automatically freezes the input field and sets the entered address:

In case users want to edit the address, they click the red cross, and they will then get the chance to edit the address:

Furthermore, the “<AddressInput />”component comes with several options, including autofocus and placeholder. Here is the example code:
const [address, setAddress] = useState();

<AddressInput autoFocus placeholder="Input your Address" onChange={setReceiver} />

Aside from “input address”, this advanced Ethereum dApp boilerplate also includes the “<Address />” component, which enables you to display an Ethereum address with a blockie avatar. Moreover, it includes an optional “copyable” icon displaying, blockie avatar displaying, and text size (how many characters to be displayed) adjustment. Here are some examples of the “<Address />” code:
<Address />
<Address avatar />
<Address avatar copyable />
<Address avatar copyable size="4"  />
Ethereum dApp Boilerplate Components – Blockchains
Supporting multiple chains is extremely important and offering a user-friendly way to switch among supported chains even more so. This is where the “<Chains />” component comes into play.

Looking at the image above, you can see that this option is straightforward and neat. It is basically an active network switch. By default, it supports Ethereum, Avalanche, Polygon, and BSC. In addition, it works with networks that have previously been added to the injected wallet. However, it is also straightforward to programmatically add a new network (see the “Web3 Provider” section in Moralis’ documentation for more info). Here’s an example of the “<Chains />” code:
<Chains polygon eth bsc avalanche />
Ethereum dApp Boilerplate Components – Coin Price
The “<CoinPrice />” component serves to display the price (in USD and in the native token [switch by clicking on it]) of a specified token by using Moralis’ Web3 API, which means it doesn’t require an active Web3 provider.

Furthermore, “<CoinPrice />” includes several options (some are required and some are optional):
- Address (required) – Token contract address must be entered for the token’s price to be displayed.
- Chain (optional) – In case the token is deployed on a chain other than Ethereum, we must enter that chain since the default option is ETH.
- Image (optional) – If we want to display a token’s logo, a local path to the image or link to the token logo must be provided.
- Size (optional) – We can set the logo’s size.
Here is an example of the “<CoinPrice />” code:
<CoinPrice address=”0x1…3″ chain=”eth” image=”https://img.png” size=”40px” />
Ethereum dApp Boilerplate Components – ERC-20 Balances and Transfers
The majority of tokens currently available are ERC-20 tokens. Therefore, having a simple option to display all ERC-20 balances to your users is extremely useful. This is where the “<ERC20Balance />” component comes into play. This display option is also paginated for the best user experience and displays token balances in a neat way.

Moreover, just as with “<CoinPrice />”, the “<ERC20Balance />” component uses Moralis’ Web3 API, which means it doesn’t require an active Web3 provider. In addition, this component lets you define the balance of ERC-20 tokens on which chain you want to be displayed. If not defined, it displays the token on the network that a user’s wallet is connected to. Here is the example code for “<ERC20Balance />”:
<ERC20Balance chain=”polygon” />
Furthermore, the Ethereum dApp boilerplate also lets you display ERC-20 token transactions. For this purpose, it uses the “<ERC20Transfers />” component. Again, the display is paginated as well.

Moreover, just as with “<ERC20Balance />”, you also have an option to define a particular chain. If not defined, the connected wallet’s network is considered. Here’s the example code:
<ERC20Transfers chain=”polygon” />
Ethereum dApp Boilerplate Components – Wallet
Imagine if you could add a wallet to your dApp with a single term. Well, the “<Wallet />” component does precisely that. This really shows you the power of the best Ethereum dApp boilerplate and the simplicity that is available when you decide to use it.
The wallet includes the field to enter an address to which users want to send assets, the field to enter the amount, and the “Transfer” button to execute transactions. Of course, all these options are available after users select a particular asset from their wallets.

Ethereum dApp Boilerplate Components – DEX
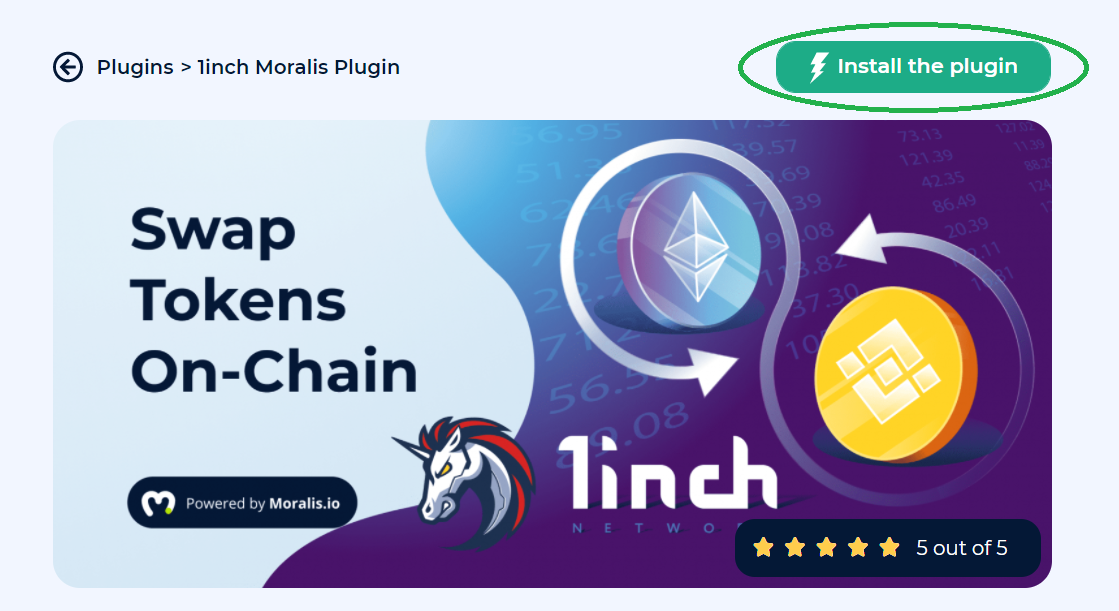
All of the components presented above are automatically fully functional (after completing the “Quick Start” steps at GitHub). However, in order to make the “<DEX />” component work, you need to install the 1inch Plugin from Moralis’ Plugins to program token swaps. Fortunately, this can be done with just a few clicks inside your Moralis admin area. First, you need to create a server (detailed instruction provided below). Then, click the “Plugins” option on your Moralis server. On the next step, click the “Go to Plugin Store!” button.

Then you need to install the 1inch plugin. First, select that plugin by clicking the “Read More” button on Moralis’ 1inch Plugin:

In the next step, you’ll have an option to install the plugin:
Once you’ve completed the installation (you should be able to see the 1inch plugin listed when you click the “Plugins” button of your server, as shown below), you’ll be able to use the “<DEX />” component.

Ethereum dApp Boilerplate – Hooks
Hooks are another significant aspect of the ultimate Ethereum dApp boilerplate. Unlike components, which include UI elements, hooks provide you with short snippets of code that give you access to on-chain data. This means that you can use a hook inside your JavaScript code to fetch the data and add the frontend code to make that hook deliver whatever you want. Essentially, you use a specific hook to build your own component around it.
Here are the hooks that Moralis’ Ethereum dApp boilerplate includes:
- useAPIContract()
- useWeb3Contract()
- useERC20Balance()
- useERC20Transfers()
- useNativeBalance()
- useNativeTransactions()
- useNFTBalance()
- useNFTTransfers()
- useNFTTransfers()
- useIPFS()
- useChain()
- useTokenPrice()
- useInchDex()
Compared to components, hooks require more coding; however, they give you more flexibility to create the kind of UI you want. As far as the functionality goes, you achieve the same results with the hooks as you do with the components.
To better understand hooks and how to use them, we recommend checking out Moralis’ documentation. Since we’ve spent a lot of resources to ensure that we offer developers one of the best and neatest documentations in the industry, you’ll gain a lot of value by taking a closer look.
How to Install Ethereum dApp Boilerplate
If you want to use the best Ethereum dApp boilerplate, you need to follow these simple steps:
- Clone or fork the “ethereum-boilerplate” depository using “git clone https://github.com/ethereum-boilerplate/ethereum-boilerplate.git”.
- Install all dependencies:
cd ethereum-boilerplate
yarn install
- Provide your “appId” and “serverUrl” from your Moralis server (details available in the section below) to “<MoralisProvider>” in a “src/index.js” file:
<MoralisProvider appId={APP_ID} serverUrl={SERVER_URL}>
  <App />
</MoralisProvider>
- Run your app using “yarn start”.
Note: Instead of using “yarn”, you may also use the “npm package manager”.
Moralis Setup – Make Full Use of the Ethereum dApp Boilerplate
These are the steps you need to complete to obtain a Moralis server’s URL and application ID:
- Create Your Moralis Account – In case you don’t have a Moralis account yet, make sure to create one now. Follow the link above, enter your email address, and create your password. To complete the process, confirm your email address (you’ll receive an email with a confirmation link). If you already have an active Moralis account, just log in.
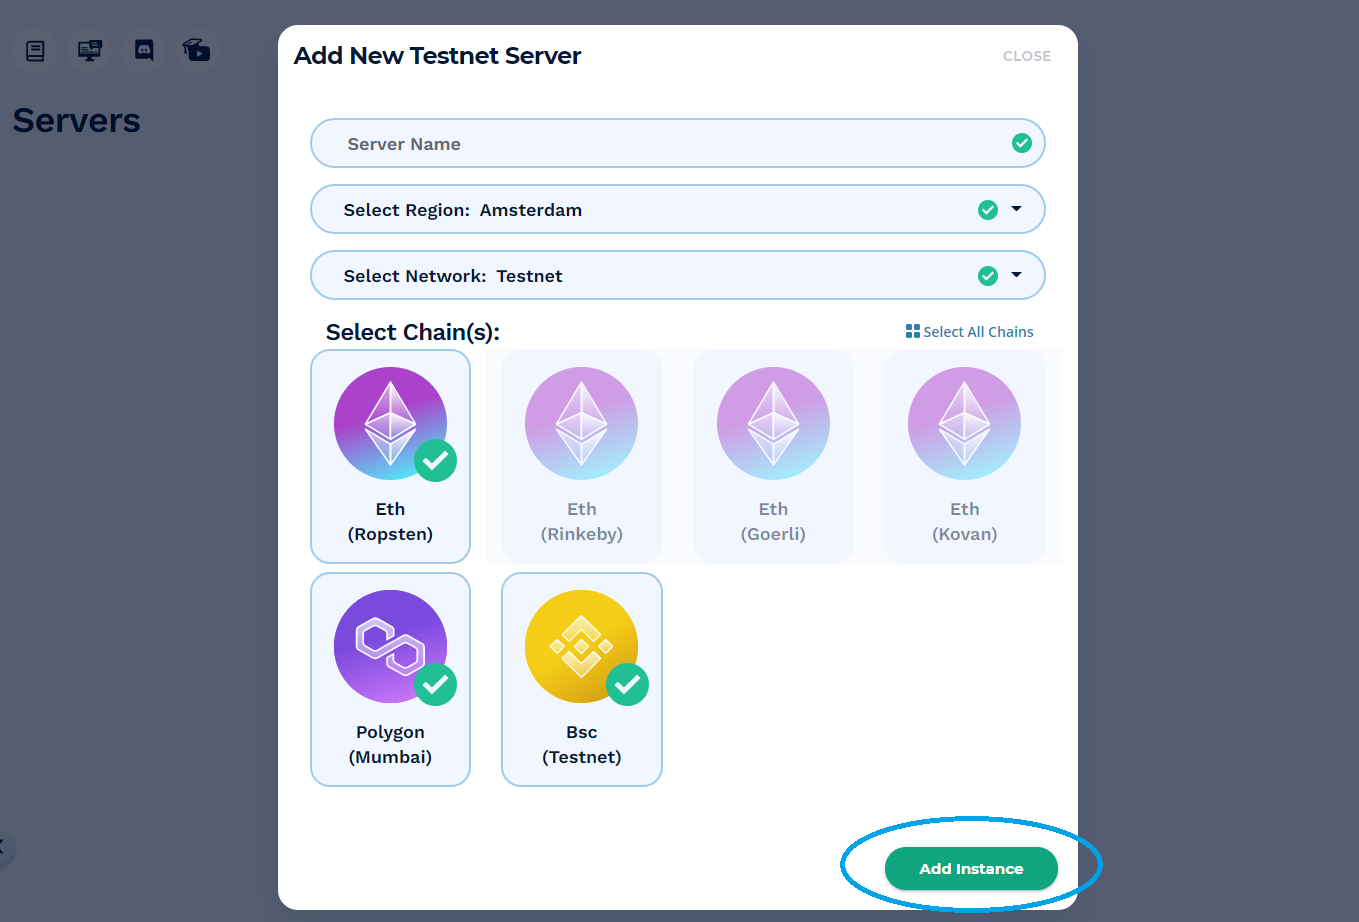
- Create a New Server – Inside your Moralis admin area, create a new server. Click the “+ Create a new Server” button in the top-right corner. From the drop-down menu that appears, select the kind of network type that best suits your needs (see the image below). We recommend starting with the “Testnet Server” option.

Next, you need to enter the required server details, including server name (it can be anything you want), select region, network, chain(s) (you can select one or multiple options), and click “Add Instance”.
- Access Server Details – After creating a server, you can finally obtain the server details. Just click the “View Details” button next to your server name. A pop-up window will appear containing all the information (see the image below). In case you’ve used Moralis before, you may use one of your existing servers.

- Initialize Moralis – Now populate your “.js” file with the Moralis server details (application ID and server URL). That way, you obtain the required backend functionality:

Note: Do not use the server details from the image above. Instead, make sure to use the details of your particular server.
If you prefer watching a video, feel free to watch the following video as one of Moralis’ experts explains the details of the Ethereum dApp boilerplate:
Ethereum dApp Boilerplate – Full Ethereum React Boilerplate Tutorial – Summary
By using the ultimate Ethereum dApp boilerplate presented above, you get to implement the most common dApp functionalities to your Web3 applications with ease. The React boilerplate components offer you the quickest solution as they already come with excellent UI elements. On the other hand, you may use the Ethereum dApp boilerplate hooks to use short snippets of code covering the backend while you write the code that will take care of the UI. Furthermore, you can get started in four simple steps; all-in-all, the key to successfully setting things up is to obtain your Moralis server URL and application ID. The latter provides you with the full functionality of the Ethereum dApp boilerplate and the entire Moralis SDK. Furthermore, we’re excited to announce that we’re already working on getting an Ethereum Native React boilerplate ready that will enable you to create mobile dApps with the same ease and speed.
In case you want to learn how to best utilize Moralis’ powerful tools, we strongly recommend you take on a couple of example projects that we cover in various articles on Moralis’ blog and Moralis’ YouTube channel. For instance, you can create an NFT marketplace, bulk mint NFTs, explore both ERC721 and ERC1155, learn to upload folders to IPFS, or take on other exciting quests to master the Ethereum API.

