To build a competitive dApp today, those developing dApps simply must be able to swap tokens. Users are swapping these tokens on various DeFi (decentralized finance) platforms. Therefore, it should be of great interest for dApp developers to implement a DEX aggregator that allows users to swap tokens on their platform. Although many might think that implementing a crypto swapping functionality to their dApp seems like a time-consuming process, you can now add token swaps to any Web3 application in minutes? It’s all possible with Moralis’ 1inch plugin, in which you can program token swaps to any Web3 application easily and quickly. If you like the sound of this, read on and learn how to program token swaps with a 1inch plugin from Moralis!
Whether you are an experienced dApp developer looking to speed up your work, a frontend programmer looking for a tool to cover the backend challenges of your Web3 apps, or a complete beginner eager to learn about creating incredible dApps, you came to the right place. By using the ultimate Web3 development platform, Moralis, you’ll gain an extra edge over competitors and save a lot of time that you’d otherwise waste on backend programming. Instead of wasting time and resources for a long development process, you can use single lines of code provided by Moralis to get the job done quickly.
Moreover, to teach you how to program token swaps, we’ll use the power of Moralis and its plugin functionality. As such, make sure to create your free account today and follow along!
How to Program Token Swaps – The Basics
Before we move on to the actual steps of the process that will show you how to program token swaps, we need to get you up to speed. In case you’re not new to the crypto sphere and know all the basics that we’re about to cover, feel free to skip over the following subsections and dive right into the core of this article.
Coins, Native Tokens, and Tokens
Since there is a lot of confusion and non-consistency related to the “coins”, “native tokens”, and “tokens” terms, we want to address that first. When it comes to cryptocurrencies, coins and native tokens mean the same thing. These are cryptocurrencies that are native to a particular chain. Some examples of that would be ETH for Ethereum, ADA for Cardano, MATIC for Polygon, DOT for Polkadot, SOL for Solana, BNB for Binance, etc. However, native tokens are in the minority.
The majority of cryptocurrencies out there are, in fact, built on top of specific chains or networks (as those mentioned above). However, they are not coins or native tokens. Instead, they are called tokens. Moreover, according to CoinMarketCap, there are over six thousand cryptocurrencies out there, with new tokens and coins emerging daily. The most popular and the most common tokens are the ERC-20 tokens, where ERC-20 is a standard that the Ethereum chain offers and is used by the tokens built on top of it. By essentially using a fork of the Ethereum chain, the BEP-20 tokens are another popular type of tokens. The BEP-20 tokens are built on Binance Smart Chain (BSC), where BEP-20 is the standard set in place for that purpose.
In case you want to learn how easy it is to create either ERC-20 tokens or BSC tokens with the help of Moralis, make sure to check out our “How to Create Your Own ERC-20 Token in 10 Minutes” and “How to Create a BSC Token in 5 Steps” guides.
What are Token Swaps?
Before we focus on how to program token swaps with the 1inch plugin, we need to make sure you know what token swaps are. As it turns out, most people know what crypto exchanges are; however, they’re not really sure what token swaps are.
Essentially, swaps are simplified exchanges (in most cases, an actual exchange does the buy/sell that must take part for a swap to be successful on the backend). While the average user may be overwhelmed by an exchange interface and all the options that come with it, a swap is surely something that the average user could easily adopt.
Commonly, swaps enable you to exchange supported coins and tokens quickly and in a user-friendly manner, without any of the advanced features that exchanges offer. Moreover, swaps normally have the following components (those visible to users):
- A drop-down menu, from which you select a coin/token that you want to swap (enter with).
- A drop-down menu, from which you select a coin/token that you want to swap your initial coin/token for (end up with).
- A field where you enter the amount of the token you are swapping.
- A field where the amount of expected tokens that you are swapping into is displayed.
- A button that executes or confirms the swap.
Unlike exchanges where you can use limit buys, with swaps, you can only go with the market buy (buying/selling at a current price). As such, there is normally a slightly higher transaction fee related to every swap. The amount of that fee depends on the chain being used, its current congestion, and whether or not the swap owners want to take an additional fee as well.

How to Program Token Swaps – Why Add a Token Swap to Your dApp?
Since it is always good to have a strong “why” before you do anything in life, we want to tell you why adding a token swap is a bright idea. With that in mind, you’ll be further motivated to use the instructions that will tell you how to program token swaps with ease.
As you go about creating Web3 applications, the chances are that your project will include some sort of token. If that’s the case, you surely don’t want users to leave your dApp and move on to other platforms or swaps to exchange tokens. Instead, why not offer users the option of exchanging a wide range of tokens right there on your platform? That way, you ensure that they spend time where you need them to and at the same time gain extra points for user-friendliness (people like having things at hand).
Unless your platform is the next big thing, your marketing budget will really appreciate the increase of your users’ retention time instead of losing users while they go off to exchange tokens elsewhere.
Moreover, in case your project includes its own token, you will not have to rely solely on other platforms but will be able to let users exchange other coins/tokens for your token right there on the spot.

In case you haven’t created your Moralis account yet, make sure to do so now. That way, you’ll be ready to follow the steps provided in the next section easily. As such, you’ll be able to use the full power of Moralis’ SDK to your advantage and properly learn how to program token swaps easily.
How to Program Token Swaps Fast and Easily
In this section, we’ll take on a simple example project that will show you how to program token swaps with the 1inch plugin provided by Moralis. We’ll break things down into simple steps, so you can implement them yourself properly.
The essence of adding a token swap to your dApp lies in a single line of code:

We told you it was simple. With this simplification, everyone can build their own financial application. Whether you are building a crypto wallet or a blockchain game, you can easily enable your users to swap assets without them leaving your platform. Do you see the power of this?
How to Program Token Swaps – An Example Project
The example swap that we’ll build will be extremely basic. It will offer users to swap ETH to 1INCH, and it will look like this:
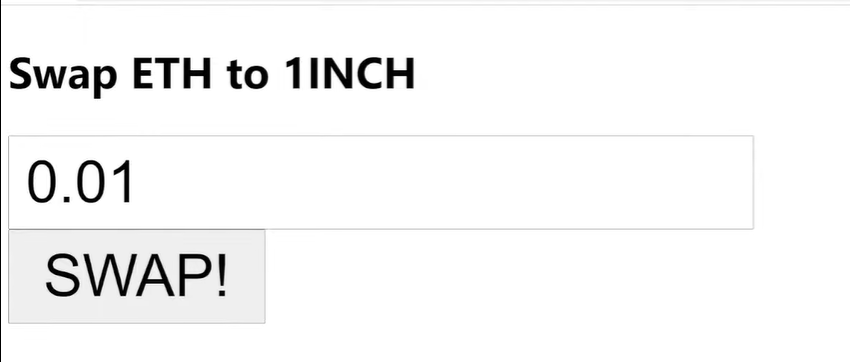
To expand its functionality and make it more appealing to the eye, see this as your next project.
How to Program Token Swaps – Step 1: Server Setup
So, how do we go about creating a token swap using Moralis and the 1inch plugin? You start by logging in to your Moralis account and creating a server. Inside your account, the “Servers” tab is on the top-left side. In case it’s not selected already, click it. Since you are most likely working with a new account, no servers will be displayed (unlike in the image below). Next, click the “+ Create a new Server” button in the top-right corner and select one of the three options from the drop-down menu that appears (you may go with the “Mainnet Server”).

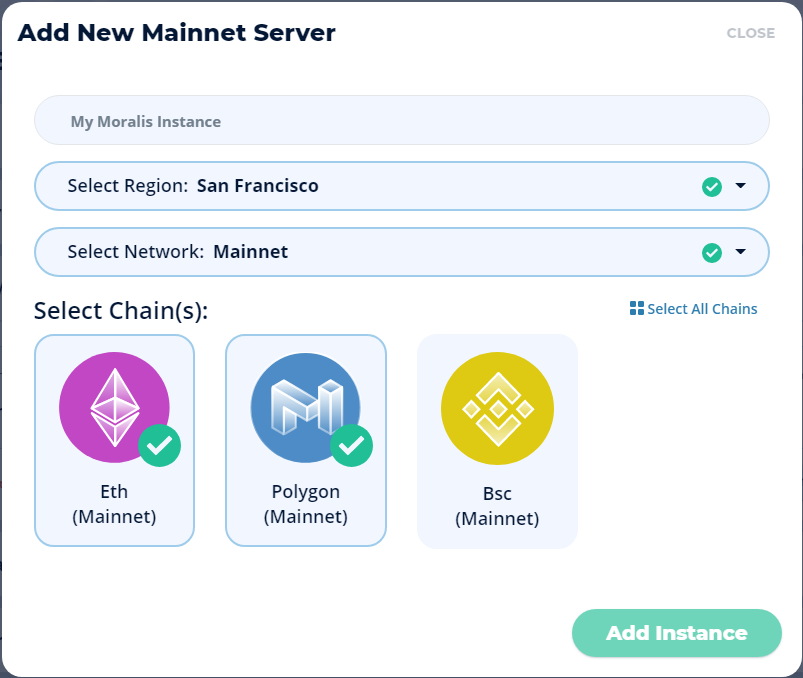
In the pop-up window that appears, you’ll need to name your server, select your region, select the chain (network) of your interest, and click the “Add Instance” button (see the image below). In case you need additional help with this step, check out Moralis’ quick start guide.
How to Program Token Swaps – Step 2: Plugin Installation
The next step is to add the 1inch plugin to your server. To do so, just click the link to the 1inch plugin and then click the “Install the plugin” button. Again, in case you need more assistance, please take a look at the “Install and Remove Plugins” section of the Moralis documentation.
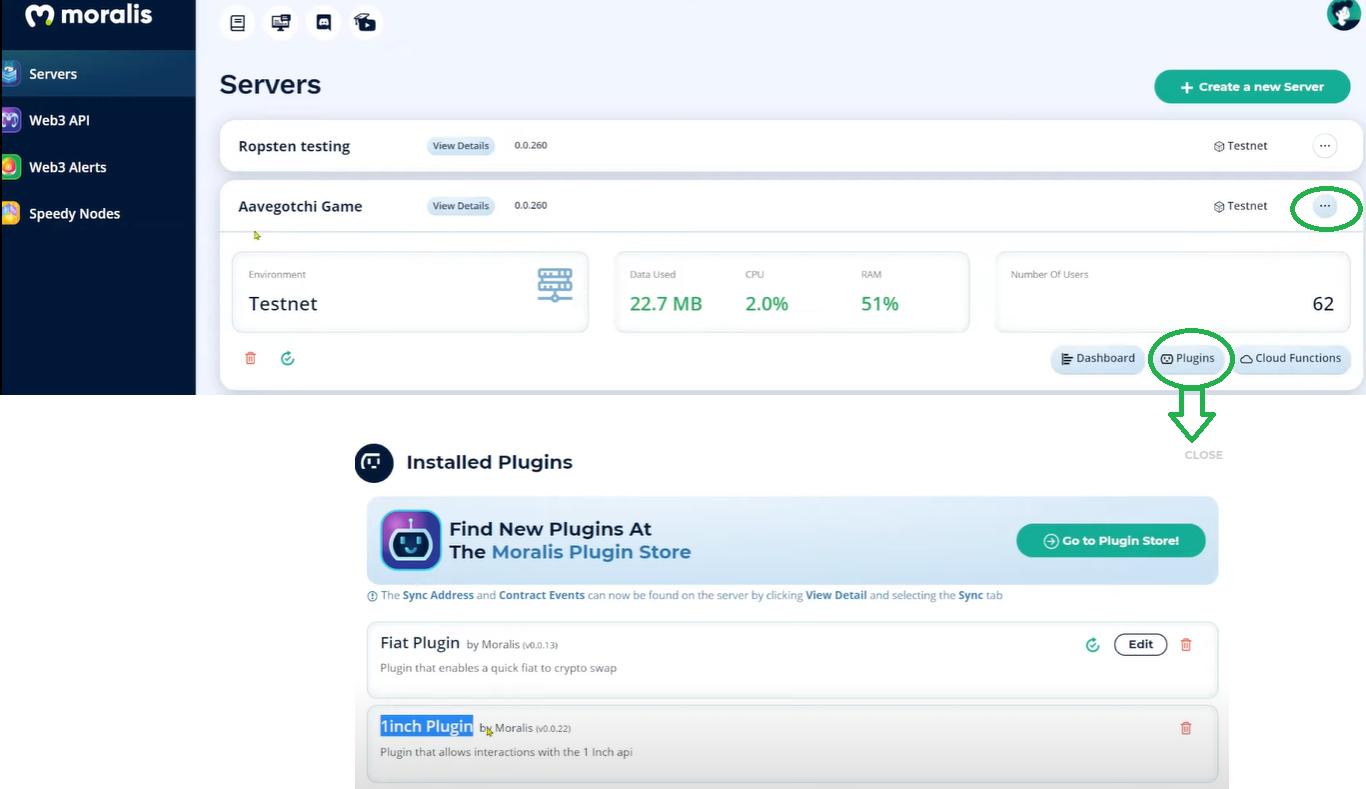
Once you install the plugin to your server, you should be able to view it as displayed below. To get to that window, click the three horizontal dots next to your server name and then click the “Plugins” button.
You might have heard of 1inch before. It’s a reputable smart contract on the Ethereum blockchain that facilitates various on-chain trades and executes them in the best way possible.
How to Program Token Swaps – Step 3: Coding
We’ve finally arrived at the coding part of our example project. Here, you’ll see the true power of Moralis. In this section, we’ll only provide screenshots of specific lines of code. However, if you want to access the comprehensive code, it’s available for you on GitHub. Now, let’s start by initializing the plugins:

Then we add a line of code that will load the 1inch plugin:

Furthermore, we need to do some initialization:

Finally, to create the actual swap for our simple case using the code below, you can simply use the following code:
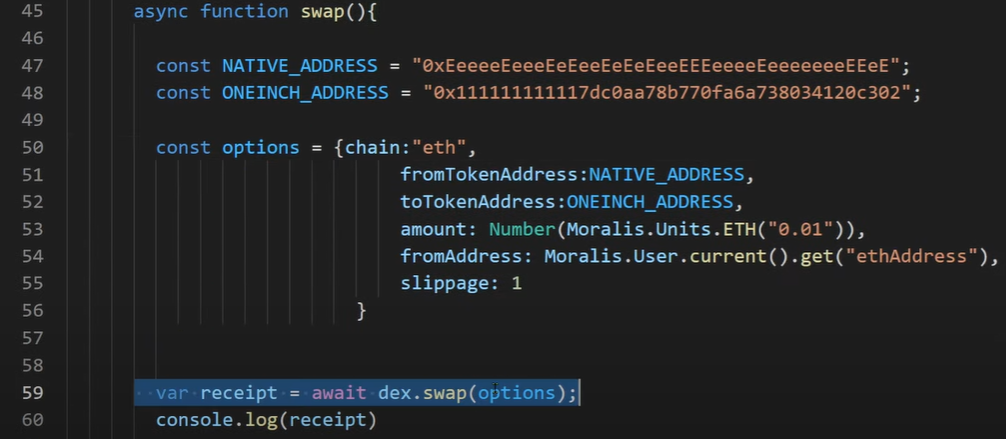
Please, keep in mind that in order to achieve maximum simplicity, we’ve actually hardcoded all the details for this example. However, you can use the same principles to create a more advanced swap, offering users more options.
Looking at the code above, we can see that we’ve specified the Ethereum chain in line 50. In lines 51 and 52, we specified which tokens/coins we wanted to sell and which tokens/coins we wanted to buy. In line 53, we specify the amount of the initial token we want to sell. Furthermore, we used line 54 to specify from which address we are selling; in our case, we’re going with a logged-in user. Finally, we specify the slippage (the % of price deviation) that we are willing to accept. Essentially, the information we provided is the bare minimum required to execute the swap.
In case you want to follow along with a video, where Ivan also explains how to obtain different token addresses, click the play button below.
How to Program Token Swaps on Other Chains
In our simple example presented in the previous section, we focused on the Ethereum chain. However, the 1inch plugin also enables us to create a swap on Binance Smart Chain or Polygon. The latter is highly practical, at least while Ethereum still maintains its rather exorbitant high fees on certain occasions.
Looking at the image above again (specifically at line 50), you can see “eth”, which determines that we’re focusing on the Ethereum chain. If we were to use BSC or Polygon, we’d need to replace “eth” with either “bsc” or “polygon”.
If want to learn more details about what type of functions the 1inch plugin enables, make sure to check out this link providing more information regarding the plugin.
How to Program Token Swaps – Summary
At this point, you’re probably excited and eager to start adding a token swap to your dApp. Now that you’ve learned about all the basics related to token swaps and about the importance of offering your users a chance to swap tokens within your Web3 application, start using Moralis and its 1inch plugin today!
Moreover, knowing that by using Moralis and its powerful plugin, you can add a token swap with basically a single line of code. We strongly encourage you to take some time and make use of Moralis’ documentation. If you know how to use MetaMask and know JavaScript (JS), Moralis is the tool to use. On the other hand, in case you are not familiar with JavaScript yet, make sure to take advantage of the “JavaScript Programming for Blockchain Developers” course.
With that being said, we conclude our part regarding token swaps. Now, it is up to you to make the most out of the information obtained in this article. You’ve got this!
