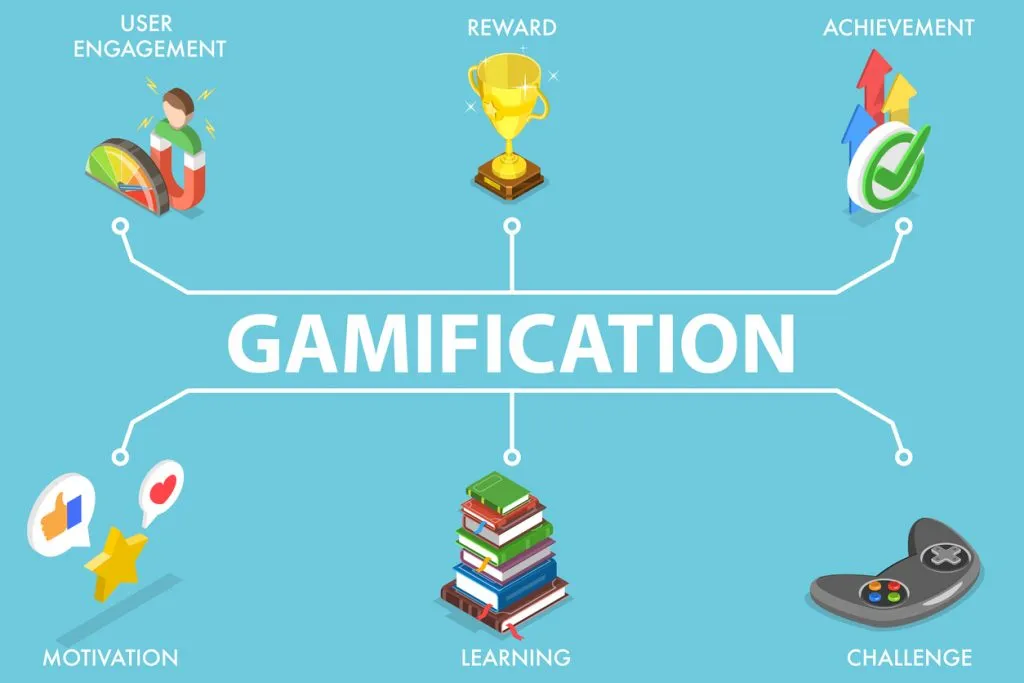
Gamification can make virtually anything more engaging. Also, it tends to raise productivity, memory, defuse tension, and much more. Moreover, an application that leverages gamification will be more exciting and add extra value to users. Among other options, added value can be in the form of potential rewards. As such, dApp developers should consider including Web3 gamification in their decentralized applications (dApps). An excellent example of Web3 gamification is the CoinMarketCap Diamonds dApp. Herein, we will mimic that app in our example project, and we’ll do so by using some excellent tools.
If you are using CoinMarketCap, then you must have seen their “Diamonds”. By introducing this feature, they encourage users to complete some simple daily tasks. As such, they get more engagement and more regular users. So, if CoinMarketCap is using the gamification tactic, you can bet your top dollar that it is working. Thus, the CoinMarketCap Diamonds feature is a great and practical example worth cloning.
Moving forward, we will use Moralis’ ultimate Web3 development platform in combination with the best Ethereum dApp boilerplate. The powerful combination of these two blockchain development shortcuts will enable us to implement Web3 gamification in less than an hour. Moreover, in the upcoming sections, you’ll have a chance to join us as we create our CoinMarketCap Diamonds dApp clone. Hence, you will learn how to set up Moralis and the ultimate Web3 boilerplate to speed up your Web3 development. Whether it relates to creating NFT game characters or building some other GameFi project, be sure to first read this article to learn more about Web3 gamification!
Web3 Gamification – An Example Project
We are strong believers in learning by taking action. As such, we include example projects wherever possible. Thus, we strongly encourage you to follow our lead by creating a CoinMarketCap Diamond dApp clone. By doing so, you’ll learn a lot about Web3 gamification. Furthermore, you’ll then be able to use that knowledge and implement it into more unique dApps. Moreover, once you learn how to work with Moralis and the ultimate Web3 boilerplate, you will have the extra edge, making your dApps more attractive than that of the competitor. With these phenomenal tools on your side, you’ll get to save a lot of time, energy, and funds. Since we have quite a lot of ground to cover in this Web3 gamification quest, let’s jump right in.
Web3 Gamification Example dApp
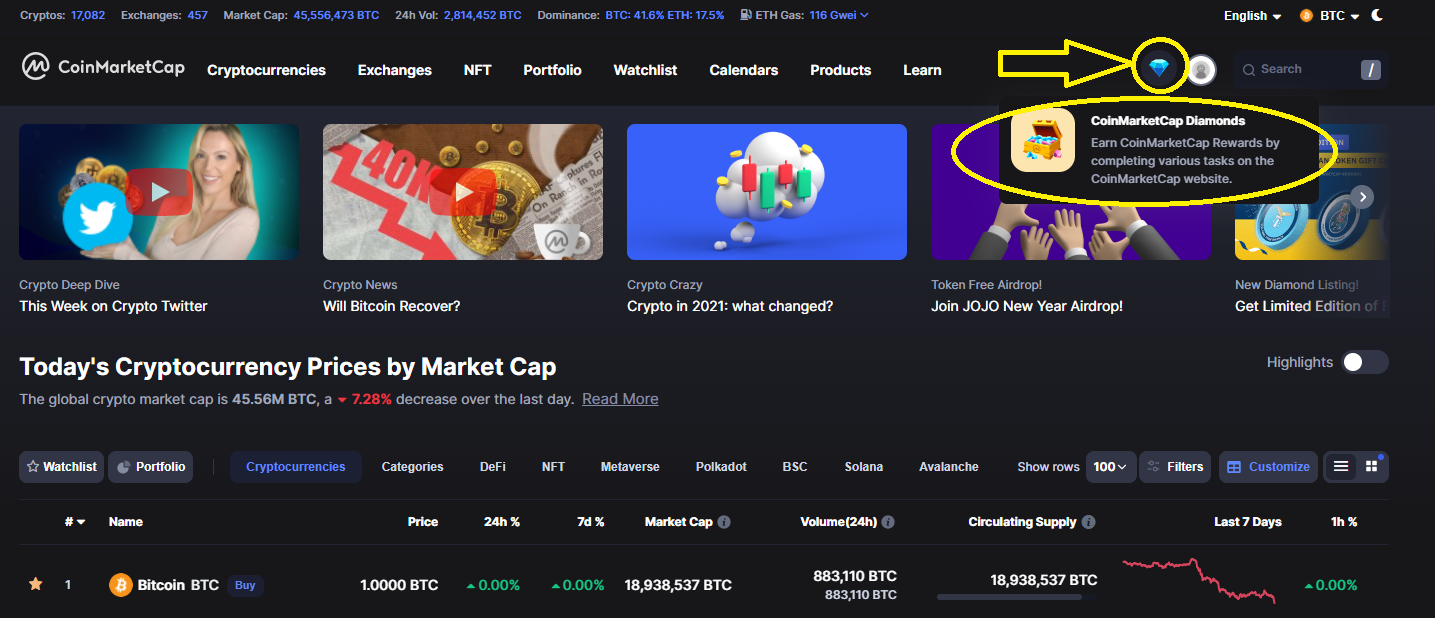
Before we tackle the initial setup and the actual coding related to our example project, we want you to do a brief preview of our CoinMarketCap Diamonds dApp example. If you haven’t seen CoinMarketCap’s Diamonds in action yet, feel free to check them out. You’ll need to sign in to your CoinMarketCap account, then click on the “diamond” icon in the top-right corner:
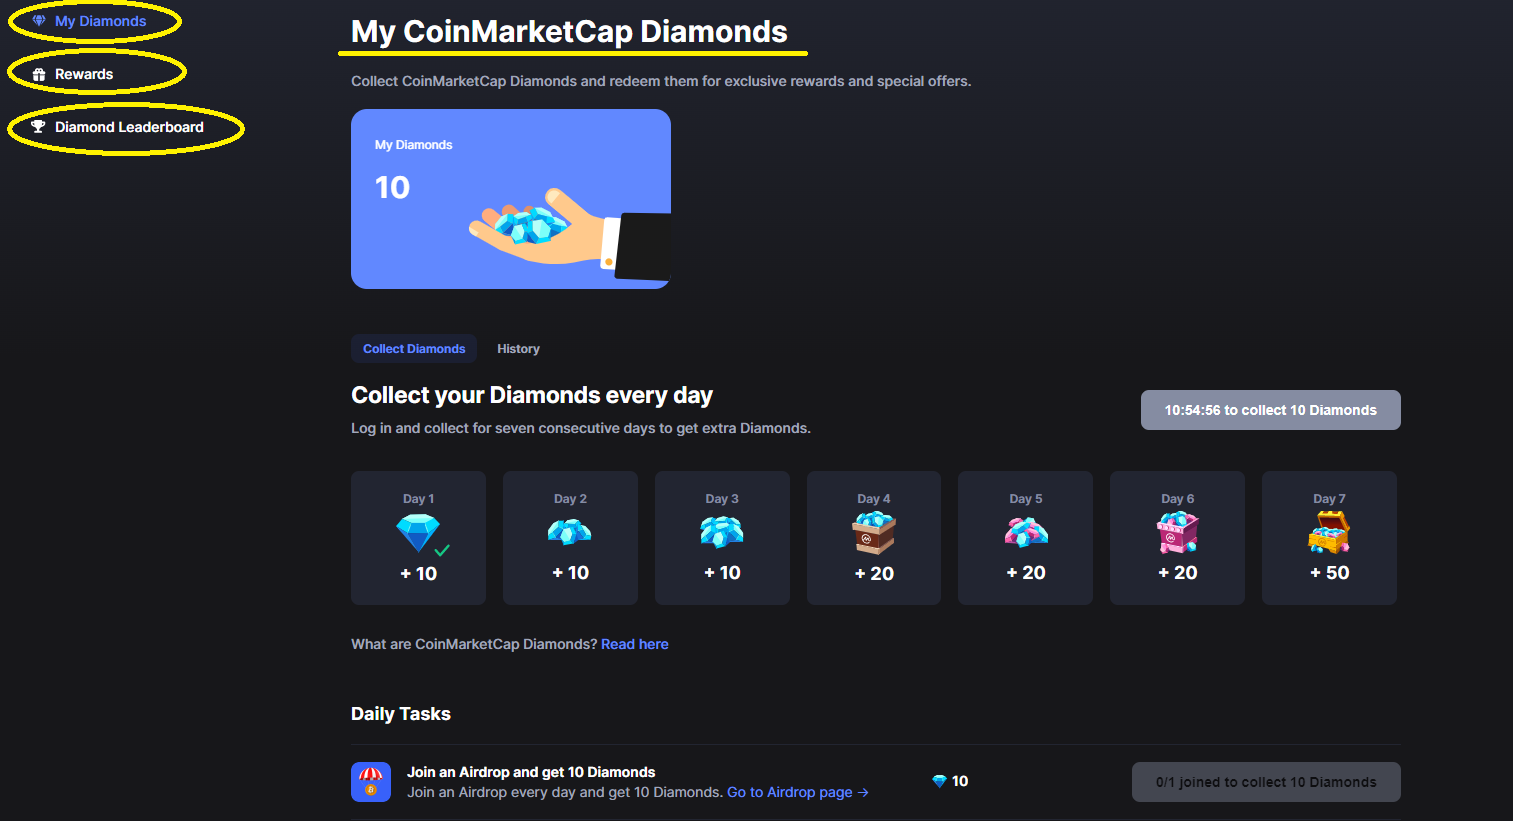
After clicking on the diamond icon, you will land on the “My CoinMarketCap Diamonds” page (see the image below). There, you’ll see three tabs (on the left-hand side) and the details of this gamification example:
Feel free to explore CoinMarketCap Diamonds further. However, let’s now focus on our CoinMarketCap Diamonds dApp preview. As with the Web3 gamification above, our dApp has three tabs on the left-hand side. We have “My Runes”, “Leaderboard”, and “Rewards” tabs. The following is a screenshot of the “My Runes” tab:
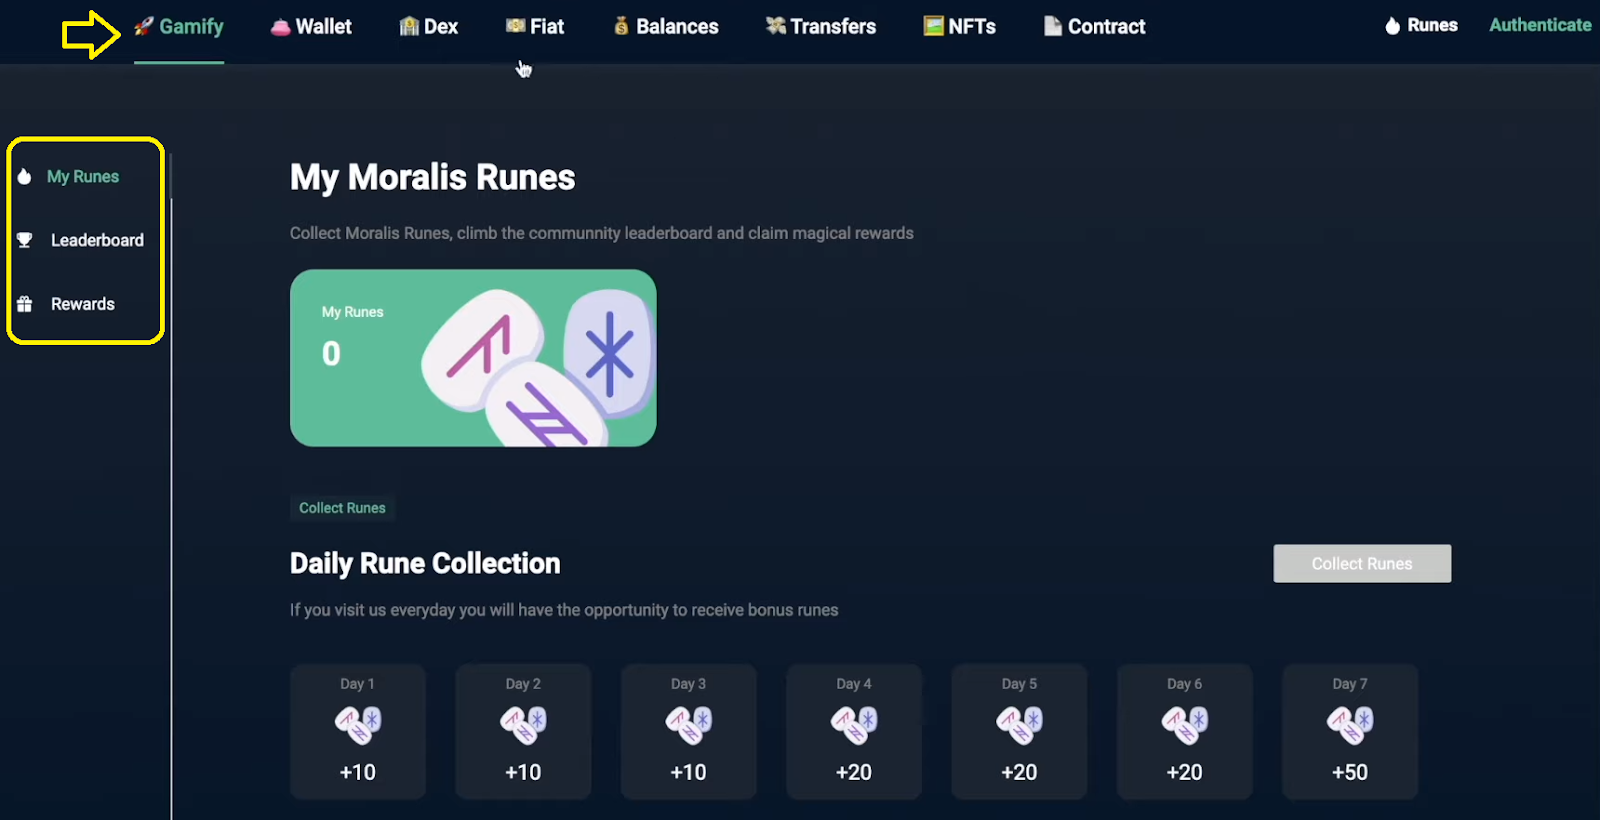
In our Web3 gamification example, users will have a chance to collect runes daily. Doing so on consecutive days will increase the number of collectible runes (as displayed above). In addition, using a leaderboard, users can see how many runes have the most active users collected. Further, the collected runes can be used to redeem rewards.
CoinMarketCap Diamonds dApp Clone Preview
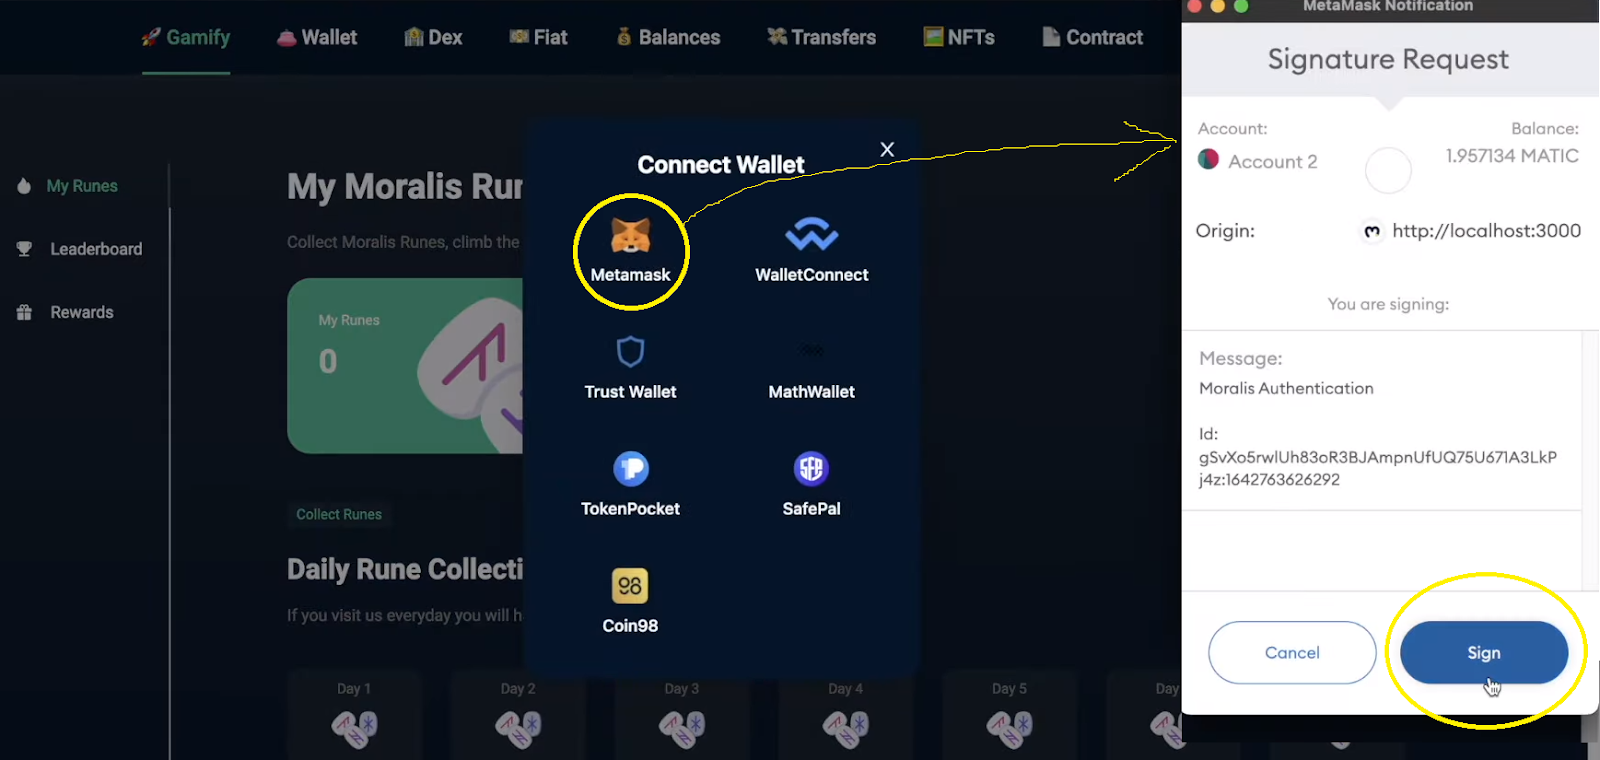
When users land on our Web3 page, they’ll see the options displayed in the above screenshot. However, to engage with our dApp, they need to authenticate themselves using Web3 authentication (Web3 login). Fortunately, Moralis and the boilerplate make incorporating this essential Web3 feature straightforward. As such, users only need to click on the “Authenticate” button and select their preferred method. For this preview, we went with MetaMask, which is our Web3 wallet of choice:
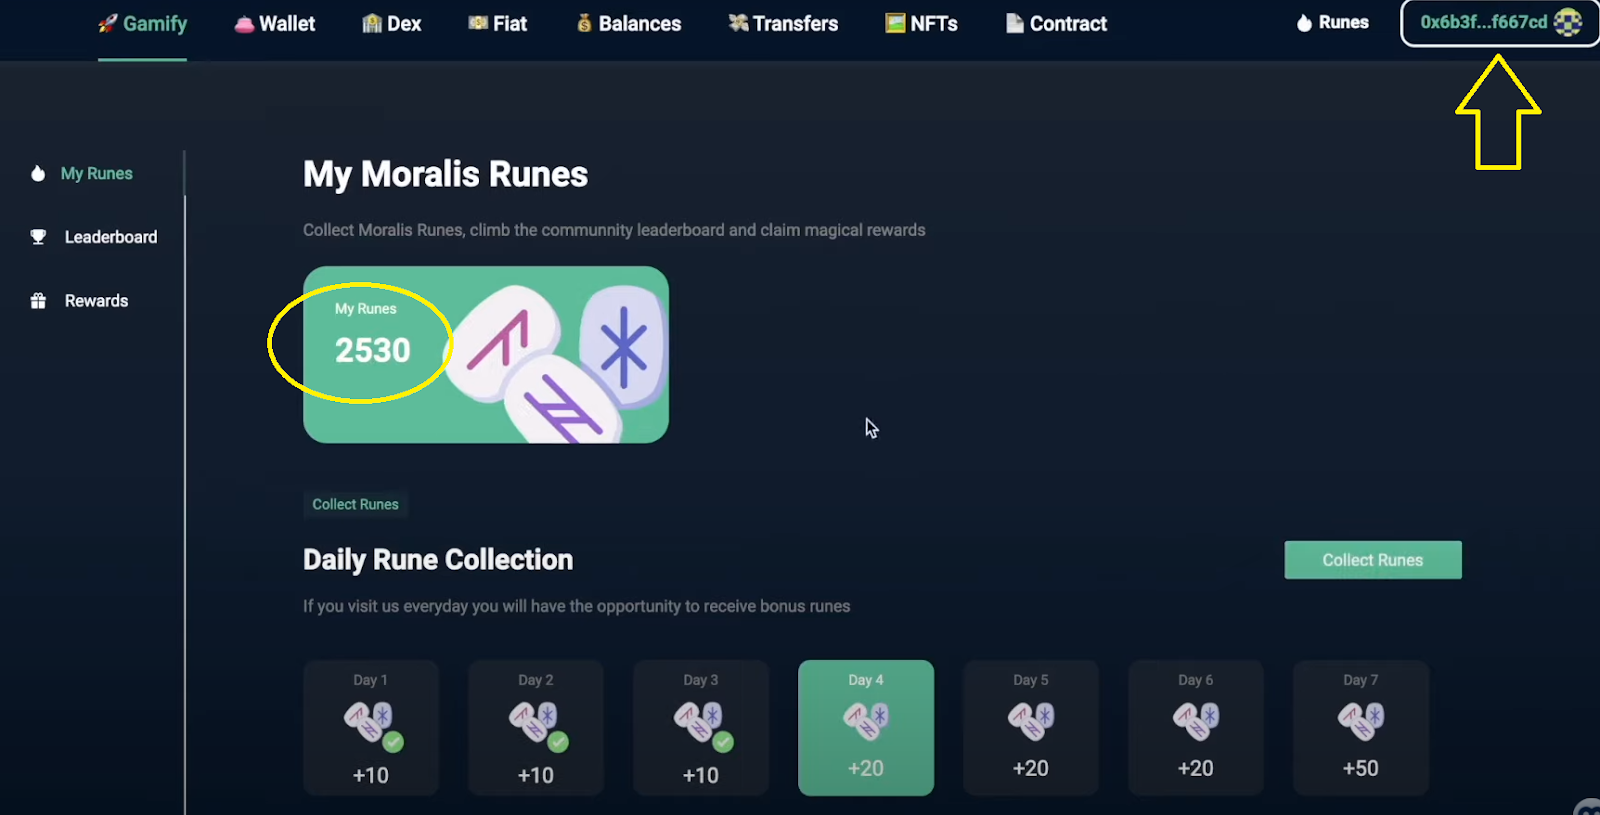
Once users confirm their login attempt, they get to access our example dApp’s features. Among others, they also get to collect runes and view the number of runes collected so far:
Furthermore, they get to view the leaderboard:

Moreover, as mentioned, we also added the “Rewards” page, where users can claim certain rewards using their collected runes:
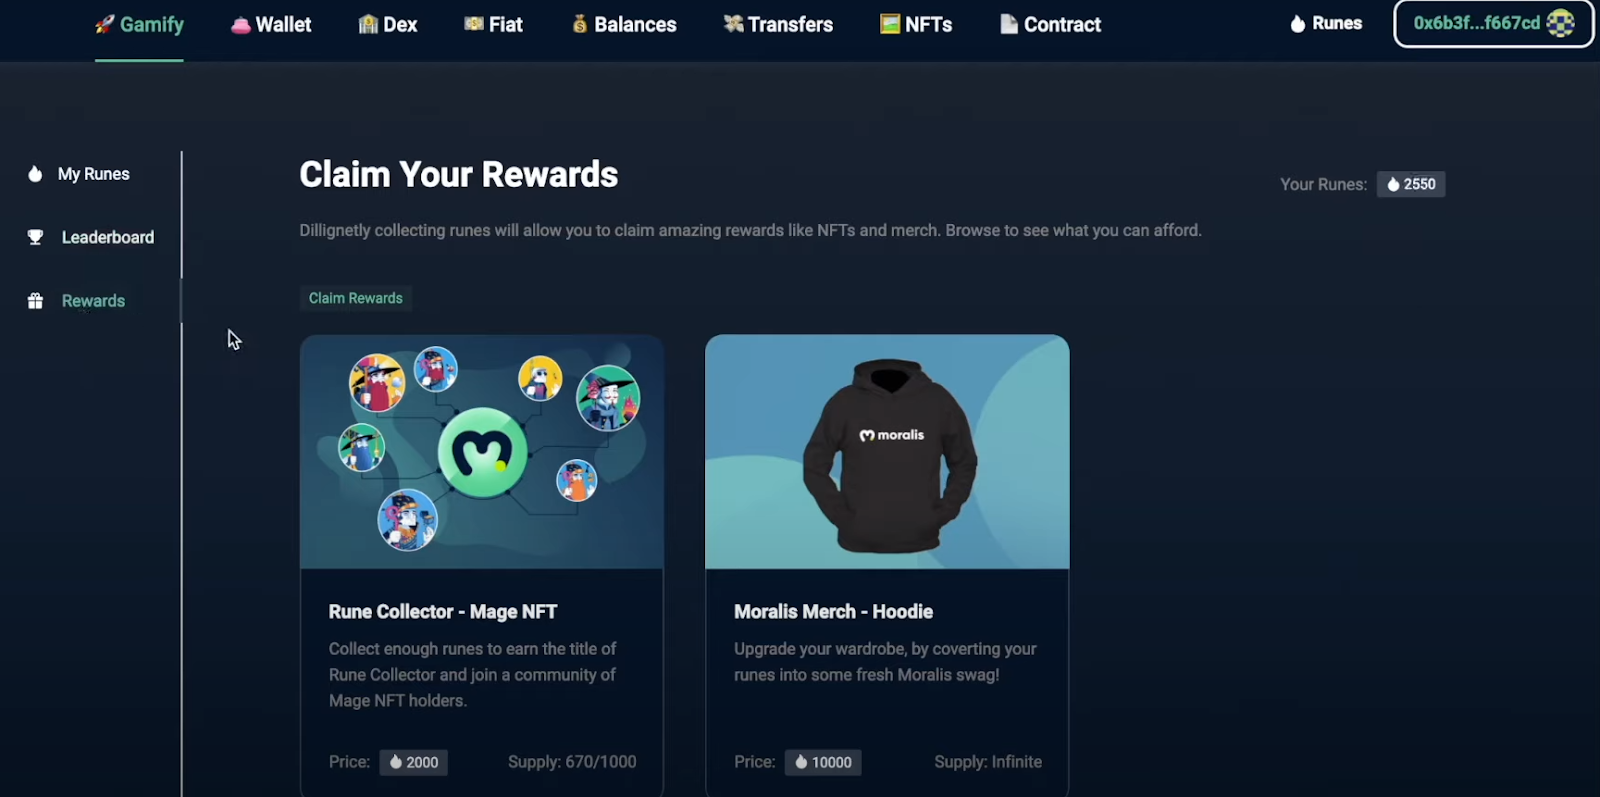
If the amount of collected runes is sufficient, users would be able to click on a particular reward and collect it. Moreover, looking at the screenshot above, you can see that one reward is “Mage NFT”. As users can select that reward, we’ve also incorporated a feature that enables users to lazy mint NFTs. You’ll have a chance to find out how to do that at the end of the article. Of course, if you have further interest in NFT token development, make sure to learn about NFT API alternatives. In addition, take a closer look at NFT generate and mint features. The latter are essential parts of NFT programming, NFT game development, and any NFT marketplace.
Creating a CoinMarketCap Diamonds dApp
Now that you have a clear vision of what we are going to be creating, it is time to roll up our sleeves. As mentioned, we will start by covering some initial setup steps. These will include creating a Moralis server and initializing the Moralis SDK. Also, you will learn how to cover the initial setup for the Ethereum dApp boilerplate.
Moralis Initial Setup
If you decide to build dApps from scratch or use the Web3 boilerplate, you must first complete a simple Moralis setup. Here are the steps you need to follow:
- Create Your Free Moralis Account – Use the link to the left to get to the signup page. There, enter your email and create your password. To confirm the process, make sure to click on the confirmation link that will be sent to your email address. Of course, if you already have an active Moralis account, just log in.
- Create a Moralis Server – Once logged in to your Moralis admin area, select the “Servers” tab. Then, click on the “+ Create a new Server” button in the top-right corner. From the drop-down menu that appears, select the network type that best suits your needs (see the screenshot below). In case of example projects or testing your dApps, it’s best to focus on the “Testnet Server” (Ethereum testnets) or “Local Devchain Server” options.

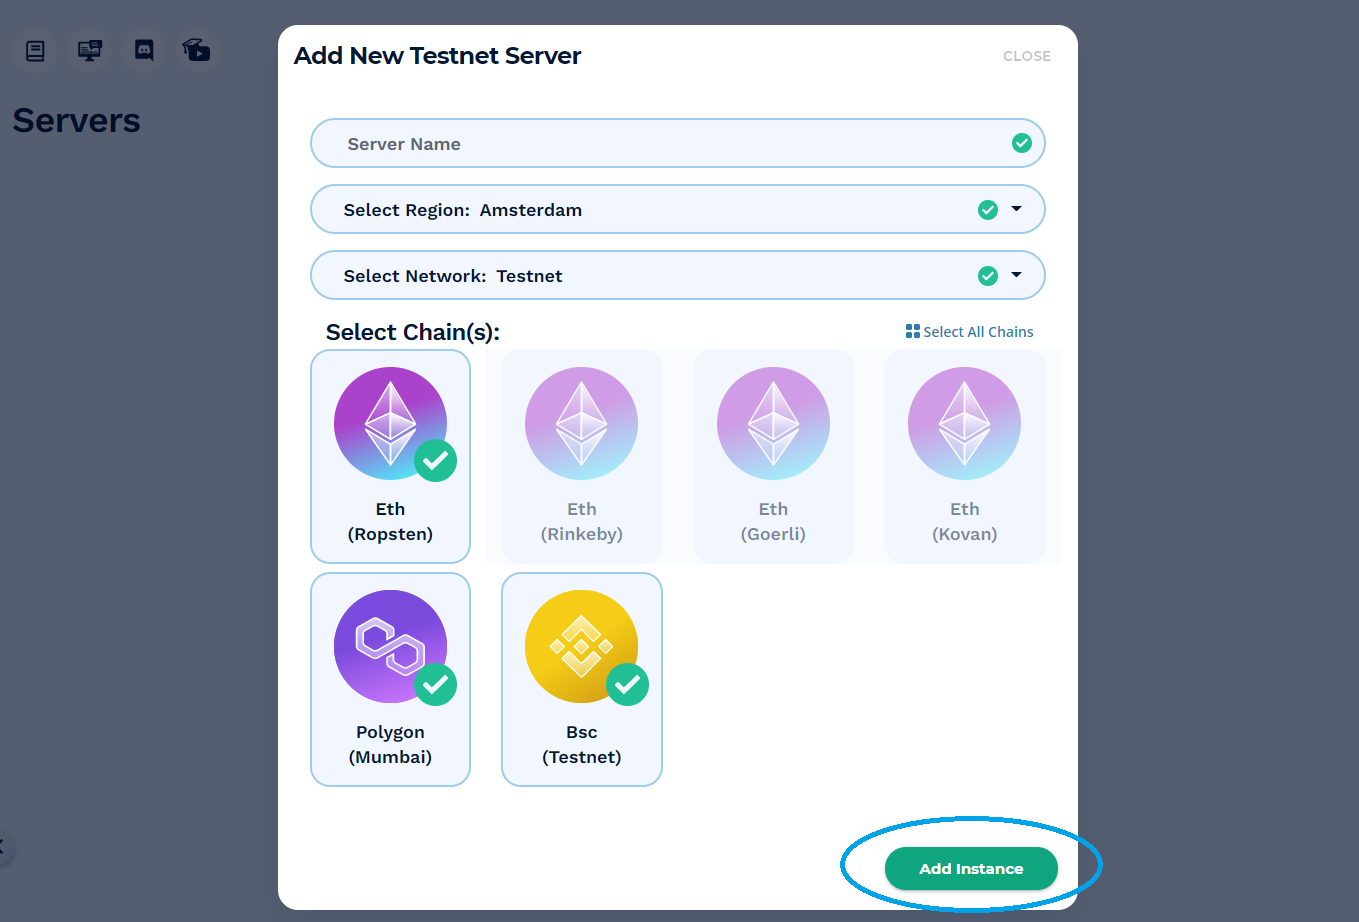
After selecting a network type, you’ll see a pop-up window asking you to enter your server’s details. Thus, enter your server’s name (this can be anything you want), select your region, network type, and chain(s). Complete the setup by clicking on “Add Instance”:
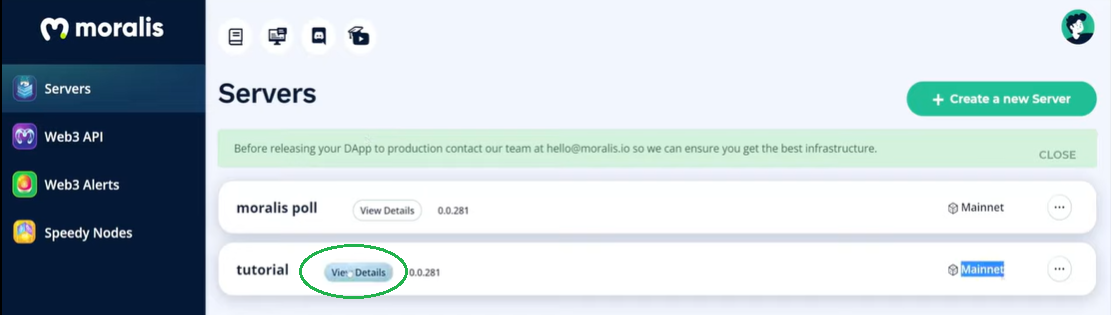
- Access Server Details – With your server up and running, you can access its details (server URL and application ID) by clicking on “View Details”:
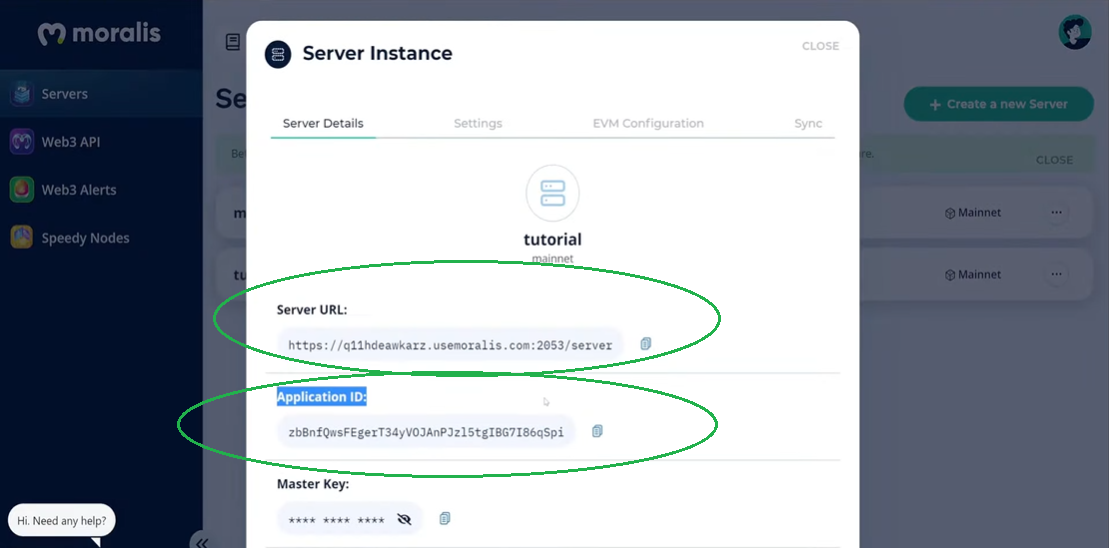
Then, simply copy the details (“server URL” and “application ID”) to your code file. When working with the boilerplate, use the “.env” file. You can use the copy icons on the right-hand side to copy the required details:
- Initialize Moralis (skip this step for now) – To initialize Moralis and its SDK and, thus, finally access the power of Moralis, populate the “.env” file. Just paste your server’s details in the designated spot:

Ethereum dApp Boilerplate Setup
By now, you know that we will use this ultimate Web3 boilerplate to simplify things for us. If you are not interested in creating a unique UI, using this shortcut will save you a lot of time. Moreover, it enables you to have a fully functional dApp up and running in minutes. This boilerplate is available on GitHub (just use Google and search for “Ethereum boilerplate”). However, for this example project, you have an even simpler route available. You can use a slightly “tweaked” boilerplate called “Gamification-StartedCode”. You can easily follow along with this guide and the video instruction below when the latter is cloned. Of course, you may also access the finished code (“Gamification-dApp”).
Here are the steps you need to complete to use our modified boilerplate:
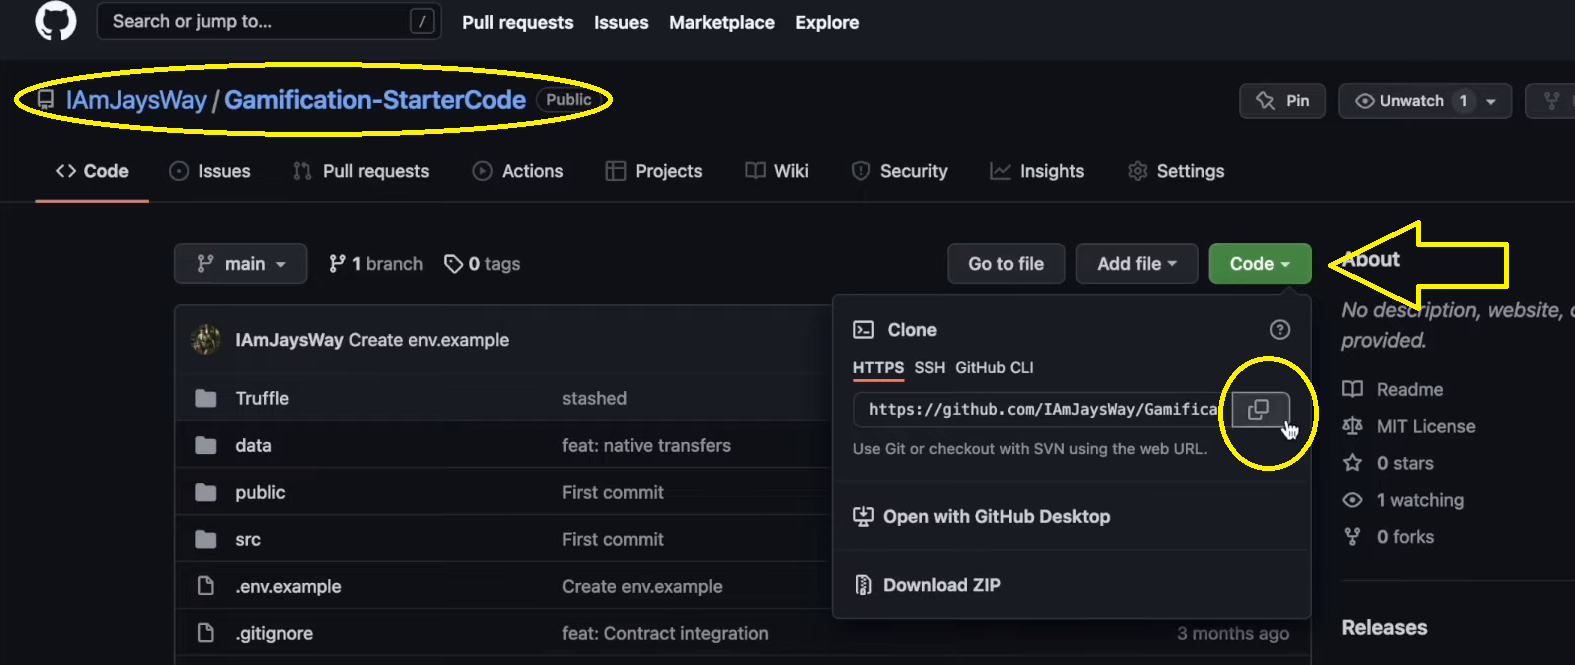
- Use the “Gamification-StarterCode” link above to access the code at GitHub.
- Click on the “Code” button and then copy the address by clicking on the “copy” icon:
- Then, use your code editor’s terminal (we prefer to use Visual Studio Code [VSC]) and clone the above-copied code:
git clone [paste the copied HTTPS address here]
- Install all dependencies by using this command in your code editor’s terminal:
- cd gamification-startercode
- yarn install
- Rename the “.env.example” file into “.env” and complete the final step (step four) from the previous section. This means that you will populate your “.env” file with your server’s details.
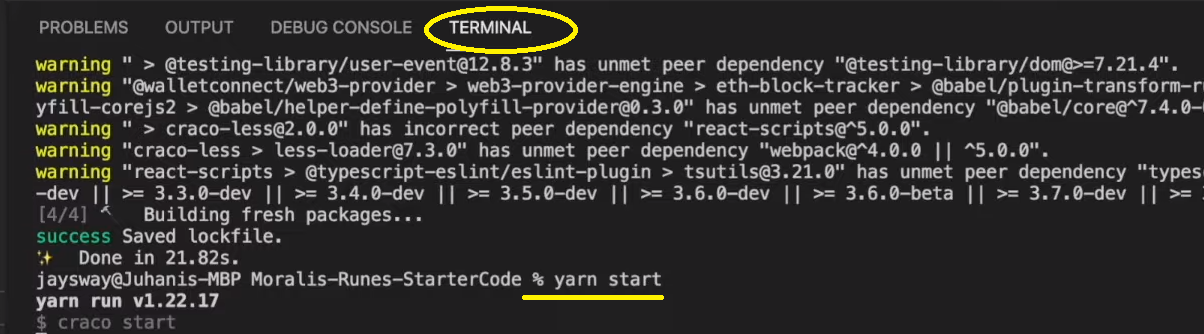
- Run your app by pasting or typing “yarn start” into VSC’s terminal:
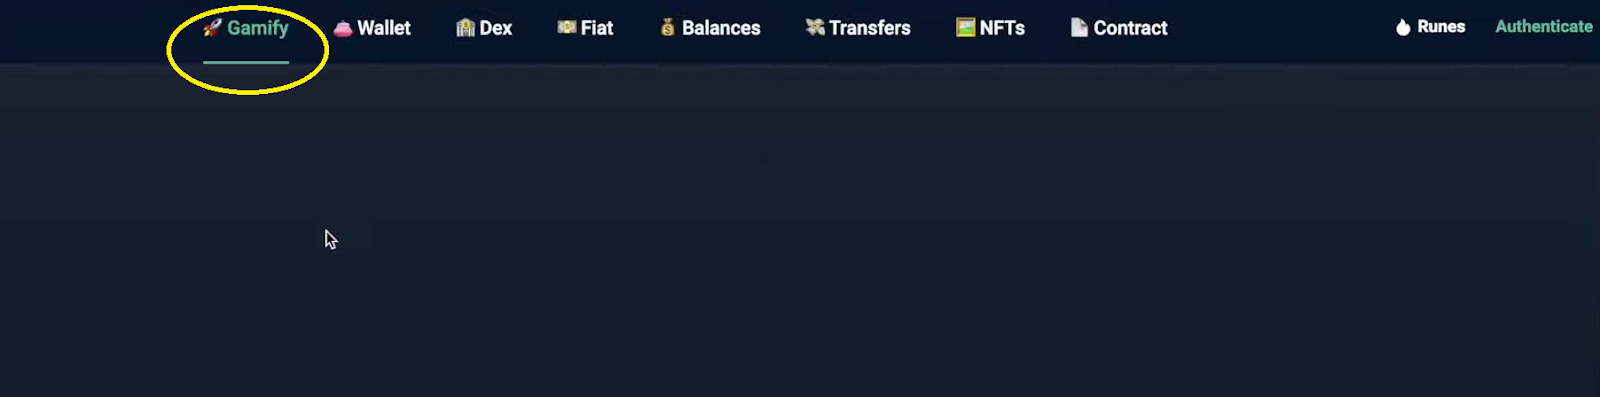
Once you complete the above setup, you’ll have an empty dark-themed “Gamify” tab ready. This is where you will be adding elements to get the same results as presented in the preview above.
Web3 Gamification – Code Walkthrough
There are quite many lines of code that you need to set in place to cover the frontend aspect of our Web3 gamification example dApp. Fortunately, one of Moralis’ experts prepared a video tutorial that you can easily follow along with (video below). If the tutorial moves too fast, pause it, and stick to your own pace. He will first guide you through the details of creating the relevant frontend. Thus, you will see how to add all three tabs of our CoinMarketCap Diamonds dApp (3:52) easily. After creating the side menu for the tabs, you will create each of the three pages. To focus on the “My Runes” page, jump to 6:15. For the “Leaderboard” page, go to 12:36, and for the “Rewards” page, go to 15:05.
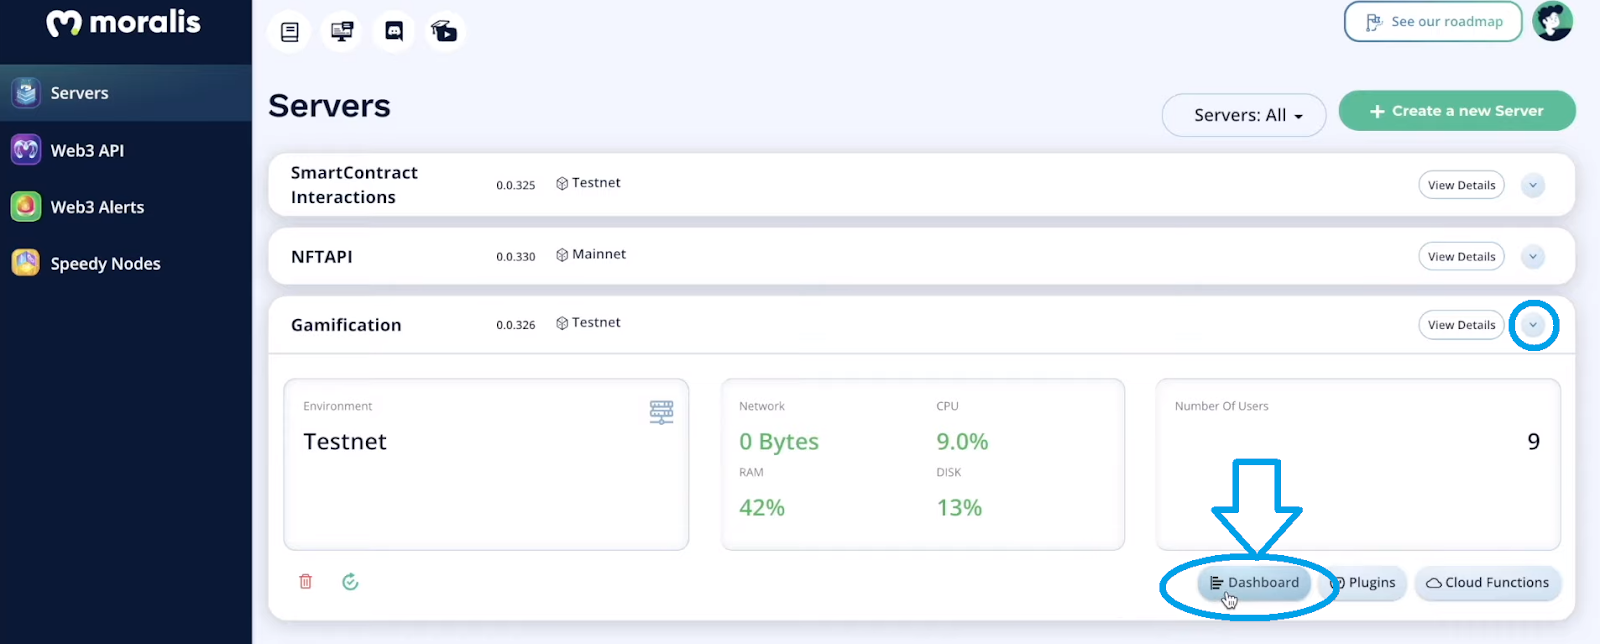
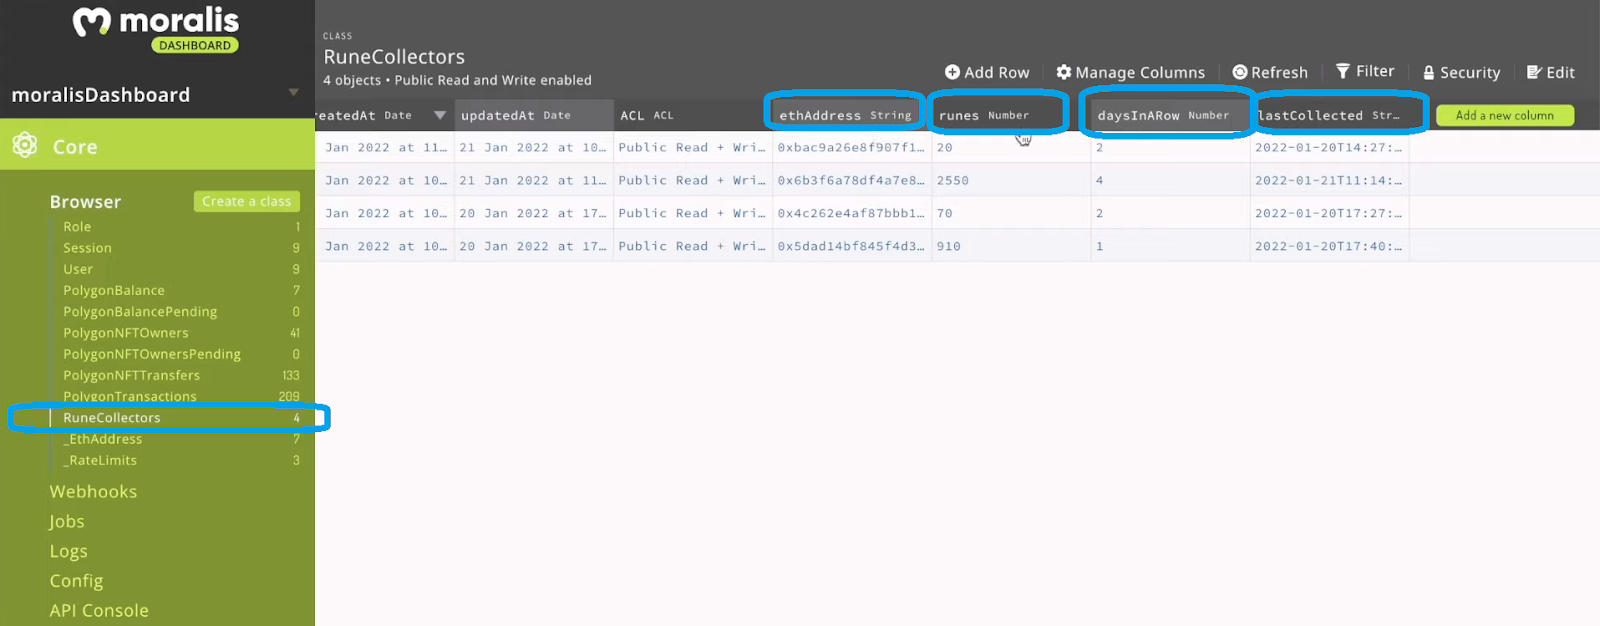
Moreover, if you are JavaScript-proficient, creating the frontend will be like a walk in the park for you. However, it is the backend where the power of Moralis shines. Starting at 20:49, you get to see how easy it is to use Moralis’ dashboard (database) to index the blockchain. This feature enables you to use on-chain data efficiently and without any troubles:
Furthermore, this is where you will learn how to implement the “rune-collecting” features. Starting at 41:05, you will also learn the details required to implement a leaderboard. Nonetheless, at 45:50, you’ll have an opportunity to learn how to set the NFT minting feature in place as part of rewards.
Here’s the video that we’ve been referencing throughout the article:
Web3 Gamification – Creating a CoinMarketCap Diamonds dApp – Summary
We’ve covered a lot of ground today. At this point, you know that Web3 gamification features can help your dApp to gain popularity and adoption. Also, you’ve learned that with the right tools, it is rather simple to implement Web3 gamification. Nonetheless, using the ultimate Web3 development platform – Moralis (a.k.a. Firebase for crypto) and the ultimate Web3 boilerplate, you’ve had a chance to create your own CoinMarketCap Diamonds dApp. As such, you now also know how to cover the initial Moralis and boilerplate setup steps. The latter will come in handy when you take on other example projects or tackle your own ideas.
Moving on, we recommend your visit the Moralis blog and the Moralis YouTube channel and use these two outlets for your free blockchain development education. Both of these content platforms offer high-quality explanations of various crypto aspects. For instance, some of our latest articles cover Web3.js vs Ethers.js, gasless transactions, Ethereum gas fees, GameFi and play-to-earn (P2E), and much more. In addition, this is also where you can find a ton of other example projects, including a guide on how to create a great Web3 UI.
If you want to become a blockchain developer sooner rather than later, we recommend taking a more professional approach. Thus, enroll in Moralis Academy. By doing so, you’ll get access to pro-grade courses, one of the most supportive communities, and experienced blockchain development mentorship. With all of that in your corner, you will easily punch through all potential obstacles and go full-time crypto in no time.